NTK FabWorks table setup with drain tank and Hypertherm wiring explained

I’ve seen lots of people asking a bunch of questions about these things, so I figured I’d post up how I’ve got mine set up. Be forewarned, this will be long winded and I’ll split into sections.

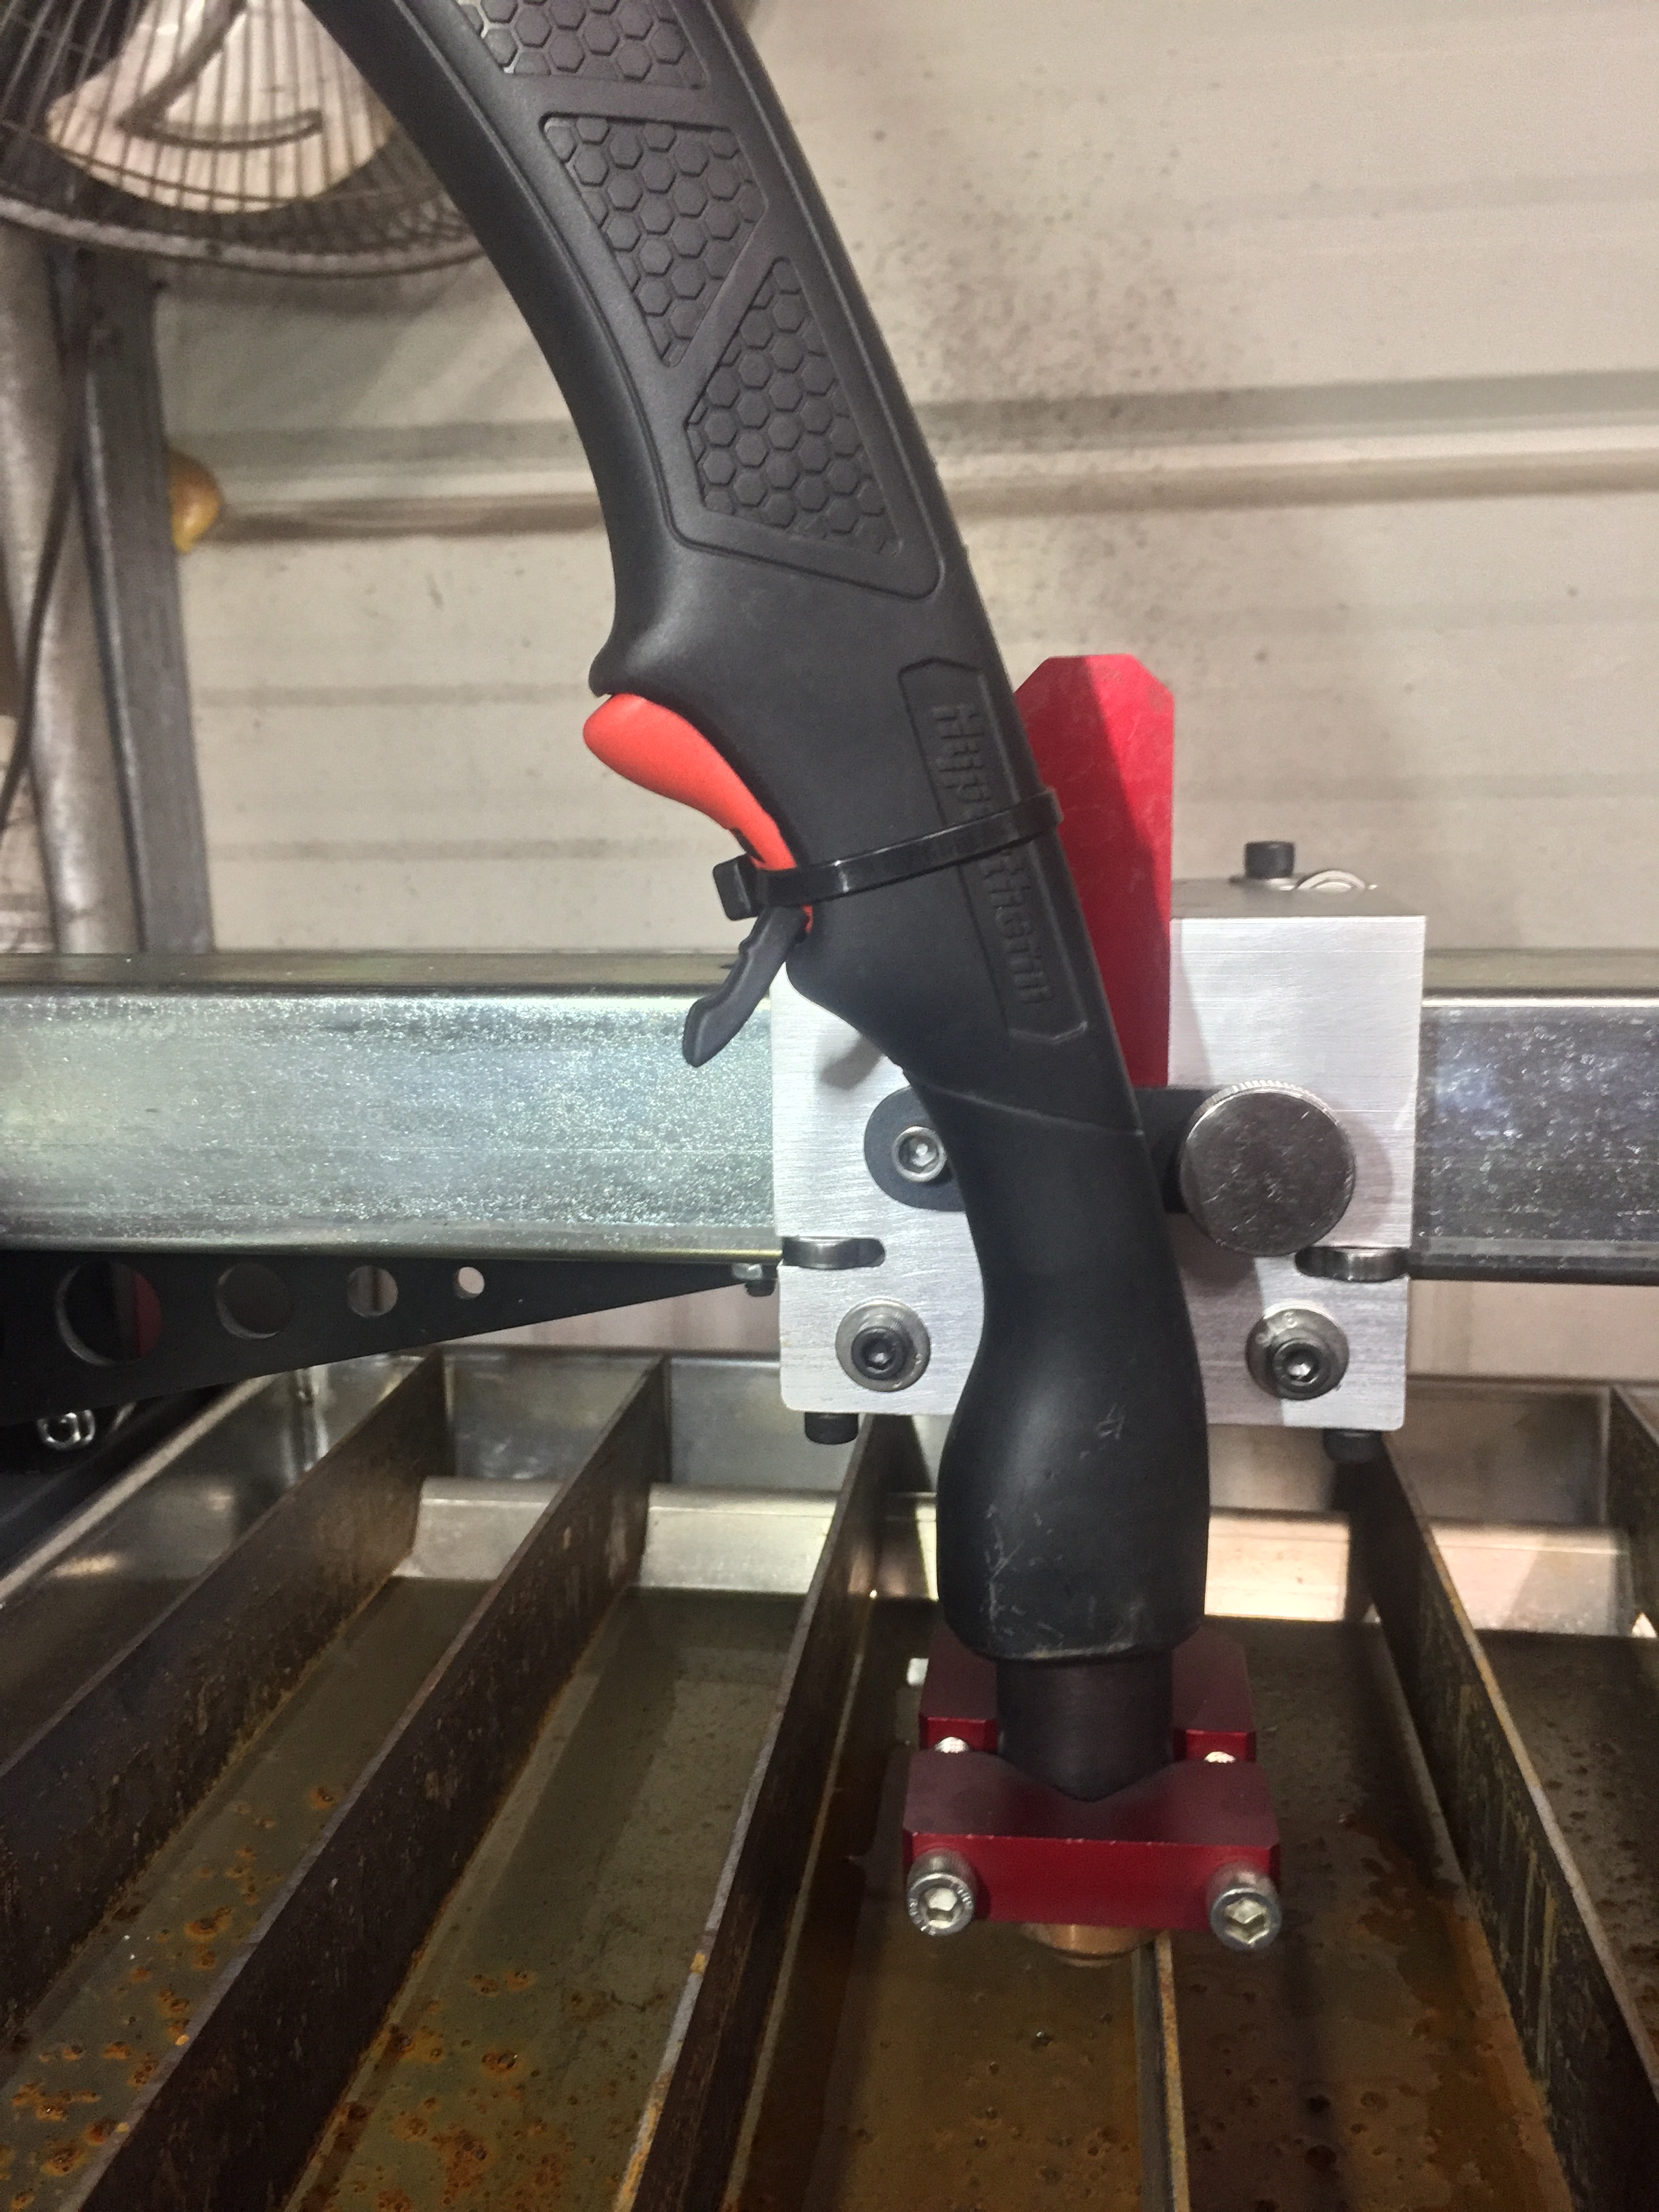
One thing I noticed off the bat was the torch wiring, scotch-locks aren’t in my vocabulary, so as soon as I saw those, I looked for another way. When I bought my Hypertherm 45XP, I specifically bought it because they have the most trouble-free track record of communicating with all sorts of different control software. As well as they’re made in the states and I was buying it to run a business, not just as a hobbyist. Also, I got the model that came with 2 torches, one normal handheld and another 15 degree torch, which is really for gouging, but I’ve been using a normal hand torch to gouge for over a decade. My original plan was it would be married to whatever cnc table I bought, which I also got one with a cpc port. If you have a hypertherm machine, with a cpc port, this is actually really easy to make a hand torch a machine torch, as Hypertherm wires them intelligently. To make a hand torch a machine torch, pull the machine end connector apart, the plug is numbered on the inside, the #6 pin needs removed from the plug, extended an inch and reinstalled in the #8 port. This bypasses the trigger safety(but will still not fire if the consumables are throwing an error, which is GOOD, that way the machine can’t short itself out). You’ll need a tool to remove the pin, I got this one off amazon:
https://www.amazon.com/gp/product/B006962LBU/ref=oh_aui_detailpage_o09_s00?ie=UTF8&psc=1

If you need pins, I’ll list them below.

Button the plug back up and zip tie the trigger. You now have a machine torch, that will only fire if the machine is commanded to via the CPC port.

DISCLAIMER: this goes against Hypertherms warnings and they tell you NOT TO DO THIS UNDER ANY CIRCUMSTANCES, as it bypasses their safety measures. Just so you know.

As for wiring in the torch firing wiring, if you want to do it properly, control it via a CPC port as Hypertherm designed it to do. If needed, add a cpc port to your machine. A plug for the cpc port can be had here:

The cable clamp for the back of the plug, that I didn’t realize was a separate piece and didn’t buy

Along with pins:

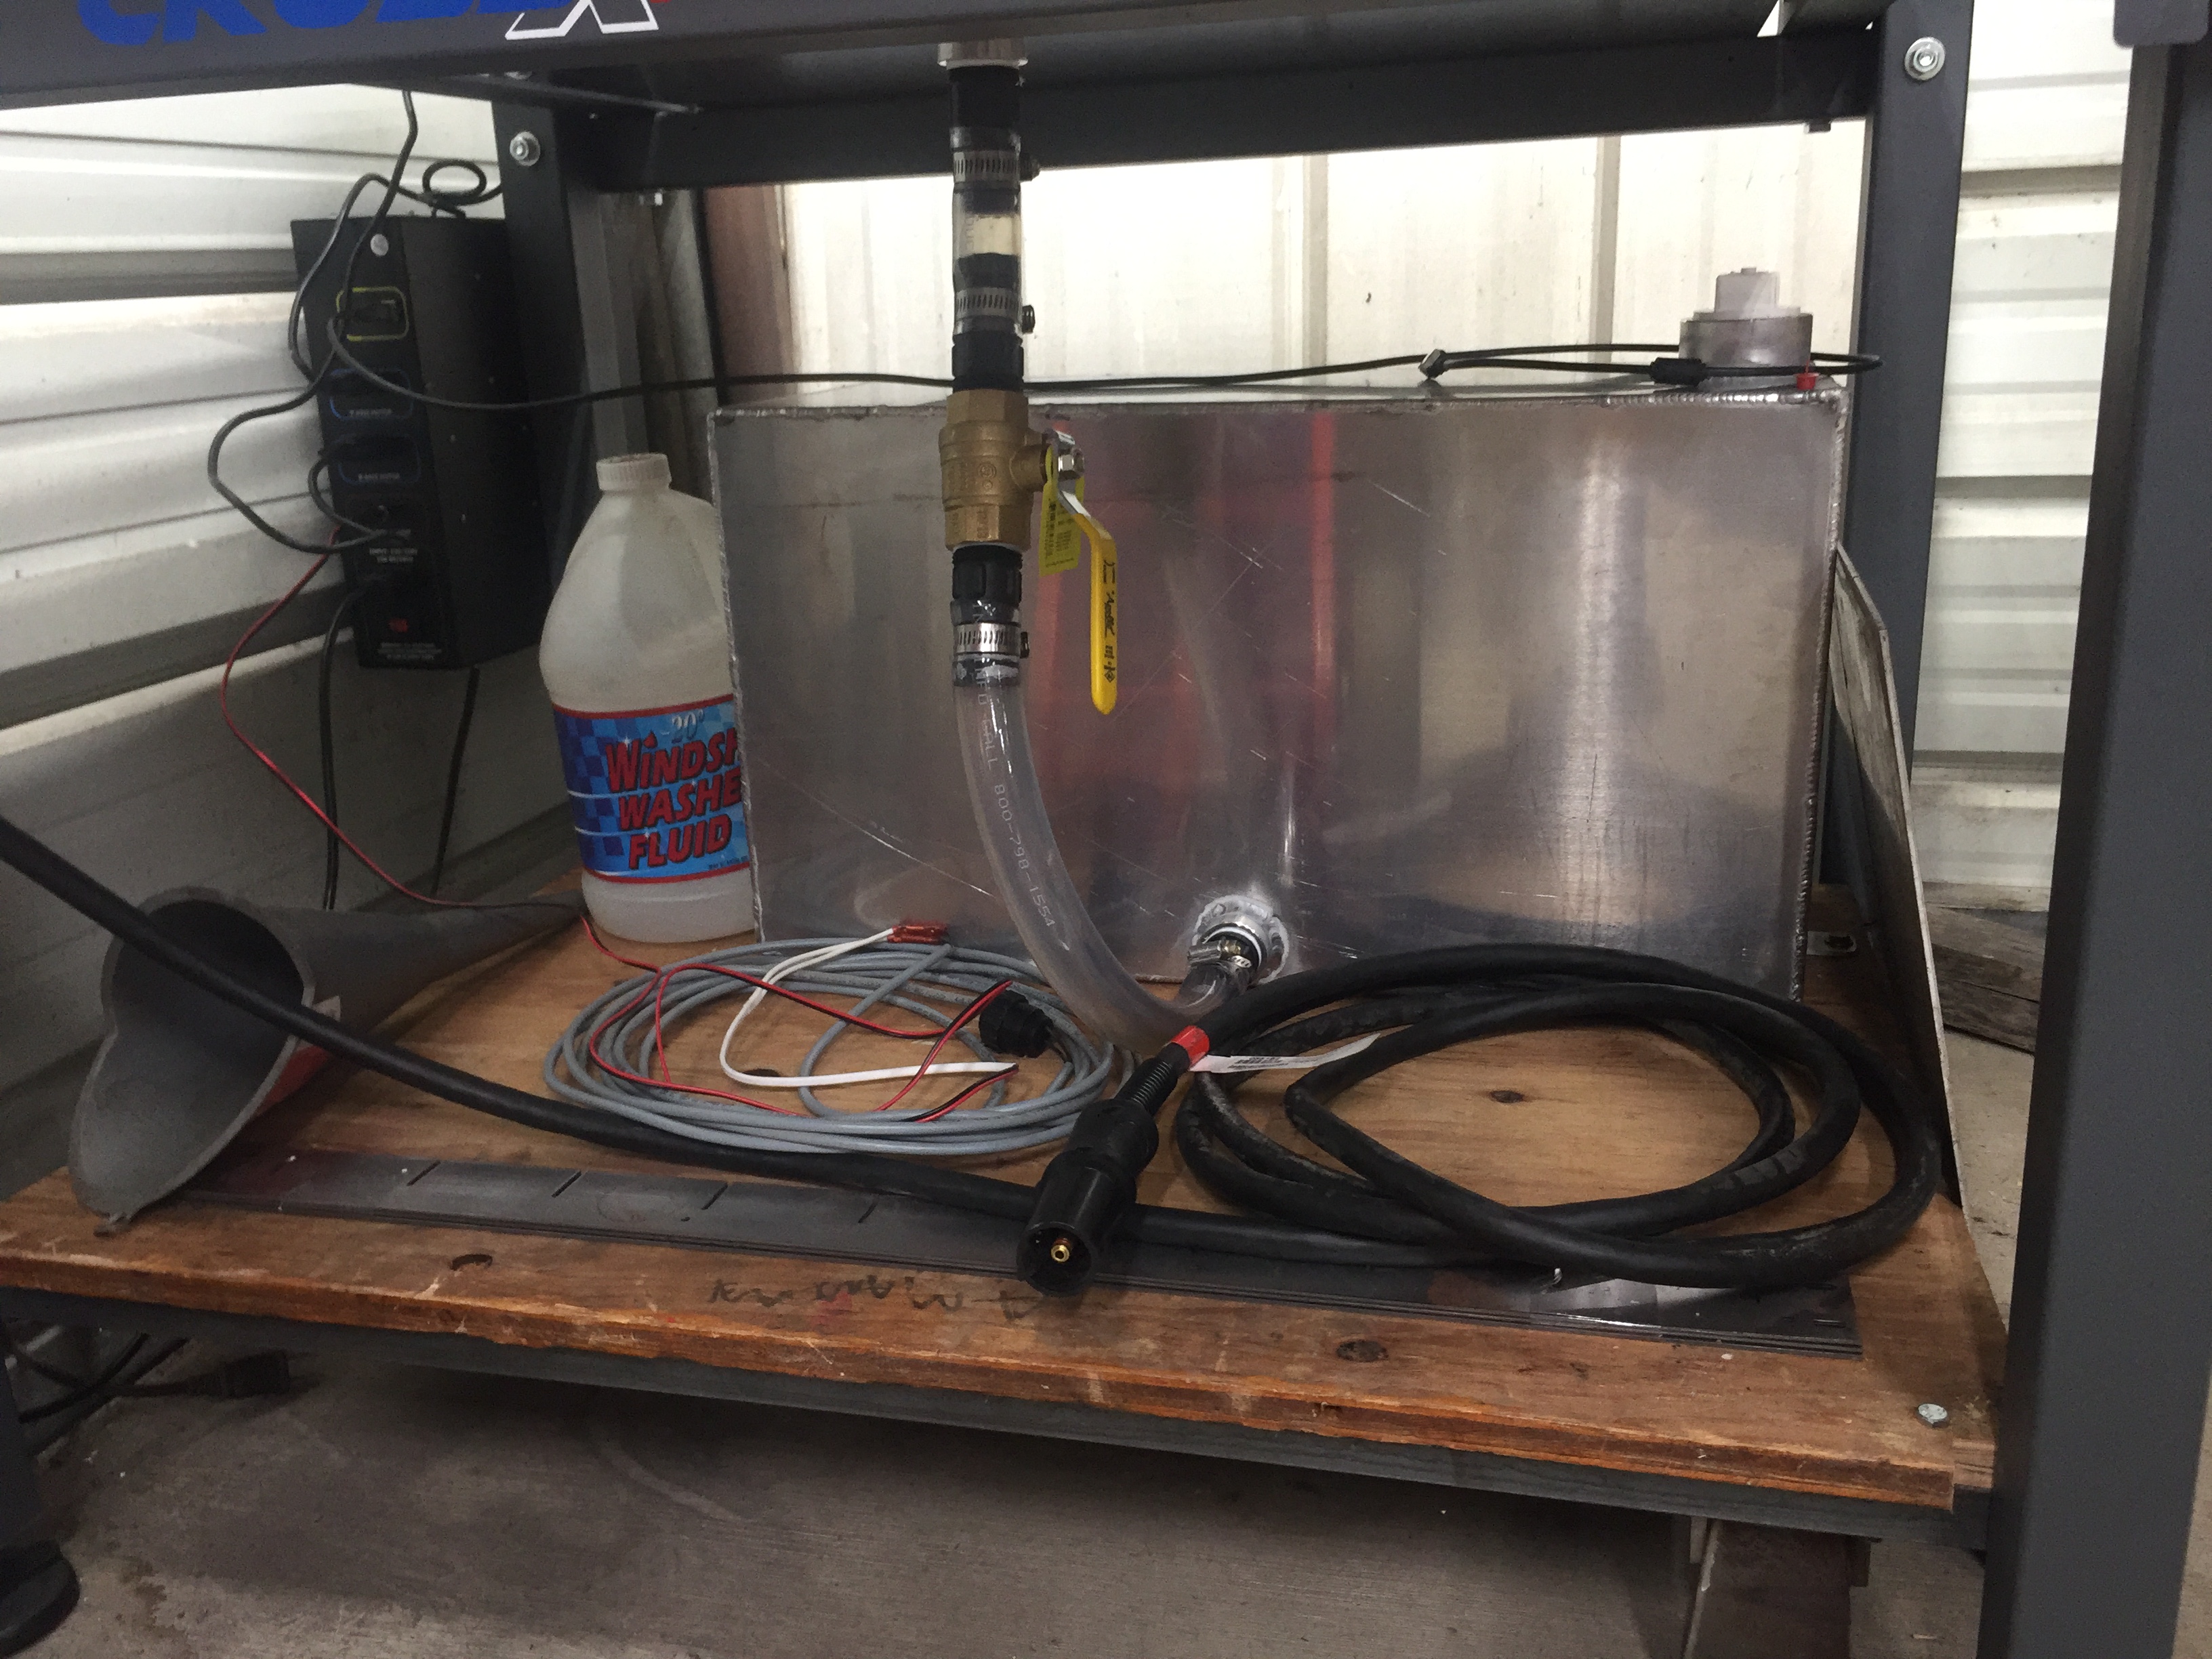
Now hooking these up can be done a few ways. One would be to cut the connectors that Langmuir has on the torch wiring plug off and put the new pins on those wires. I chose to buy some 4-wire control cable from McMaster. The part number is 9936K12, I got a 20’ piece. Put pins on the #1 and #2 wires and hooked them to Langmuir’s wiring(so now its like 30’ long, but my machine doesn’t have to be right at the table, small shop problems). The other ends of those wires get the same pins aforementioned crimped on and go in the #3 and #4 ports in the cpc plug. Doesn’t matter which one, they simply complete a short(just as the trigger does), to initiate/extinguish the arc.

Pic of the wiring:

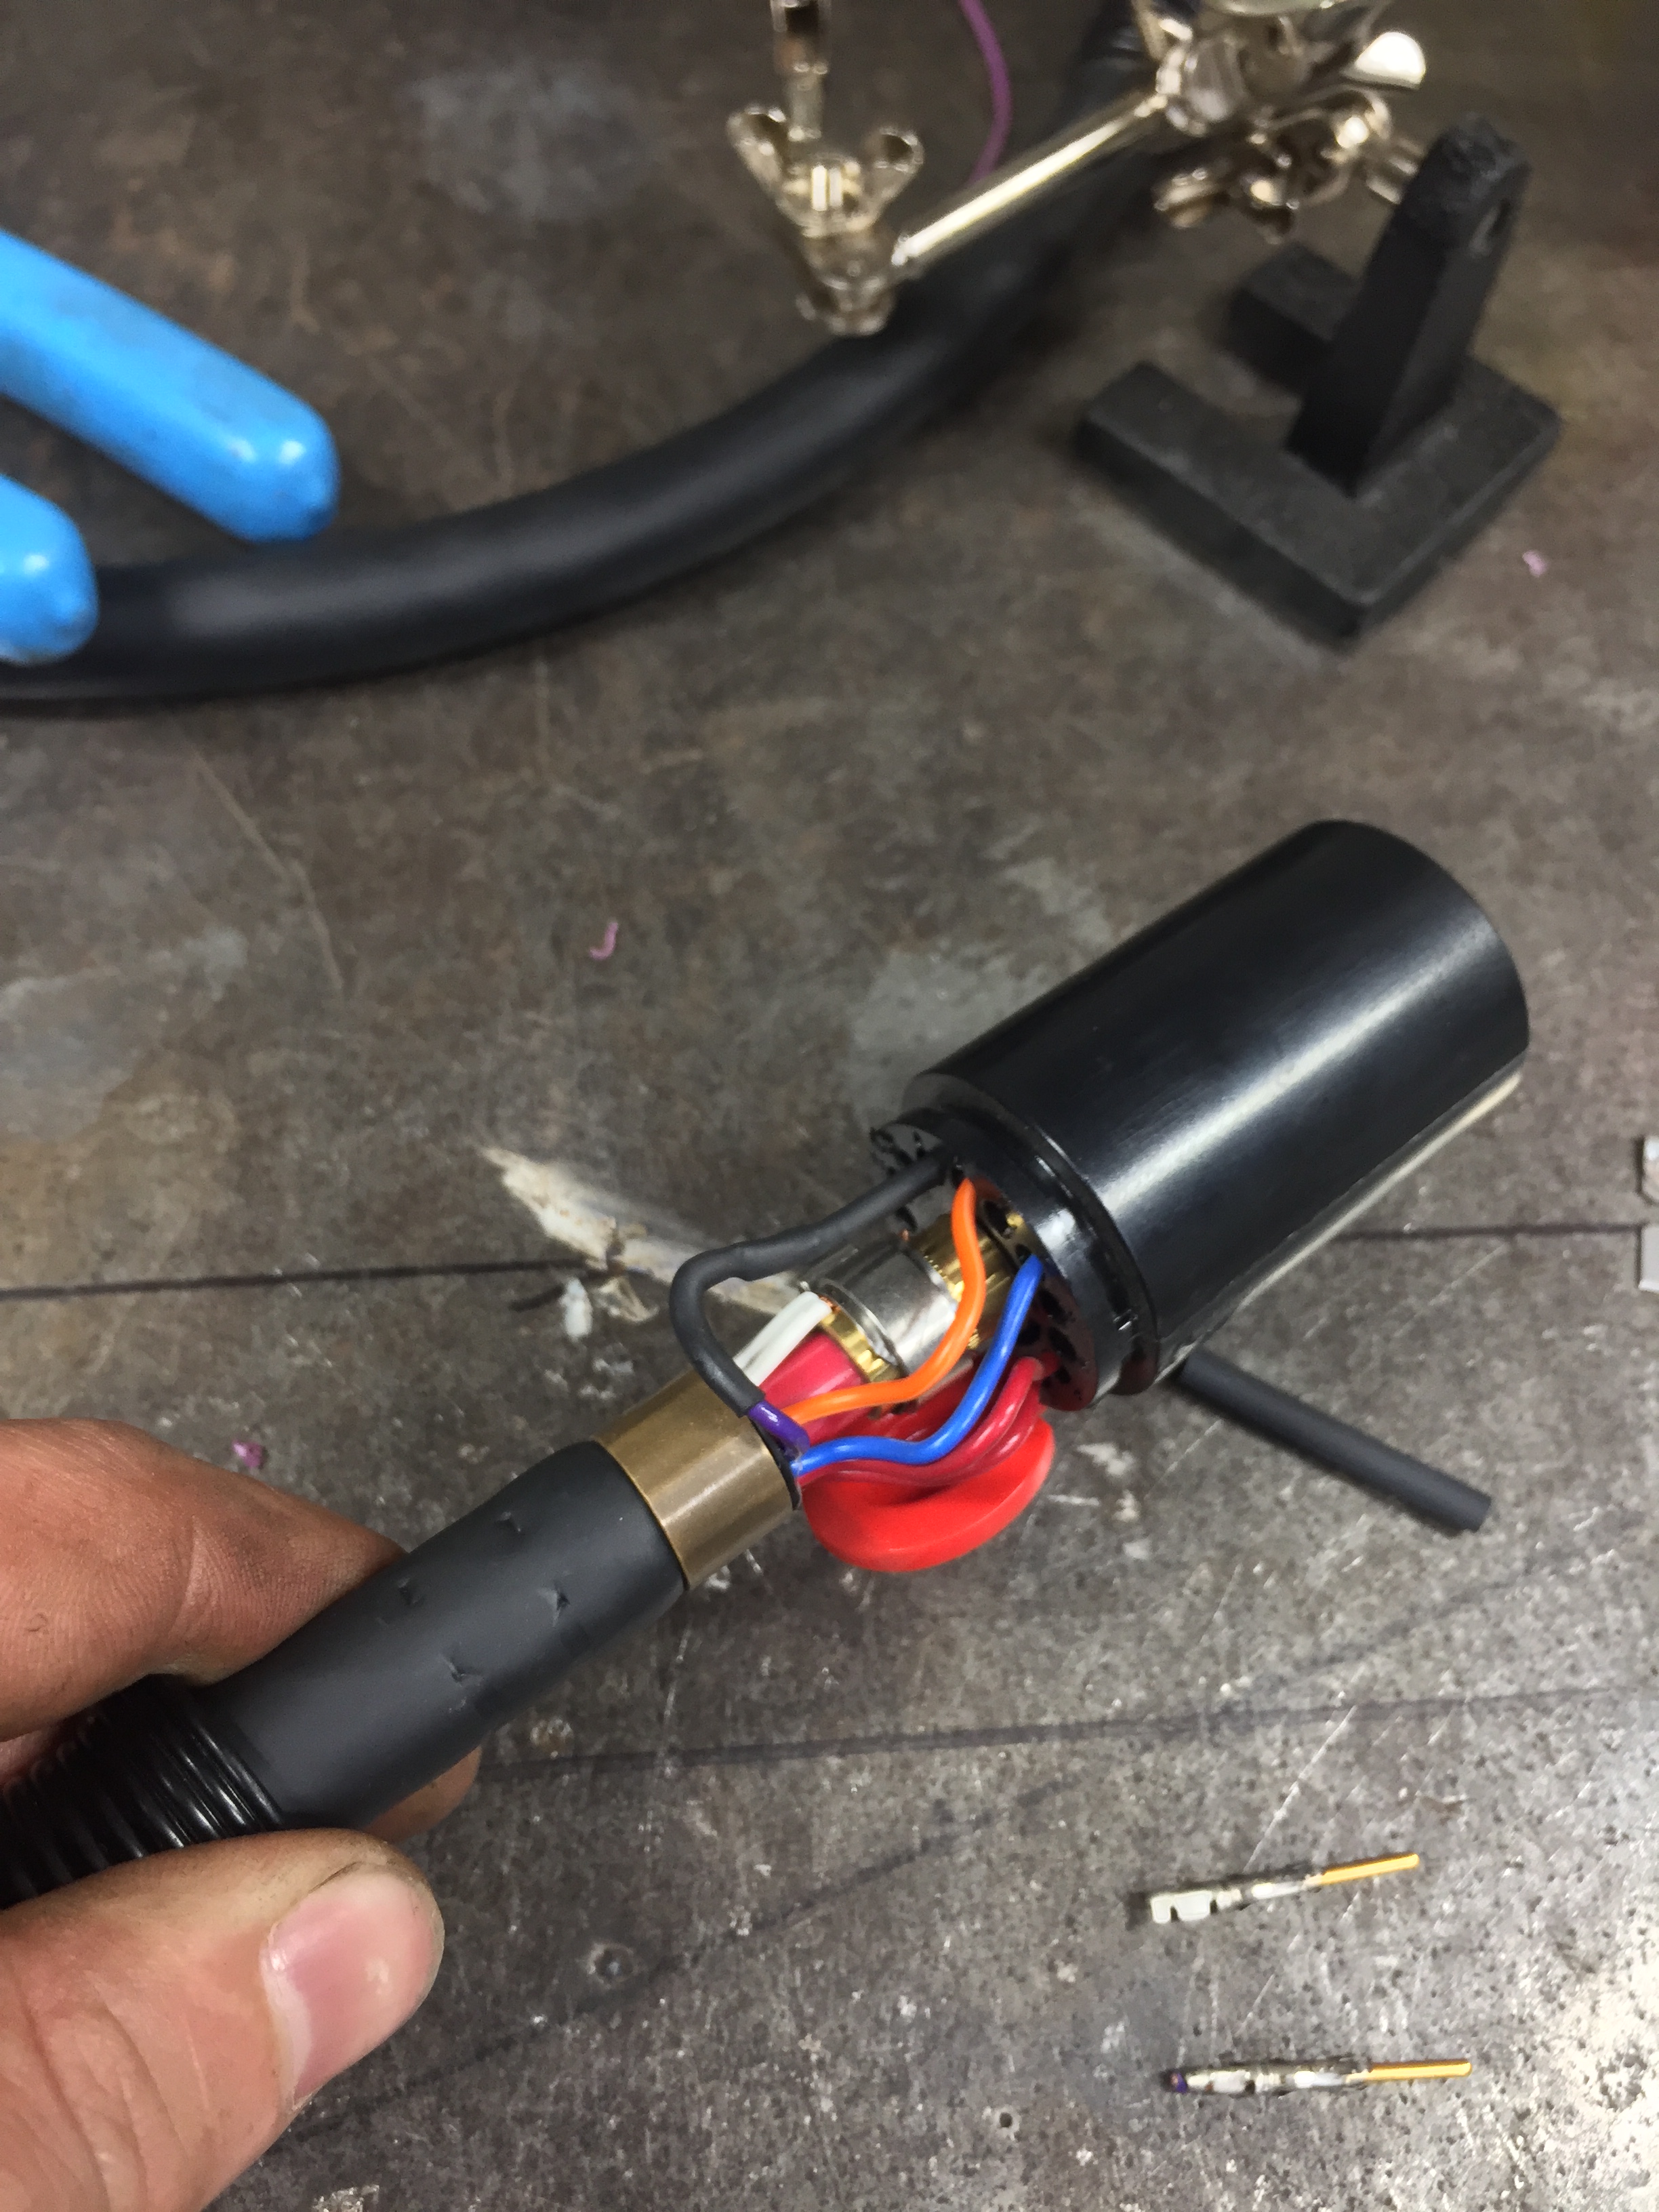
Self explanatory,but I’ll share anyways

3 Likes

Next thing I wanted to do was have a drain tank, didn’t care for the idea of a big pan of water sitting in the corner of the shop all the time. Mostly so if i need to set something down, I don’t want the possibility of it falling into water and I’m in BFE in the woods, bugs love stagnant water. Put a simple shelf on first, just some 1x1 steel angle going along the x-axis, and a piece of 3/4 plywood I had sitting in the corner, that literally fit perfect(after I miss-cut the hell out of the corners, it was the tape measure, I swear). Didn’t want anything too permanent, in case it moves and needs re-leveled. Then made a 13.5 gallon tank from 1/8" 3003 AL, dimesnioned at 24L x 13H x 10W. Put some mounting feet on it, 1" npt fitting for hose, 2’’ NPT for the fill(not needed to fill, but good for cleaning out and inspection) and a 5/16" hole for my blowgun to push the water into the pan. Plumbed between the pan and tank is some 1" clear PVC, 1" brass ball valve and barb fittings. Along with the same 1" NPT fitting welded to the pan. This is a stupid simple setup with the valve being the only moving part. All the parts came from McMaster, if anyone wants part #'s, I’ll post them.

Video of it in action and the first couple cuts(of course the screenshot is of my dumbass):

Pics of tank:


6 Likes

I also didn’t want the table on the casters, it will be in a permanent spot for now, it’s also not heavy so I can move it easily. The studs are a M10x1.5 thread, so I went to old trusty McMaster and got some machine leveling feet, same ones I have on both my fixture table and mobile table.

Part number is 6992K37 and they’re $8.50/piece

And a few pics of my first few cuts. Business logo, tag with my sons name, bracket for some Atlas shifters and a half ass cawk and balls cutout(only because a friend asked how many metal dicks had I cut out already). Once I get better with Fusion, it will become more economic.


It sits nice and nestled in he back corner, which is where my wood stove and wood rack usually goes, going to have to figure something out for heat in the next couple months.

3 Likes

Awesome post, thank you for sharing. I am sure that we will see others borrowing some of your ideas for their machines.

1 Like

Thanks Daniel! Just trying to help people out, I spent wayyy too much time researching all this to just hoard it to myself haha

2 Likes

I truly appreciate your assistance and have used your advice! Just as an FYI, the cable clamp that you linked to DOES NOT fit onto the cpc cap. It’s too small. I have not figured out what the correct clamp/cap is but that one will not screw on the back of the CPC plug

1 Like

I think you actually need this one that is size 17:
https://www.alliedelec.com/te-connectivity-206070-8/70042391/

1 Like

Not a problem man. Post is edited!

How many gallons does the water table hold if it is filled to the brim?

According to an online calculator I use, 27.75" x 33.75" x 2" equates to 8.11 gallons. I made the tank larger so as water evaporates, I wont have to refill it as often

I got my 45xp with the 15° torch set up today and luckily I didnt have to extend the purple wire there was plenty there to move it to the other port. Did everything like you post and it works great, thanks for sharing the info and part sources!!

1 Like

Nice Tig Finger did you get that from Jody at The Weldmonger Store https://weldmongerstore.com/

2 Likes

Ya buddy! Glad to help, keeps others from wasting as much time as I did.

2 Likes

Yessir. Jody sells a quality product, that’s not some China made garbage.

2 Likes

Im confused. What is the point of the zip tie on the trigger if you are moving the 6 to 8 terminal.

I am trying to figure out a way to do this so I can use my torch for both cnc and also by hand.

The trigger is a switch, a switch interrupts/connects a wired connection. Switching the wire in the connector “tells” the machine that a machine torch is attached, which doesn’t have an interruption in the internal torch wiring(trigger). So by zip tying the trigger, the connection is always made inside the torch, essentially making it a “machine torch”.

Clear as mud?

So if I get a 45xp with the cpc port and a machine torch will I still have to do any of this or tap into any wires or will I be able to just plug it right in and run it on my table?

Only thing you will need is a cpc cable to plug the torch firing wires to your plasma machine. If you plan to have your machine right next to your control box, you really just need the connector and pins(and tool) and put them right on the wire included with the crossfire, they’re actually pretty long.

The plasma will know that a machine torch is attached, via the pin locations in your plug.

Awesome! Thanks for the reply. That makes complete sense.

hi, i just purchased an xp 45 with cpc port and cpc cable with my machine. Which wires do i connect to the Langmuir table? I think its the green and black acording to the Hypertherm book? Any info would be great.thanks