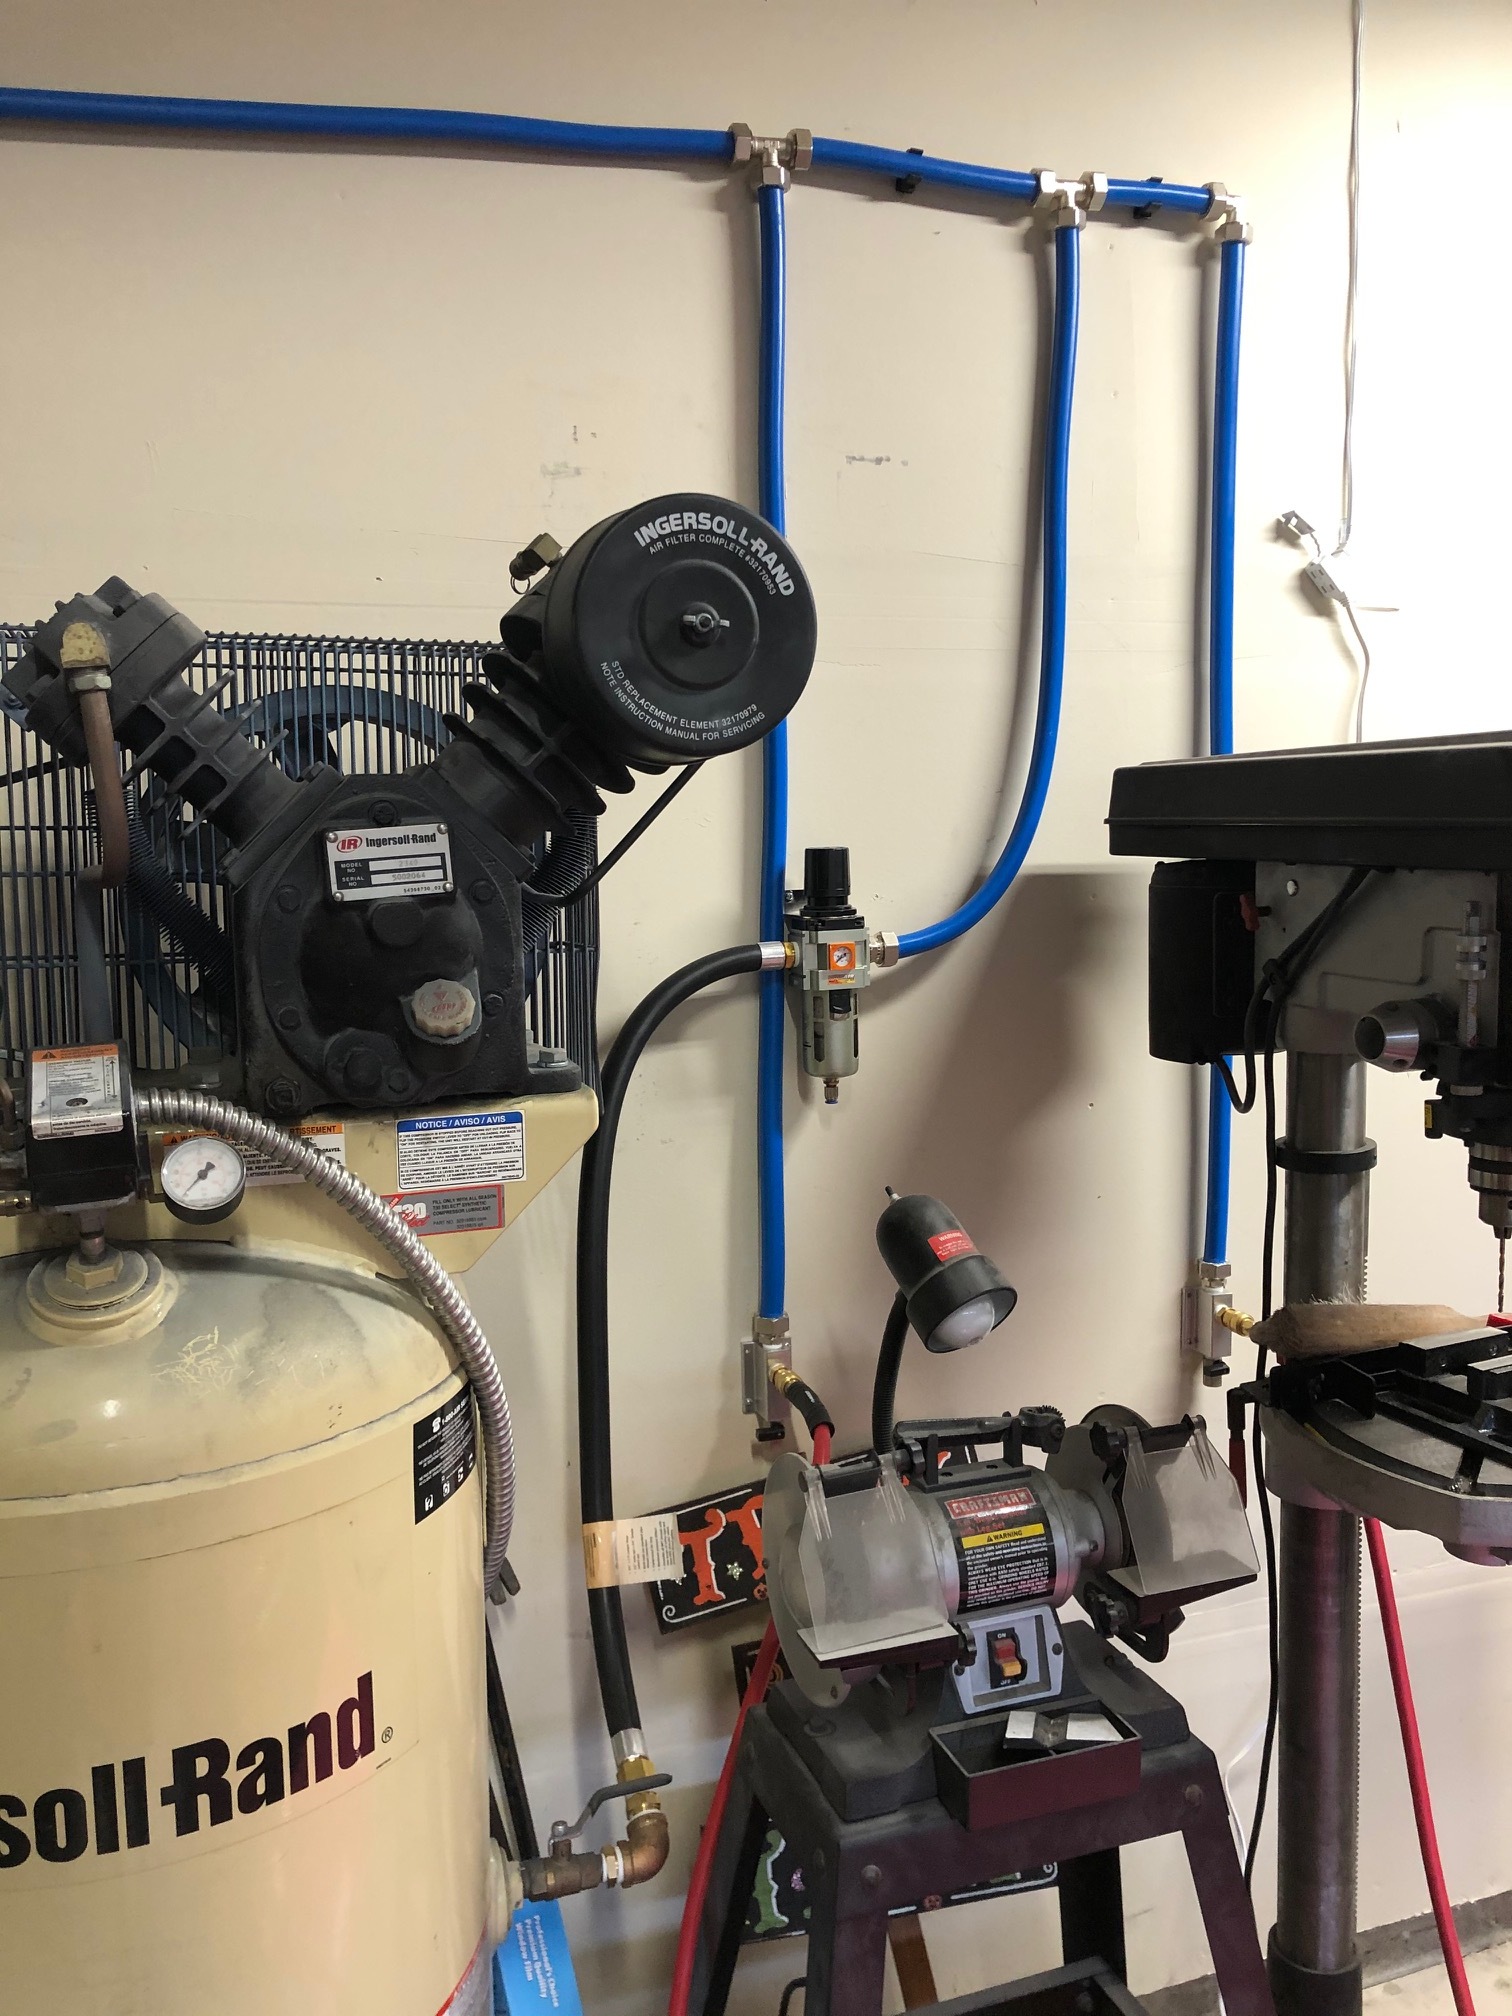
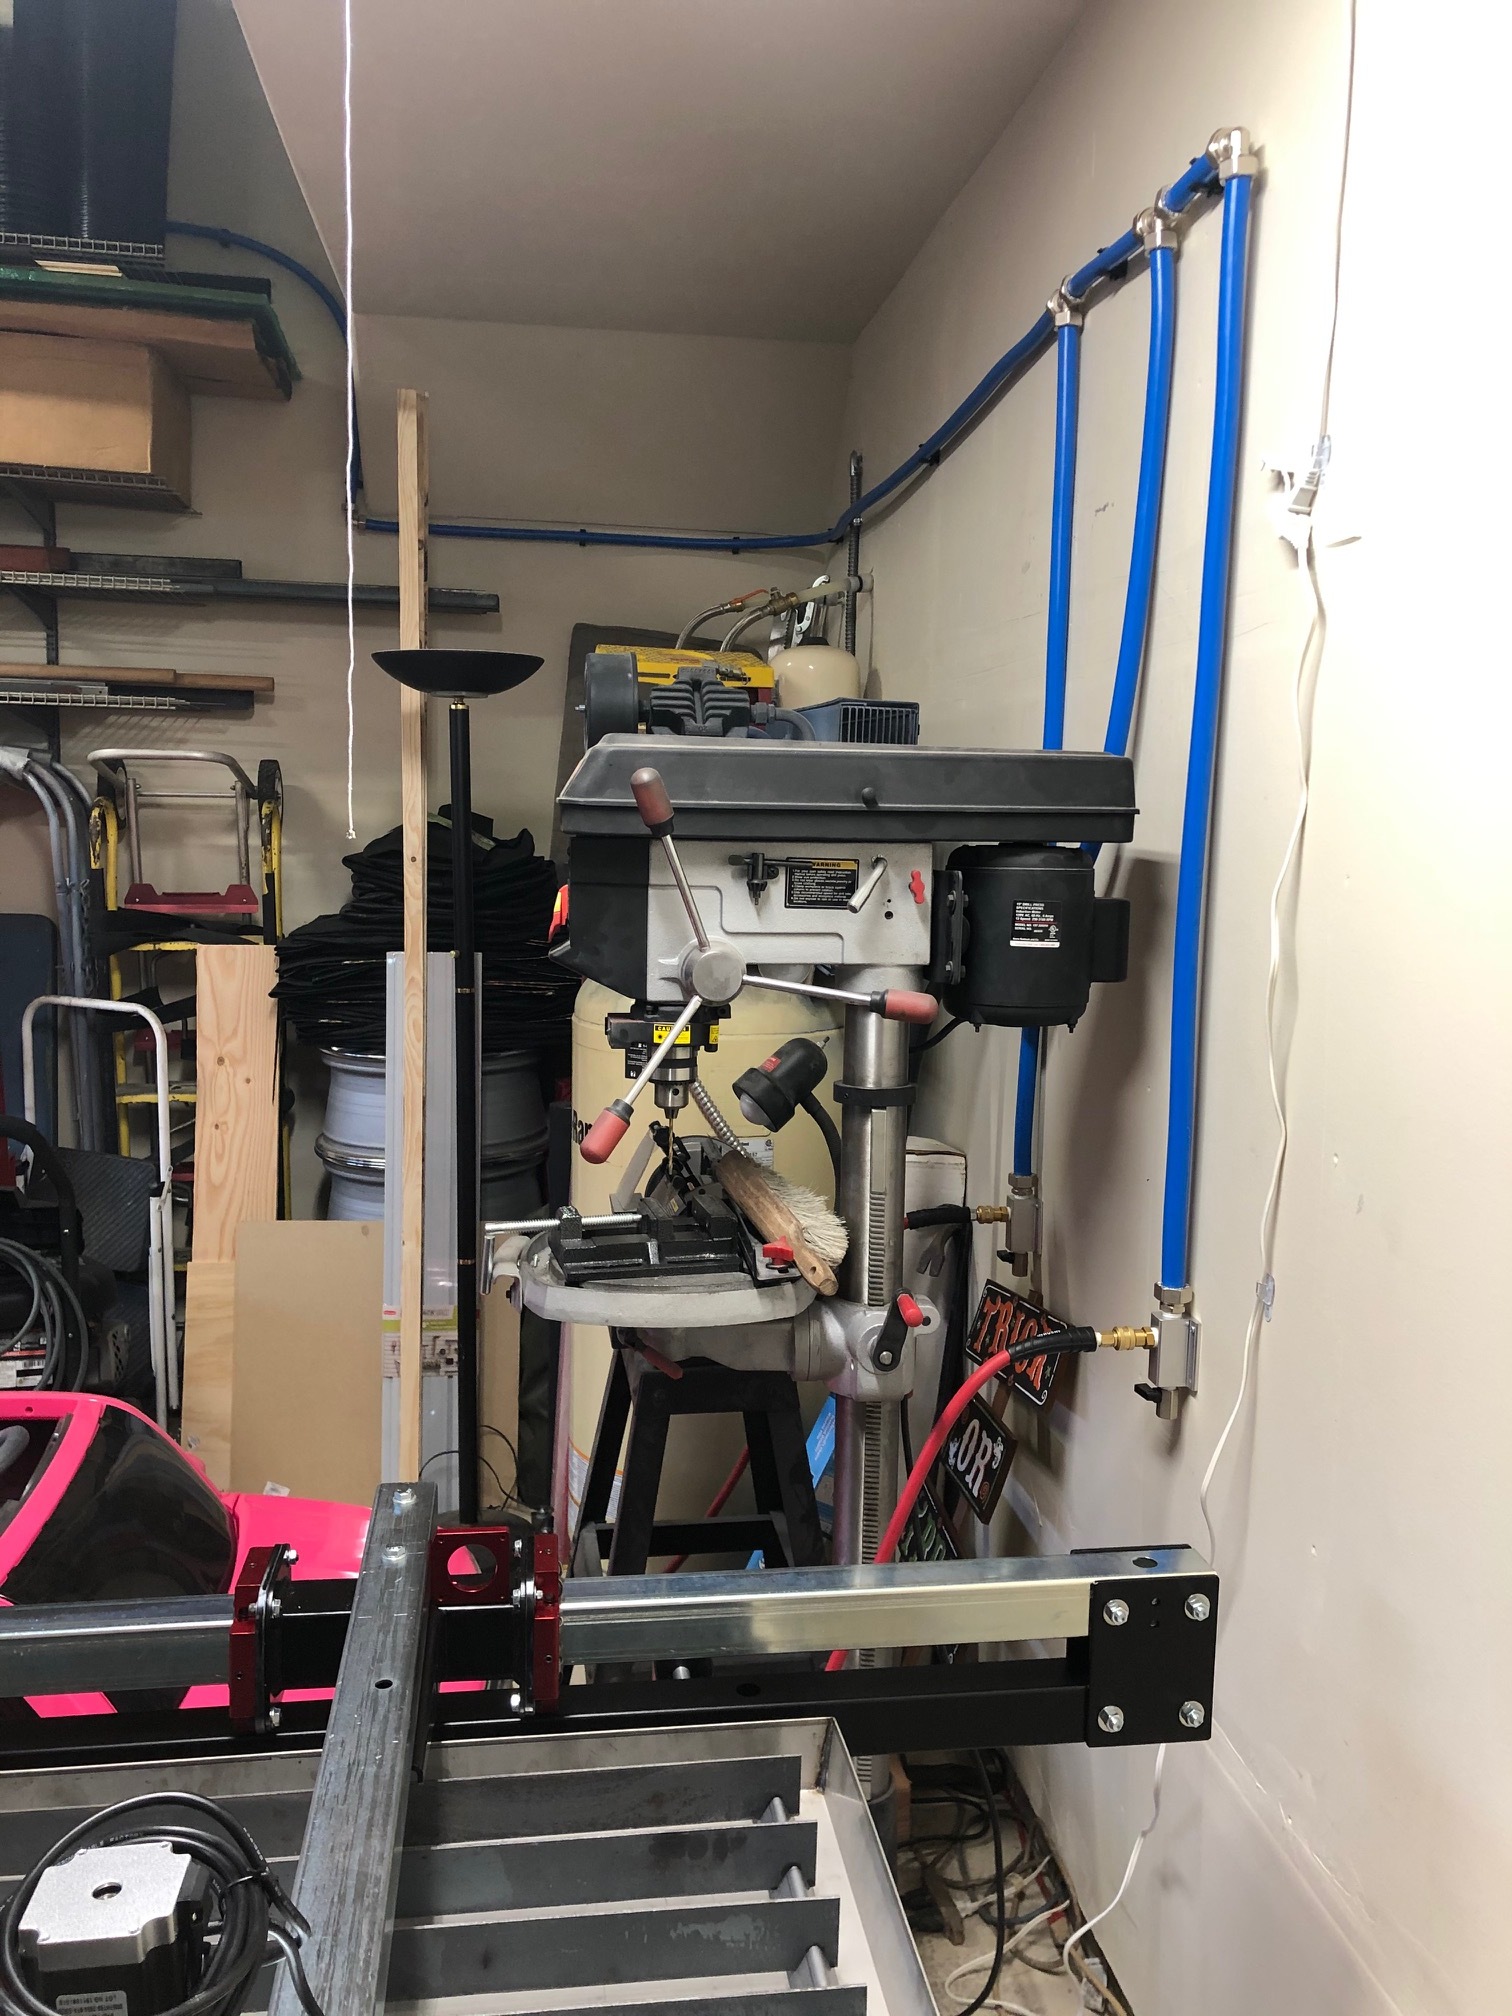
RapidAir maxline 3/4”. I have the 100 ft 3 outlet setup. I have 2 outlets for normal use and 1 for my HVLP paint guns using larger fittings.

I’m looking at the Rapid Air system. I was wondering if it is hard to straighten out from the coil?
It was very easy to straighten out.
ok thanks. I think I will pull the trigger and order it.
You can order the kit from anywhere you choose but it may not come with all the fittings or accessories you need depending on how you want to set it up. I bought my kit from northern tool and they had most of the extras I needed like elbows and the jumper hose but all the brass fittings I needed I got from RapidAir’s website.
I found it on amazon. I was gonna see if they had extra fittings on there. If they don’t I’ll get them off rapid air’s website
I’ve got an issue, I feel like I may have goofed somewhere, but maybe not. The holes on the stanchion plate and y-axis tube do not line up on one side, there are holes there because I reached inside the tube and felt them, they just do not line up on either end of this particular y-axis tubing.
However they line up perfectly on the other side.
Also yes if facing front of the table the y-axis tube on left has the big hole for cable support at back, the the tube on the right has the big hole on front.
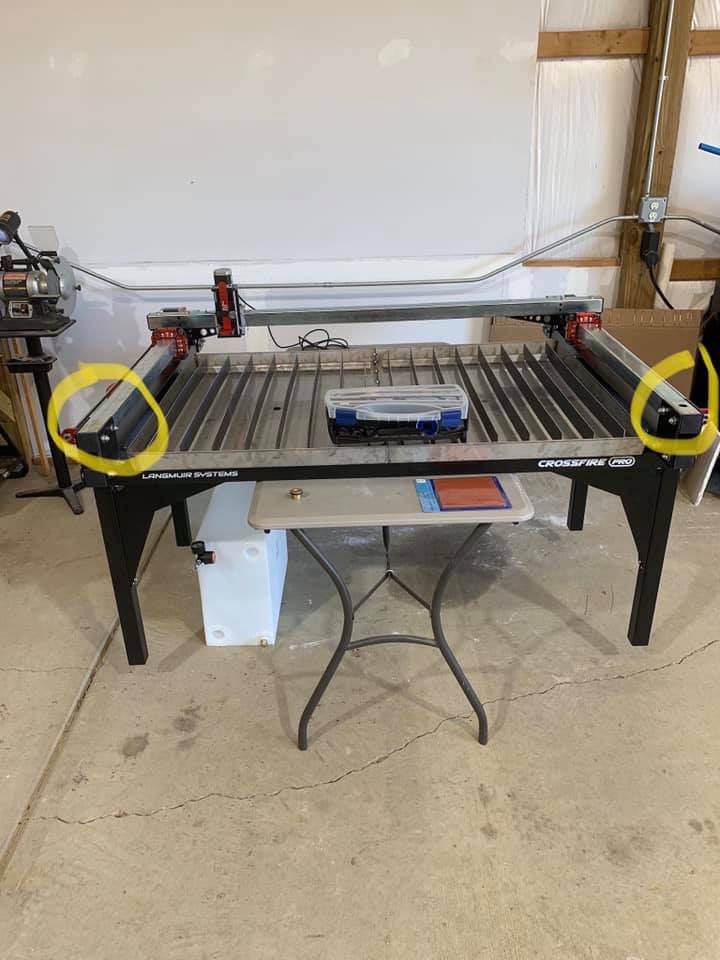
We definetely goofed up in punching one side of that tube. We’ll send you out a replacement. In the mean time, if it were me, I would use a 1/4” drill and drill through the holes in the stanchion plates. Doing so will allow you to move forward with assembly.
2 Likes
No worries, haha. I’m order #8601 if you need shipping info.
Oh also, you do mean drill the tubes not the plates right? I’d assume the tube is off not the plates.
However when I get back home I can take the plates off and verify that it’s the tube not plate.
The stanchion plates are fine, I’m sure that we punched the hole pattern upside down by accident.
1 Like
I haven’t seen this mentioned but I had to drill out the X axis lead nut holes to fit the 8/32 Allen head bolts. Not a big deal.
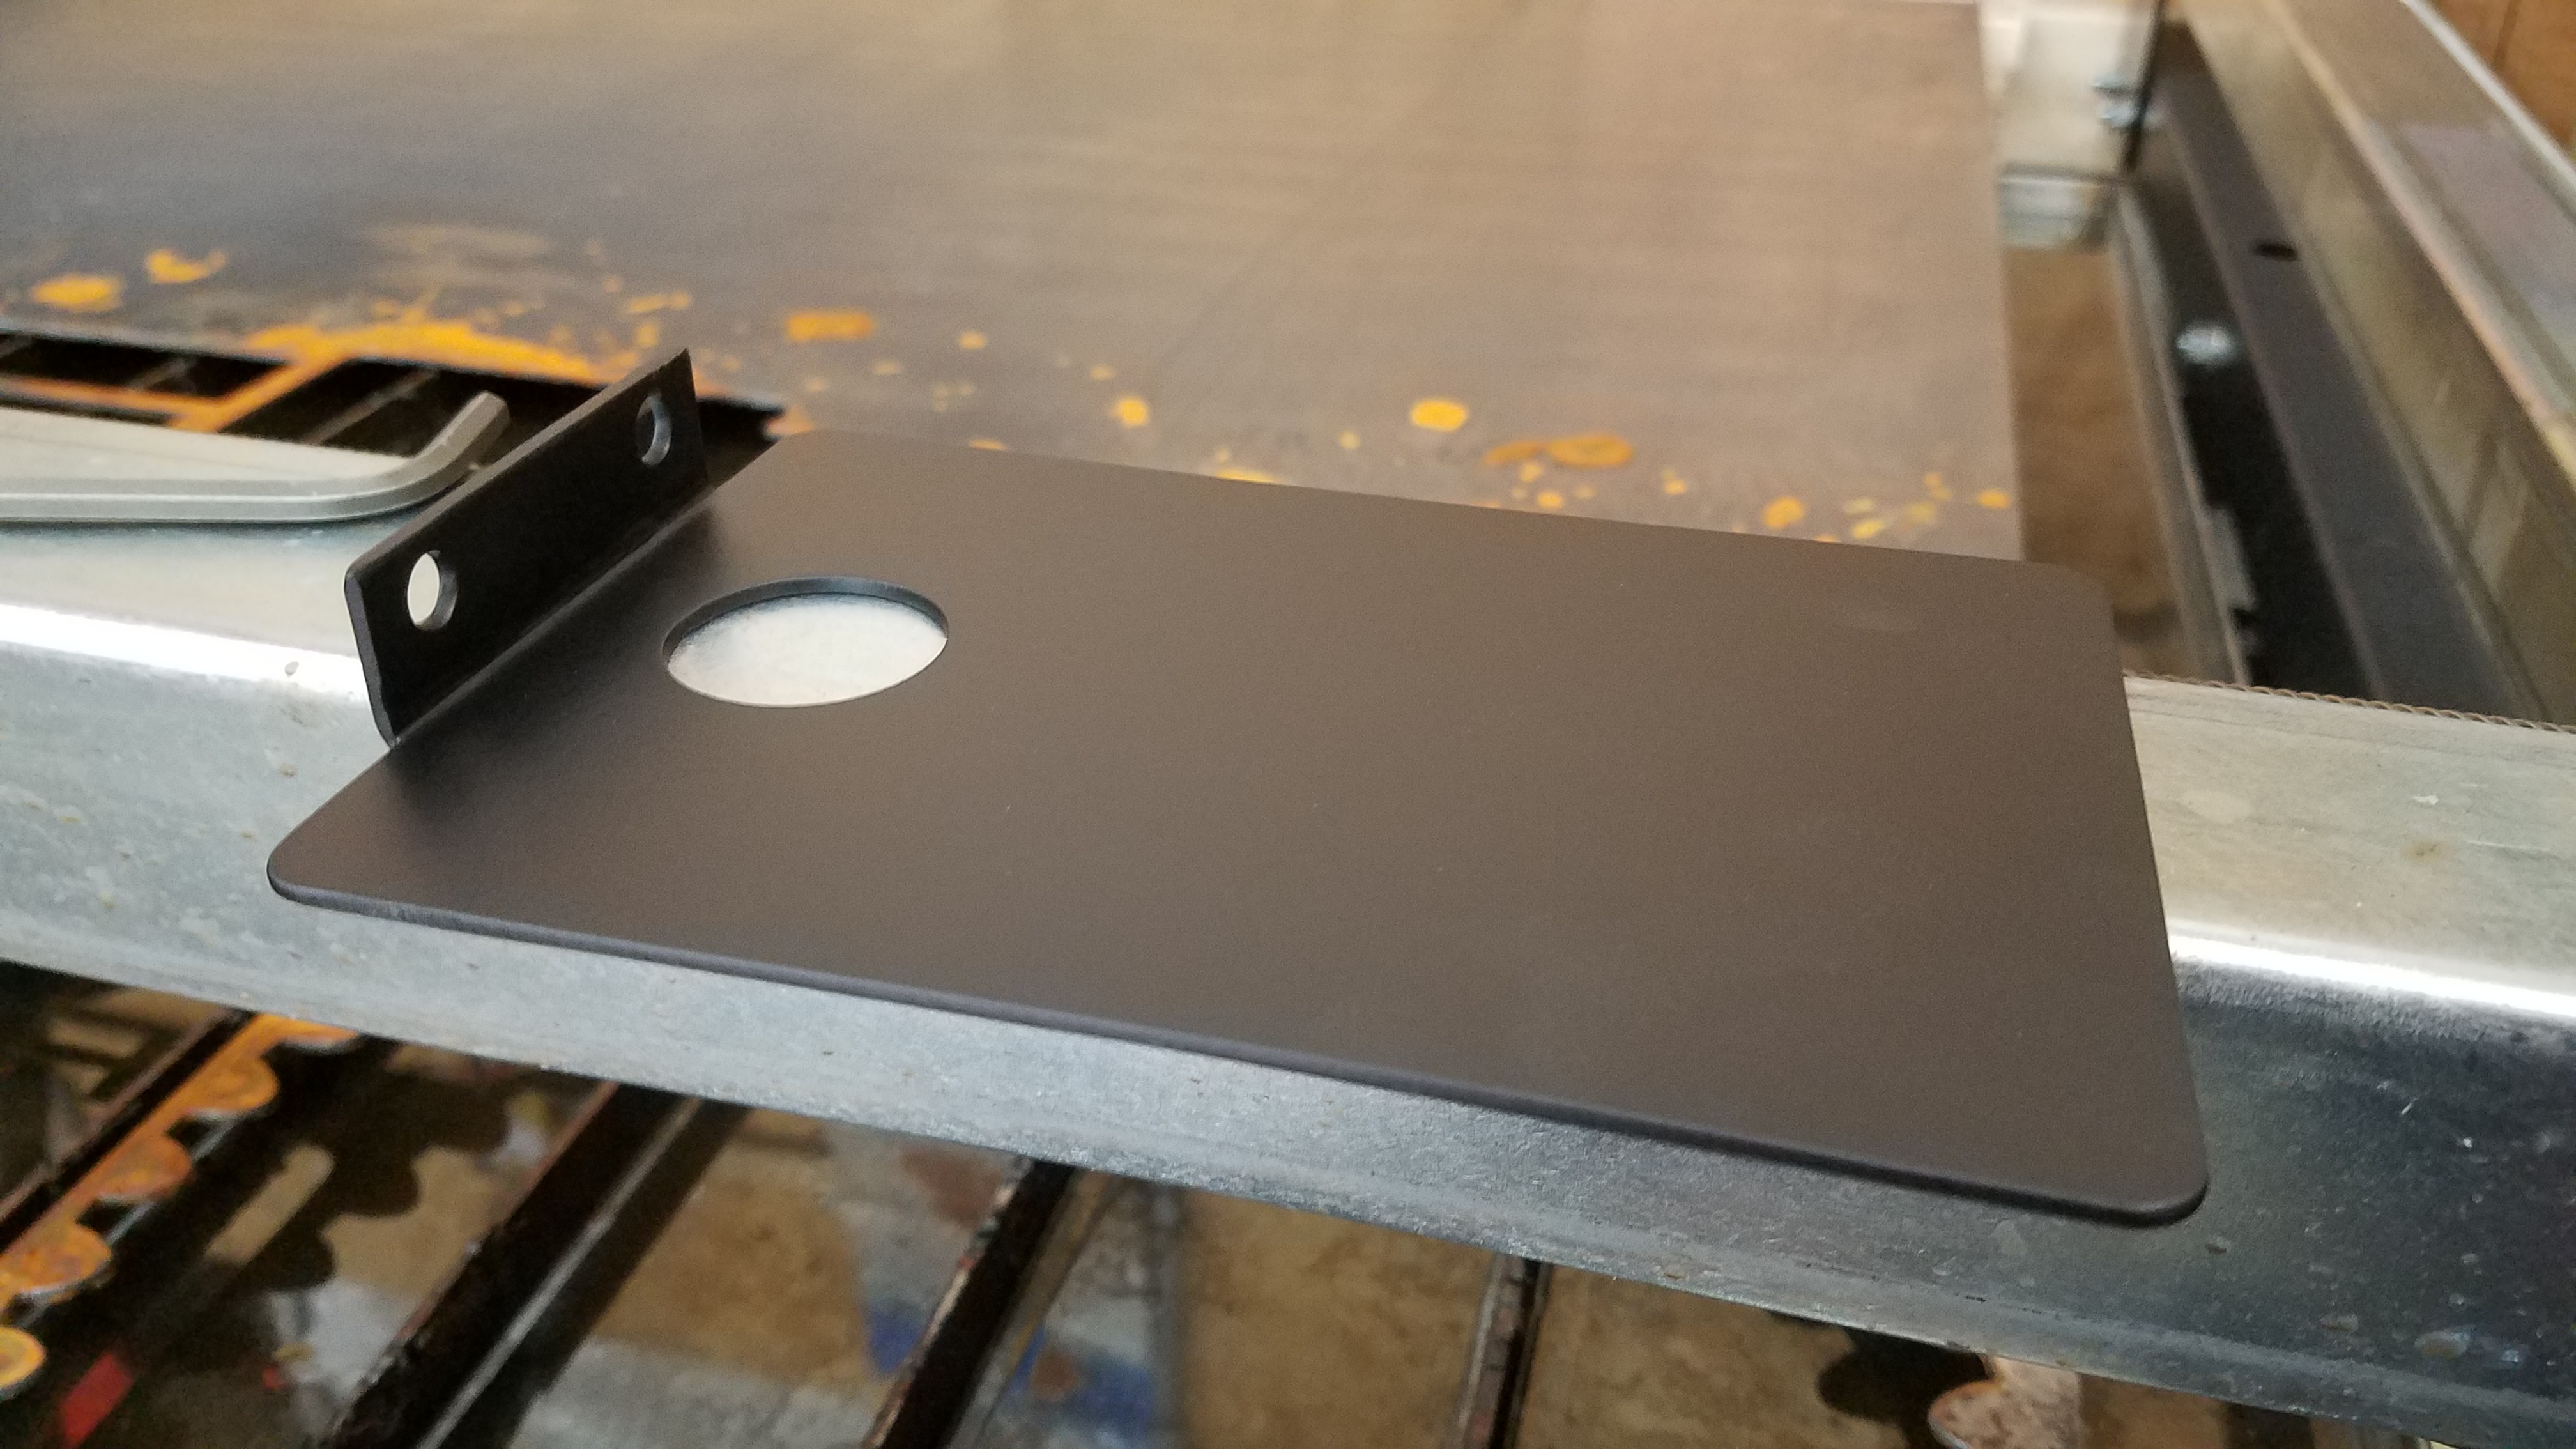
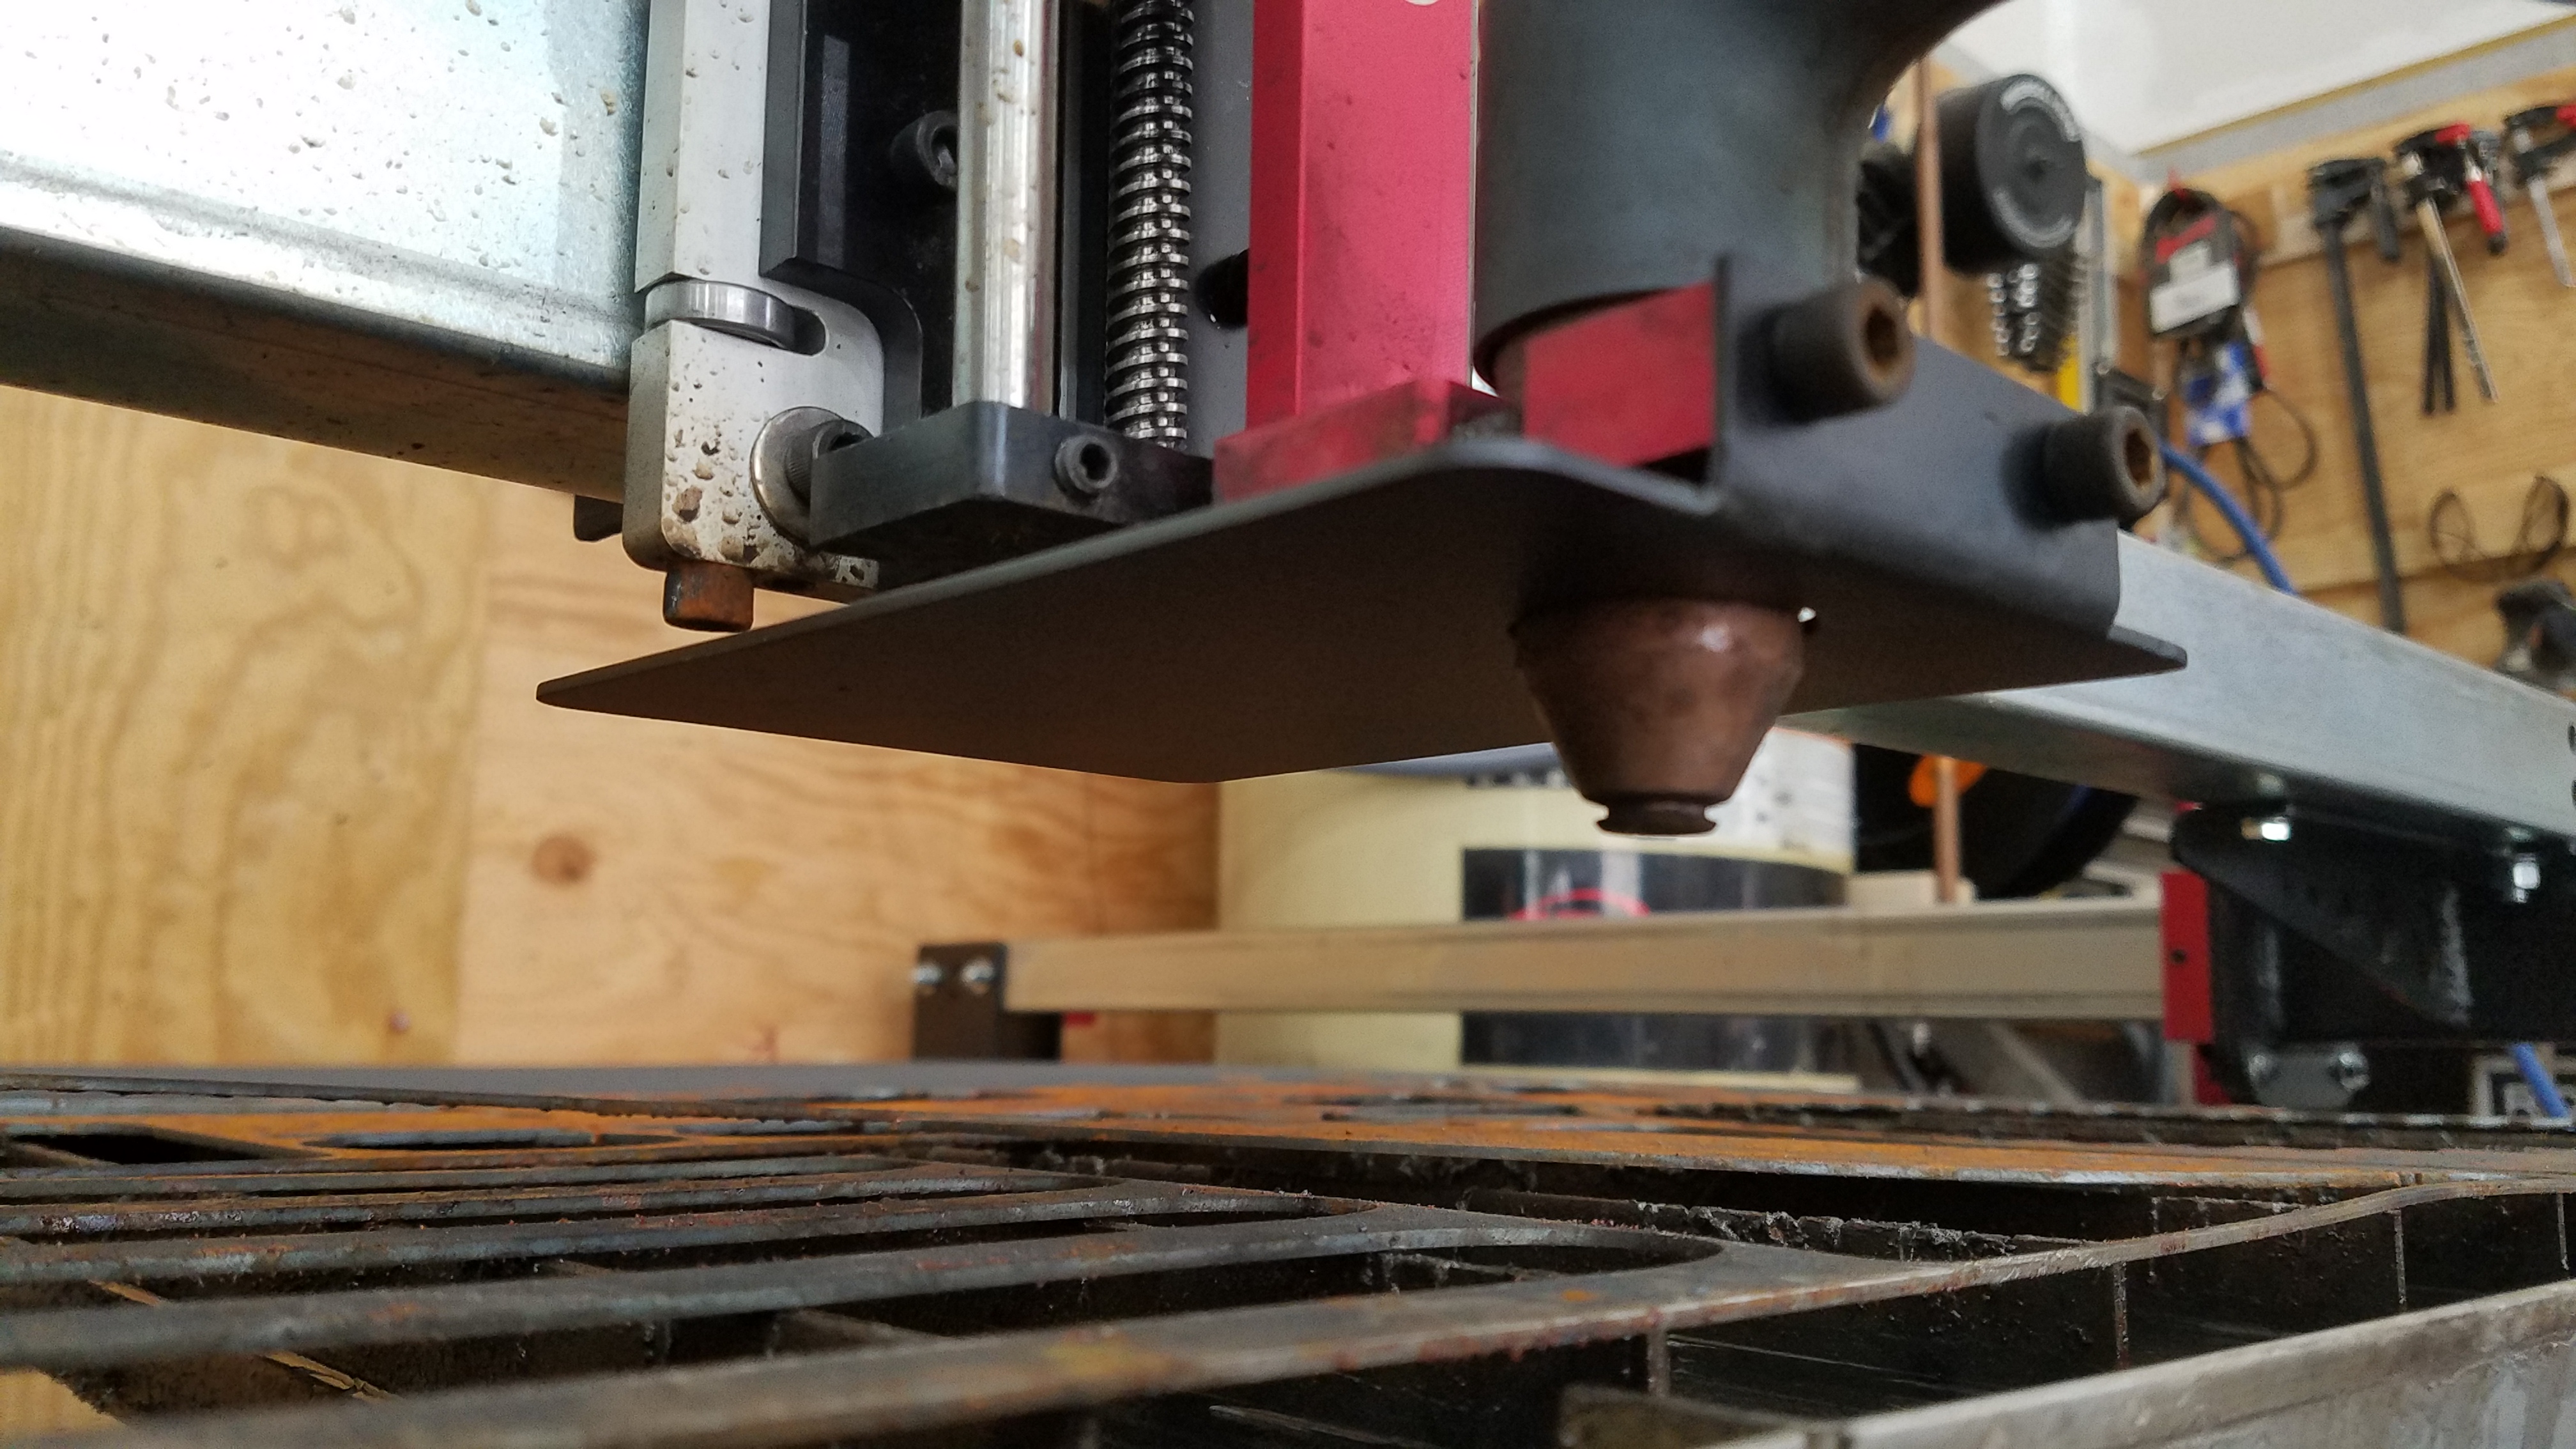
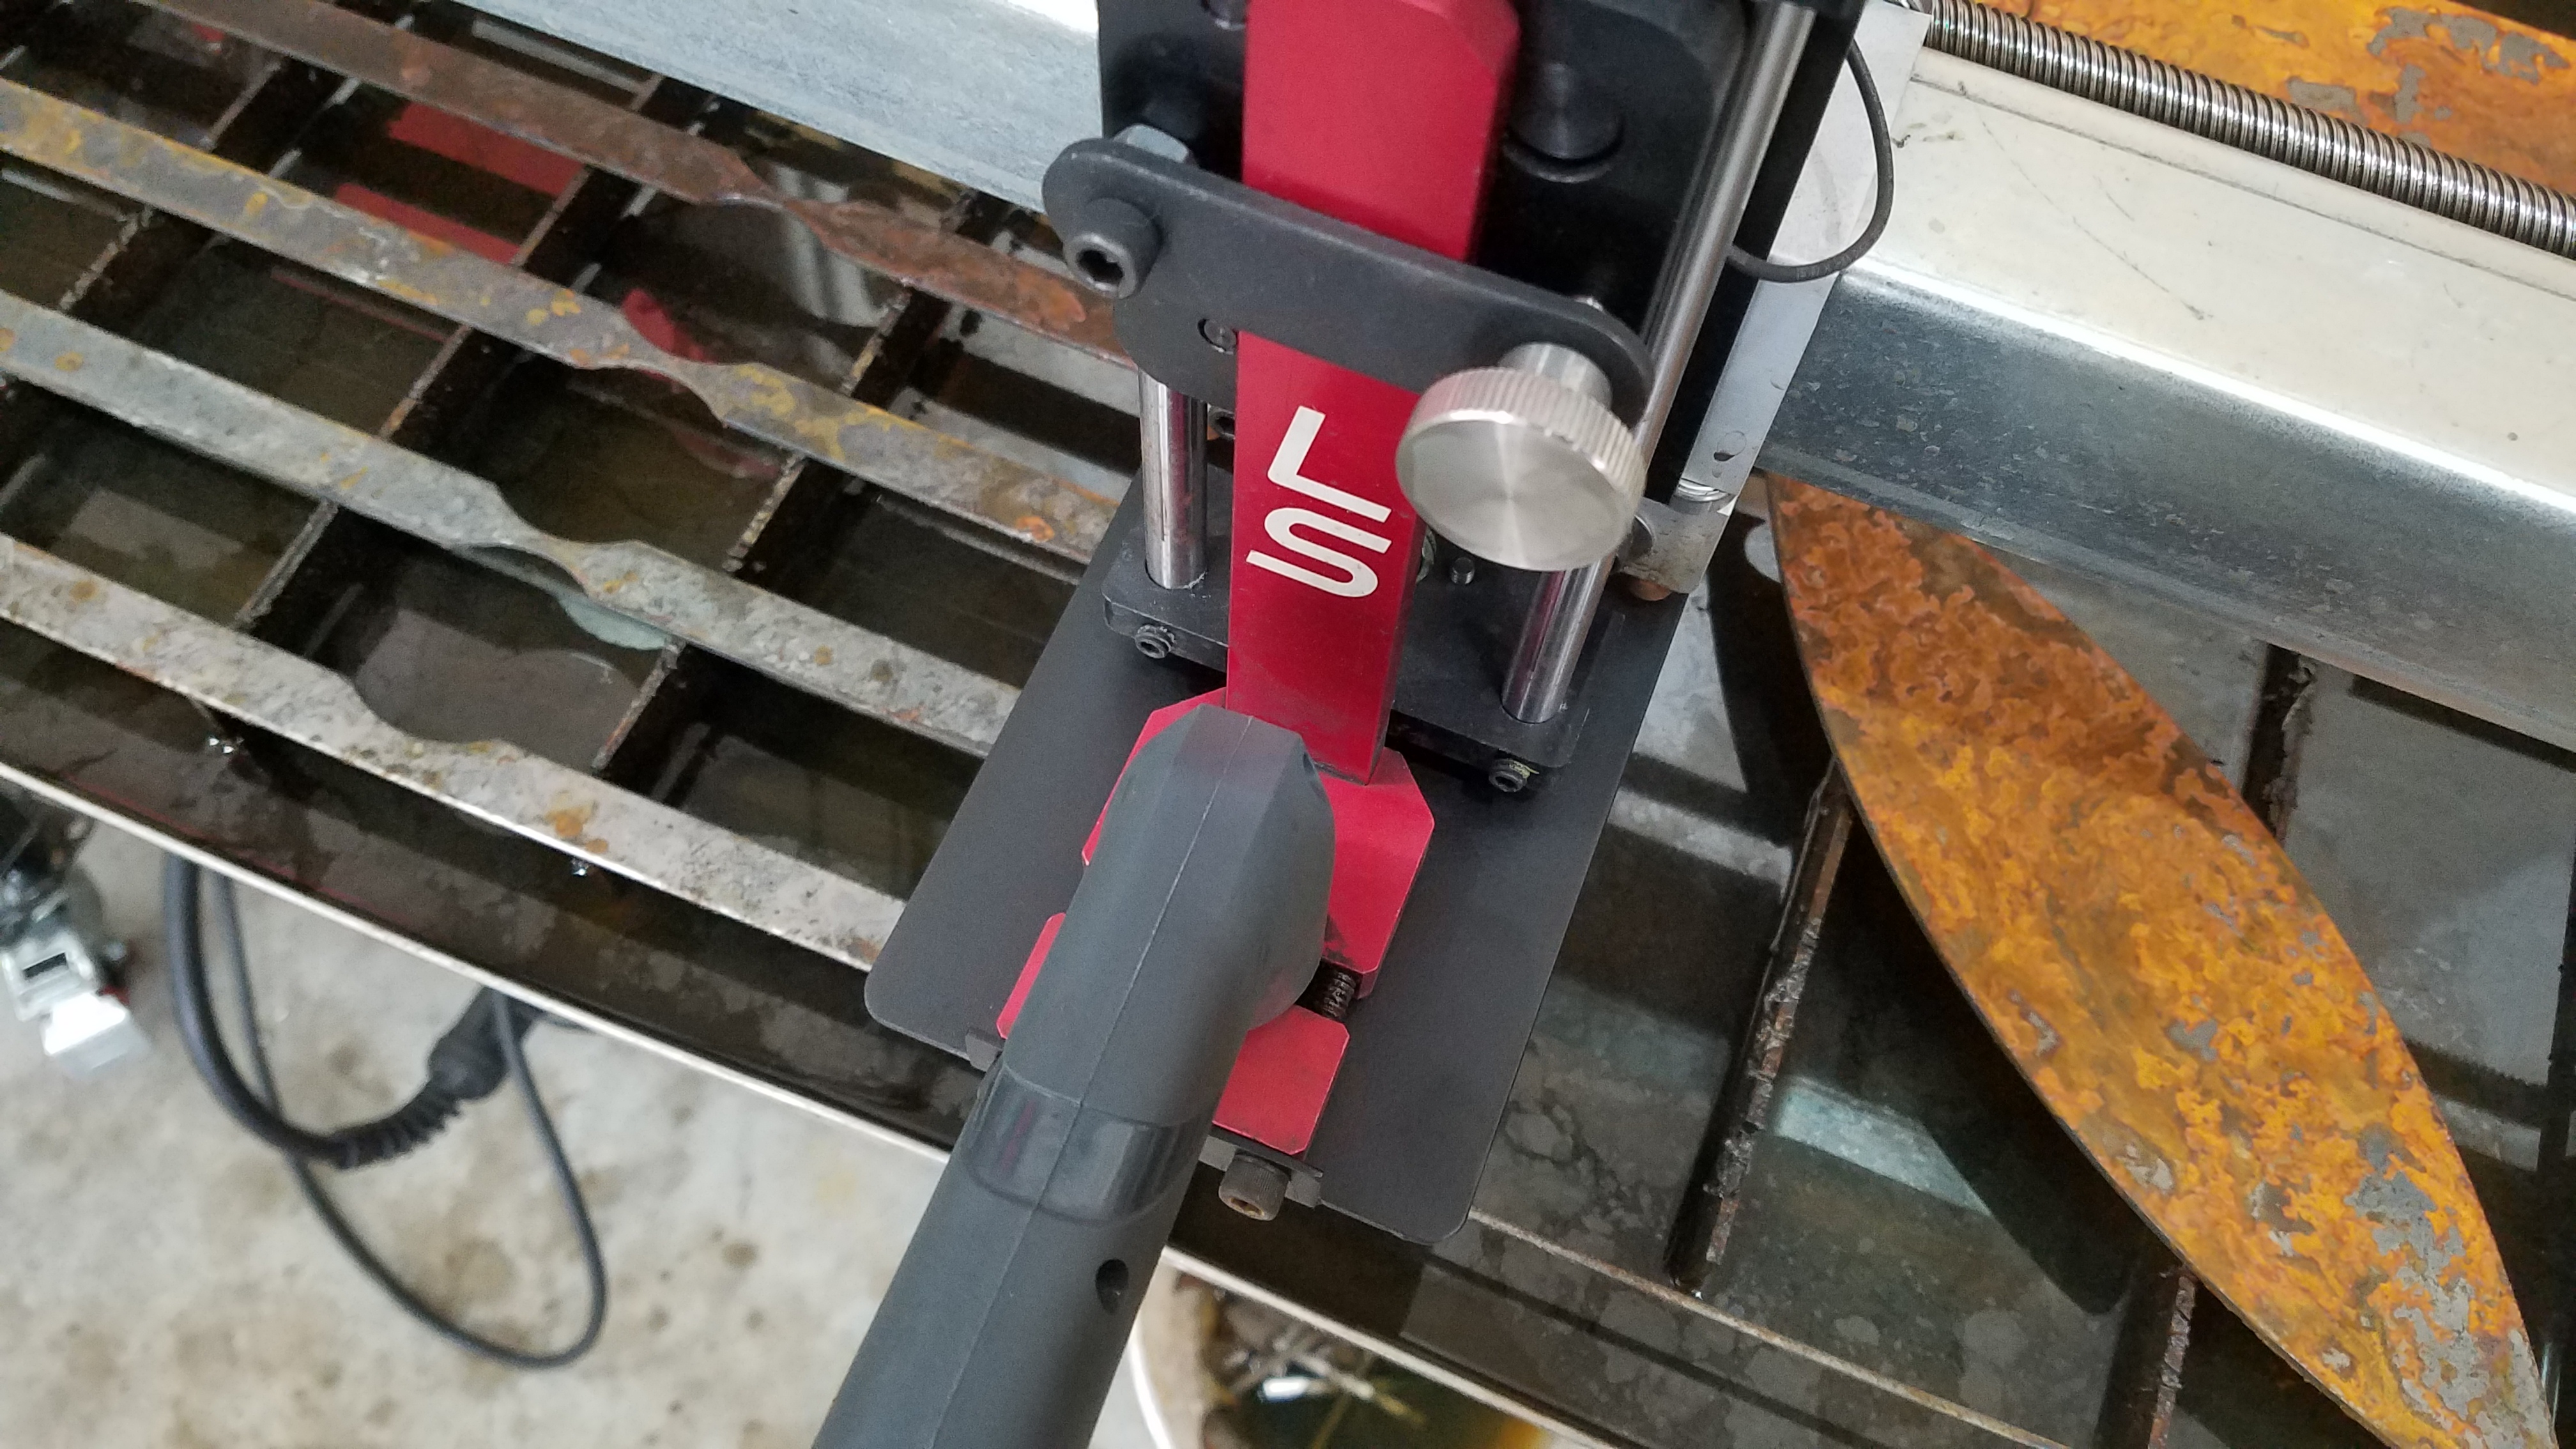
I built a splash guard to keep water off the Z axis. I noticed the bottom bearing getting a little surface rust.

12 Likes
Heres the file if anyone is interested. Just keep in mind you must lower the torch mount so the splash guard will clear the bottom z axis bolts. Also you will need something to bend guard with
splash spark guard big.dxf (4.0 KB)
5 Likes
fantastic…thanks…this group is great…!!!
1 Like
I had the same issue but I was able to thread mine through without drilling.
I considered threading it through but there isn’t much shoulder material there and was afraid it might break.
That guard is nice.
Are you running plain water in your table? Running Green Cut I never saw any rust on my table components on my original X-Fire in a year of use.
1 Like
I use the plasma quench mix and make sure the PH level is above 9. Its all surface rust. But doesnt matter what liquid you use its still not good for electronics and bearings