I think I’ll be able to figure it out, but if you could take some pictures it would help a lot of us out.
1 Like
I’m in Nebraska on business this week but will do this over the weekend and post that.
In light of @langmuir-mike’s post above, it’ll be my experience and not official Langmuir instructions ![]()
1 Like
Anything you can share will be appreciated!
How thick are the stanchion plates that connect the gantry tubes together. What gauge are they?


Still waiting, you said they have it all over their site and forum when they just said that they omitted this out, you said there is tons of trends already describing the connection. I will wait…
https://www.langmuirsystems.com/thc/guide#vimB
Every plasma cutter has two high voltage main terminals; the plasma torch electrode (negative) and the work clamp return (positive). Each Langmuir Systems THC kit includes a pair of red and black Raw Voltage Pigtail Cables that are rated for CATIII 1000V for connecting to these plasma terminals. One end of these cables is a 4mm high voltage male banana connector that plugs into the corresponding color socket on the top of the VIM box. The other end of these cables is stripped as a pigtail for connecting to the raw plasma terminals inside or outside your plasma cutter by a suitable connection method.
Each plasma cutter model is different and it will be necessary to consult with your manufacturer or a qualified technician in order to determine the best hookup points for the Raw Voltage Pigtail Cables on your plasma cutter.

I’m not saying this to pile on you, but it’s two wires. I think most people with basic electrical knowledge can safely figure it out. Between the description above and the labeling on the VIM that tells you where each lead needs to go, there should be little room for confusion. It’s up to you to find those terminals inside the cutter. If that isn’t clear to you, then you probably shouldn’t be doing the modifications. These voltages can be lethal, if you are not comfortable doing this yourself, do as Langmuir says call someone who is. I see @jamesdhatch will post pictures, it’s probably better to at least wait for that.
3 Likes
I appreciate your email, and you are not piling on at all. It was just one person Virtue Signaling.
I am not an electrician but I do have an Idea of which cables they are referring to but I am not 100% certain because I don’t have wiring schematics (wire ID). That wasn’t my point I was trying to make. Hypertherm provide wiring schematics, most electricians won’t even dare touch it with out schematics (liability) Also I know enough not to (Splice) into those cables I would use proper ring terminals to make the connections.
Langmuir who sell and chose to partner up with Razorweld doesn’t provide that type of support, my frustration is that I wouldn’t have bought that if I would have known that, I bought that cutter because I wanted to avoid this exact thing, that’s in the past now. I will just deal with Sean with Jasic directly. Greg thanks for keeping it professional
1 Like
Did you update the photo with the + and - notations? Did Jasic identify those for you? It’s going to be super handy for other RW owners!
You probably know but the next guy who uses your post to help might not, but I’d solder the pigtails in the crimp on the ring terminals (great idea to use ring terminals if you can get in there). Otherwise Posi-taps should be okay. I prefer them to those foldover clamping wire taps.
Also the really critical part is making sure + in the RW goes to + on the VIM and - to -. Because the work clamp is positive, not a normal negative “ground” it’s easy to swap them and blow the box. Kind of like working on old British sports cars with Lucas electrics 
1 Like
James,
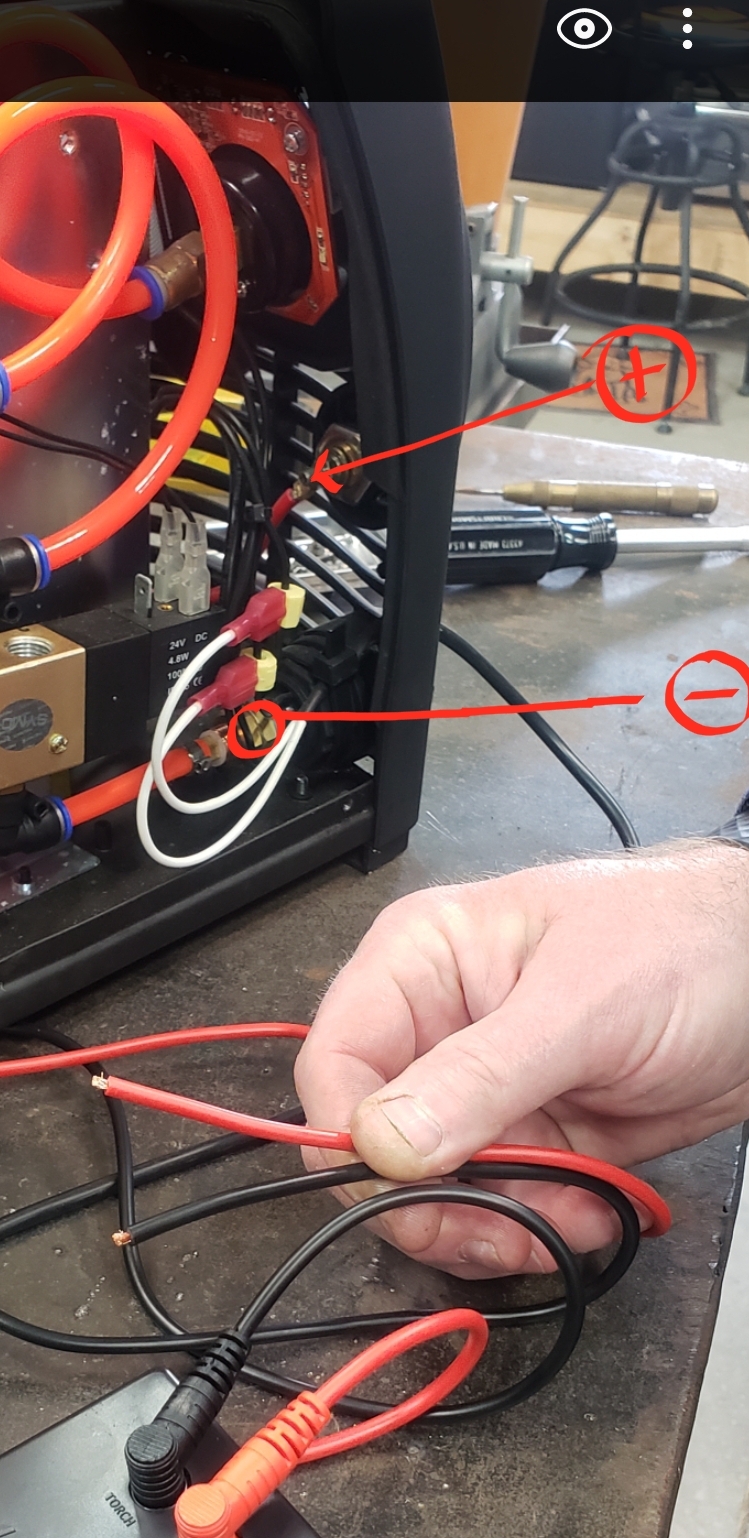
To answer your question before I started with my soapbox a couple of nights ago, based on my understanding and reading the logical location was those spots, I just needed confirmation. I posted that picture this morning hopefully getting a forum confirmation. I just got off the phone with Jasic they did not identify either. They may get back to me tomorrow. They said that they exclusively made the new Razorweld with CPC for Langmuir and did not support wiring any additional wires for the torch height controller, which is why they have the new Razorweld. They told me to give them a day or so to see about these connections and not sure if they would be able to help. When I originally saw those wires as I redlined in that picture, I cringed when I read (Splice) high voltage pigtails. I would never splice those cables, ever! I would install ring terminals by crimp and solder then a heat shrink wrap.
If they don’t come up with the answer, I was intending to break out my meter and see what I read on the likely candidate wires. I like checking things with a meter to make sure. Just insurance 
The Raw Voltage Pigtail Cables should never be spliced. They should have solid, soldered connections with something like ring terminals as you were suggesting.
Also, the picture you posted is correctwith respect to positive and negative voltage inside the Razorcut 45. The Red Wire connects to Positive (work clamp) and the Black connects to Negative (torch lead).
Also, if you have a Razorcut 45 with a torch firing port on it, you should notice that right next to it there is a plug in the front of the enclosure that is a good spot for routing this cables through with a strain relief plug.
Hope this helps!
3 Likes
Thank you Mike, that’s I needed.
1 Like
im just gonna throw a wrench in the gears here:
does anyone know how to wire in a Hypertherm 30Air plasma cutter to use the THC system?
the 30Air does not have a cpc port.
i have the THC box, but havnt opened it since i was just gonna hold onto it until i, maybe decide to buy a 45xp cutter.
You can use RAW voltage instead. You’ll need to open up the 30’s case and attach the RAW cable from the THC box you got from Langmuir. There’s a pair of wires that attach inside the plasma machine and the other end goes into the VIM black box that’s in your THC shipment. There are instructions in the download section of the website for the THC User Guide. It’s similar to how you had to wire your torch firing cable to allow the Crossfire to trigger the torch.
The VIM box is then attached to the main Crossfire control box.
This might help! https://www.hypertherm.com/Download?fileId=HYP174006&zip=False
1 Like
I was gonna say: there are many wires in the machine, guess I’ll just have to open it back up again and start looking around after reading the torchmate manual.
You’re looking for two fairly obvious ones. They’re both on the inside of the front panel because they’re the two main ones going out - the negative going out the torch and the positive going to the work clamp. The latter is pretty easy because it’s got a dedicated port on the front of the machine so you’re just looking for what’s on the “innie” side. Follow that back to the wiring block where you can get at a terminal screw to add your ring tip to.
The negative us doing the same thing for the torch connector. This is a little trickier because there are a couple of other wires for the trigger and possibly safety as well. The negative power is typically a larger wire due to the current it carries.
A wiring diagram is hugely helpful but if it’s not available it is still relatively easy to wire up to the Raw voltage.
Just started building it and currently just got done with the water table. Now that most of the weight is on it I got to test out these Foot Master leveling casters and for small wheels they are very smooth. I barely have to put any force on the table to move it. Now I see why a lot of people use these for their welding tables.


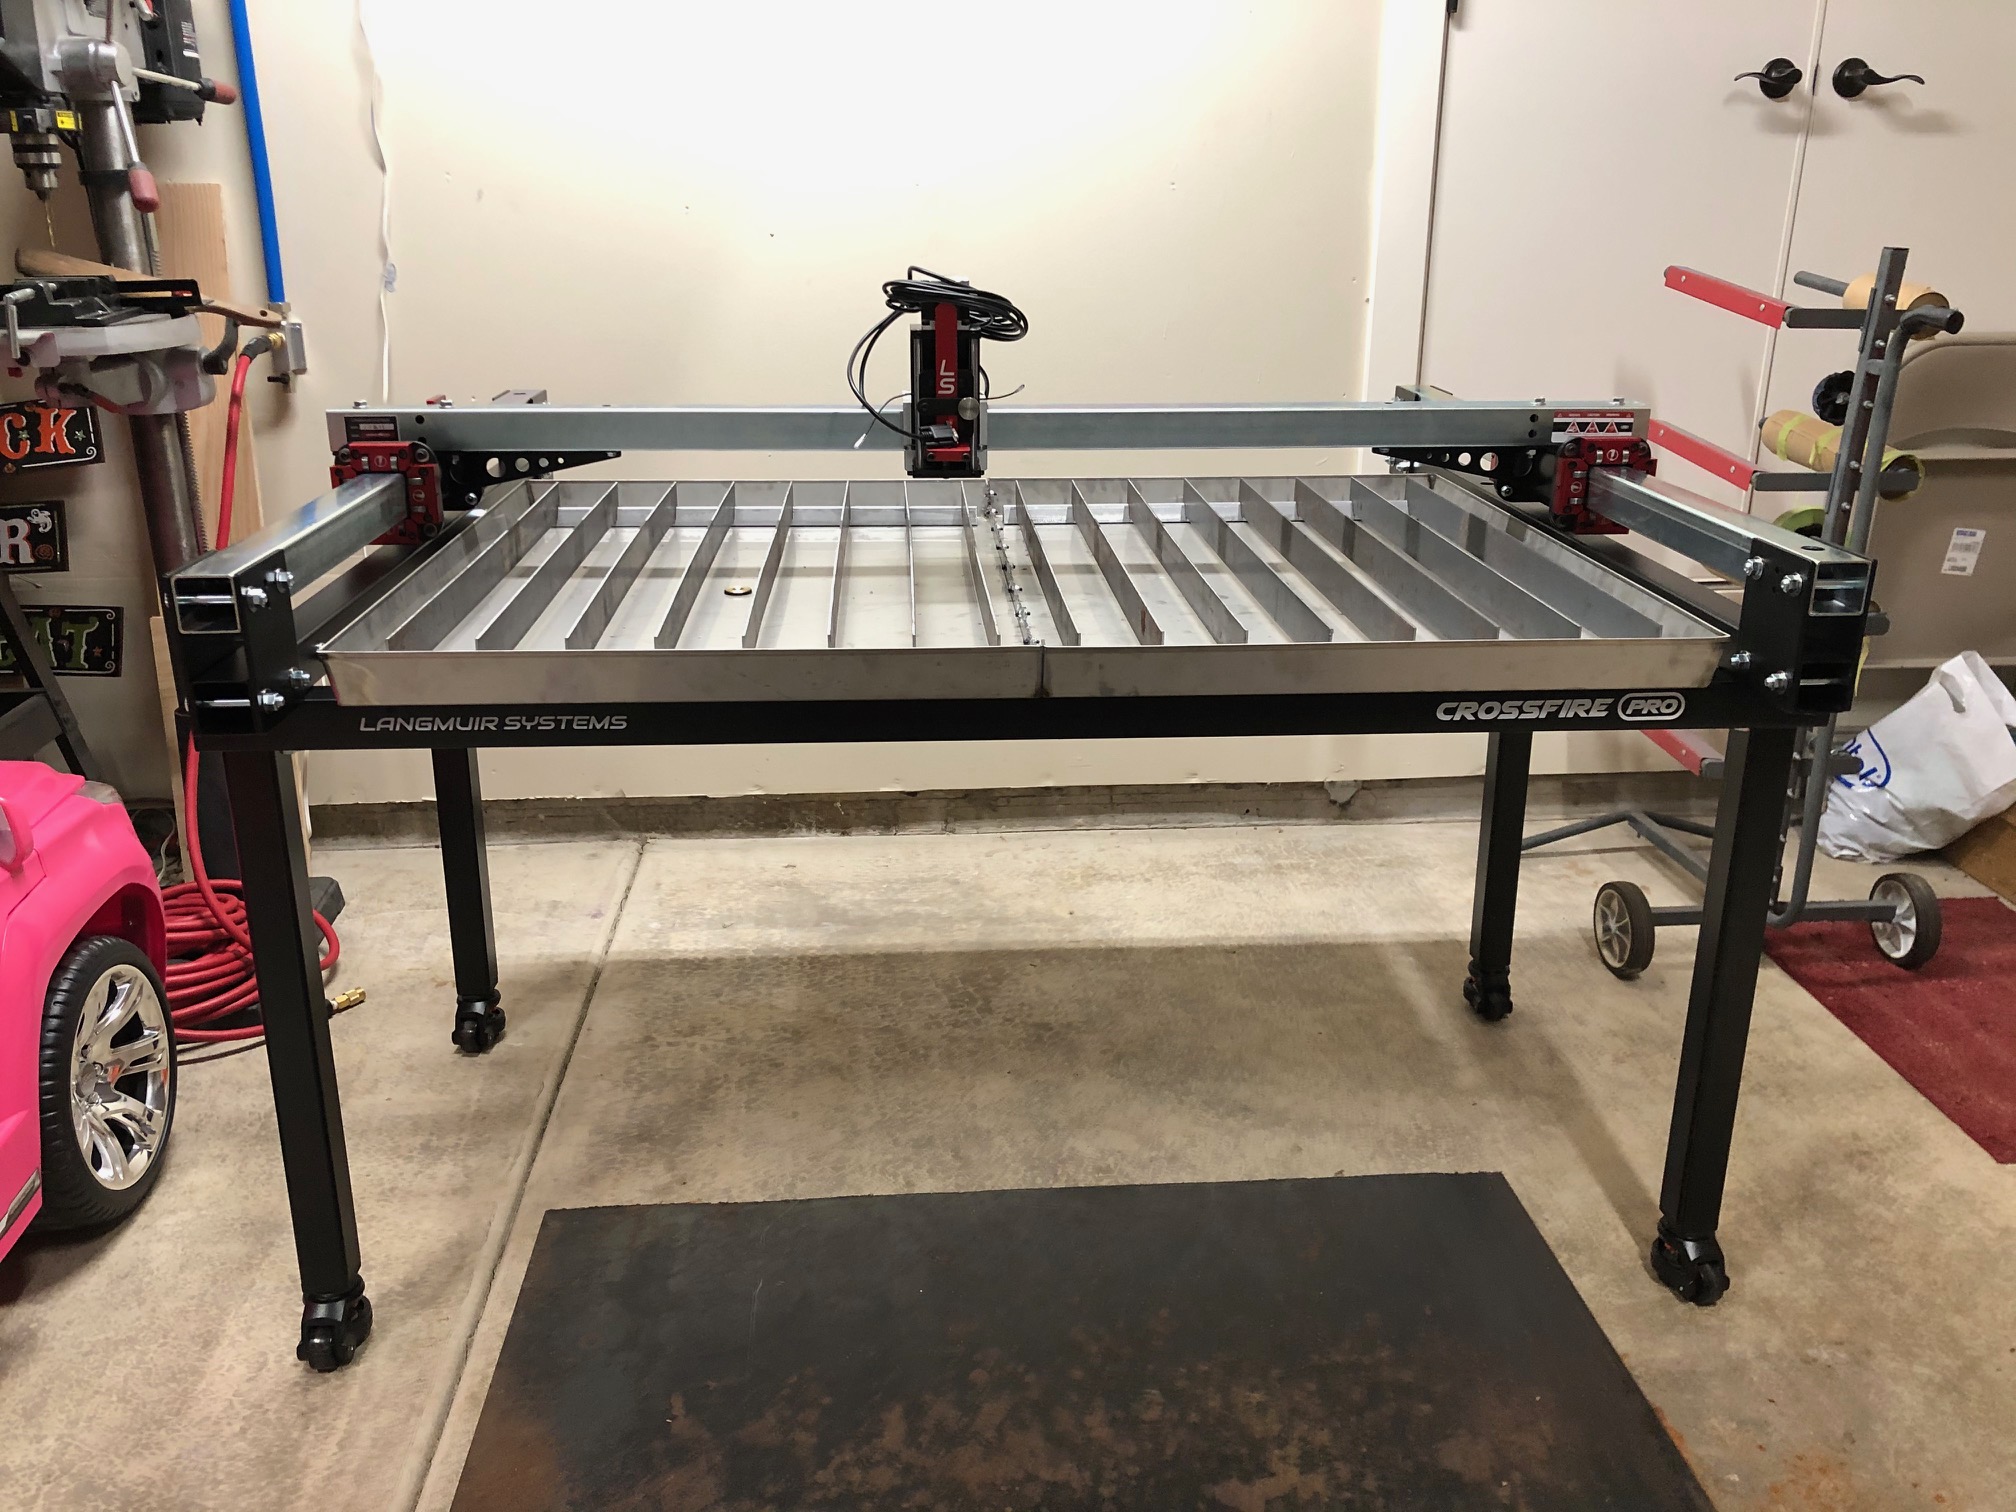


7 Likes
Kinda off topic but what kind of air lines did you run in your garage?