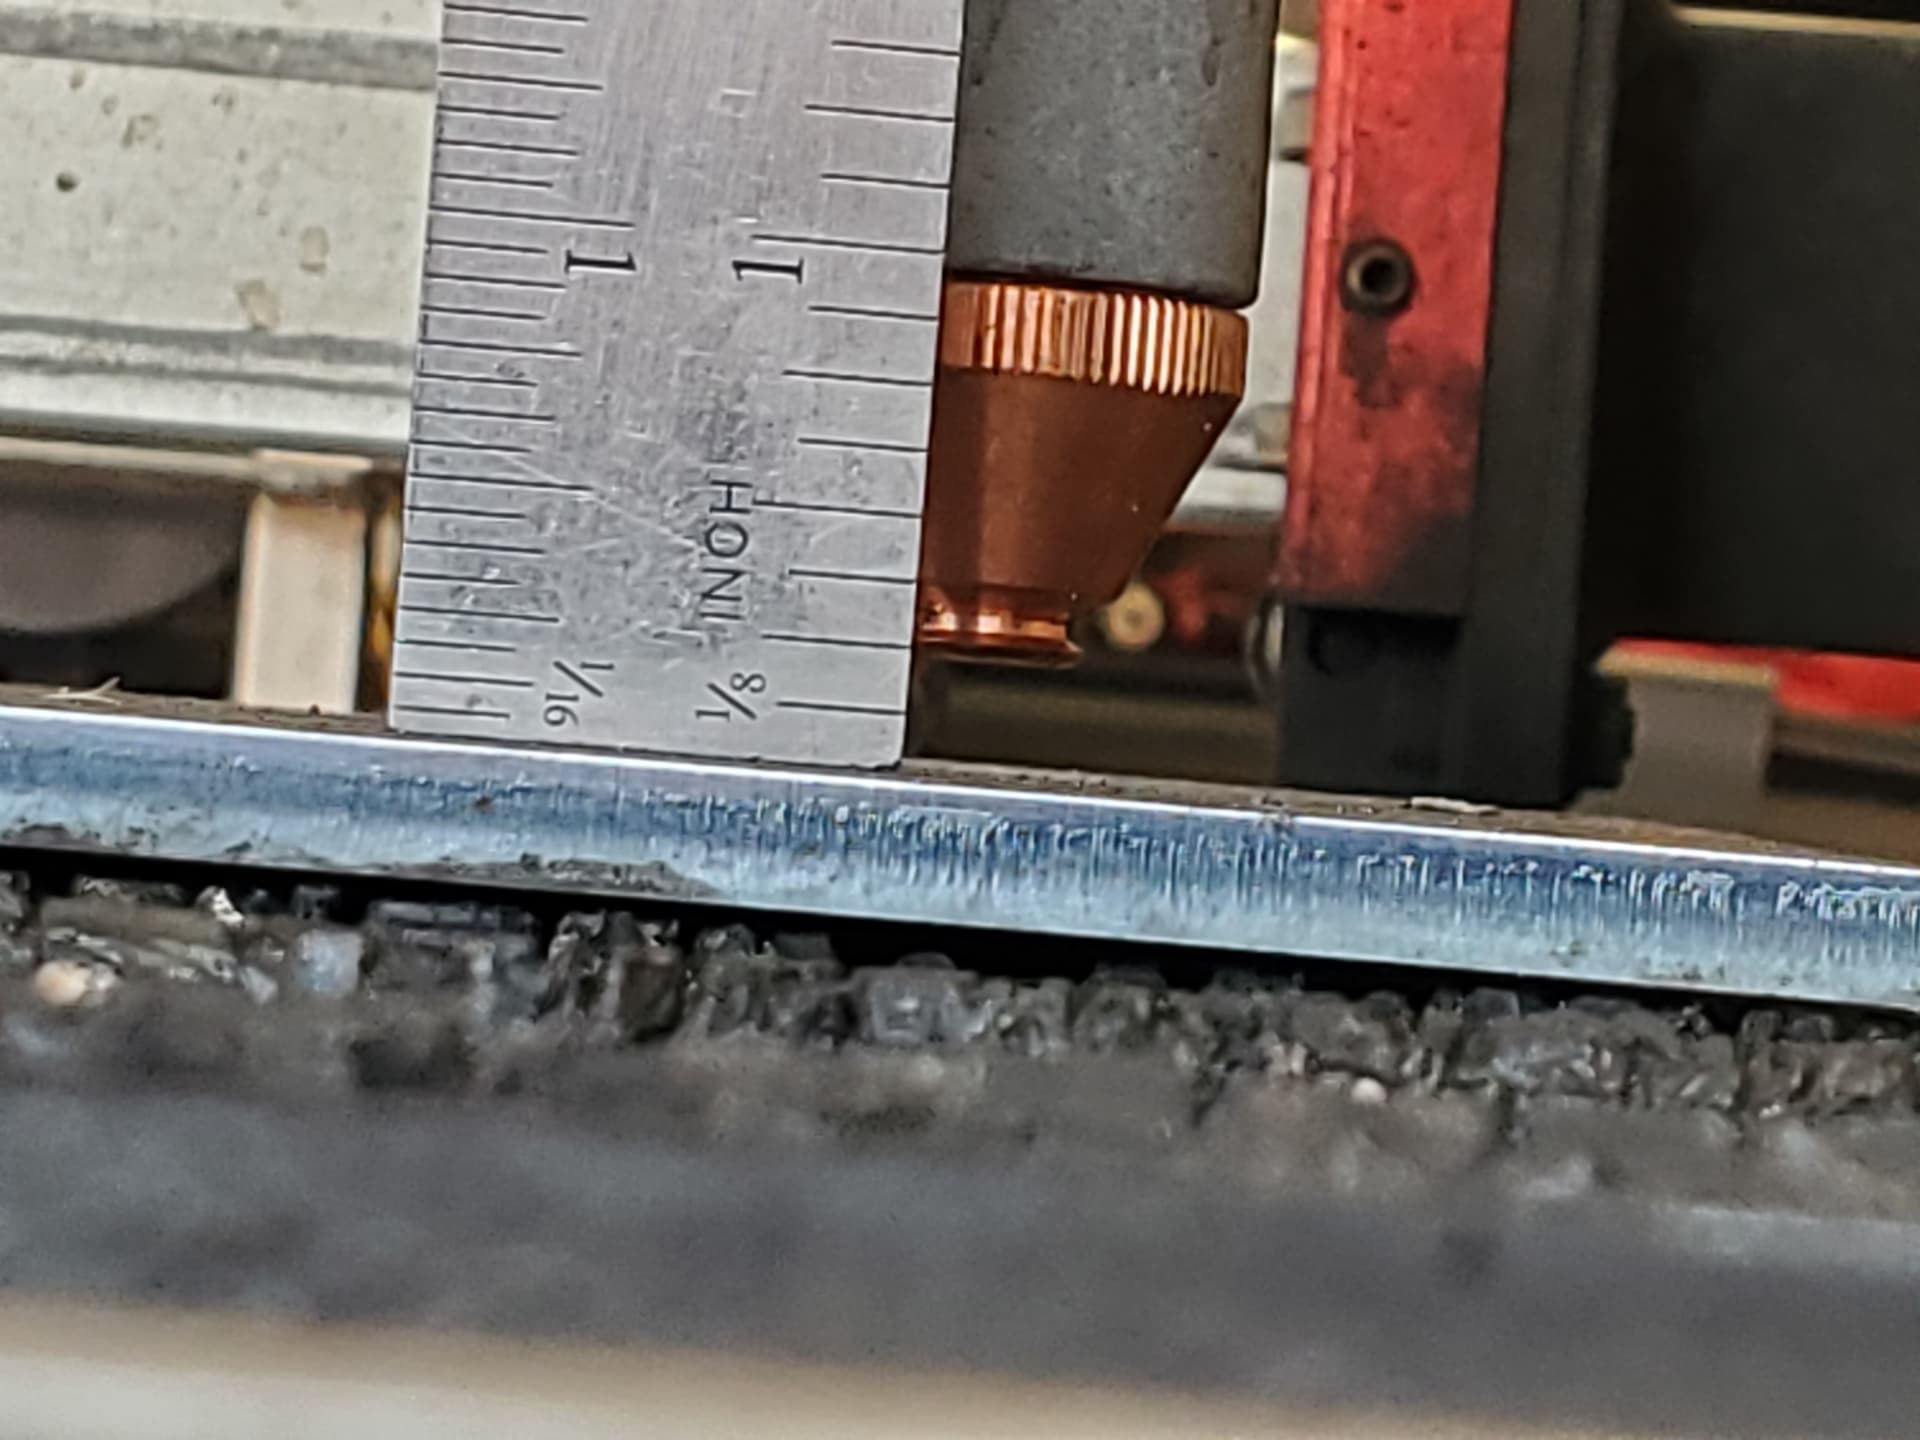
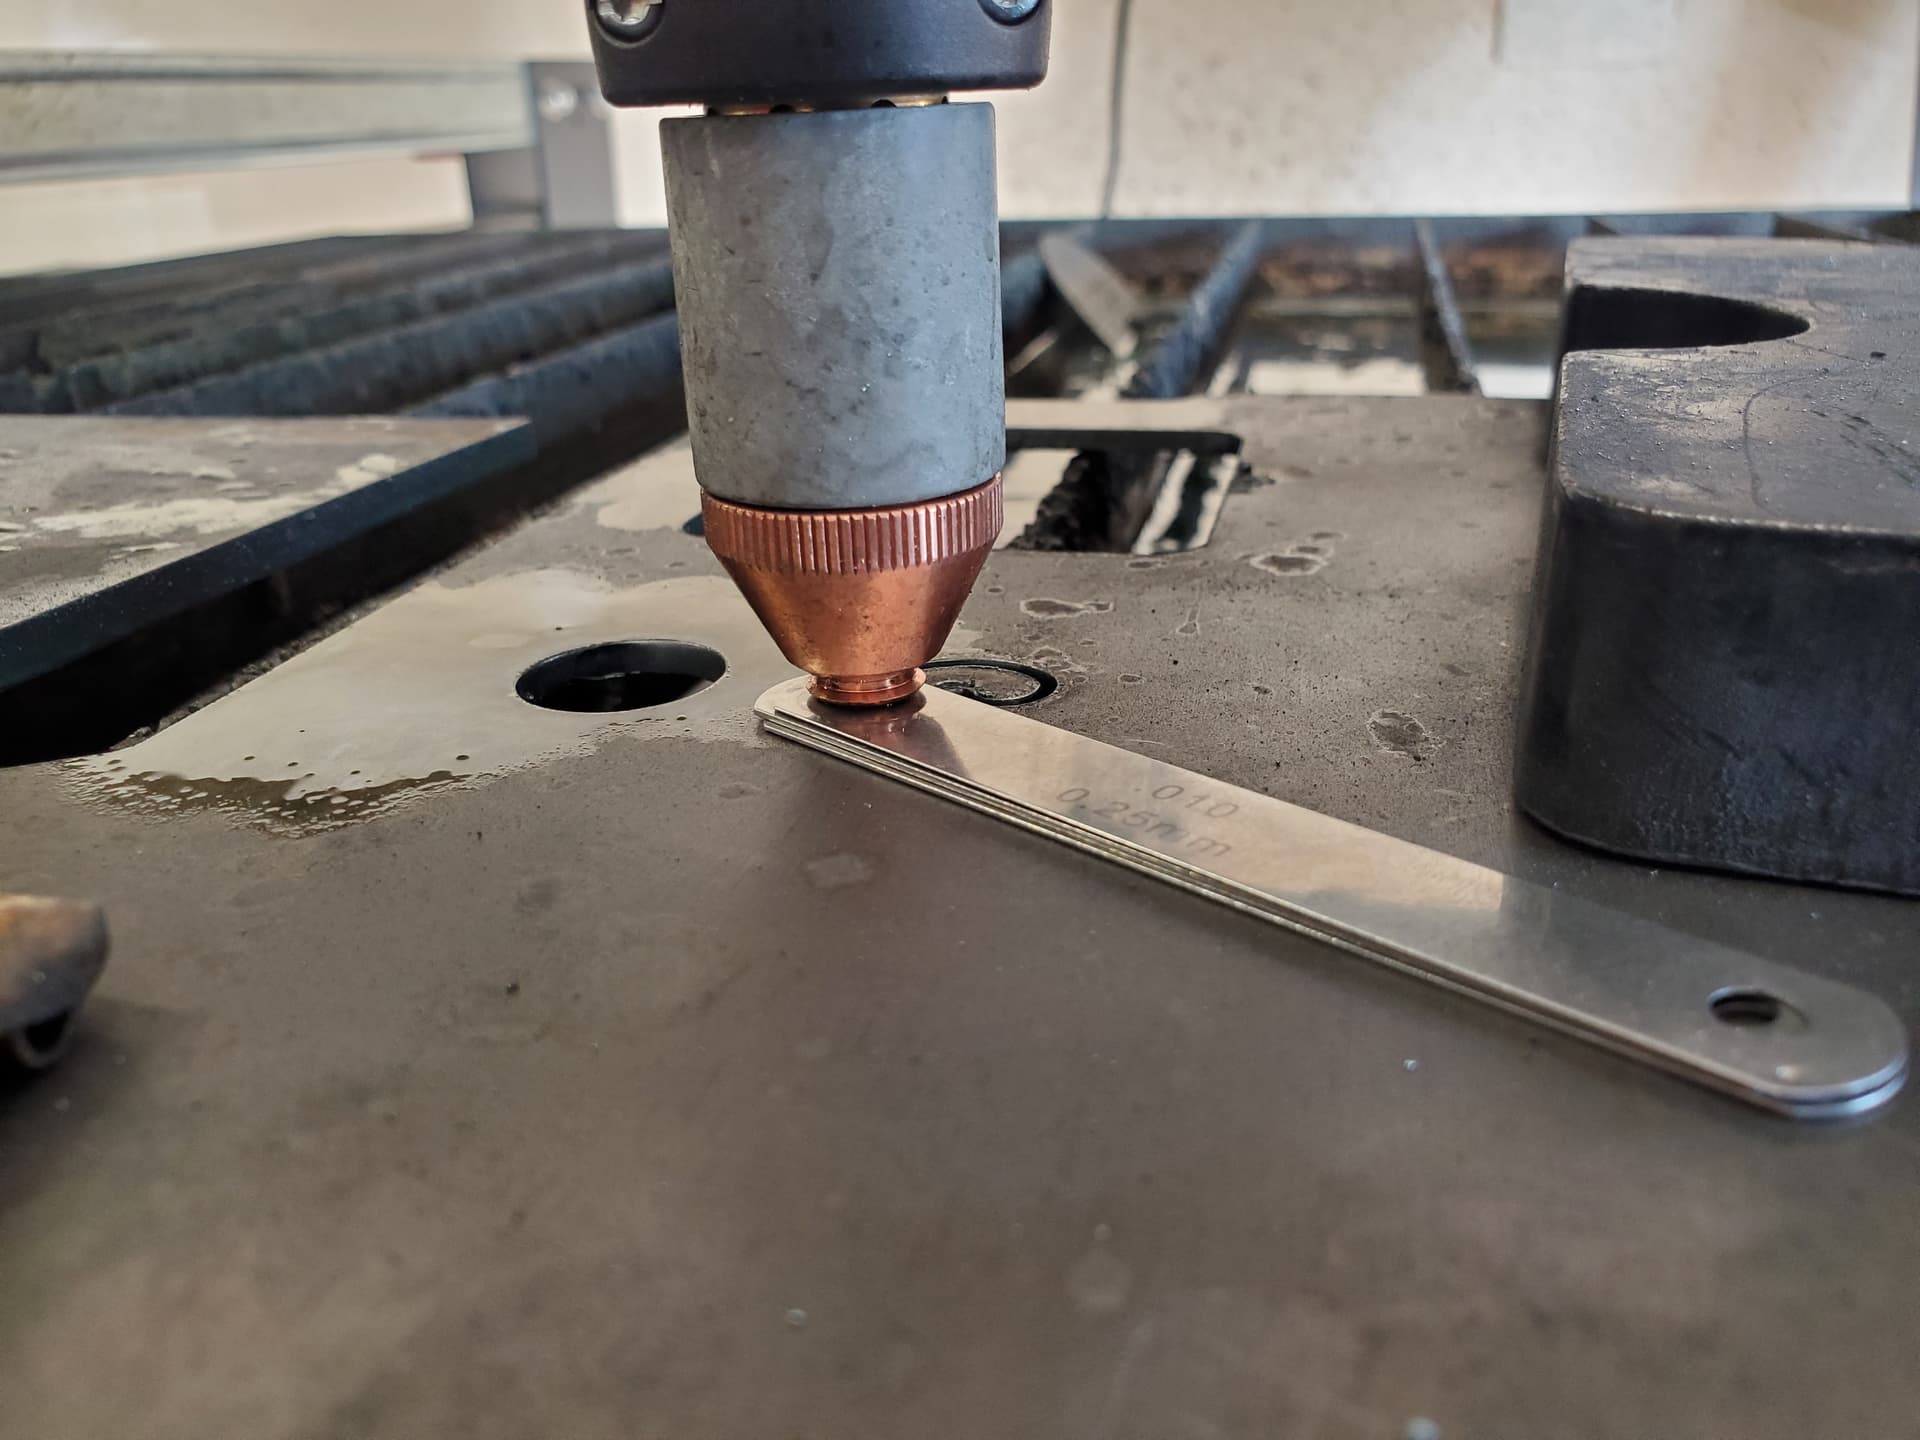
Now we’re getting somewhere. That would also correspond to your cut height of .02" (A setting of .06" + .02" backlash= .08") Exactly 1/4 of the programmed distance.
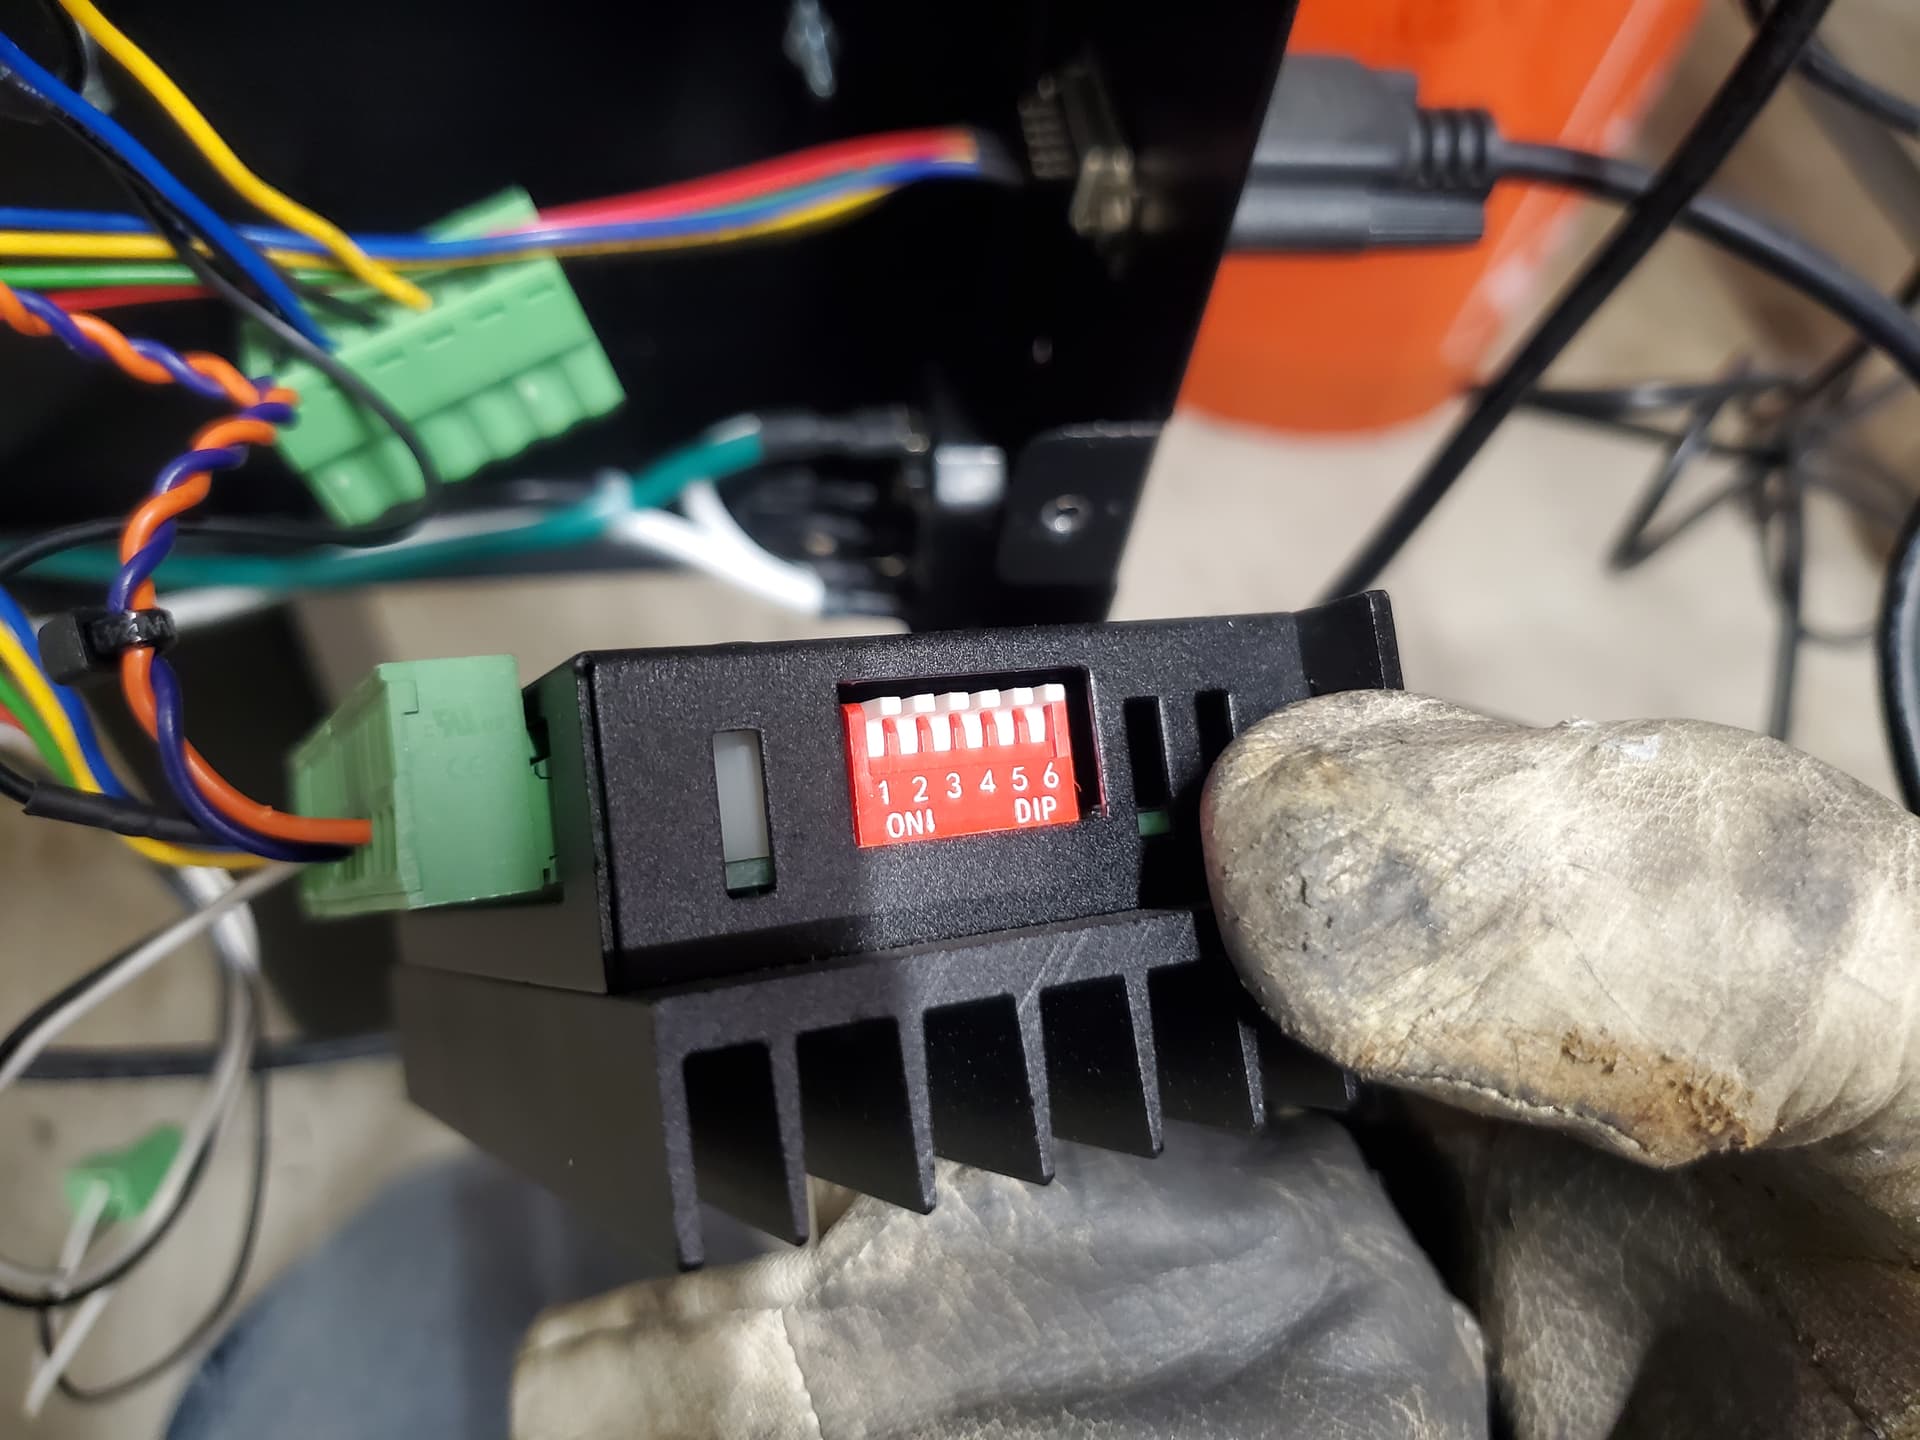
If you’ve still got your enclosure open (otherwise, please open it), take a look at the dip switches on your Z axis driver. (The one farthest away from the control board.) There should also be a chart on the side. That will tell us what the step settings are currently. Hopefully someone here knows the default settings, otherwise I’ll open up my control box. (@langmuir-reilly perhaps…)
If the dip switches are in the correct configuration, it points to a failing driver, IMO.
I do still have the cover removed so it’ll be easy to check, just need to eat, head out and run some errands but once I pull it I’ll take pictures of how it’s set up.
I don’t recall Langmuir requesting that the end user should change anything, but just to be safe I’ll check their site’s install instructions and guide just to confirm.
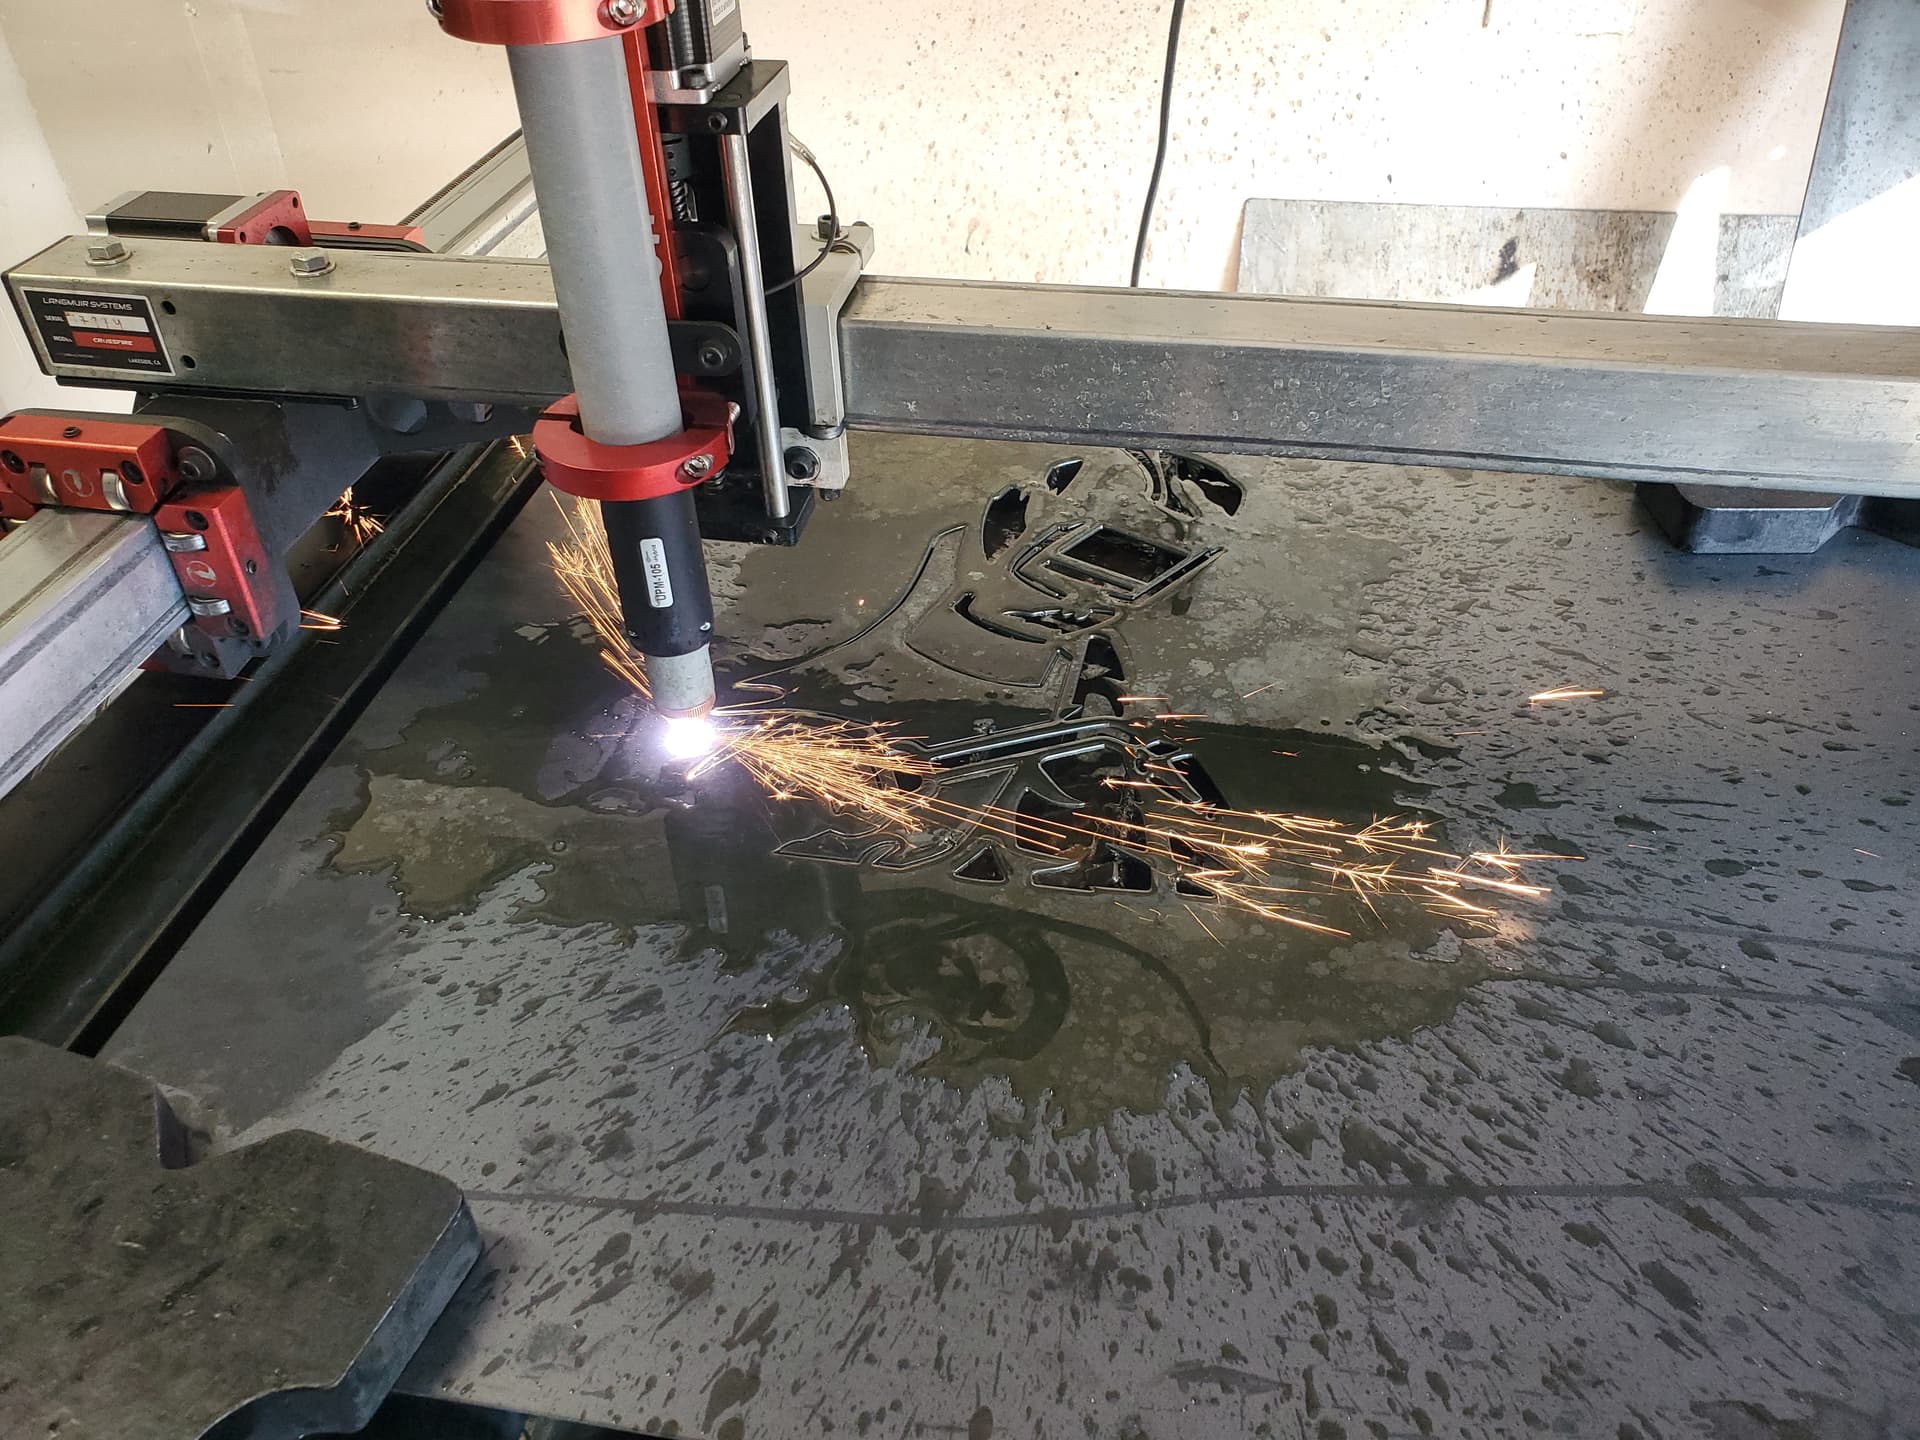
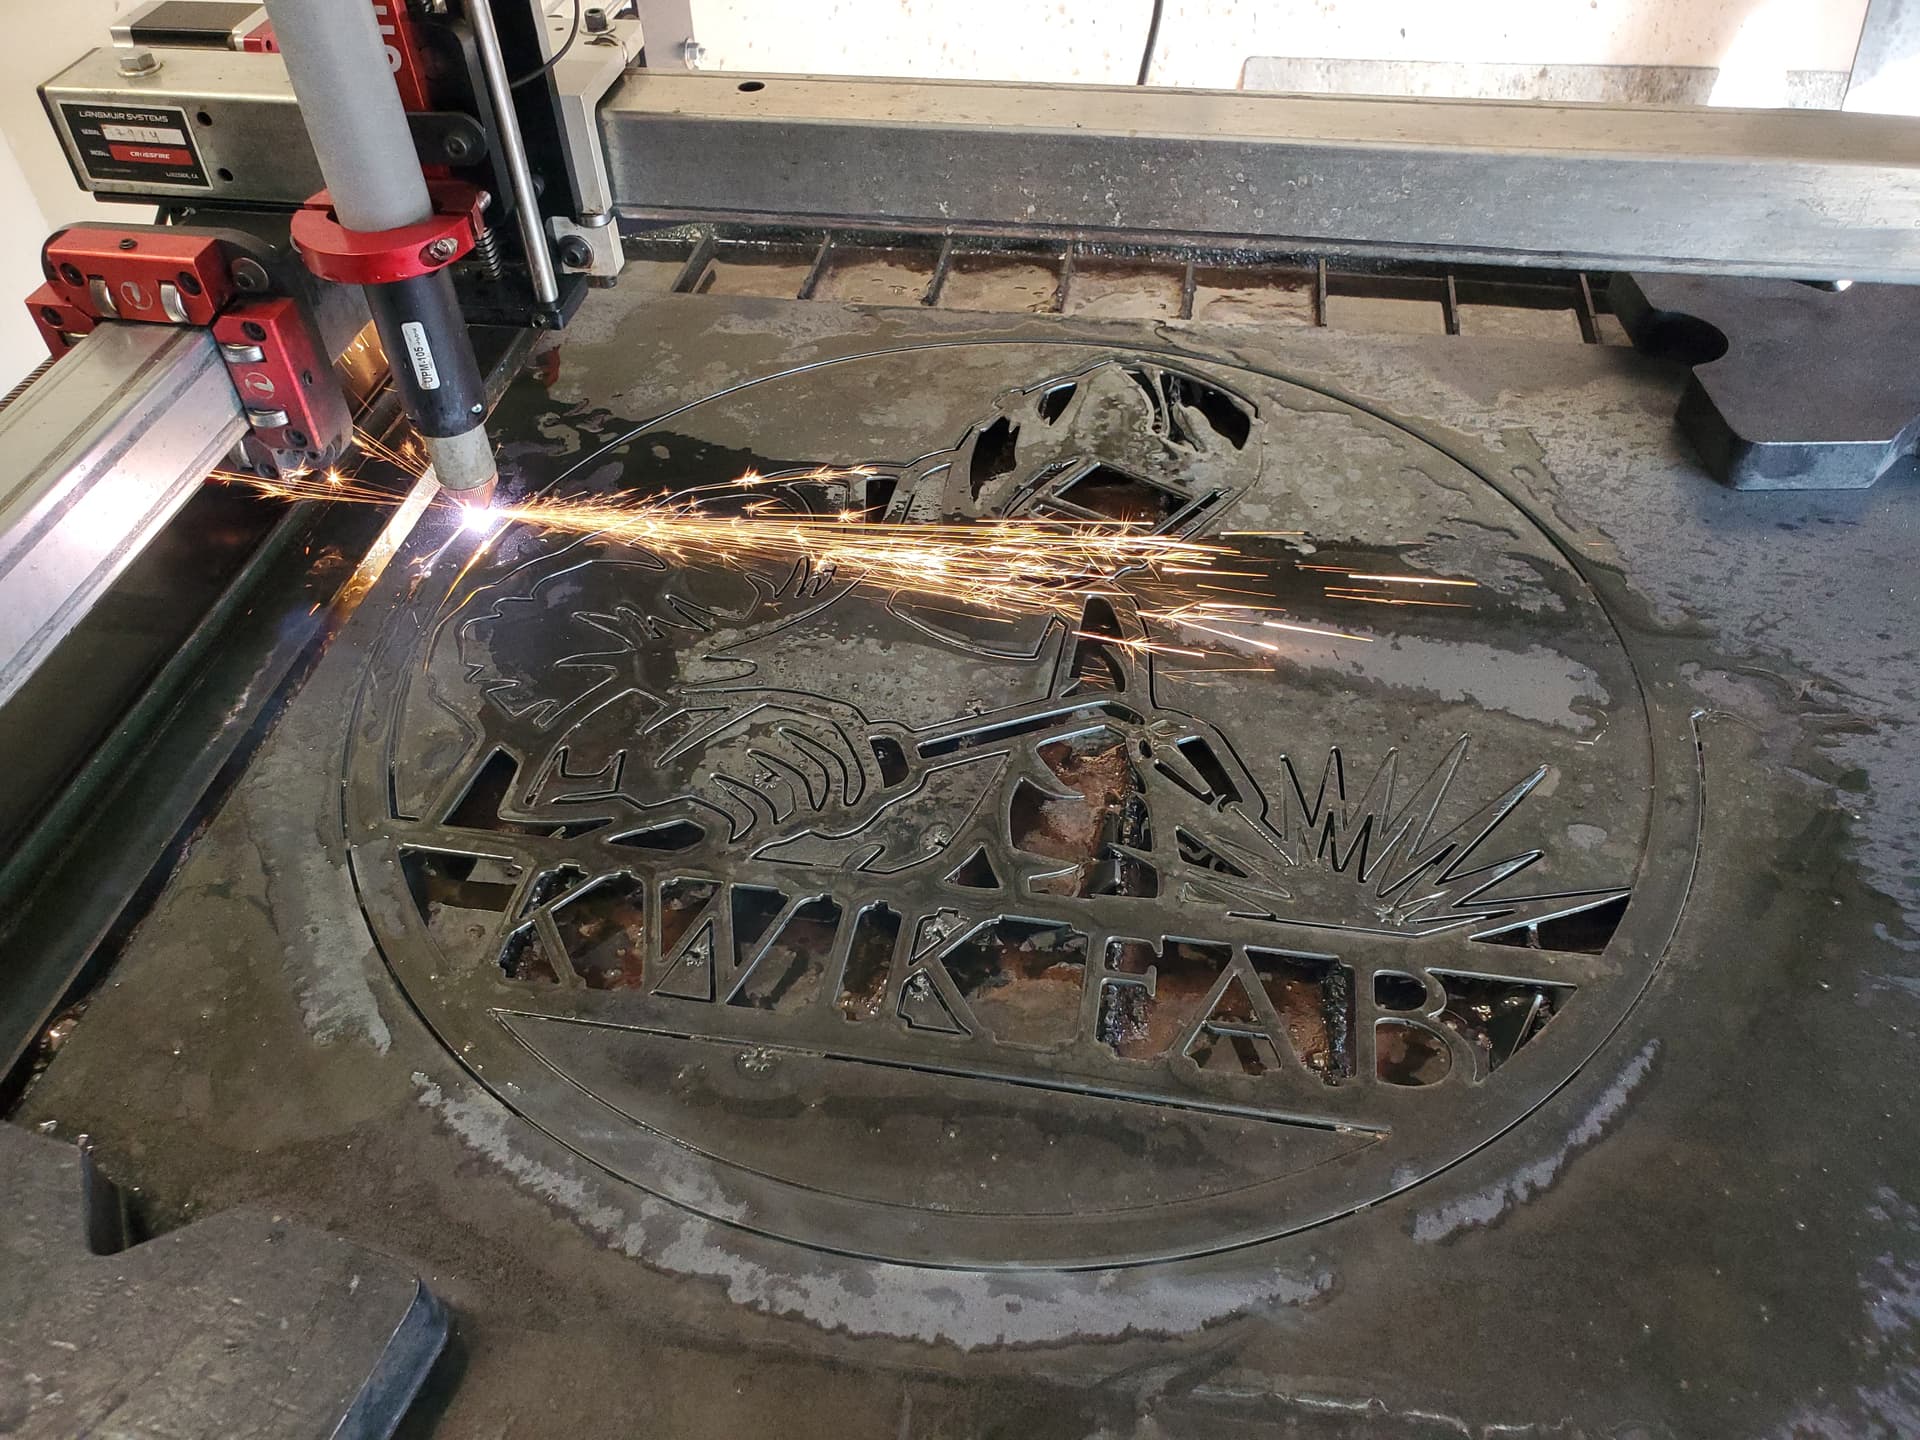
For anyone reading, it’s the bottom most driver and will have a pigtail/harness to the backside of the Z-axis port.
Moving the dip switch #2 to the down position now translates to exact movement both physical and Firecontrol using incremental movement.
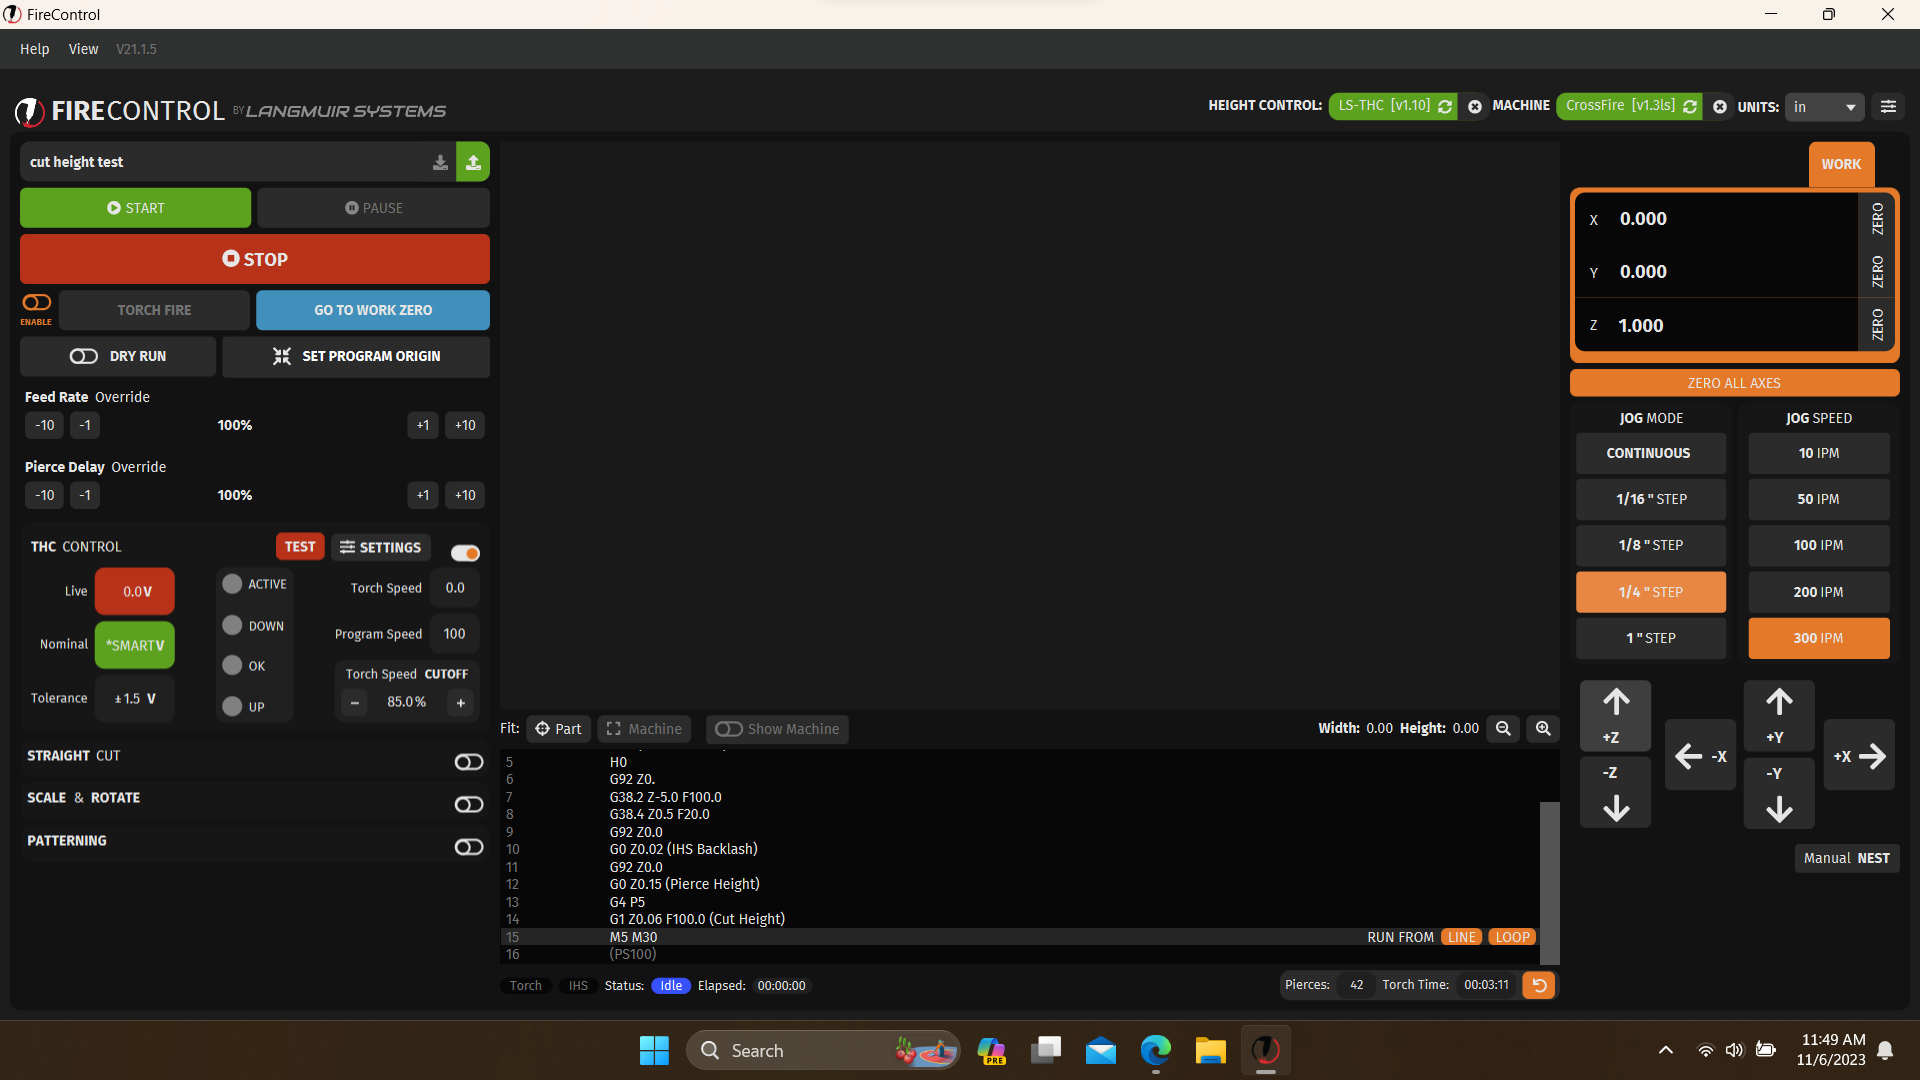
Rather than running the dry program, I am going to run one of the TAP files @Phillipw provided and record a video of the voltage it runs, then run it again and measure physical cut height by pausing in the middle of the run.
Just need to button everything up and place the cover back on the control box.
Now I am glad you got it taken care of. Now if you start having some bevel on the top side or flaring after about 100 pierces with your new torch you may want to reset your cut height to the right settings. With the PTM 60 you were using un-shielded consumables and .060" from cutting tip to the metal worked well. But now your using shielded consumables so the cutting tip is recessed about .030" up inside the shield so now your cutting height is .090" . That works on a Hypertherm because of the extra power it puts out, not as well on a Primeweld.
Just something you may want to think about if you start having cutting issues.
Real big thanks to everyone here, but really @Phillipw for suggesting the non-firing TAP file that got us looking in the right direction, and @Simsworx for figuring out the troubleshooting step.
I went through Langmuir’s site again as far as install goes and whatnot, and I see no mention of the driver’s at all. Makes sense of course, you shouldn’t be messing with it.
But a small suggestion, with all the disclaimers (very thorough fortunately), maybe adding one to the install of the Z-axis kit for Crossfire and Crossfire Pro users, adding to ensure dip switch #2 is in the down position.
I can’t confirm if mine was ever up or down, but have to say it should’ve been in the correct position since I had a cut height of .06" in the past. To add to this, the cover of the control box was never removed up until today for troubleshooting purposes. The table has always remained in the same place in my garage throughout ownership.
I went through my old pictures of when I first got my CNC table but none show the driver’s switches at all unfortunately.