Was you doing multiple coats when paint was lifting?
I was but plenty of drying time between
That could be your issue. Some newer rattle can paints gives a window of time to do multiple coats or you have to let it fully cure 24 to 48 hours to do the next coat.
Read the directions on the can probably a window of 10 to 15 minutes between coats. When it isnt done right when the top coat starts curing it will pull the bottom coat because it is still flexible.
3 Likes
Yeah it says repaint within 1 HR or after 24 HRs. I was well within all of those but that one area kept messing up. idk…
2 Likes
First layer too thick? Just helping brainstorm.
Maybe, just that area was taken down to bare metal, so I was being a little more liberal with the paint there. Good suggestion, I’ll keep that in mind for next time.
2 Likes
I’ve had that same issue with areas of paint that just refuse to play nice. Same as you, recoated within time window, sanded down to bare, cleaned with paint thinner or alcohol, I’ve tried just blowing off the sanding dust and painting…definitely frustrating. I still don’t understand what is causing it. Doesn’t happen super often though, that’s the good news.
1 Like
This may not apply to “while painting”: I have a theory but could not find any article to support it. I suspect that bubbling of the finish happens when the top of the finish seals up before the solvent in the paint gets a chance to flash off.
If I make sure that my metal pieces are warmer than room temperature, when I apply any oil base finish, I have pretty good success and cannot remember a time of having any bubbling. And make sure your paint is above room temp as well. With spray cans, you can immerse them in hot tap water (shake, immerse, shake, immerse…until you can feel that the can has some warmth to it). If the metal is cold and you paint it and then put a lot of heat on it, chances are the paint surface seals with a skin and then there is solvent trapped underneath.
I believe that is also why it is suggested for that first layer to be thinner like Phillip reminds us. You really want that layer to get a good chance to cure.
If the surface is warm when you paint and give it 4 or 5 hours of steady drying above room temp, then you can crank up the heat and have good success. I usually get my finishing room up to about 100F and try to keep it there for 24 hours.
Acrylic (water based finishes) do not do well with heat during application. It will dry too quickly and you will get a gritty surface.
4 Likes
Did a quick search on the paint thing. From what I read . Do thin coats thick coat takes longer for the solvent to flash out. When you add the next coat and it is thinner than the first. It will flash off faster and dry causing it to pull and lift the coat underneath it.
3 Likes
First thing I’ve cut out in several months. I was waiting out sub freezing temps to refill water table and I only cut when I can open up the overhead door adjacent my table. Plus, limited time for hobbies right now.
Former employee is retiring. Some of the guys who used to work for me asked if I’d make him a camping sign since he just bought a large motorhome. Tried to somewhat copy his motorhome on the sign.
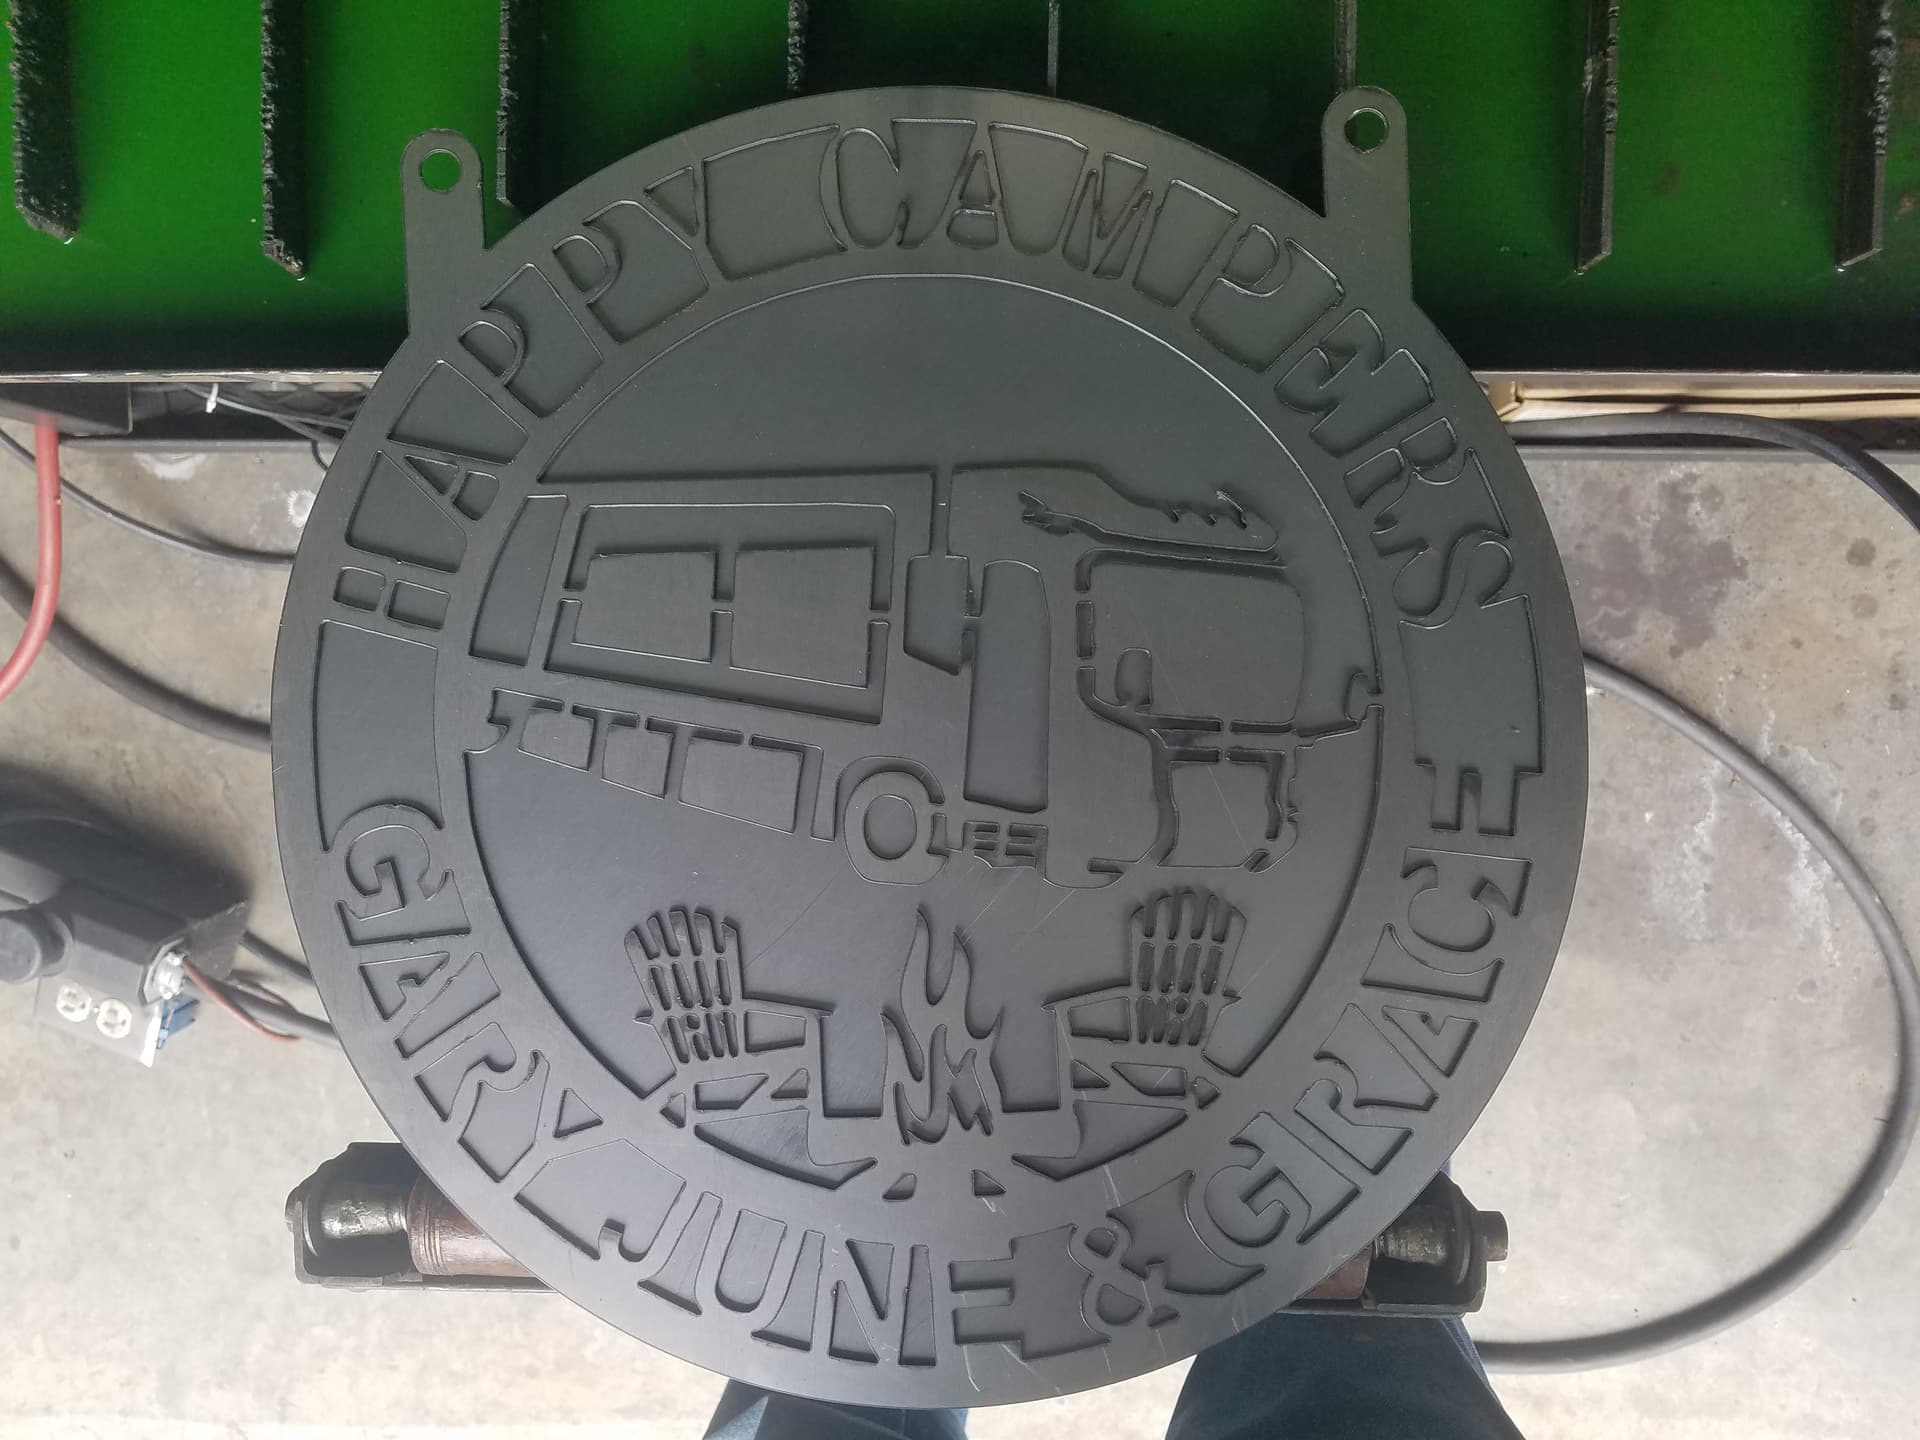
7 Likes
What software did you use to create it?
I’ve only ever used Fusion 360. I started with an SVG of the motorhome, but like usual, ended up redrawing the entire thing. The lawn chairs and fire pit are someone else’s work with just minor tweaks on the size of some closed loops. Noo idea when/where I downloaded the original camping sign.
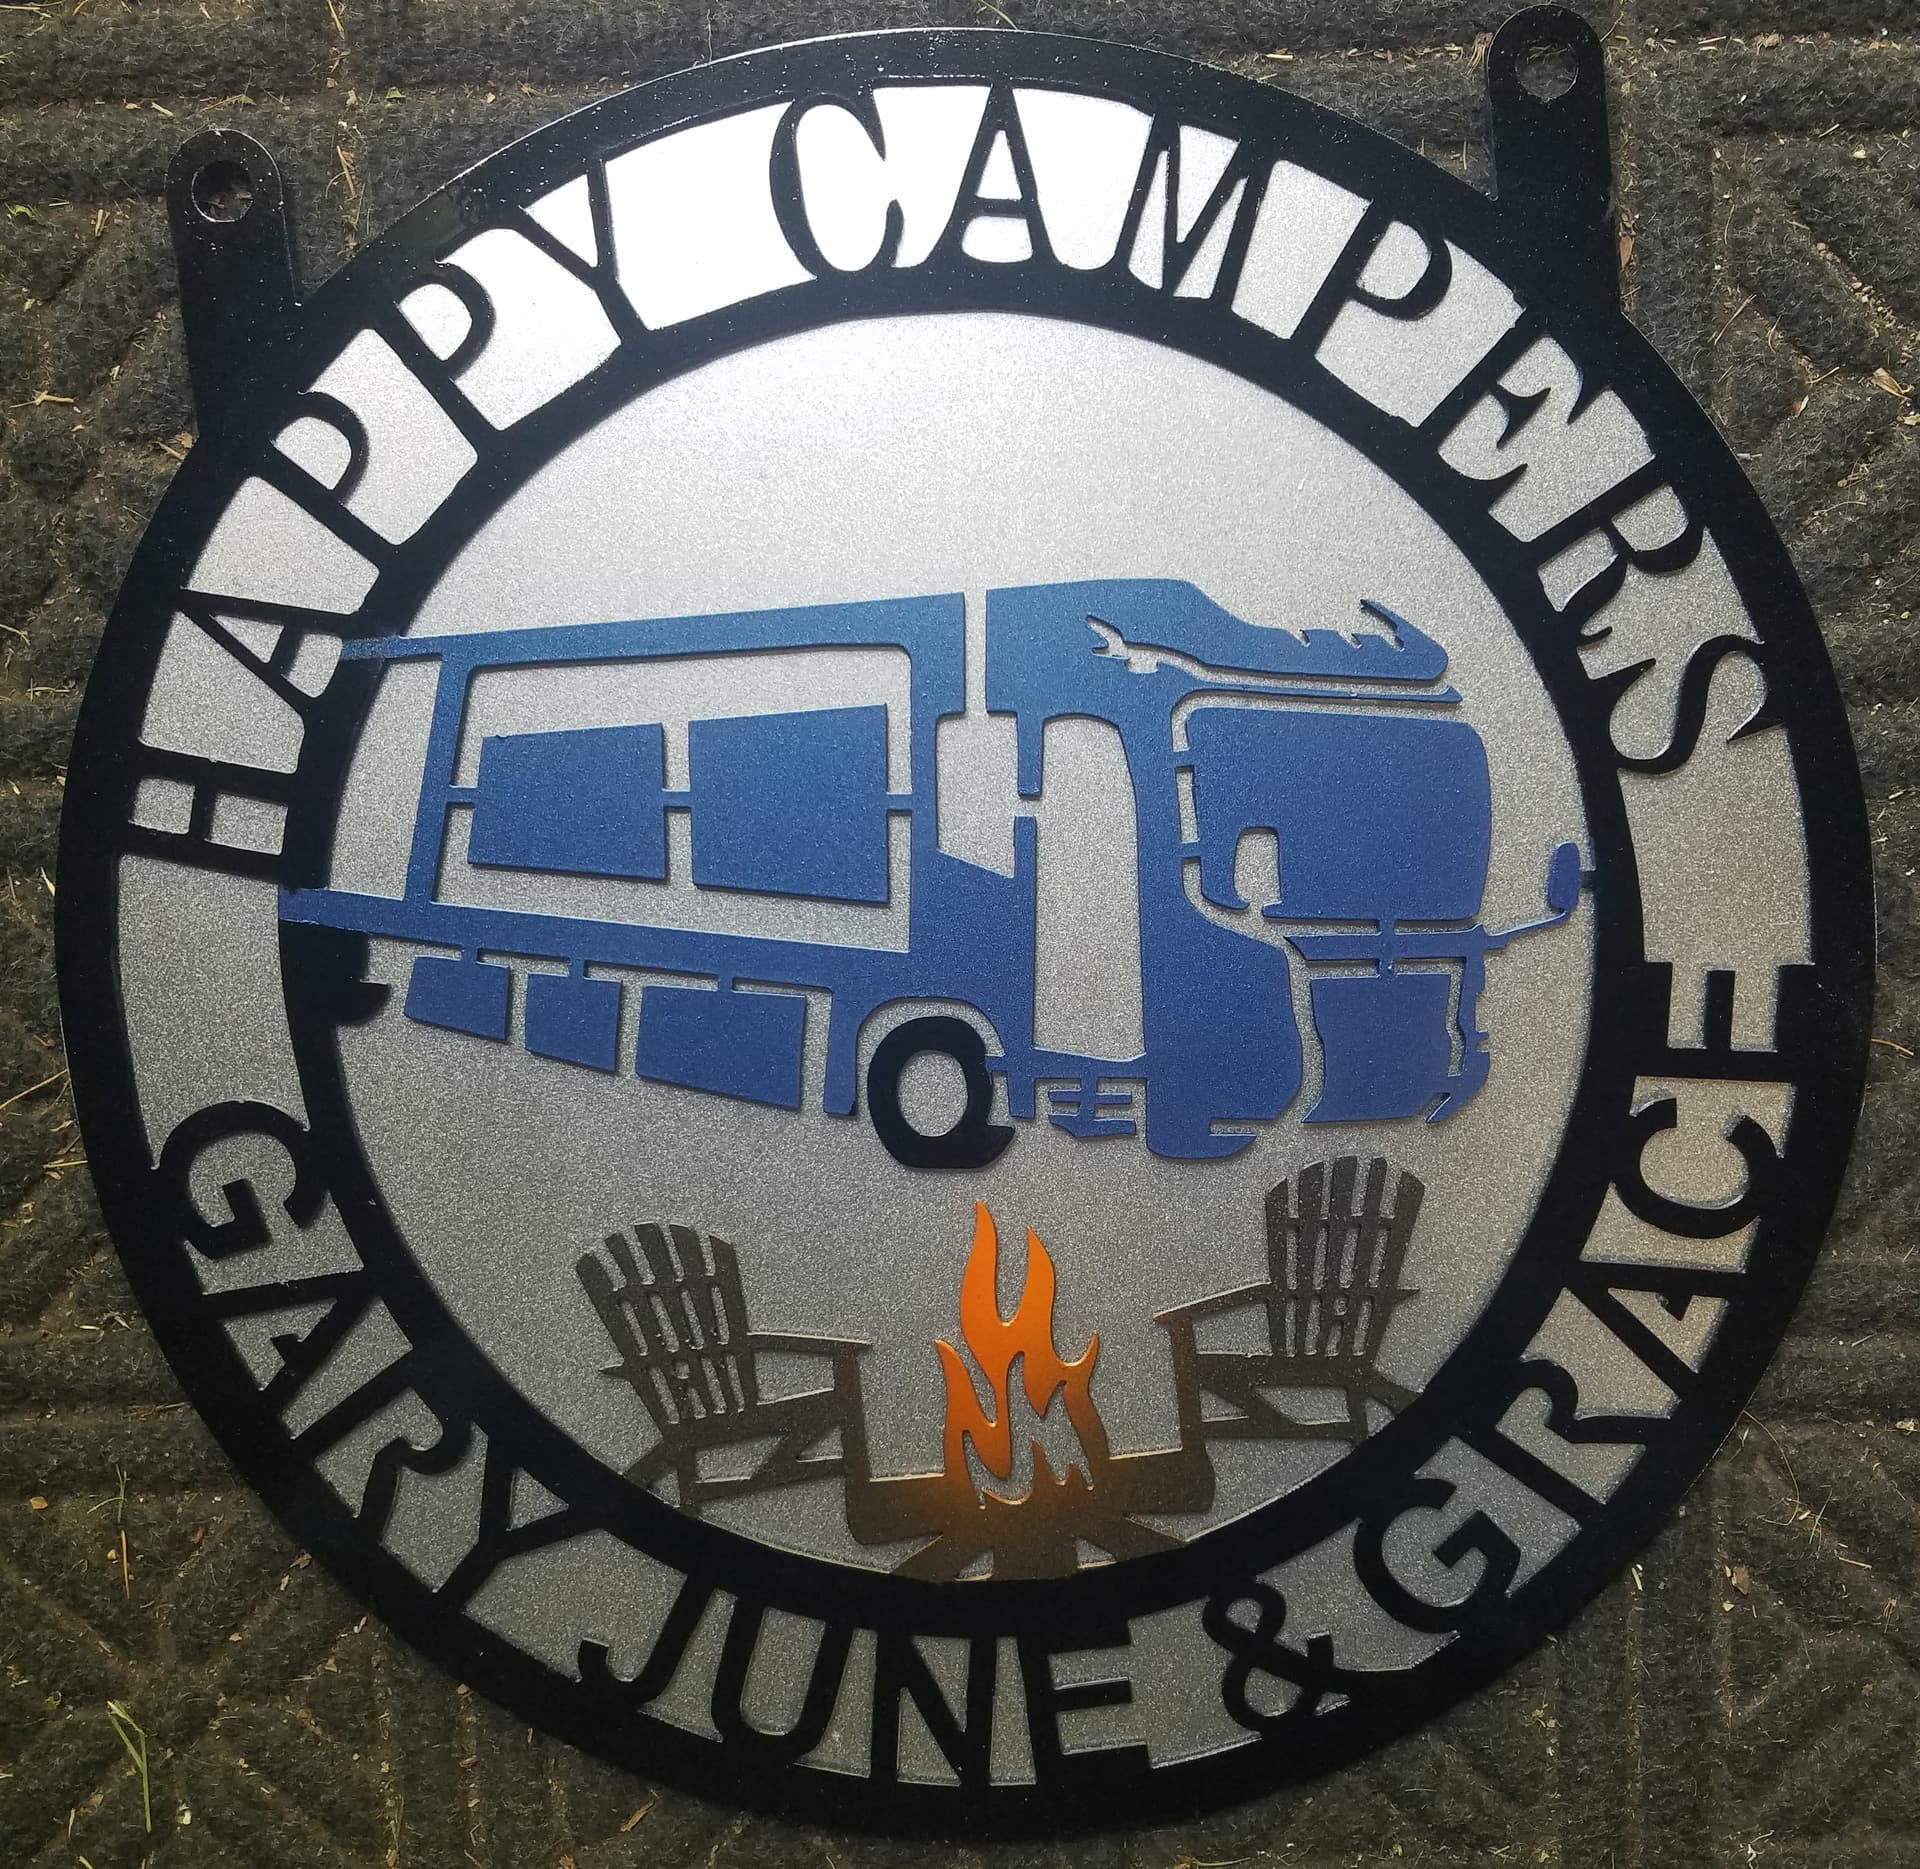
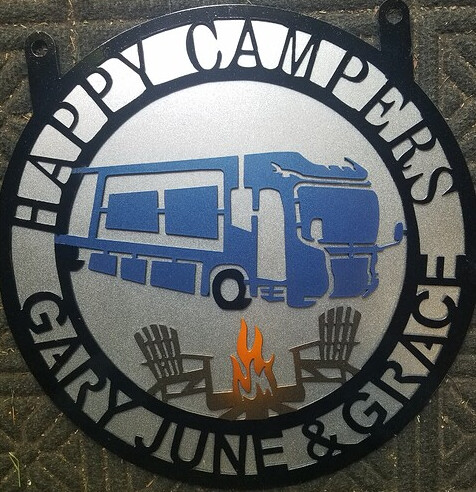
Once you learn your way around F360, 2D stuff like this is pretty easy. I should have it painted later today and will update my post.
3 Likes
Rattle can paint slapped on.
1 Like
Cool paint job Bret: Move over you PC guys!!! ![]()
(Since I don’t have a Powder Coat process available to me either)
6 Likes
Love that setup toolboy.
On a side note was it you that shared info on another thread about a compatible stepper motor?
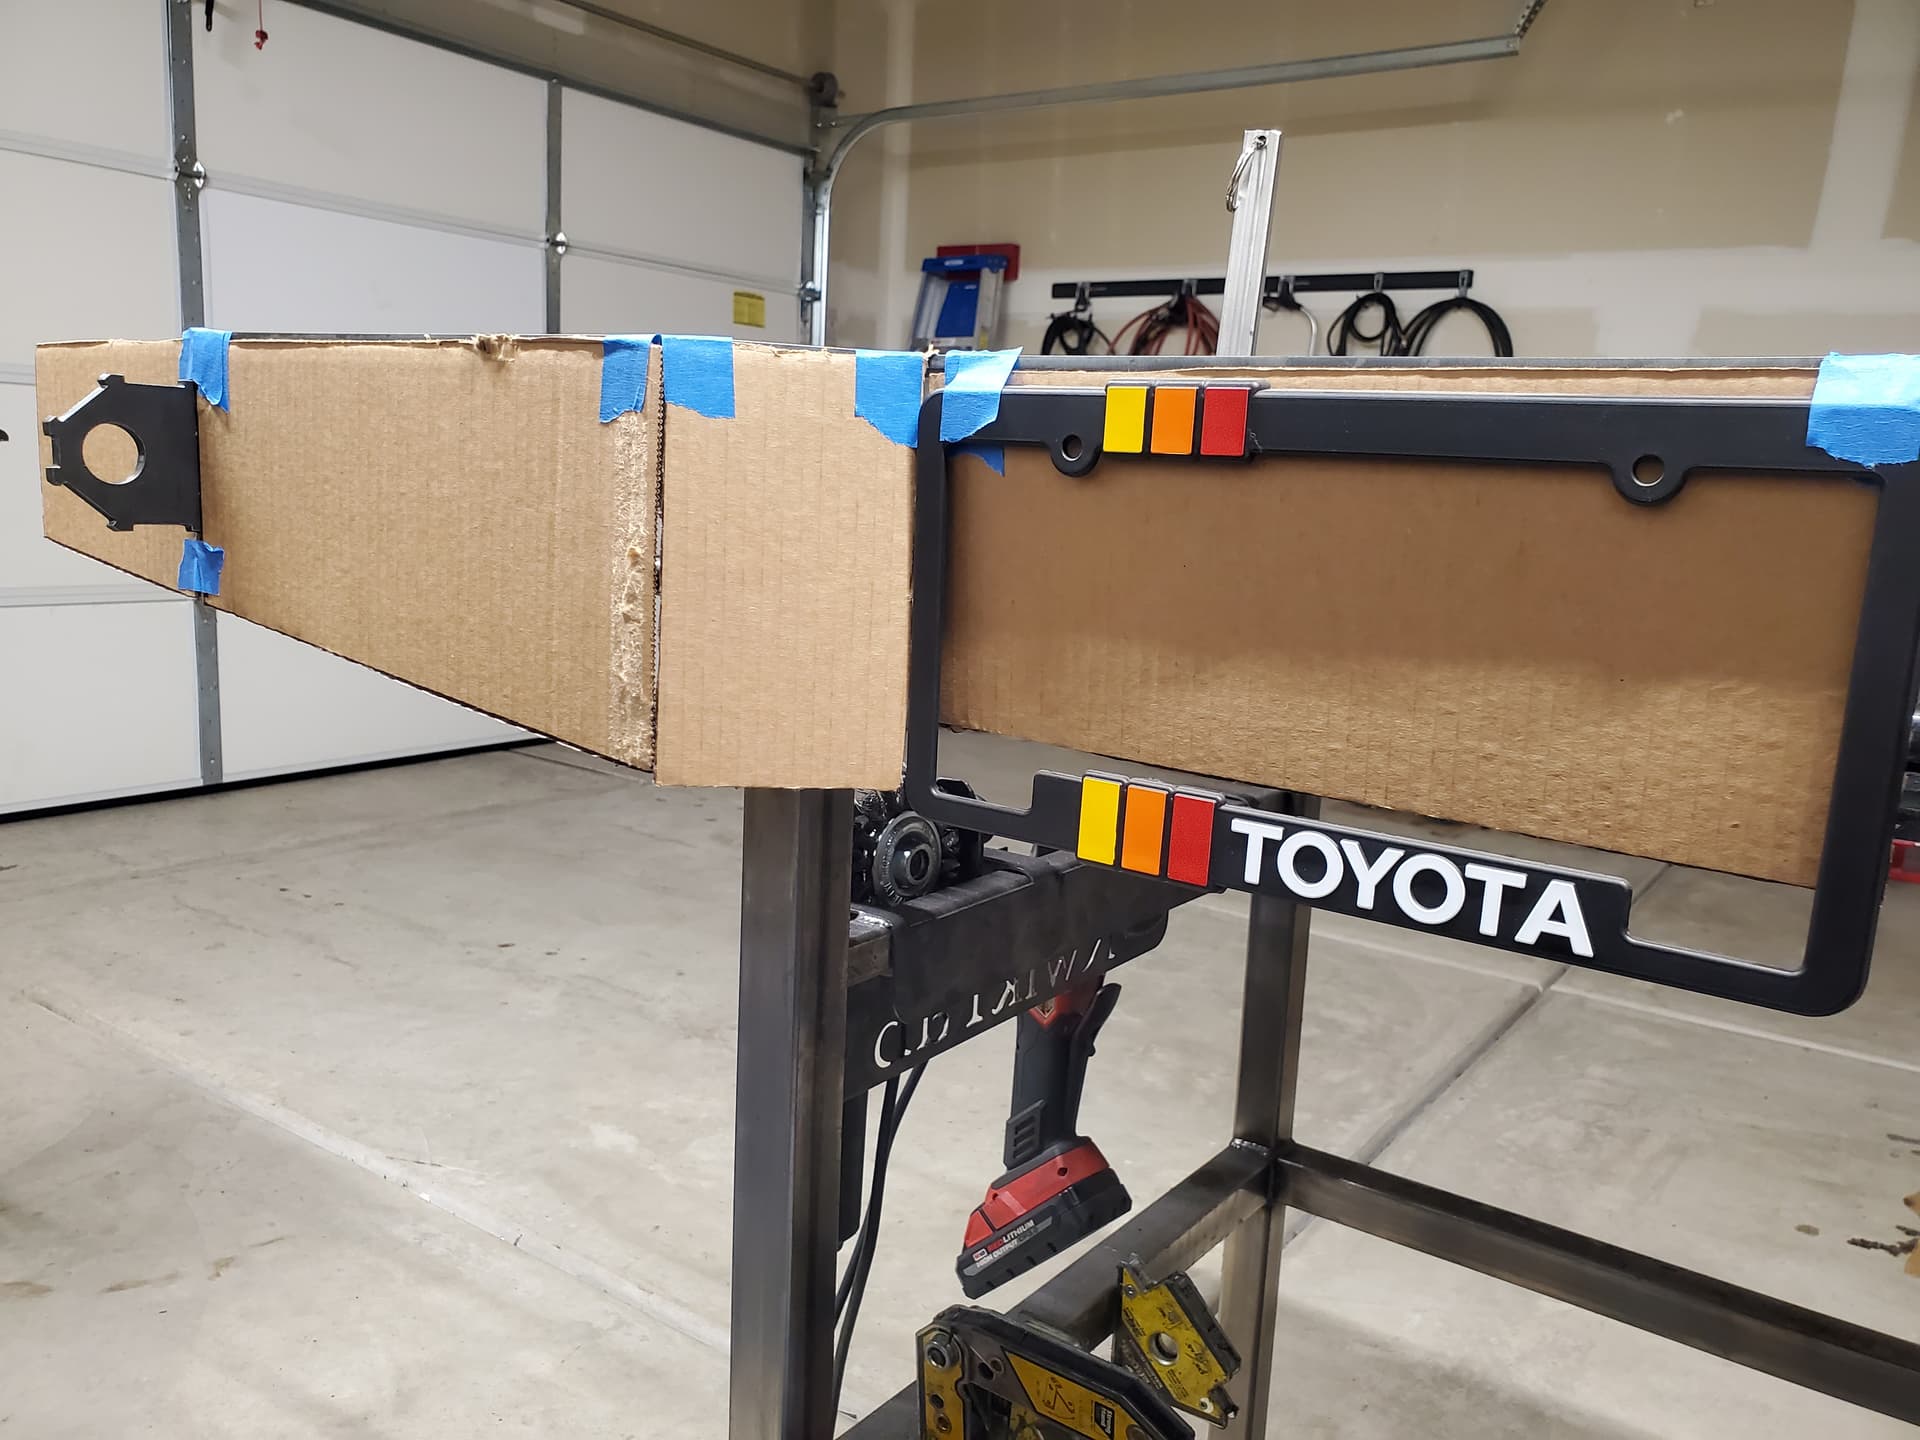
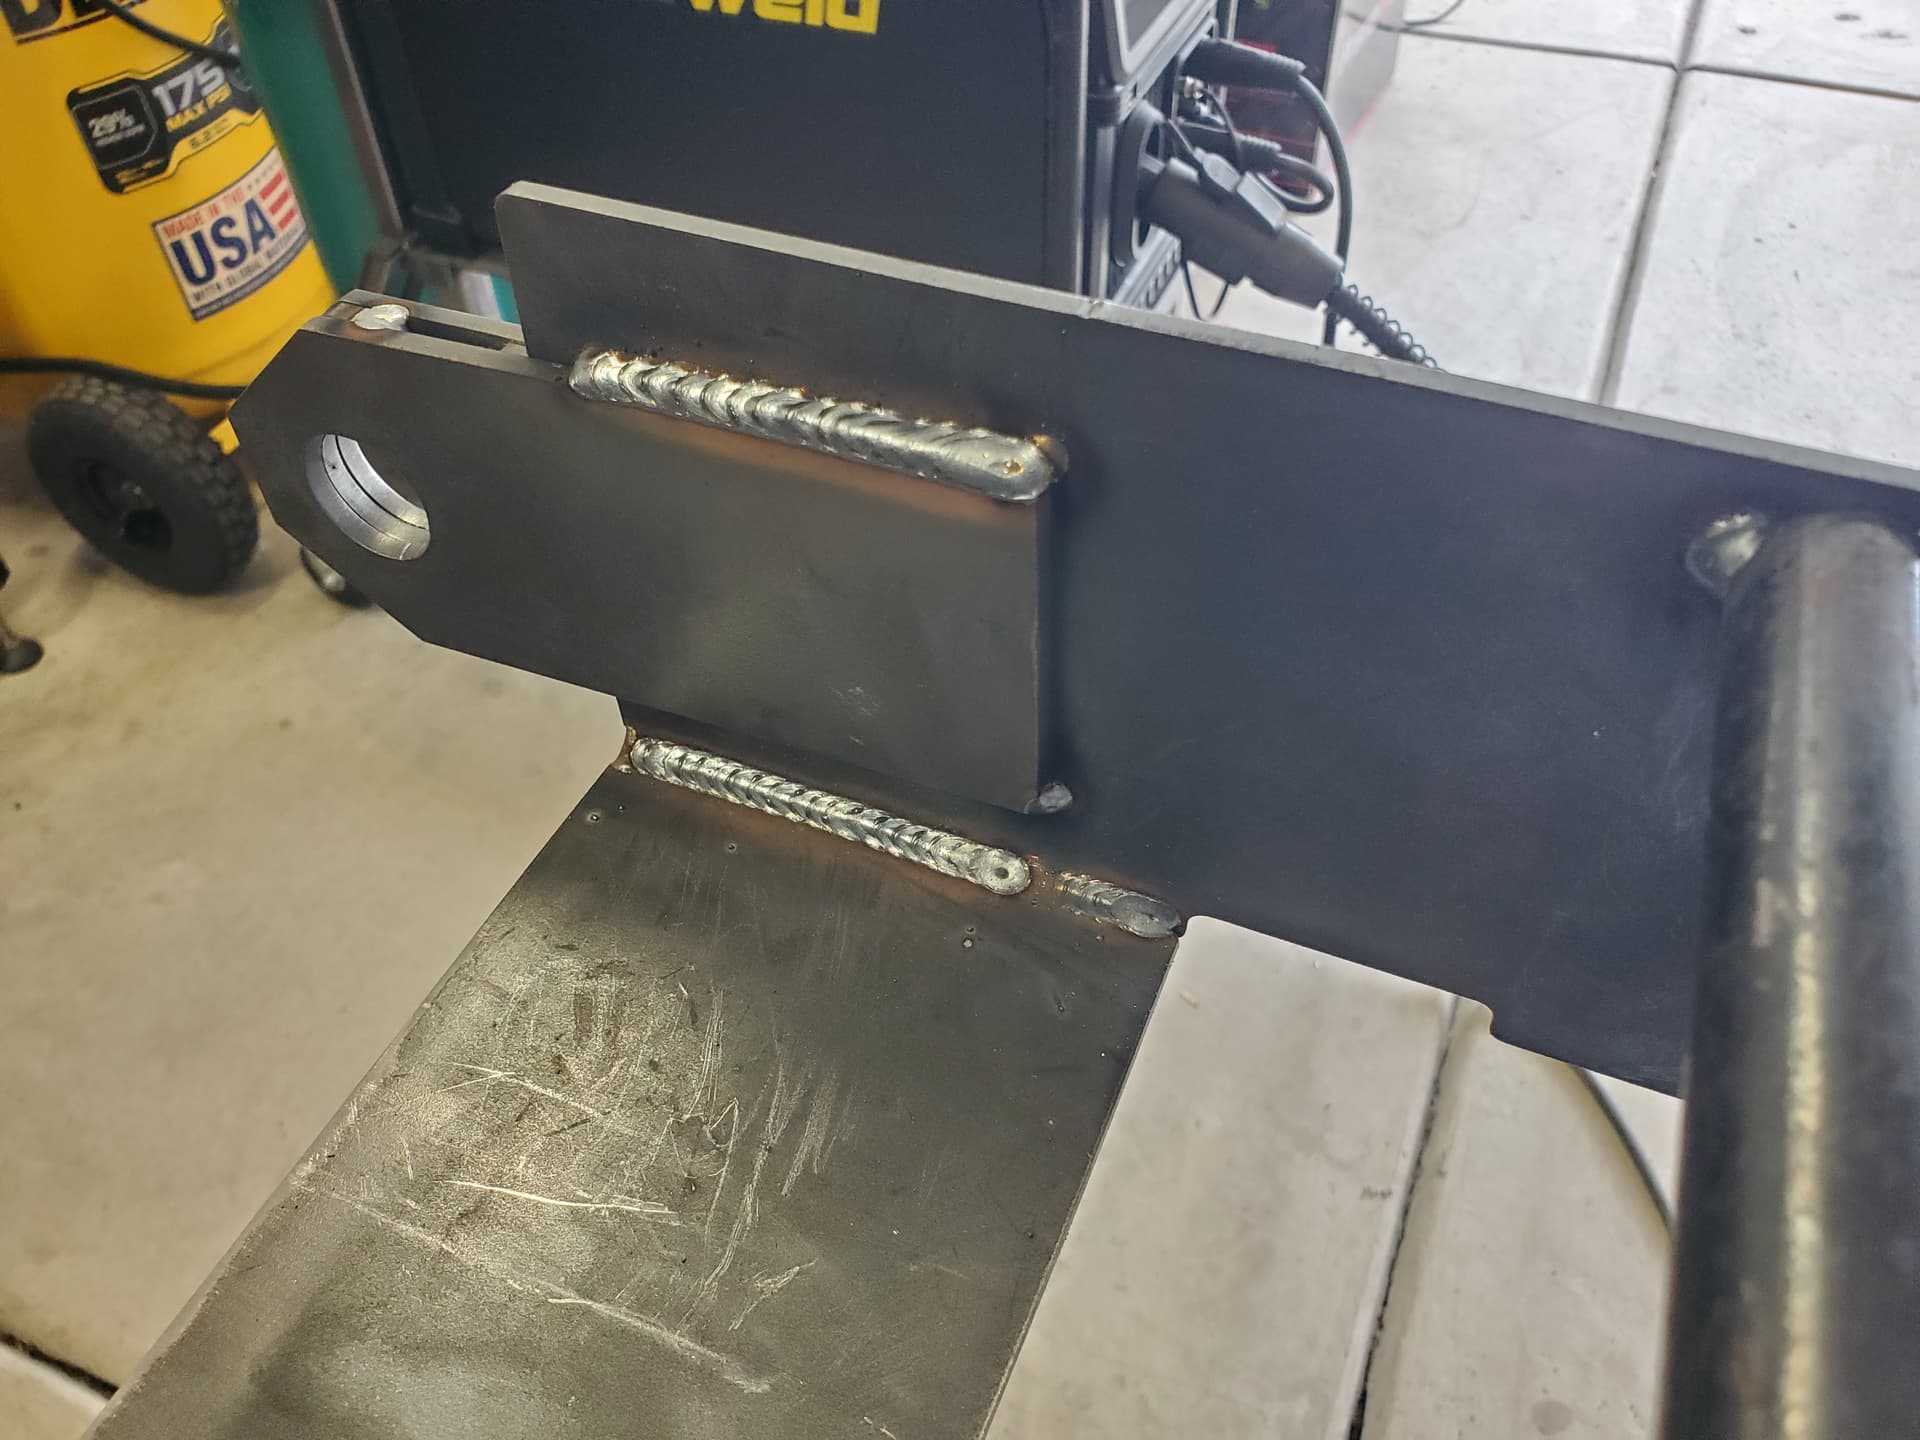
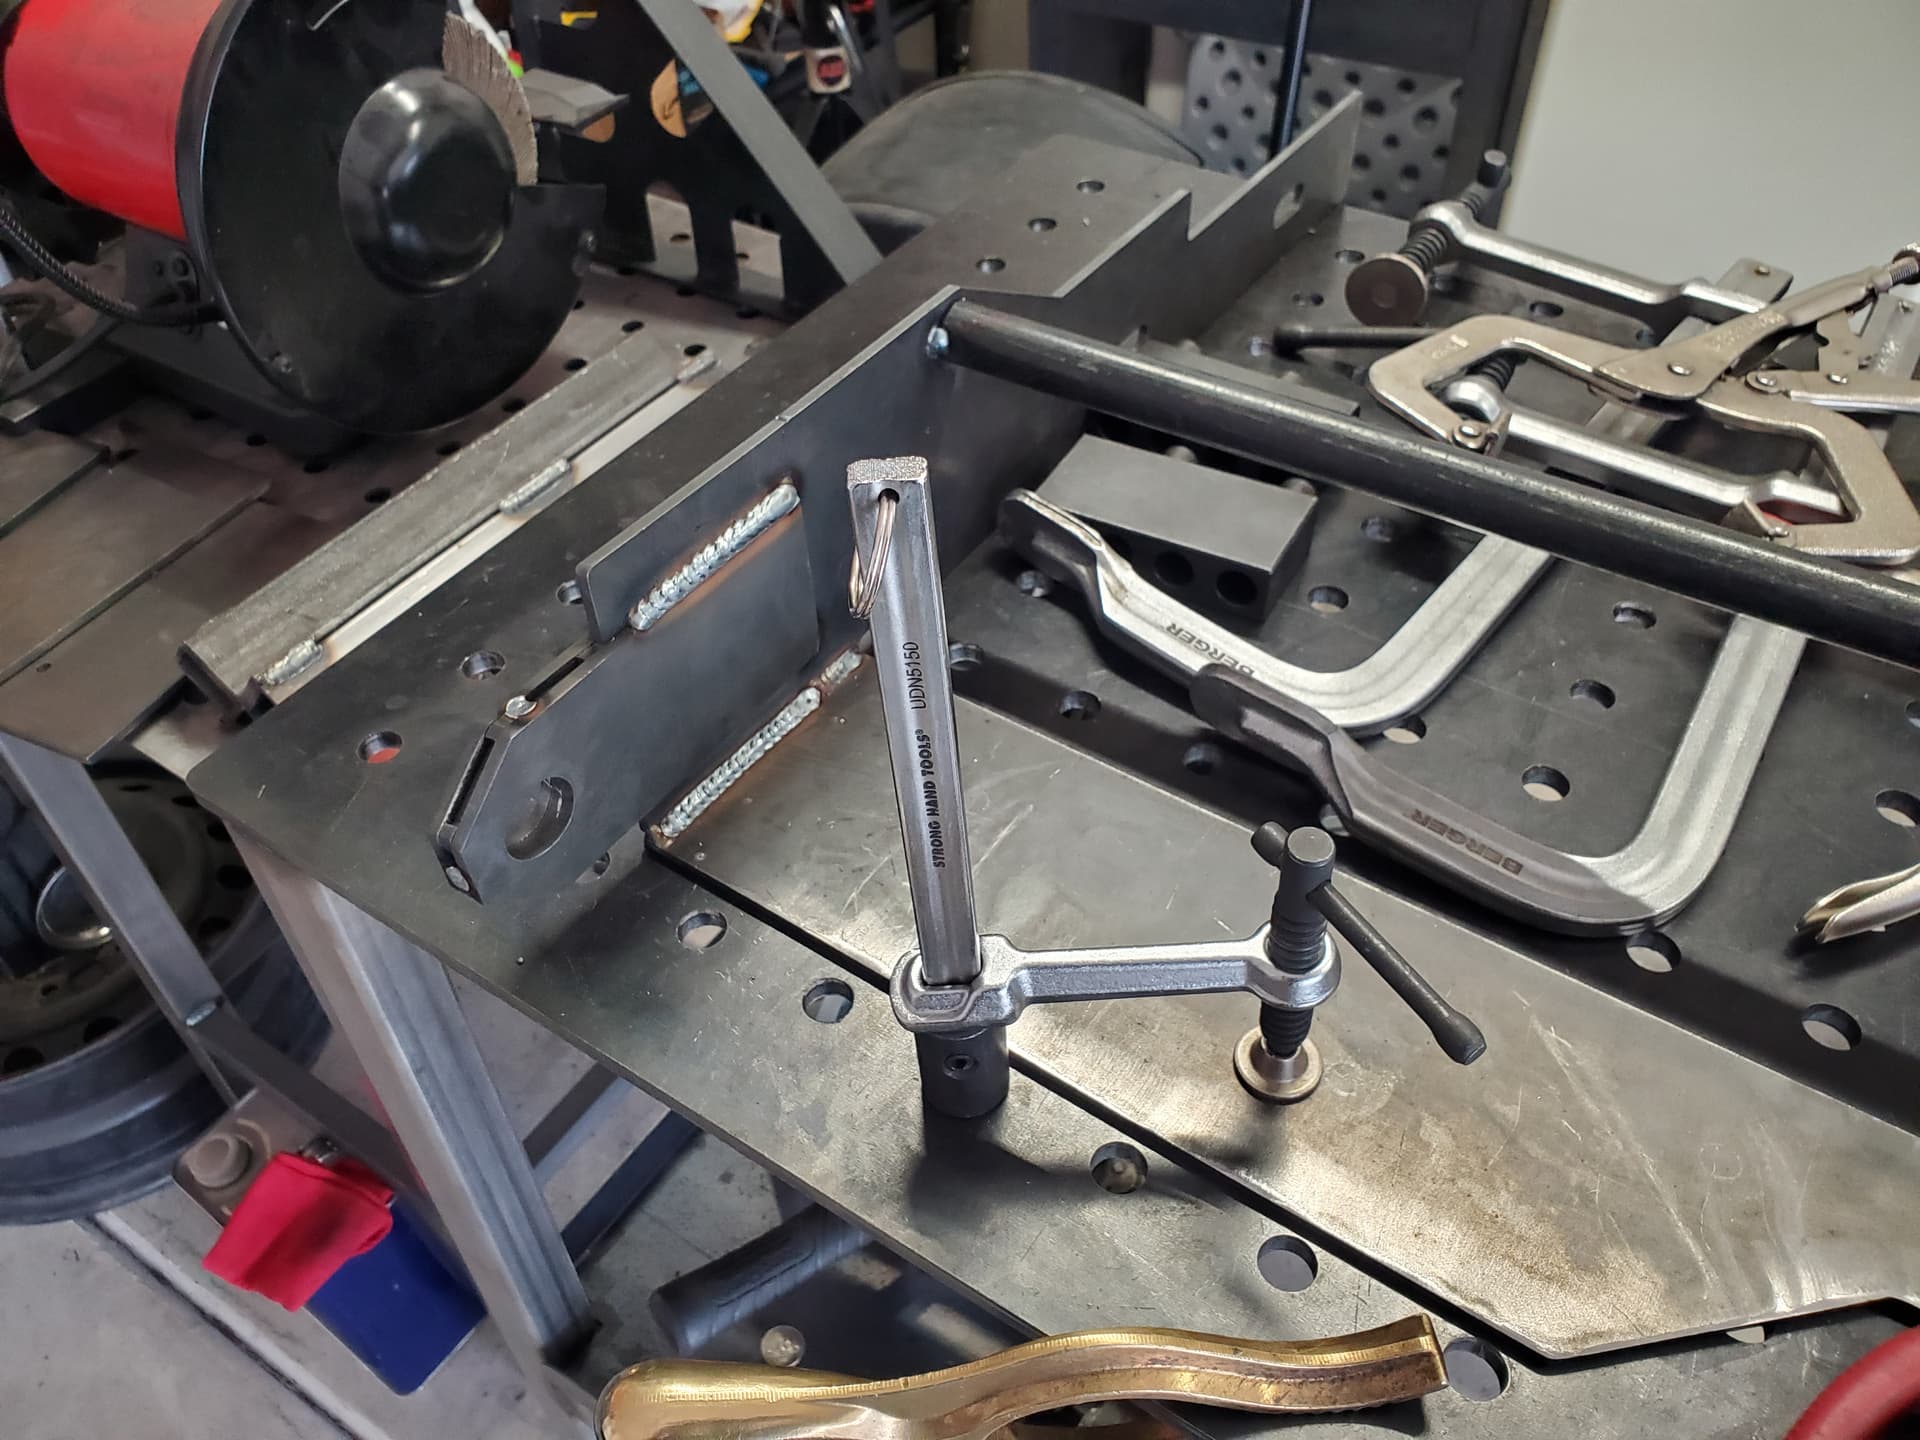
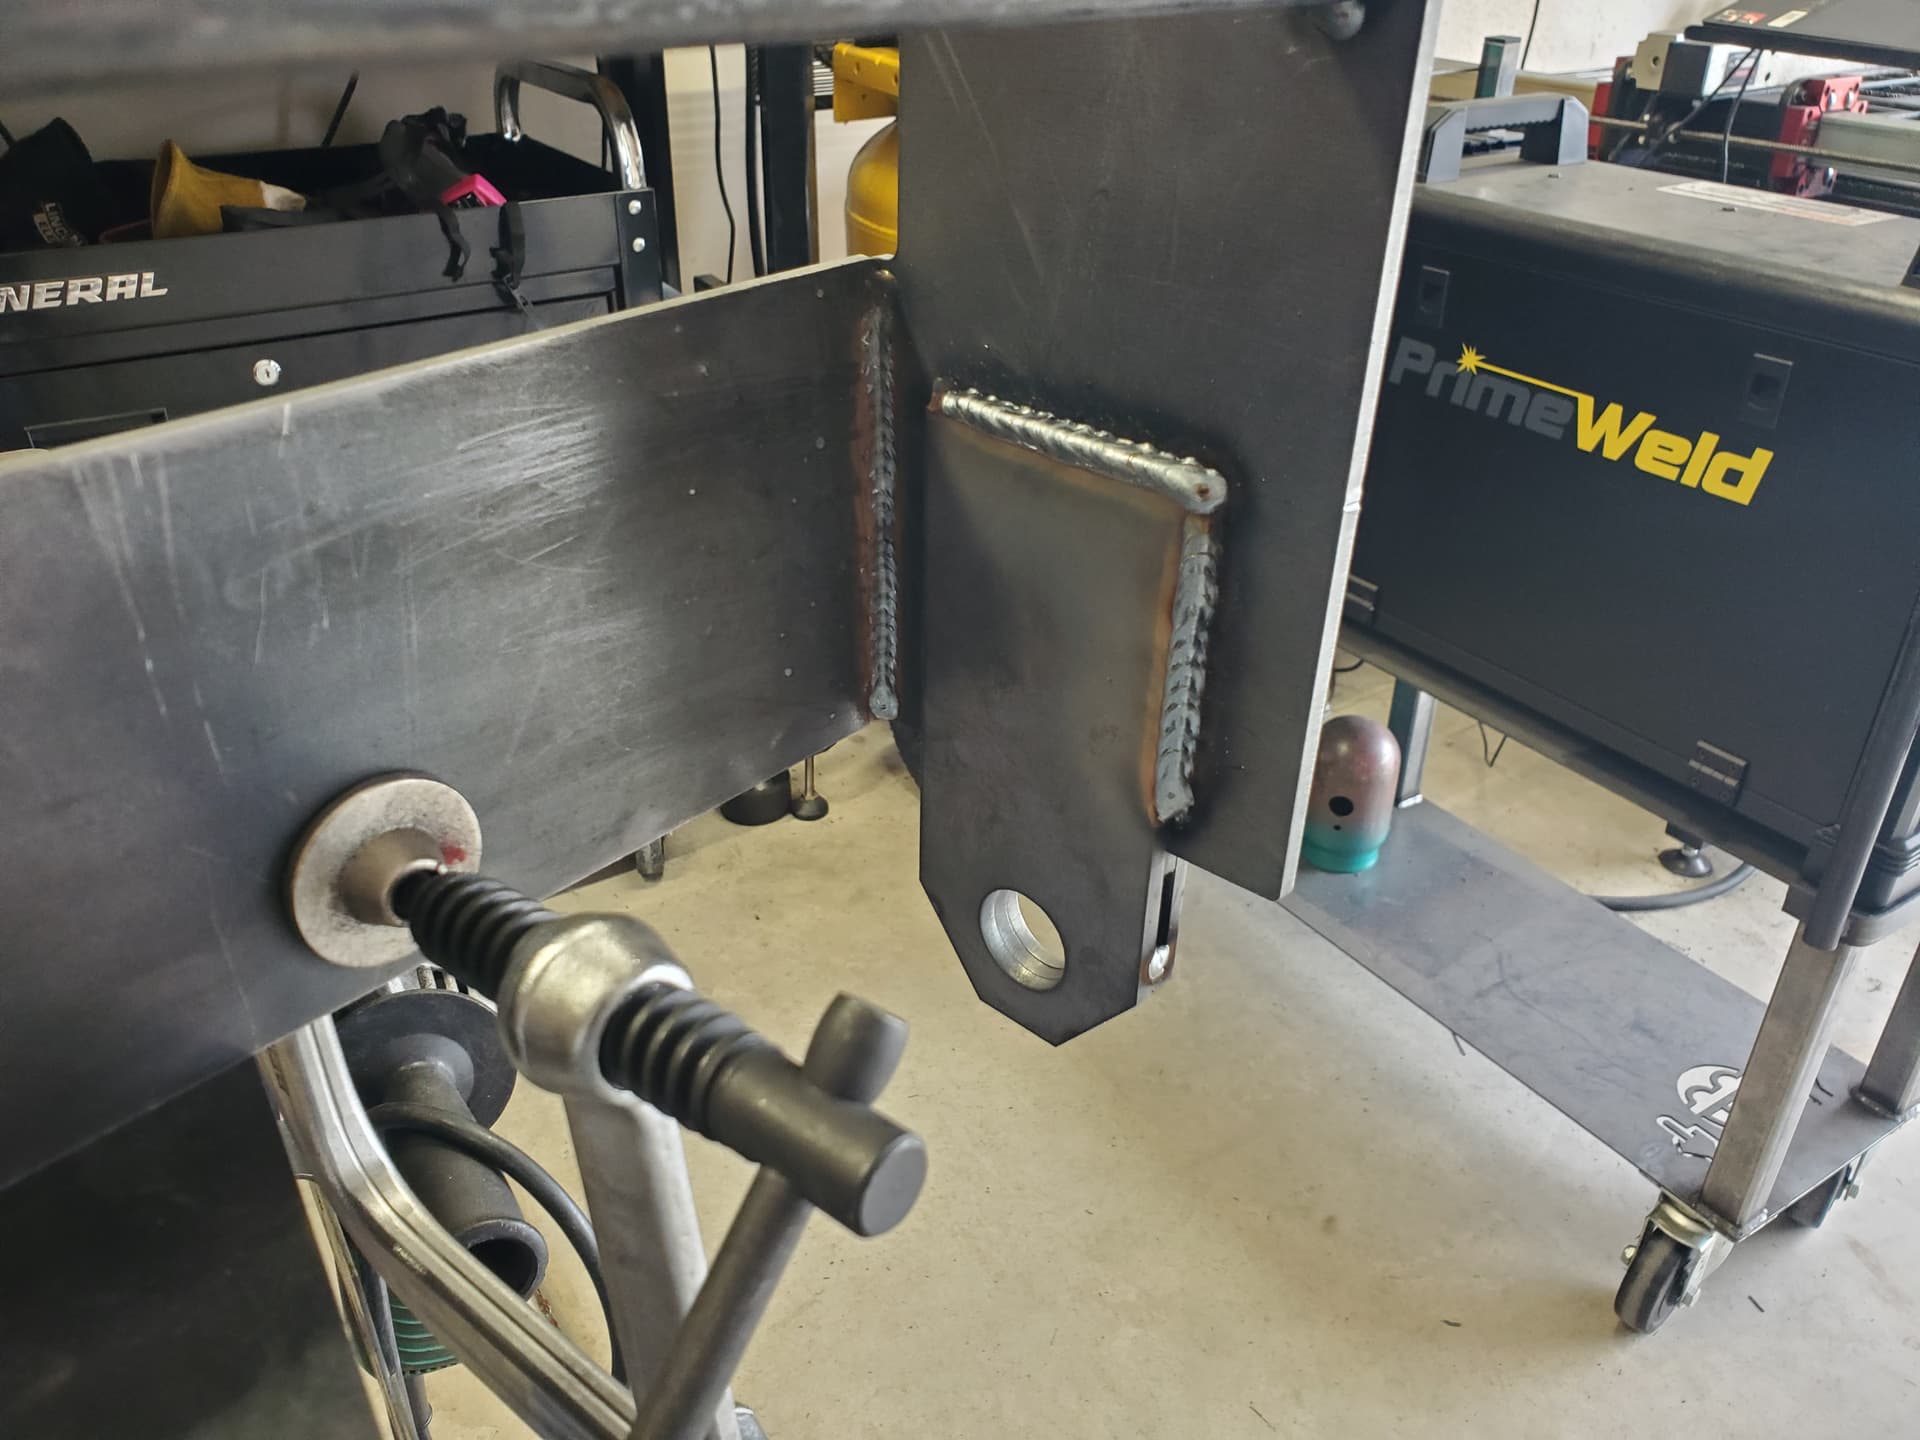
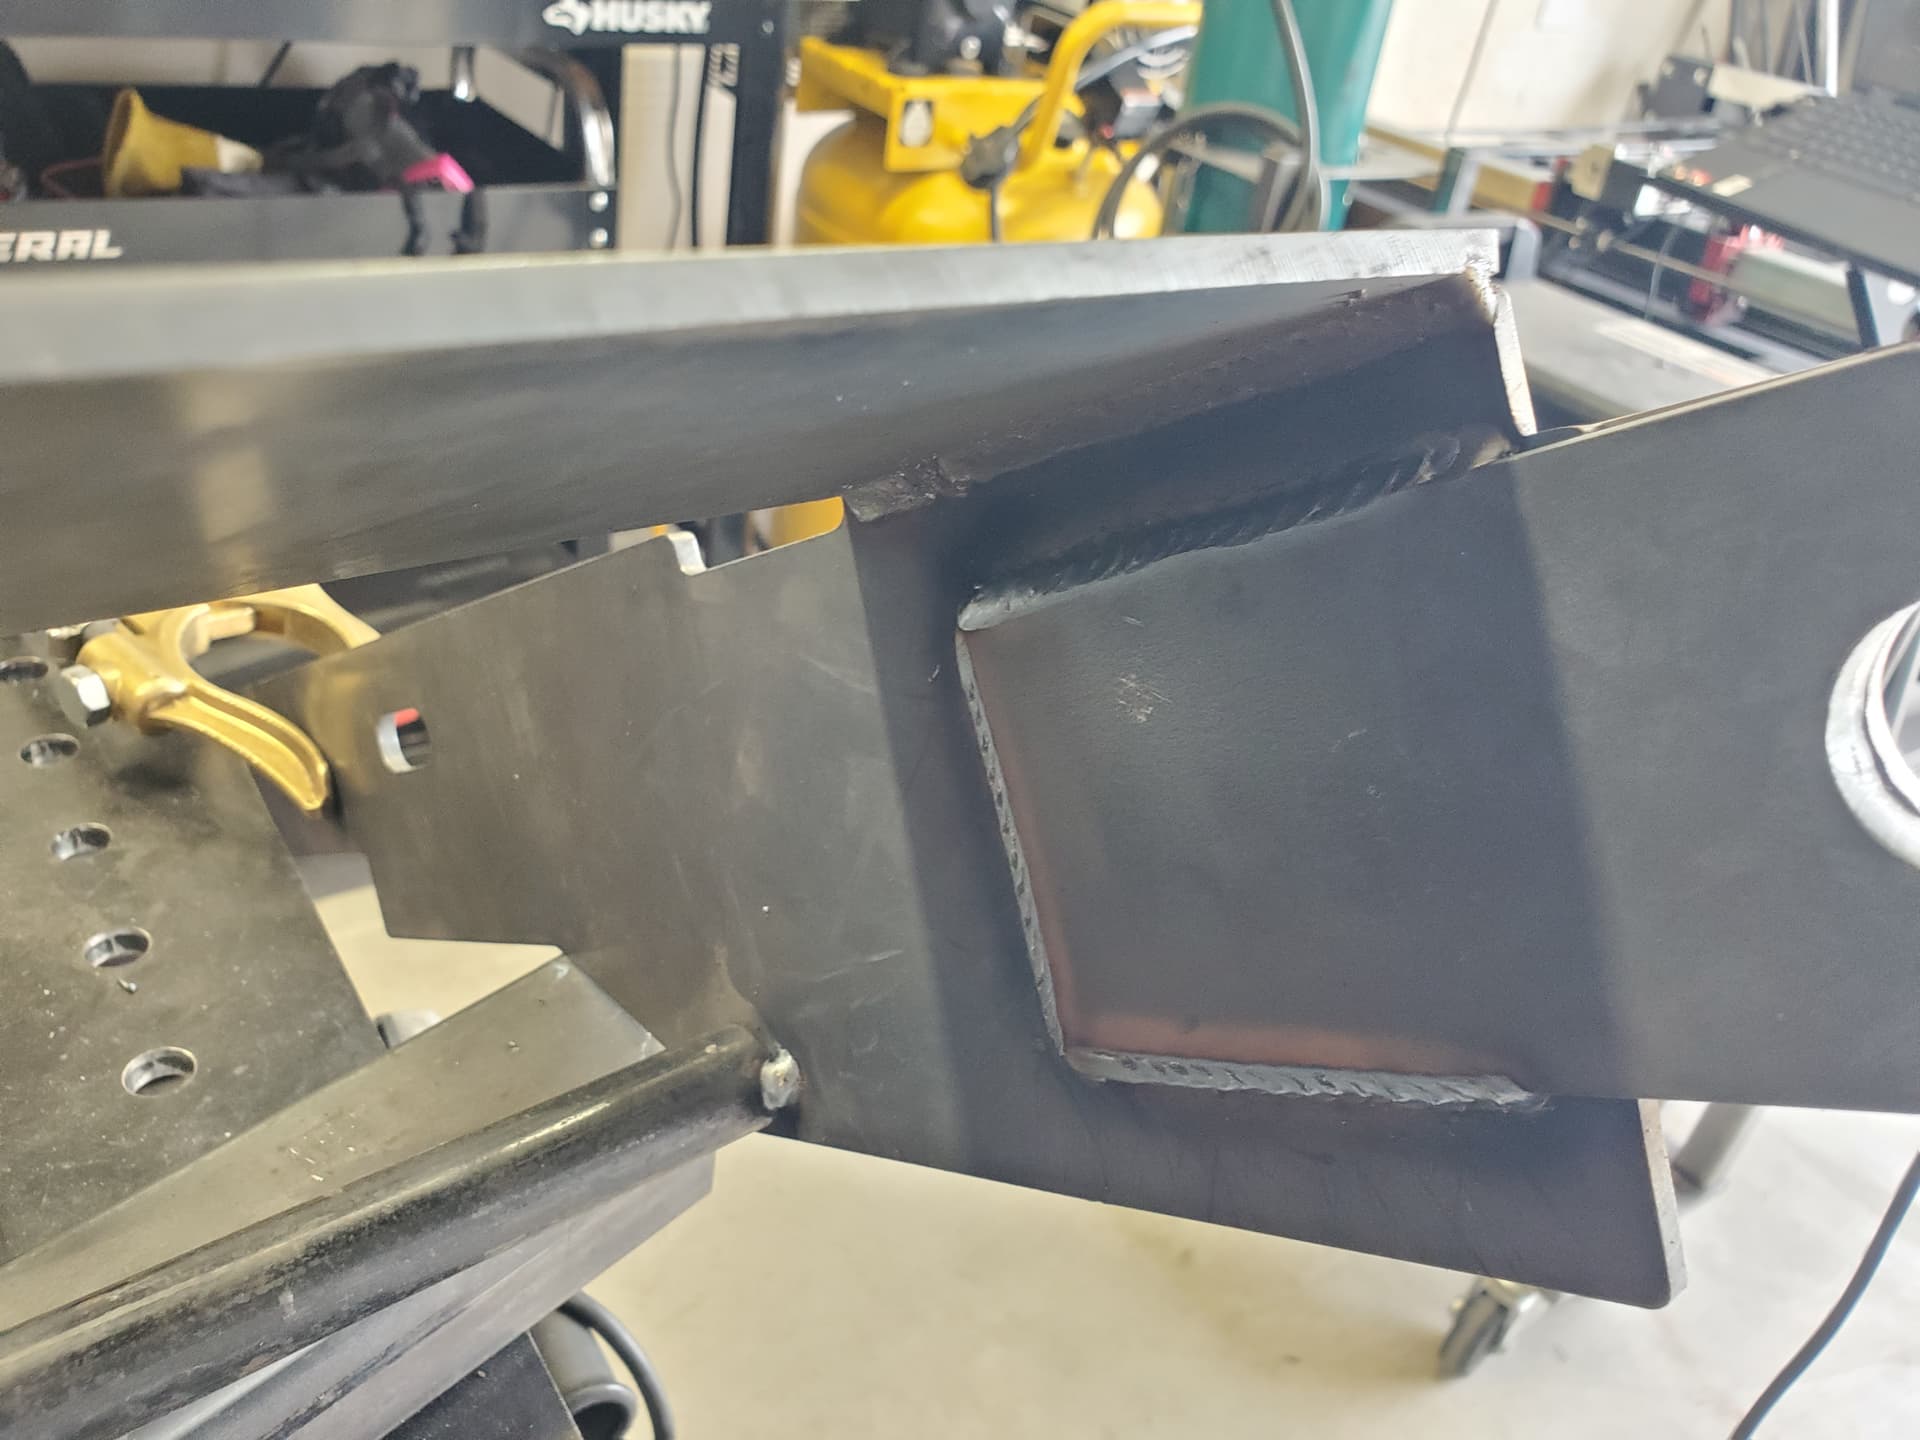
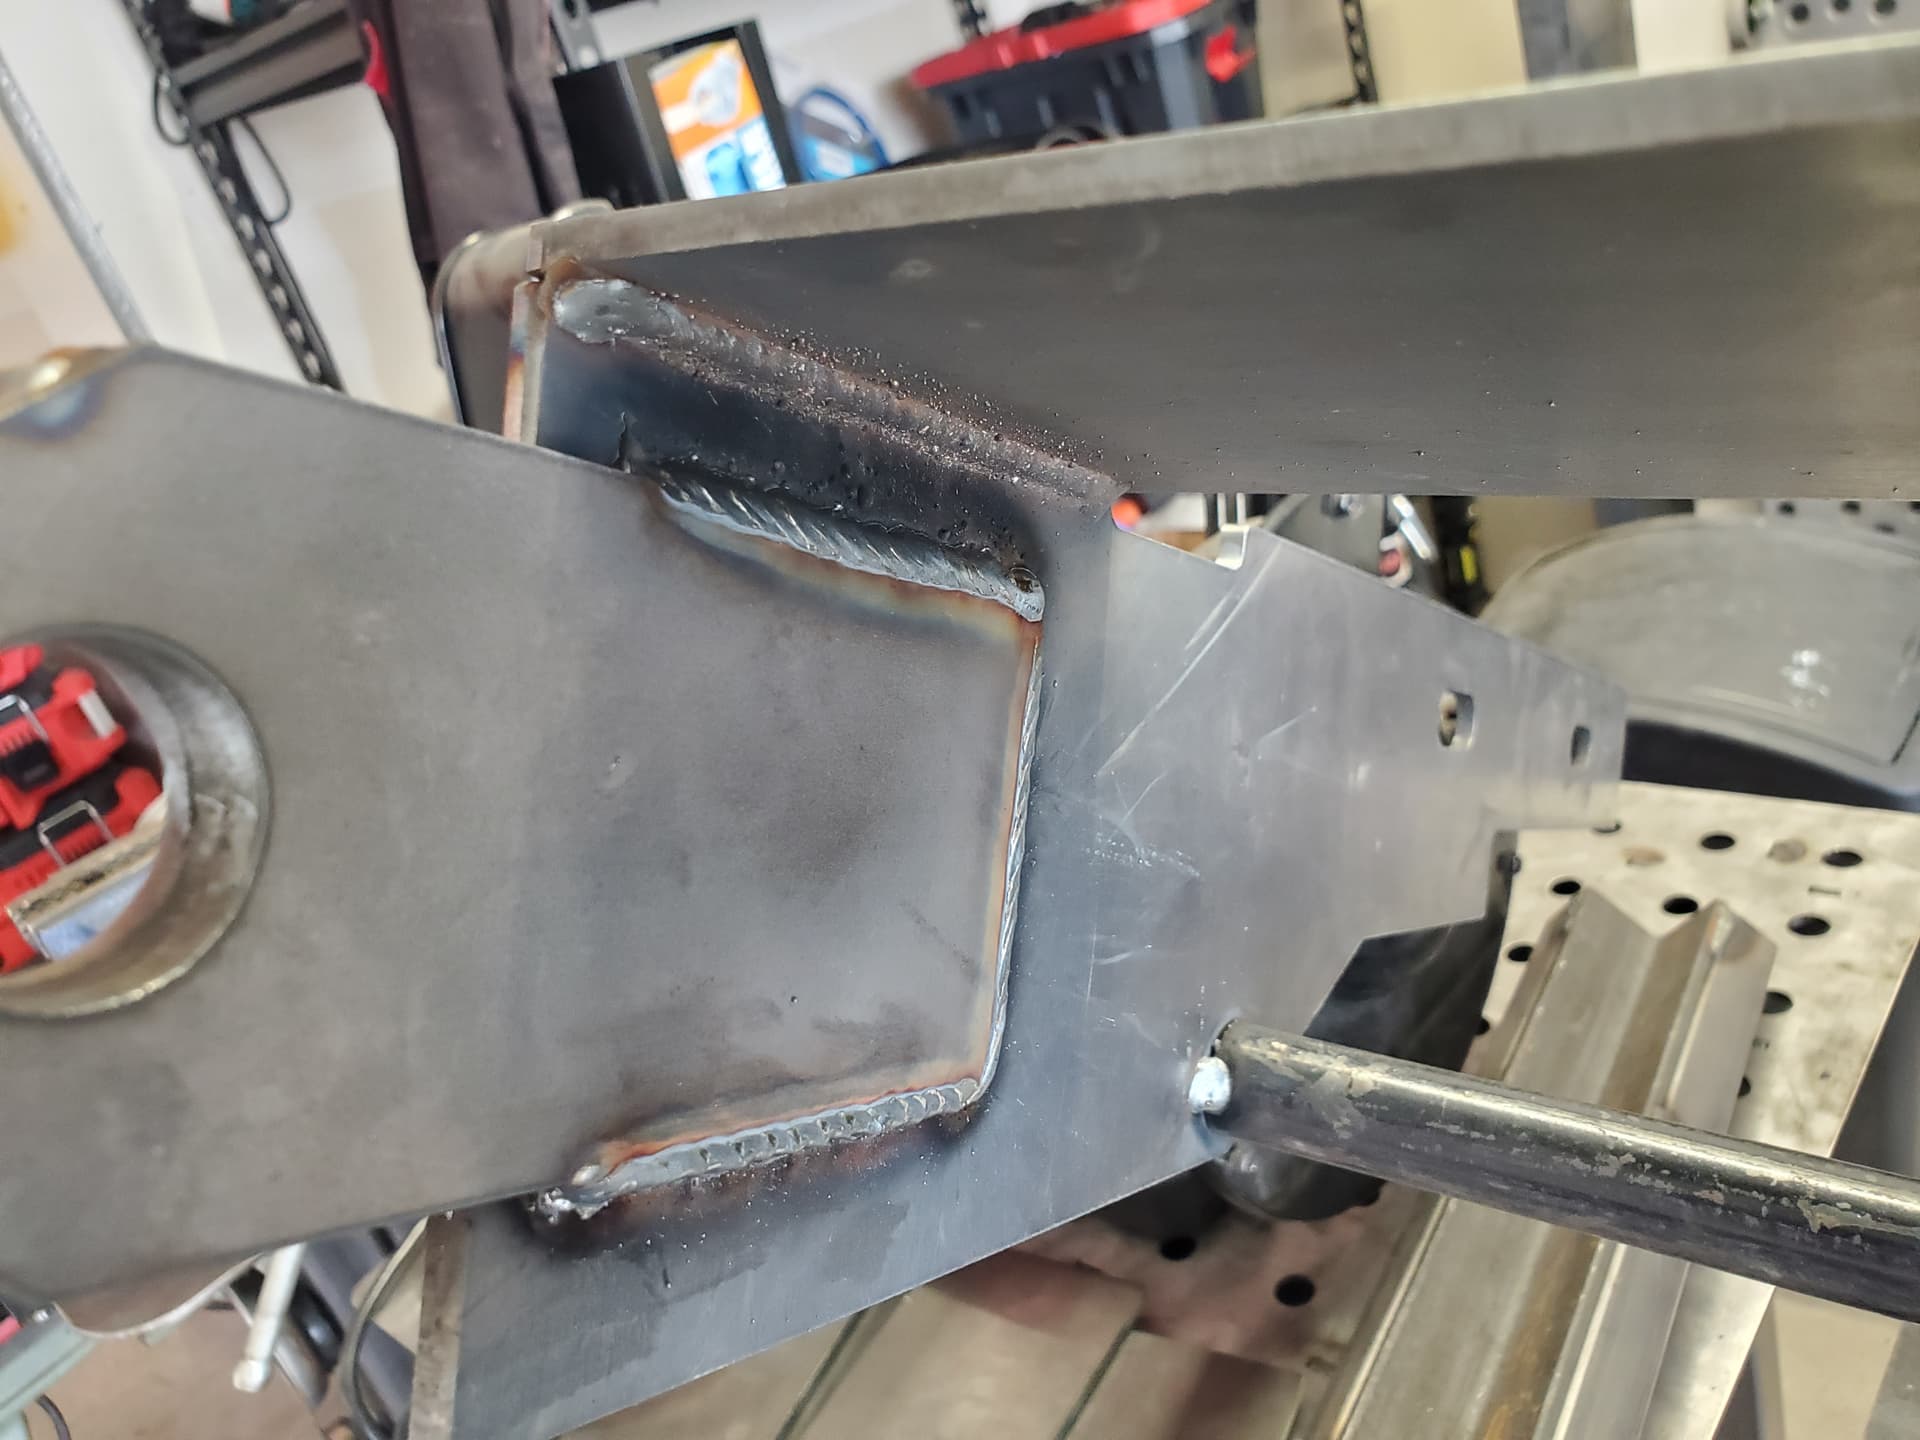
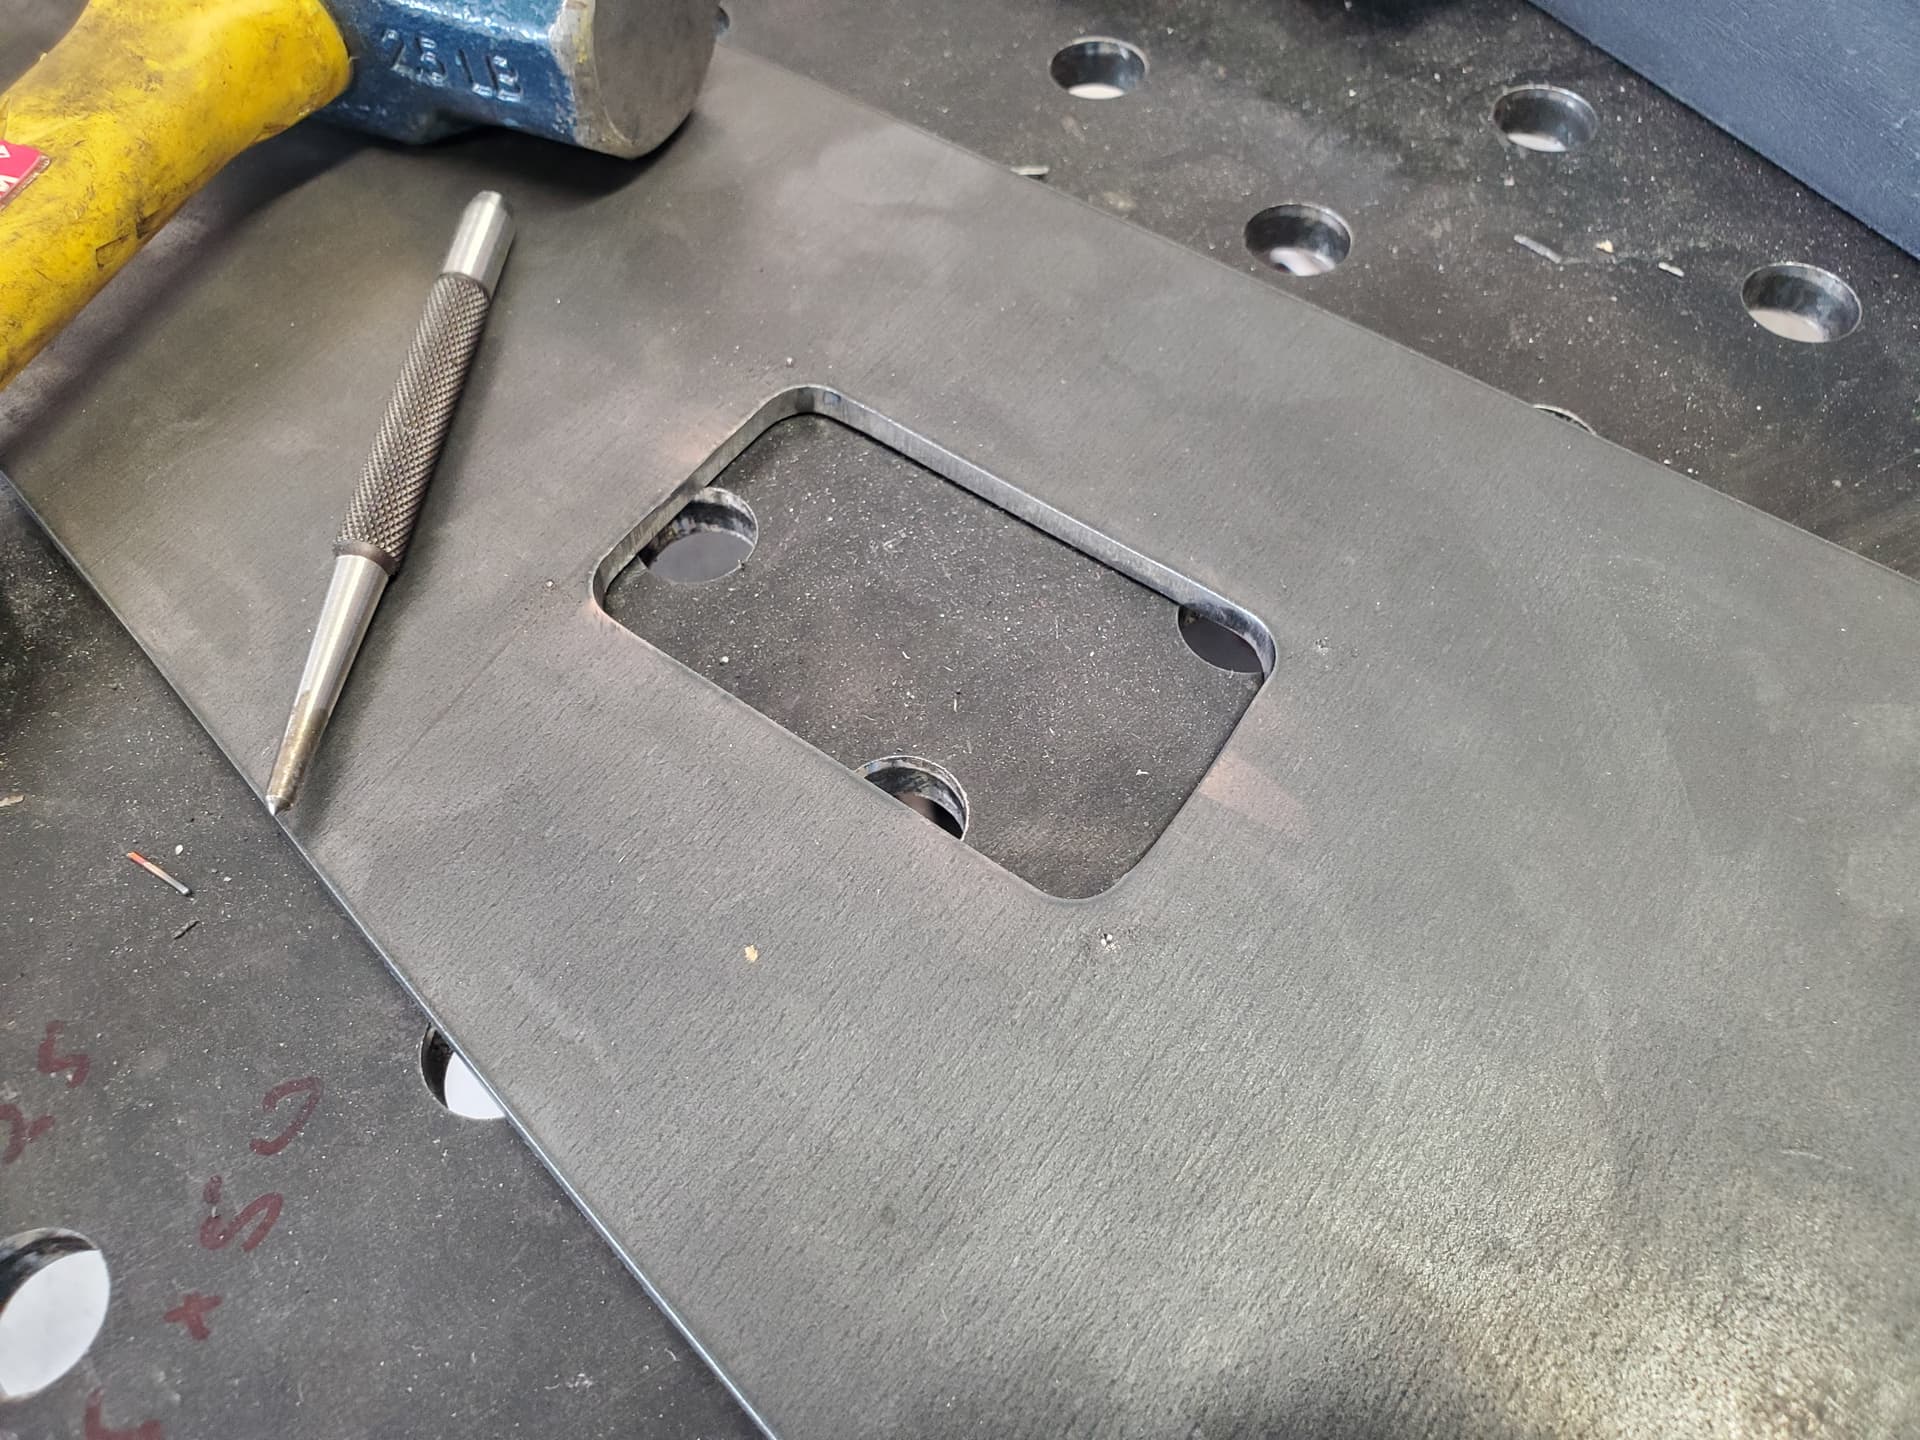
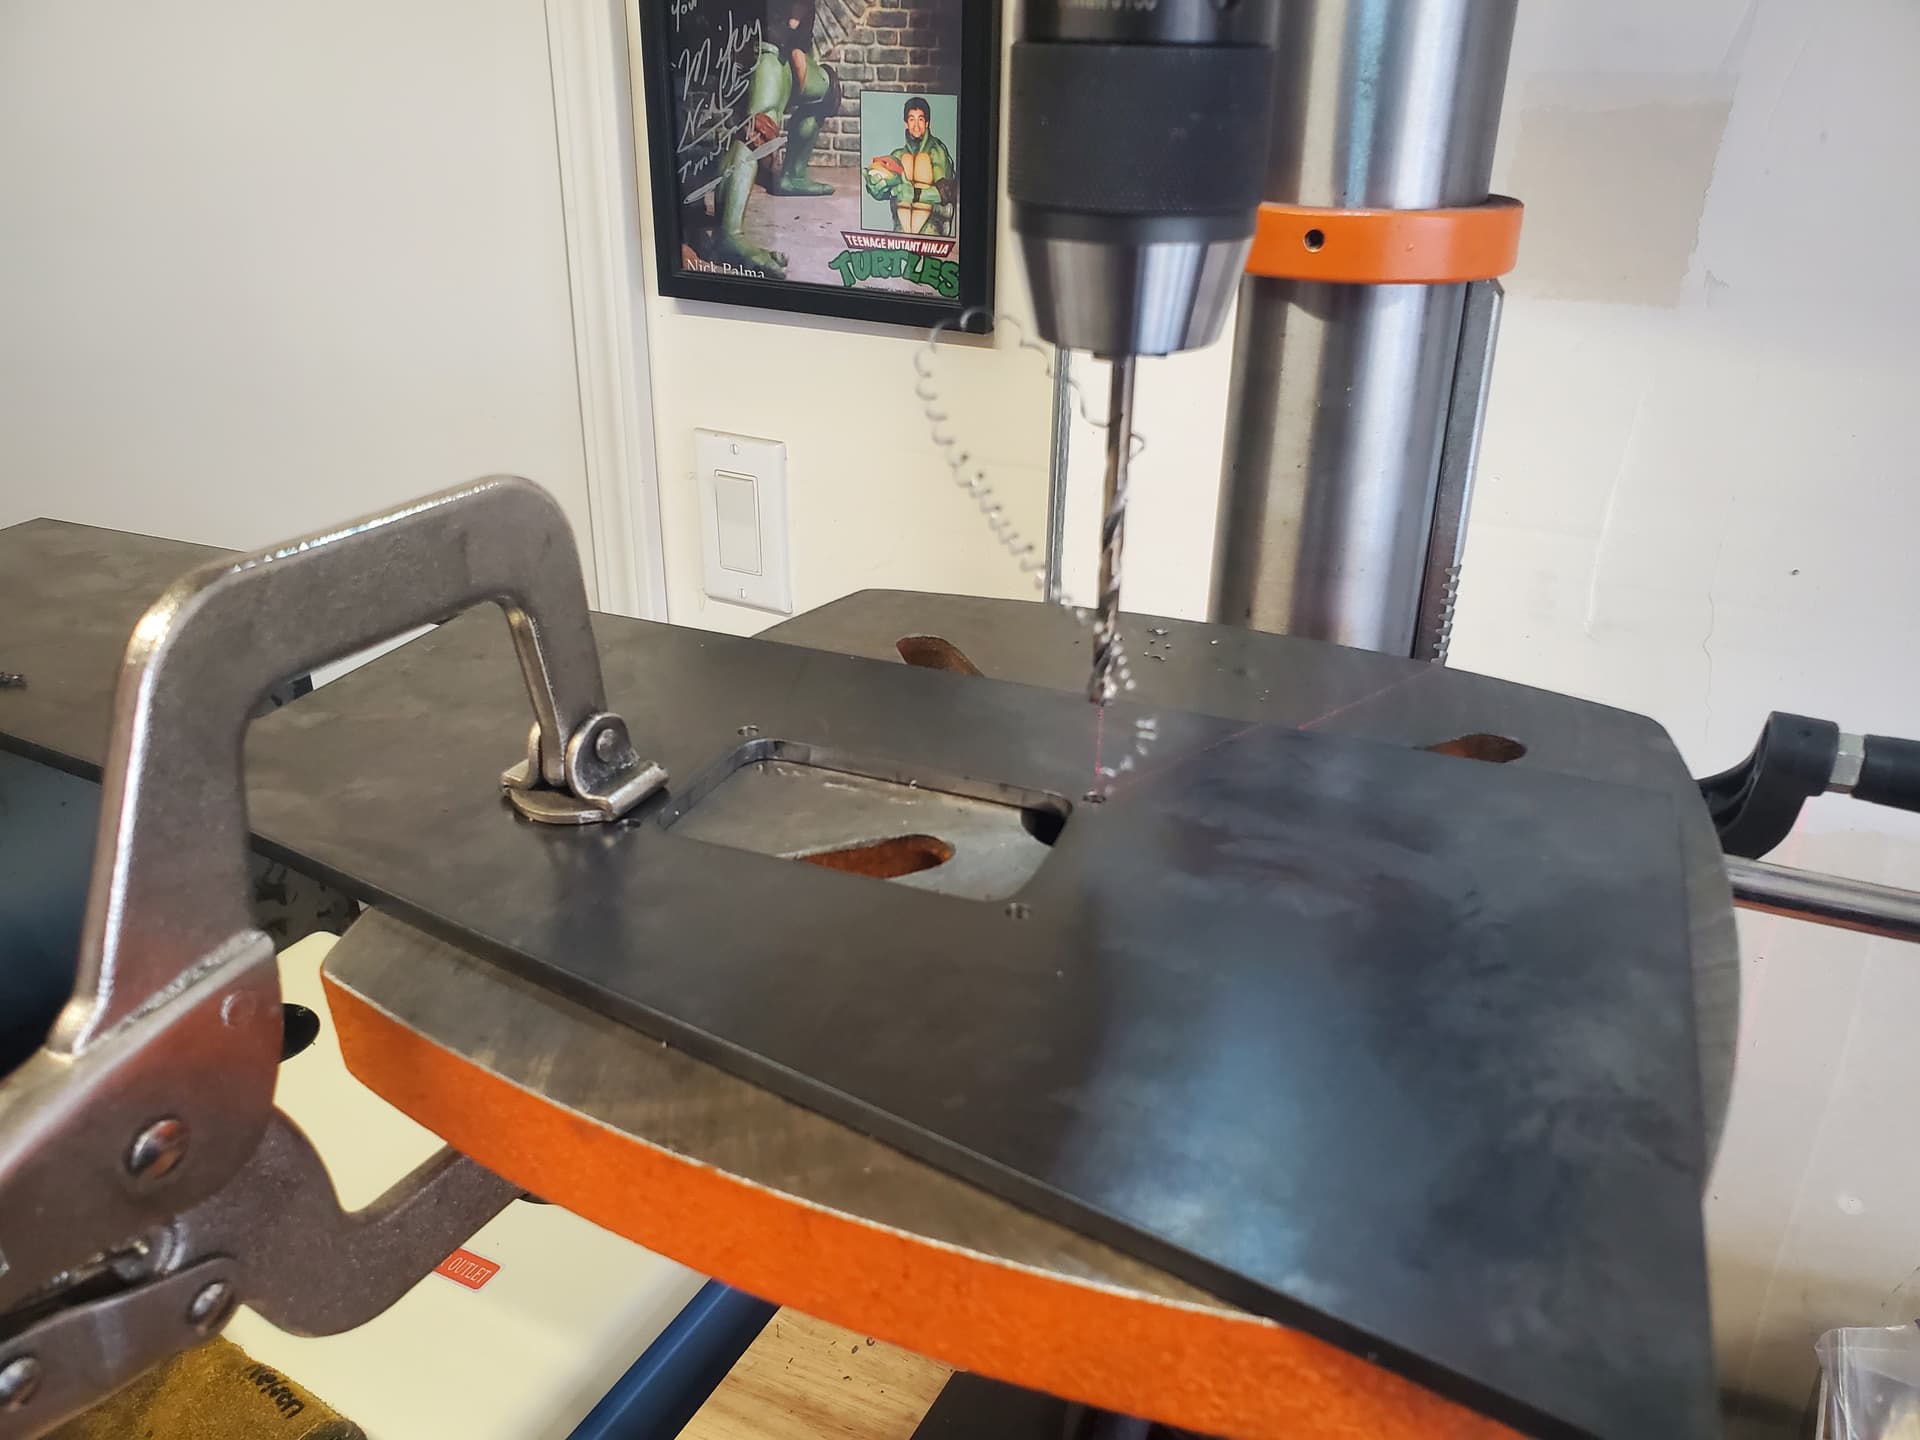
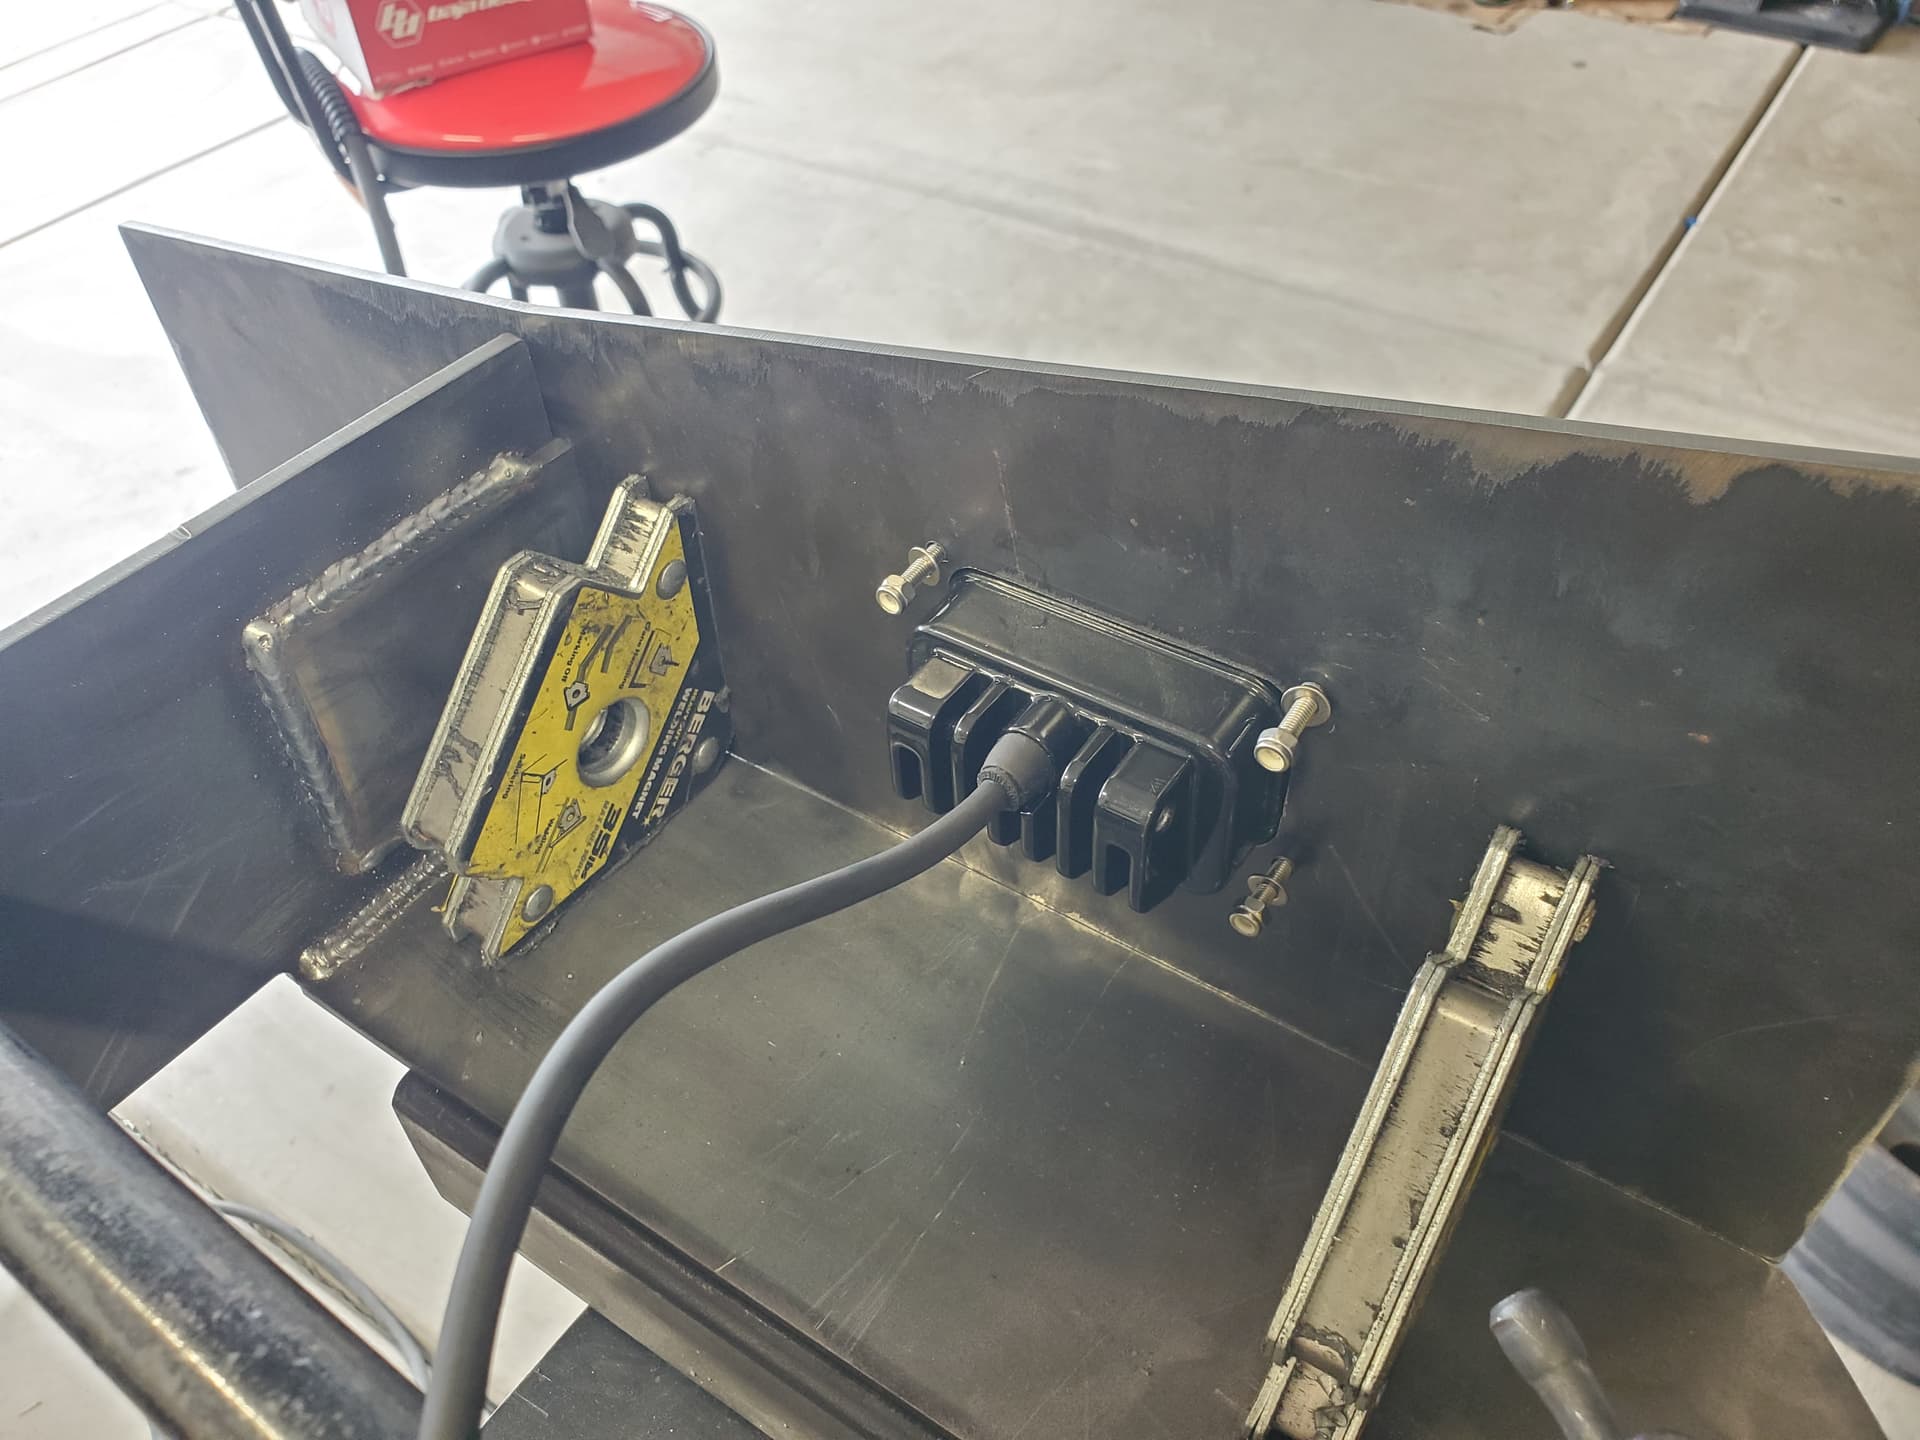
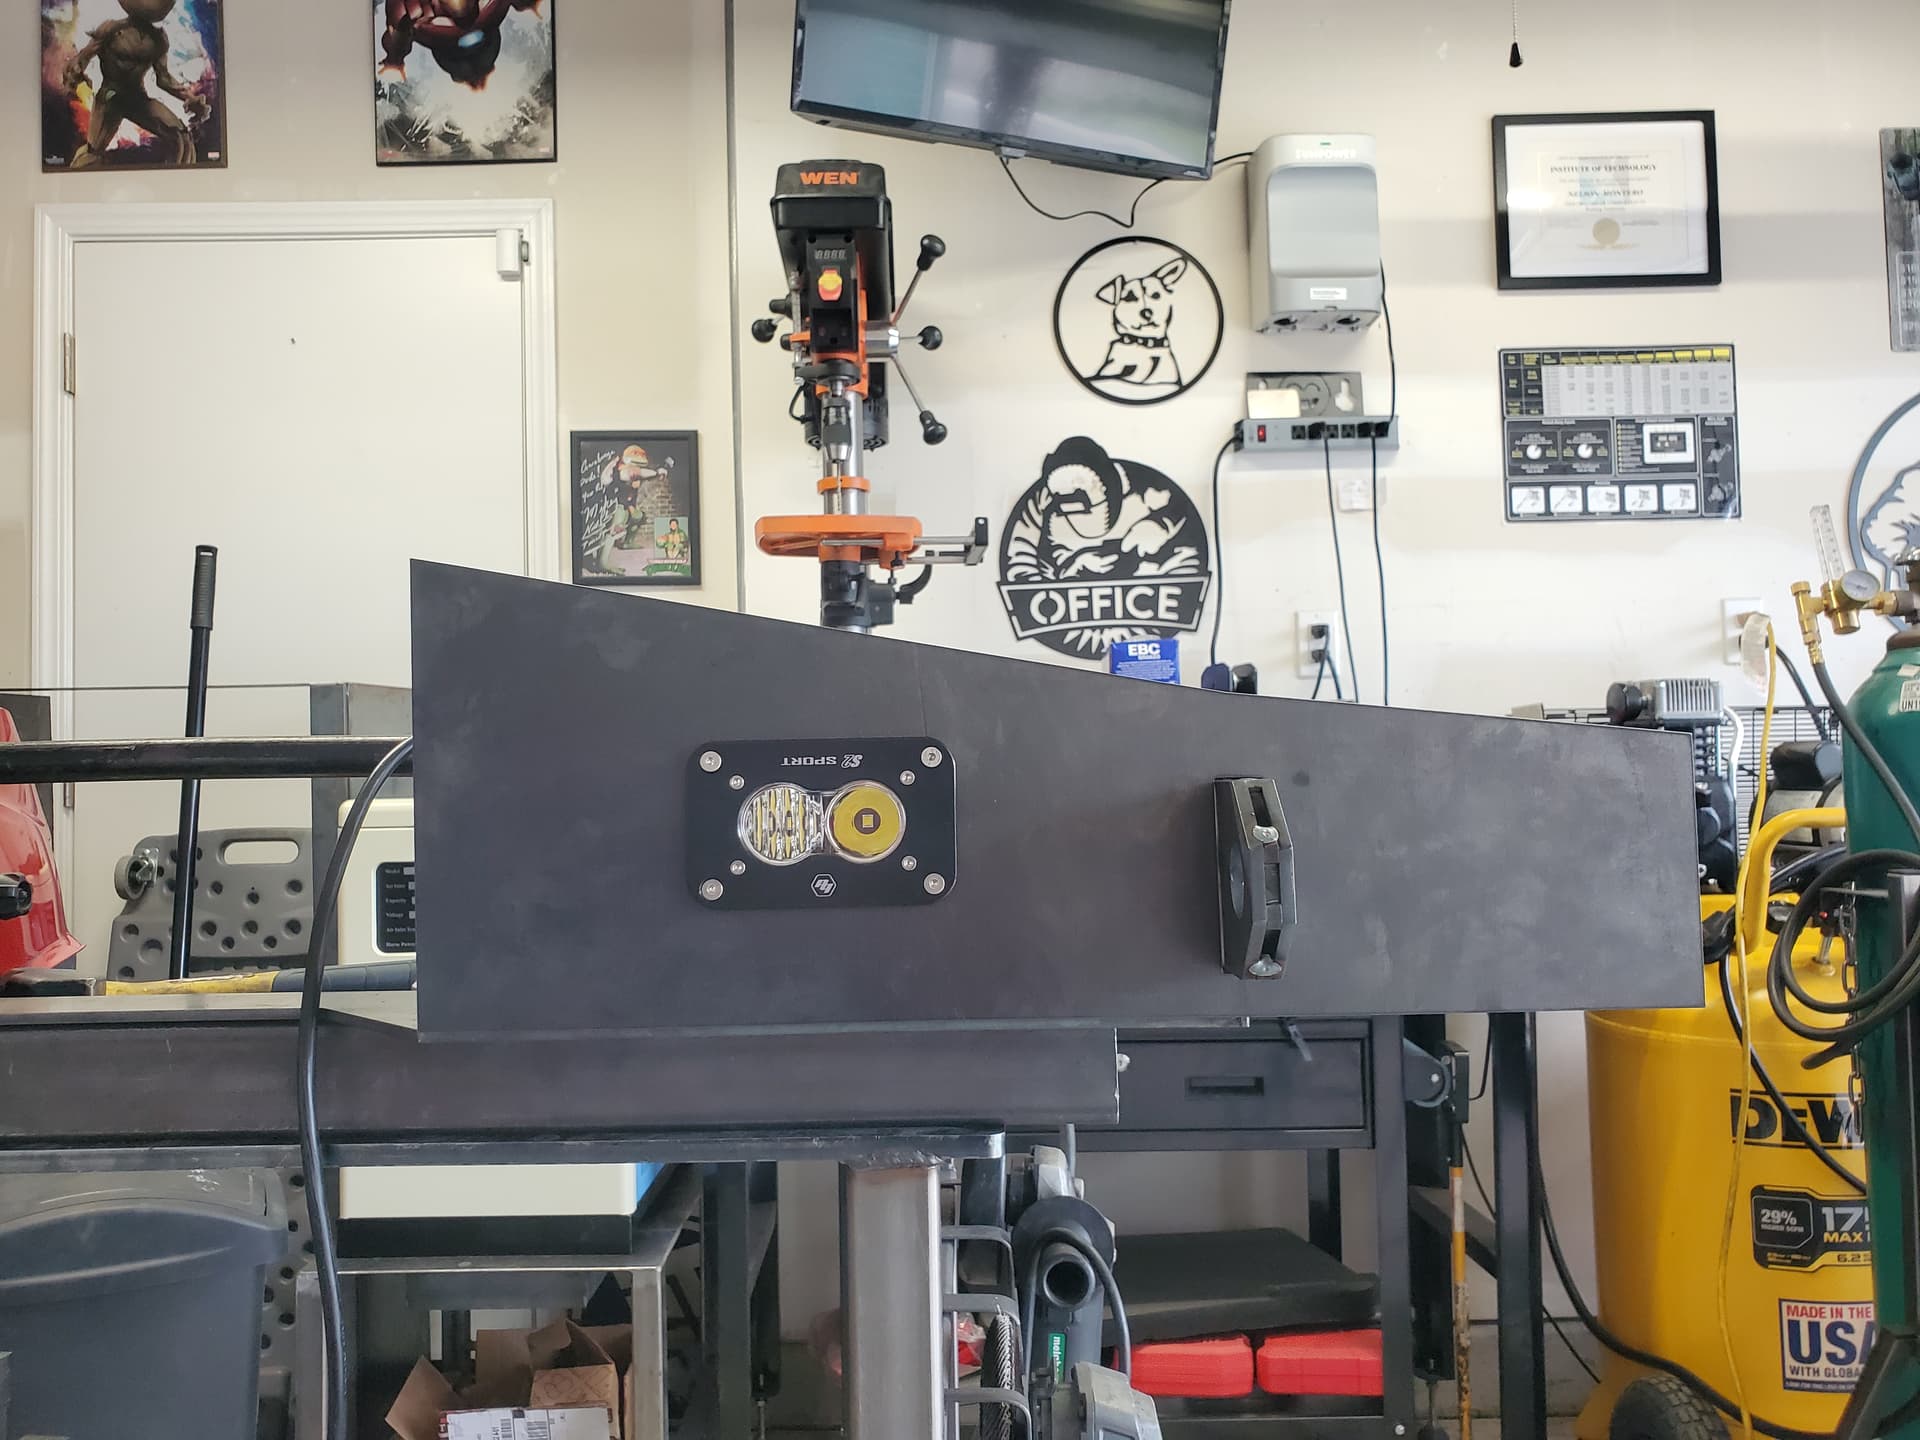
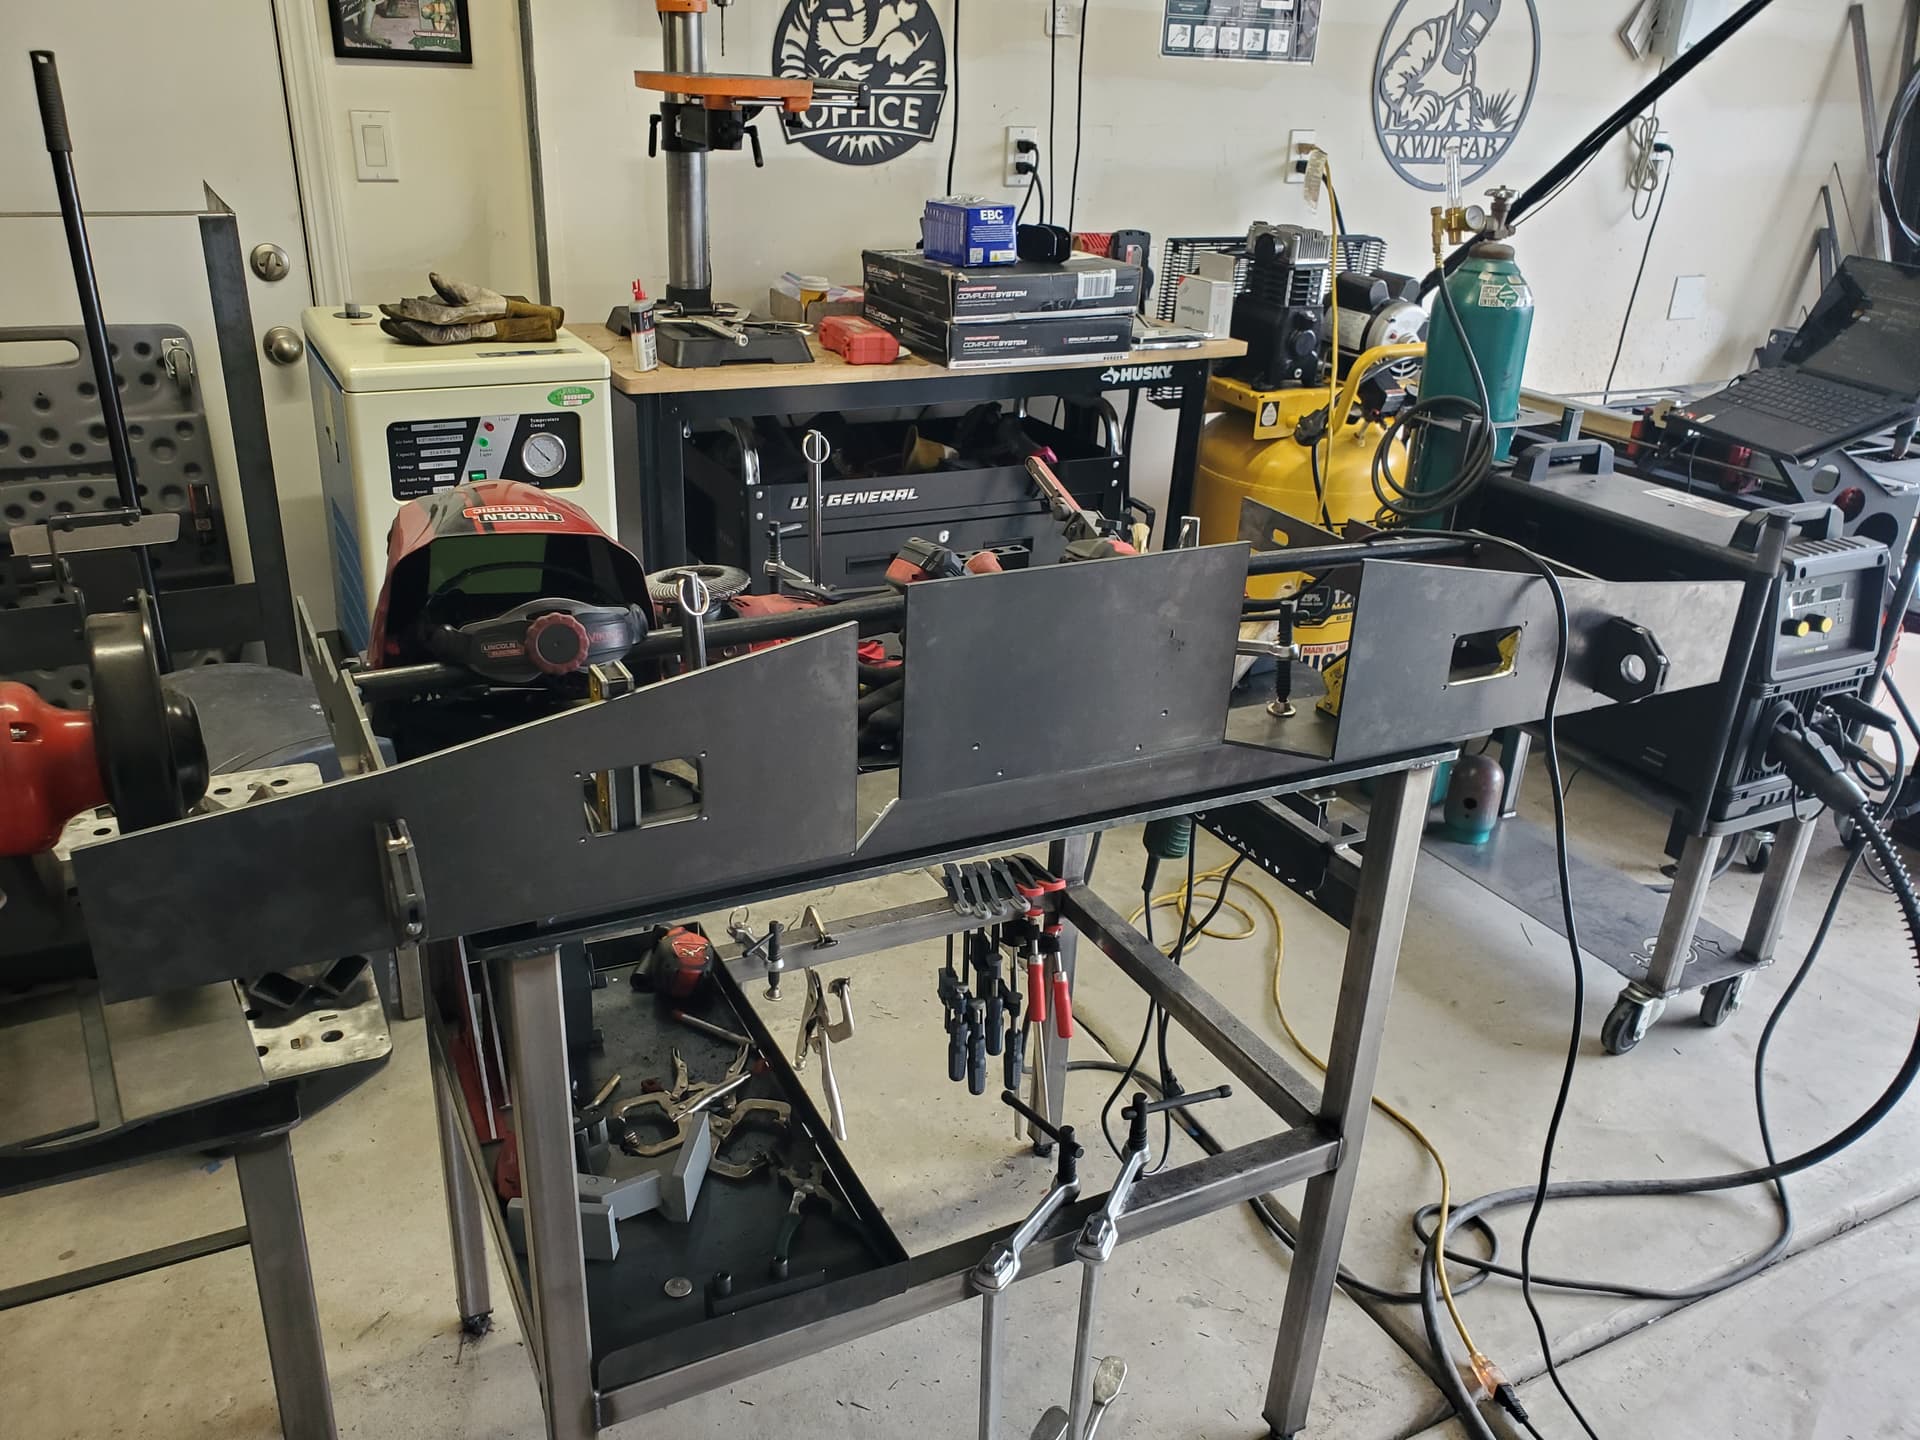
Little bit of cutting and welding; been too busy to do anything really so I got to working on this as soon as I got my measurements
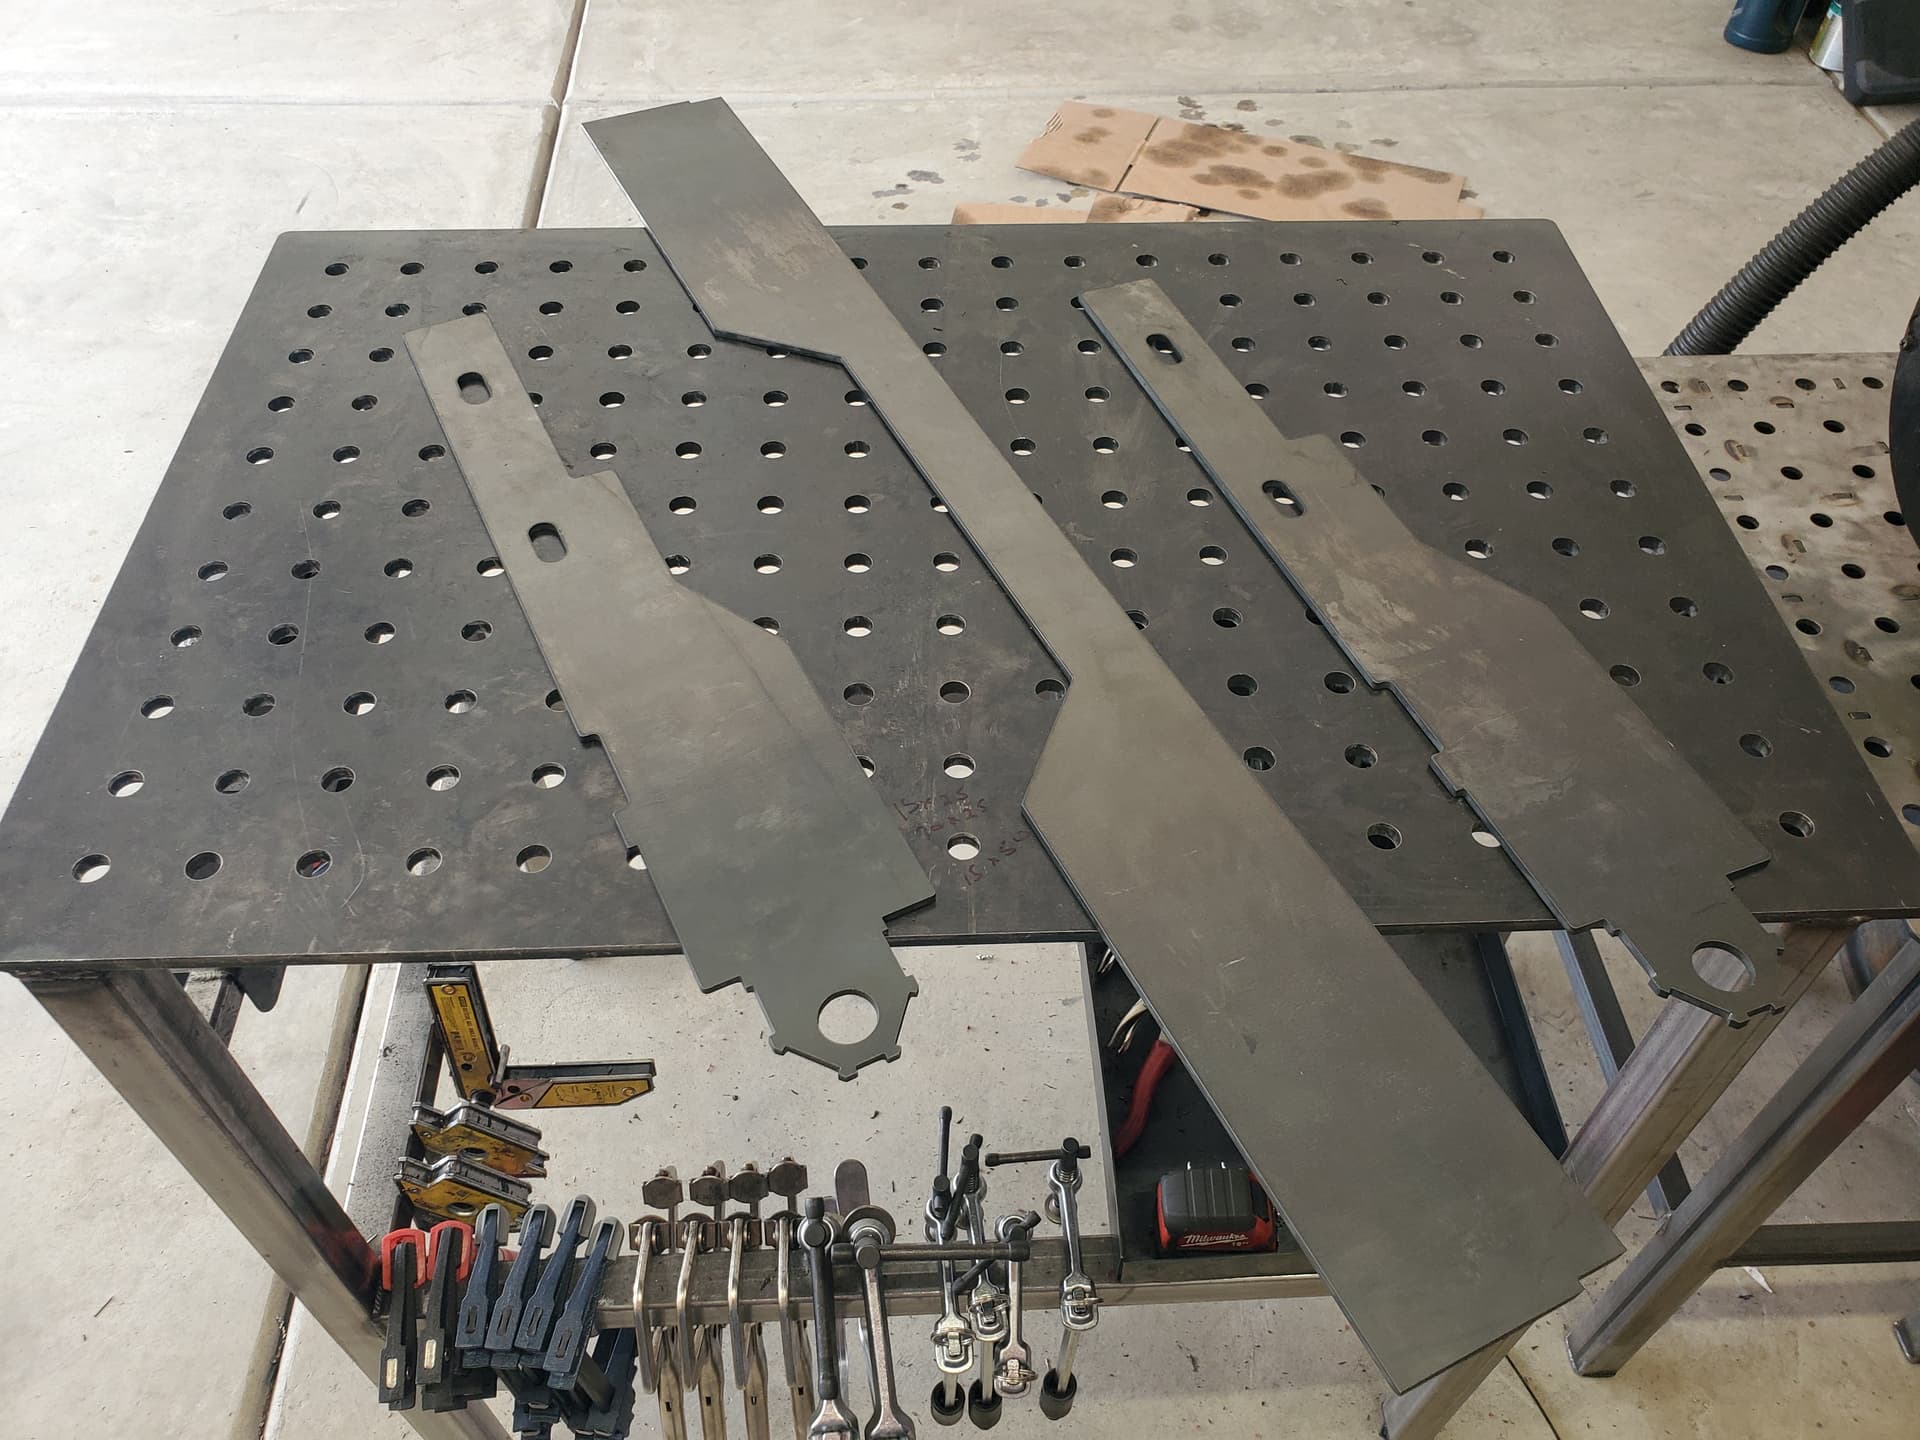
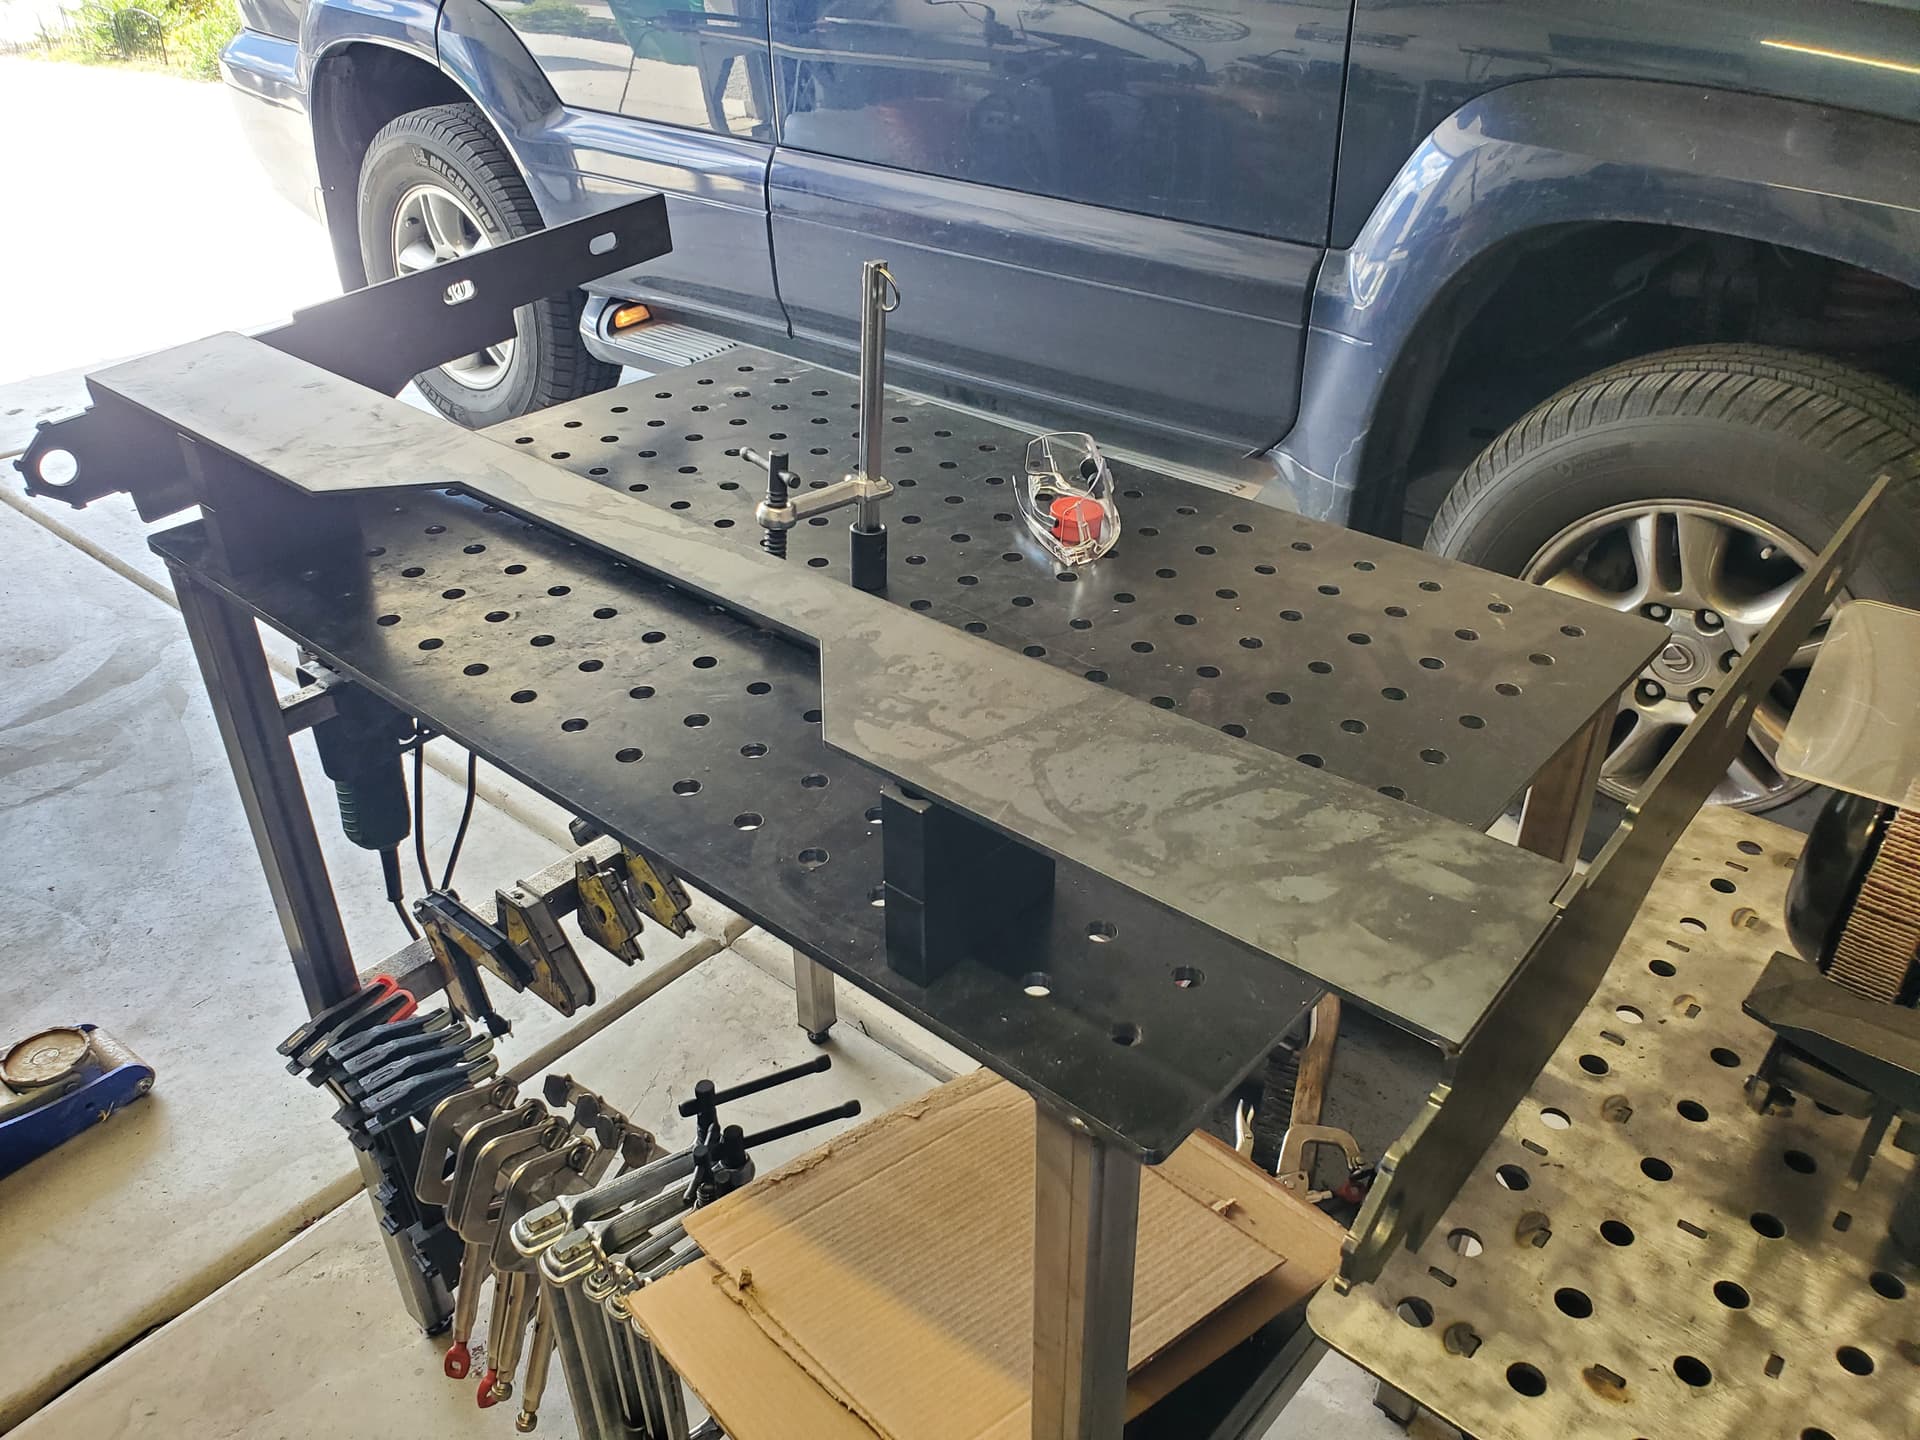
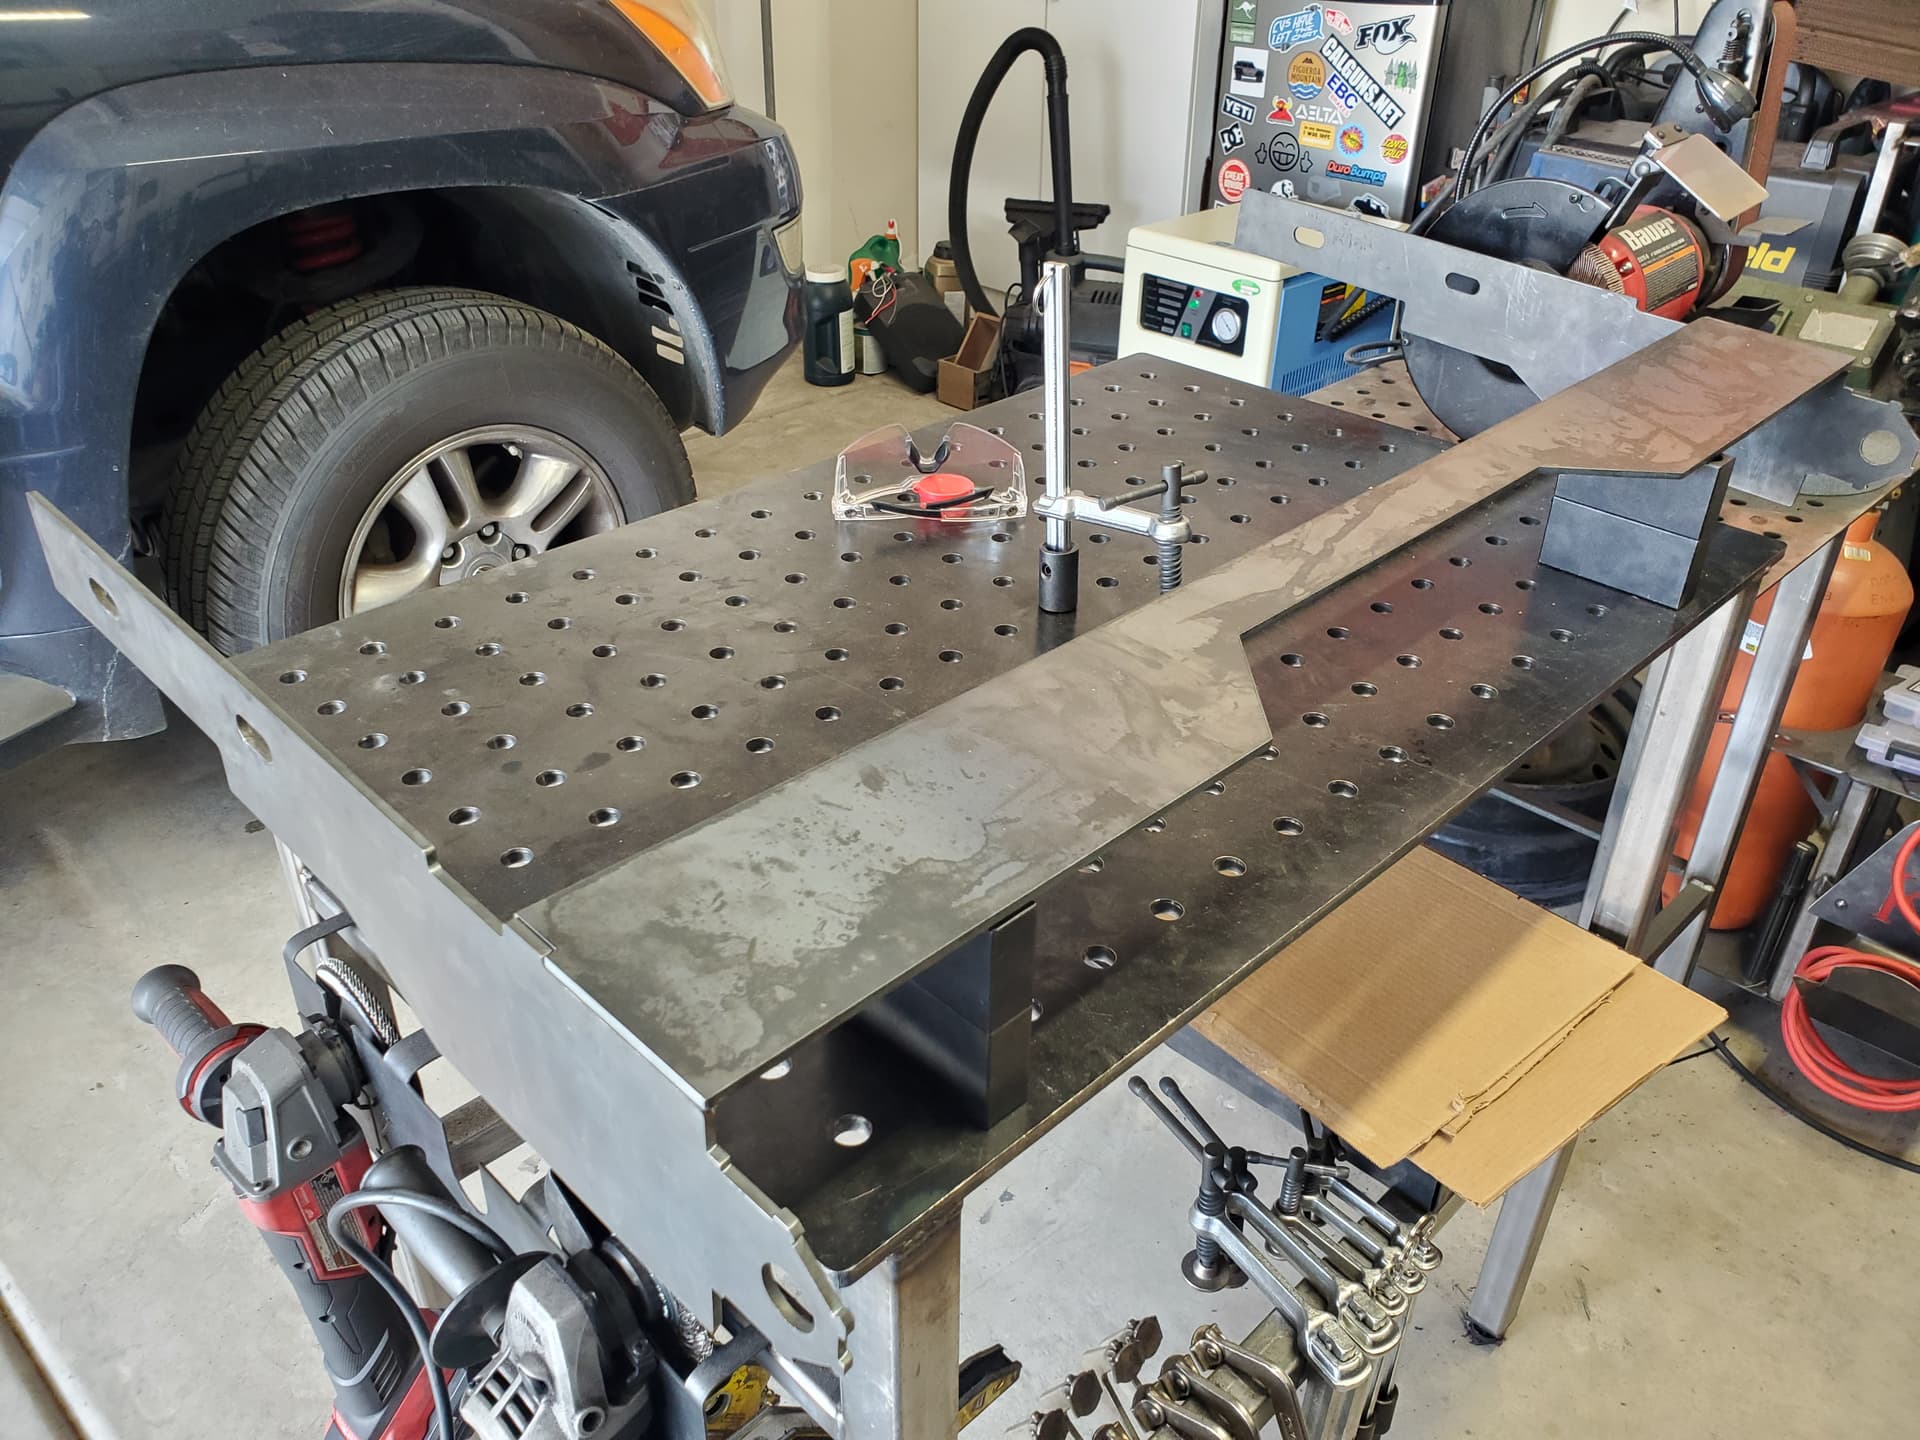
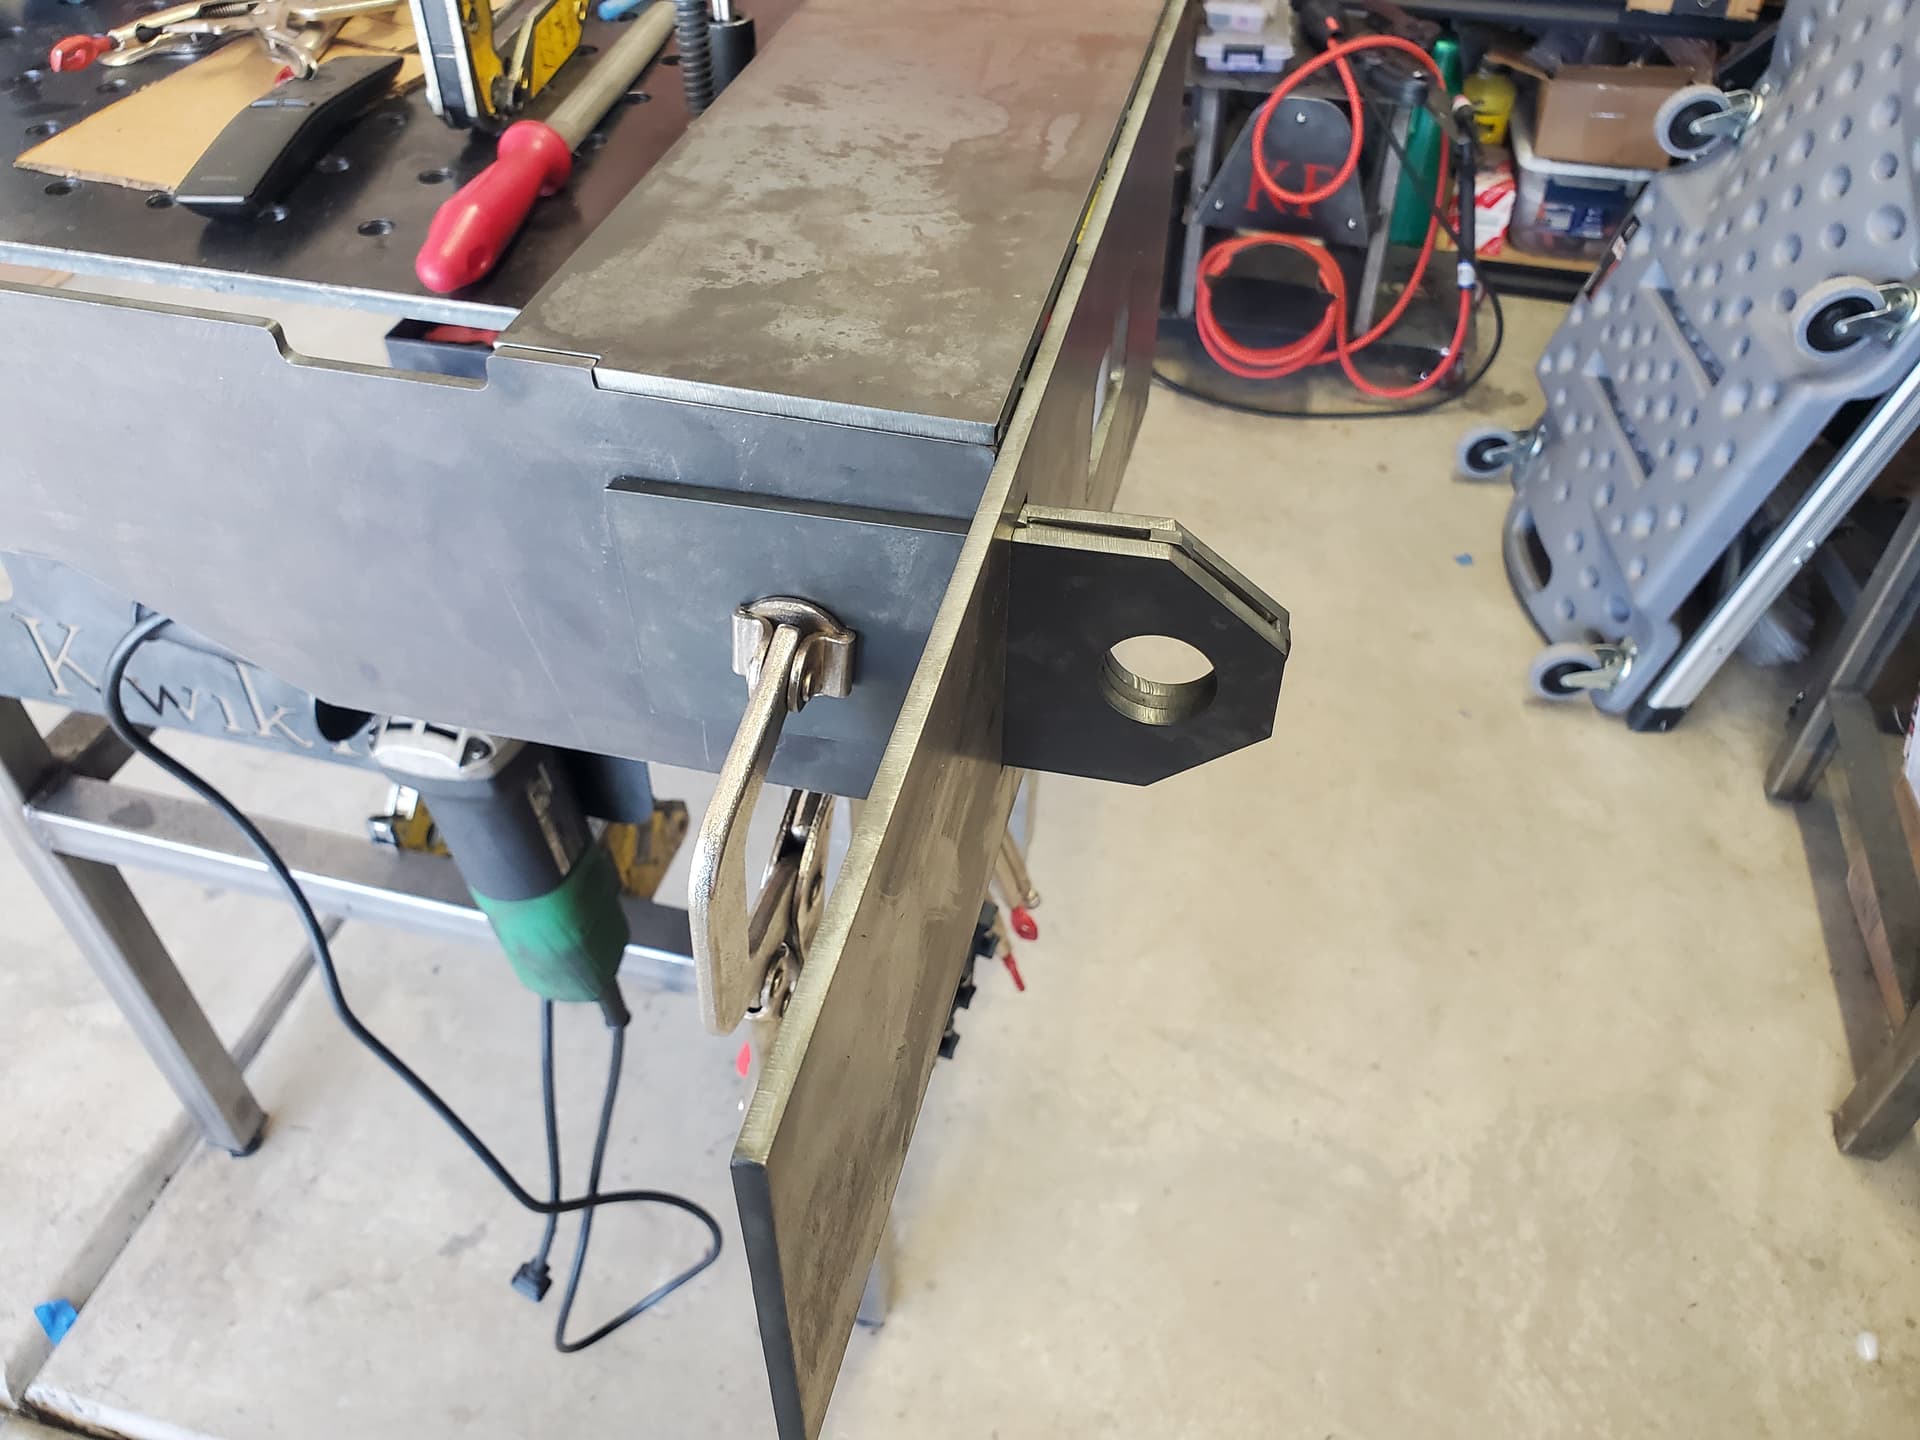


Had to leave to run some errands so I’ll get more done tomorrow
11 Likes
Damn, maybe someday my welding skills will be half as good as yours…one can dream.
Nice work as usual
6 Likes
Appreciate the kind words!
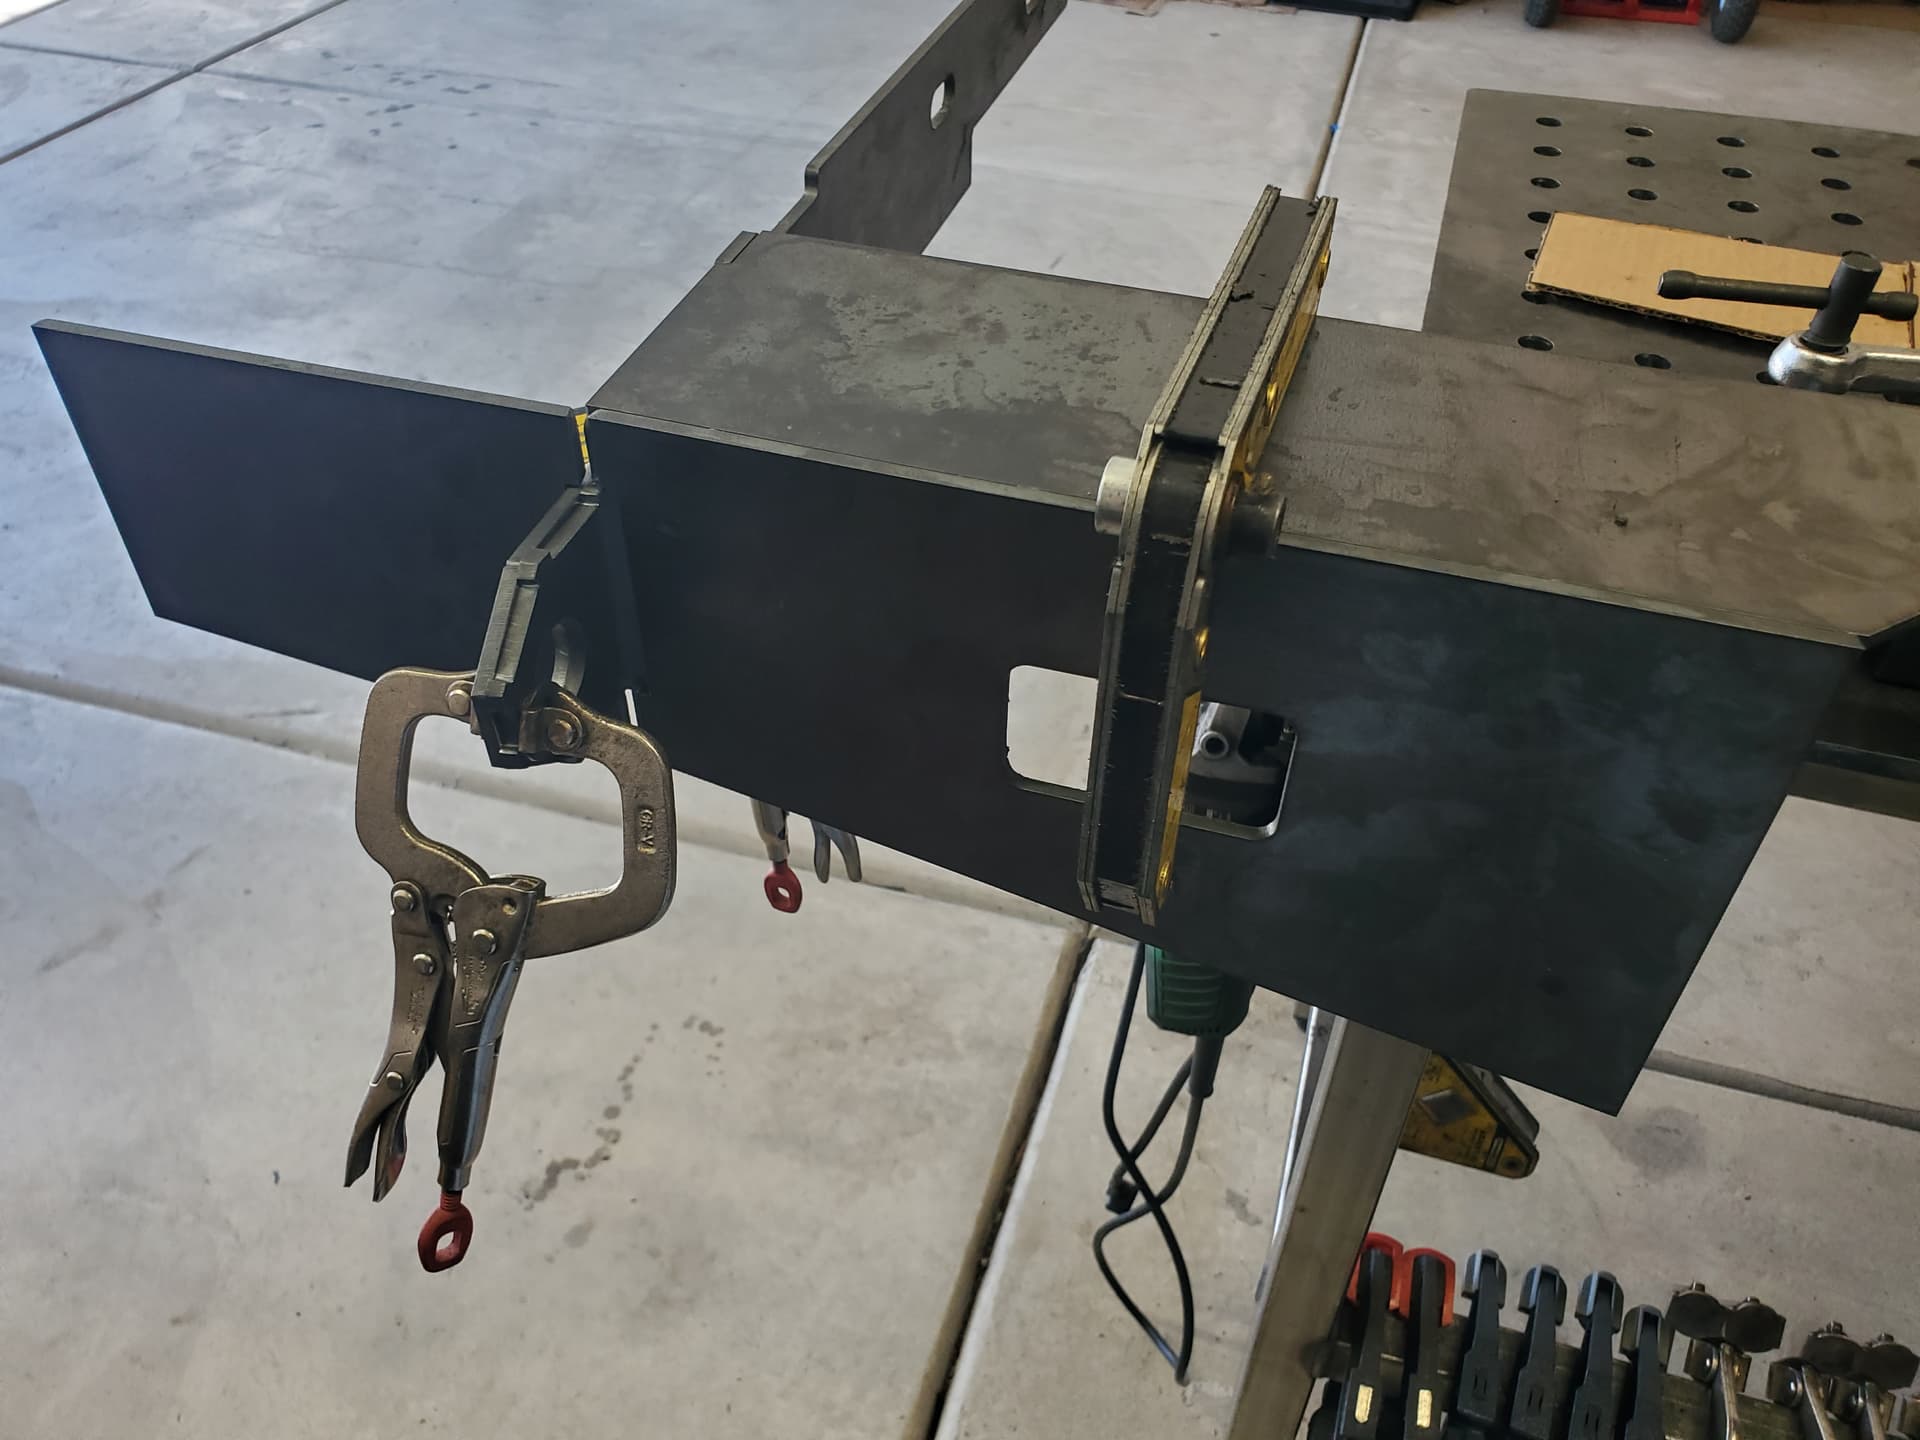
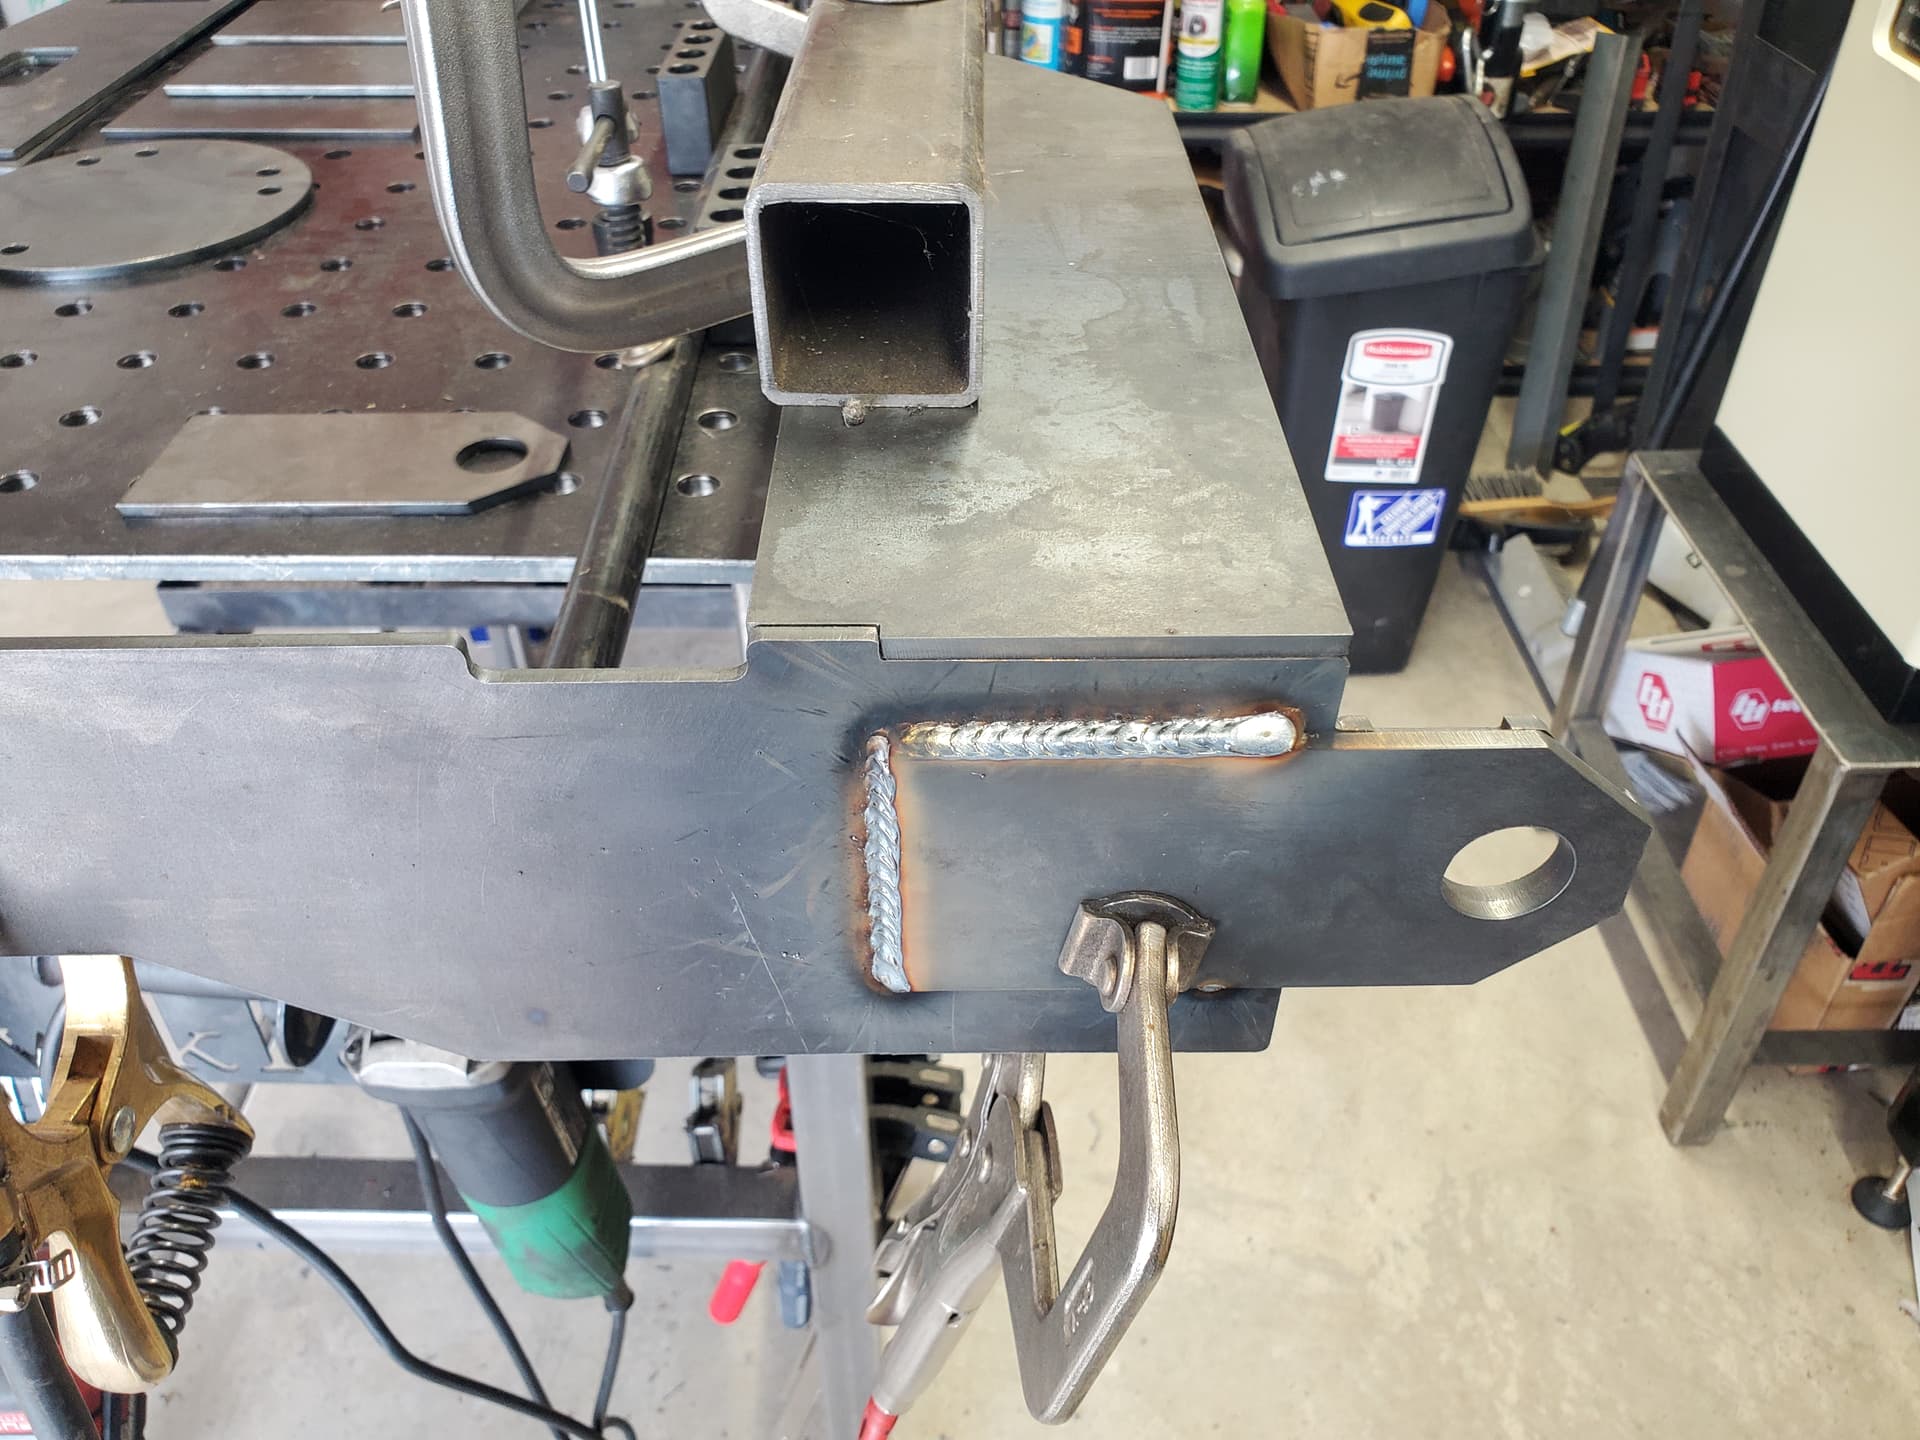
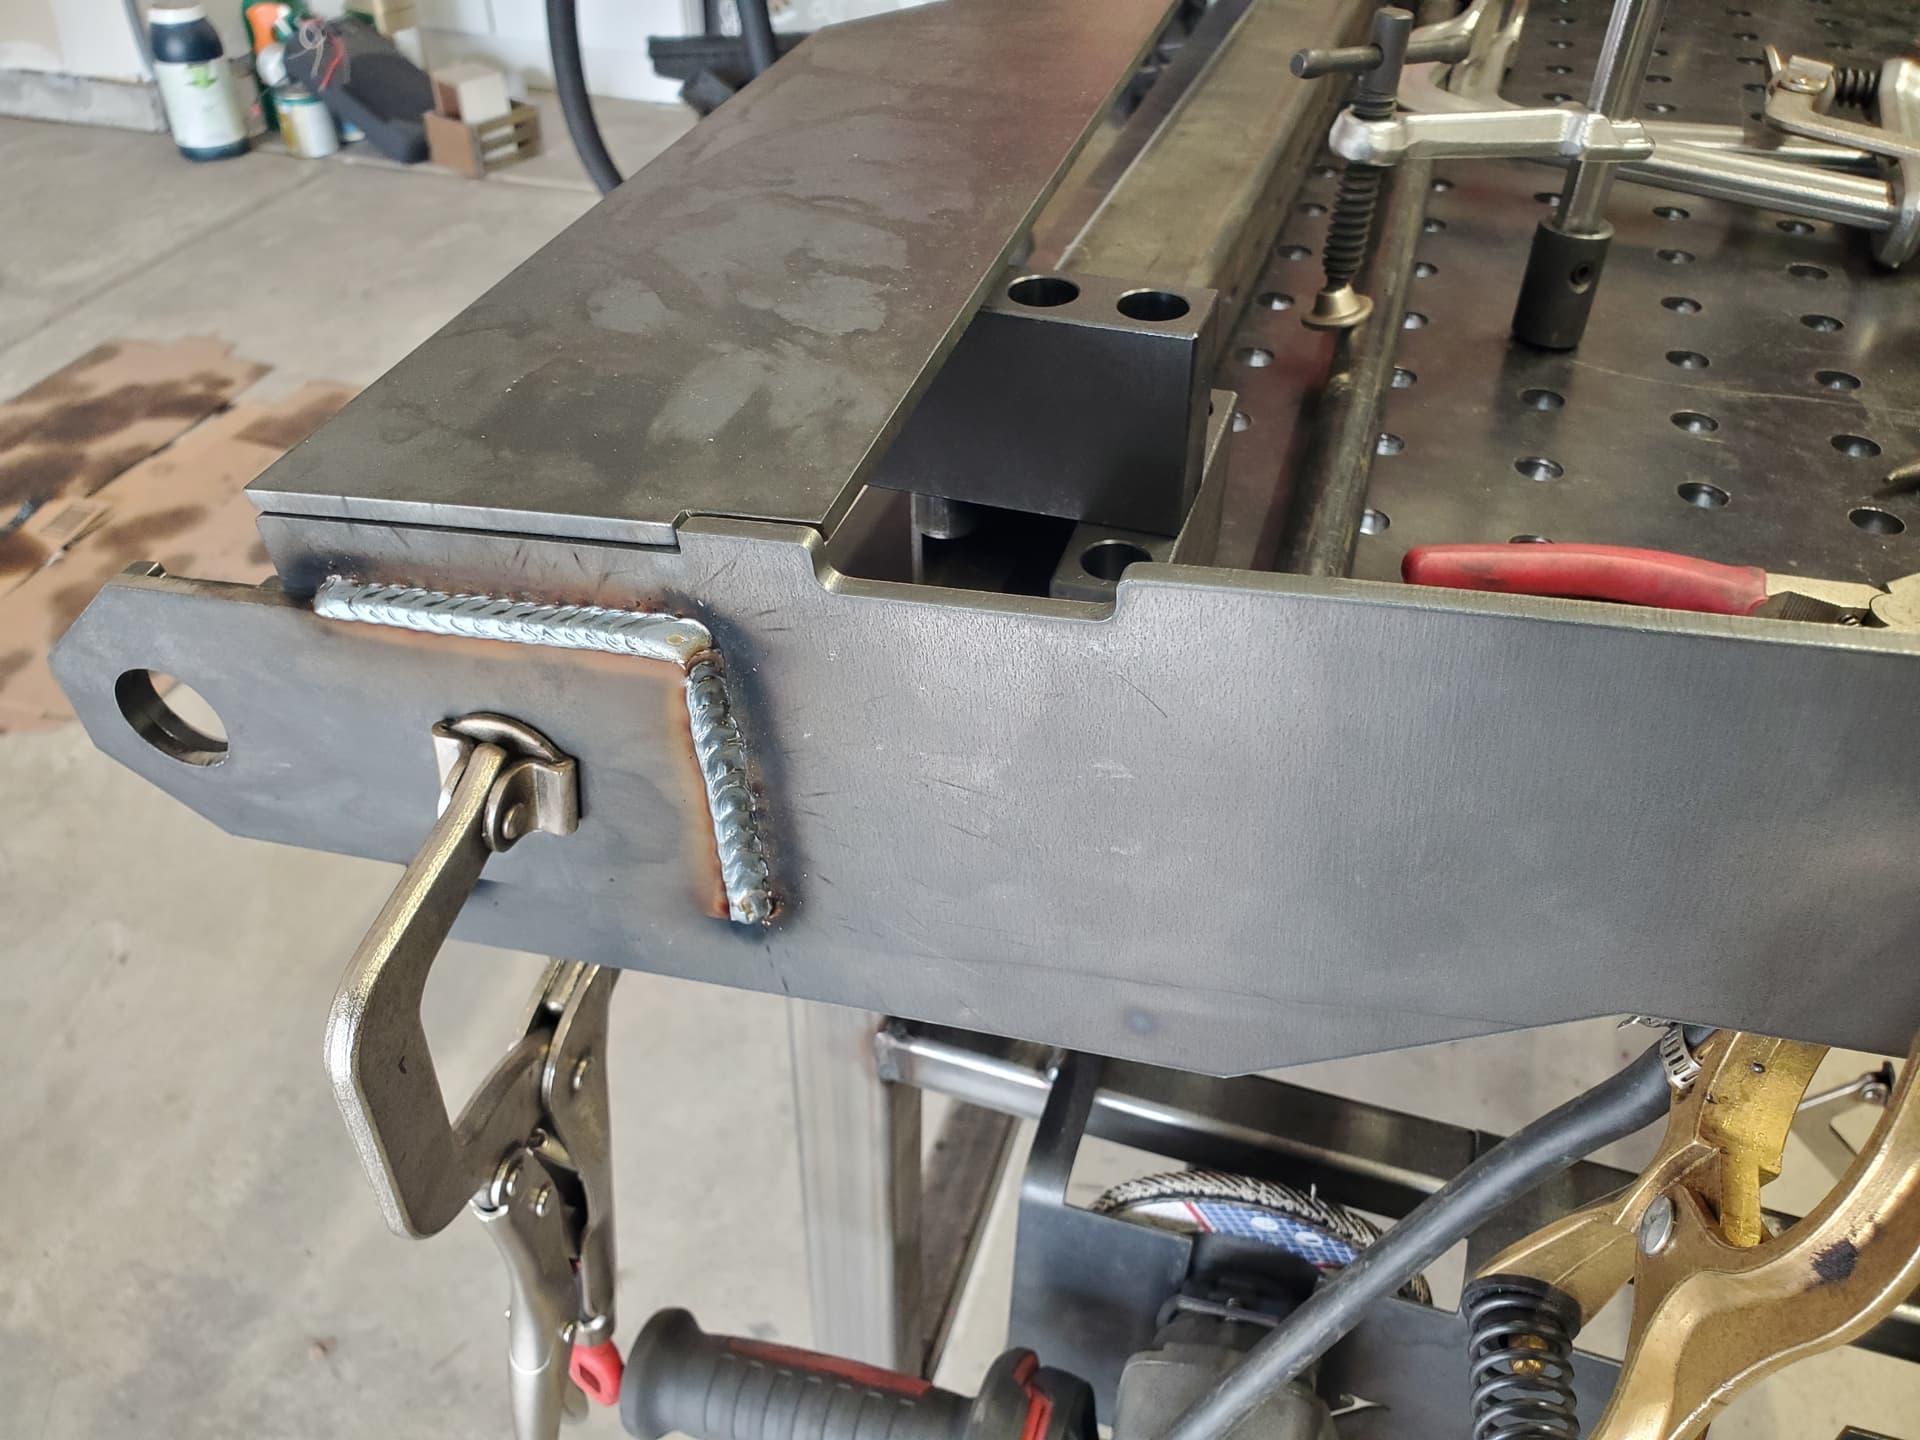
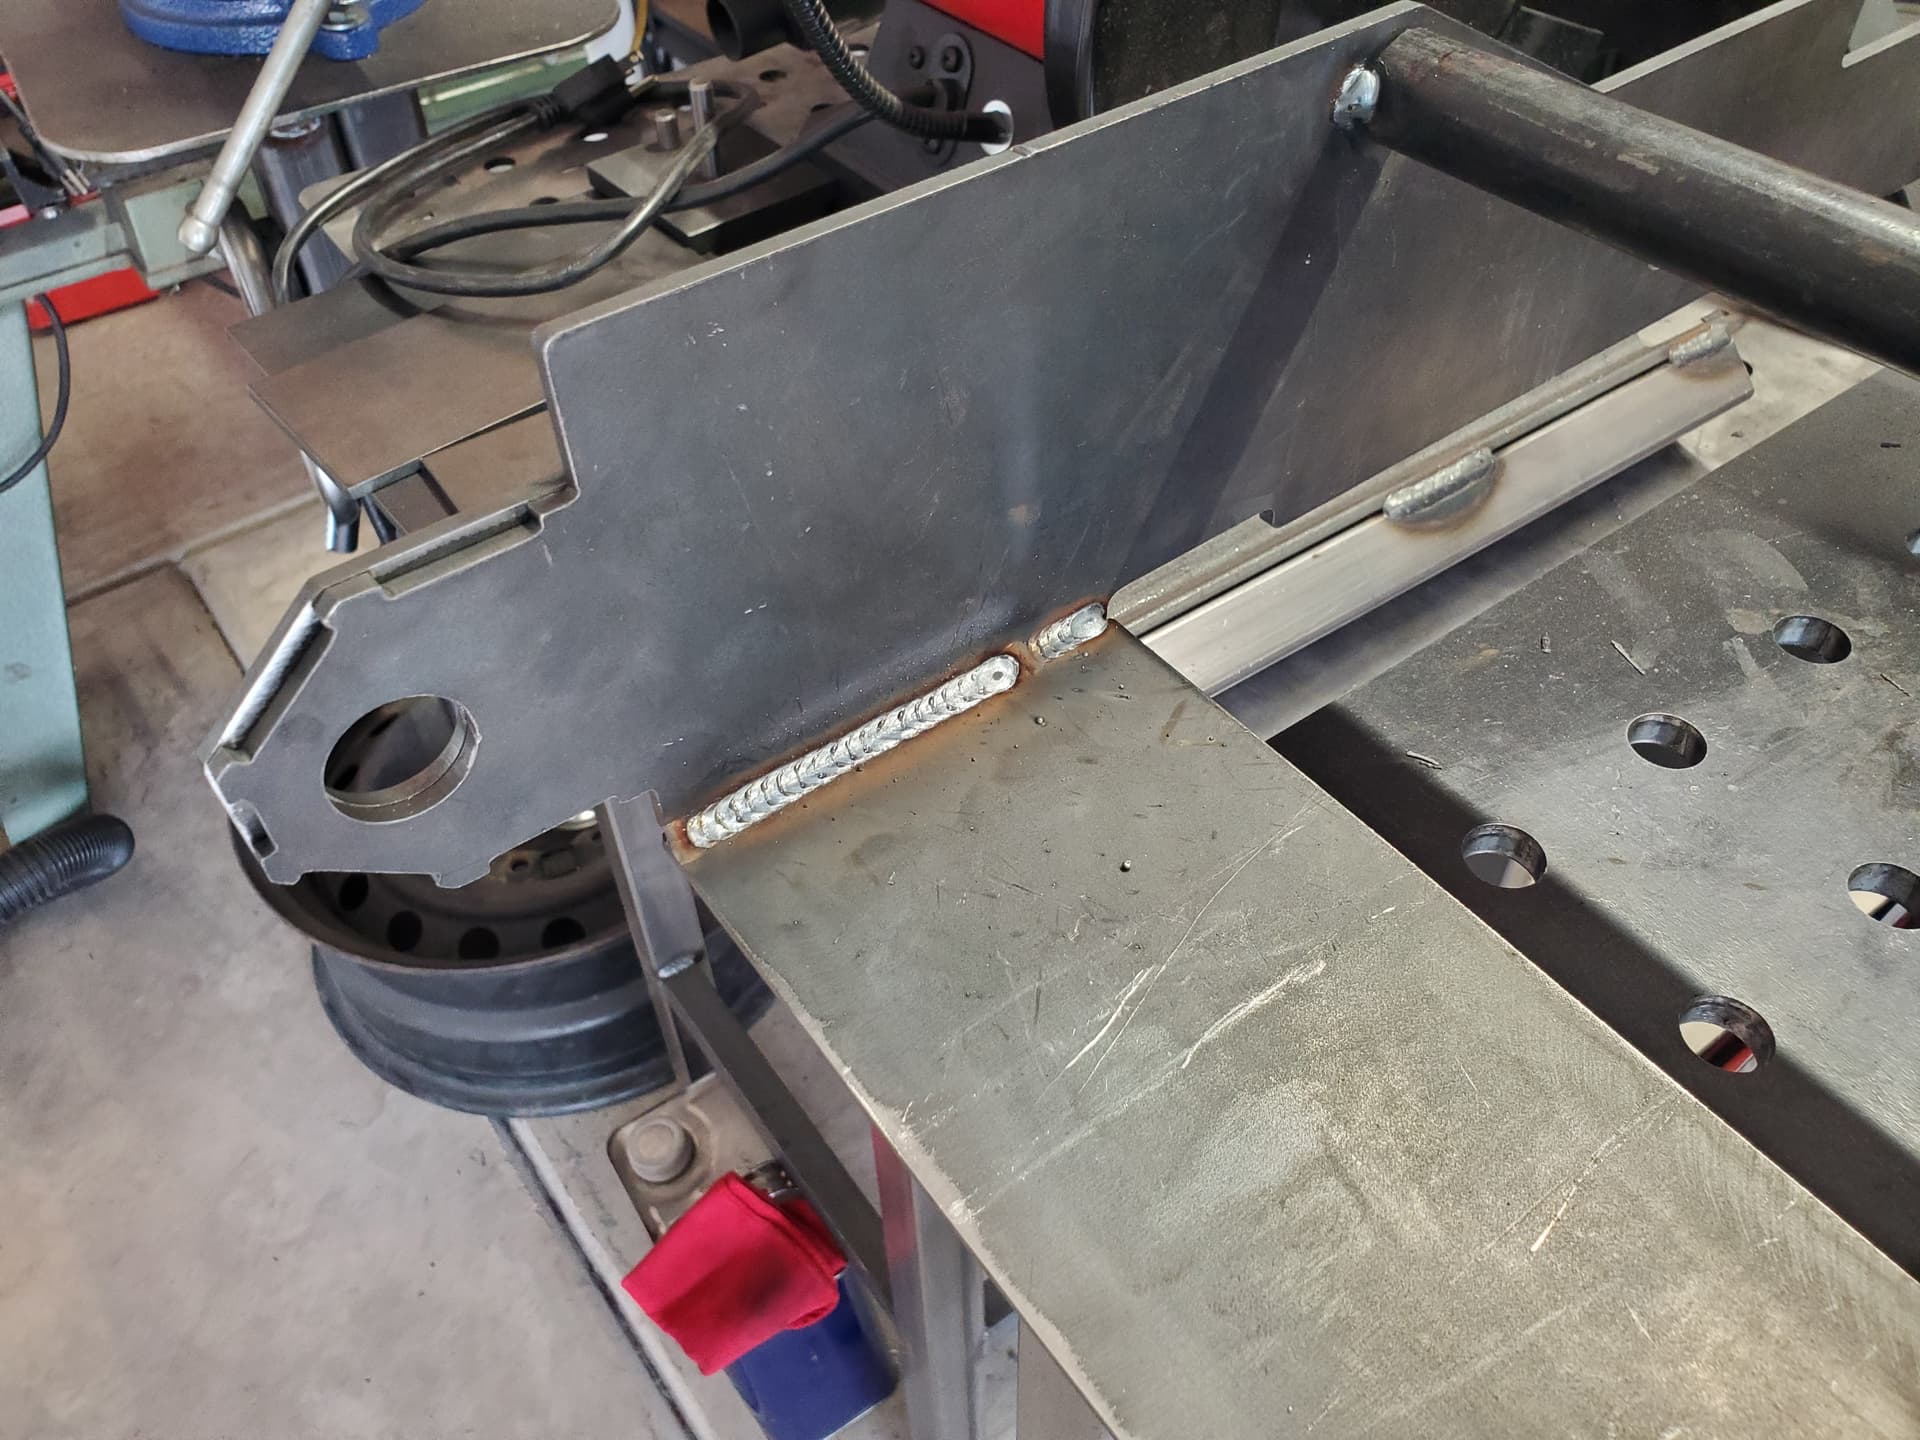
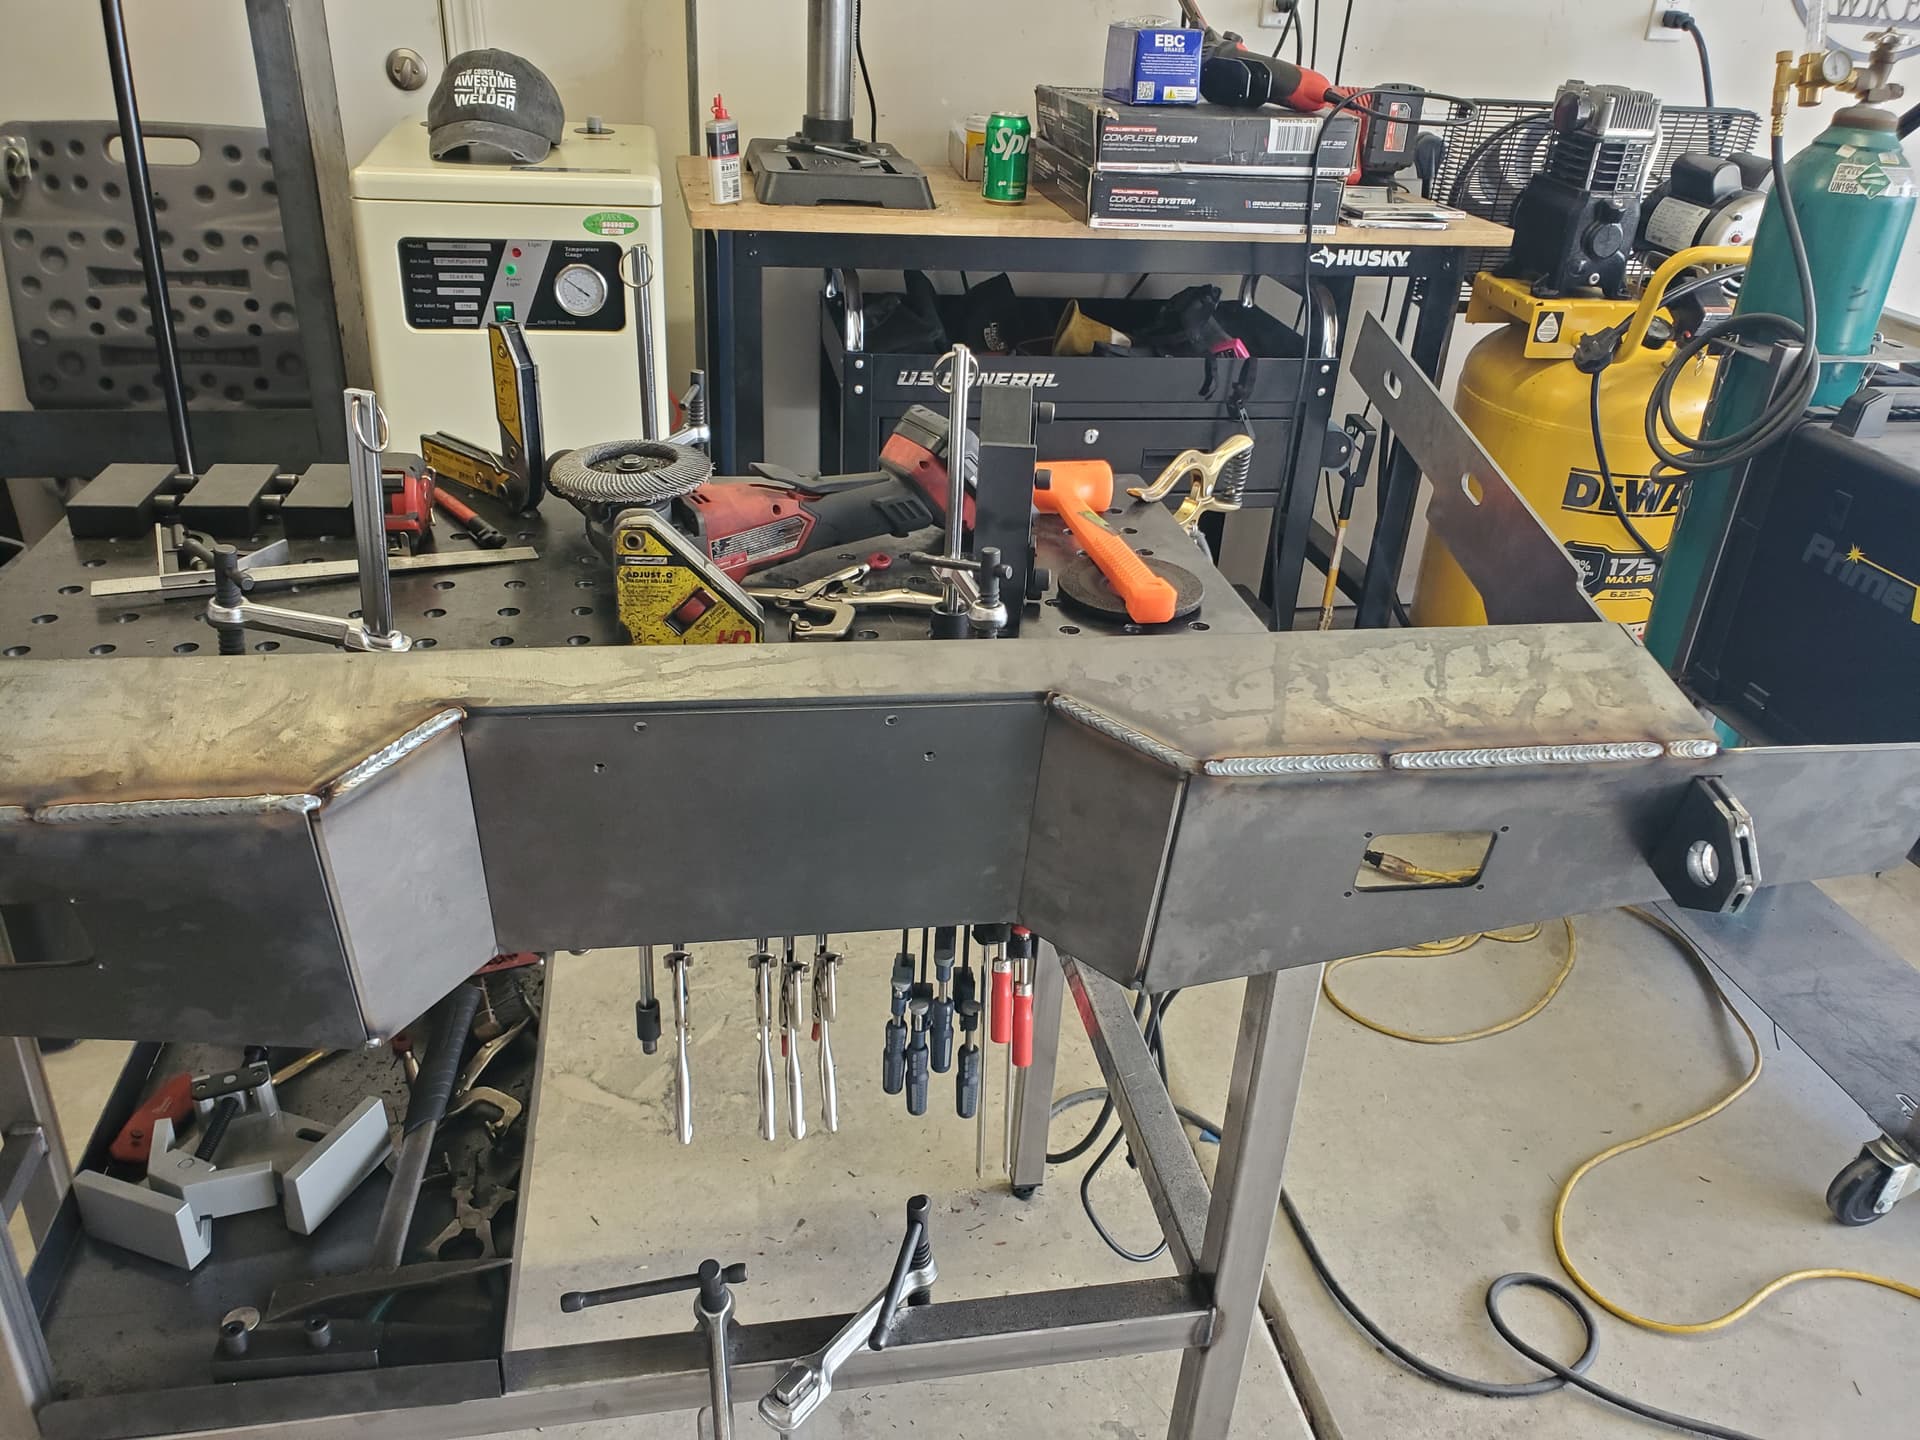
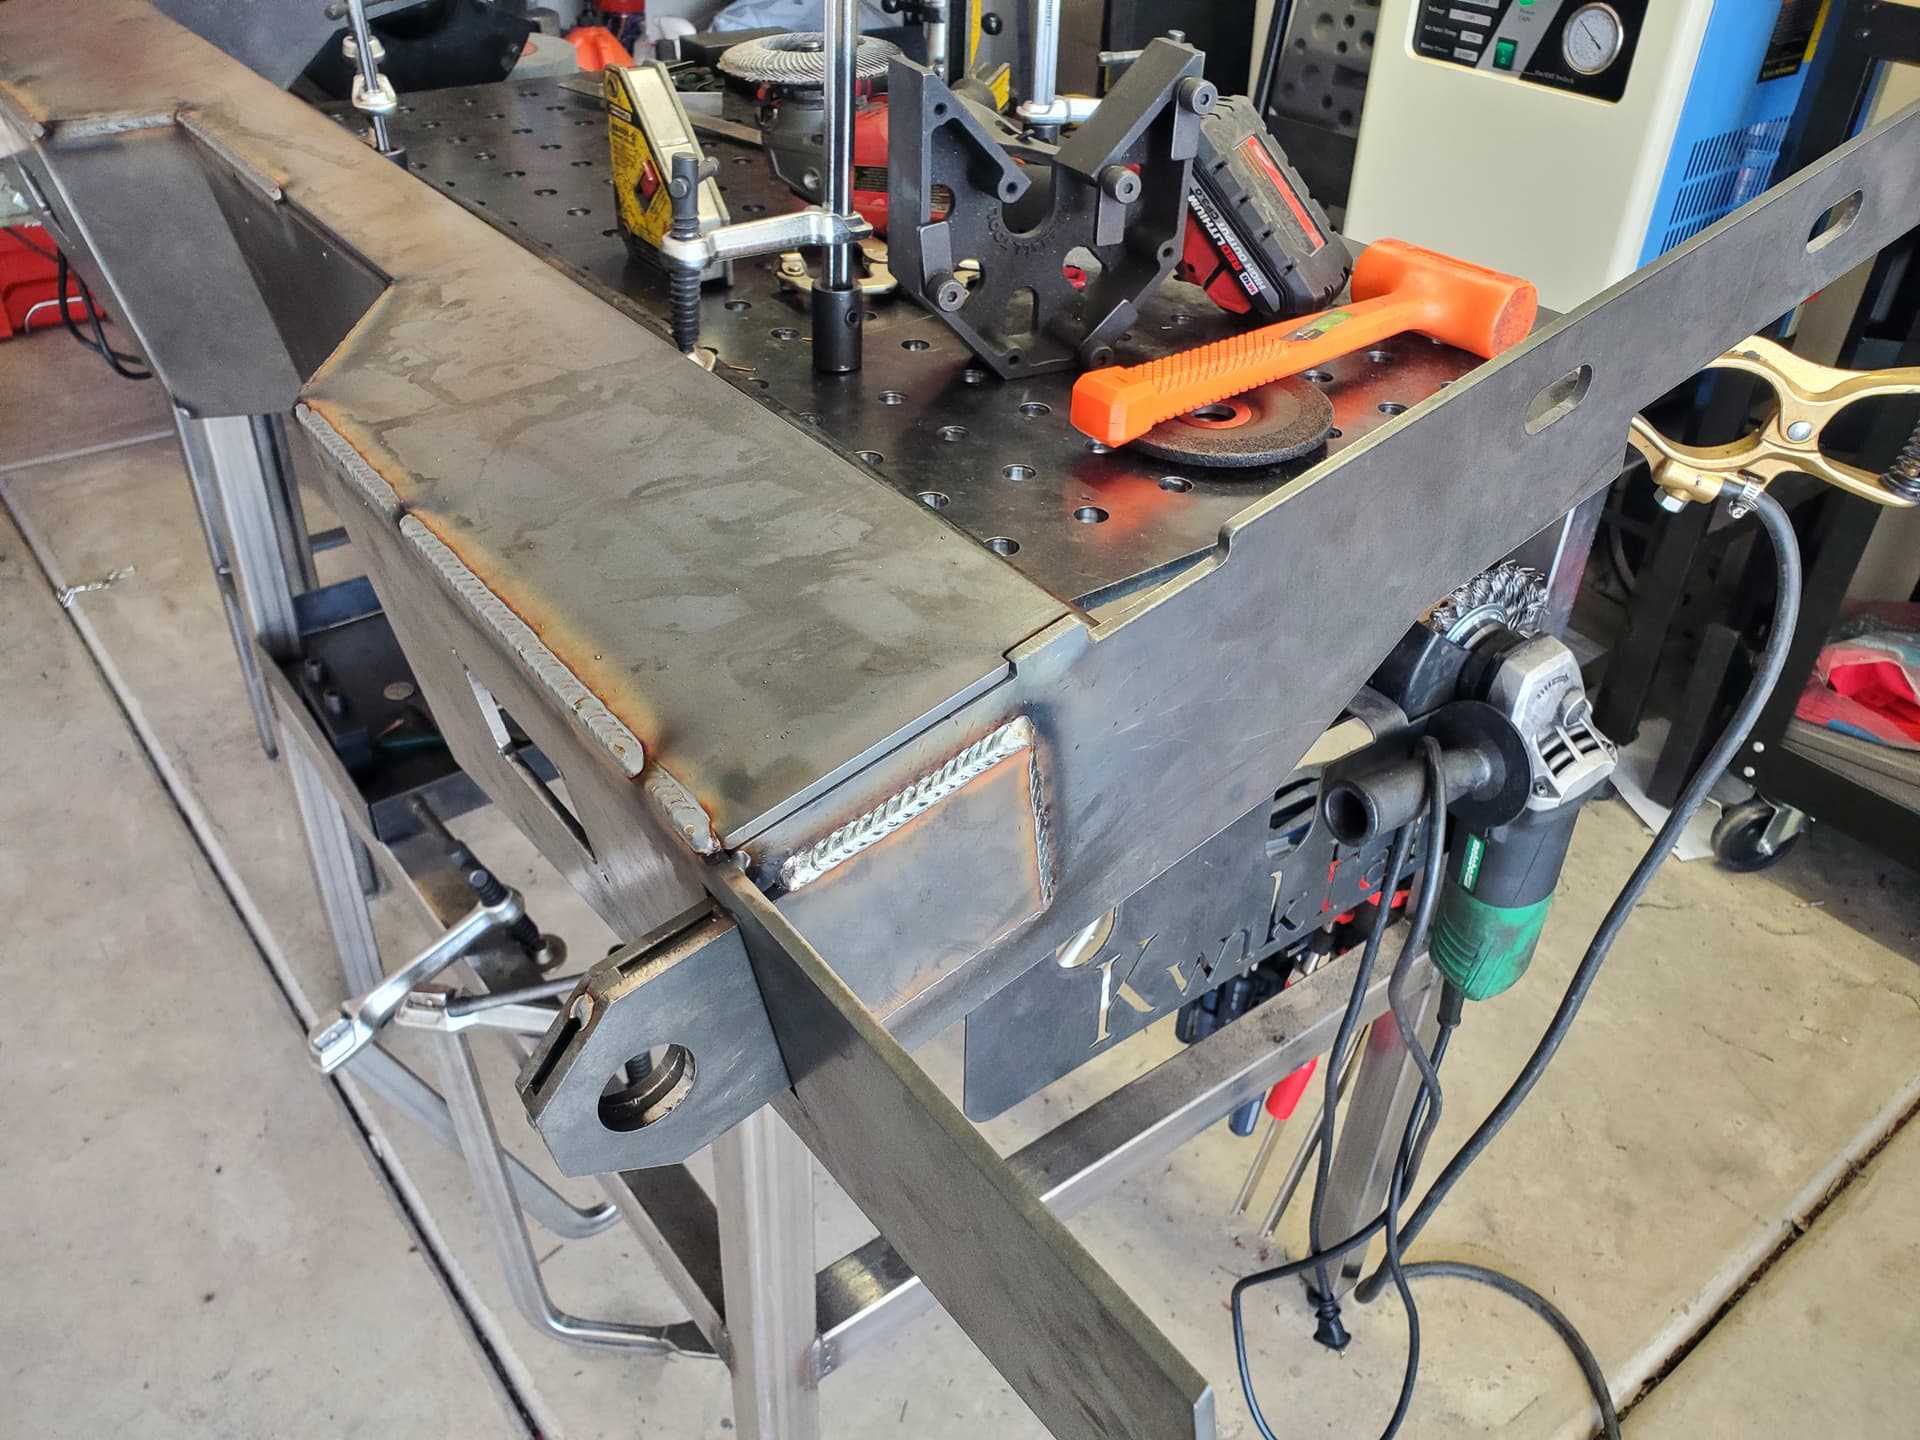
Just started burning it in; beveled specific mating surfaces and doing open corners for the outside for best fusion
8 Likes
Don’t let @Kwikfab kid you. He has a friend who on other websites goes by user name Bartmaster that does all his welding for him!
2 Likes
Nice work and some great looking welds.
1 Like