I use both gasket and so far so good. No leaks.
1 Like
I used the silicone provided and reading here about leaks , i used a strip of flex seal on bottom of whole seam and then cut a square for every hole so it lays at same height and it seals hole. No leaks and its been together at least a month. You guys have some great setups!!
1 Like
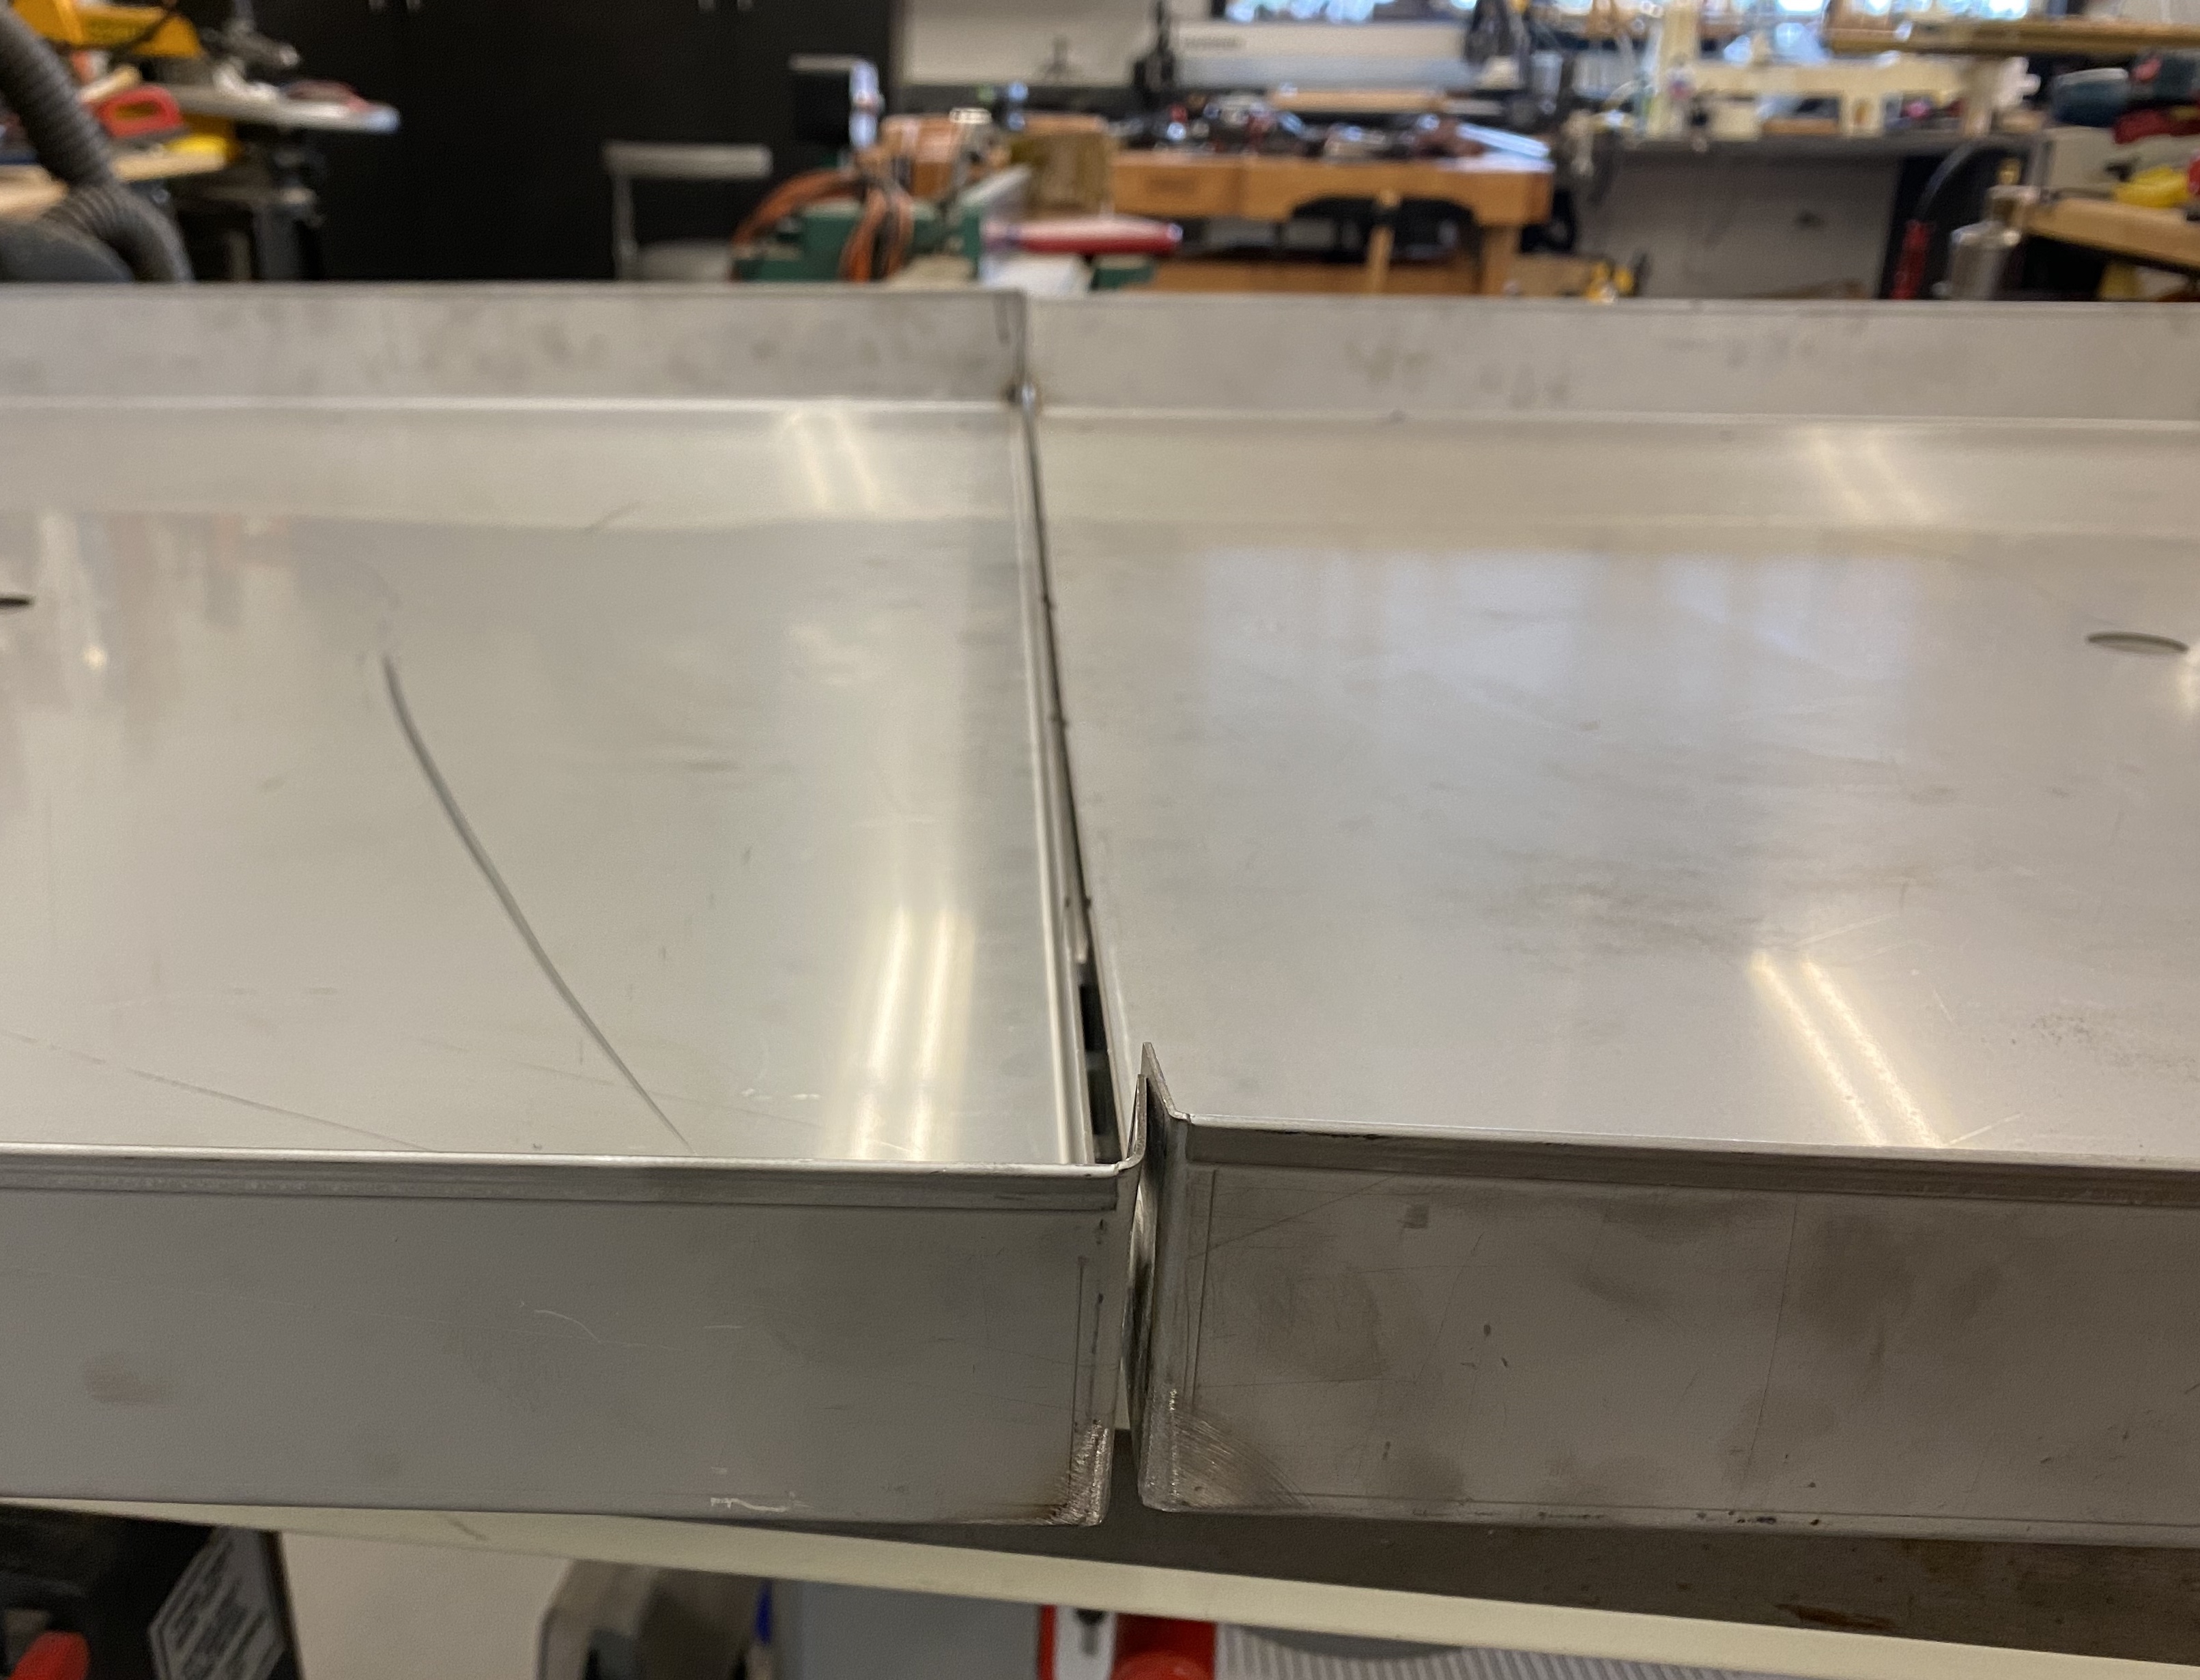
My table was leak free for at least a month until I needed to cut something quick and didn’t fill up the water table. I think the heat fried the silicon. I’ll be taking it apart and attempting to tig the half’s together. If that fails terribly I’ve got a quote for a single piece 14ga stainless water table 6” deep. I plan to make taller sanction plates and slats if I get the deeper table
1 Like
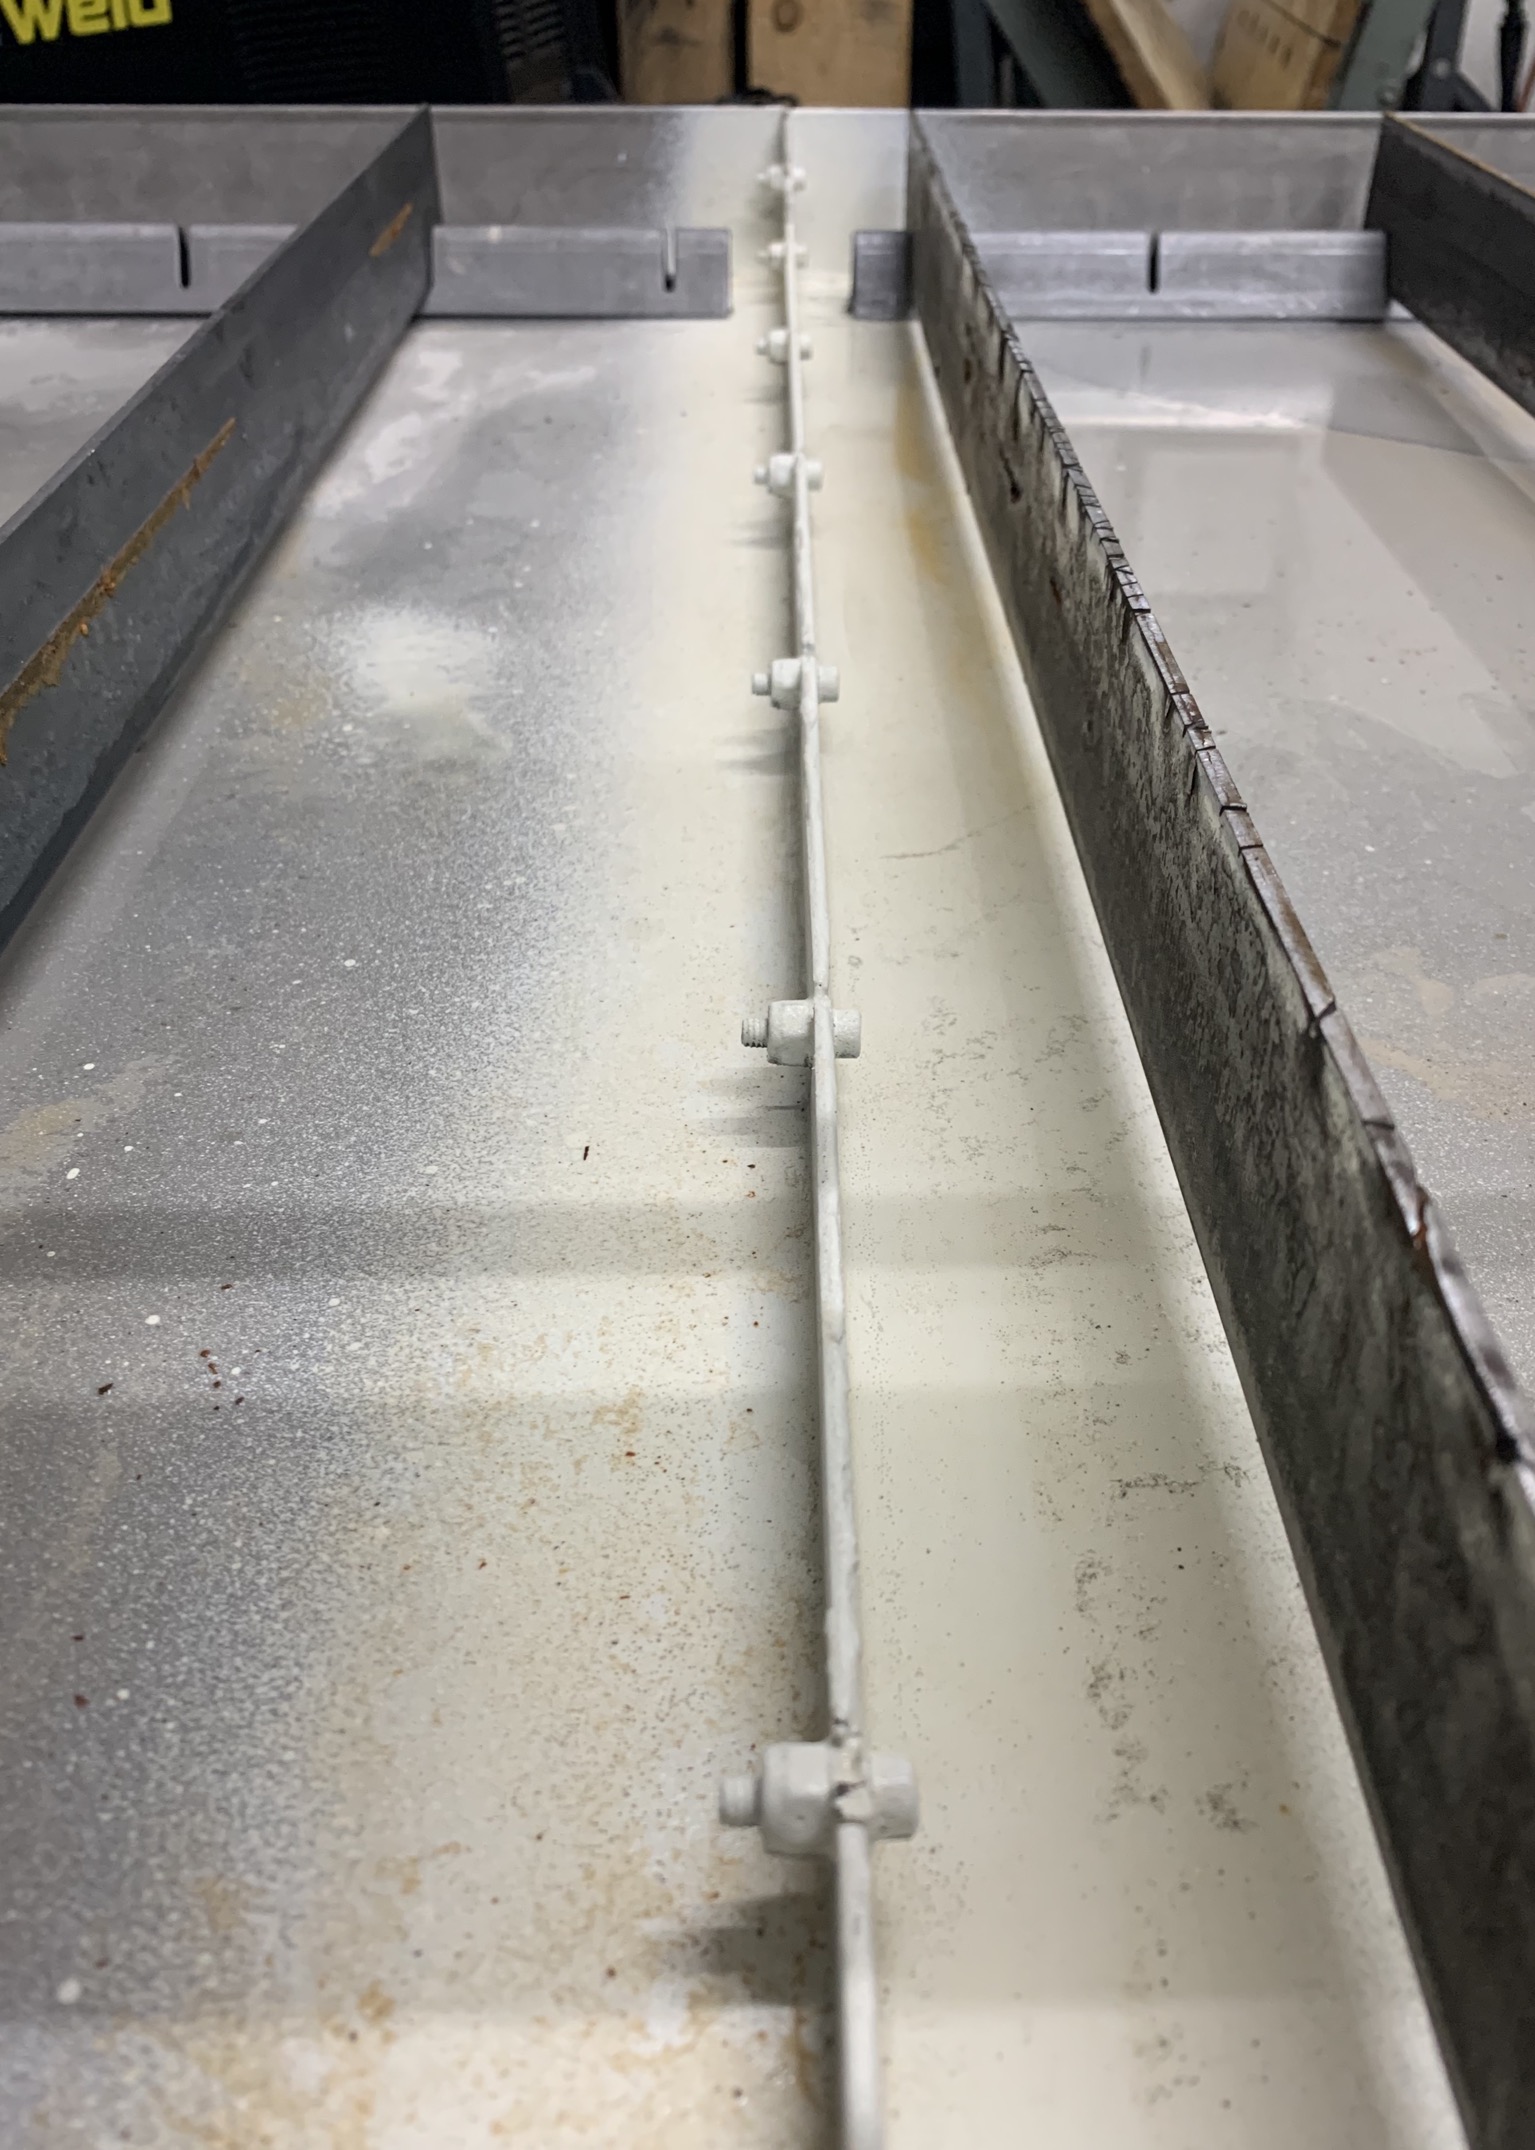
I did mt table with a tig…do it very slowly of course…but I was able to keep the table fastened to the frame…kept the bolts holding it together…then added some water to the trays…just below where I wanted the weld line to be.
I did a bit from each side…
turned out pretty good with no warp.
I will post some pictures soon.
1 Like
There really should be a warning not to run the table dry. It isn’t a “if you are really unlucky it might warp”, it’s a “guarantee table will warp if you run it dry”. I cut 1 little piece (bottle opener) dry and it warped the table enough to the point you could see it. Pulled apart between two of the bolts, and lifted the bottom.
For those not wanting to make a career out of the water table, the urethane adhesive I used seems to be working well. I’ve even convinced myself that it’s stronger than a tig weld along the top, as it is bonding the full width of the lip between the two halves. That opinion of course has nothing to do with my inability to tig it ![]()
How will that work? The current table sits on top of the frame, if you make the new one 6" deep, the z travel will be lost. Otherwise, you’ll need to step it down to get your depth, and still have the problem of cutting dry near the edges, where the table overlaps the frame. on edit, never mind I see you said taller sanction plates. Now I understand.
I don’t see why the deeper tray would cause a problem, even without taller sanction plates ? The edge of the tray is outside the cutting area, seems like it would just allow you to run the water level at the top of the slats and keep the floor drier. Now if you run taller slats… than yes the taller sanction plates would be required.
The braces for the X-axis are in the way. You would have to narrow the table slightly to miss the bearing blocks, then you could raise it about 1.5" before it would hit the brace. Current pan is about 2-1/4", so you could get close to 3-3/4". @bsjilek mentioned going to 6" deep pan.
FWIW Here’s the damage running it dry, the hot spot on the left was caused by a manual torch fire when Firecontrol lost connection and the torch wouldn’t turn off, the one on the right was from cutting a bottle opener dry, that warped the table.
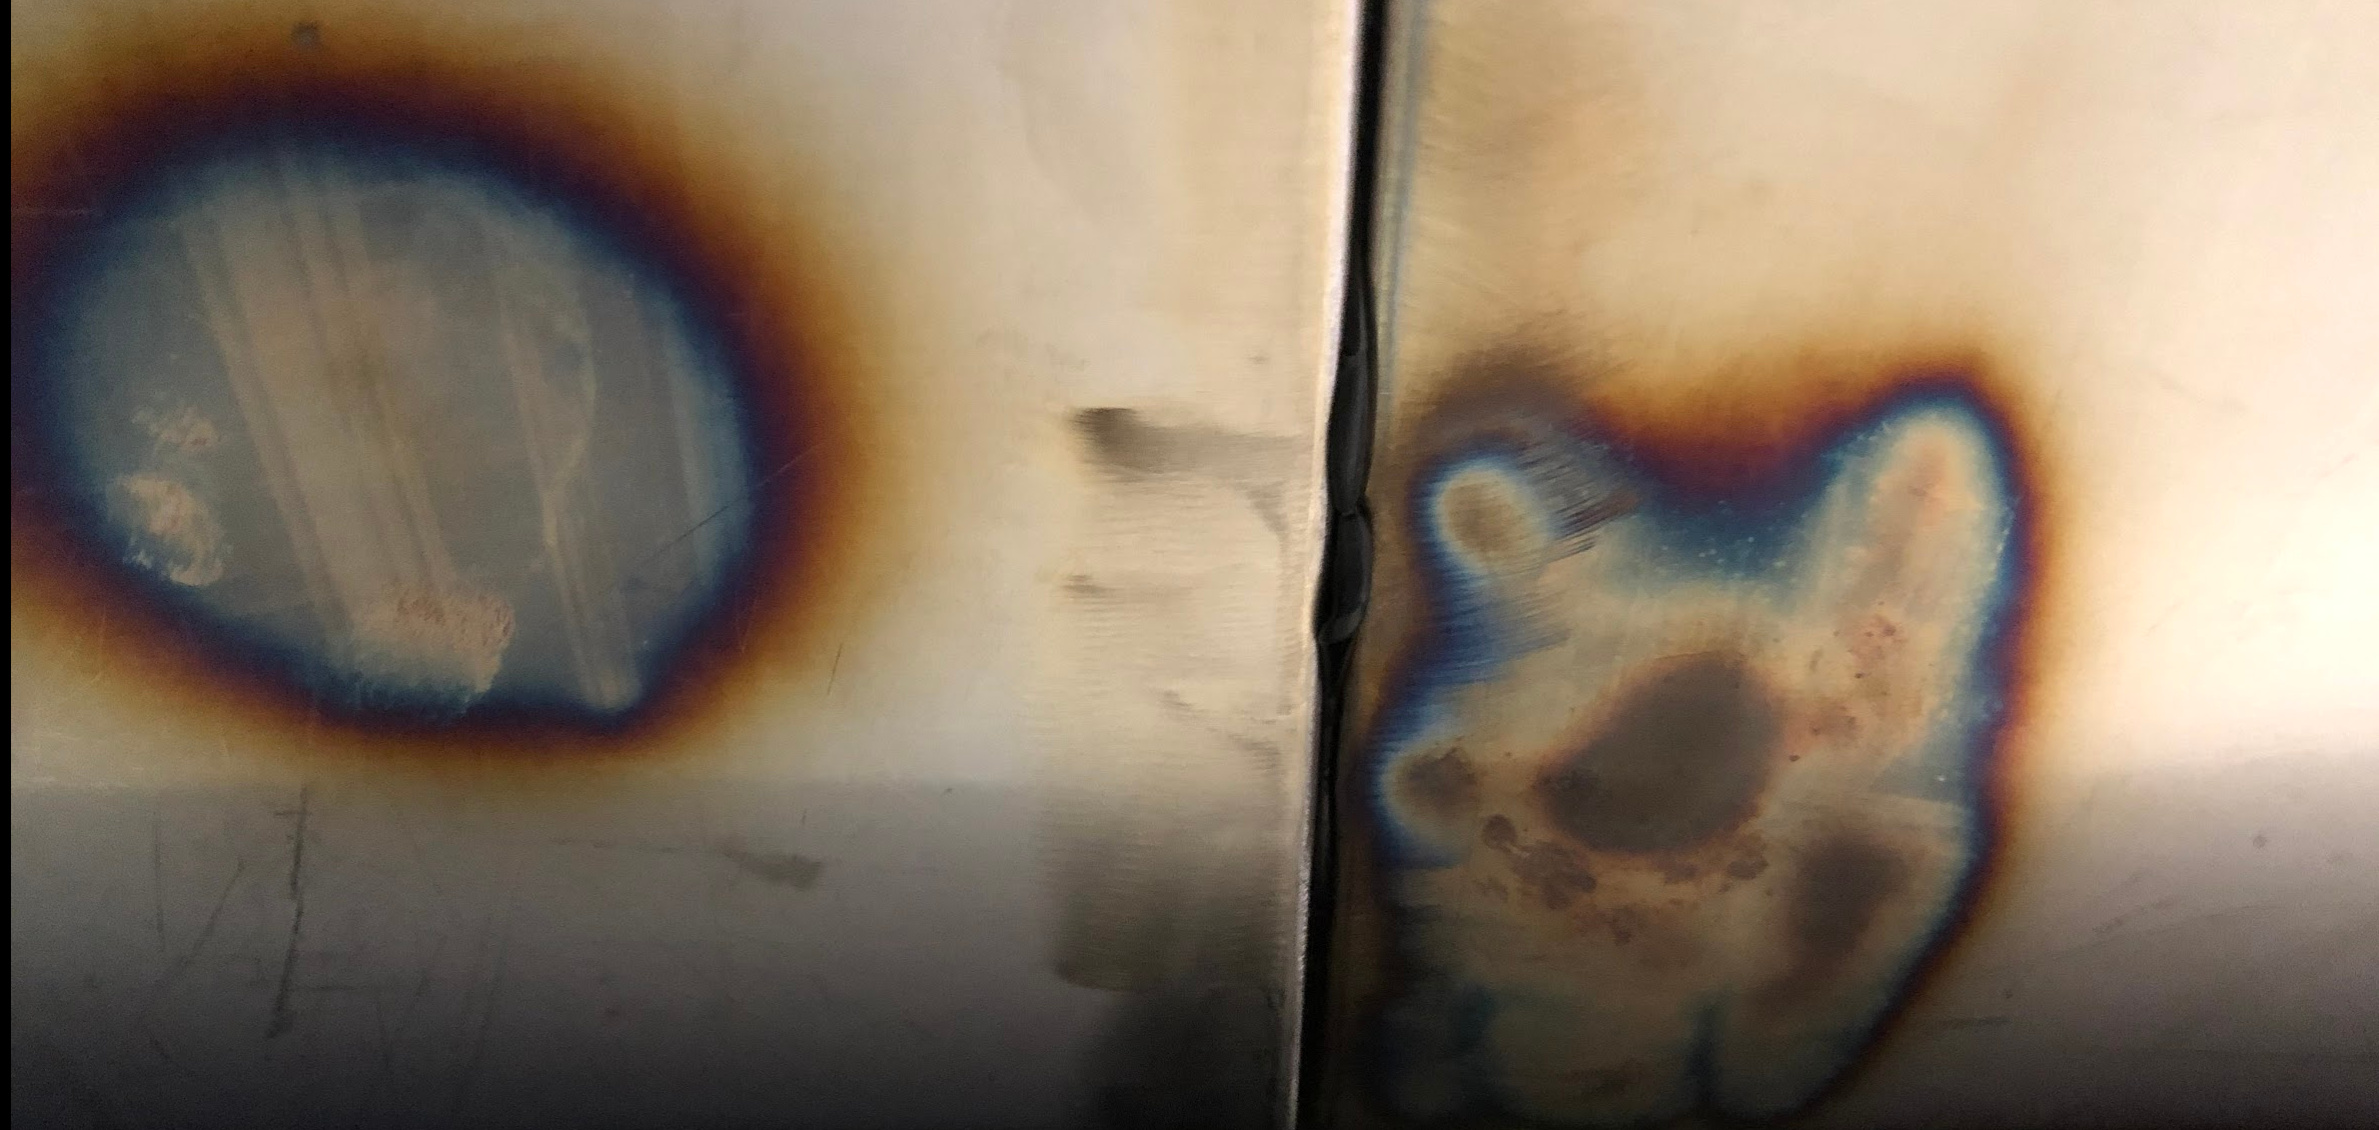
Anyway not to beat a dead horse but don’t run your table dry.
3 Likes
Yes the tray would be slightly narrowed to clear the bearing supports, was going to make it 51”x36”x6” deep, gives 1/2” clearance on the sides. The cutting width is only 48.25” so it will still cut inside the tray and have room for the width of the torch
Just looked at my drawing, the top rails would move up 3”, the stock tray is 2.25” and there is currently 1.5” clearance. So the gussets would be 3/4” above the top of a 6” tray
3 Likes
Aw, yes my mistake. I was only picturing the torch when you said z axis and didnt think about other clearances.
If you don’t mind sharing, what was your quote for a new single piece water table? My table just started leaking at the seam after two leak-free months.
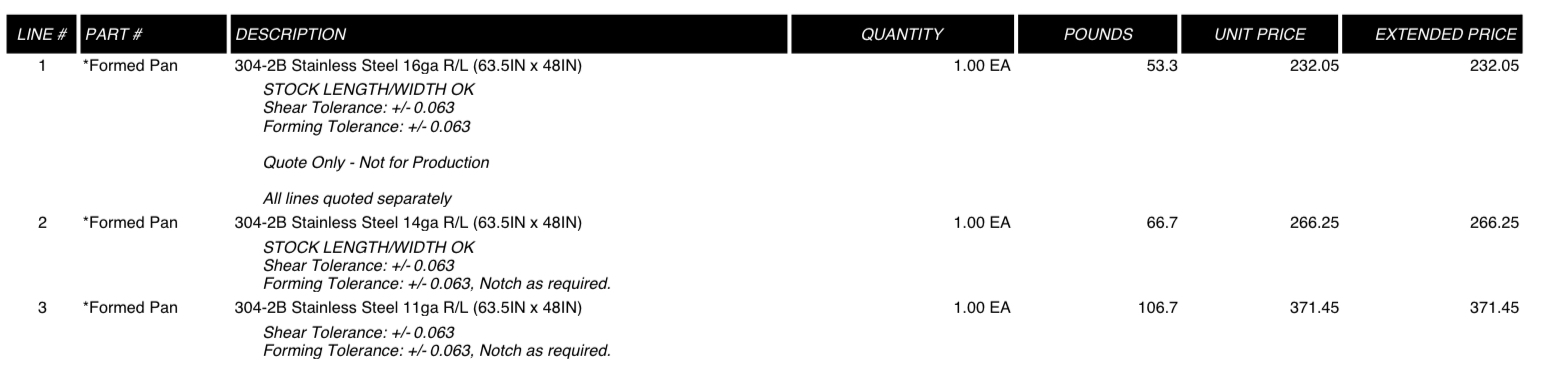
I asked for a quote on 3 different thickness, the size shown is how big the piece would be before bending. I would still have to weld the corners And do my own drain once o got it from them.
Thanks for sharing that info. I’m just trying to decide which way to go—1. Disassemble, clean silicone off and try again with another type of sealant, 2. Disassemble, clean and find someone to tig the seam as I don’t own a tig welder, or 3. Have a one-piece pan custom made locally.
I’m leaning more toward having a new water pan made. Has anyone done that yet on the Pro? Pics?
My pans arrived a little dinged up which seemed like no big deal, but one of the halves had a misformed flange and a I wonder if that was a contributing factor.
Also, can anyone confirm that high ph solutions break down silicone? I’ve been using the Pico Quench Guard and don’t always drain after use.
I haven’t got box 1 yet but I did install a silicone rubber gasket between the halves. I have not tested it yet since I can’t really finish setting it up but I think the silicone gasket at least for me is the answer. I had to bang the end tabs in to make them parallel. Time will tell.
1 Like
Do you remember what settings you used to cut the 22 gauge? Also did you get any warping?
Don’t remember off the top of my head. Hypertherm fine cut consumables, and most likely used exactly what the book called since I don’t have much experience with stainless I haven’t experimented. I still had a little water left in the tray after draining it so that might have helped keep it cool but I didn’t notice any warping.
1 Like
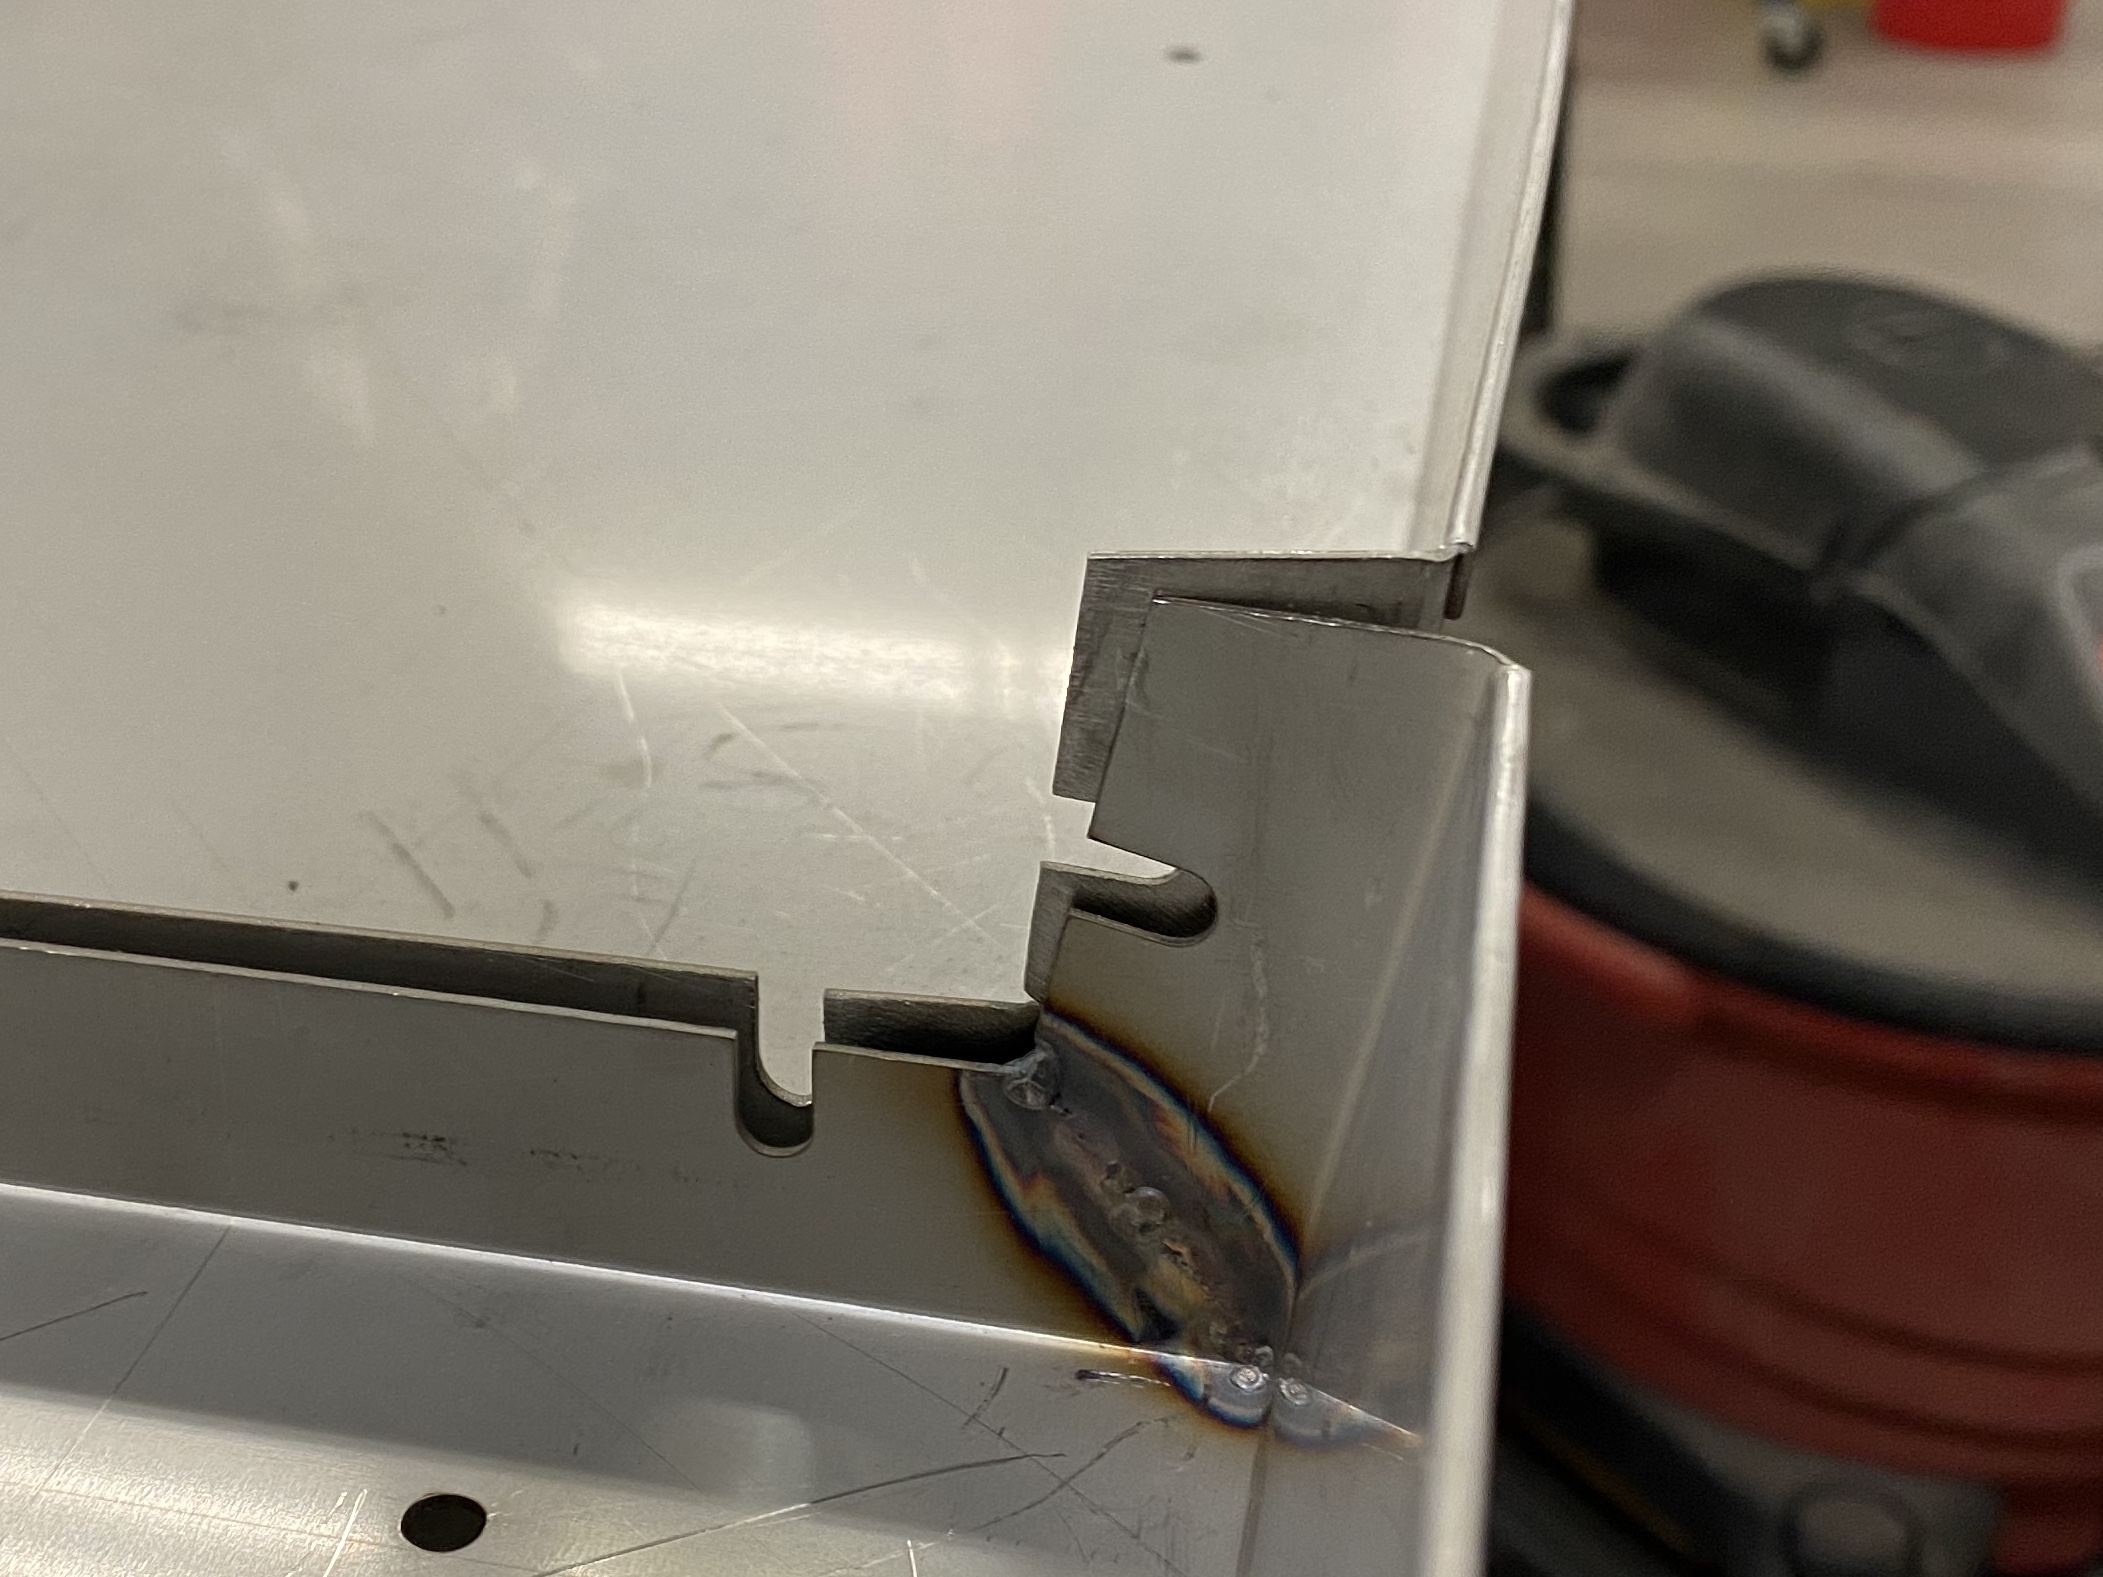
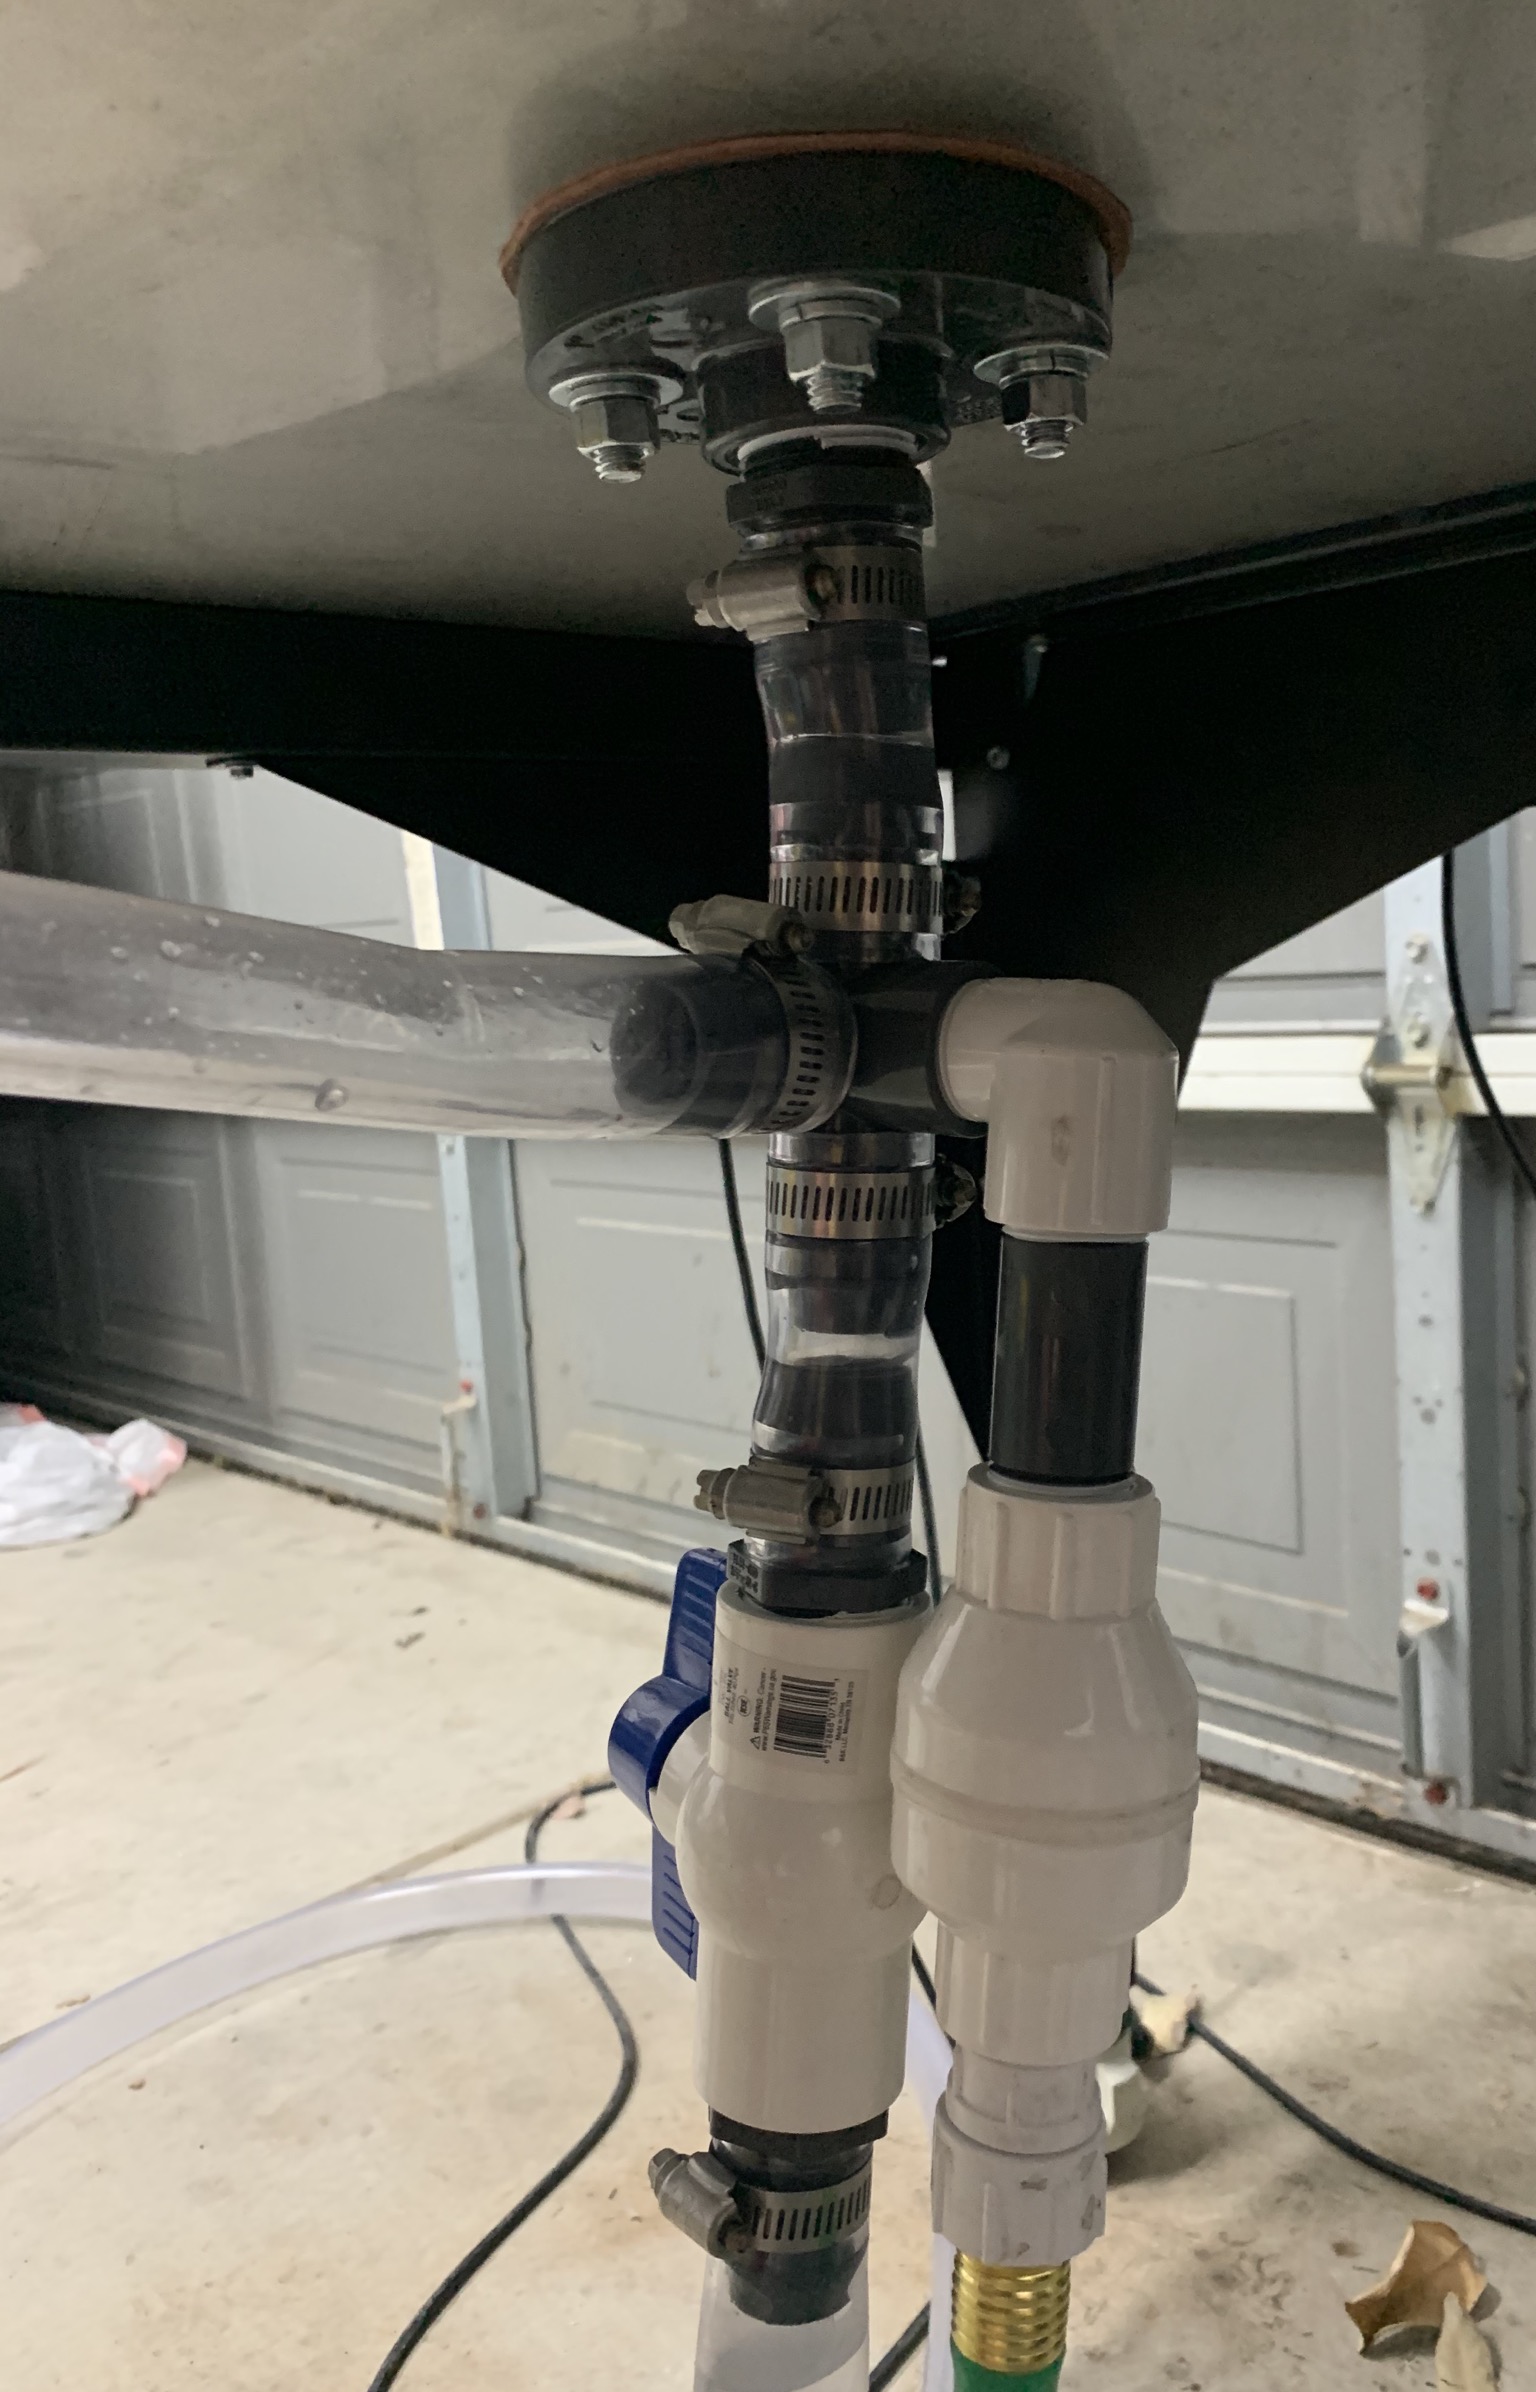
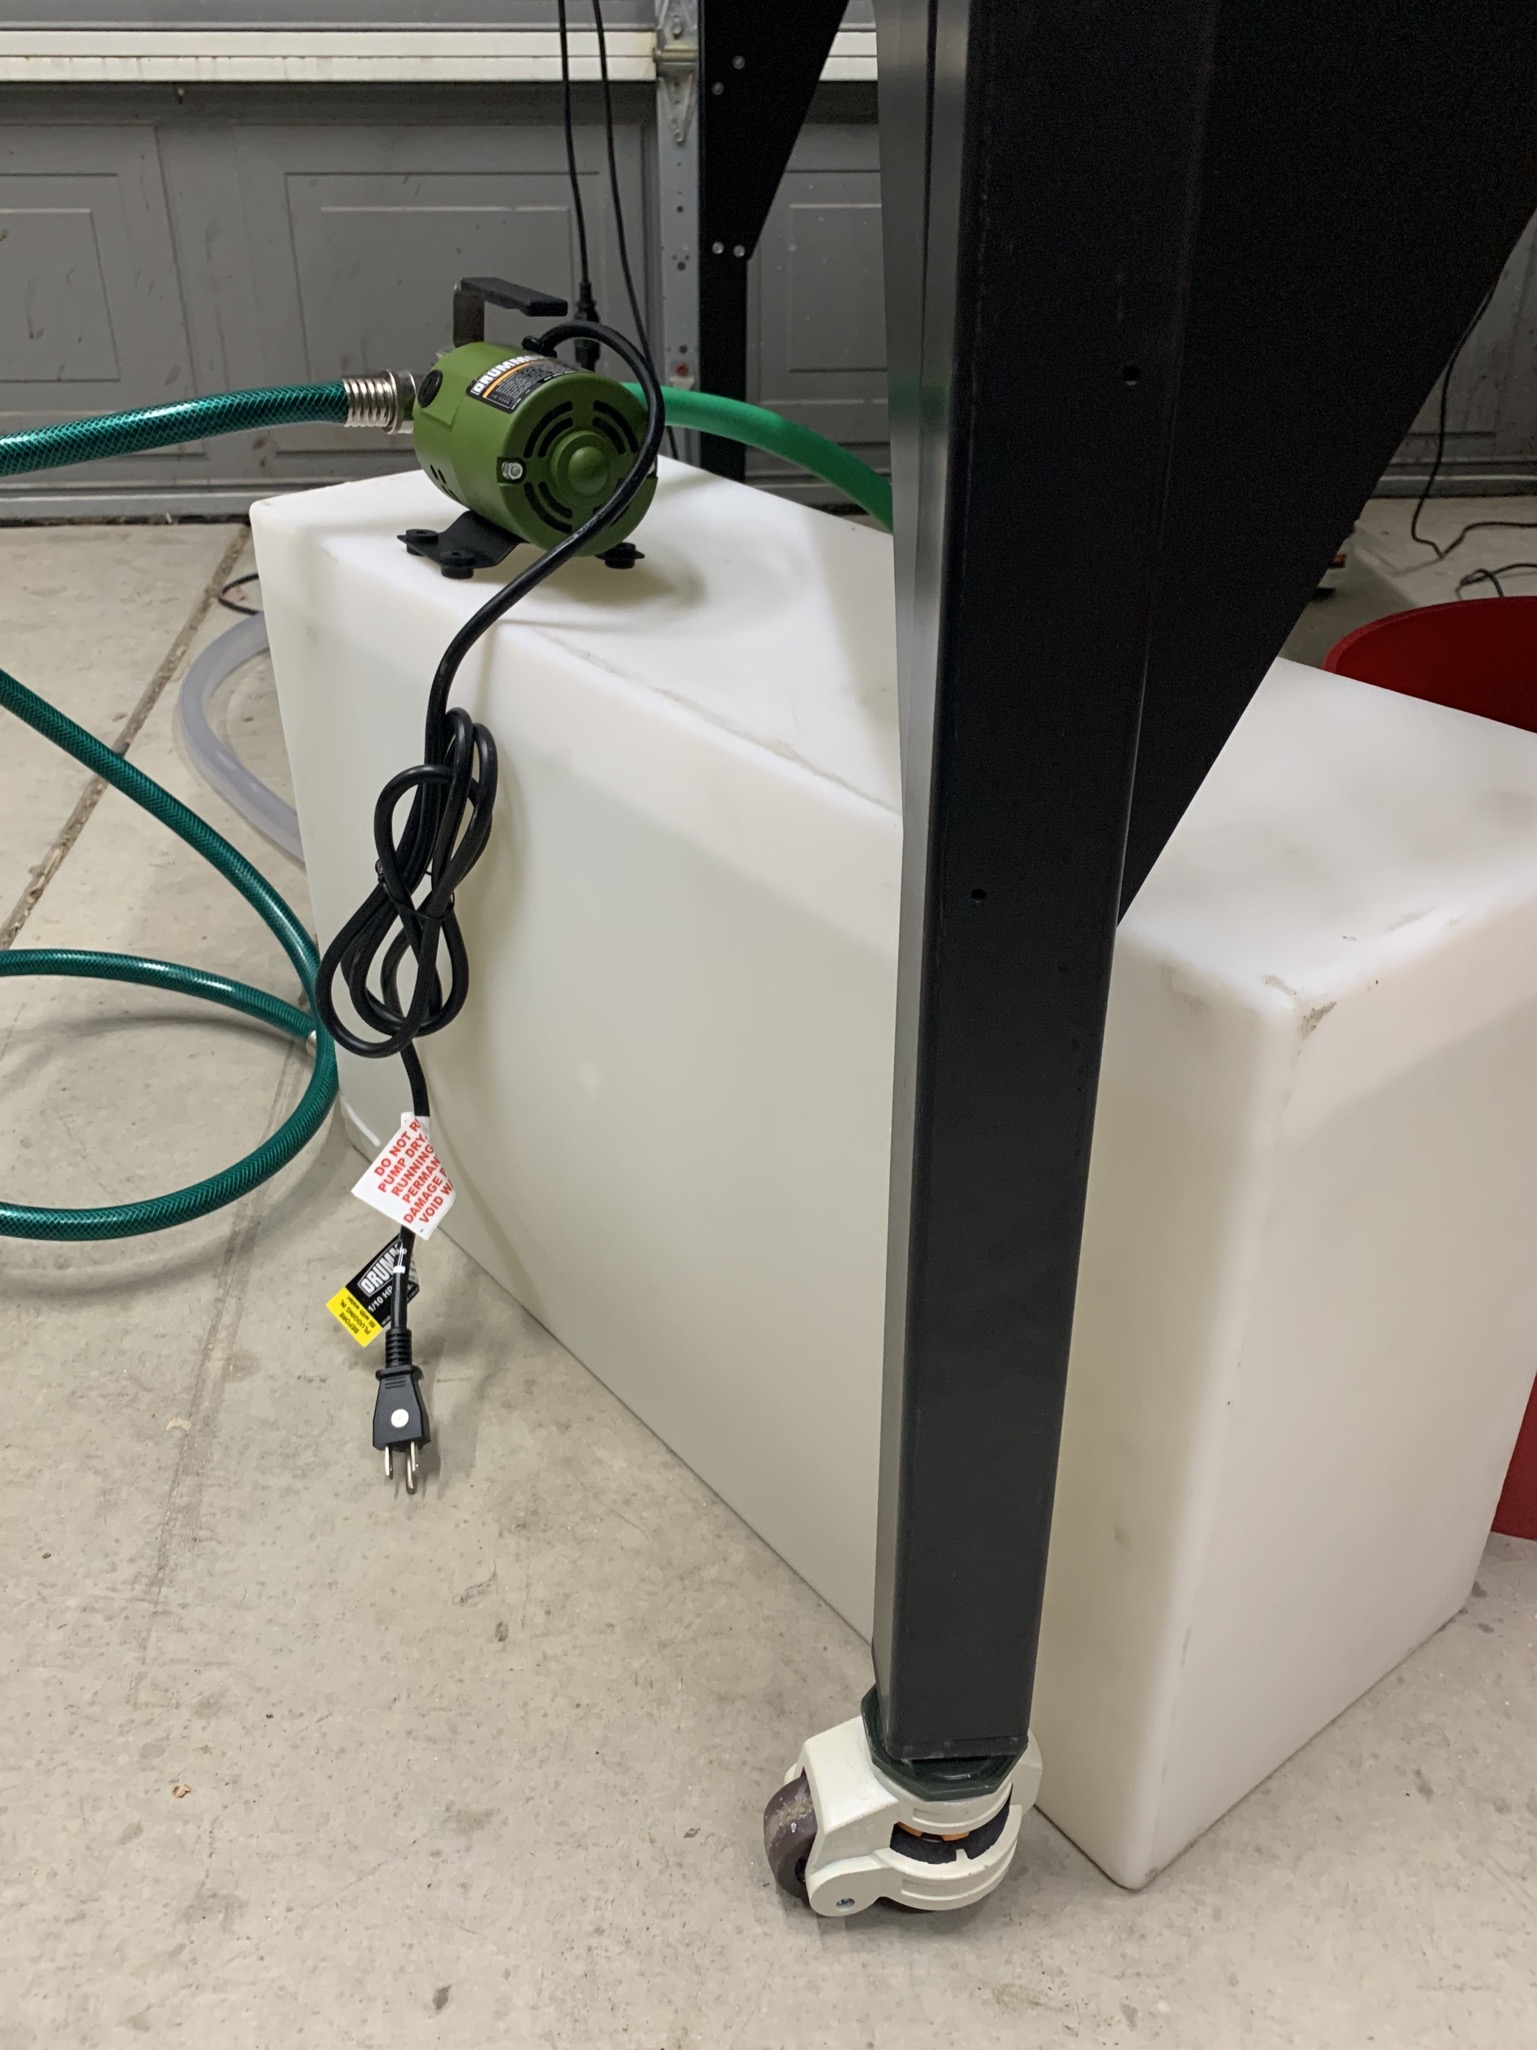
Here are a few pics of my table ready to go… took ideas from a couple of posts to come up with mine.
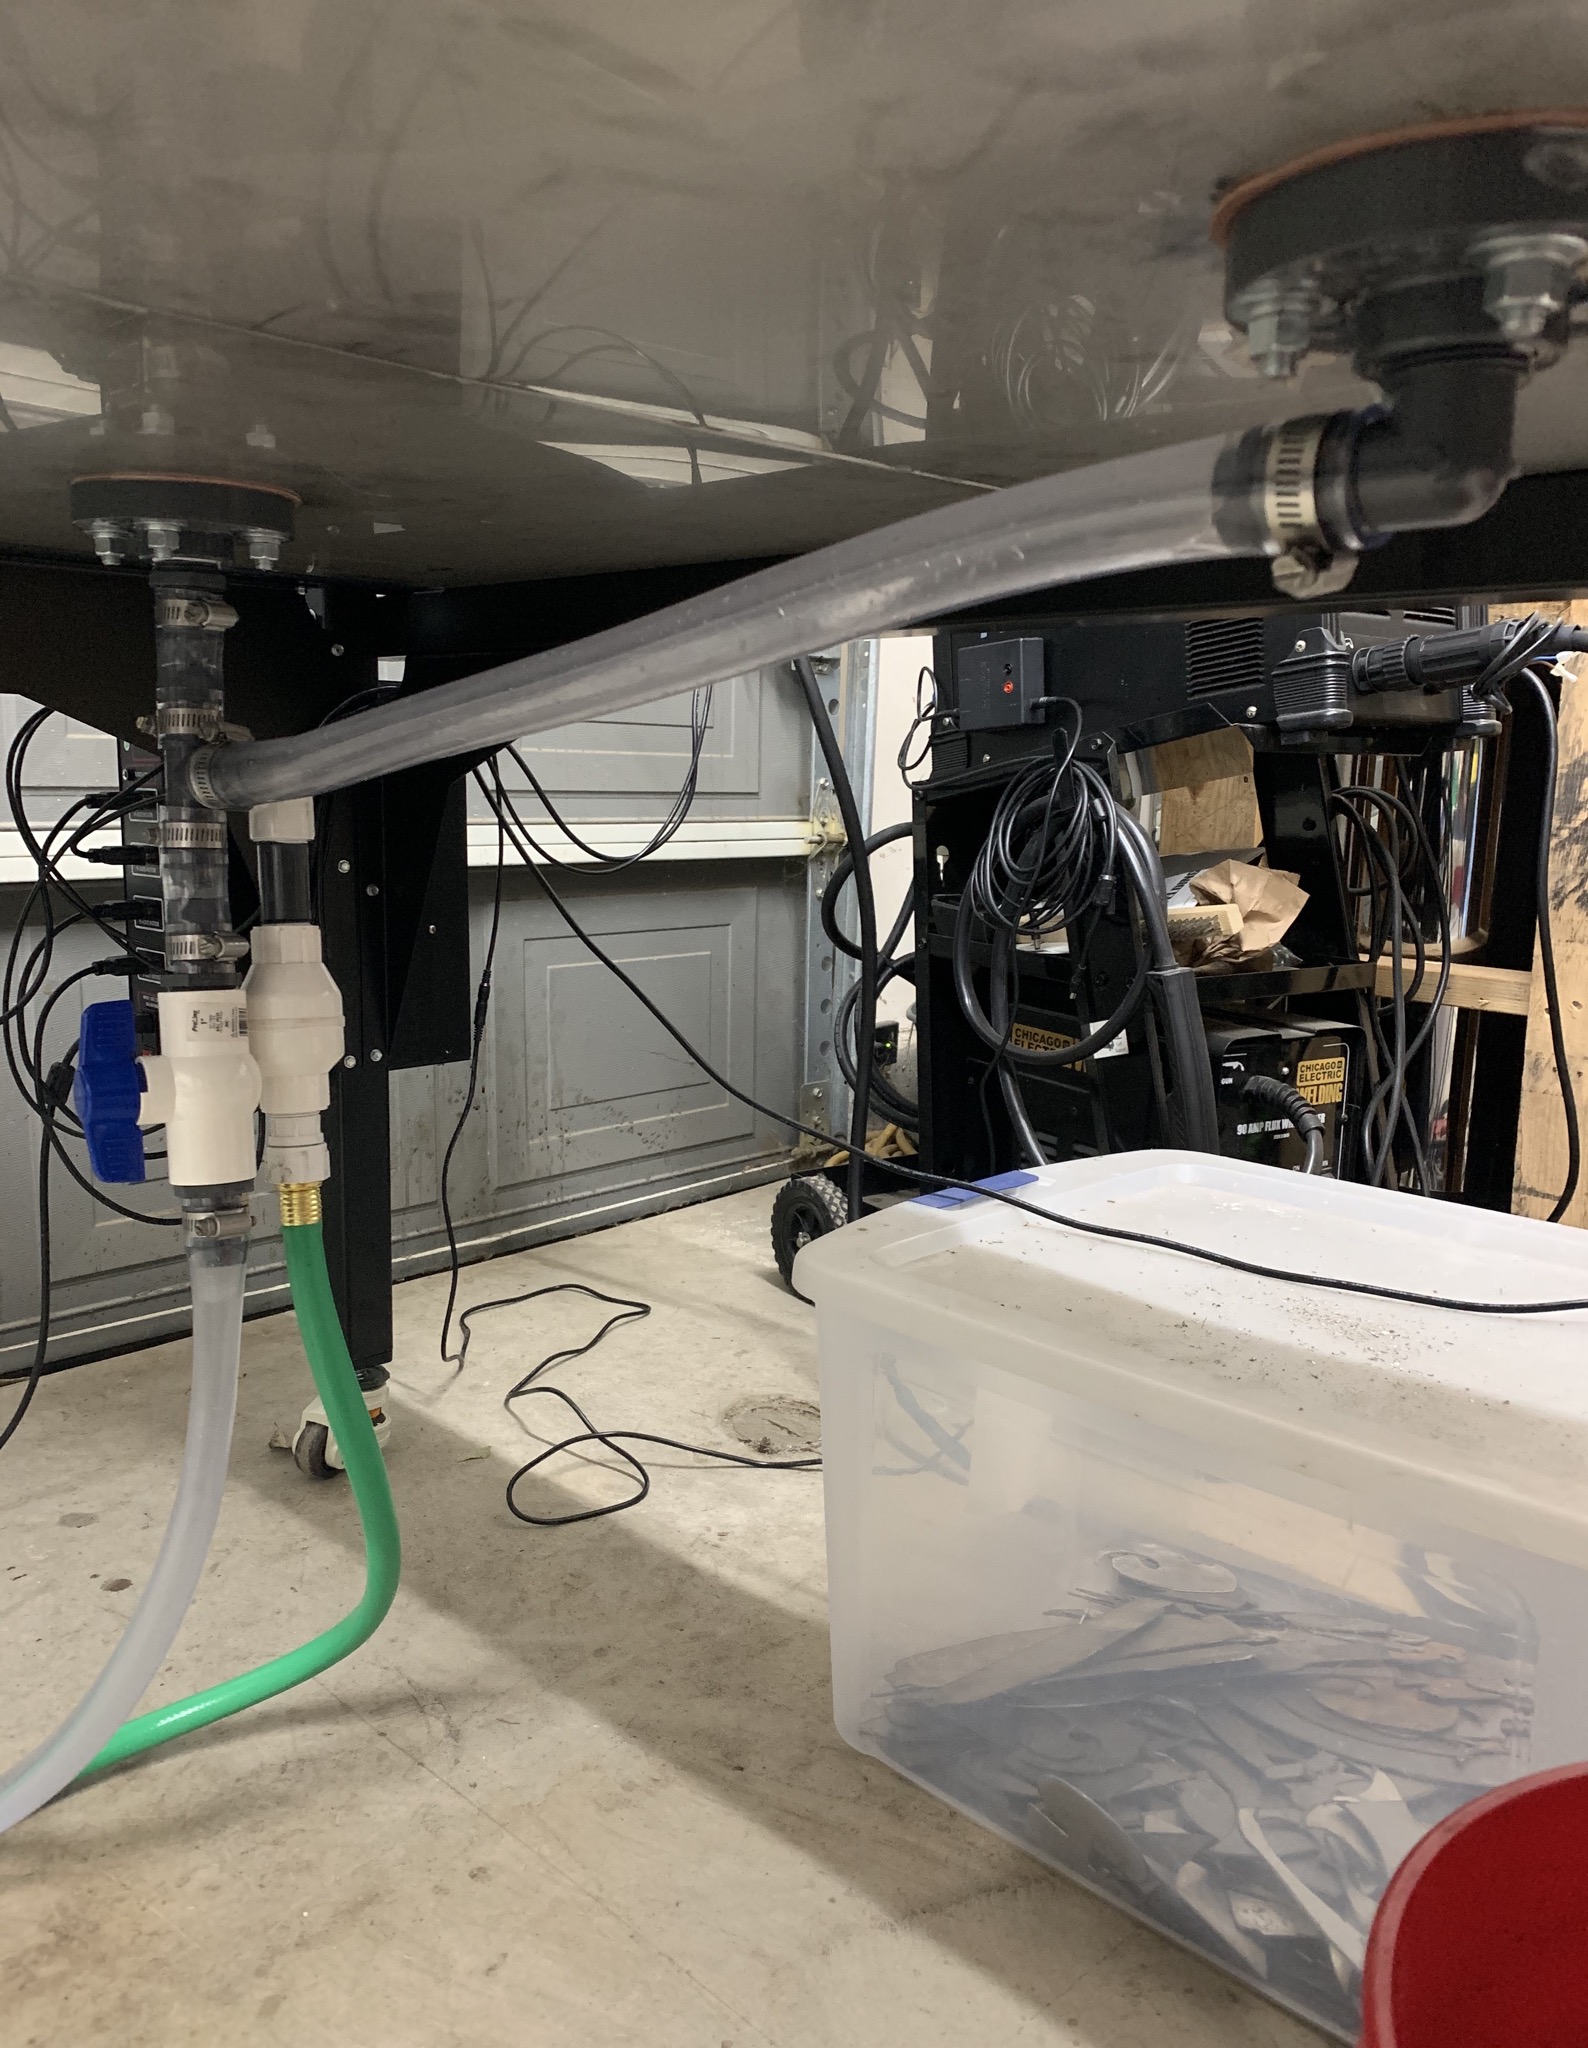
Used only 1 shut off valve for the drain and a check valve for the refill line
Leveling casters and inserts… water pump from harbor freight. On sale with coupon right now for $49.99
Sprayed on a couple of coats flex seal spray on the water tray seams after putting it together as instructed with silicone.
2 Likes
I like the Van Stone flanges. Think I’m going that way with my setup. Looks good!
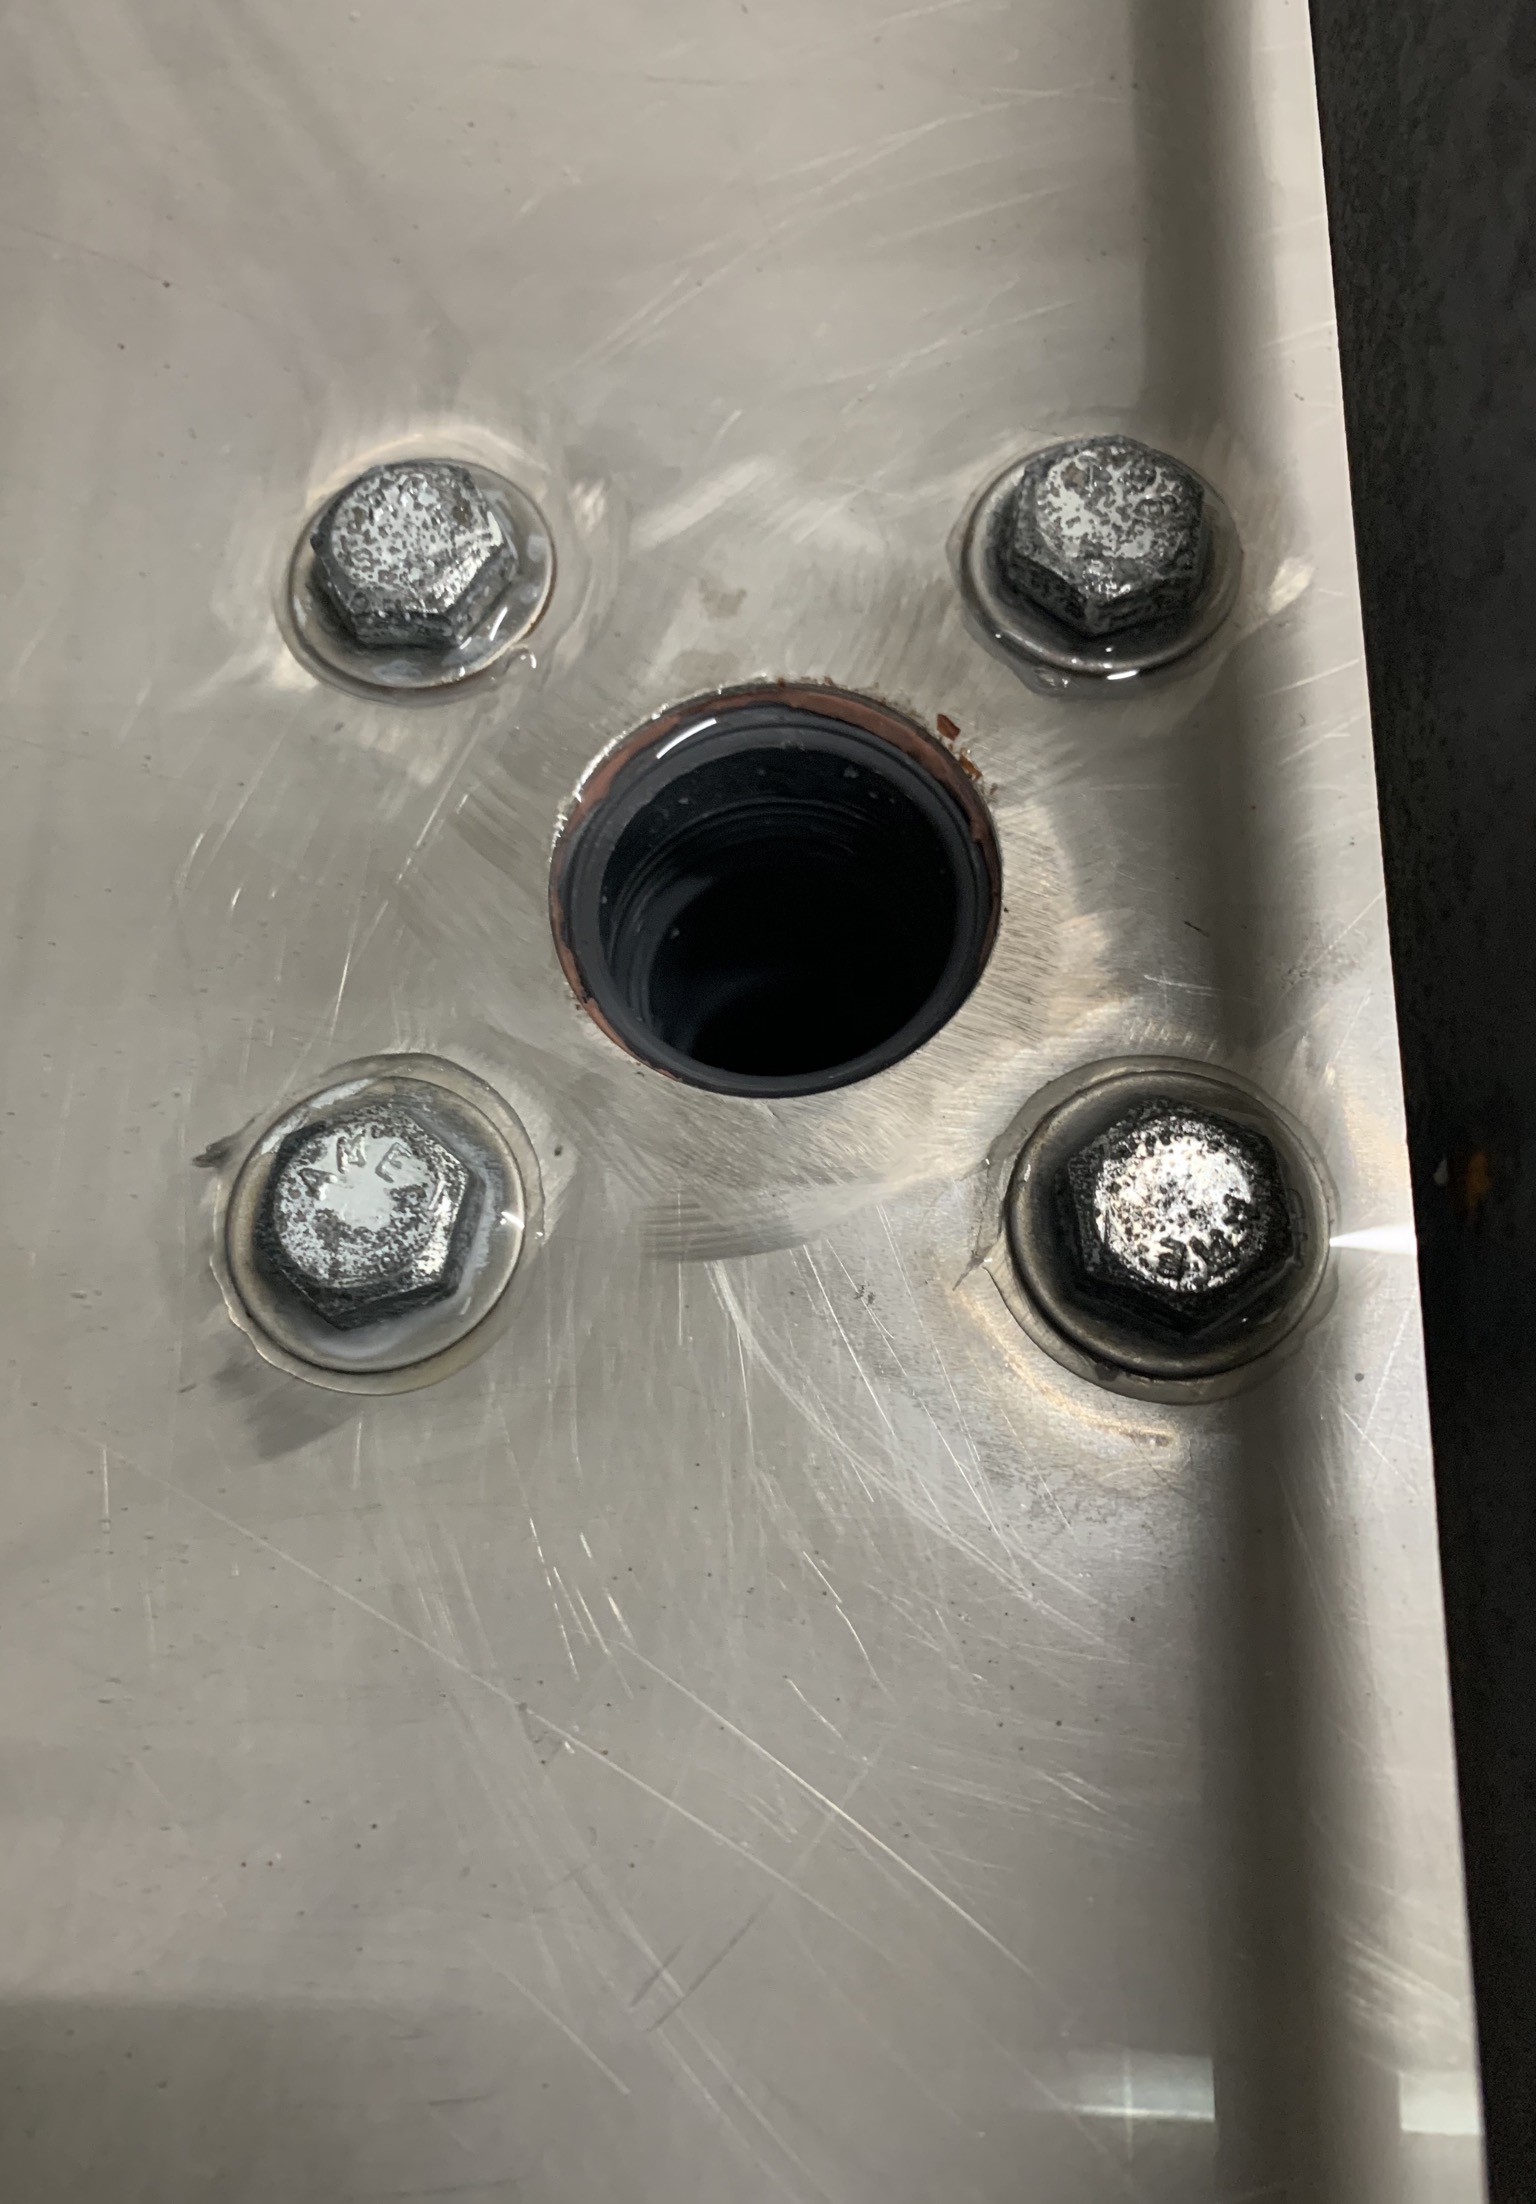
I’m using flanges as well. Did you put gaskets under the bolt heads or just the one I can see on the bottom?
i put a bead of silicone around the bolt on the bottom of the top washer that meets the table top… it was leaking before I did that. I tightened it slowly to get an even seal of silicone all around the washer.
3 Likes
Now you can use the water table as a boat!
1 Like