For those with leaking issues, I immediately threw out the silicone that came with the kit. From building camper trailers, silicone is a big no no. If it leaks, you can’t just add more, you have to scrape off all the old and reapply since nothing, not even silicone, sticks to silicone.
I used Proflex RV sealant on mine and haven’t had a single drip from any seams. It urethane based too which means you can add more if you notice leaks, but you won’t because this stuff is the real deal.
Sometime this week, I want to get some scrap stainless steel and practice first. I’m all new at this, so it is all a learning experience. Waiting for a response from dj_elite why he says do not mig. Thanks for your input!
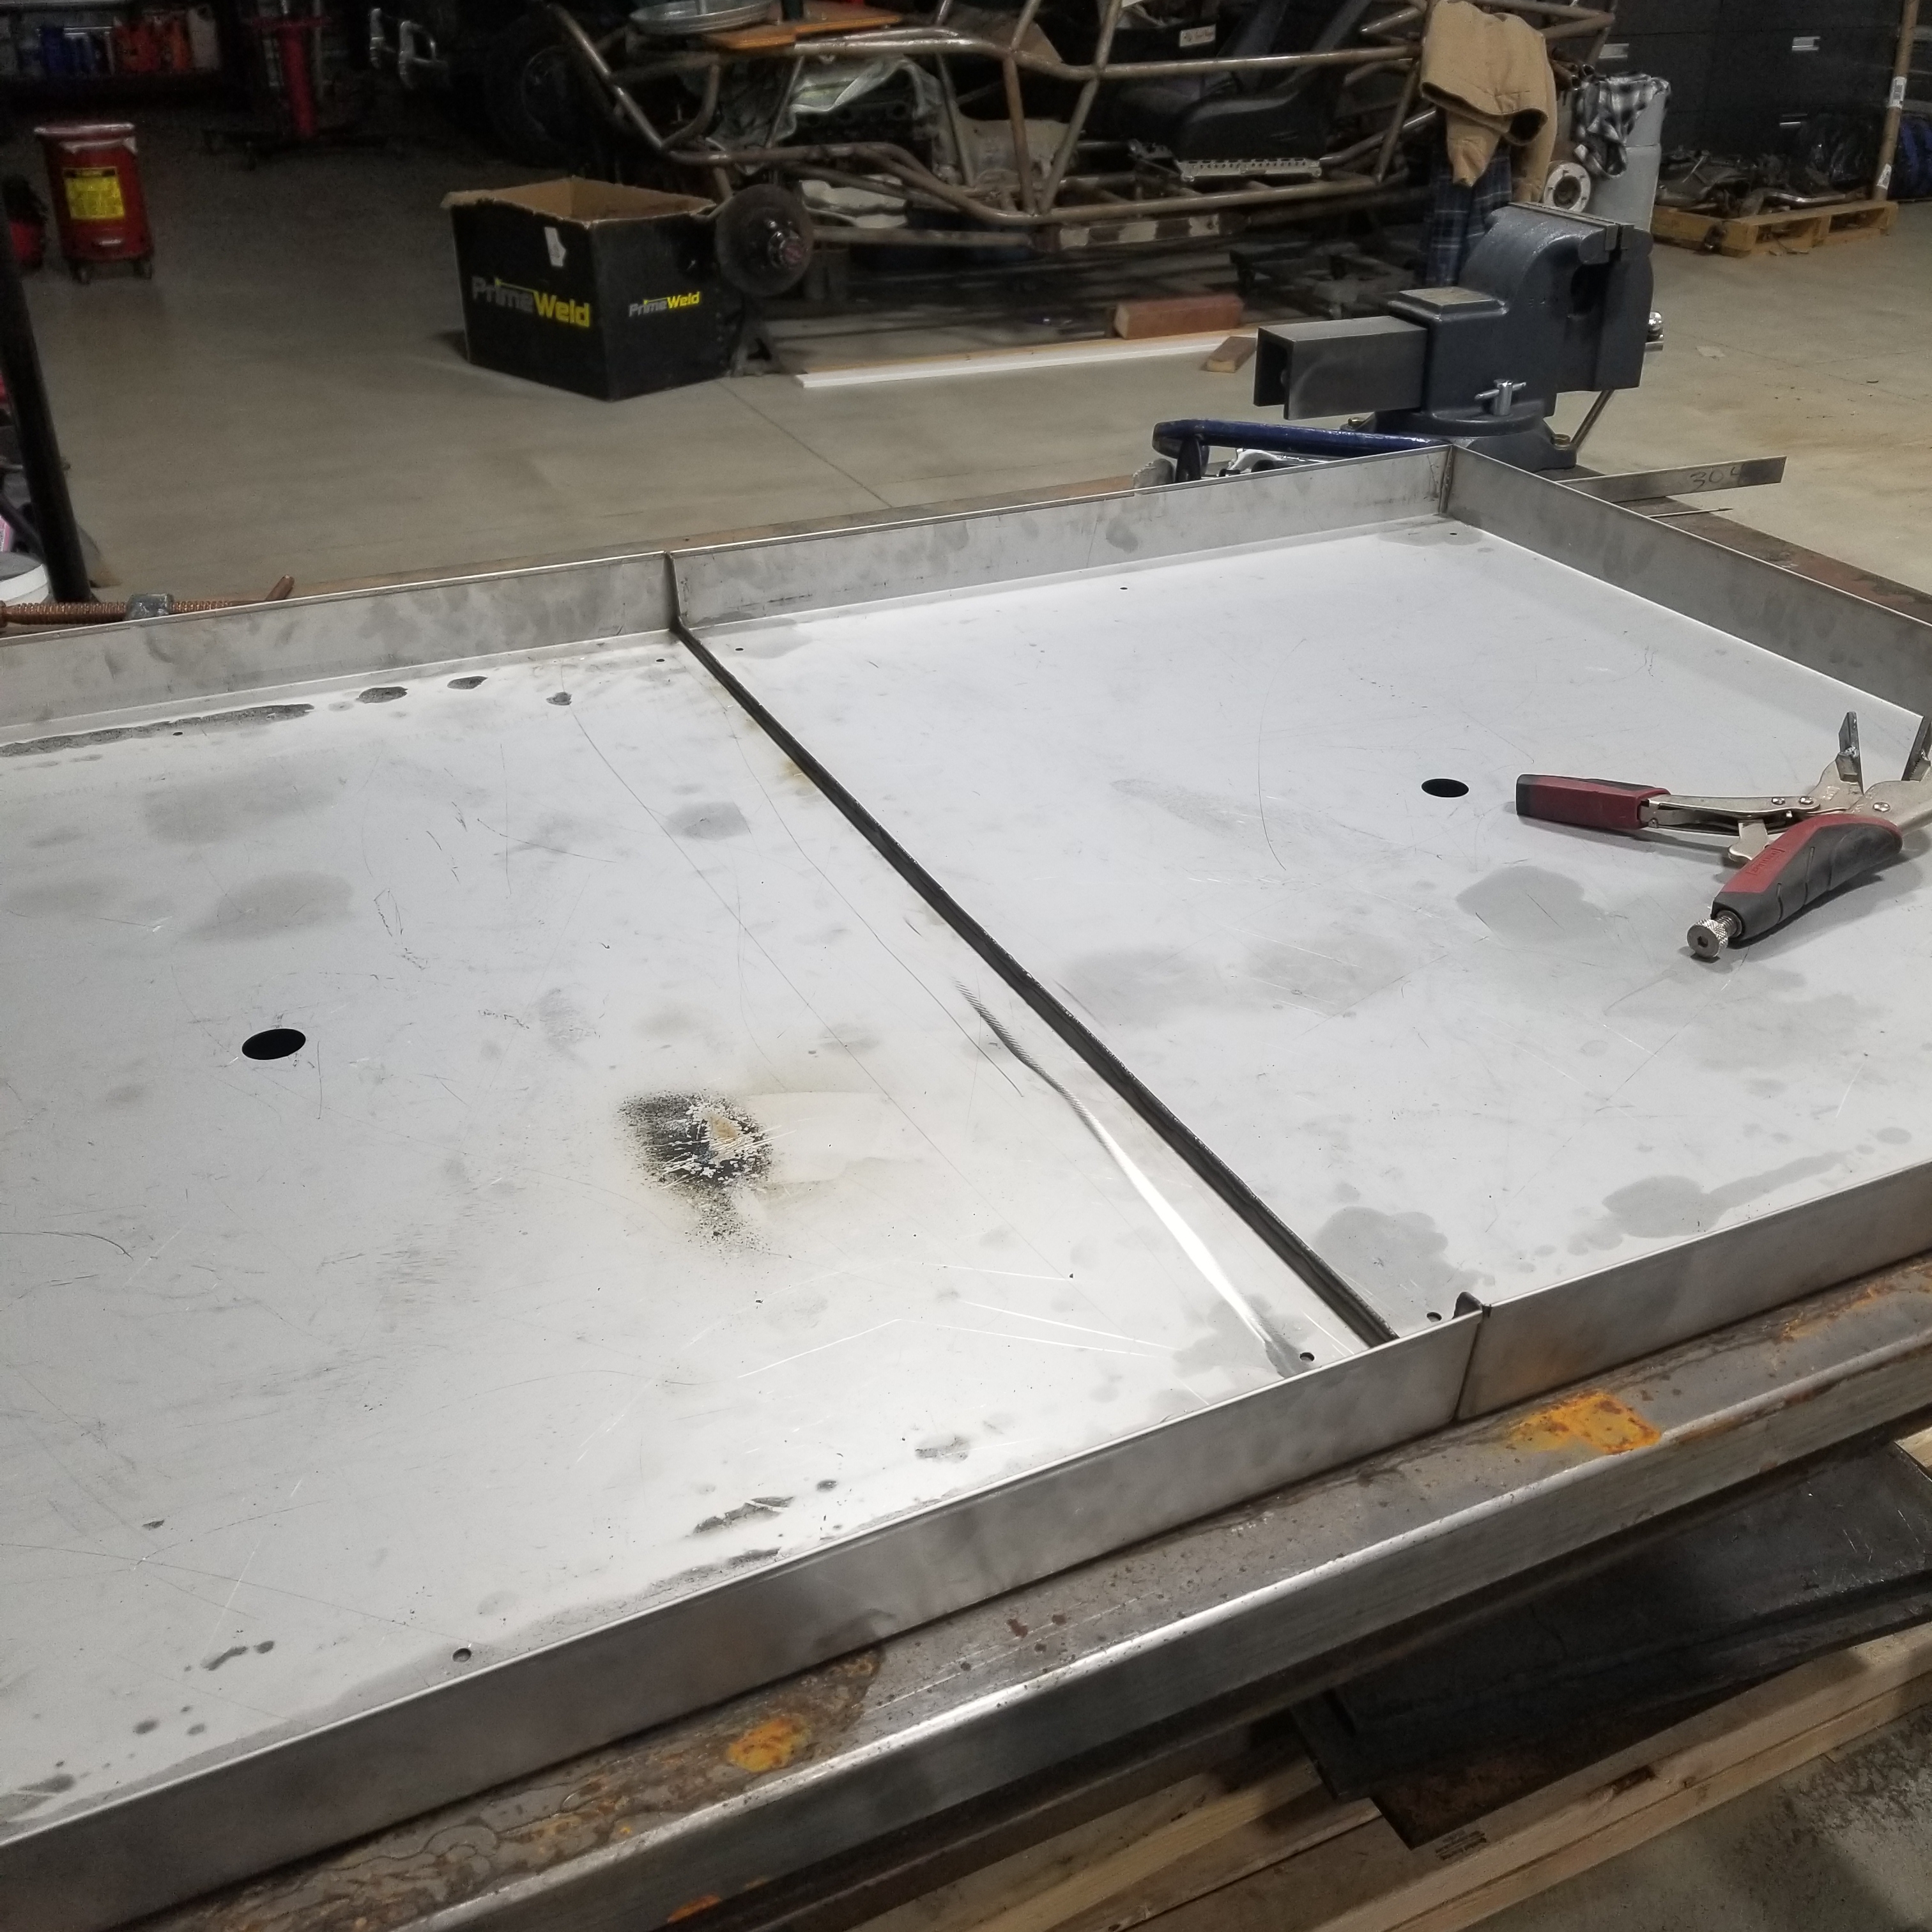
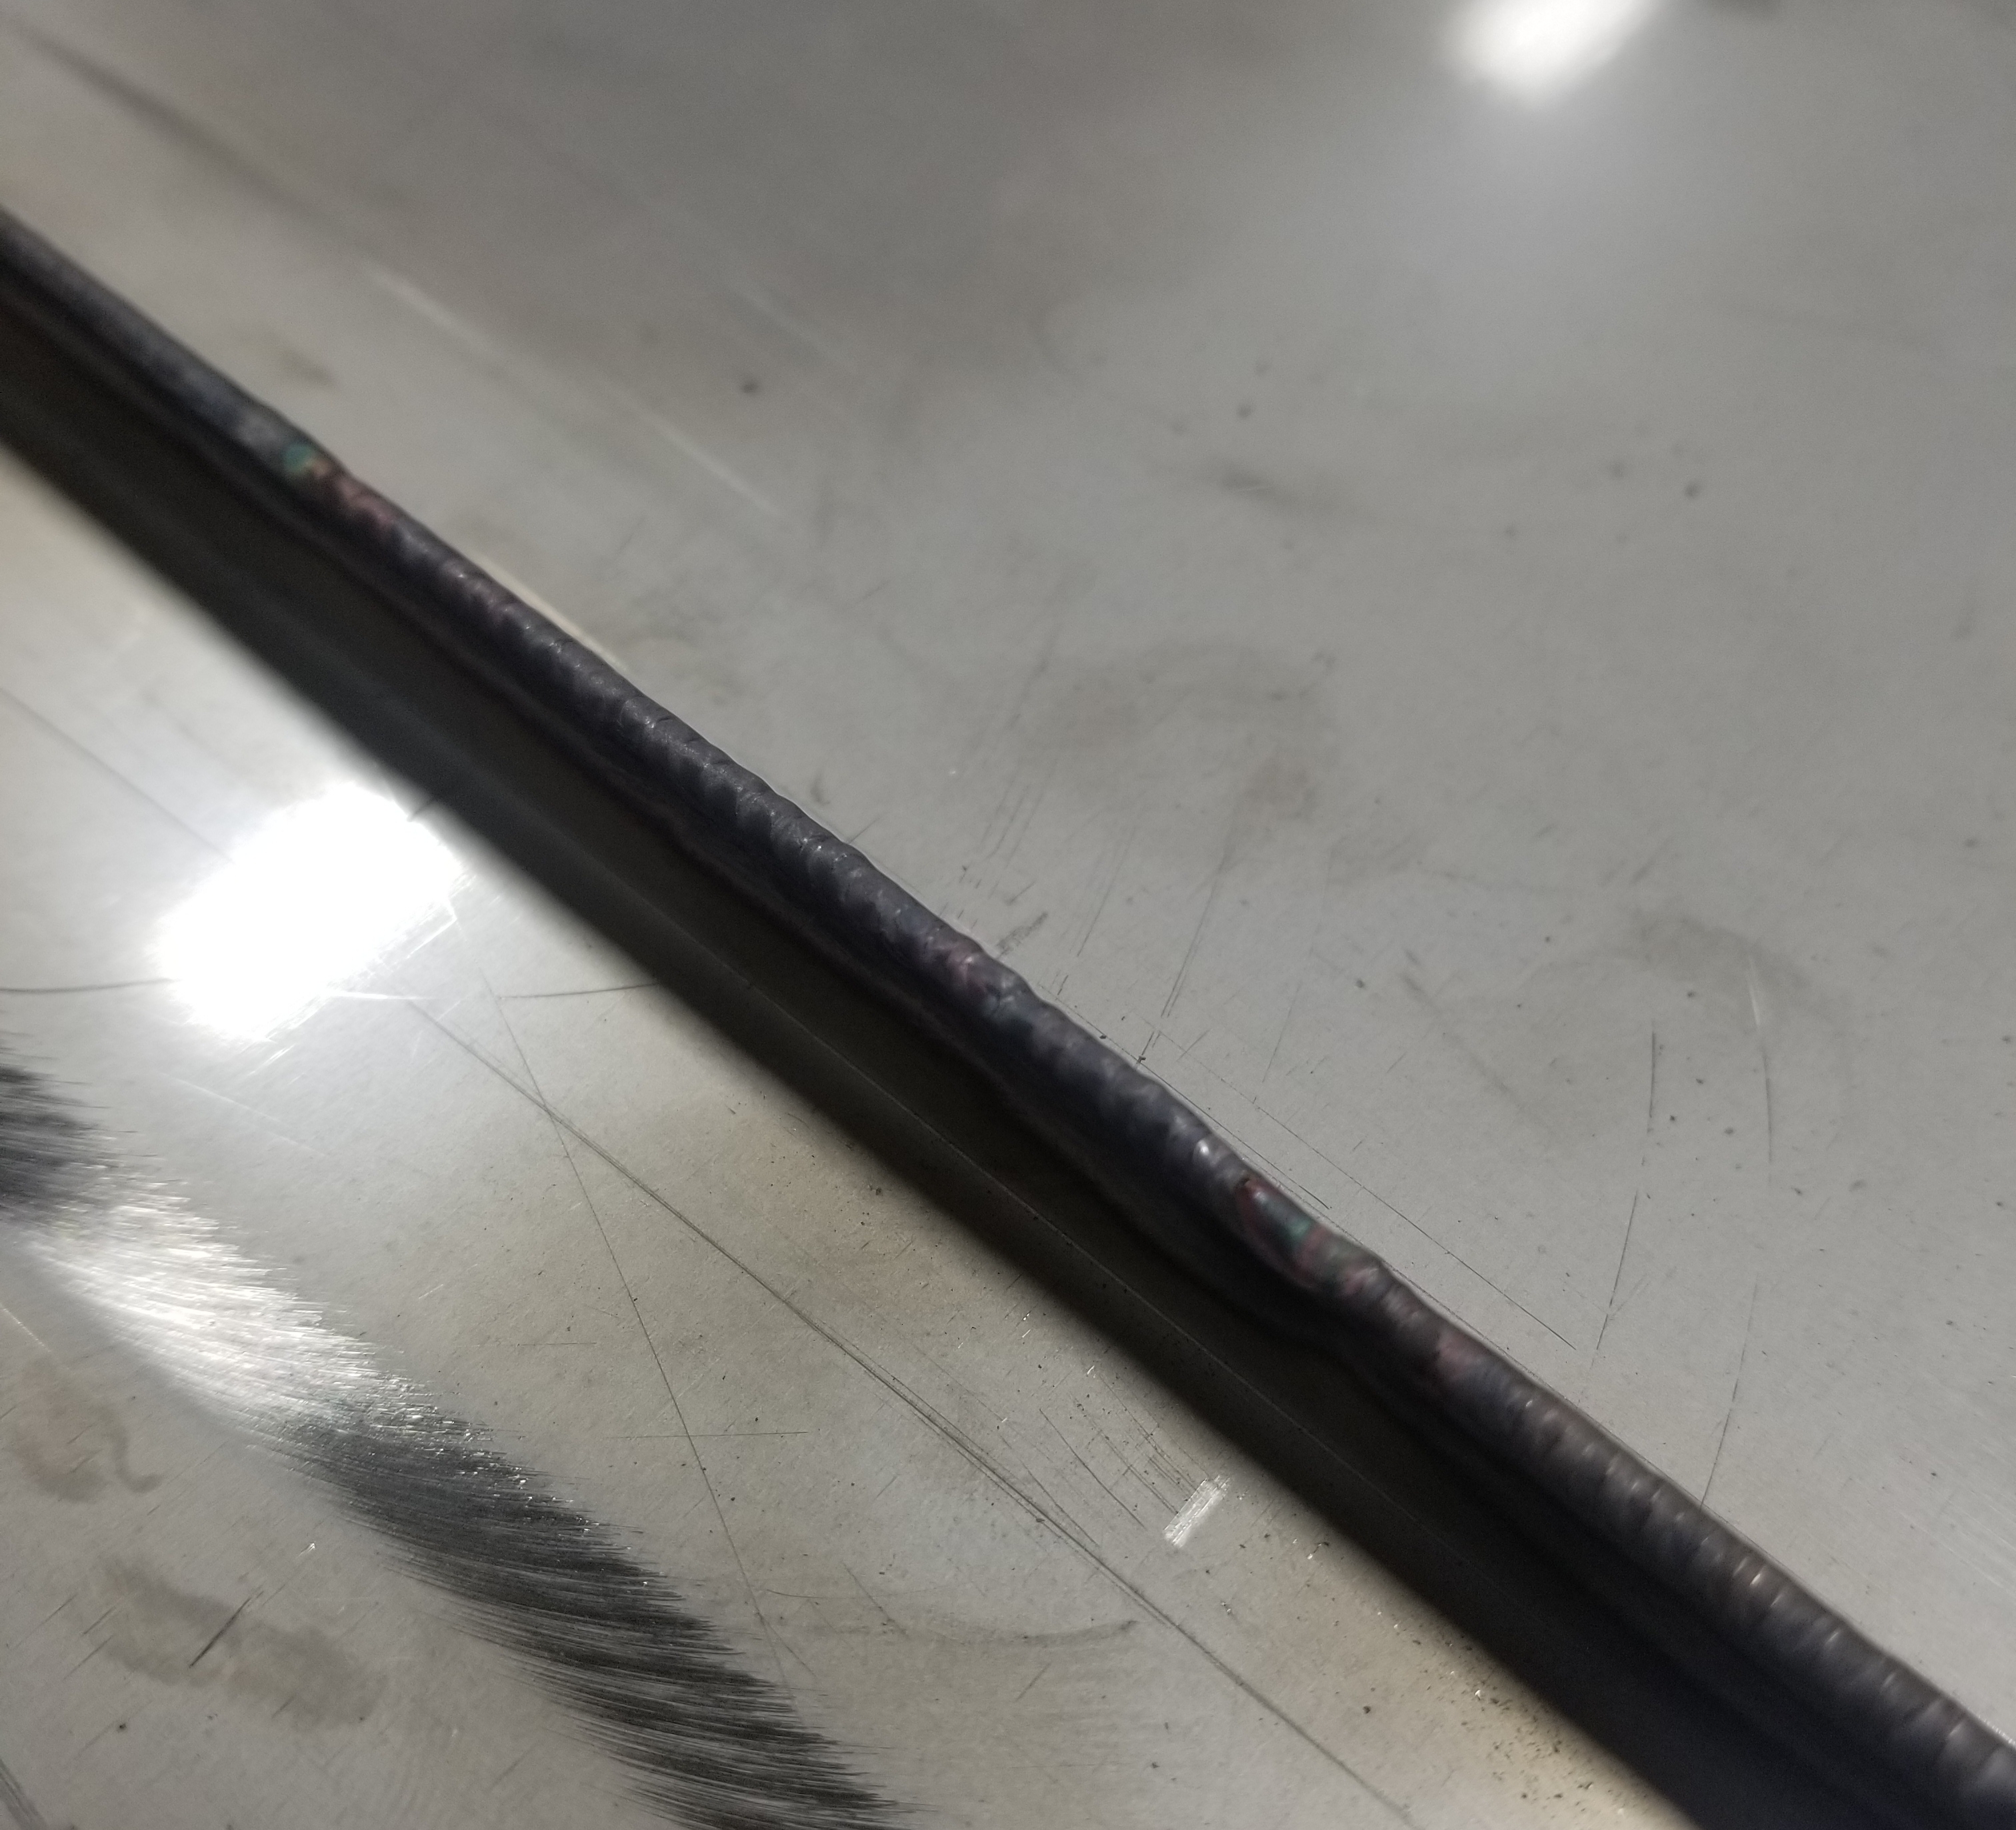
I would not mig weld it. It’s to thin for that. I had very little warping on mine. Even though it’s welded inside and out plus the sump cutout. Keep in mind I’ve been tig welding almost 25 years. If you try to tig it the general rule of thumb is 10 amps per .01 thickness. So 20ga is. 0375 running at 38 for amps for full penetration. If you don’t have a foot pedal, set it a little lighter like 28 to 32 like j-cohen03 said. Then you won’t burn through easily because your amperage is lower than full penetration. If you aren’t comfortable with tig welding this is not a project to tackle. Hope this helps you out.
While waiting on my final box 1 to arrive before I can put this thing together, I decided to dive into the various mods that so many of you guys have posted on this forum.
Figuring that it was highly likely that Batch 2 would get stuff in the same order as the Batch 1 bubbas, I didn’t want to wait to get box 2 at the end and then assemble the water table. I followed GunTruck1776’s advice and used 3M 4200 with some SS hardware to assemble the table halves on a level 2x4 frame that mimics the CF Pro table frame.
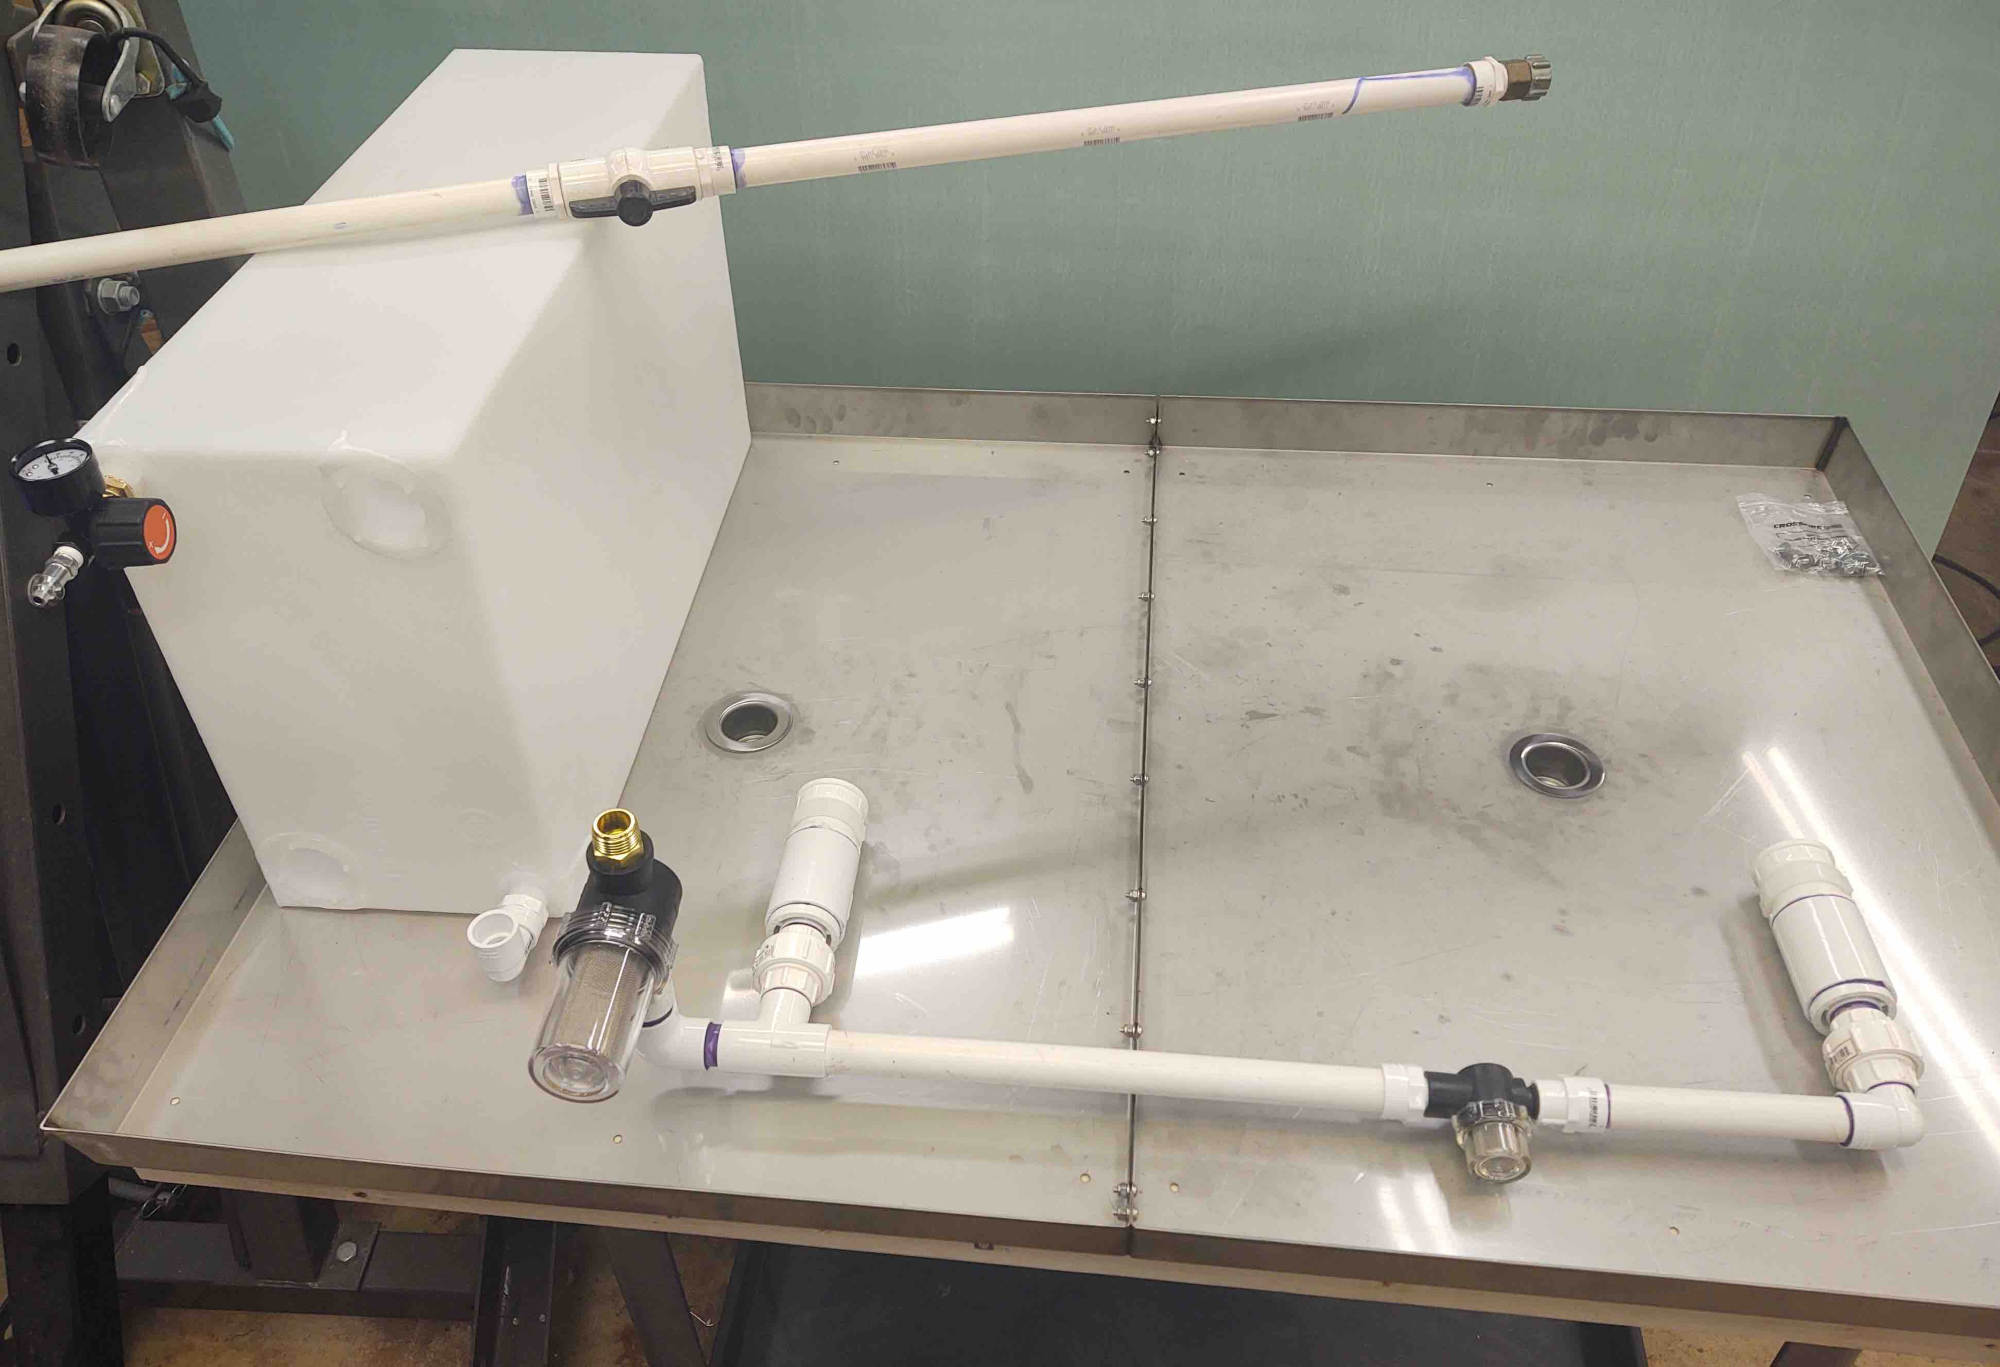
I enlarged the holes on the drains, installed bar sink drains and then cobbled together the plumbing using a bunch of 3/4" PVC I had on hand from an old, outdated project. I also ordered a 16 gal water tank (thinking should have gone with the 13 gal, no biggie) with the air regulator that Swizcore recommended.
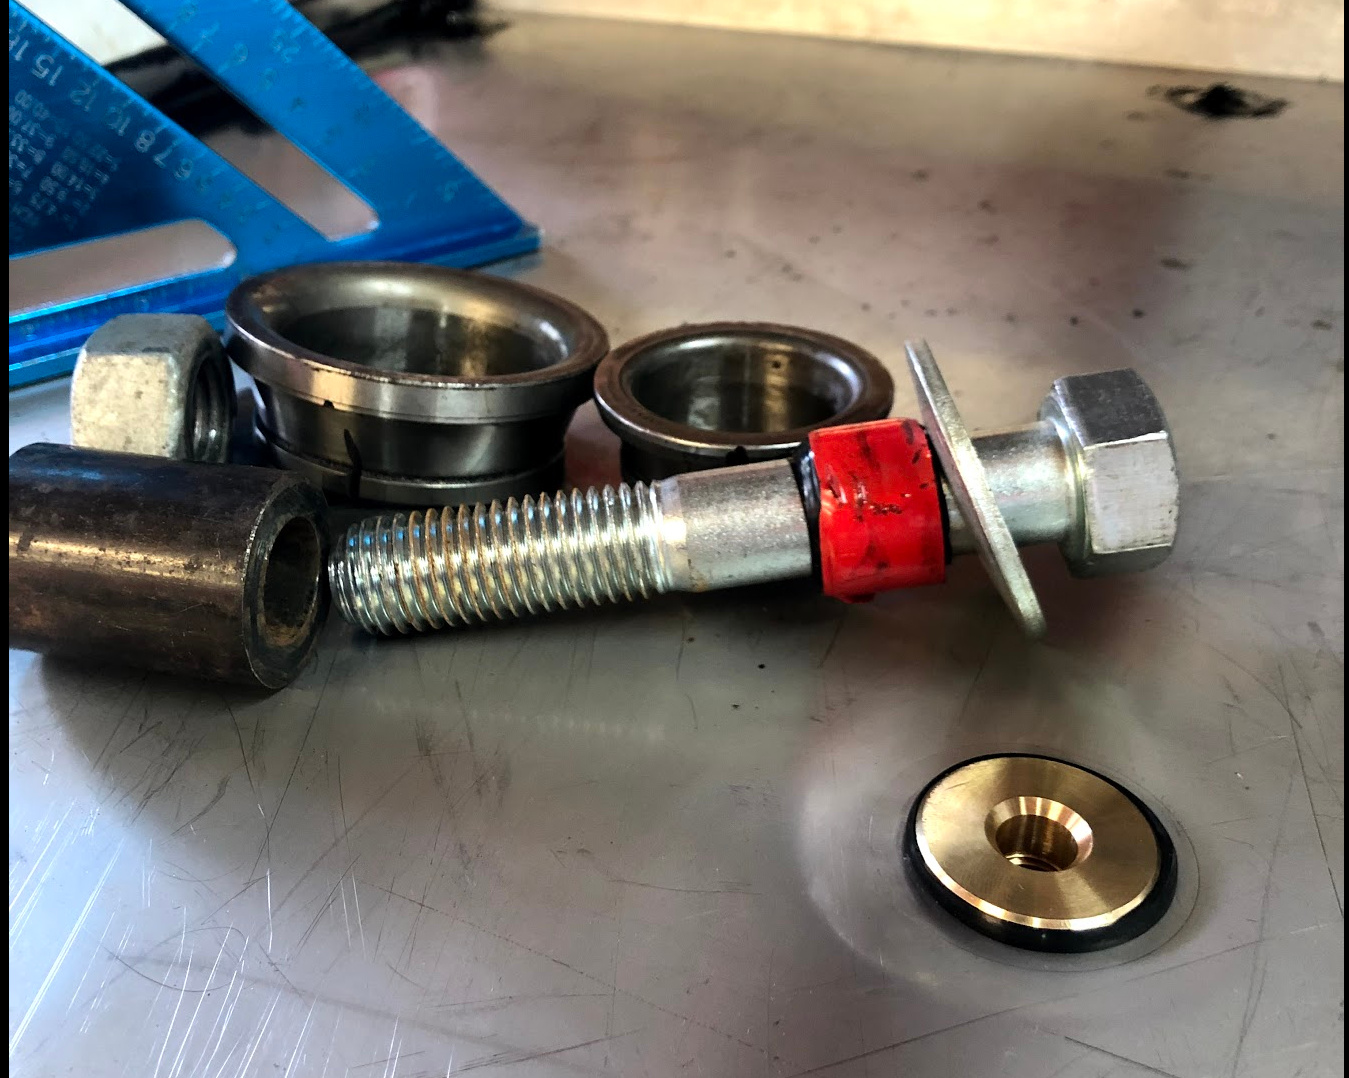
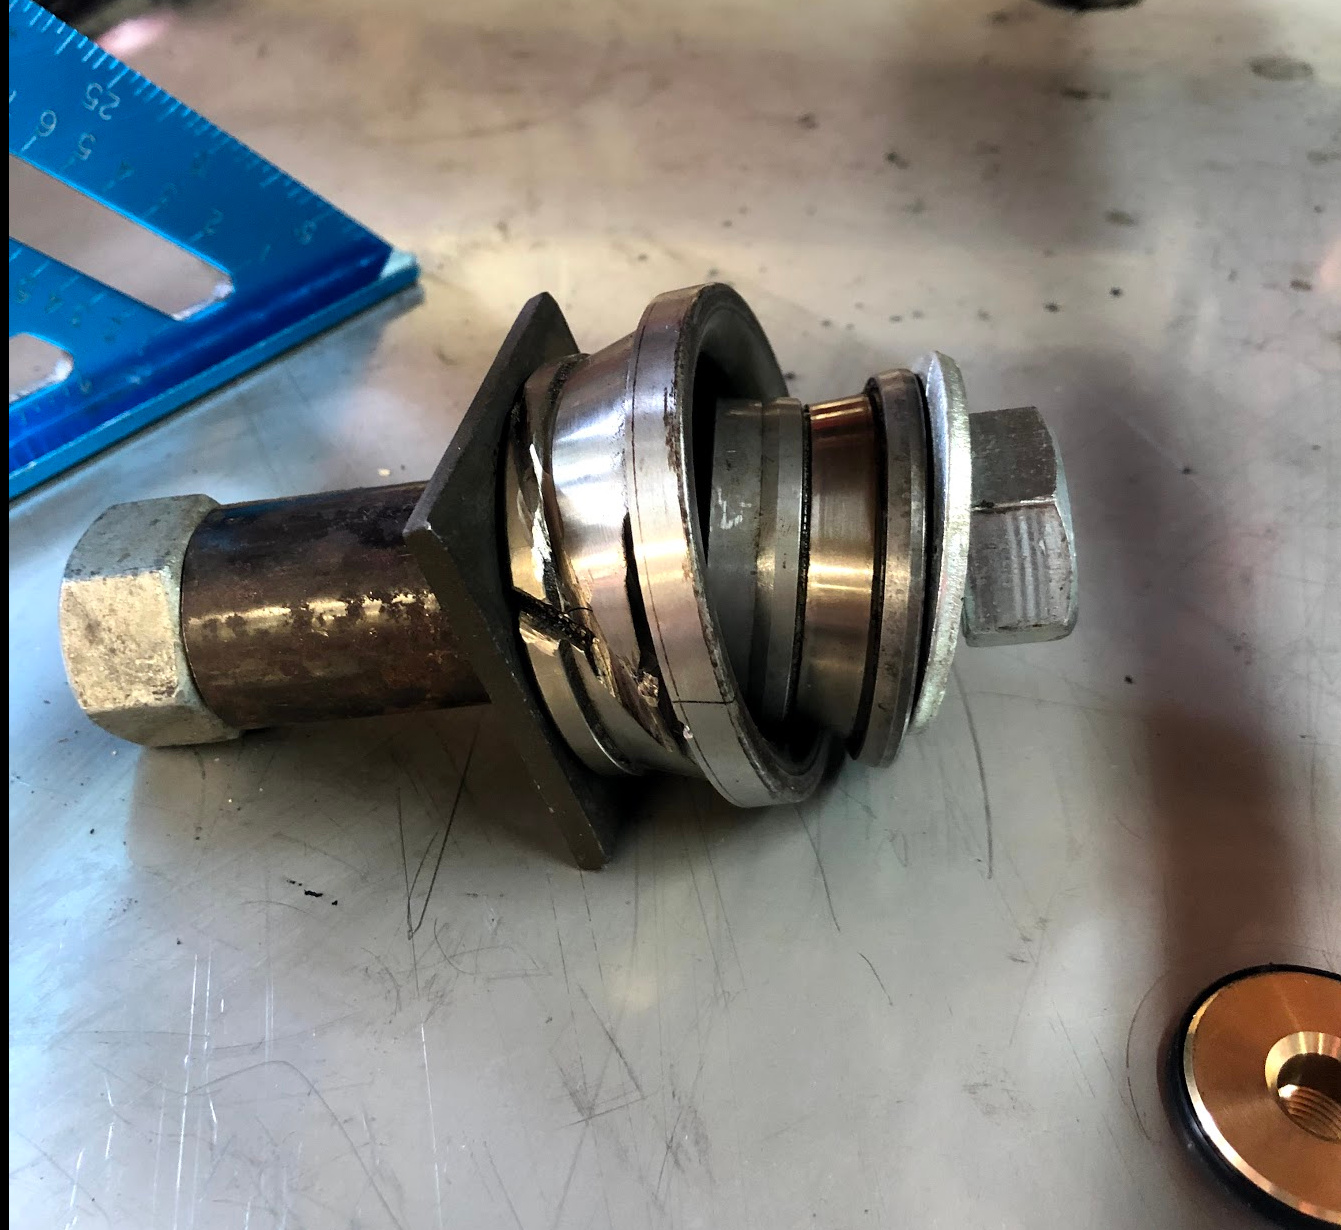
Here’s my improvised dimple die, old bearing races and 3/4" bolt. Some tape around the bolt to hold it centered in the drain hole. Not as nice as the dimple @Dirty_Bill made, but I think it should work.
And here’s the mess while I tried to come up with the right combination of bits… I also used some urethane windshield adhesive to seal the two halves together. I did two stupid things, assumed I had the talent to weld the halves, and cut a test piece (bottle opener) without water in the table. Both warped the table. I stopped welding after a few inches and cut it apart, which took out most of the warp I put into it. Then before I had bonded the halves together (but with them bolted together, and screwed down to frame) I cut a test piece. That put enough heat into the table to start to pull it apart between two bolts. So lesson learned, don’t cut dry. Urethan is still curing, but it seems like it should do the trick. While I really wanted to weld it, it was time to move on and start using the table.
I put my table together per the instructions, now uts leaking. My water smells like a swamp so i may drain it soon and fuse the 2 halves together with the tig…
I’m interested in how folks have assembled their water tray so it leaks. Mine hasn’t been an issue. I used the silicone on the corners and then the rest of the tube (nearly the whole thing) on the seam sides before butting it together and using a boatload of spring clamps to hold it together while I put in the nuts & bolts. Then I tightened those in an alternating pattern starting at the outside & moving in. After they all were wrench tight (light, not monkey hamfisted tight) I let it sit for 48 hours (the instructions said 24 but I was being conservative). Then I screwed it down to the frame and filled it up. No leaks.
I hadn’t thought about Tig welding it until after it was done & people started complaining about leaks.
Now I’m wondering if I’ve got a giant leak waiting to happen.
I assembled mine two times and it leaked both times. My flanges were a little bent from shipping, but I bent them back. Didnt think it would be an issue but it was. I have since welded the seam
I knew I wanted to weld mine before people started having problems but for durability but I do think that a leak free seam is obtainable with the silicone. Conventional wisdom says you should have gone inside to outside on your bolts to avoid the center from creasing… but if its working than all the better. I know mine had some shipping dings that I had to straighten out before weld and probably even would have needed more work for a sealant to work well. Which is what I’m assuming most people with leaks are dealing witg
My .02, Problem is silicone isn’t designed to flex, vibrate, twist and have stuff hit seams under water. And you would have to get the perfect blend of cure/flash time to not squeeze it out as you tighten bolts that are not supported to each other ( maybe 2 pc of 3/16 x 3/4 strips with bolt pattern used to sandwich the joint might work), otherwise you will crease the metal and it will fail. That is why you do not use silicone on boats.
My plan is still to use 3M 4200 (I was thinking 3M 5200 BUT it may have to come apart one day) I will rough surface, clean with 91% or similar, then apply liberally, clamp, with load spreaders and go back in a couple days and bolt it together, just because.
I have never had it fail, will/can it? I am sure BUT I know it is better than silicone
For those with leaking issues, I immediately threw out the silicone that came with the kit. From building camper trailers, silicone is a big no no. If it leaks, you can’t just add more, you have to scrape off all the old and reapply since nothing, not even silicone, sticks to silicone.
I used Proflex RV sealant on mine and haven’t had a single drip from any seams. It urethane based too which means you can add more if you notice leaks, but you won’t because this stuff is the real deal.
I’m doing the same assembly this weekend, hopefully.
I do have a question, the van-stone flanges have a 0.15" gap on the flat side, is the gasket alone enough to seal that? did you add any plumbing putty when doing the assembly?
Mine hasn’t leaked. I used the included tube, laid a good, even bead, alternated direction on screws, tightened evenly. If it ever DOES leak, I’ll clean it up and hit it with RTV 'cause my TIG skills suck bad.
This covid is a real pain trying to setup my water system. Need to work with what I have instead of running yo home depot to pick what I need.i will post some pictures soon when i get it all done.