I only just poured concrete last night, so this may need to modified.
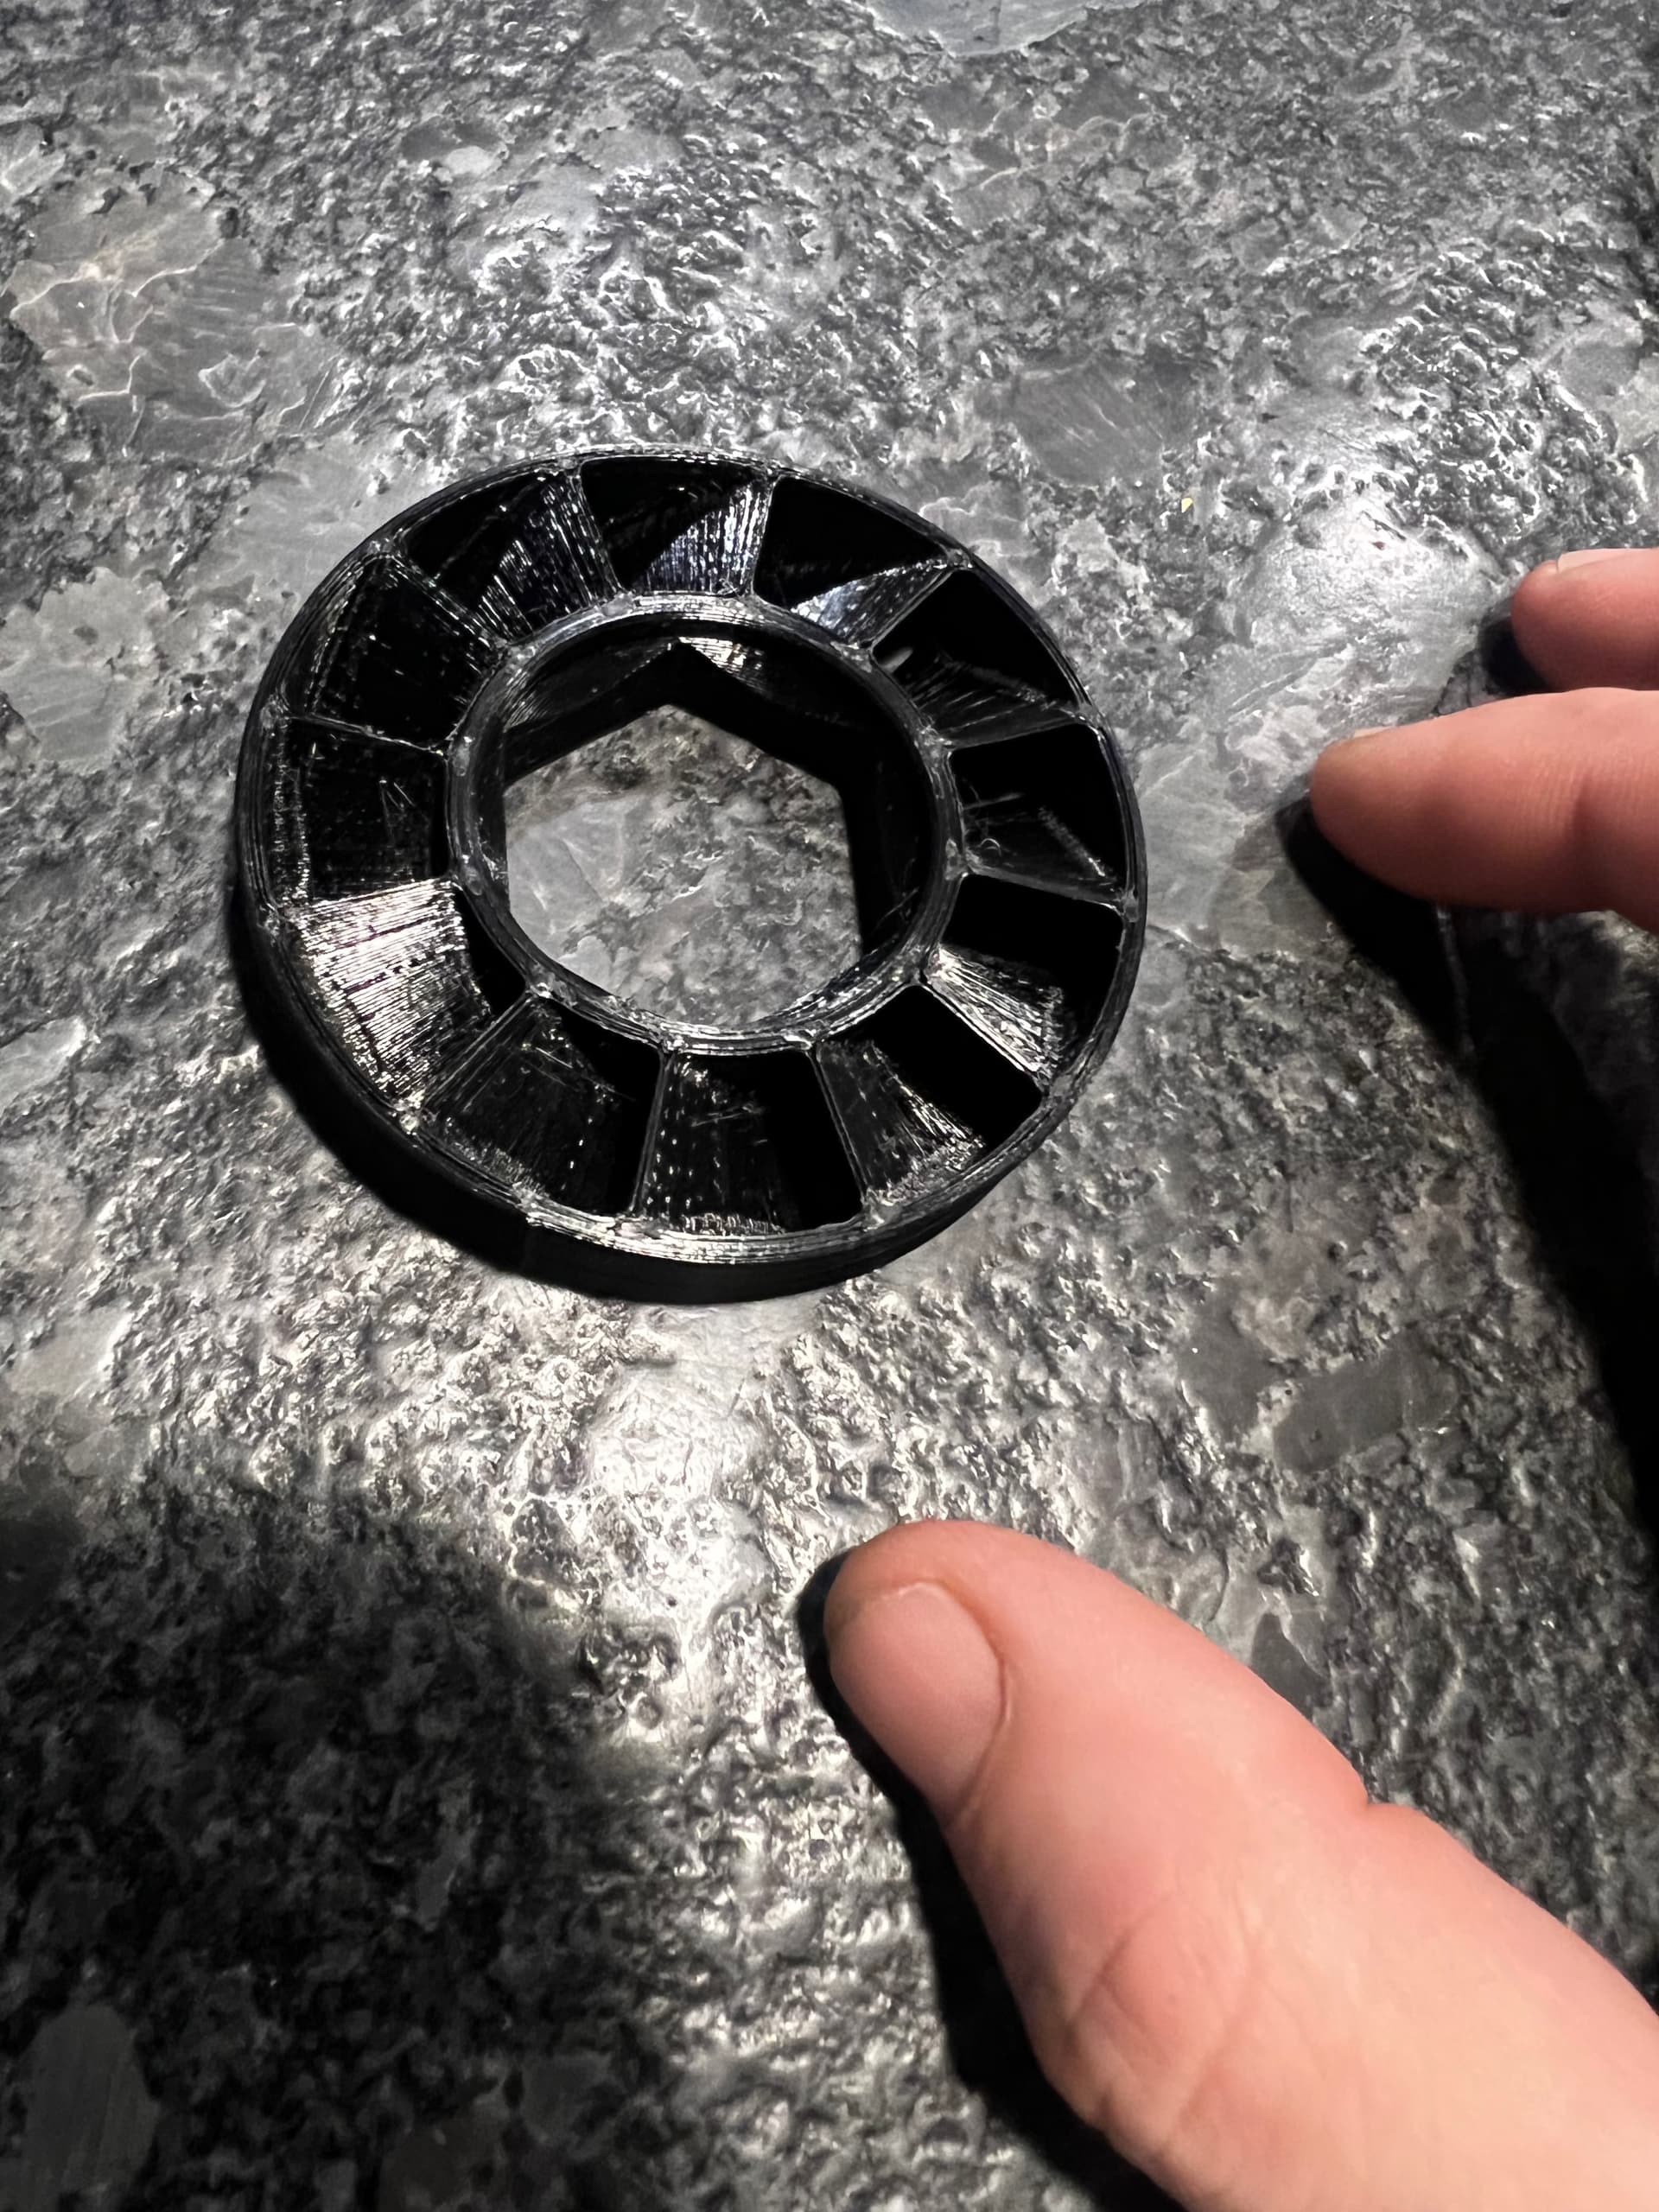
But ER20 collet nut chip fan:
Not my file, but here’s the link of anyone wants to try it or modify it
I only just poured concrete last night, so this may need to modified.
But ER20 collet nut chip fan:
Not my file, but here’s the link of anyone wants to try it or modify it
Spindle lower 5/16" tapped holes… It’s not a good time to find out that the 5/16" -18 screws won’t start in the 5/16-18 holes while your holding the spindle… ![]() Apparently, either the holes weren’t tapped all the way through or they were tapped from the opposite side that you would be inserting the screw from… Had to run the screws all the way through and then try again.
Apparently, either the holes weren’t tapped all the way through or they were tapped from the opposite side that you would be inserting the screw from… Had to run the screws all the way through and then try again.
Check that the screw will start before you go to mount the spindle!
We found this issue a few weeks ago and have since began chasing all of these holes before shipping. So shouldn’t be a problem for most folks moving forward.
The parkerizing is a bit thick in the tapped holes.
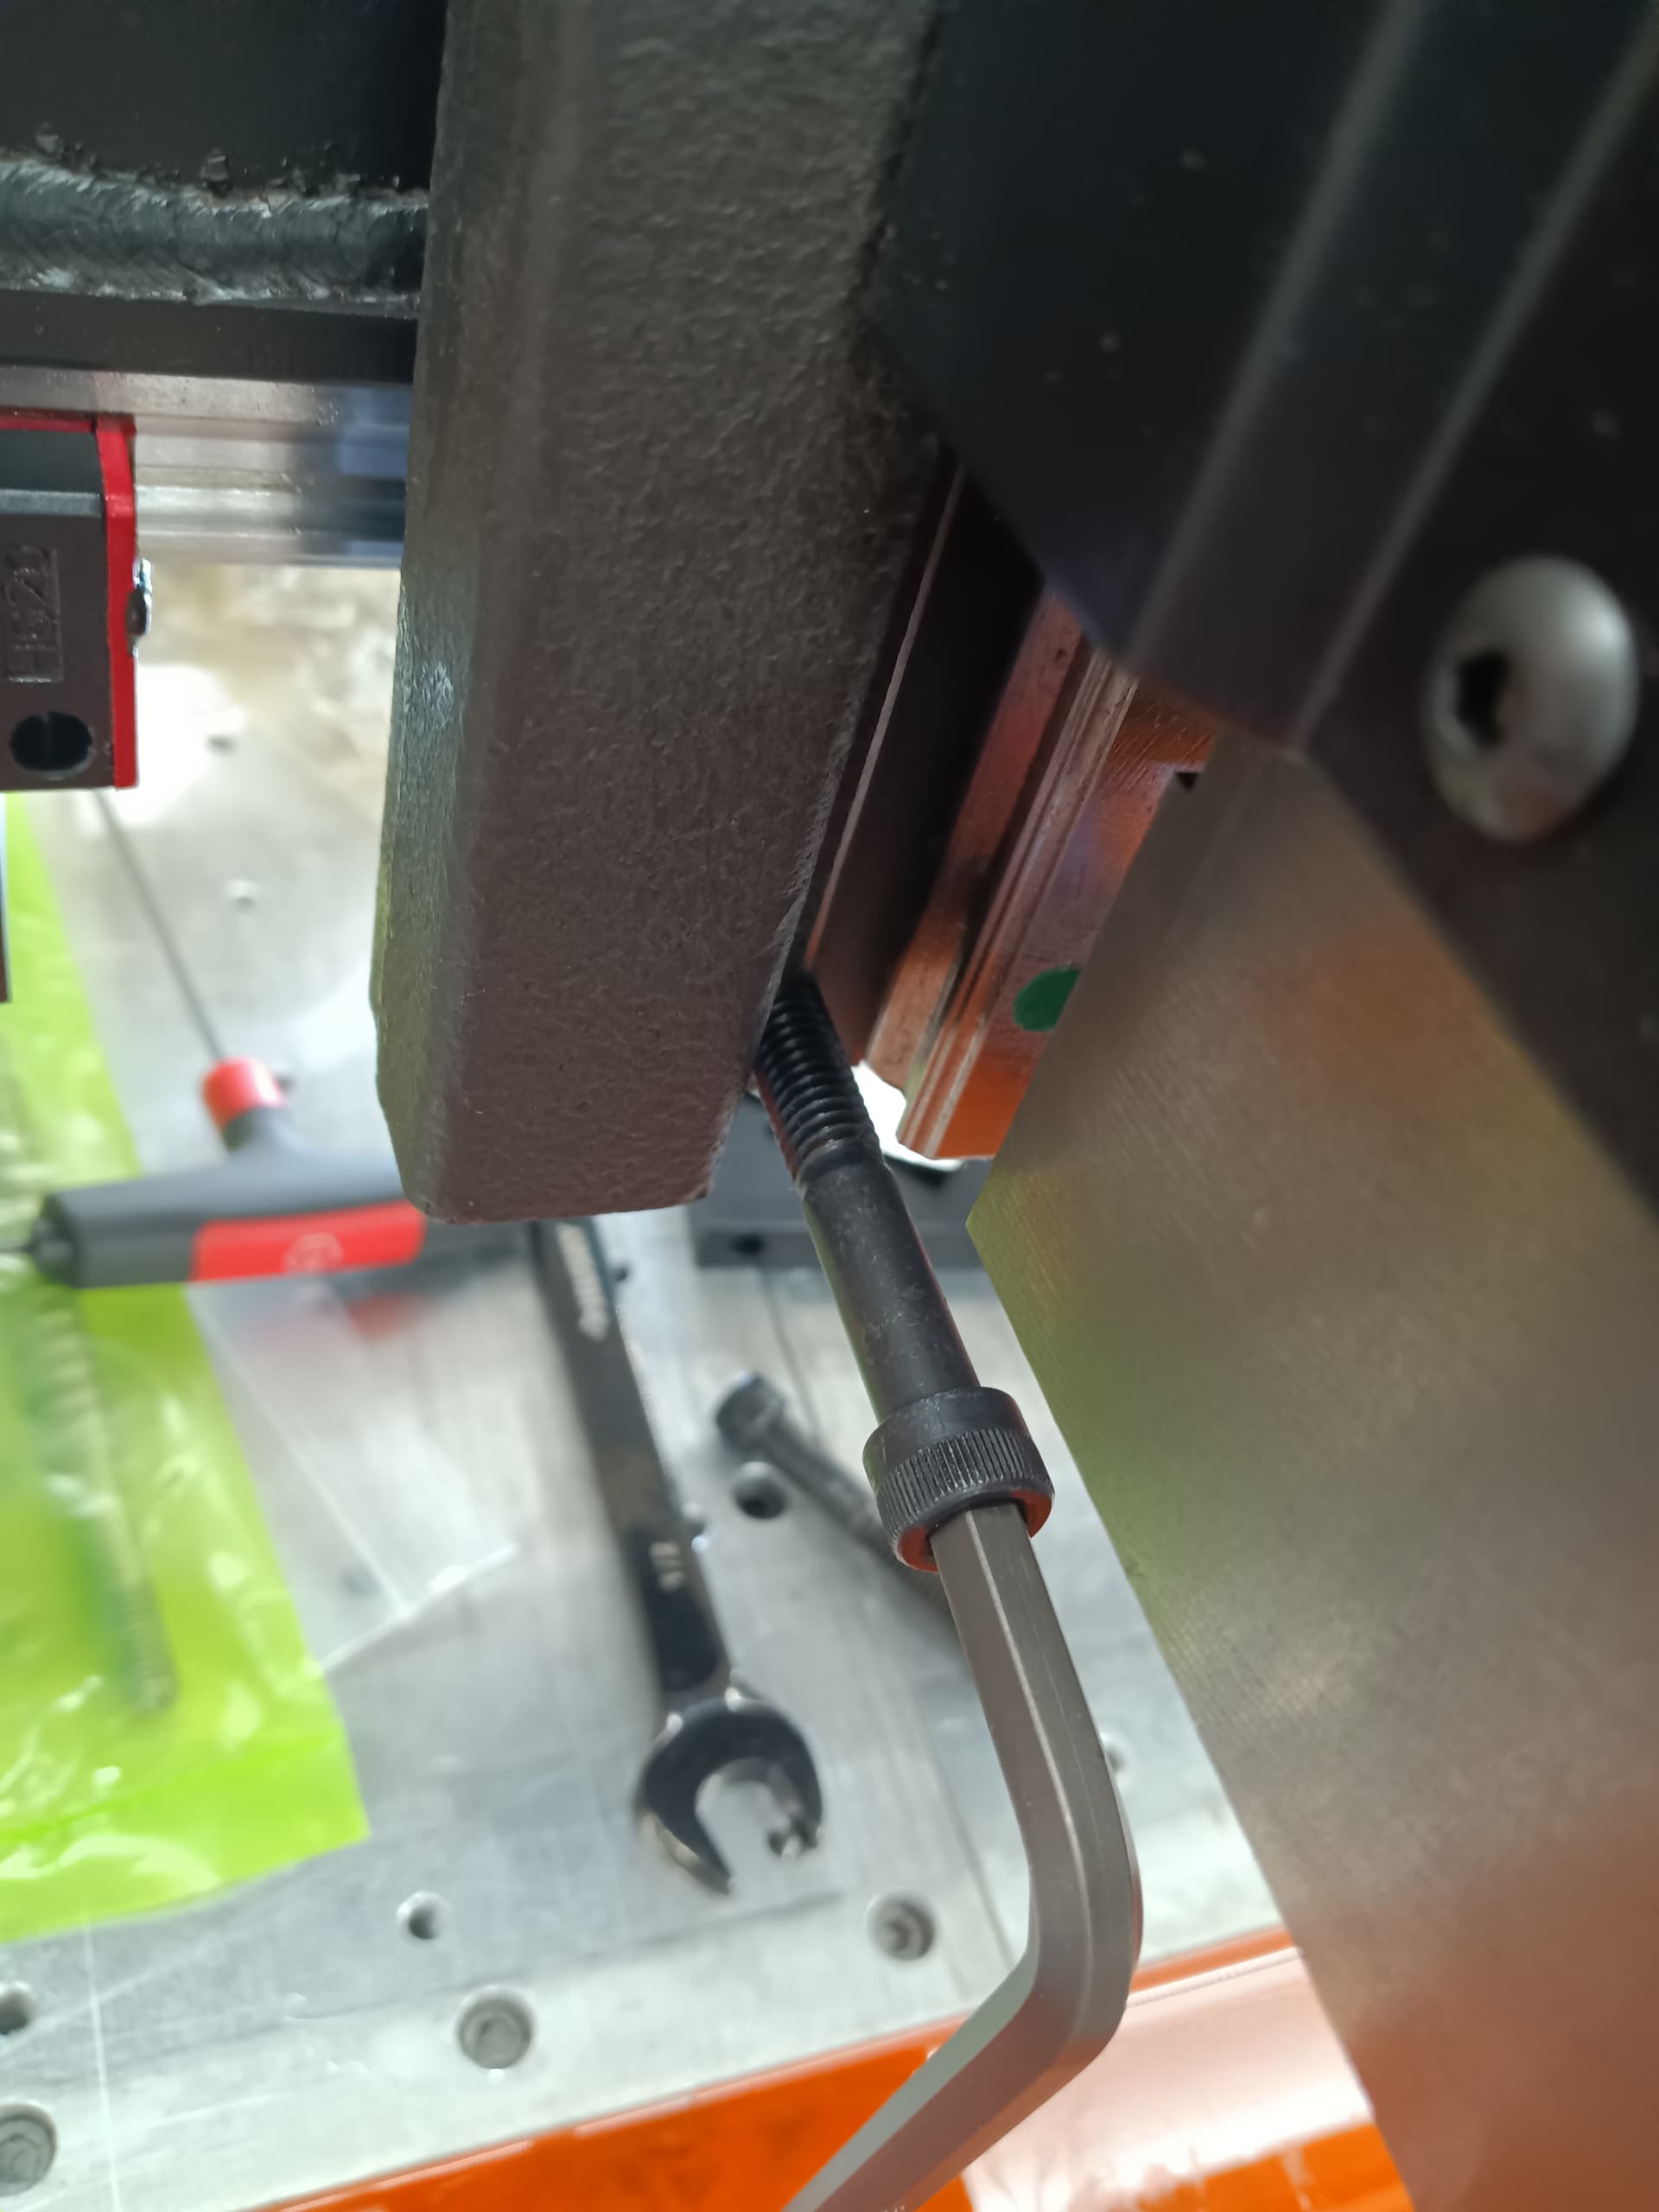
I noticed this afternoon that the center bolt on the X/Z carriage bottoms out before it gets tight.
I had an issue with one of the Y carriages had to run a tap thru the backside. I actually ran a tap in the holes on the gantry. It was dirty and those holes were packed full of crud. During assembly this weekend I found that the center hole wasn’t deep enough for the bolt to pull up tight, it bottomed out first.
We’ll take a look at the bolt length on the center bolt. Haven’t seen this before so thank you for bringing it to my attention- Do you have a 5/16 washer you can use for those bolts?
Yes a zinc grade 5 washer was more than enough to pickup the difference and it tightened up. Would be easy for a guy to think that bolt was tight.
Yes i’ll have to study this tomorrow, thanks for the tip!
As for grime in some of the tapped holes, we’ve begin aggressive with our vendors to make sure they eliminate that issue on the go forward. It’s really a coatings problem, not cleaning their dip tanks frequently enough.
I had one other problem which was completely my issue. I managed to install all the motor mounts backwards. Yep 3 for 3. I went ahead and just installed the Y axis limits switches reversed so they center up correct. I’m hoping that isn’t an issue. I haven’t squared up yet so now is the time to fix it if I need to. On the X mount I pulled the mount to reverse but to do that I had to remove the motor coupler. When I reinstalled the coupler it stripped out a screw. Fortunately I had couple spare couplers from when I replaced them on the Crossfire Pro.
It’s technically impossible to install the motor mounts backwards since you can just flip the limit switch over so that the lever contacts the thumb nuts (as you mentioned).
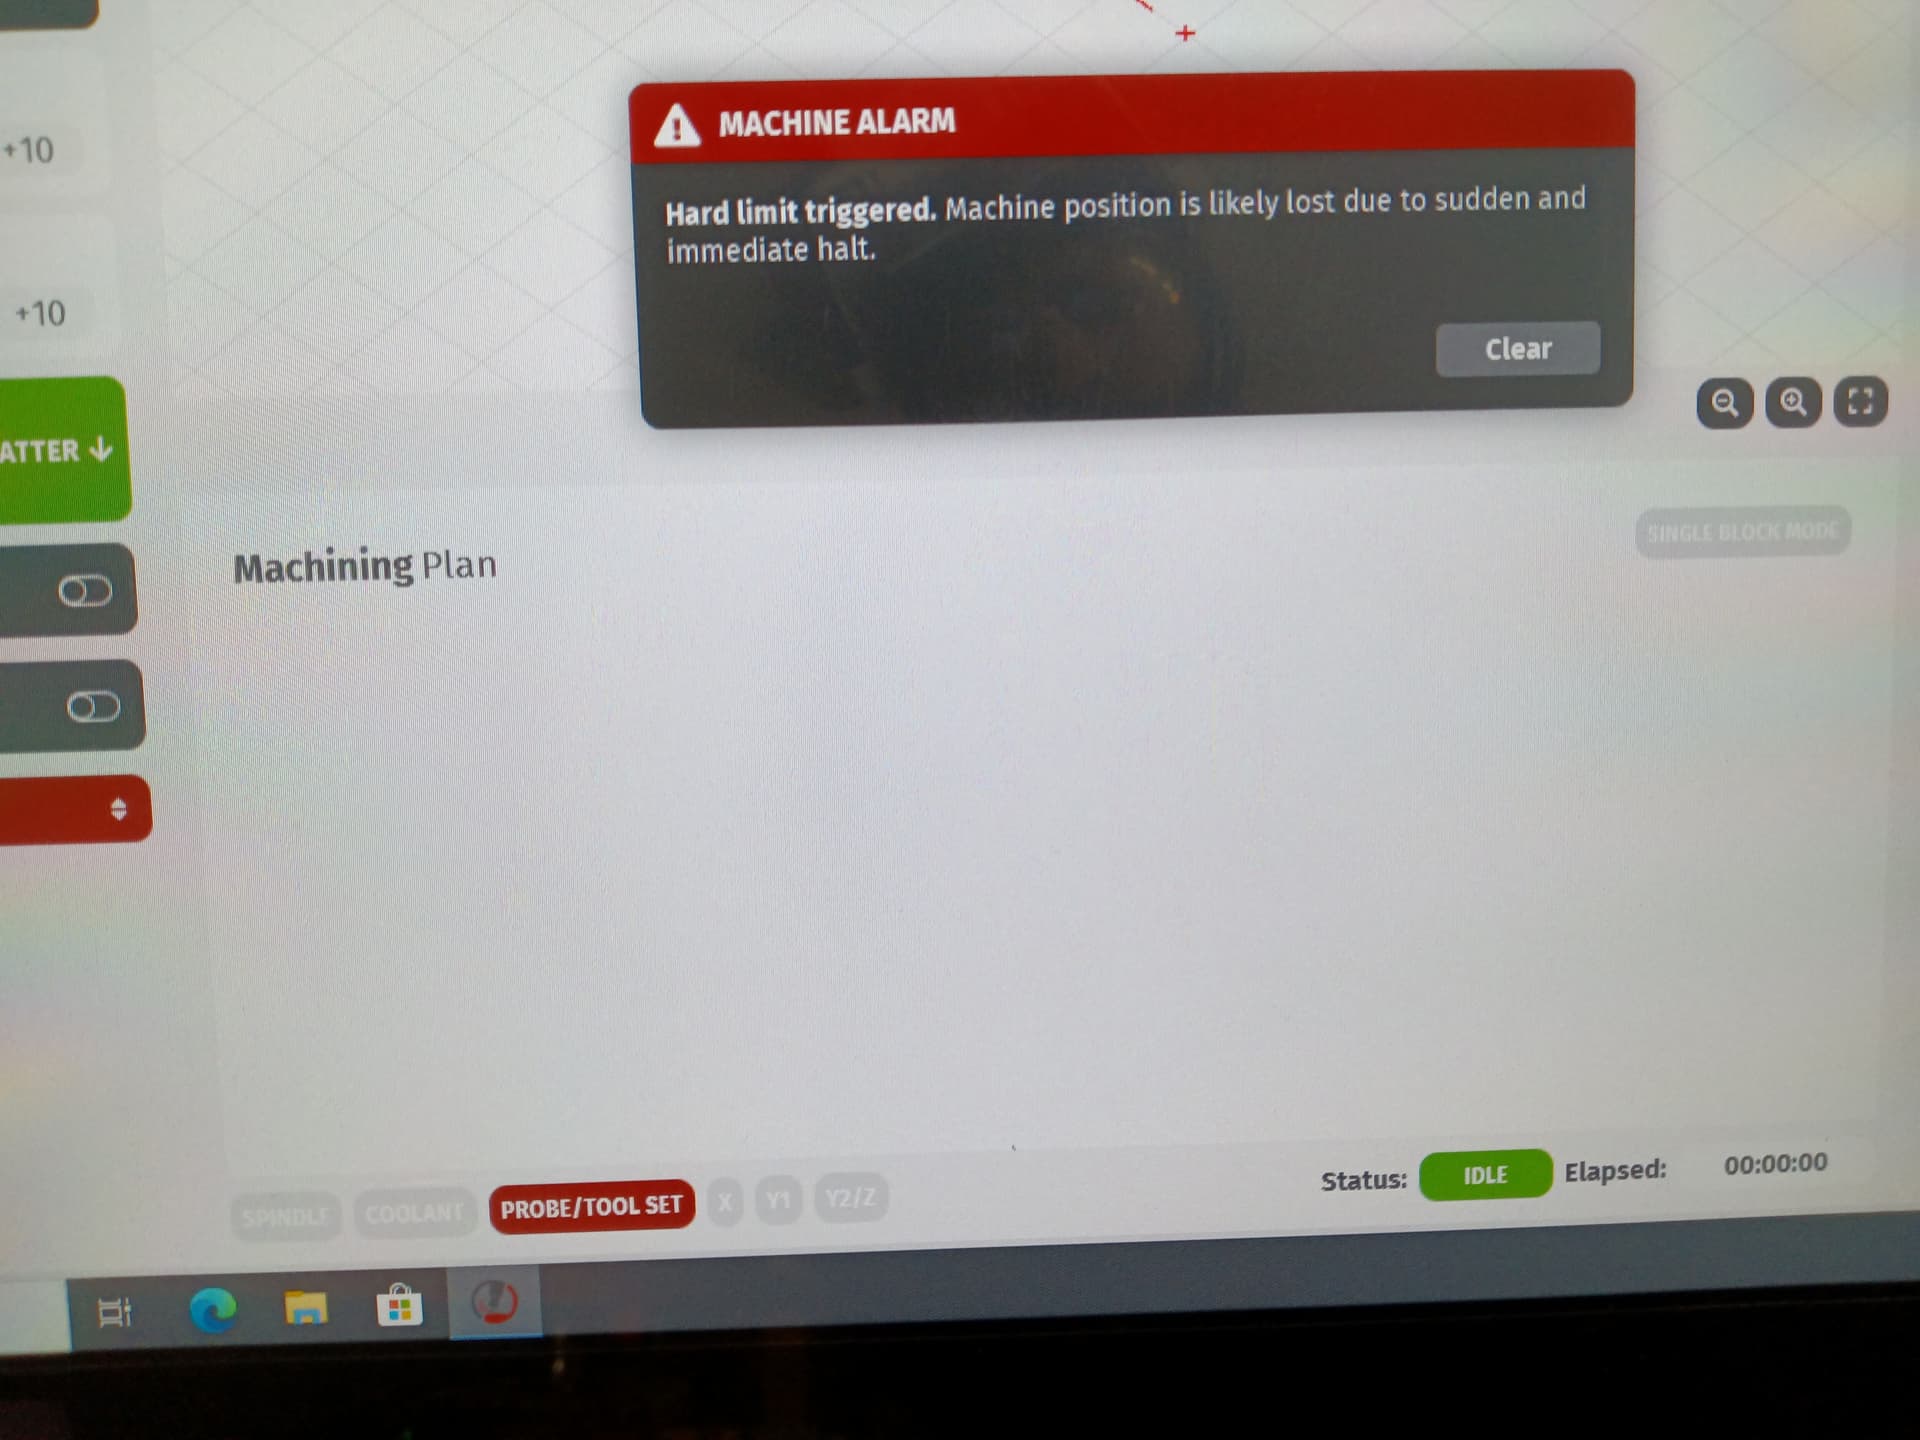
X, Y1, Y2, Z not highlighting when limit switch pressed manually
I was wondering if anyone could help. I’m at the first homing step in the assembly and when I manually trigger the limit switches I get the “hard limit” error warning, but the individual letters for the switches do not light up. Is this correct? I have version 22.1.0 of cut control. The video shows that the limit switch names are supposed to light up.
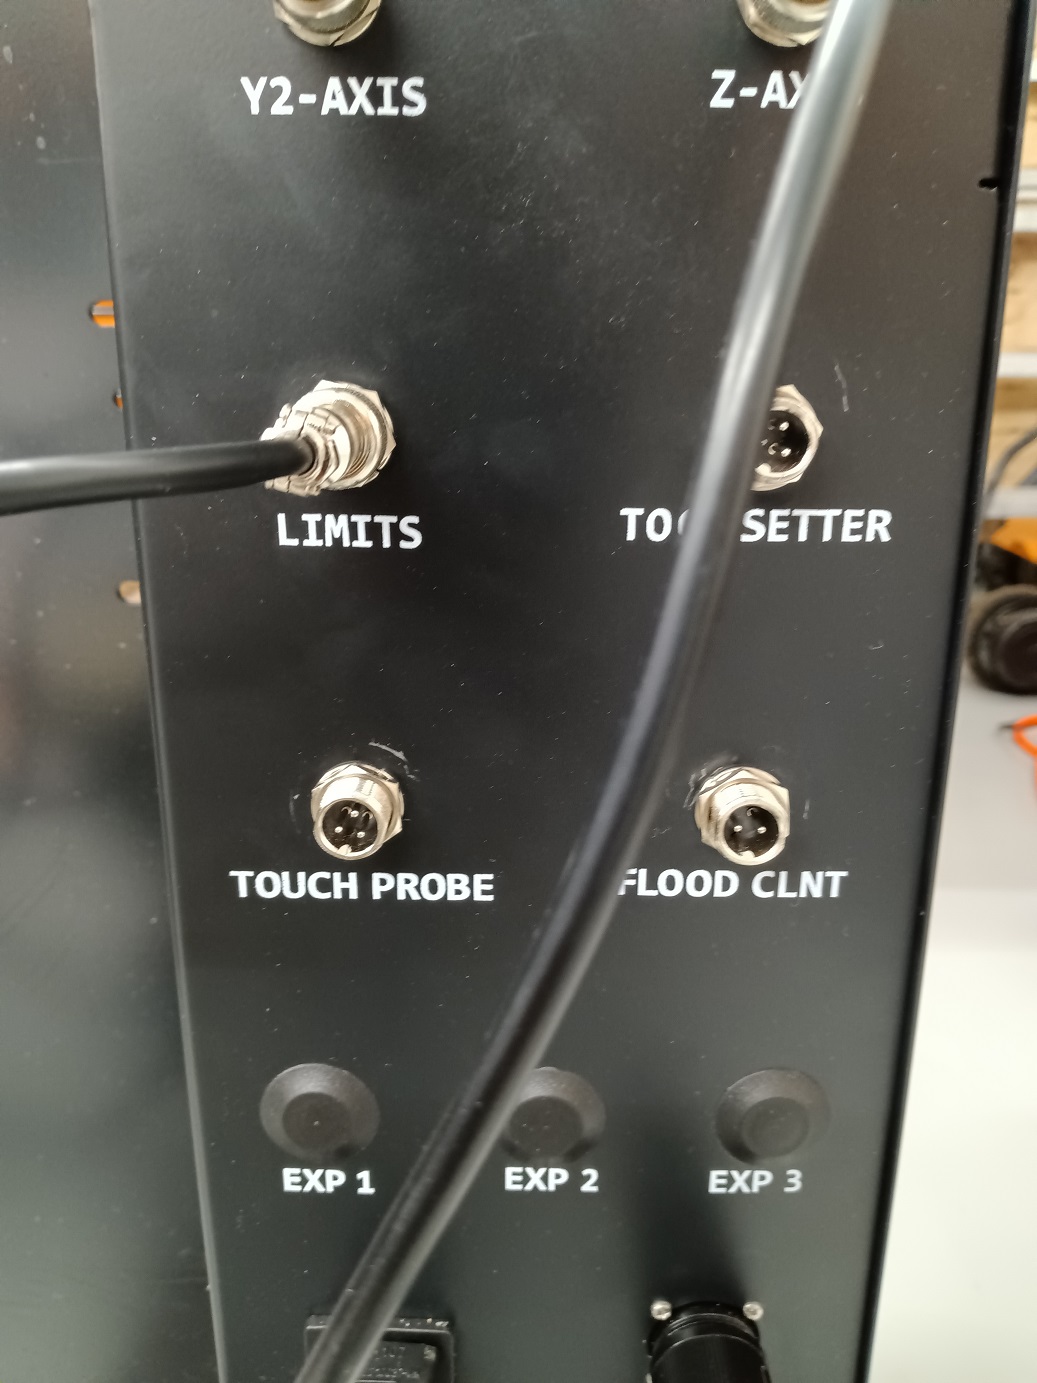
X-axis limit switch pressed in this picture
Do you have your limit input plugged into your probe port? I see the probe is lit up.
Hello, nope… the limit switches are plugged into the limit switch port, but good observation. I will check the other ports on the back of the control box.
@Robotronix09 hold a switch down, clear the message while still holding the switch, then you should see it illuminated in the bottom status bar.
Okay… I will give that a try. Thanks.
So here is the question. Who is going to be the first person to figure a way to extend the z-axis in order to work with a pallet type system? ![]()
I’m not ready for that yet.
id think you could just lift the Y rails with precision machined blocks without much of a change in rigidity, wont gain Z travel but you would gain Z clearance for a pallet.
Anyone have any pointers for this. I can home the machine, but If I try to rapid away from the home position on the Y-axis, the stepper motors will stall. If I lower the speed to 25, then the gantry will move off the Y-axis limit switch with no problem. Has this happened to anyone else? Trying to upload video now. Here’s a link to some video of the problem.

Z-travel? Not yet. But Z-clearance?
I think I would rather make a block that went between the gantry where it attaches to the Y-axis carriages.
Messing with the Y-rails means going through the shimming process all over again along with issues of dealing with the rail stiffeners that got set into the concrete.
Meanwhile a 1 or 2 inch block could be machined so that one side allows it to be bolted to the carriage. Then with a slight off set it is then bolted to the Y-axis carriages.
Kinda similar to a wheel spacer.
Everything is so beefy through there I bet a 1 or 2 inch block will not greatly effect rigidity, slow down on cuts otherwise maybe.
Hey there- I recommend resetting your limit switch stops. This is likely caused by limit switch stops that are out of sync. The end result is that the gantry is forced into a bind when auto squaring. I’d recommend redoing the squaring process- if that does not work, then please let me know as there are some other things we can look at. If it doesn’t resolve it would be best if you send us an email so we can help you through our support system.