Indexing Jig ideas

Has anyone successfully created an indexing jig for the Pro?
I’m thinking of cutting a piece of bar stock to clamp on the left side of the table to square my material up against. I’m trying to come up with an accurate way to measure for this. Of if there are better ideas, I’m all ears.

My similar idea was to use either 3/4 or 1" angle, 1/8". About 44" long, so it spans the water table. It would sit on edges of the water table, not a slat. That way you can butt a sheet up against it. You may need to slightly shift the slats to the right to make room. I was going to use some coupling nuts, bolts/threaded rod (1/4 or 5/16) to attach/adjust it square to left side (probably at the stachon plates). Haven’t quite figured out the exact approach yet.

I’ve been thinking of the same thing, a fence or a stop at the left side of the table so your material is always at the same spot. I was thinking of a tapered slat that would drop into the water pan locking it into place with a raised edge above the slat to butt the material to. I have a simular setup on my Torchmate and the first slat is my stop but on that table the slats are fixed to the water table.

Greg, so you’re talking some type of fence setup that has a mount on the side? Like a table saw but fixed it sounds?

mr540602, I saw a youtube video with what you’re describing. I really like the idea of sliding what looked like little pieces in and out to align stock quickly. I was thinking I might have to re-square the water table, fix the slat mount to the water table, then make custom slats that are the full width of the water table. To be able to index with something like that though, there would need to be more slats? a grid? or the angle fence along the left with a combination of the slats…
Makes me just want to research and buy a 5x10 table…

I think you could make a drop in fence without locking down the slats. The water table sides are tapered so make a first slat that is independent of the factory slats that slides down and locks itself in place using the tapered sides of the water pan. If it just drops in place you could remove it if the fence was getting in the way of a special alignment of a sheet. I have it visualized just need to put it to cad and cut it.

Yes. Here’s my first crack at it:

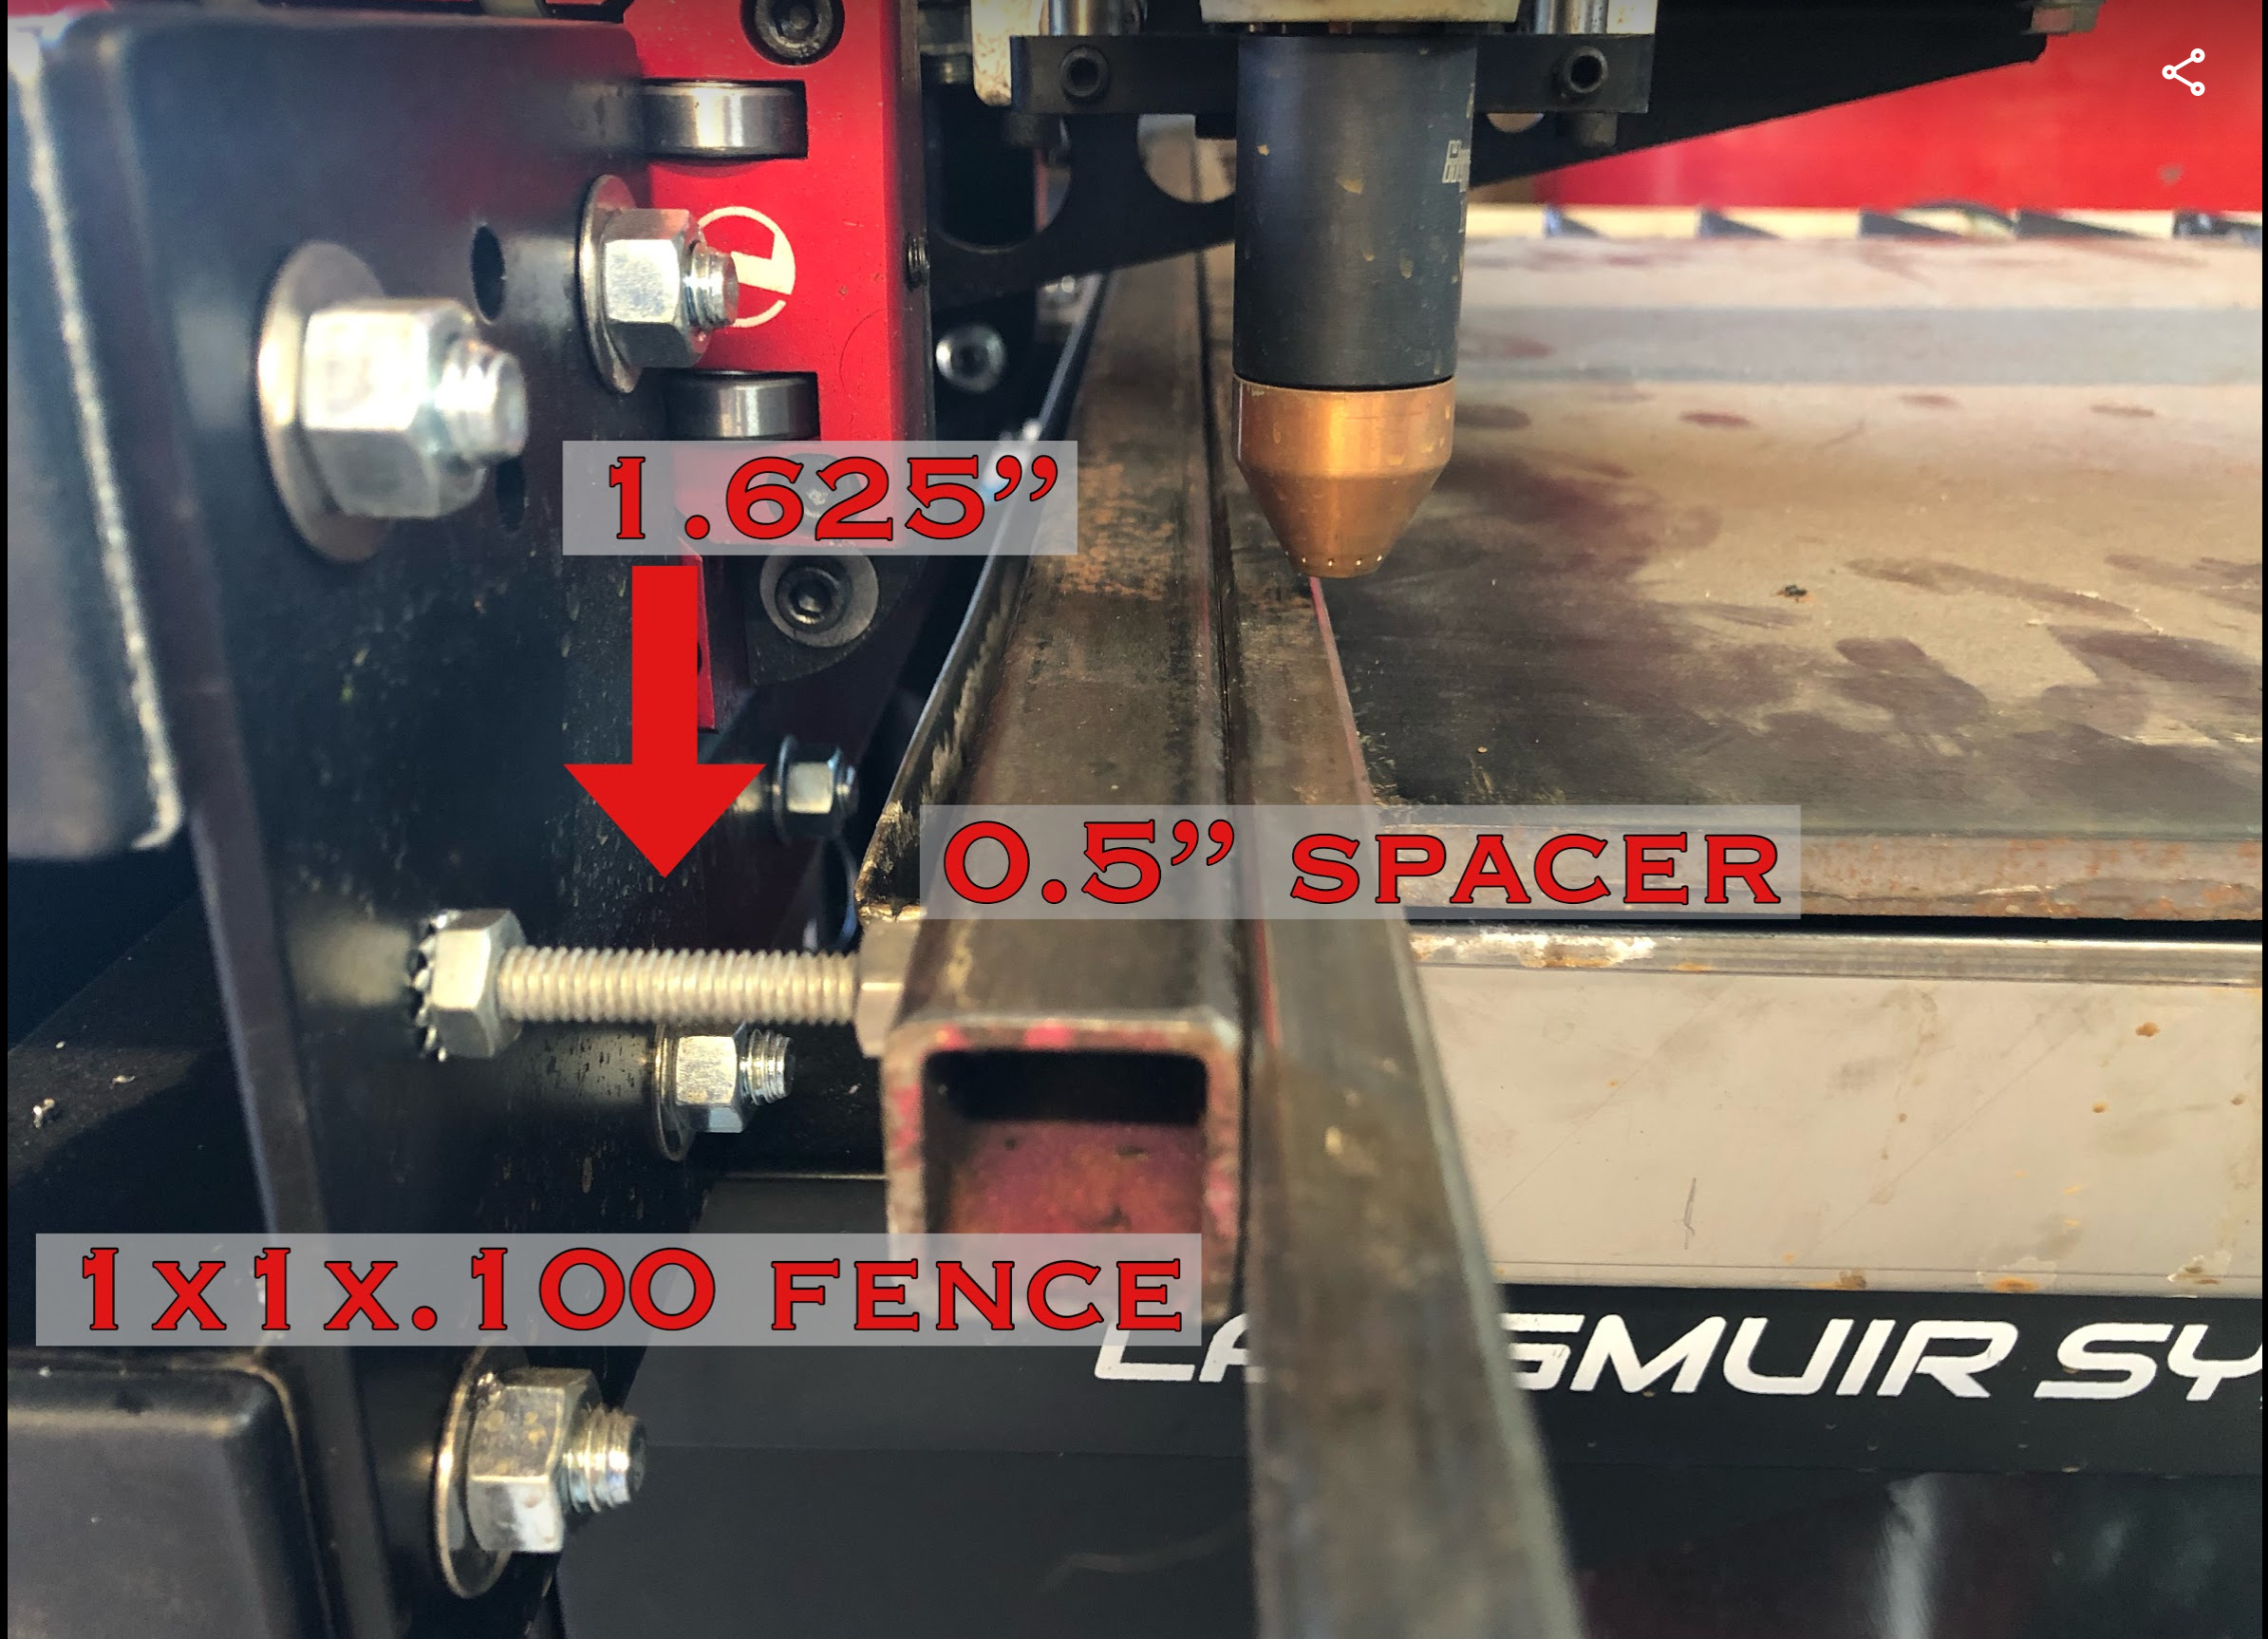
I found I needed to use an additional removable spacer between the fence and the sheet. Otherwise the fence would be in the way of the torch. Not ideal. The fence stays in place, when you want to load a sheet, put the spacer on (it’s 1/2" stock), put sheet on. Remove spacer, cut. Put spacer back on, slide sheet to make indexed cut, remove spacer, repeat. I’m open to better ideas.

I (think have to double check) the length is 51-1/2", holes were drilled 1" from the ends, 2-1/4 2-1/2" long 1/4" bolt (or 1/4 machine screw) is used. Needs to be threaded full length. Holes were drilled 1" in either end on the stachon plates.

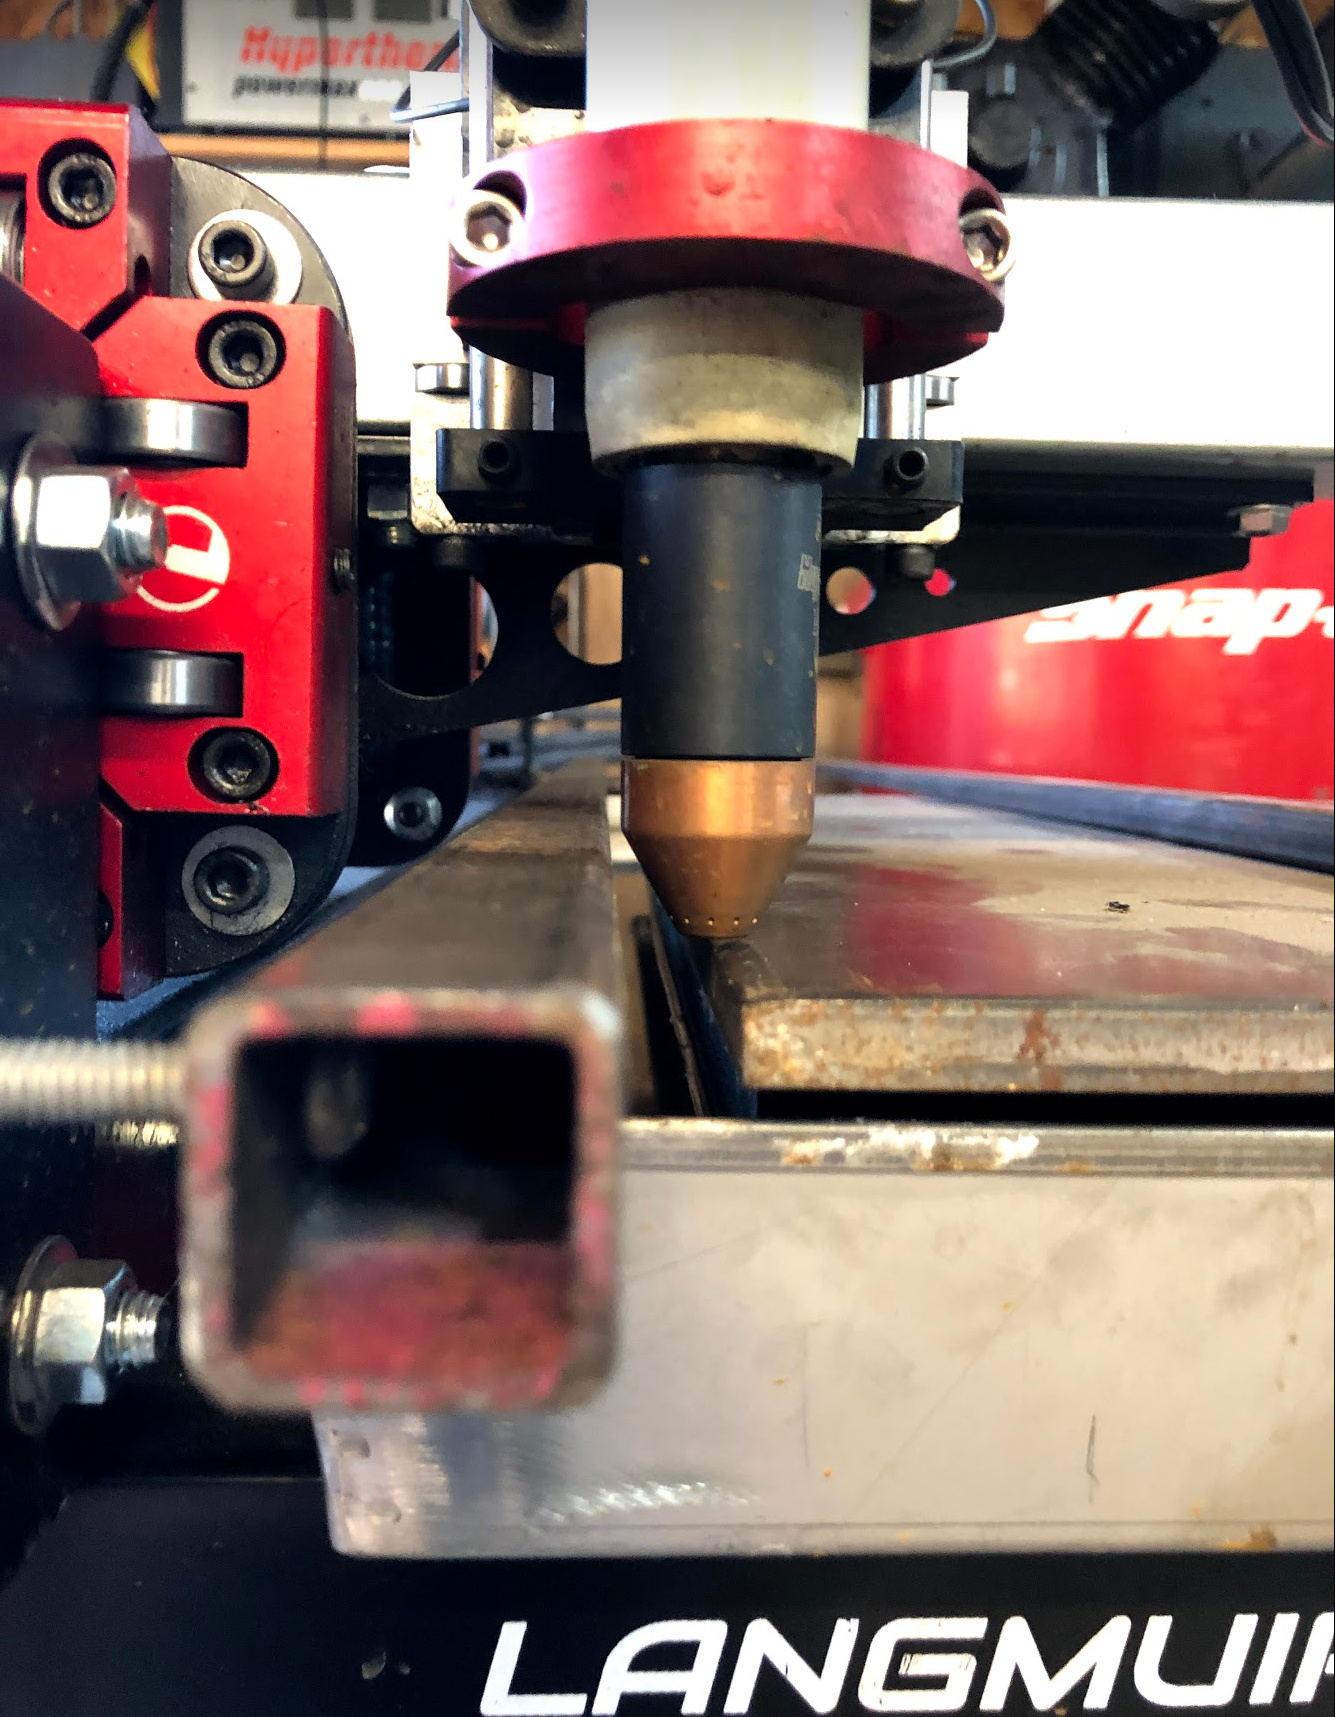
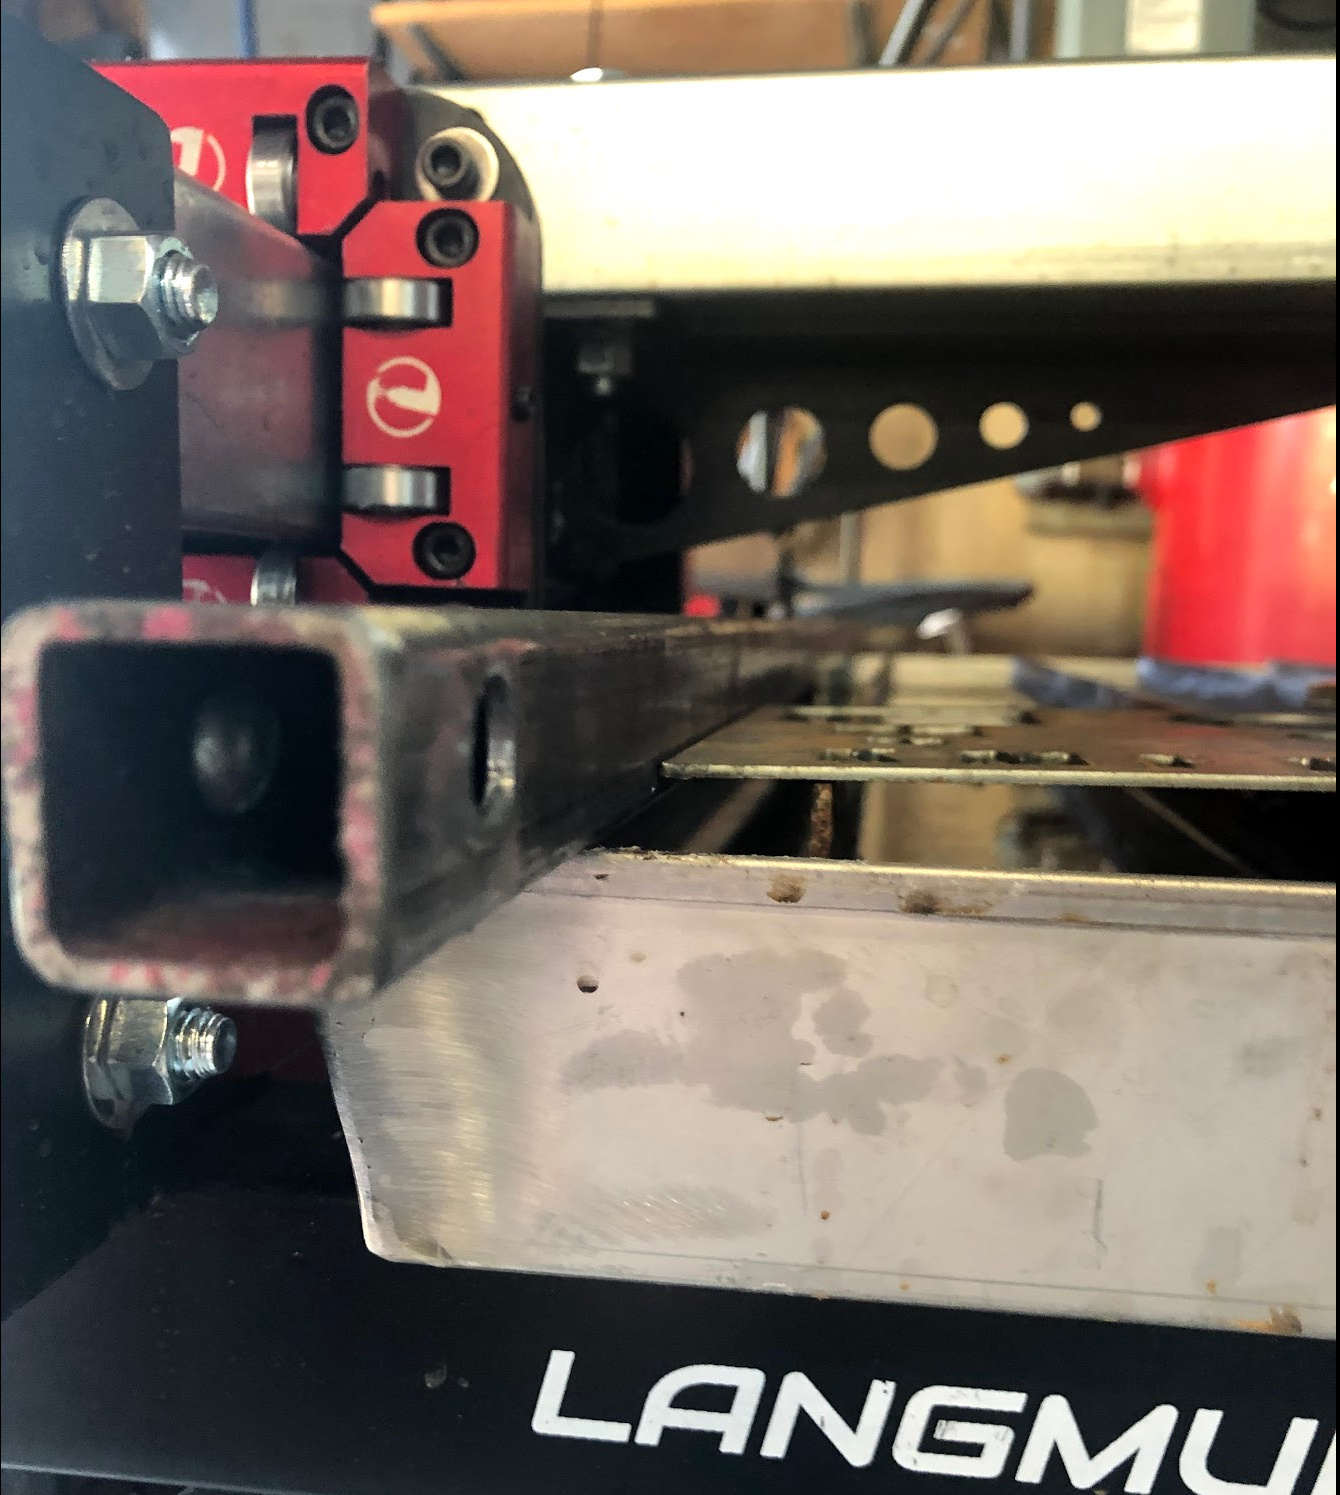
With the 1x1 resting on the water table, sheets will be high enough that you don’t have to worry about the rounded 1x1 tube edges, they meet on the flat:

There is approximately 1.625" between the stachon plate and the 1x1. Didn’t take too much fiddling and I got it to within 0.001 either end of travel

Oh to be clear, I think we might be thinking of two different things when it comes to indexing. I was more thinking along the lines of making cuts greater than the Y axis travel. So you have to break the cut up into multiple parts, and slide (index) the sheet along the Y axis. That’s why I wanted a fence. Less so for positioning in X.

4 Likes

If you used a piece of angle iron instead of square stock and put the thin profile against the steel like a letter L you wouldn’t need the spacer.

1 Like

@mr540602 Yes thought of that, may still end up doing it that way. The problem is if you want to do edge starts, or cut all the way to the edge. The X travel on the Pro is 48.25", not a hair more. So if your fence butts up against the sheet, you’ll cut your into your fence. It may not be that big a deal, just grind it down. The parts outside the water table will still have a good edge for sliding the sheet along.

Your idea is way simpler than what was running through my head. I would also put a stop on the forward edge of the fence. I don’t really use it for indexing I use it to place the sheet exactly the same every time I load it. That way you just bump to “0” “0” and off you go with the sheet placed as close as you want to run it every time. Plus if you are cutting a large piece and something goes wrong and you loose position you can just go back to hard stops “0” “0” reset the program and use “run from here” to save it.

3 Likes

I’ve been trying to wrap my head around doing this myself and decided to keep it simple. Thanks for the ideas. Here’s what I did last night.
I first used a piece of 2x2x1/4 angle that I had. It was basically 1/2 inch short so I went yesterday and got a drop from my supplier. This is a 2.5x2.5x1/4 piece of angle. It didn’t take much to align, an 18ga shim on the front and a 14ga shim on the back bolt and it was lined up. I’m currently just using clamps as I haven’t decided how I want to install this semi-permanently with easy installation and removal. I’m maybe going to drill holes but the clamps seem to be very stable currently and will allow us to index a job we have.

2 Likes

It does look like you could get 2 longer bolts for the stachon plate, one either end, and have it permanently mounted. Use some thin jam nuts to adjust it. Anyway clamp/bolt as long as it’s working that’s all that matters.

I added a couple extra jam nuts and painted mine, should have painted it red.

5 Likes

yeah I like the way you did yours and was thinking of doing that, however to attach the angle, I’m going to have to drill through the plates and the square tubes so I figured I’d ‘sleep on it’ before drilling. I’m hoping a simpler option will present itself and honestly the clamps are holding well. I might just convert to some c-clamps.
I want to create some type of a stop or more reliable 0,0 measurement but I unfortunately only have small bits of time to work on these things.
It’s a work on progress for sure.

@wvredbeard
Were you ever able to make a reliable 0,0 stop? I’m cutting 1/4" plate right now (48x32) and it is a nightmare to get it aligned at 0,0 and square by myself.

We did, sort of. The only modification I’ve made to my original post was to use smaller c clamps. I’ve had to realign it once since then after I moved the table with my tractor. The angle definitely provides a reliable square edge. The only thing that I will change in the future is the 0,0 stop. We used a chalk mark originally because we were needing to get that job done and it worked well enough. Most of the time we aren’t needing to index x and y. I was thinking I’ll find 0 with the pointer, and make a cut with a hacksaw and dremel. I’ve seen others have created stops that attached to the water table to help with this type of alignment but it wasn’t something we would use enough. There was even a table that came with these stops as standard equipment so you could do a search if you haven’t already seen them.
The pointer that you can see in the picture above was the piece that gave me confidence I was aligning the angle properly as it comes to a sharp point and is the exact center of your torch. The pointer is probably the piece you need most for what you’re trying to do. I ordered it from a guy who mills them in FL I think. Let me know if I can clarify anything or help further.

2 Likes

I had what I thought was a good index, but after getting motivated by this post, I did a big improvement.

I designed two brackets to bolt to the frame rail (the front one utilizes the existing 5/6" bolt. I included slot cuts in the brackets to allow for adjustments. They are bent at the notch points in the attached .dfx file.

After bolting to the frame, I used a notched piece of 1x1 angle 41.75" long that serves as the index edge guide. Using a cut off nail head in the torch end, I easily lined up the edge guide to exactly match the Hypertherm cut head. Finally, I cut and sanded the adjusted edge flush (on both ends) so that I can exactly reposition it if I need to remove and reinstall.

Crossfire index brackets v3.dxf (465.2 KB)

2 Likes