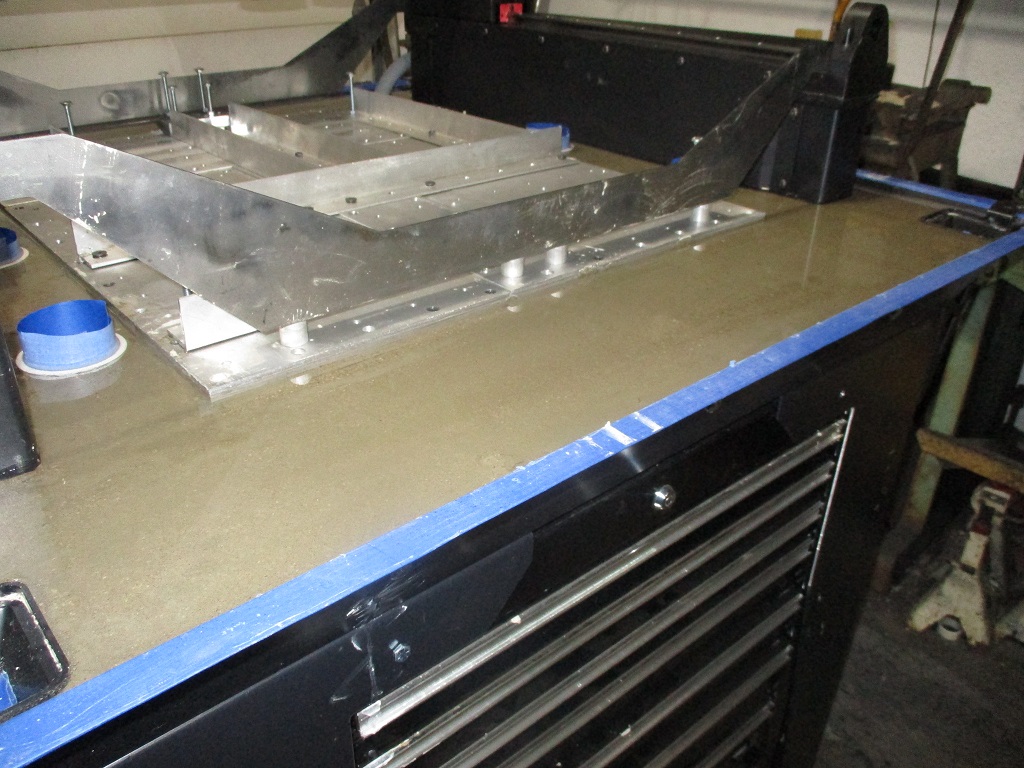
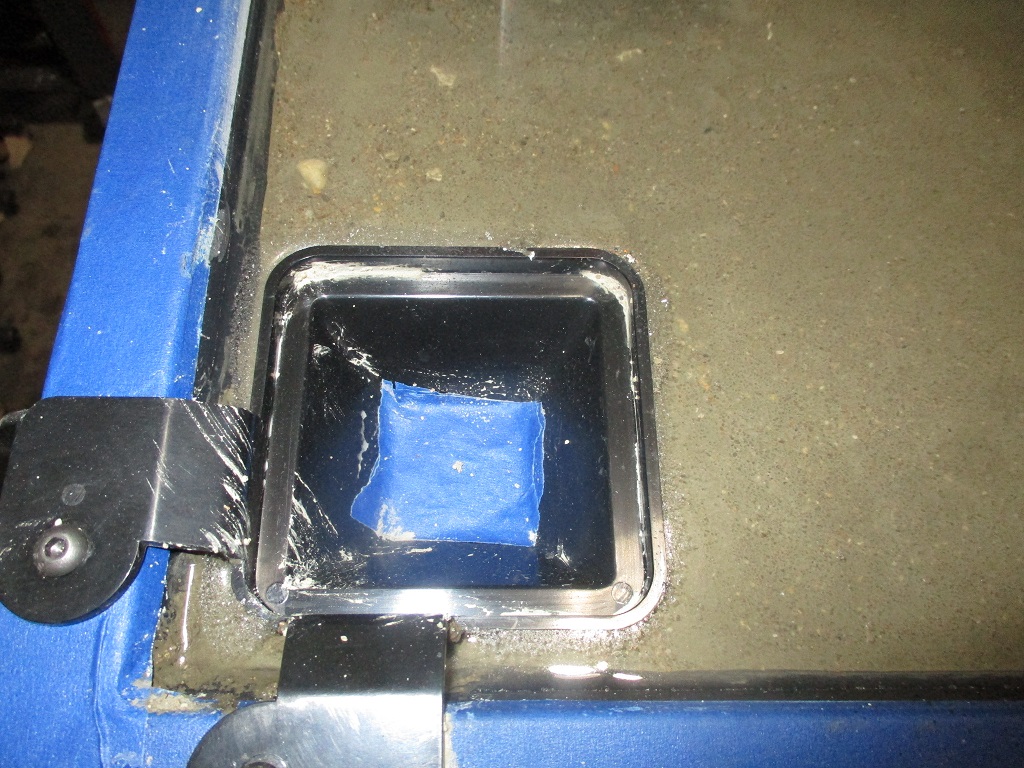
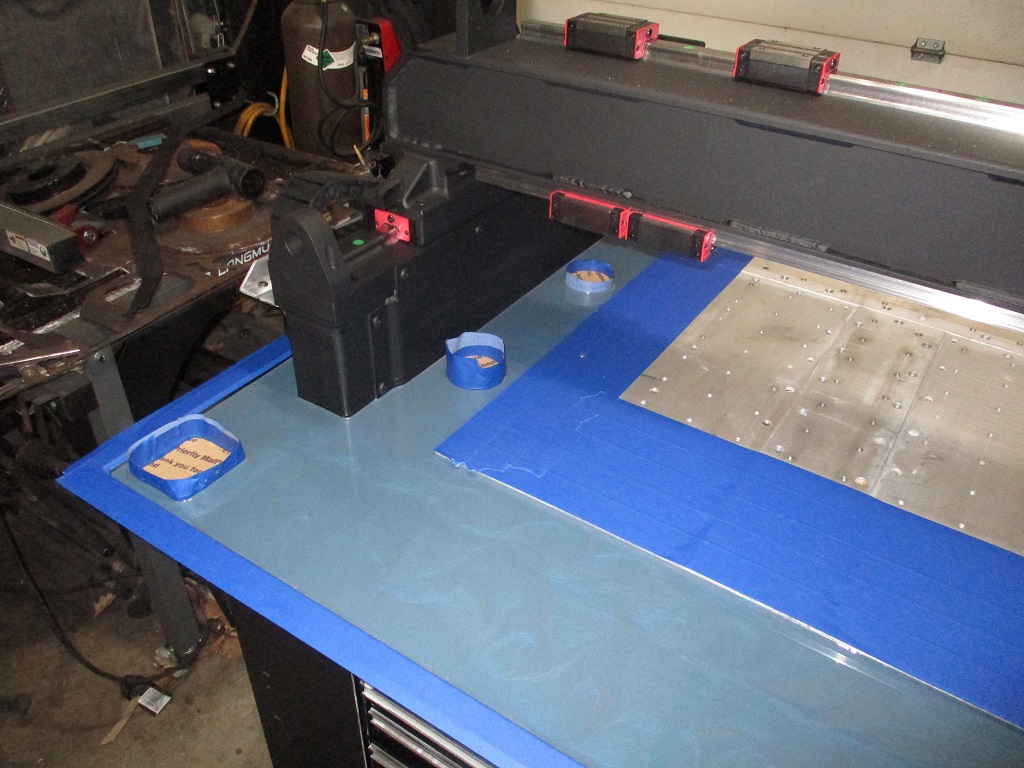
Started the pond cure this morning. Took about 1.25 gallons, so I will need to get a little more epoxy while I wait. 3 of the 4 corner drains are almost perfectly flat and level with each other, The one in the left rear seems to have popped up about 1/16". I think I will trim the sides of this one down prior to the epoxy. The new center drains are about 1/8" lower than the corner ones, so I will use tape like shown to create an edge dam for the epoxy on all the drains.
3 Likes
I was going to suggest clamping some angle iron temporarily to the outside of the stiffening plates to keep them from bowing out in the middle during the pour but I saw you were way ahead of me. Only different thing I would have done is put the gantry at mid travel during the curing phase instead of all the way forward or back. Probably won’t make any difference.
i have a gallon of the same stuff not going to use it, its yours for the cost of shipping from LA. Looks good! glad everything worked out.
1 Like
While the concrete was pond curing, I took a week’s vacation out in AZ in Phoenix, Sedona, and the Grand Canyon.
Today I removed the brackets that supported the base plate and removed the tabs on the corner drains. Also checked the alignment of the bolt pattern to the Left rail and it was within about .007" over 15" and I made some adjustments to get is within .001". If all goes well, I am planning to complete the epoxy pour this coming Saturday or Sunday.
5 Likes
Ok I hope this doesn’t sound like too ignorant a question. Never done much concrete other than maybe helping on a porch slab or post holes. Had a few floors or driveway poured tho - I have never heard of pond curing.
So, do you literally finish off the top making it flat, and then flood it? This doesn’t ruin the surface?
Haven’t started my build yet, investigating the concrete step.
Thanks
Tenting and wet curing.

1 Like
Looks like BrianS beat me to it.
I learned about pond cure as part of the research on other MR-1 builds and decided to give it a try. I ended up letting mine pond cure for 2 weeks. When I got back from vacation I drained the pond and then started cleaning and scraping the surfaces. If you plan on the epoxy coat, then you don’t need the concrete to be super smooth/flat with a great finish. The epoxy will give you a flat glossy finish over the concrete surface.
2 Likes
I’m curious as to your ideas on routing your wires. I know how I’m going to do mine but I really want to see your set up
I haven’t got all the details worked out yet, but lets start with the two rear electrical 90s. The 3/4" one on the right will have the limit switch and Y-servo motor wires .
The right side I upsized to 2". This will allow me to pass through all the wires and connector ends for the spindle, probe, X-motor, Y motor, and tool setter and the hose for the flood coolant. All of this will run outside the left Y-rail, probably elevated about 2" above the base.
I am looking into running two cable carriers that will lay in support trays. One on the outside of the left Y-rail and one on the backside of the X-rail to support and allow the cables to flex. This placement should help protect them from chips and coolant. The tool setter cable will likely be wire tied under the support tray to the front left corner of the baseplate where the tool setter will be positioned.
I am still working through the details of the cable carriers and the support trays - trying to find economical solutions.
I am also planning to run a compressed air hose, washdown hose and power to the LED lighting on top. Those don’t really matter which side they run through, so I will just use the one with the most room. When these hoses and cables go up the interior wall of the enclosure panels in one of the corner, they will be in some more PVC conduit for a clean look and to keep them protected.
1 Like
I just ordered some cable carriers. They will be here tomorrow and then I will run as much as I can through them to see how much room I have left. I did this same thing on my cnc plasma table so I have a good idea how much room will be needed.
I can’t wait to see how you set yours up!!!
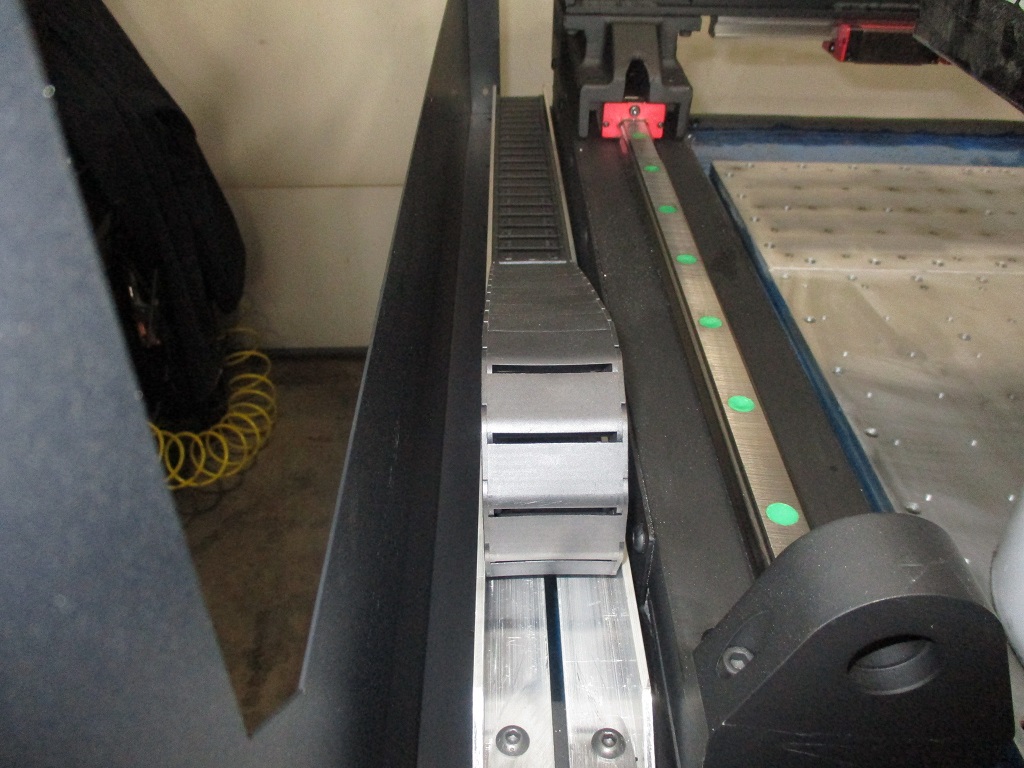
It was a little cooler today, so I delayed the epoxy fun to Sunday. My cable carriers came in and so far it looks like they work will well for the Y-axis run.


These are the ones I am using:
https://www.amazon.com/gp/product/B07WQ8P3PZ/ref=ppx_yo_dt_b_asin_title_o00_s00?ie=UTF8&psc=1
They have an open area of 15mm x 40 mm and are 3ft long. I purchased 3 just to make sure I had plenty, looks like I can take a few inches out of the Y-rail one and the X/Z rail one will be even shorter.
I mounted them at an angle so any coolant that gets on them will drain away. The rear of the cable carrier is lower than the PVC tubing so all coolant will drip off the cables vs. running down the cables and through the PVC tube.
4 Likes
Those are some amazing modifications. I’m watching in suspense to see the final result.
Has anyone thought about using anything like this for the motors?
STEPPERONLINE Closed Loop Stepper Motor 1 Axis CNC KIT 12.0 Nm/1699.68oz.in Nema 34 Stepper Motor & 0-8.2A 24-80VDC Stepper Driver https://a.co/d/0MxYzBb
The specs look good. I don’t think the controller would notice a difference. All of the servo function is controlled within the servo controller itself. No more missed steps and much more torque. Any thoughts?
depends on the power supply if your able to use the stock one to deliver the voltage and amperage to make those upgraded closed loop steppers worth while.
Not planning any motor upgrades at the moment. Don’t know the first thing about servos and stepper motors… more of a mechanical engineer, mechanic, machinist, & metal fabricator.
2 Likes
Didn’t even know closed loop steppers existed. Concept is way beyond my understanding. Is the loop closed in the stepper motor circuitry itself?
Yes. May need to upgrade the power supply also to get all the torque. I was mostly interested in the servo function.
The controller is responsible for all the pulsing to the stepper driver. The loop is closed within the motor and the driver itself. It verifies that the motor moved the amount of steps requested by the controller.
1 Like
Can you still install the enclosure with these?
I have used them in the past on my custom cnc mini lathe with centroid acorn controller. What I learned is that the feedback of the stepper closed loop will give you only an alarm status when it loses steps and then the machine will stop with en error on the display. It will not correct the missed steps, but will give you the option to know there is an issue. In order to do so, I believe the MR1 controller needs to have the ability to stop the machine when en error is detected and pop up a window with the error in cutcontrol.
Therefore, not sure these will be just plug and play until Langmuir allows a firmware update with these functionality.
2 Likes
I kept everything on the inside of the bolt holes for the side panels, so I was pretty sure there would be plenty of room. Went ahead and pulled out a side panel for mockup and have about an inch the inside of the steel panel. Will lose some with the window and hardware, but should still be left with plenty.
Finished the epoxy coat today.
4 Likes