The plan is for the cables to loop down from the PVC before going to the motors and sealing the ends of the PVC with 2 stages of heat shrink to seal the opening and make it leak free.
1 Like
Id highly recommend using plasticizer and adding some slow cure mix to your concrete, getting that baseplate in to normal concrete in a timely manner while getting the bolt pattern straight would be really difficult. Plasticizer will definitely help and keep water content down.
1 Like
I used an electronic vibrator. Without it, the mix would have needed a lot more water in it. Almost no bleed water came up and troweling the surface was almost useless. The epoxy hides a lot of sins…
That said, I think the vibrator is why the fittings well off one of my drains and it made a mess running it along the stabilizers.
Yes, I have been looking at plasticizers and plan to use them to help keep the concrete pliable. I am also planning to have a tool or something help determine when the concrete thickness is just right for setting the plate to reduce the amount of concrete that needs to be displaced. Sure the anchors will need to make space, but having the concrete 1/8" too high to start with will just make it worse. Still planning out my process…
I picked up on the portable back massagers for vibrating duties. With my reworked corner drains, I plan to RTV the caps to the drain tubes while having something sit on top of them to level then out. I will likely just push the concrete into the corners by hand and not use the massager close to the corners.
1 Like
My guess is that with the rigid PVC tubing you have in place on your drains, it is pretty unlikely that vibrations would cause a fitting to detach.
This is the back massager I used. I paid $80 for it as part of the last prime day sale.
https://smile.amazon.com/gp/aw/d/B09WYK1DXY?psc=1&ref=ppx_pop_mob_b_asin_title
I received my build kit a week ago. So many of your mods are similar to things I’ve been considering for 10 months and the ideas are constantly changing. That’s the problem with long waits, you tend to overthink everything.
The approximate 1 x 3 x 32 guide rail plates are very heavy duty but 3-1/2” above the concrete level they’re supported by 5% sheet metal and 95% air. For some time now I’ve thought displacing this air with concrete or epoxy granite was a no brainer.
It makes perfect sense to tie the stiffening plates to the 3 x 3 uprights with a couple screws and I wondered why LM didn’t do this. But now that I have the kit I’ve discovered the square tubes are only 0.125 wall thickness so if tapped for a 1/4-20 screw that would only be about 2-1/2 threads to bite into. Are you considering filling the uprights with concrete or EG as well?
I thought about trying to caulk or tape off the gaps in the stabilizers and add concrete under the rails. Either as part of the chip tray pour or after the fact (and accepting that the concrete wouldn’t bond well to the 1st pour). I didn’t do it basically out of fear of making a big mess before the epoxy pour.
My guess is that because it would be difficult to get the rail to be perfectly “bedded” on top of a column of concrete, that the extra bracing on the stabilizers doesn’t make much difference. Adding anchors to the bottom of the rail might cause some bending moments as the concrete cured as well. However, it would add additional mass to the base, which would probably help damping a little bit. It would be interesting to know if langmuir did some FEA on this and ruled it out…
Yes the vertical tube wall thickness is pretty thin, but was enough to tap some 1/4-20 threads and snug the bolts down. I plan to RTV the extended portion to the verticals to help seal in the water from the concrete.
With the new side plates with the side flanges, and having the verticals bolted to the base vs. just setting in it, I can start my pour with the side plates installed, top rails removed and fill the void between the Y-rail vertical posts to within about 1" of the top. Then I can install the top rails and continue with the filling the rest of the pan. This way I don’t have to worry about the concrete bond between 2 pours.
1 Like
The reason the side plates aren’t attached to the upright tubes is because, in addition to not making any difference at all in rigidity, it will make it very hard to align the y axis rails to be perfectly parallel. They need to be parallel within about .003” in order to avoid binding.
The only way this is achieved practically is to install the gantry, loosen the bolts at one end that secure the y axis rails and then jog from one end to the other. Having the stiffeners attached to those tubes will make this more difficult if not impossible.
2 Likes
That is why I went through the effort to bolt everything down and get everything aligned to the point I could use my pinky finger to move the X-rail back and forth along the length of the Y- rails.
Then I made and fit the new side plates so there is little to no deflection of the 14ga side plates when tighened and was able to maintain ponku movement of the X-rail.
The next step is to test the removal and reinstallation of the top plate on the Y-rails to verify everthing stays in alignment during reinstallation.
I also plan to install the X-rail once the baseplate is set and all concrete is in the pan so I can validate alignment of the Y-rails before the concrete sets.
“ponku”???
Pinky. Typing on the phone with fat fingers and autocorrect makes for some interesting posts.
1 Like
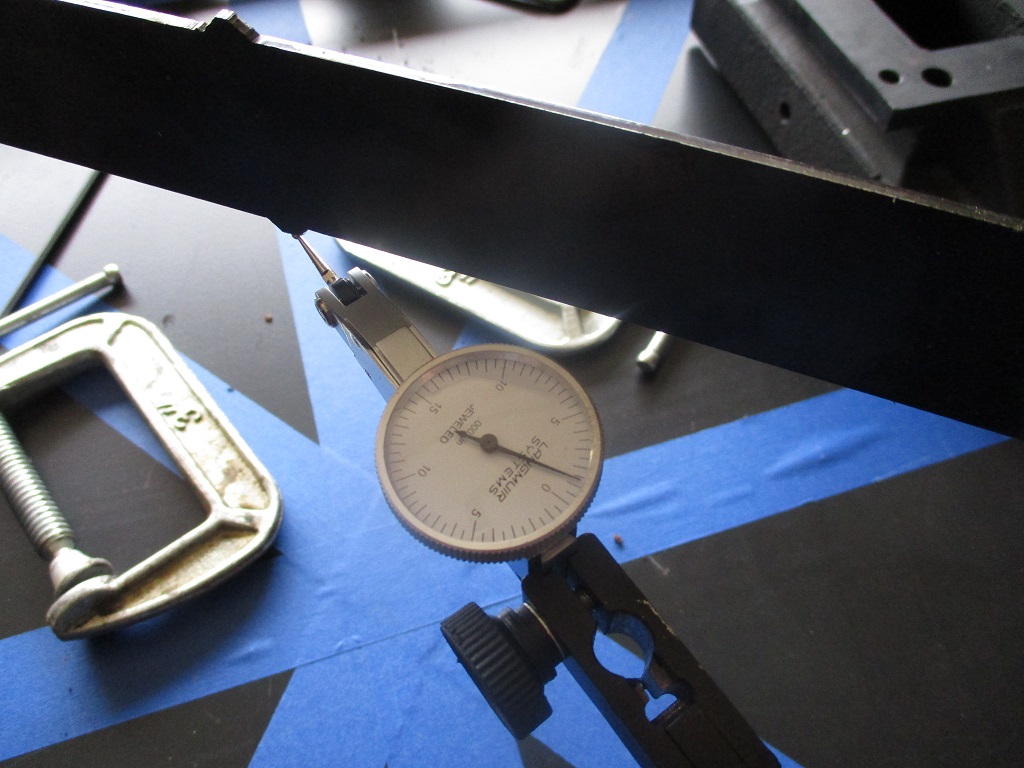
Took the top of the Y-rails off to verify everything stayed in place with them off. Everything checked out and once it was put back together I checked co-planarity and it came out about 0.0013 off between the two measurements w/o any shims. Looks like my time with the machinist level, the jack bolts and hold down brackets paid off. Next step should be the concrete poured once I get some help rounded up.
1 Like
Saturday is concrete day!
Been thinking a lot about the concrete pour sequence…
I have 15 bag of concrete pharmacy set control to delay the setting on the concrete. I also ordered 10 bags of the concrete pharmacy flow control… but not sure they will be here in time.
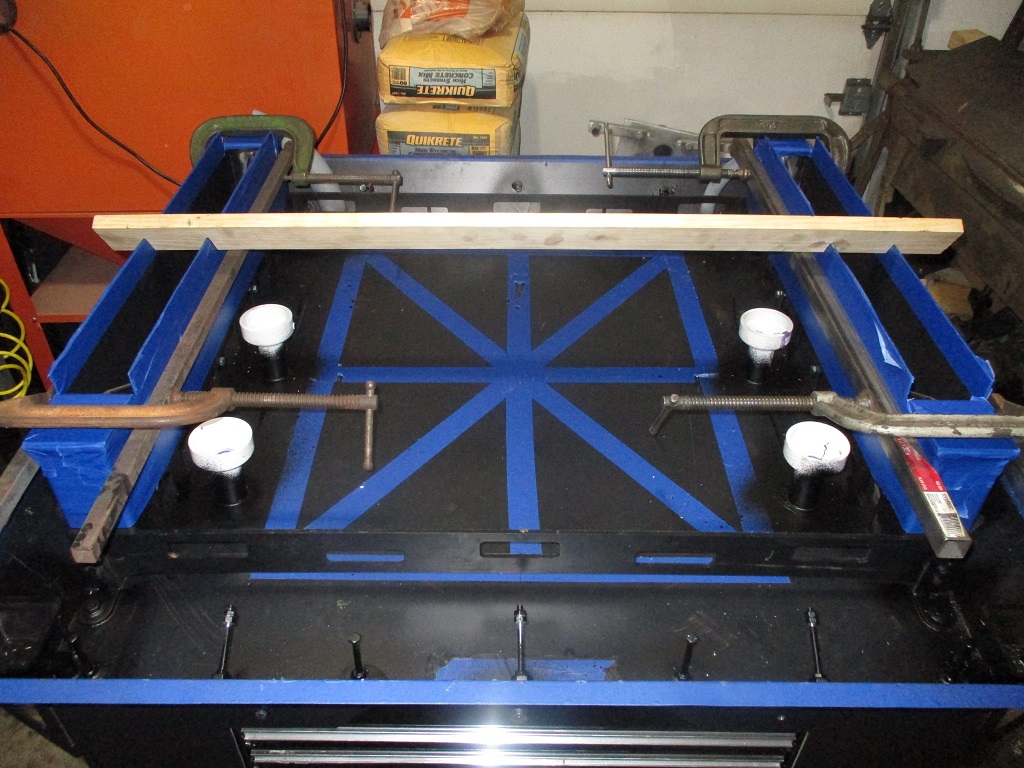
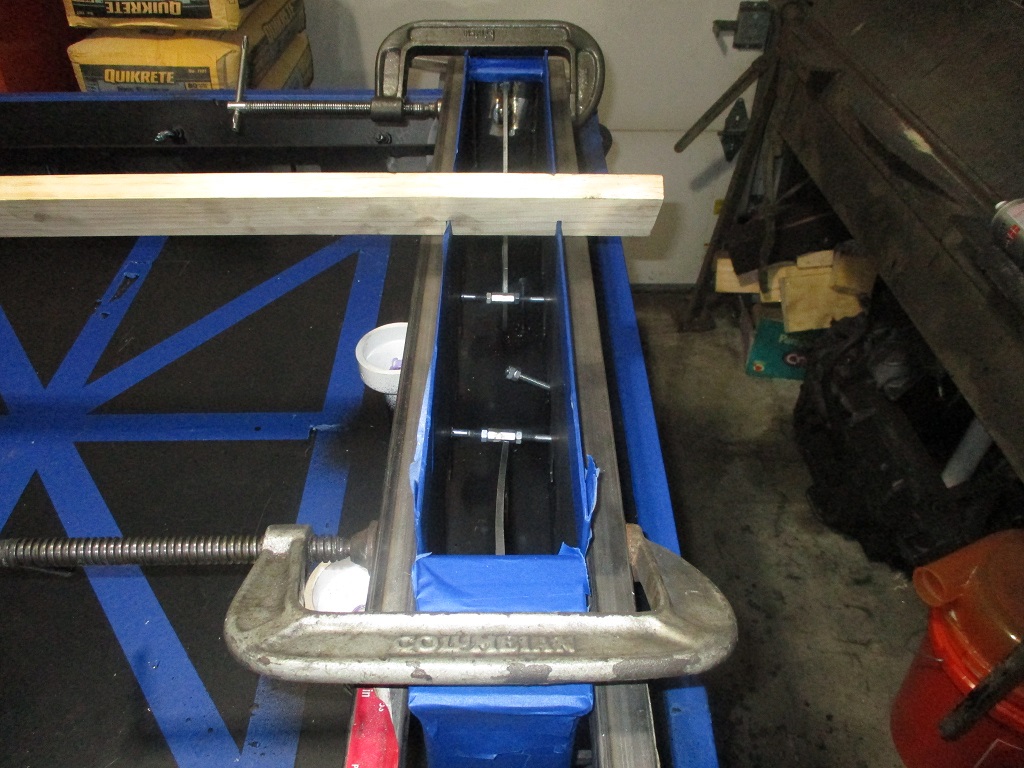
The Y-rails are now opened and taped off to protect them from stray concrete. The bottom has a couple of 1/4" bolts through them to keep them from spreading as the concrete is filled. To keep the top of the panels from bowing out with the concrete I have clamped some tubes to the sides.
The plan is to start the concrete by filling one y-rail at a time. Once the first one is filled, I will install the top Y-rail and all the bolts, then remove the clamped on tubes on the side.
Then do the same with the next Y-rail and install the top rail and remove the clamped on side tubes. Once both top rails are installed, then I will square them up and proceed with the concrete for the center section so I can get the base plate set and positioned early. Once the Y-rails and base plate are set, then I will focus on the corners and edges.
This should help avoid any issues with the center setting up before the baseplate is set.
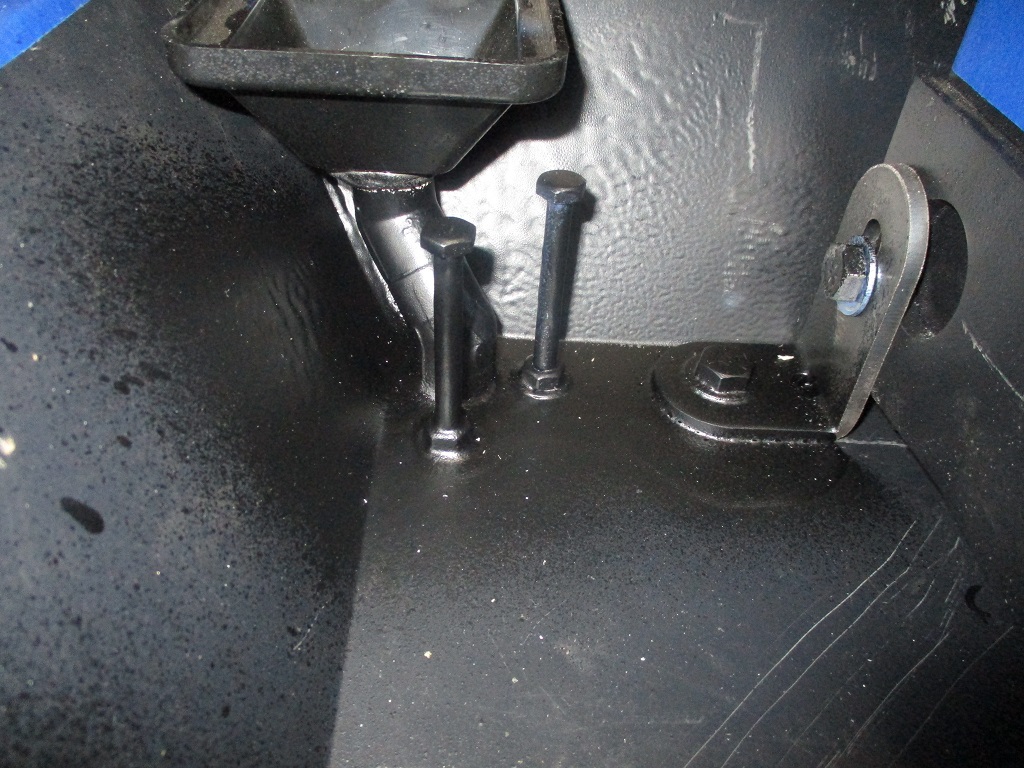
I also wanted to seal around all the drains and bolts in the base to keep any concrete water from seeping out during the pour and cure. I was looking for some Permatex red gasket spray at the parts store, but they didn’t have it, so I picked up a large can of flex seal. It pooled up nicely around all the bolts, tubes and brackets in the pan and should get the job done.
3 Likes
how much working time does your concrete have? any reason you don’t leave the rails on and then add the stiffeners? If you dont have 2 hours working time and a mixer I would leave the rails on. Will be really difficult to get the diagonals to match if they move during the pour. Having the rails installed will make sure they stay where they are at.
Hoping to get 1.5 hours with the additive to delay the set time.
I want to fill the entire y-rail cavity with concrete (within about 1" of the top bar) as my Y rails have been raised 3/4". You can’t do this with the y-rail bars on and you can’t take them off during the initial pour once the base plate is set. My custom side plates, brackets, and jack bolts keep everything in position with the top bars off. Filling these first also allows additional time to focus on filling and installing the top bar before starting the clock on the concrete in the pan to baseplate install.
With the larger baseplate, I don’t want to chance the concrete starting to set early and causing issues with its installation and proper placement.
there wont be a cavity if you don’t have the y axis stiffeners installed? is there a reason you cant remove them? I had a large base plate as well, if you dont have a mixer id recommend 3 people. but if other wise rent a small one for $50 and it will be no probelm.
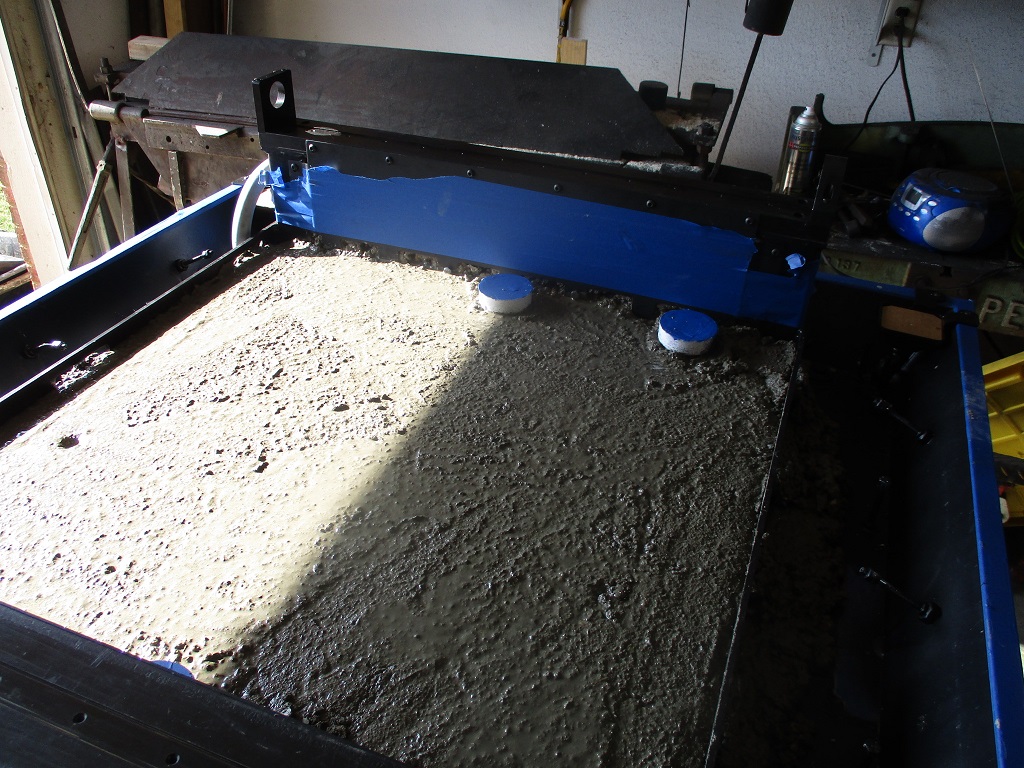
Concrete is done! Used 80 lb bags and mixed 2 at a time in a rental mixer. Used a 5 gallon bucket to transfer the concrete to the tray. My modified concrete pour sequence worked like a charm and the baseplate went in without much fuss.
Filling the Y-rail cavities:

Removed the tape, installed the top rails, and bolted the side plates to the top rail. Then squared the assembly and tightened all the bolts.
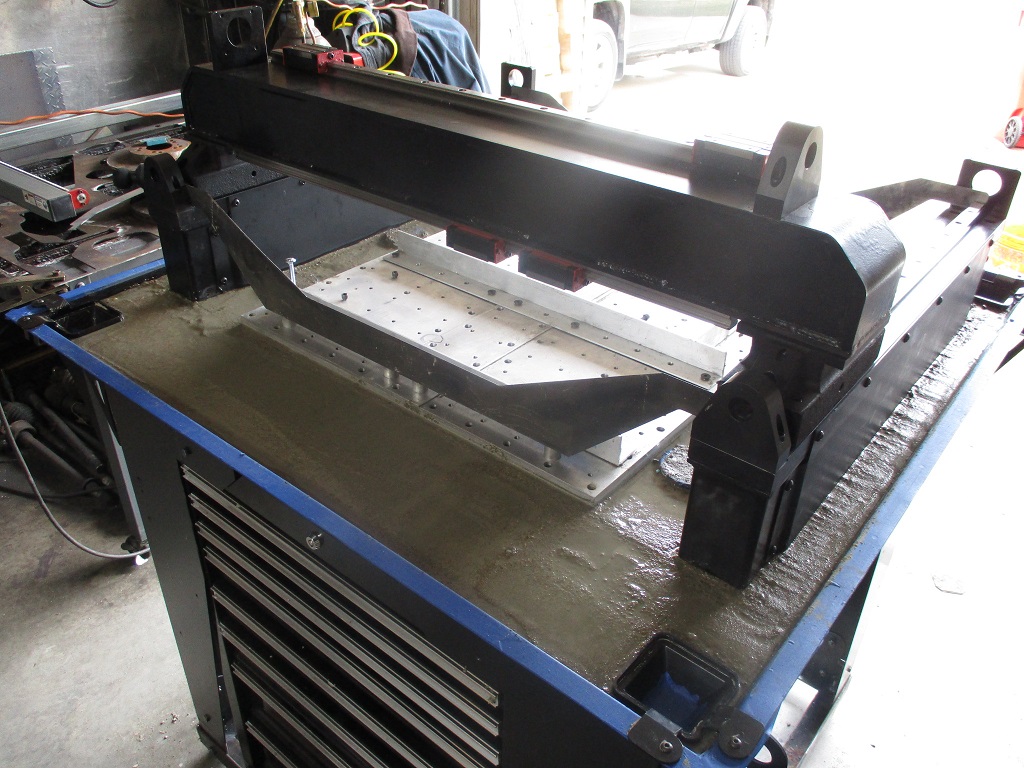
Then started filling just the center section of the pan:
Added another couple of buckets of concrete and installed the base plate and positioned it tight to the right side of the left rail. Then filled in the outer perimeter of the pan, leveled everything off and started to remove all the tape and wipe things down. Once everything was clean, then the linear Y-rails and the X-bridge were installed so I could make the Y-rails parallel.
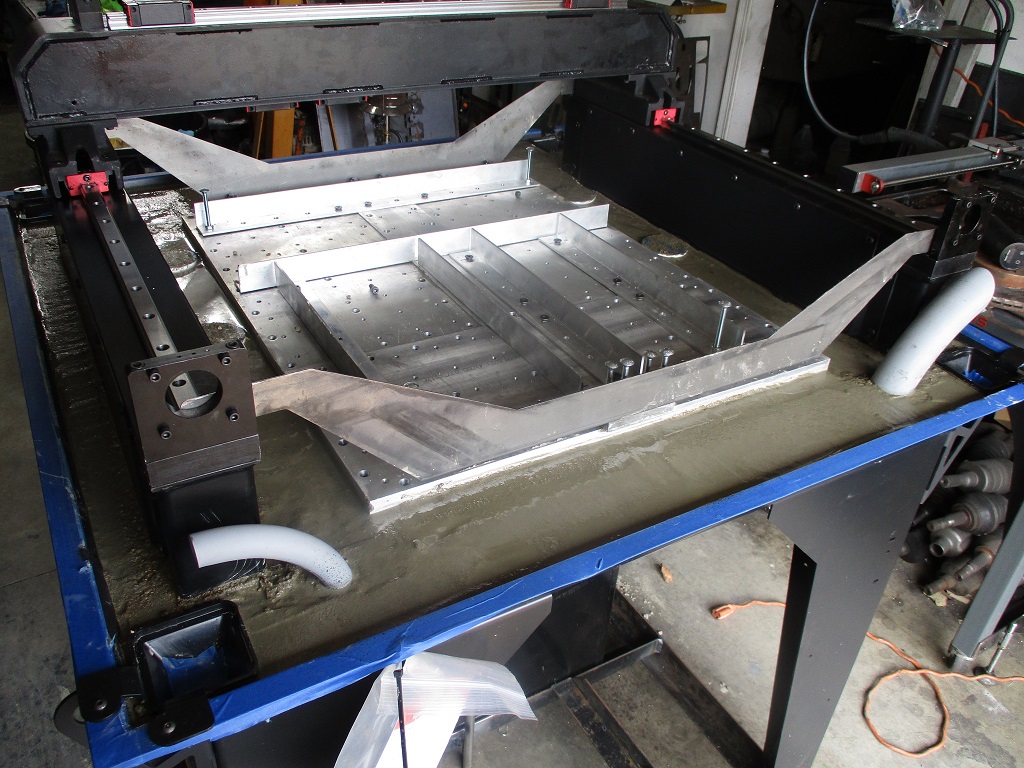
I am going to let everything cure until the morning and then I will add more water for a pond cure for at least 14 days.
2 Likes