I’m about 90% through the build of my Mr-1. I’m to the point of squaring up the X & Y with the indicator. Cut control is connected.
So just jogging the machine around I noticed that the Z-axis will go down fine but a click and hold up will result in it moving up a few mm and then stalling with the motor going high pitched.
Any ideas what could stop it from moving up when continuous steps are sent to it?
As mentioned, try backing the nut off. Also, try greasing the lead screw and slowing the max speed. If that doesn’t work, langmuir is recommending swapping the x axis driver (it’s higher power) with the z axis driver. I think they’re supposed to be adding instructions.
The instructions are in the assembly manual. Very easy. Plug and play if you already have the high power controller installed. If you don’t, you need to swap two wires on the power in plug. You may want to check the Z axis limit switch. I had one with a broken wire inside the head shrink. Just soldered it back and re heat shrinked it.
Yeah i greased the lead screw and it didnt help. Also its definitly not the limit switch as that would give a prompt saying limit is hit. And I’m definitely not going to buy another driver to fix an issue that came stock with the unit!. If the only way i can travel at designed speed with the Zaxis in the up direction is to have the High Powered Z Driver, then this should come with the unit stock.
Very disappointed that the unit is designed so tightly that a small backlash nut can stop the Z axis completely if its slightly turned. Backlash nuts tend to need to be retightened and this means there will be a high probability that this nut will fall back into this position down the road an during a part run.
Buying a brand new machine and worrying from day 1 that the the z will not move up when it should is not something that should happen. if there is that little margin in the power of the Z driver that’s really sad. design should always have some safety factor especially for such critical parts.
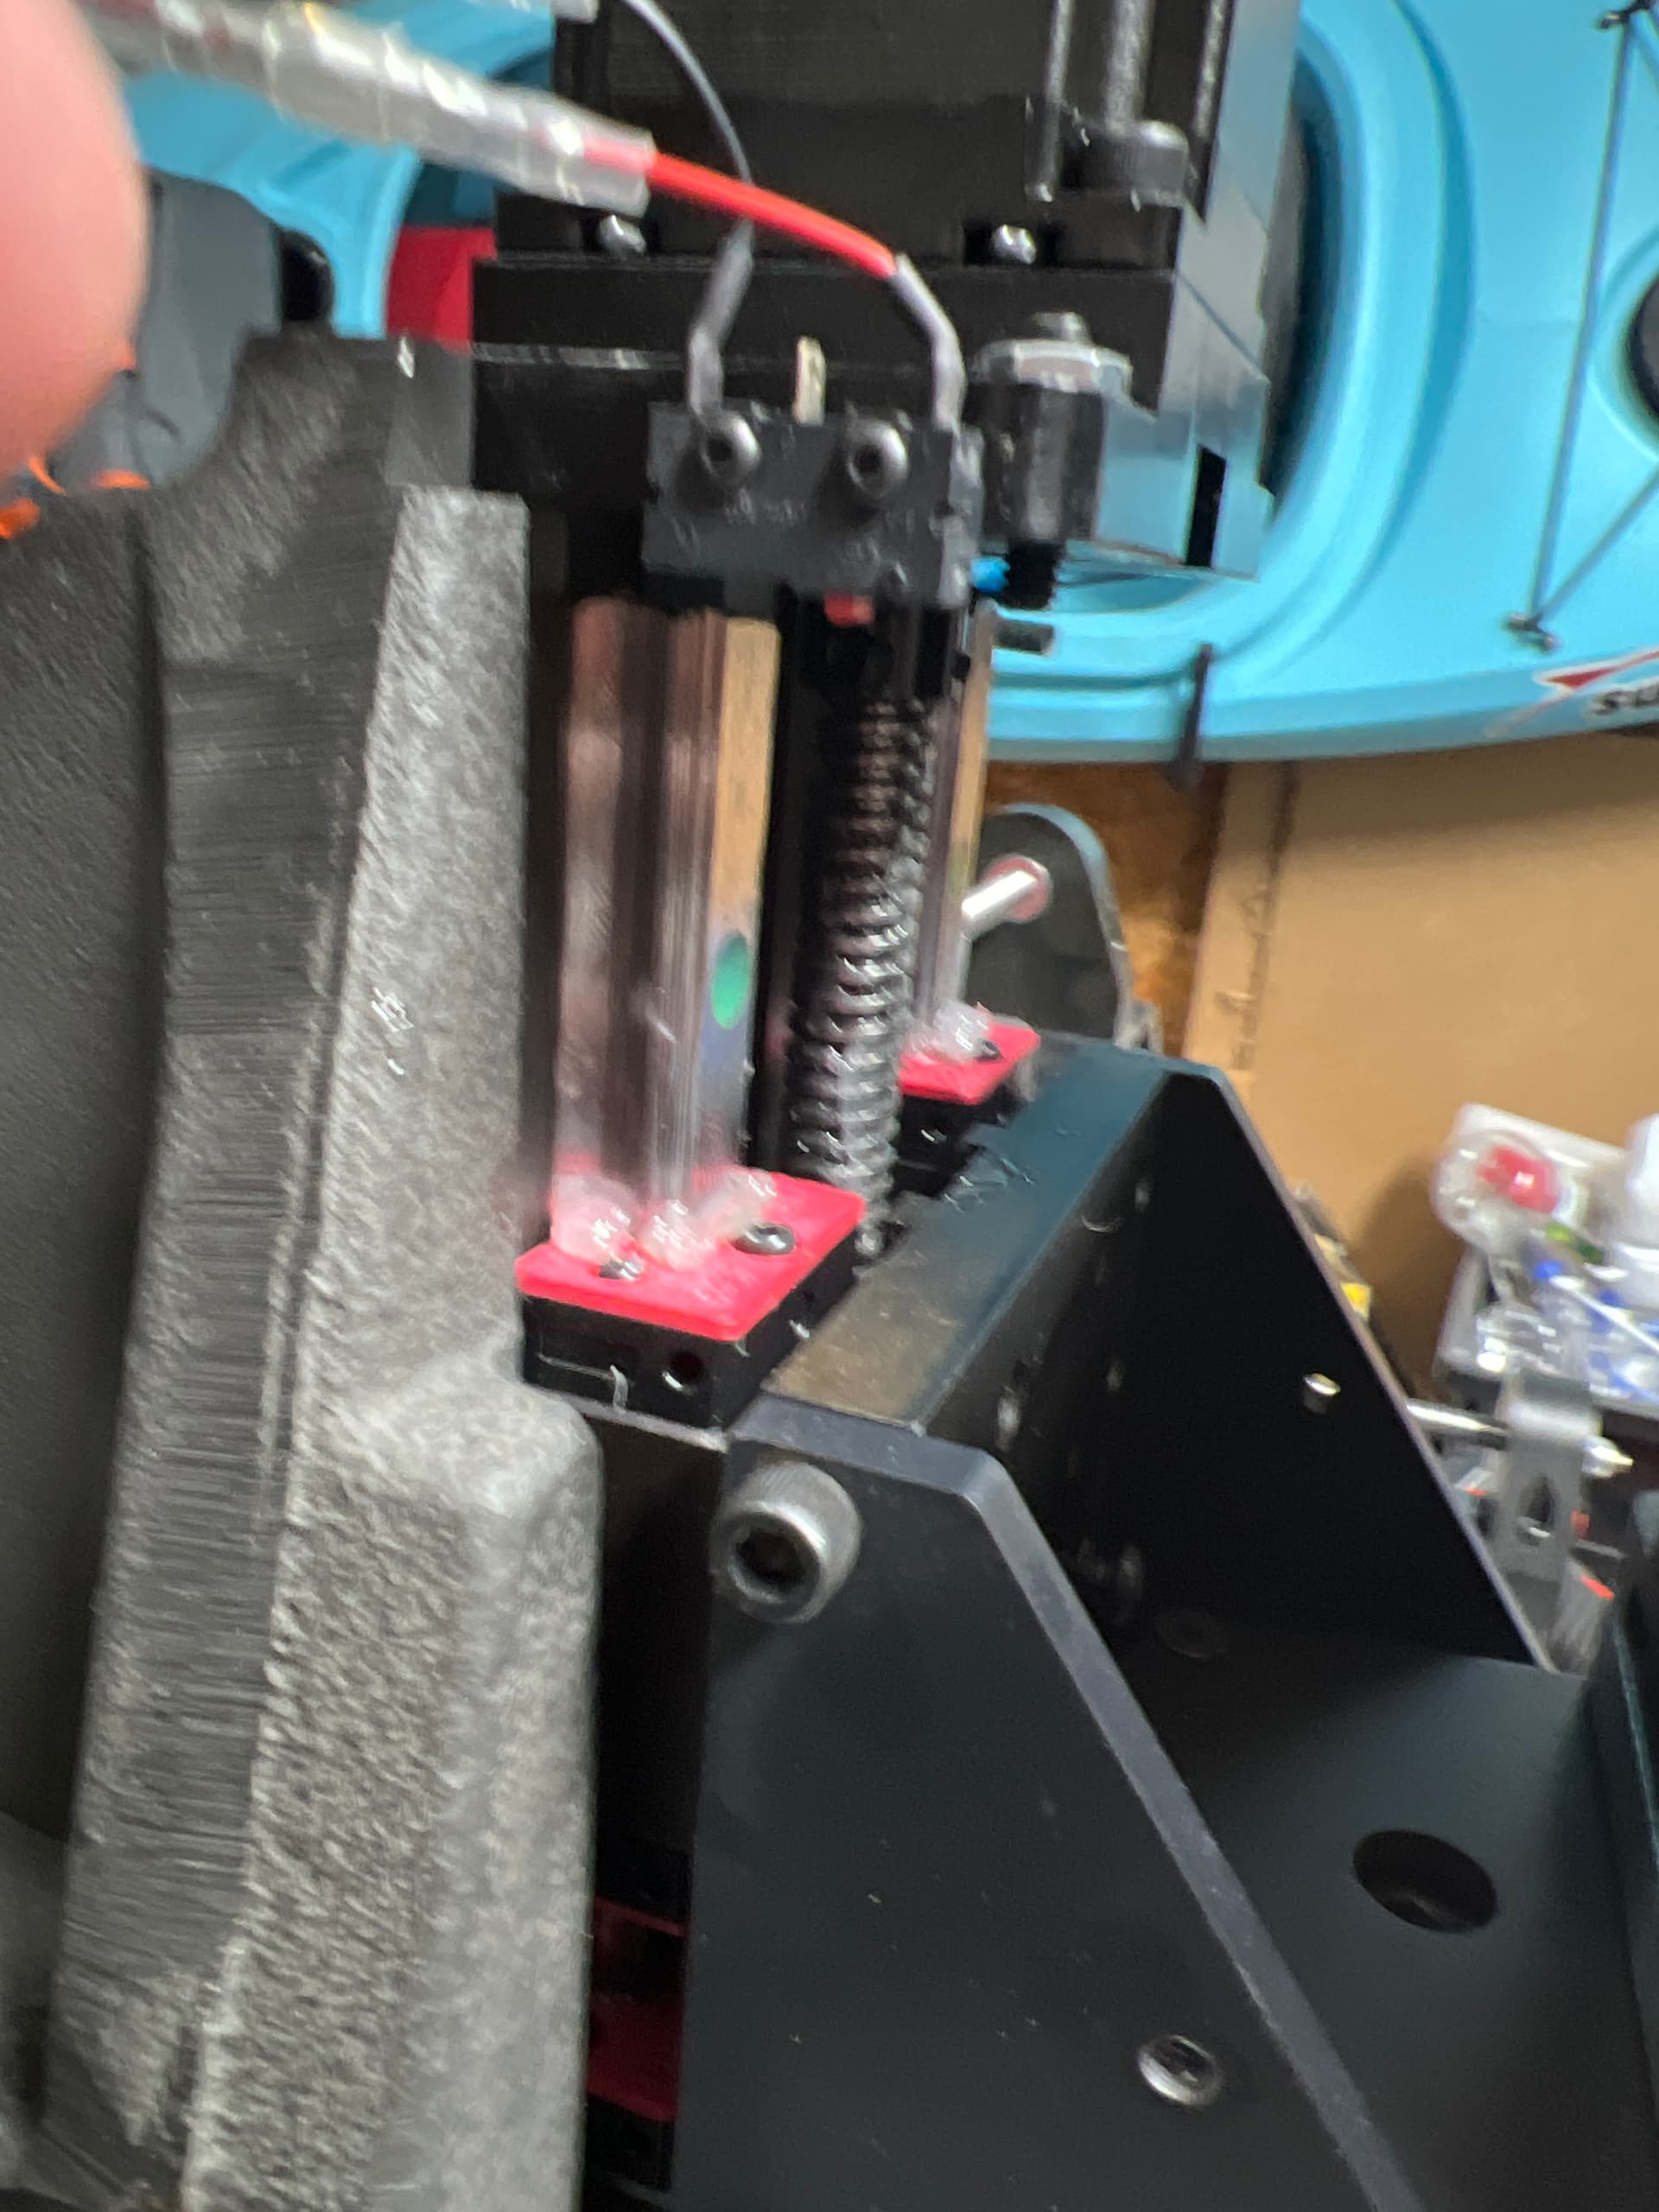
I took apart the spindle shield and first thing I notice is I can’t even go up high enough to reach the lash nut on the bottom. And second, I noticed that the z limit switch has no lever. I think this may be what’s making the machine pause prior to being at its limit.
Idk if I have the right lash nut you guys are talking about. What does it look like? Is it right above the two bearings on the lead screw?
It’s just so odd I can fool with it and get it back up but there’s nothing specific I’m doing and then all of the sudden it stops 2thou before the top. Homes nice and what not and then it can’t make it all the way back up.
I can’t figure out what’s wrong and I’m not comfortable making a part of it can just all of the sudden forget some of its z height exists
I would advise you to do the X/Z axis high powered driver swap as it should solve your issue entirely. This is how we are shipping machines from our shop now. Our MR-1 support engineer is out this week and he will post a PDF instruction set for how to do this, but below is the basic gist if you want to do it yourself now. I’ve also include some reasons as to why we’ve made this change to the machine in production moving forward (below).
1.) Remove power cable from the electronics box. Remove the cover by remove the hex head sheet metal screws.
2.) Locate the X-axis driver inside the control boxes. It is in the upper left hand corner and it is larger than the other 3. Locate the Z-axis driver. It is in the bottom right corner.
3.) You’ll notice that there are 3 unique connectors that plug into each driver. Essentially what you will be doing is just swapping the 3 connectors between X and Z drivers while making sure to plug them into the exact same terminal position on each driver. It would help to take a picture of these before you start just in case you forget.
4.) You’ll notice a 4 wire connector in both the X and the Z driver. It is the 4 wire connector that does not have twisted wires going to it. Before swapping this connector over between the X and Z drivers, we will need to move some wires around that go into the green terminal block. On the connector in the X axis, us a flat blade screw driver and back out the clamp screw that holds in the purple and orange wires. Remove these wires from the connector, flip their positions, and then retighten the screws. Do this same procedure on the connector in the Z-axis but flip flop the green and the red wires.
5.) Once you complete step 4, swap the connectors over between the X and Z drivers.
Let us know if you have any questions! Below are some points as to why we made this change moving foward.
The Z-axis lead nut uses a heavy spring on the anti-backlash leadnut and also has a tight fitting thread on the ACME lead screw. We do this to ensure that backlash in Z is kept at a minimum for accuracy and floor finishing purposes which are very important for milling. Over time, this tight system breaks in better and the standard Z-axis driver has proven adequate for operation, even at rapids. That being said, any lost motion on the Z-axis has the greatest chance of causing damage to the machine itself (such as a vise or baseplate if the Z axis position gets off during a program) and we’ve decided that the high powered driver on Z provides significantly more margin for the broader customer base.
We’ve had a half dozen folks with stalling issues on the Z-axis that have reached out to us. Switching to the larger driver has immediately solved these issues. We’ve never seen a stall event on the Z-axis on our own machines using the High Powered Z-axis Driver.
Swapping the large driver inside the electronics cabinet from the X-axis over to the Z-axis means that the X-axis will use the standard sized driver moving forward. In all the years of testing that we’ve done on MR-1, we’ve always used the small standard driver on the X-axis without any issues (and we take much bigger cuts here than anything we’ve seen customers attempt so far ). The fact is that the X-axis uses a ball screw with significantly less rotating friction than the Z-axis lead nut. It also, doesn’t need to lift up the 60lb+ spindle assembly that is required by the Z-axis. In addition, the published Max Thrust values for the X-axis on our website spec table (135 lbs) was rated using the smaller driver on the X-axis. The Three MR-1 machines that we have sitting in our prototype shop that we run daily for rework and production all have the standard sized driver on the X-axis.
The High Powered Driver add-on option is still available for sale on our website. Users can choose to put these higher powered drivers in X or Y (need 2 drivers) if that is desired. In the not too distant future we are going to release the High Feed Speed Ball Screw upgrade option for MR-1 that increases the machine rapids up to 200 IPM. Having the larger drivers on the X and Y axes (3 total) will be required to run these new ball screws. This add-on feature will be great for folks running softer metals/plastics and doing a lot of 3D surfacing type of operations.
Using the High Powered Driver on the Z-axis provides many additional benefits such as better drilling performance and better end mill plunging capabilities.
I switched my Z axis over to the high power driver and still encounter stalling. It seems to get better as the stepper motor warms up. My garage is about 50 degrees usually. I also tried backing off the nut and that did not seem to help much. When I first turn on the machine moving Z at 10 IPM causes it to stall and homing is out of the question. Any ideas?
Have you greased the lead screw? I had to upgrade the driver, loosen the backlash nut, and used lithium grease and ran it a bunch and it finally loosened up.
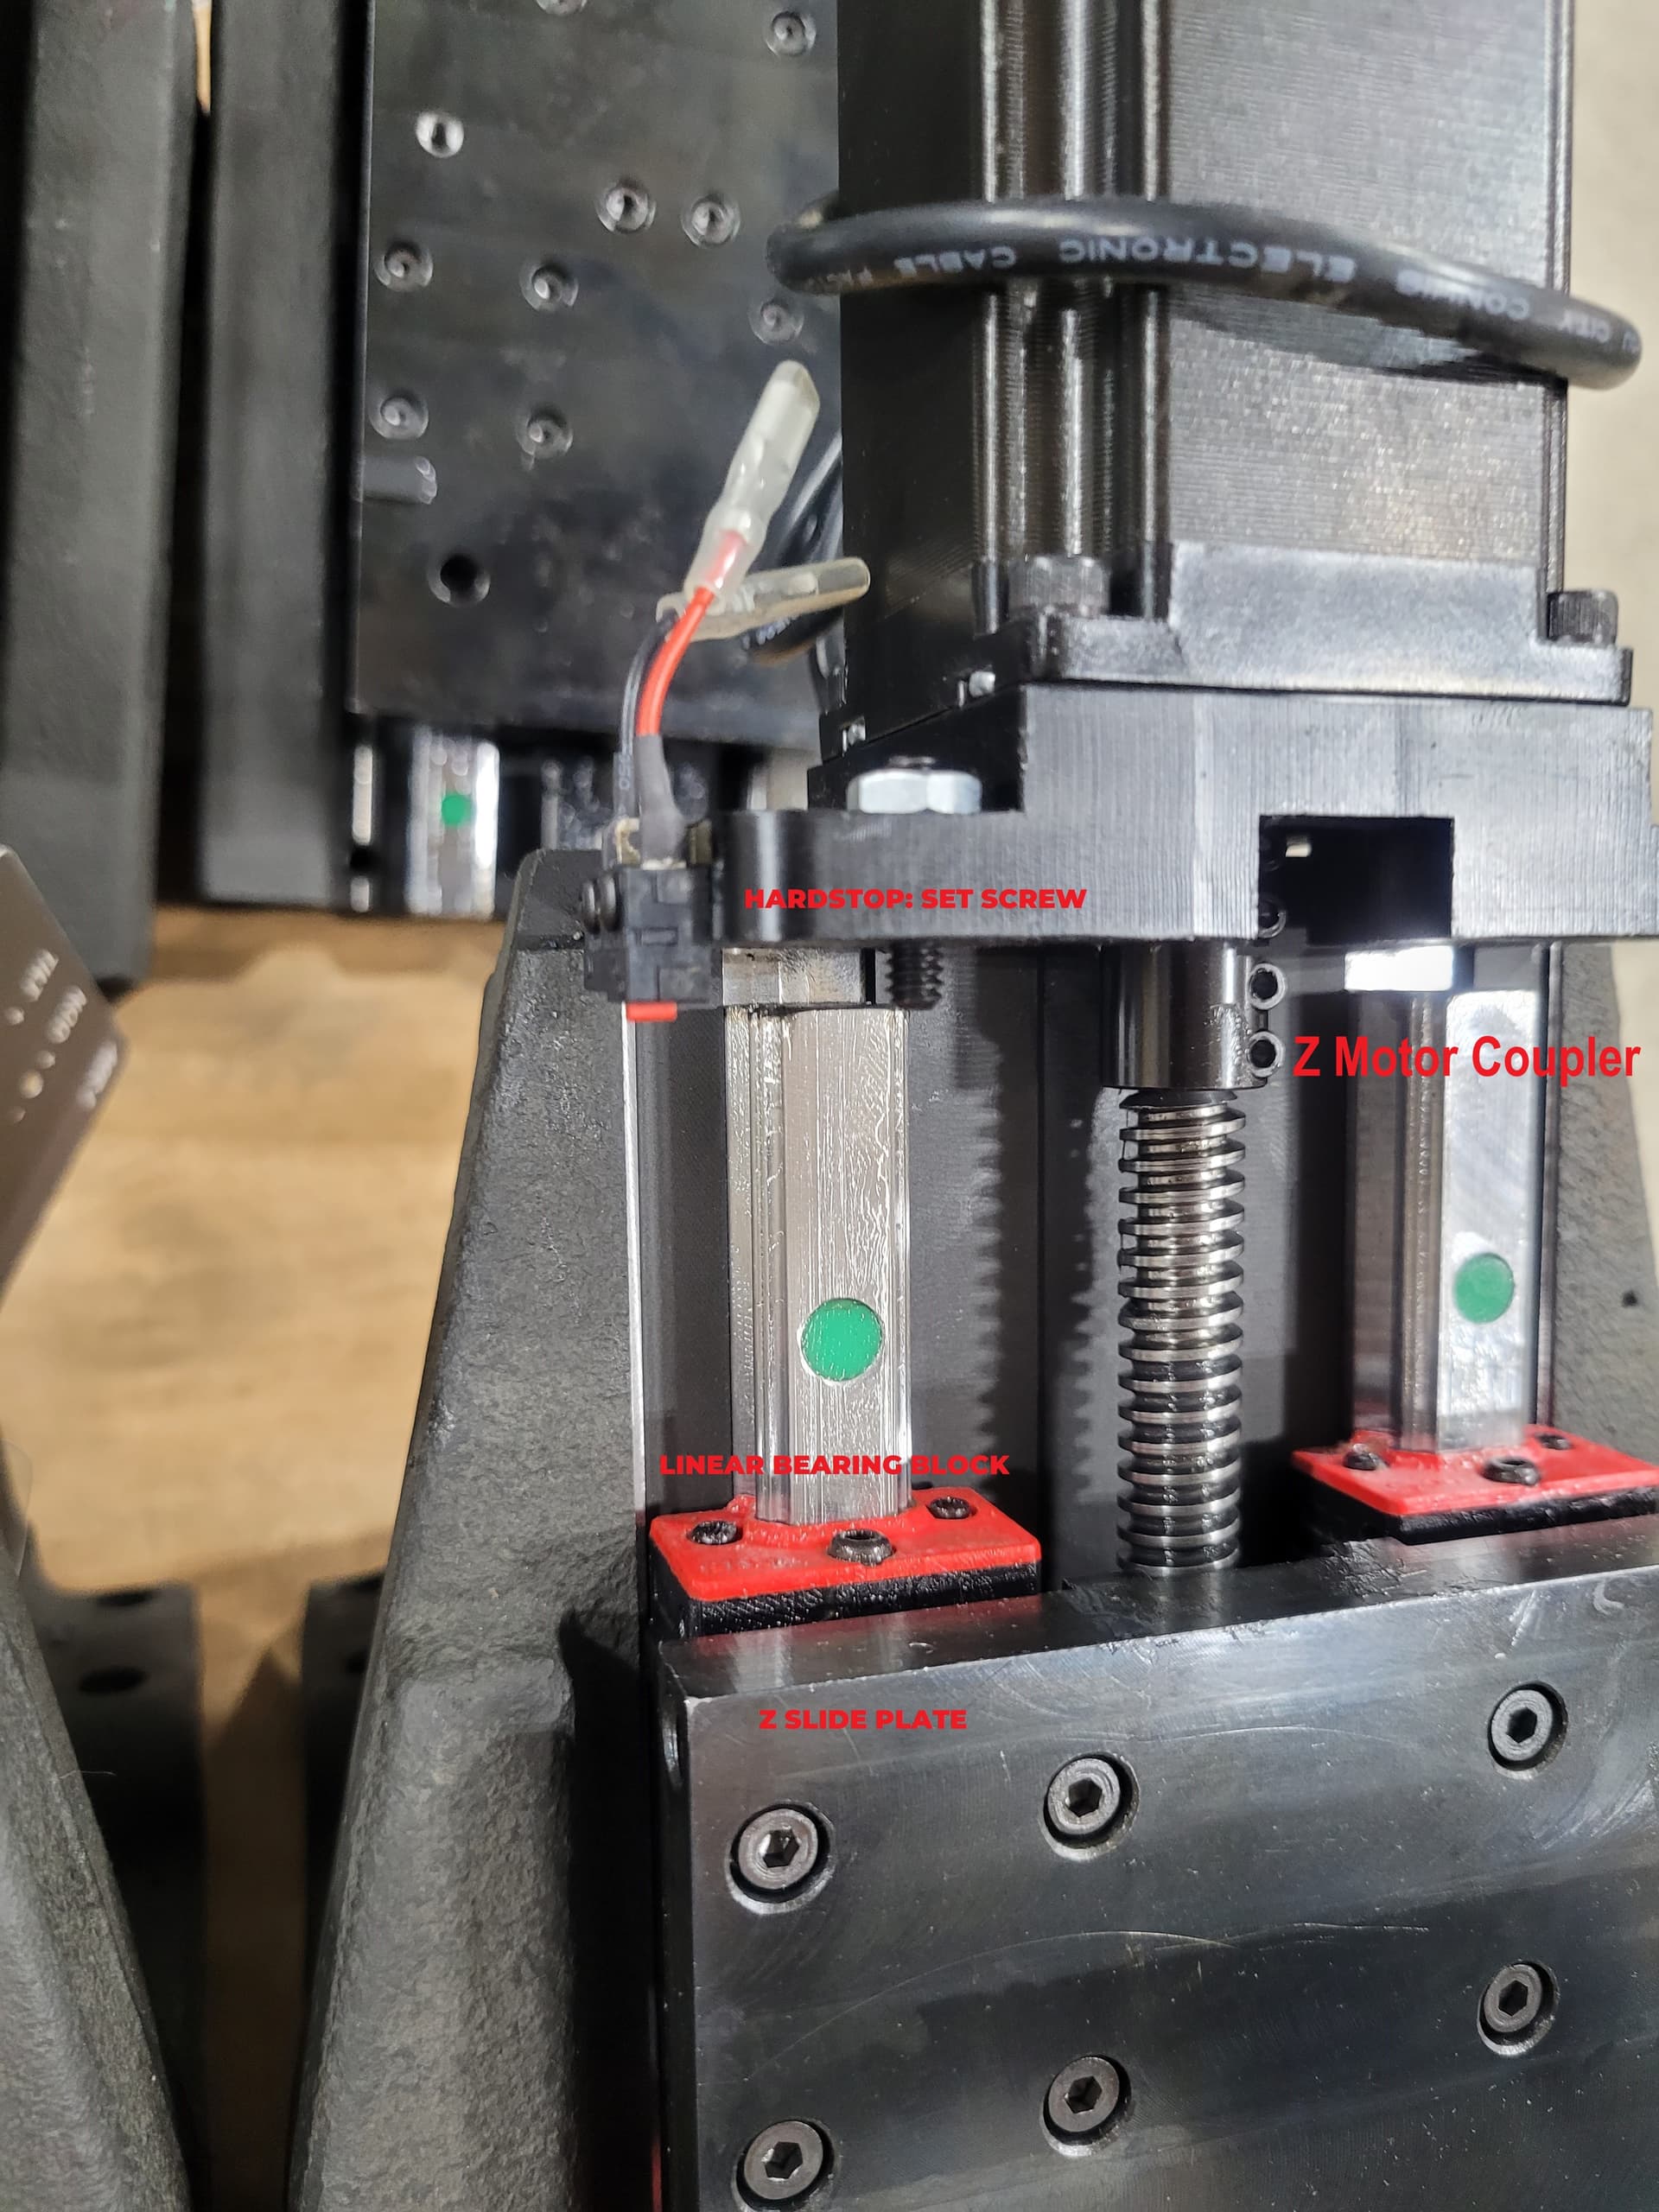
Image from Langmuir of how it’s supposed to look. No lever on purpose…contacts the Z-Slide Plate from pic. Set screw needs to be set minimum 0.010" above immediate trigger of switch.
My lock nut vibrated clean off and Z-axis started acting up. Seen the lead screw and securing nut vibrating a lot on some aggressive aluminum cuts. The lower bearing lock nut came loose 0.25" when I noticed. First indication was measurment of part was 0.020" smaller than desired, only on parallel sides.
My machine also had the lower bearing installed upside down and from the aggressive use, I believe the heat built up over relatively short time and started jamming up. MR-1 wouldn’t even come up to the limit switch (locked up beneath it about 1.75").
I’ve had some down time and replaced the bearings and tightend as Languir detailed. Verified full Z travel before homing; adjusted lock nut as specified and machine runs great again.
Doing final nod/tilt check after all that and back to making stuff.
Track record when taking time with this MR-1 is parts that come out with repeatable accuracy of 0.0002" - 0.0005".
Track record when going fast and getting things roughed in is 0.0005" - 0.0015".
Take all the time you need to set the machine up accurately and somewhat tight and it performs like a dream.