I was assuming you are getting a unacceptable taper due to cutting to low or consumable life?
Nope, not at all.
Not sure if you read the initial post but here’s the synopsis -
My cut height does not change with programming changes.
Correct because of your THC. What it does is determines a voltage and maintains that height to keep that voltage no matter what the program says. You can write in a higher voltage and it will maintain a higher height to keep that voltage.
If you cut quality and consumable life is acceptable. I wouldn’t care. I checked my height and adjusted my programming for the cases if when the THC is disabled. I write in a voltage 85 percent of the time and let it work.
1 Like
To add more context, as a few members here are familiar -
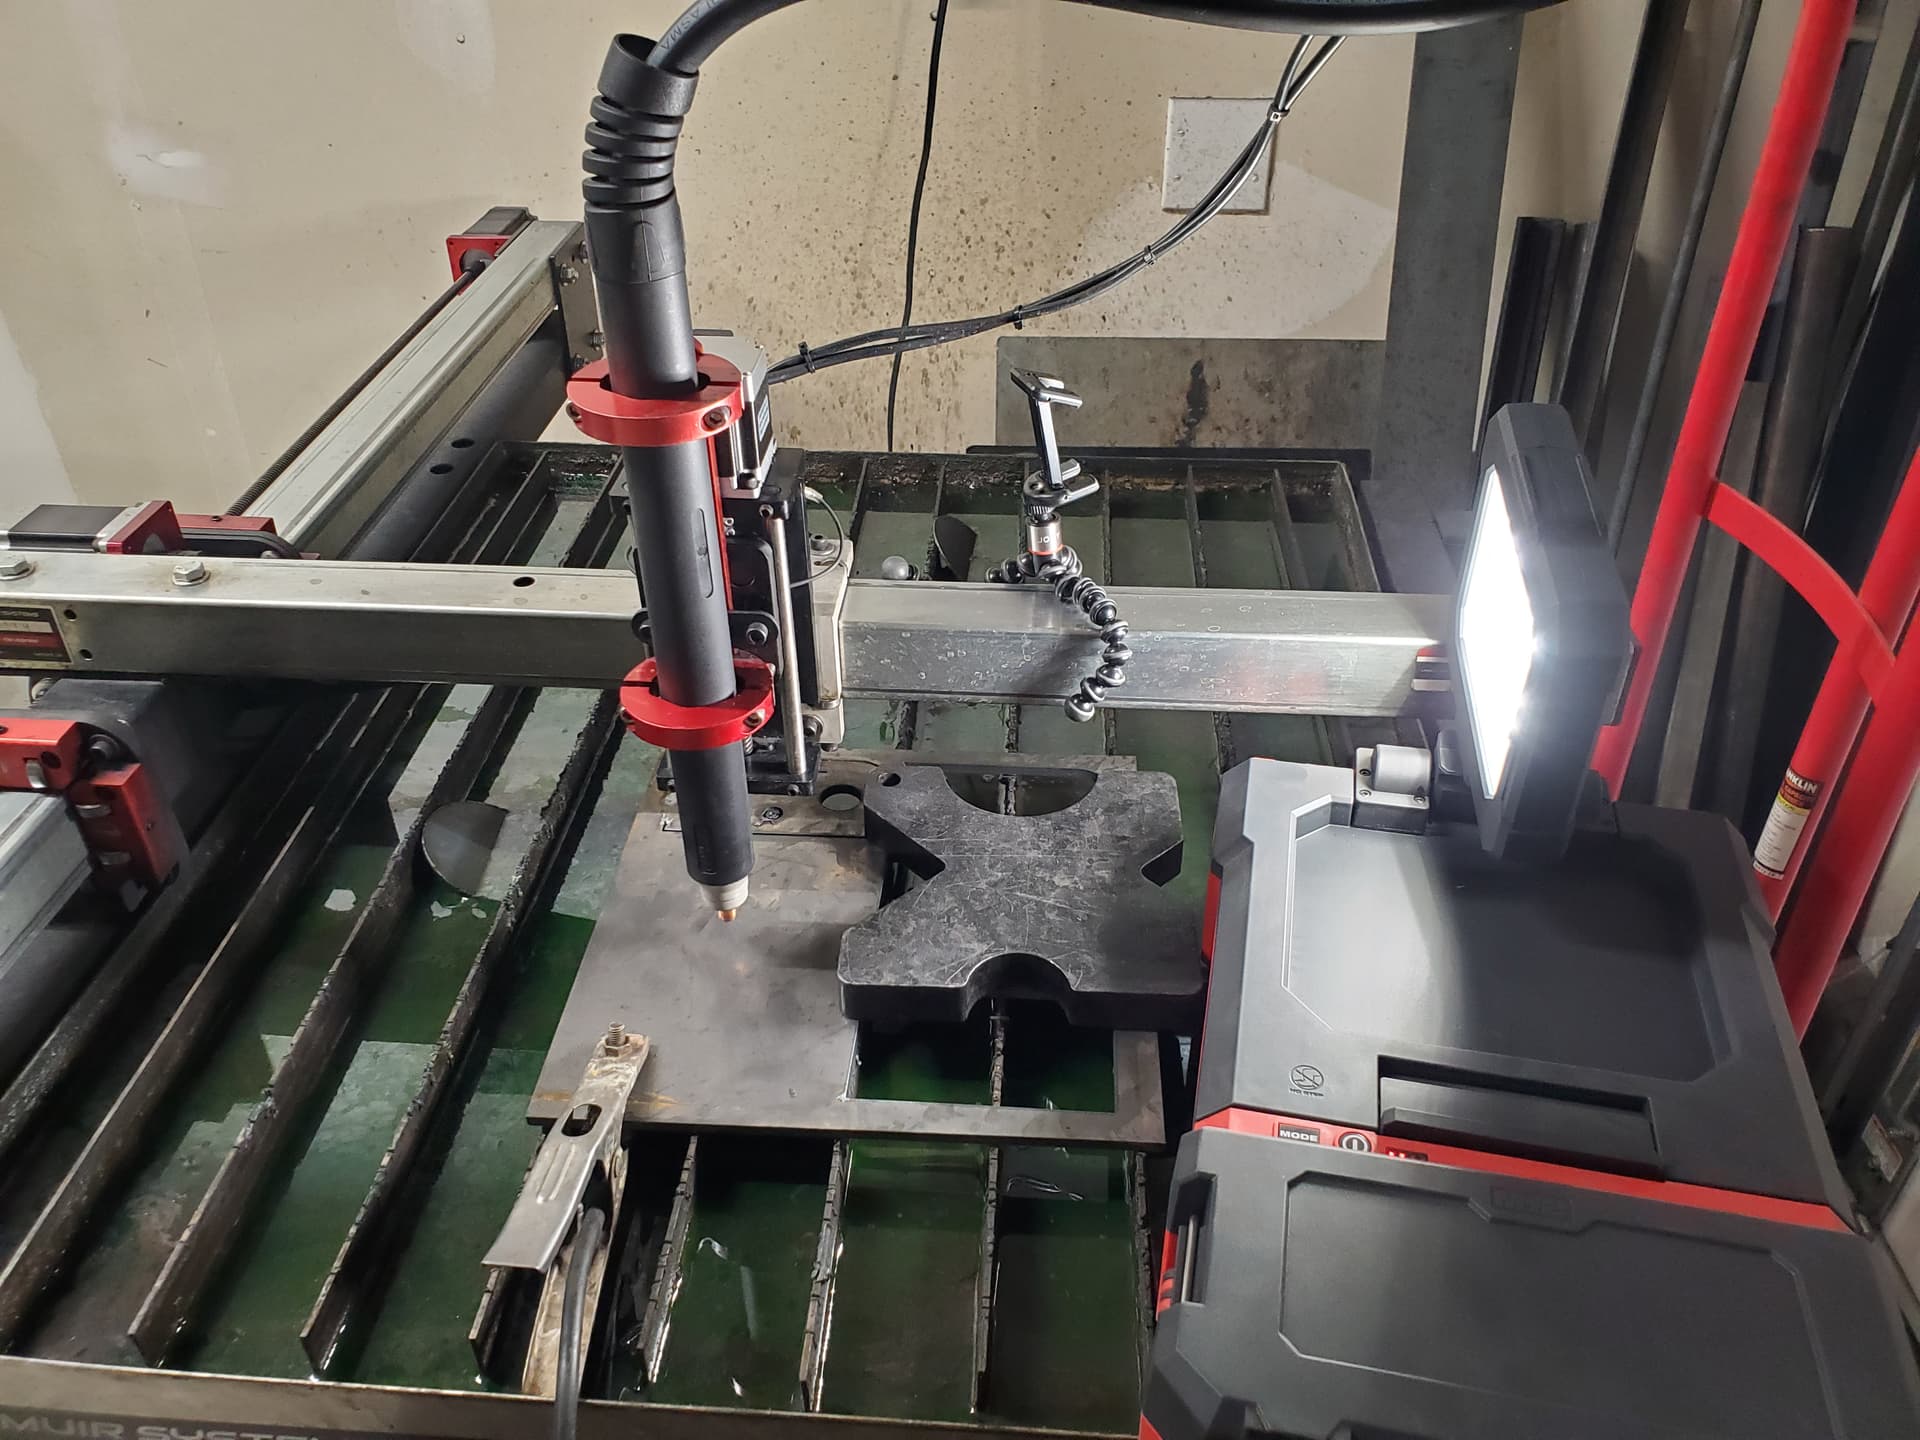
I started CNC here in January; CUT60 with PTM-60 torch…all the same items used as described in the start of this thread. I was running divided voltage.
Initial setup went as any experienced member would state - make sure all legs, gantry, etc are square. Also, measure actual cut height and adjust programming to maintain that cut height. This resulted in a programmed cut height of .0545" which meant .06" actual.
Fast forward to late September or early October, an issue occurred and the result was resistor 8 blowing out in my voltage input module. This forced me to go raw voltage until a new VIM was sent.
Since then, I never re-measured my cut height.
Why did I decide to measure my cut height suddenly? Because I wanted to create a new test file in anticipation of my new UPM-105 torch I purchased. That’s when I discovered my physical cut height is too low, and also “fixed” regardless of my programmed cut height.
This was never the case before and I’m thinking raw voltage has changed that forcing me to create this thread.
Well, if you see above what I posted…yeah that 1/4" may be acceptable to a lot of people right?
It’s square on every edge, and it matches another piece cut after it.
What bothers me is that it isn’t cutting at the physical height it needs to. I don’t want to waste consumable life and metal with the possibility that consumable life may be altered with this fixed height of .02"
I can’t say if it will create a bevel on 10 gauge or 3/16", but can say it created beveling on 16 gauge a few weeks back as 16 gauge is all I’ve cut ever since going raw voltage.
I wrote it off as “who cares” because they were mock-up parts for a customer. Now that I have a new torch I want to install and need to cut parts properly soon, this needs to be set up correctly.
I hope the additional information now clarifies things, as well as brings up experiences I’ve already had with my setup.
But again, I still need to take your suggestion and run a cut with no THC and run that file you linked and report back.
Just hoping the extra context adds to the thoroughness.
These are in fact, budget tables. But proper setup allows amazing results.
I achieved amazing results many times when I ran divided.
Now I’m trying to get that back again for when I run my new torch but a feature at the moment isn’t working as intended.
I think you may be overthinking this. For curiosity sake the file I referenced will confirm the mechanical side isn’t defective which no one suspects…
When smart voltage determines a cut height which it does if it make a acceptable cut . Roll with it every machine will be different anyway to a extent.
Out of curiosity you can increase the voltage by writing a higher number in. Just to see if it helps.
I see the big picture as if you are satisfied with the results it doesn’t matter what it cuts at. Unless you are blowing thru consumables.
2 Likes
I agree with everything you’ve stated in this thread except one thing - the big picture.
I believe I should have satisfied results when utilizing the correct cut height.
I don’t think .02" cut height will work for every thickness metal. I had beveling on 16 gauge days ago, even if I have a square edge on 1/4" today.
Will be new playing with the voltage part of Firecontrol since it’s always been on Smart Voltage. Wish I could ask my buddy what his voltages are (Crossfire Pro and CUT60) but unfortunately he’s running divided ![]()
I’ll still post my results, you and everyone else have been very helpful.
I also use a CUT60 and switched to raw voltage inside the machine early on due to reports of inconsistency with the divided voltage board on the CUT 60. I haven’t experienced any of the symptoms you are. Hopefully changing the VIM will resolve it… tho I can’t see why it would as the divided side and raw side are not connected as you have pointed out previously. Is it possible you cooked your THC module when you had the VIM failure?
1 Like
I would go do some testing… but the shop is full of apples waiting to be squeezed… don’t want to make dust while they are in there.
1 Like
Those pierce delays won’t work for the Langmuir set-up either. Hypertherm users generally add 0.4 to 0.5 seconds to those pierce delays found on the Hypertherm cut chart. The cut speeds and voltages seem to be on par, however.
I ran the TAP file provided; ran it 3 times actually.
First, zero over a work piece, ran it, and it completed the run.
Second, raised the Z axis all the way up, zero, ran it, and completed the run.
Panned way over off the work piece, and zero. Then panned it back over the work piece, zero, ran it, and completed the run.
The torch after the program runs (really short, seconds long), had my torch sitting .02" above my work piece.
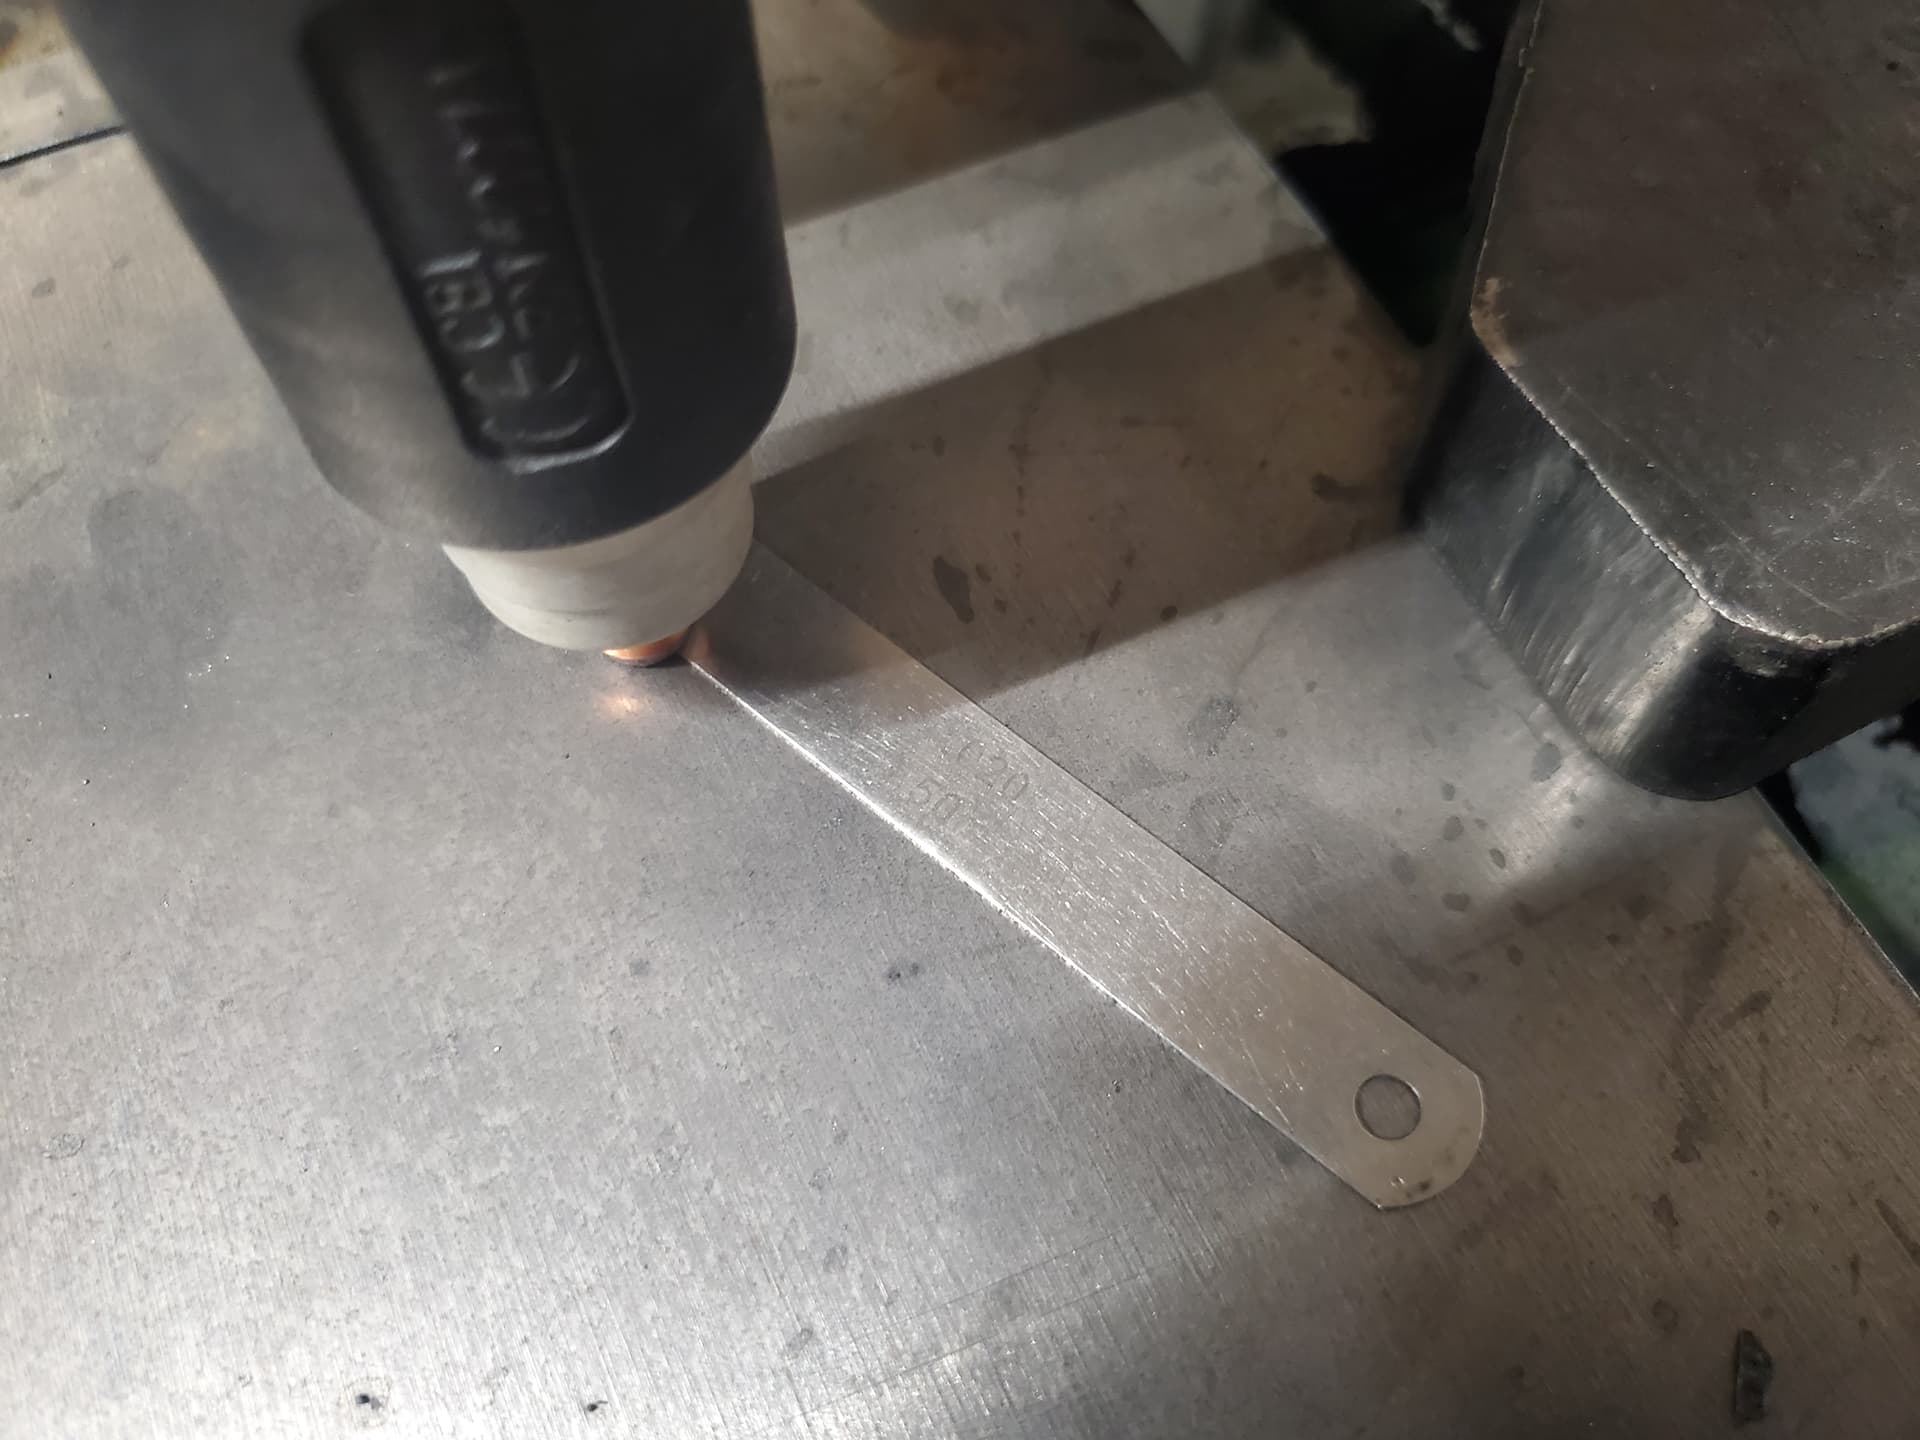
When the Z axis cycled during the run, it ran to the work piece and sounded as if it wanted to go a little farther until it sprung back.
Maybe this will provide the information needed to figure out my issue.
If that program ran and it stopped at .020. I believe it is a mechanical issue. You are starting your cut at .020 which will explain what I thought was low cutting voltage. The closer the torch the lower the voltage. So may not be the vim or plasma.
You can open that tap file up in notebook and change the cut height to something else.
Sounds to me like the ihs switch may be lazy. maybe some debris somewhere?
I changed the TAP file to .08 in notebook and saved it.
Ran the file, and again it cycles the Z axis all the way down then back up to .02"
Before creating this thread, I ensured the Z axis screw, contact points, cable, all were clean and secure.
I did so again after I pulled off my torch.
I have no problem pulling off my torch again but what would I be looking for exactly?
It’s relieving though knowing we have an issue outside of voltage and all that.
I’d be happy to record a clip; the Z axis movement is fluid.
I would’ve noticed binding right away, and it cycles up and down at will without any issue.
I believe the issue is in the ihs switch you may run it again. Modify the codes to slow it down should be able to. Watch the ihs switch make sure it opens and closes smoothly.
You can even grab the torch and lift it by hand.
That switch is what determines the contact withe the material. If I am correct it is primarily open so it closes on contact. It sounds like it it opening 40 tho early. Material flexing?
1 Like
Never having modified G code, is it safe to assume F is my travel speed?
Which line of that code should I change exactly?
Again I’m happy to set my phone next to my torch and record a video.
As for material flex no sorry, I’m using 1/4" plate as I want a solid, flat surface for accurate measurements. But if say the material was 20 gauge, in theory it would flex the material as the Z axis pushes into the material for a little bit before it springs back up.
1 Like
Yes f is feed. The line may or should say cut height. Probably f 100 that is 100 ipm. As long as you change that should not hurt anything. As far as a video I am at work cell signal is bad . Someone else I am sure will chime in on it though. Be sure to video the his switch
Look and make sure spring on the switch isn’t broken or missing