Have the Y axis dialed to .0001 but X is another issue. Just cant get it closer than a .001 to .0015. Have a tenth’s indicator. When I disconnect the motor, turn back on to lock the other… just cant get the screw on opposite side to relax to a good indicated point that stays when plugged back in. The screw nut and possibly the motor engaged is enough play to keep moving it around. Is this normal and can I not get it in the tenths? I can understand .0001 or .0002 being a bit much but I was hoping for at least .0005. Is there some “clocking” of the screws that can be done to improve the locked position? Then I’m worried that once dialed in… would only take the machine home routine to knock it back out.
This post contains mods and great info on getting the spindle adjusted. I would also suggest getting the sst tram gauge. SST Mini Mill & Lathe Adjustable Tramming - Squaring System Amazon.com
1 Like
Would need an additional video on that thing… lol. I was thinking its more in the screw nut and motor engagement than anything I have control over. Two indicators inches apart not much different than a tenths indicator sweeping the same inches apart…I would think. Maybe creating an axis of the spindle is what the two are trying to replicate but that still doesn’t account for travel in a linear motion. I did get some improvement using a clamp on the two blocks… guess a little fluid/dust was part of it. Thanks for the input.
Sorry my bad. Thought I was responding to your post about the build plate surfacing.
Now that you have run the machine a bit I would go back and check the lead screw lash for all axis. Step 15 in the assembly guide. Than 22 for my above Z alignment tilt and nod and last for what I think is related to your current question step 23 set travel compensation.
1 Like
Sounds like you need to loosen the x-axis gantry to y-axis carriage bolts, to allow the gantry to pivot and not be in a bind, which is forcing it back out of square.
Bolts are shown in this image in the assembly guide:
https://assets.langmuirsystems.com/img/mr1/assembly/mr1_assy-34.png
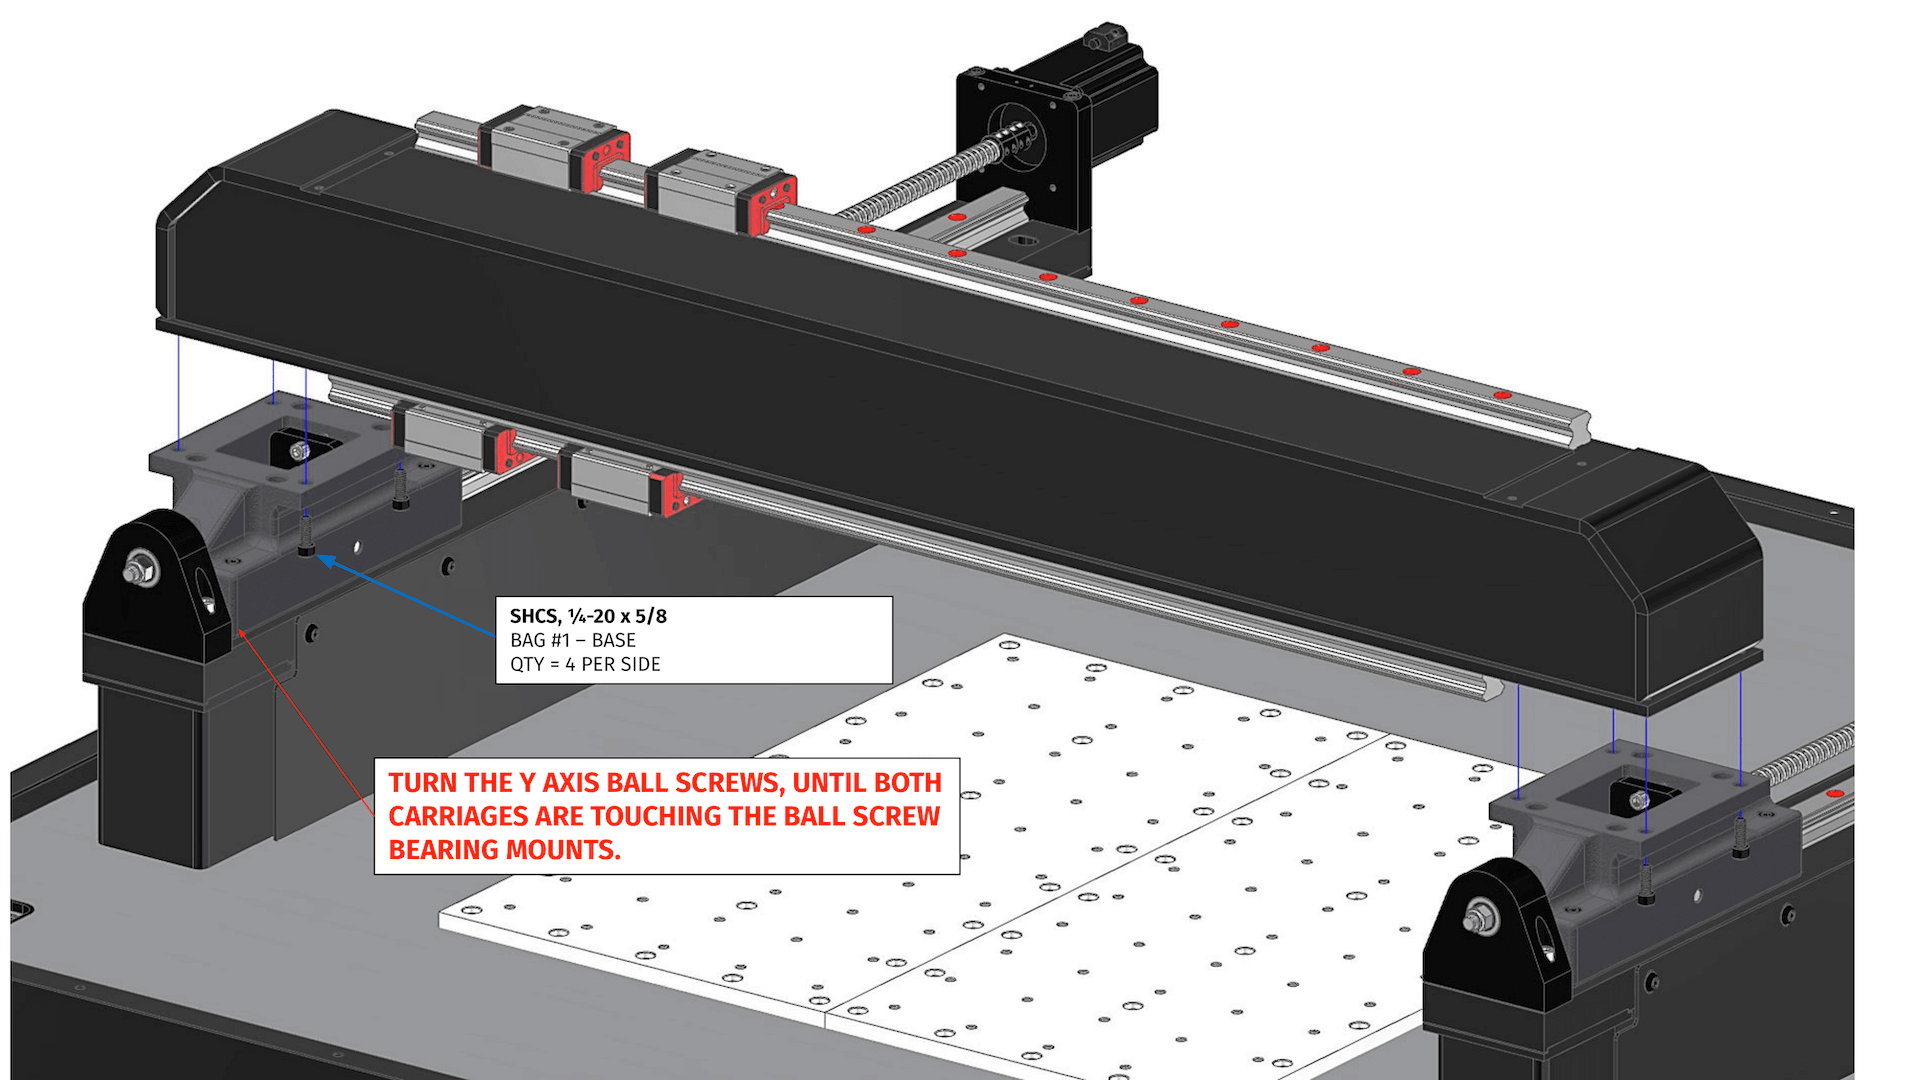
3 Likes
im not a fan of LM method of unplugging the motor. It makes more sense to decouple it and leave the motor plugged in with its brakes on. thats the way I did it and was able to get it dead within a few tenths which is what my 2/4/6 block was graded for.
just loosen BOTH sides of the motor coupler to the ball screw, loosen the X/Y bolt mounts like mentioned in the video and adjust your screw that way.
I did the Right side screw since it was easier to get to .
try it and see if it works better
2 Likes