The pendant side will be a little more complex and will be doing most of the heavy lifting. But I might prefer JTAG debugging event for it as it makes things a lot easier for me.
1 Like
Esd is best on 5v, + and -D
Re: FB. I’ve read numerous debates on it. I dont have empirical evidence myself but some argue to use them. But it costs almost nothing to add and does reduce some high freq noise and you are in a high noise environment with noise and arcs. I use them in everything even some ADC power and gnd. All I do is motor controls so I compensate for noise.
My God I feel like I have stumbled on the meeting of the minds! You guys are making me feel more inferior then normal! ![]()
2 Likes
We do have some intelligent dudes here on the forum. I’m impressed. But, @Knick, you impress me too.
That’s funny
1 Like
I use an x box elite controller with the buttons bound to keystrokes in windows and it works pretty well bound the top buttons to toggle through speed so I can make it move faster or slower. Not the cheapest solution but it works well.
2 Likes
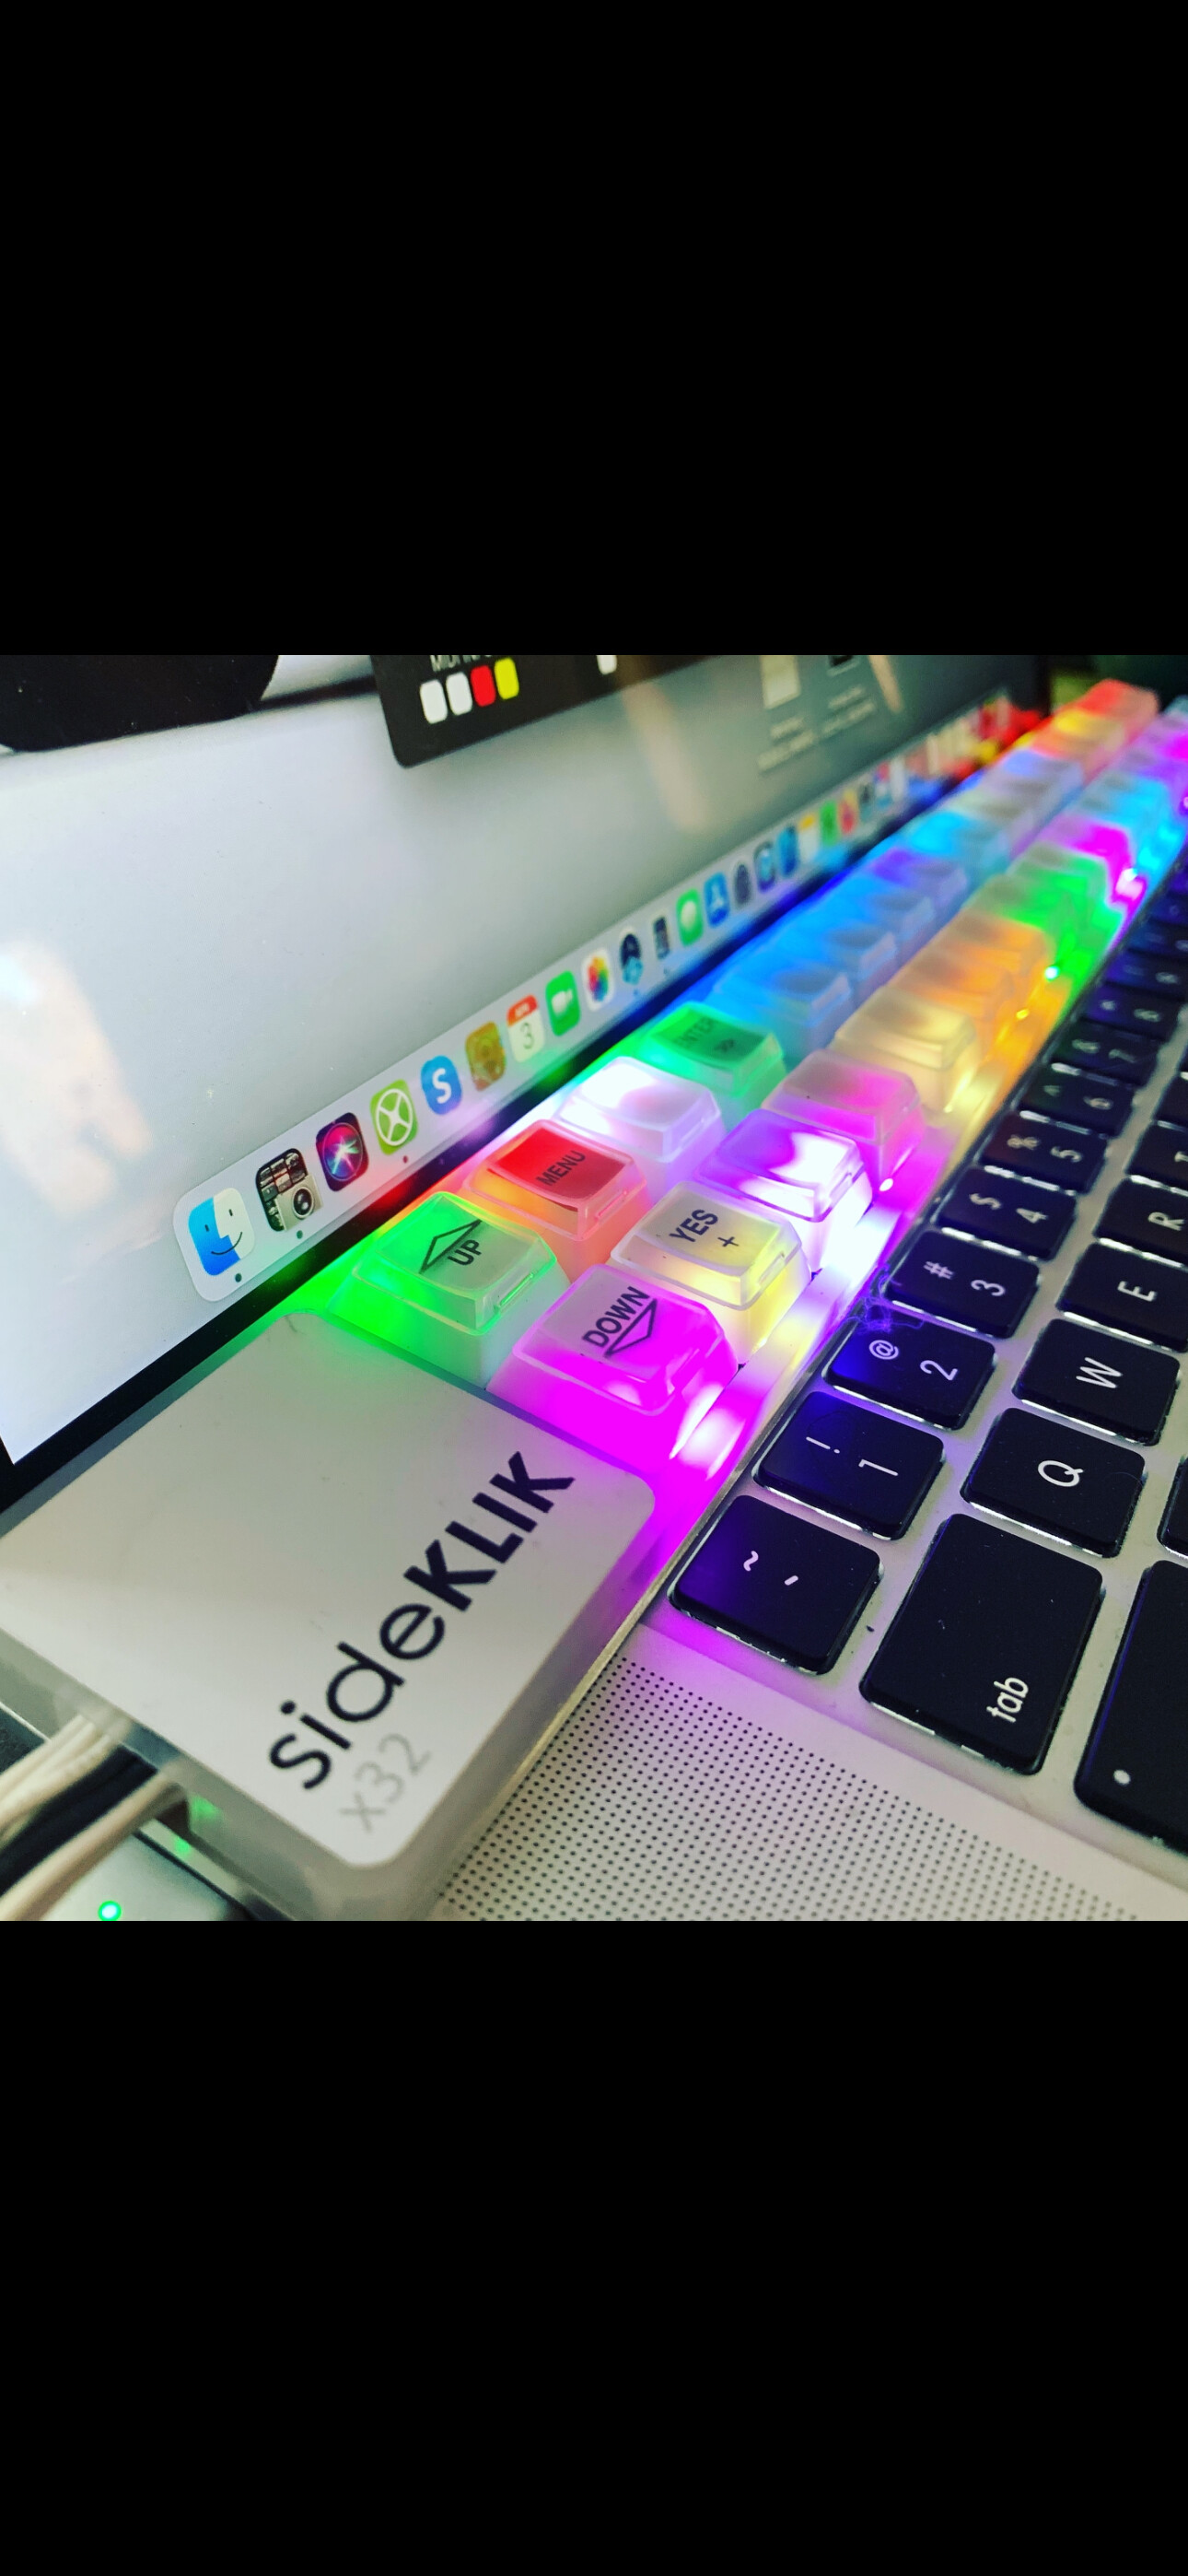
I designed a macro keyboard with 32 buttons and software that can assign any combination of keystrokes to one button press ie control>alt>delete. String any number of mouse moves, mouse clicks and or keystrokes to the button. Not wireless but better than using a laptop button for basic navigation and other frequent commands. I like buttons in sections of 4 wide like old school keyboard f keys where I could just feel where things were without looking.
3 Likes
That’s a great alternative, how did you achieve binding the top keys to speed change? Are you using some kind of mouse macros?
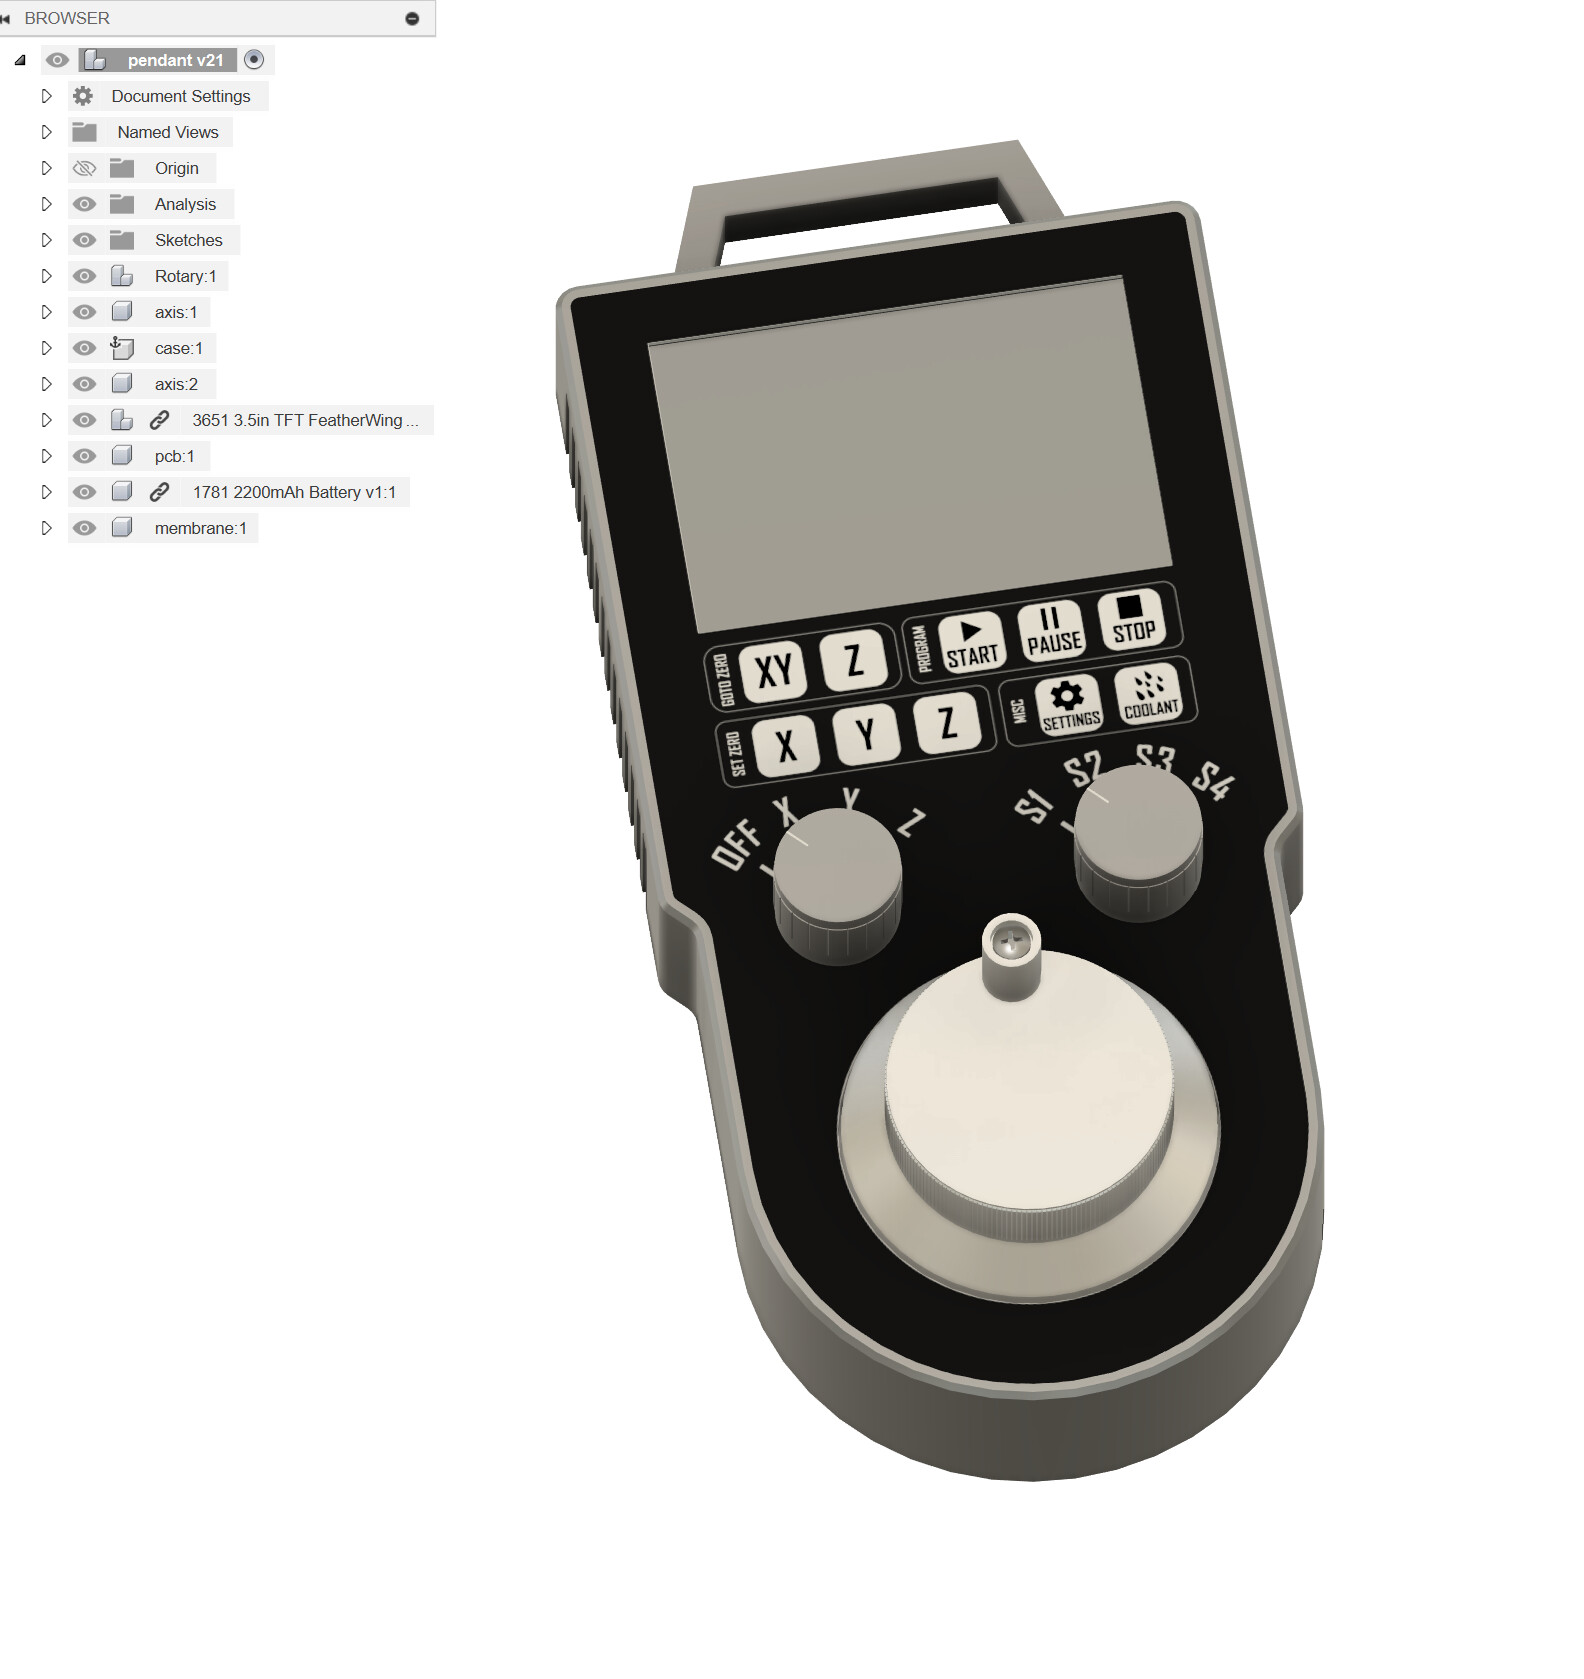
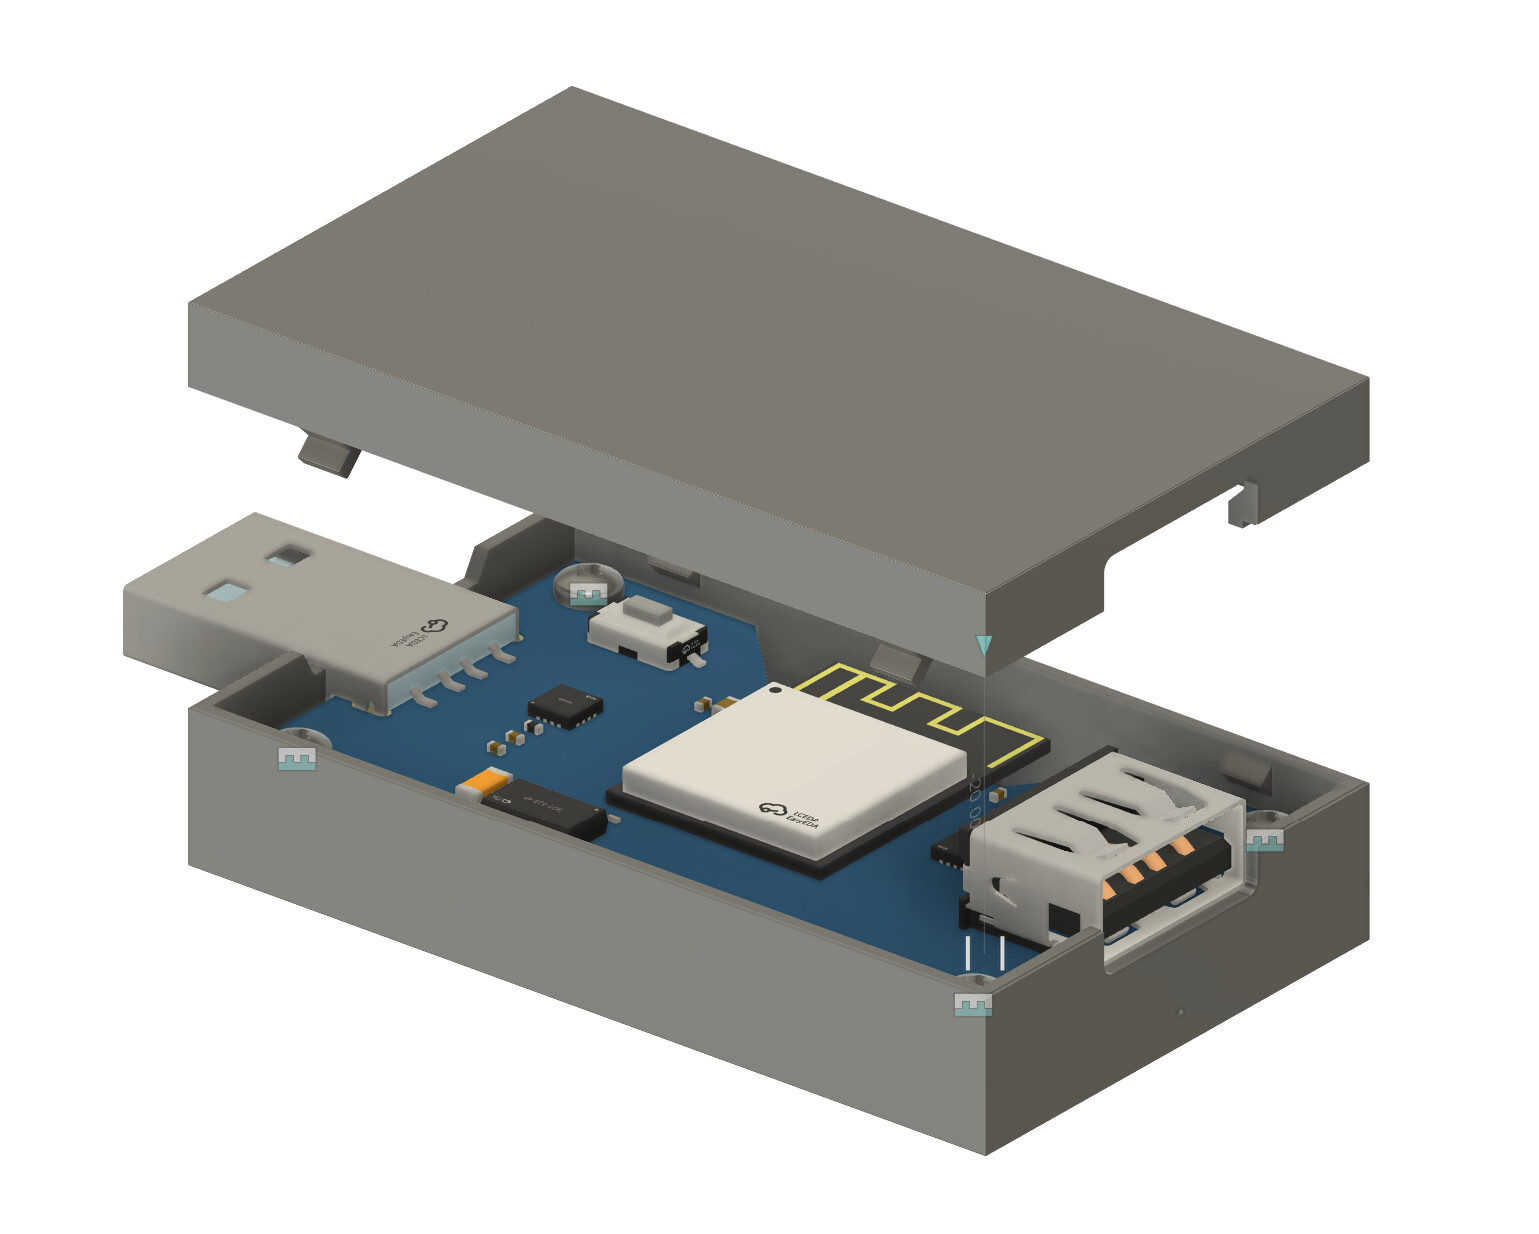
I made the first revision to the usb dongle side according to the feedbacks and created a 3d printed enclosure also.

The previous version of the pcb will arrive in 2-3 days and the new one is in production. I also ordered the following items for the pendant side:
https://www.amazon.com/gp/product/B074WMC9C8/
https://www.amazon.com/gp/product/B07WTL3KPB/
1 Like
Keyboard Button Mapping for Xbox Controllers - Xbox Wire
Xbox accessories app is where you go to set the bindings
- Jog X+: Right Arrow Key
- Jog X-: Left Arrow Key
- Jog Y+: Up Arrow Key
- Jog Y-: Down Arrow Key
- Jog Z+: Page Up Key
- Jog Z-: Page Down Key
- Toggle Nudge Jog: Tab Key
- Start Program: ALT + R
- Pause Program: Space Bar
- Stop Program: ALT + S
- Zoom in Visualizer: Mouse Scroll Up
- Zoom out Visualizer: Mouse Scroll Down
2 Likes
Is there a keyboard shortcut that toggles between speeds?
The tab is what I have used to change speeds.
Hi,
Just found this discussion, I think that you may be attacking this the hard way. If you can do all you want to do using the computer keyboard. then I would suggest that you build a programmable wireless keyboard emulator instead of breaking into the communication stream to the GRBL driver. I built a wired USB keyboard emulator to run my CNC and found that it serves me quite well. Making one to do the same thing wireless can be achieved either using a Bluetooth keyboard interface or a USB dongle and emulate a wireless keyboard. That way you don’t have to deal with the GRBL traffic on your interface.
Unfortunately for you, my controller is default MACH3 compatible, but it is fully user programmable allowing each button to have up to 16 keystrokes, and three different commands on each button. I also use two 4-way joystick to control X, Y, & Z.
Your project is very interesting and has lots of potential.
Good luck.
Bill
1 Like
It would be awesome to get Langmuir to support XHC pendants in CutControl. There is some info here: XHC CNC Pendant Mach3 Handwheel | NVCNC.NET
They come in two flavors, wired and wireless. I have the wireless one working on my MR-1 with LinuxCNC (not CutControl). It’s nicely made with good weight to the wheel and plenty of buttons for custom functions. The wheel is a big improvement over the keyboard for moving the machine, because it is trivial to go from rapids to moving one thou at a time. In LinuxCNC I also have it showing me G54 coordinates on the screen.
They run about $100-$200, a bargain for what you get.
1 Like
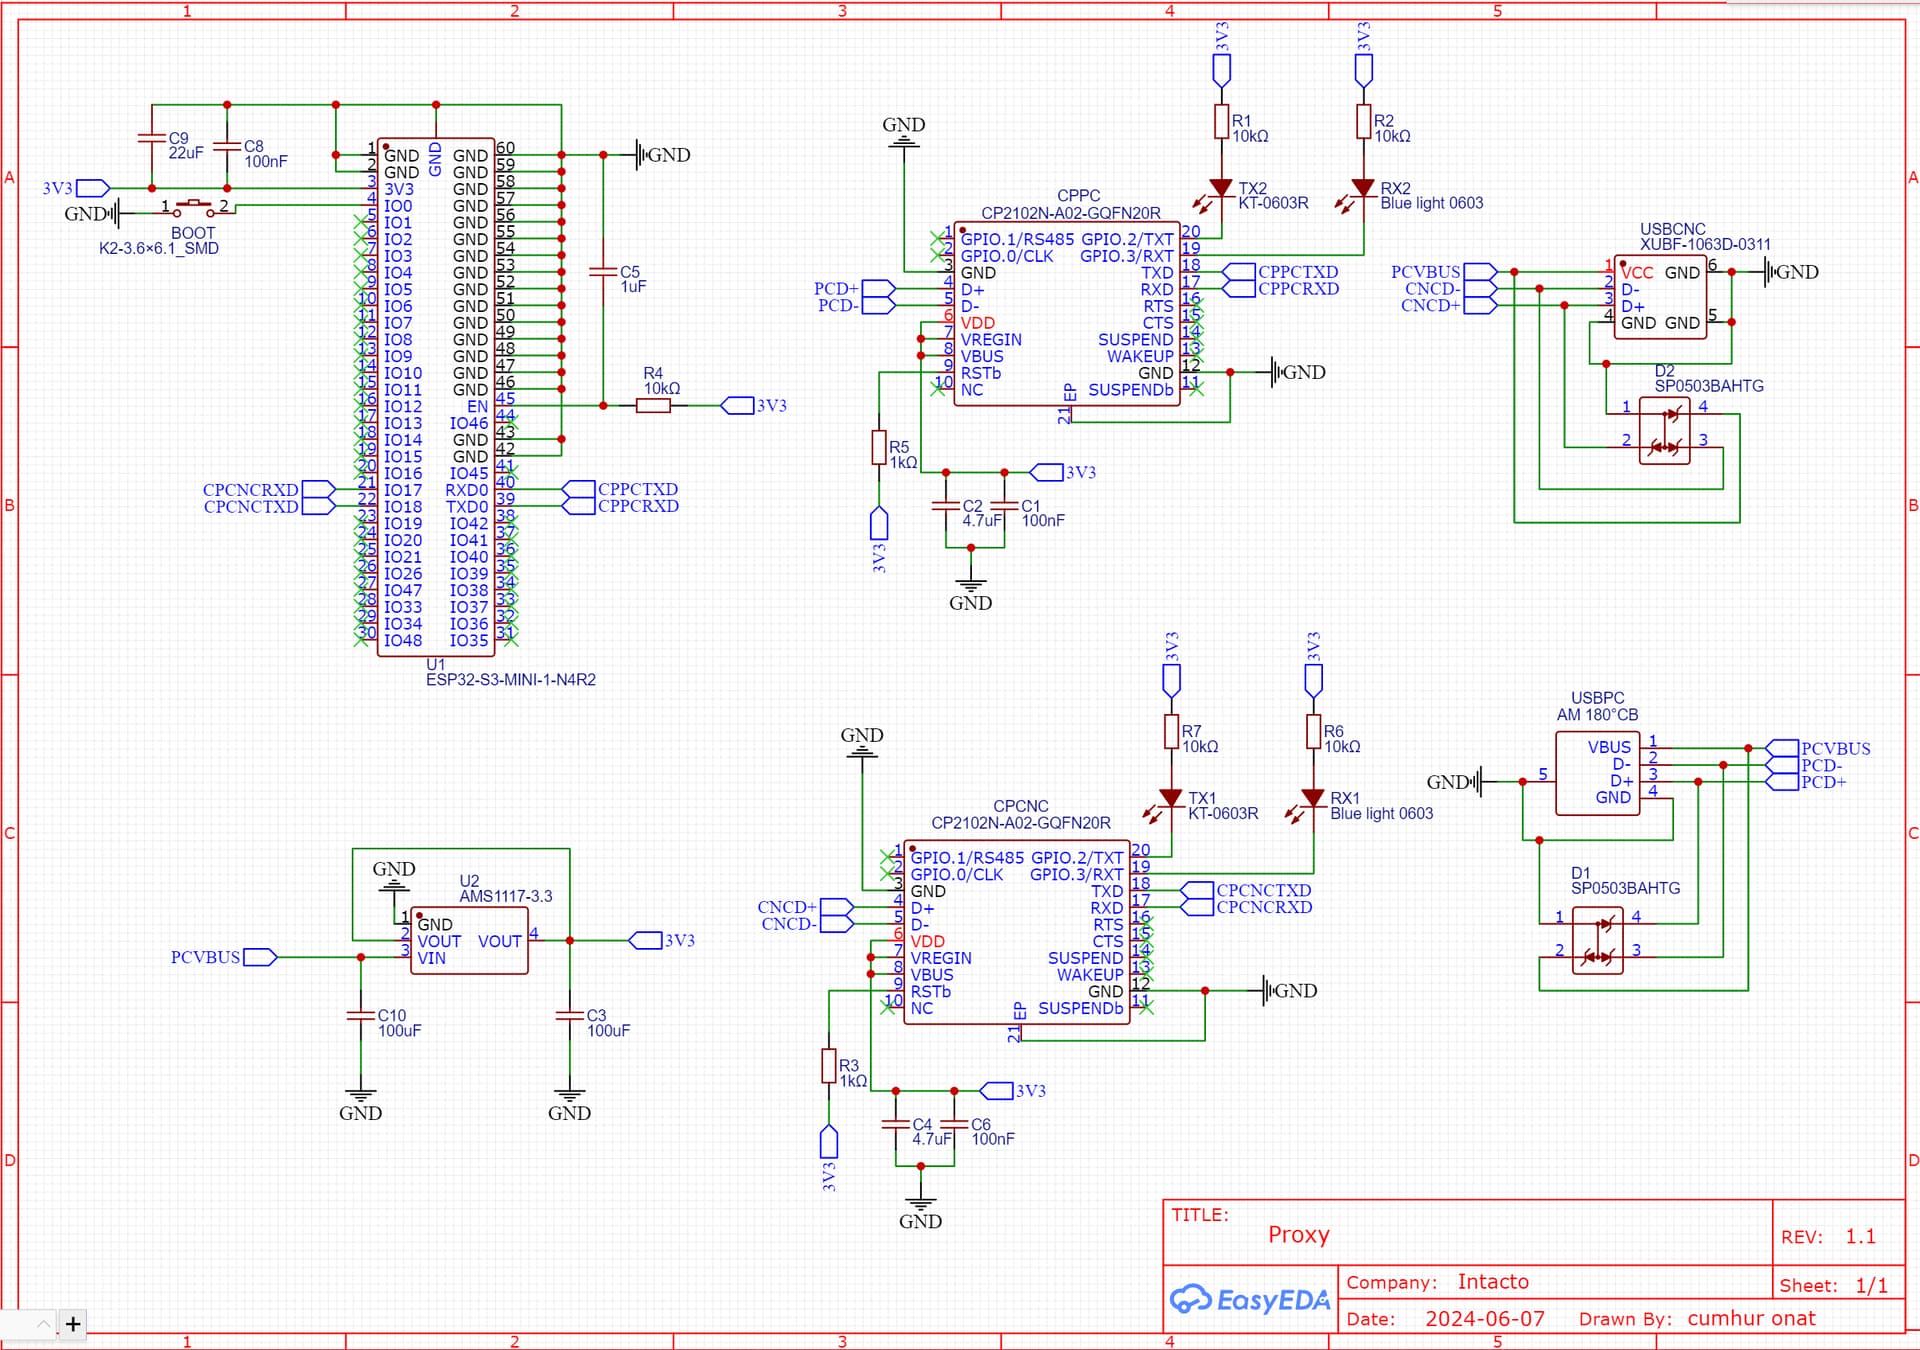
Let me give a quick update. It looks like I made some wrong assumptions. I received both the initial design and the updated one, but both of them are pretty useless at this point. There are two big issues:
- Cutcontrol picks the virtual serial com port by its USB VID (Vendor Identifier) and PID (Product Identifier) so for the pcb to work I had to override its factory default VID & PID with the same of the controller unit (0x16d0, 0x103e). But this means I have to create a new driver bundle for the cp2102n and get it certified by microsoft which will cost thousands of dollars.
- I was believing that the second cp2102n on the pcb could communicate with the controller unit over the usb line as they both will be using TTL over USB, but that’s not the case. The device that gets attached to the controller unit needs to communicate with it only with some special OS driver.
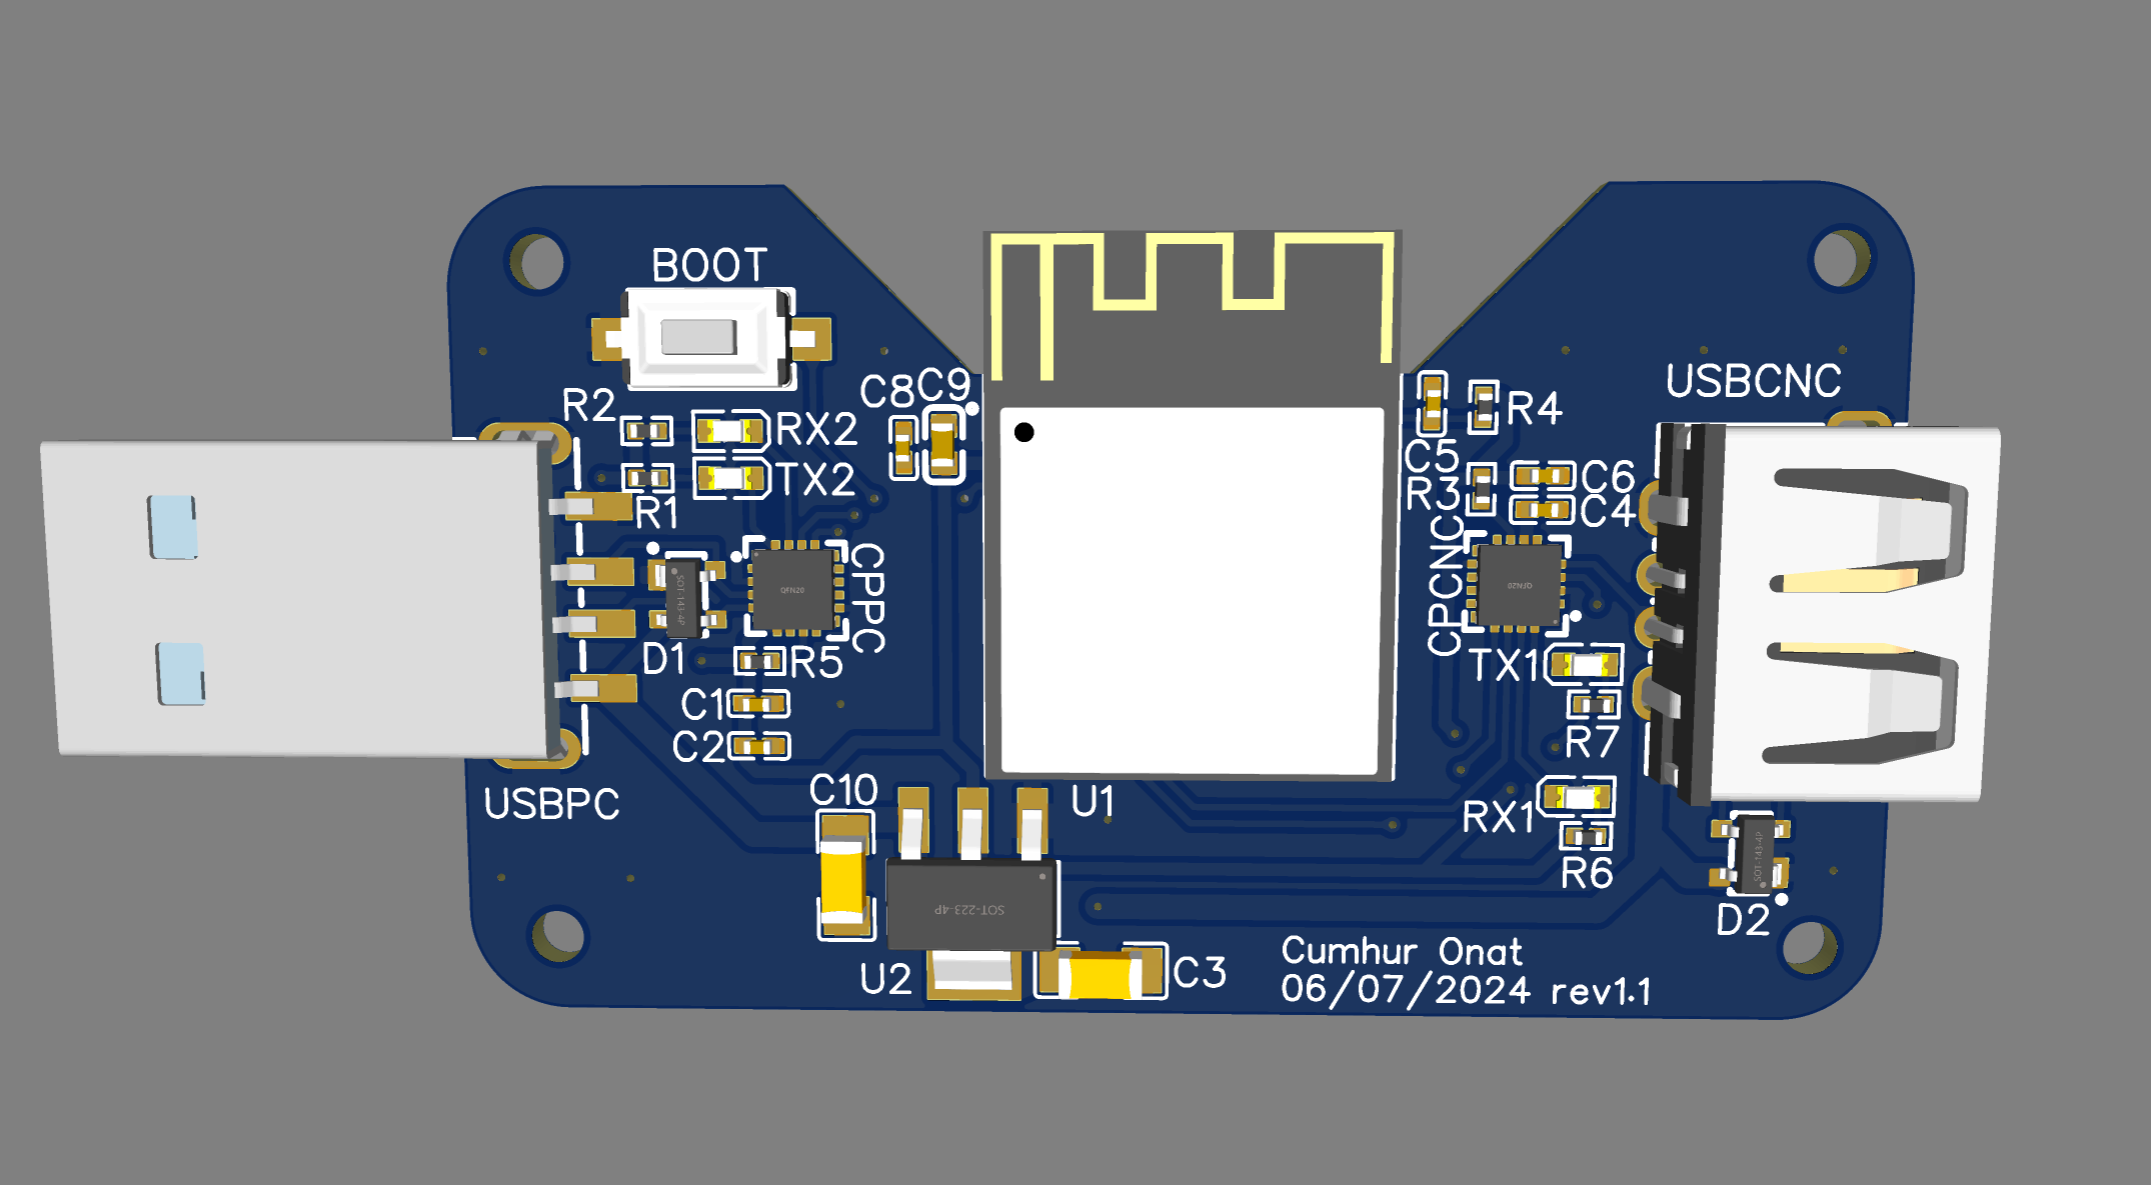
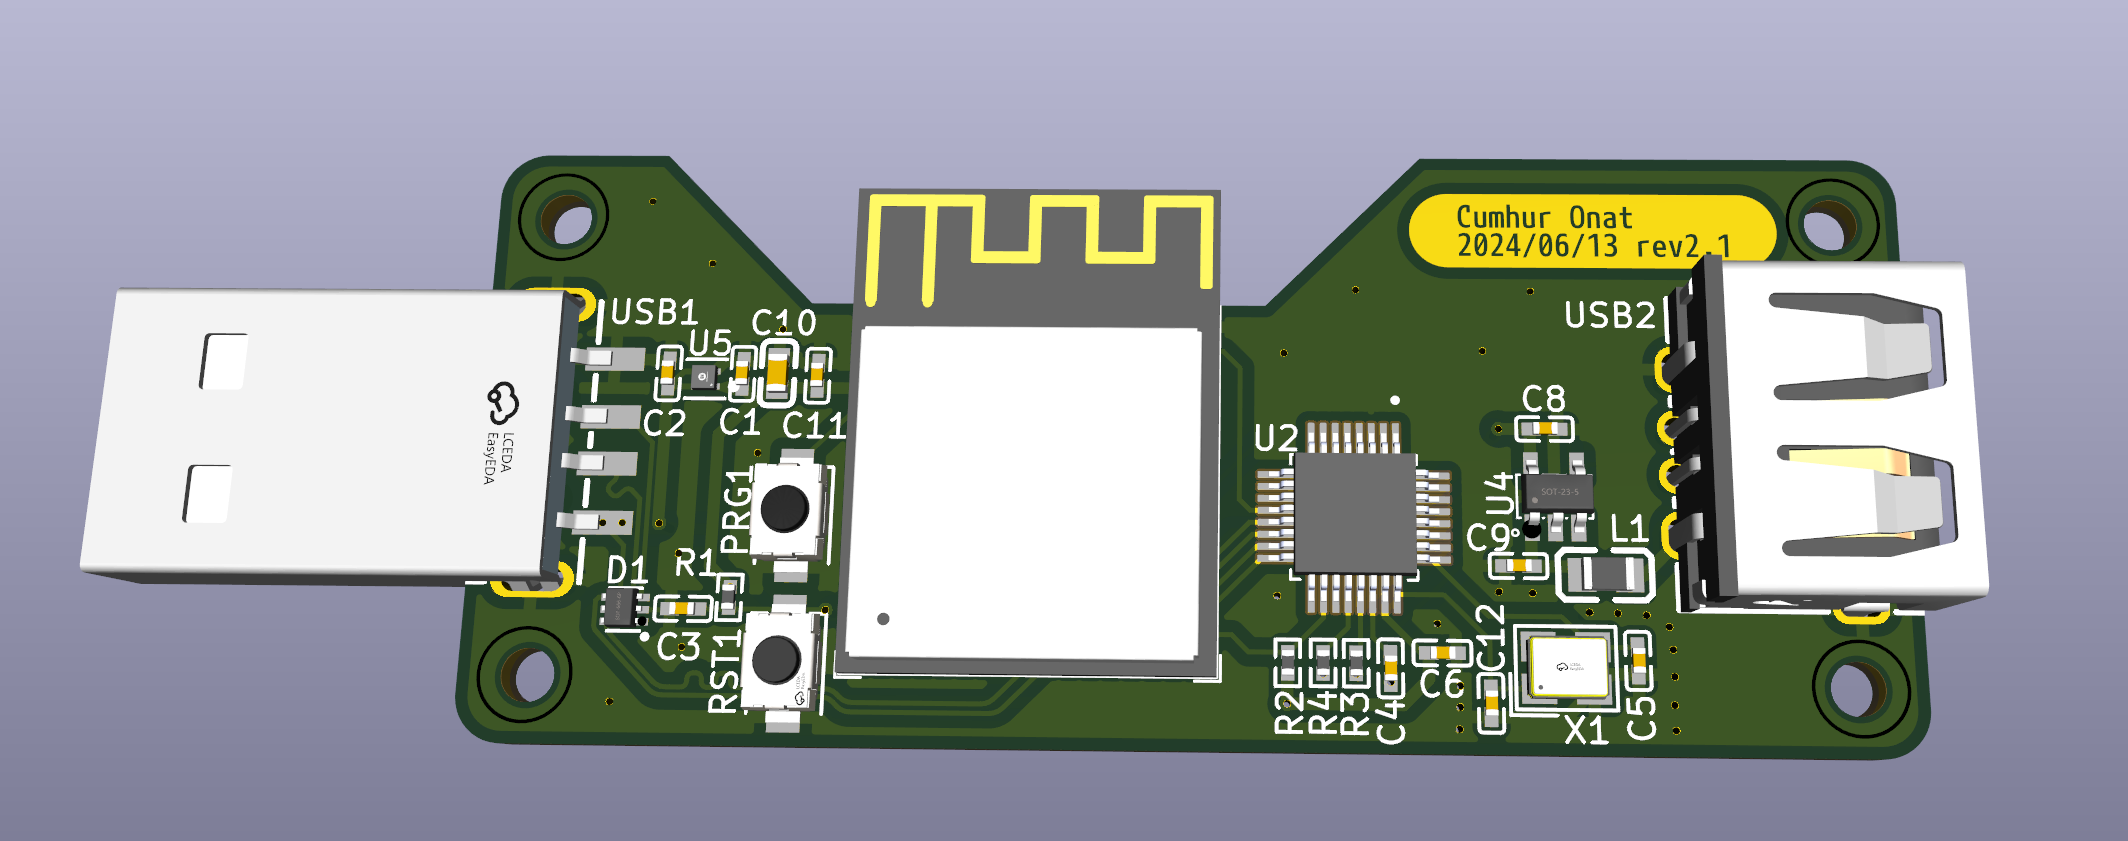
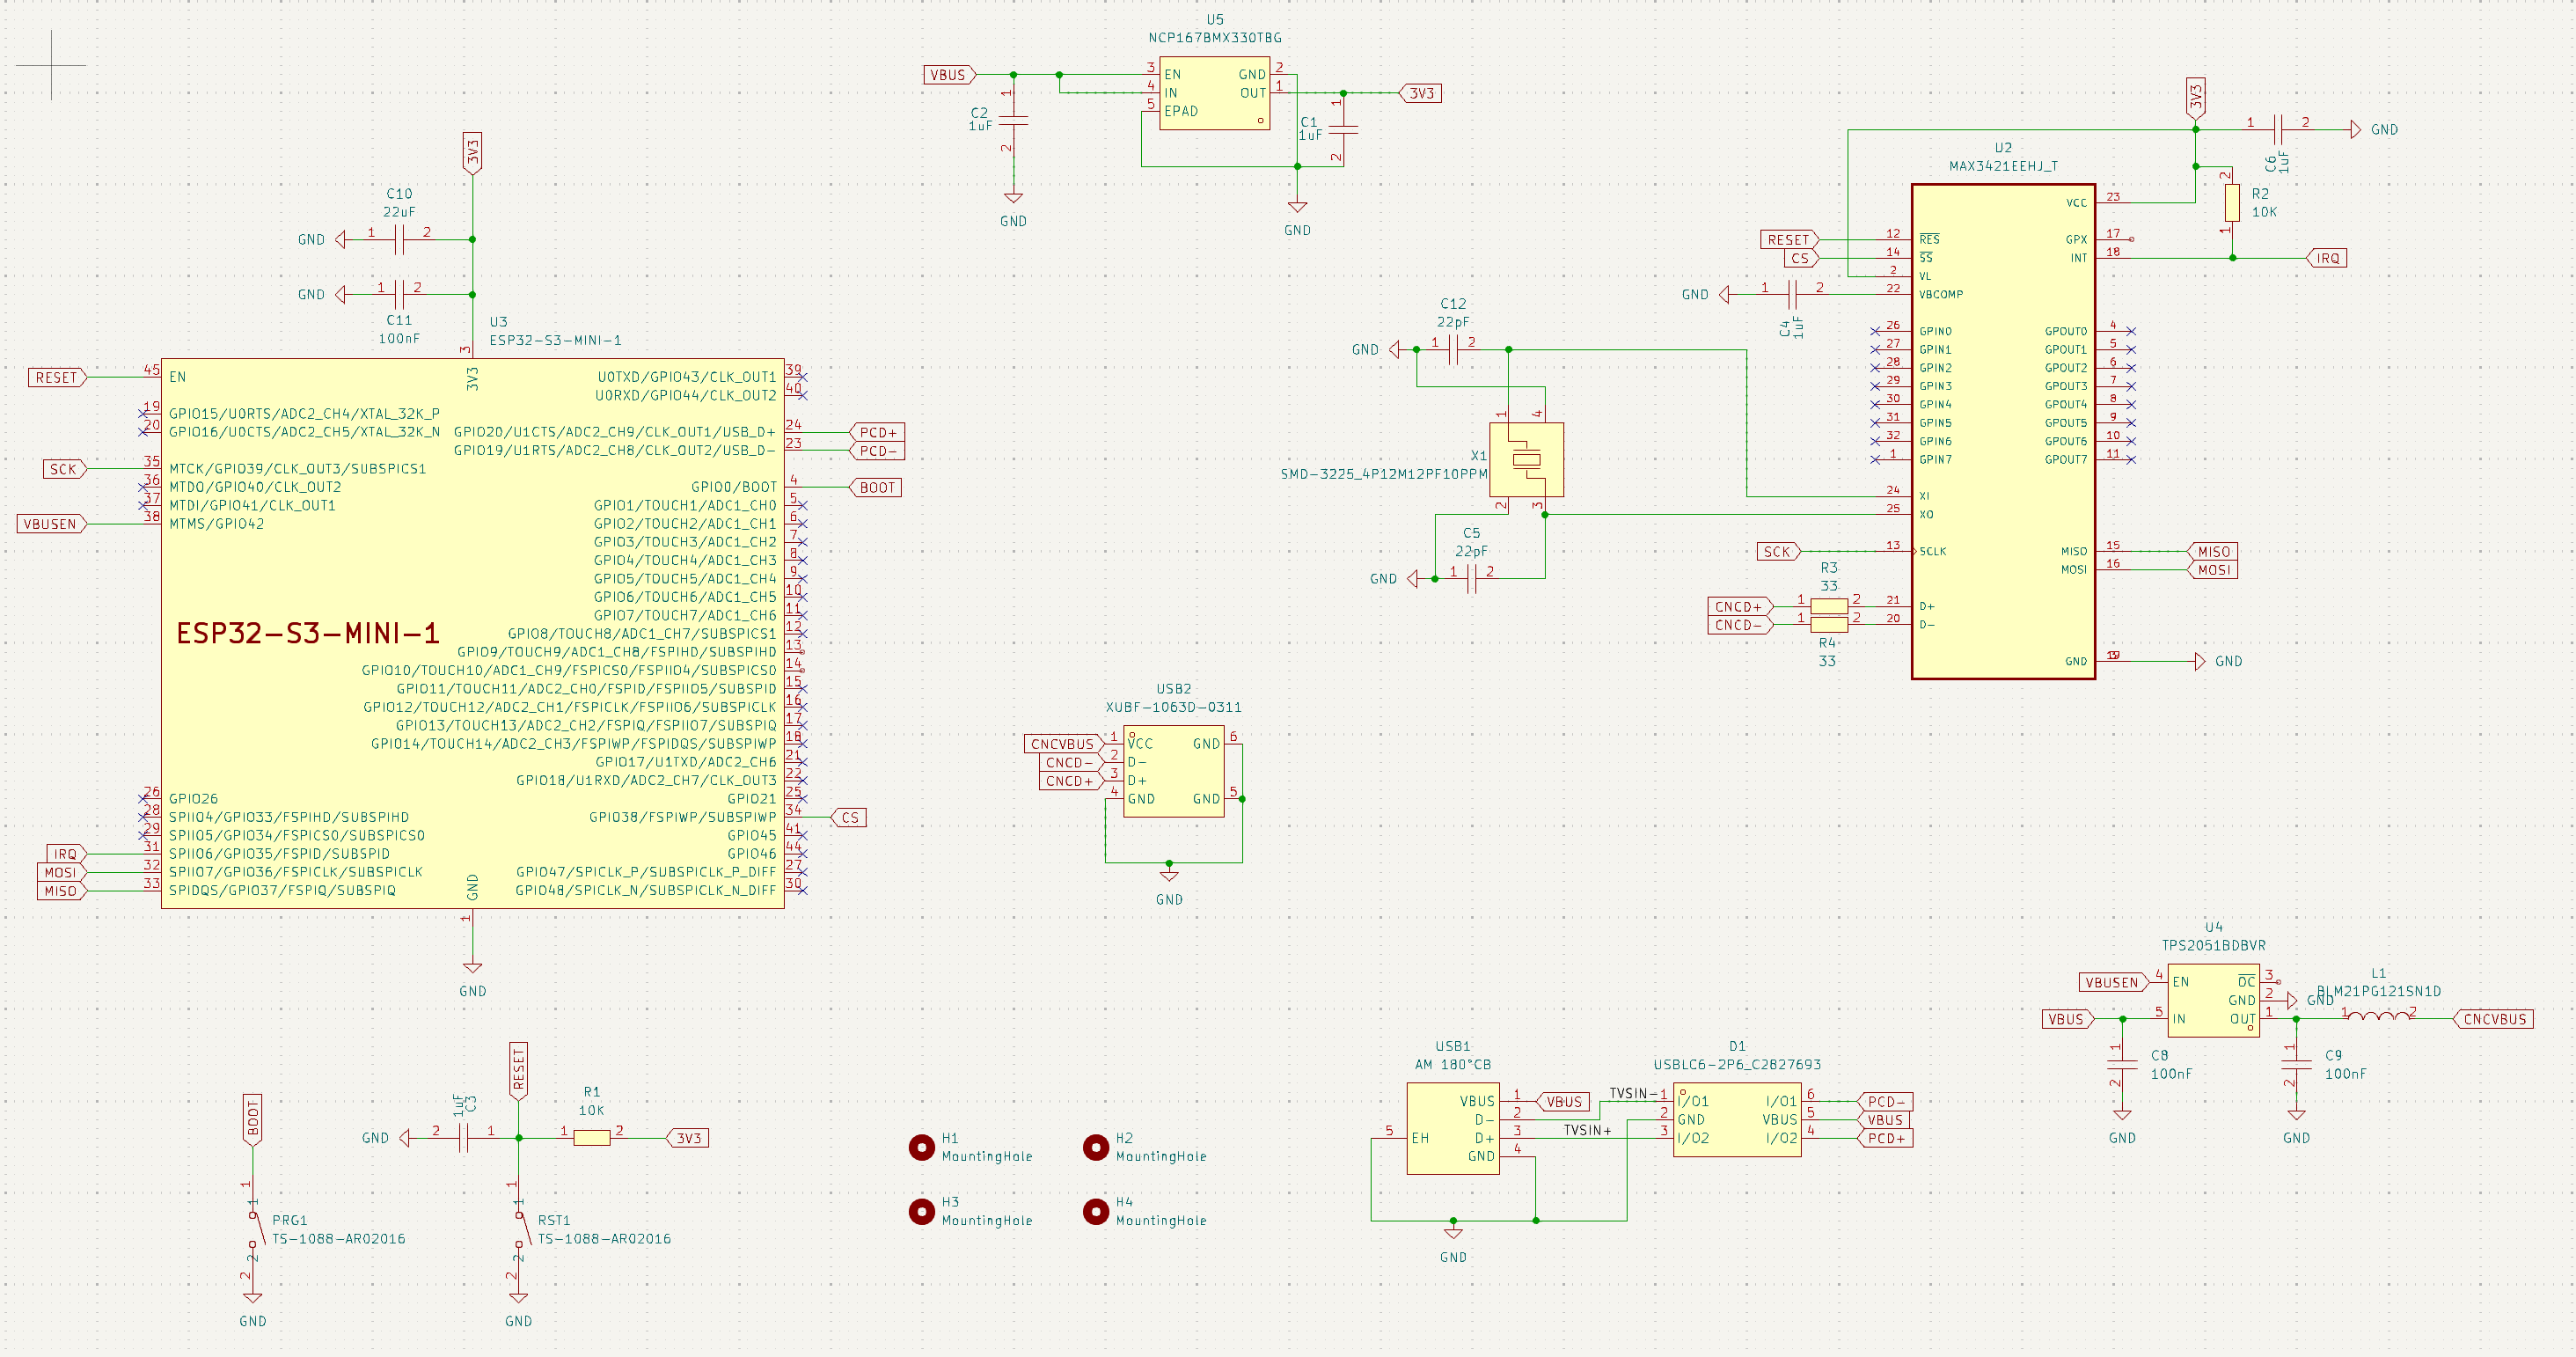
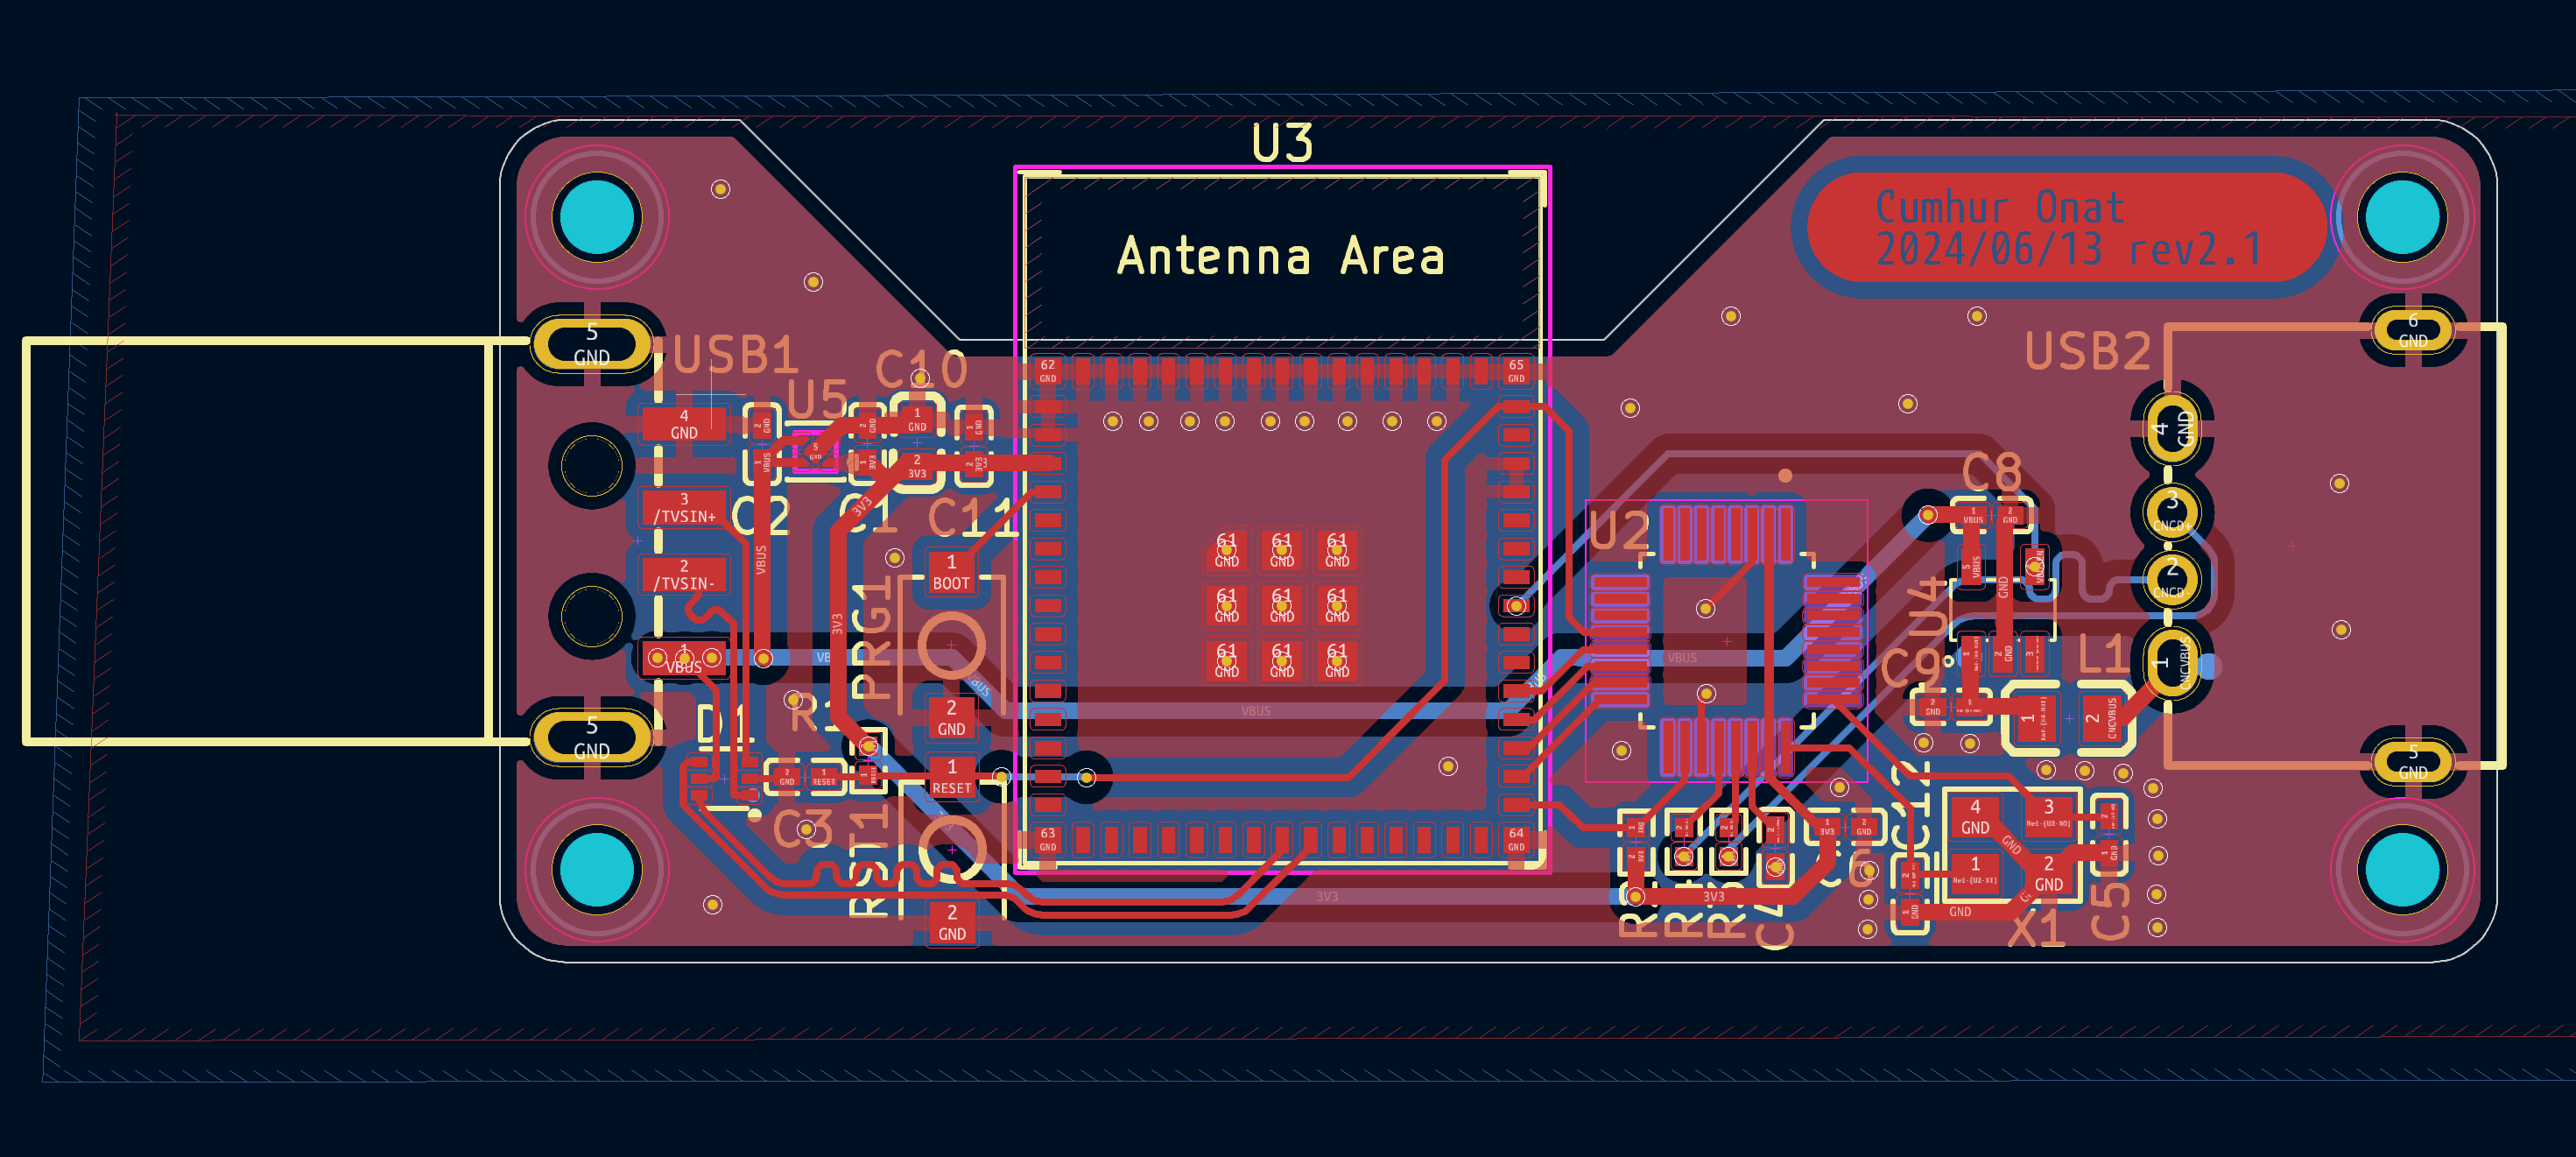
So, I designed the pcb from scratch. This time ESP32-s3 will handle the pc usb connection with it’s native USB support, the good part is it also supports CDC-ACM which means it doesn’t need any driver on windows 10 & above even if I override the VID & PID. For the controller usb connection side I’ve included a MAX3421 USB controller chip which supports both CDC-ACM, cp210x and some other usb devices. It’s currently being manifactured on jlcpcb.
I’m sure this could be done by using some software and readily available devices, but it’s a great oppportunity for me to get a better understanding about hardware & software aspects of a cnc machine.
3 Likes
I like the way you think! Good luck
1 Like
Some decisions are based on if it is one off for yourself or if you are trying to have others use it. If for yourself you could try hacking into traces between the micro and usb uart and talk direct with the micro and bypass all usb traffic. The other simplest solution is keyboard and mouse emulation as a usb hid device using the silabs part you like. I have used knobs/encoders as inputs which can be assigned to buttons ie hold buttons down while knobs turning or for more granular control each pulse if quadrature on the knob output can do button down button up and with some dwell times/ pauses on button down events you can get some nice usable knob >button translation. Especially with a non detented smooth quad encoder and heavy large knob it changes your feel of the interaction of a machine Since all the jog options are on a qwerty kb anyway the end goal is already laid out for you to tap into. But for sure there is a lot of fun building boards and figuring things out. I have a pick and place machine and much prefer to design a PCB and build it myself, you learn about 100x about stuff.
1 Like
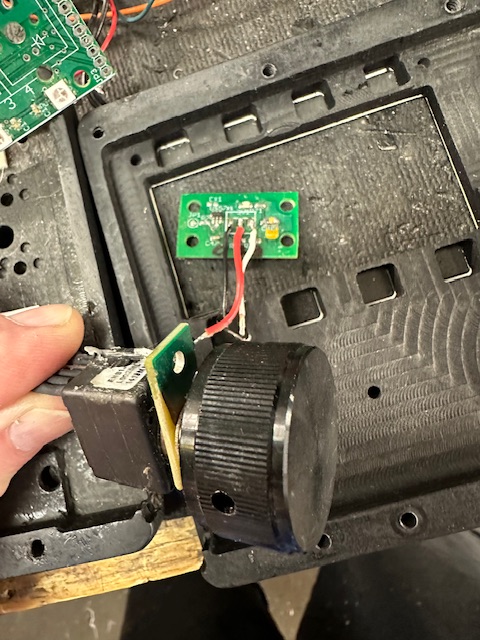
I made a little PCB with exposed copper to make contact with the barrel of this quadrature output part. A wire comes off the barrel PCB and goes to a QT1010 cap touch sensor. If you touch the aluminum knob the output turns on. In the software I did something to drag a knob on the PC gui screen.
On touching the knob:
Mouse move to screen XY to be on the PC GUI knob
Mouse down event
When moving the quad pot right by one count, move mouse right by 1. One encoder pulse is one mouse move increment ie pixel.
Move knob left, moves the mouse left.
On releasing the metal knob, mouse up event
This replicates a screen knob identically on a physical knob. You would have some divisor on the quad output counts to set the knob resolution to mouse ratio. Ie encodercount /5