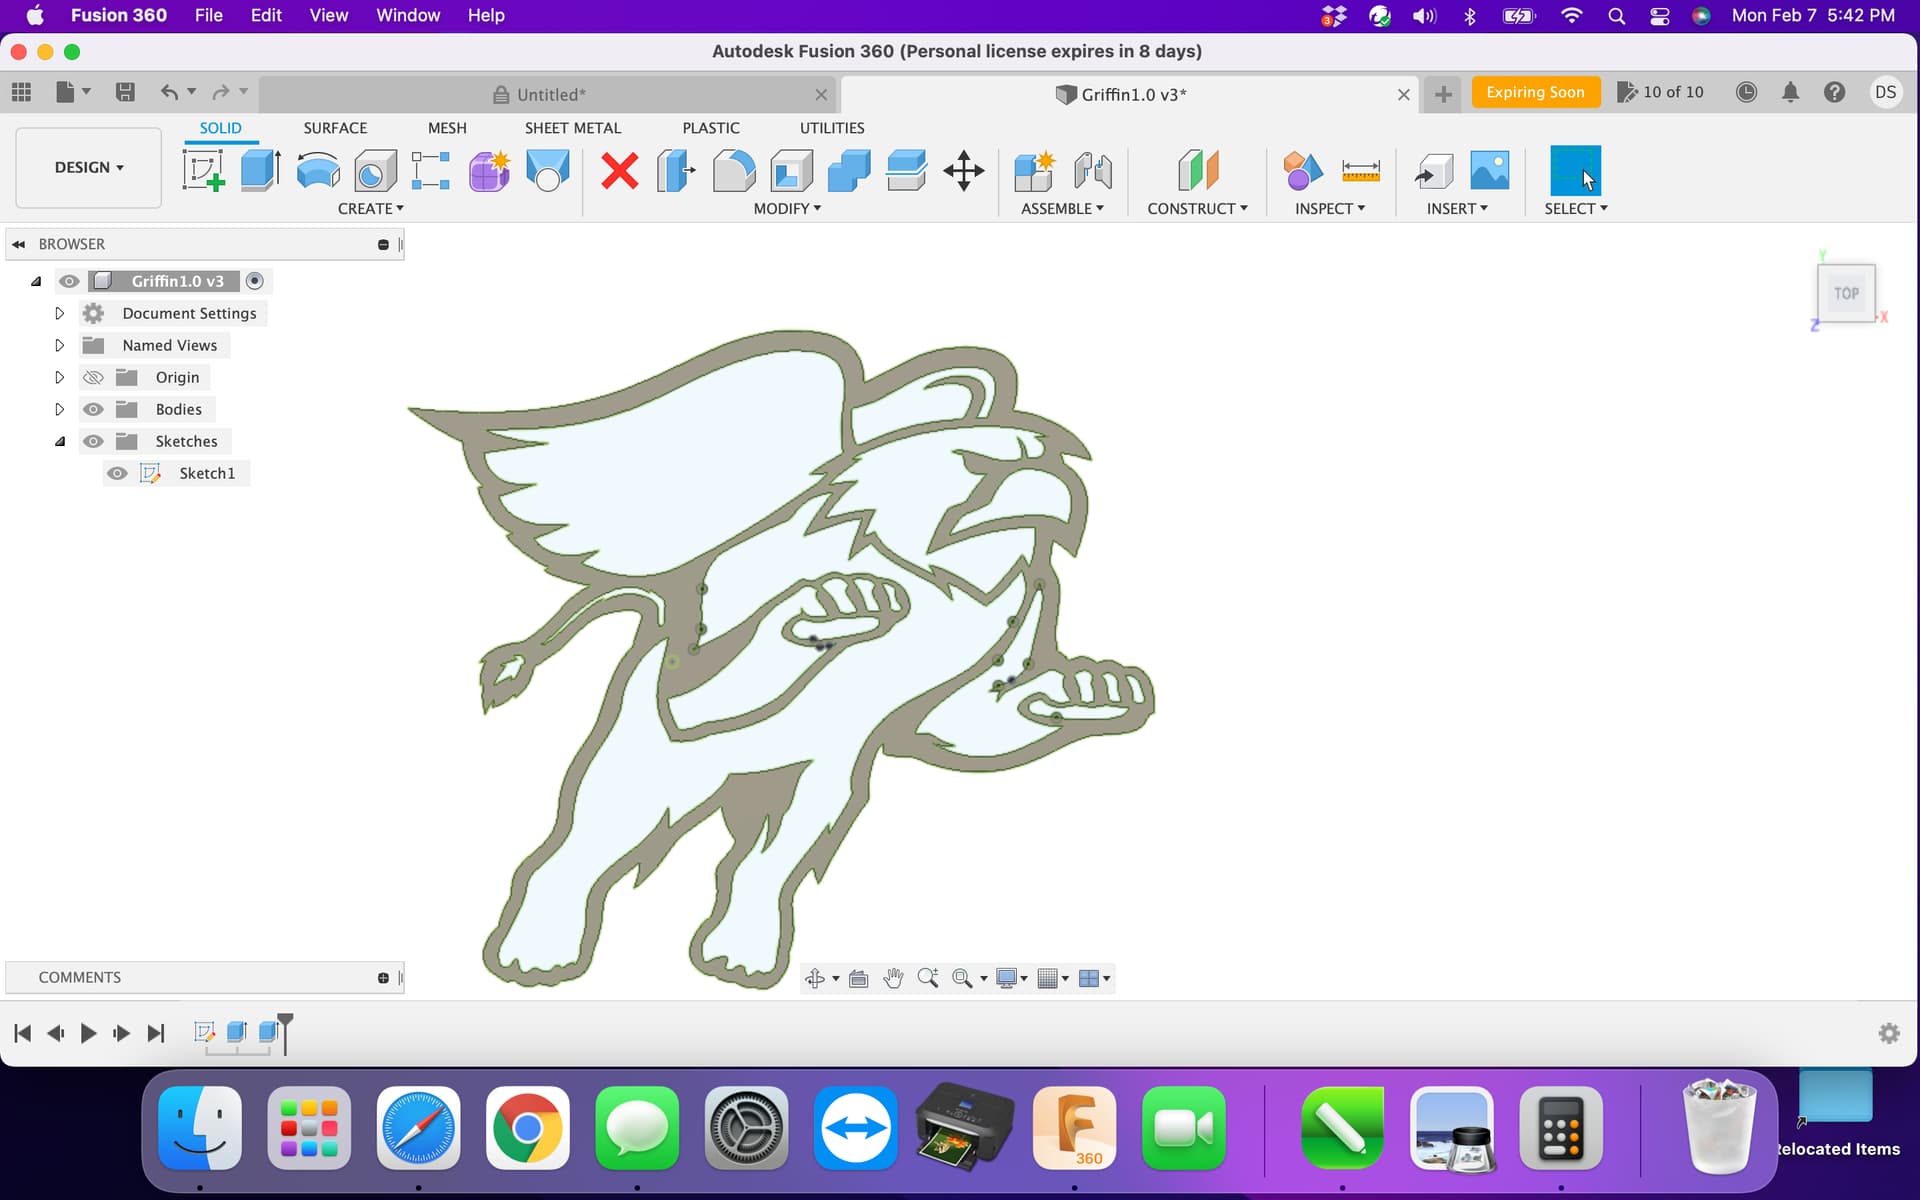
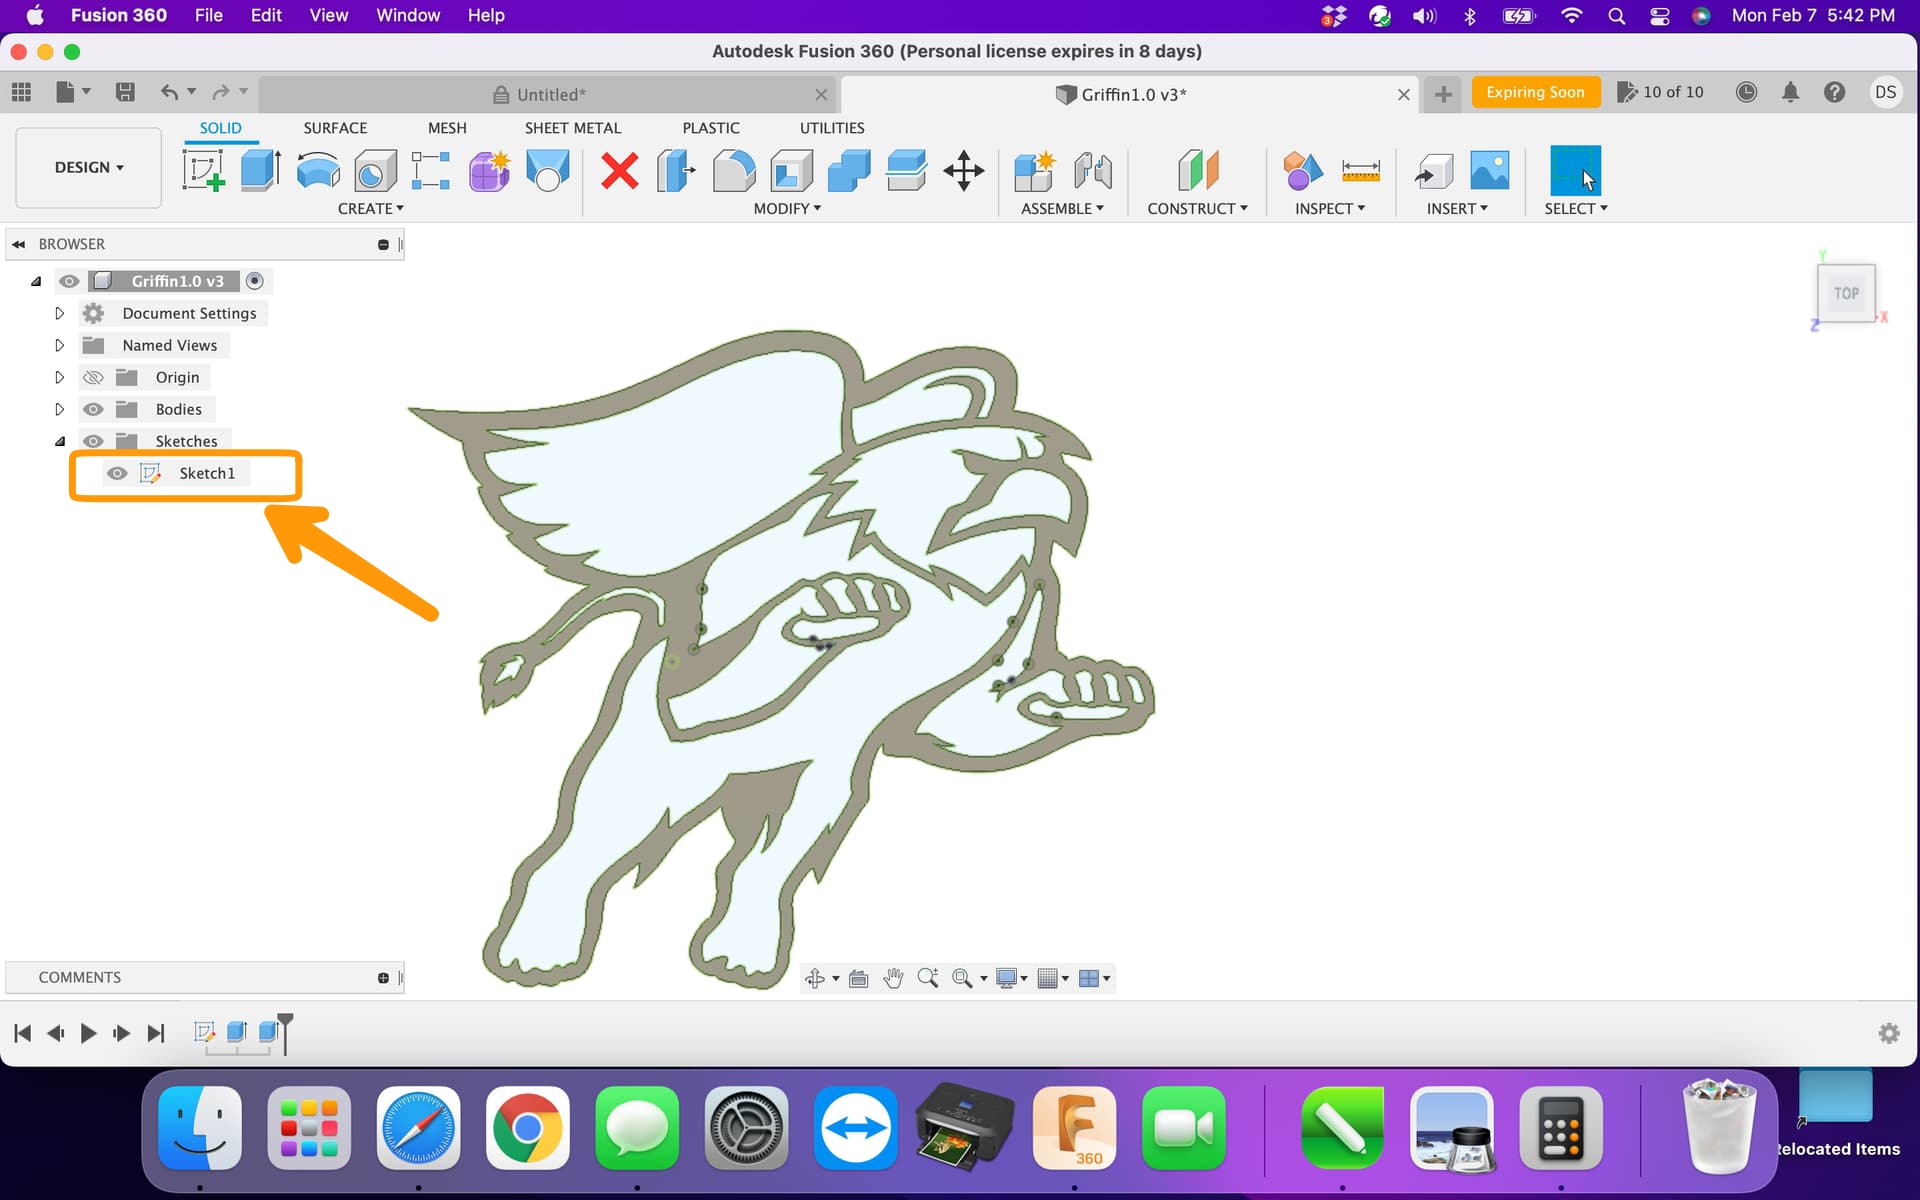
This is going to be my next venture I guess. My son is a freshman at Seton Hill and this is their mascot if you will. His birthday is at the end of January figured I’d get him something he could hang in his dorm room. The actual logo is very detailed and the Griffin seems to be a lot more friendly. However my question is any suggestions what I would cut out or what I would leave? What is the proper way to determine?
I see it as what you cut out is up to you (or the customer). This will be a cool piece when it’s done. I use F360 and when I think it have what I want, I will extrude it to simulate the finished part. Then make changes as needed. Sometimes I take the “less work” route because my brain starts to overheat and I’m over thinking things. But that’s just me.
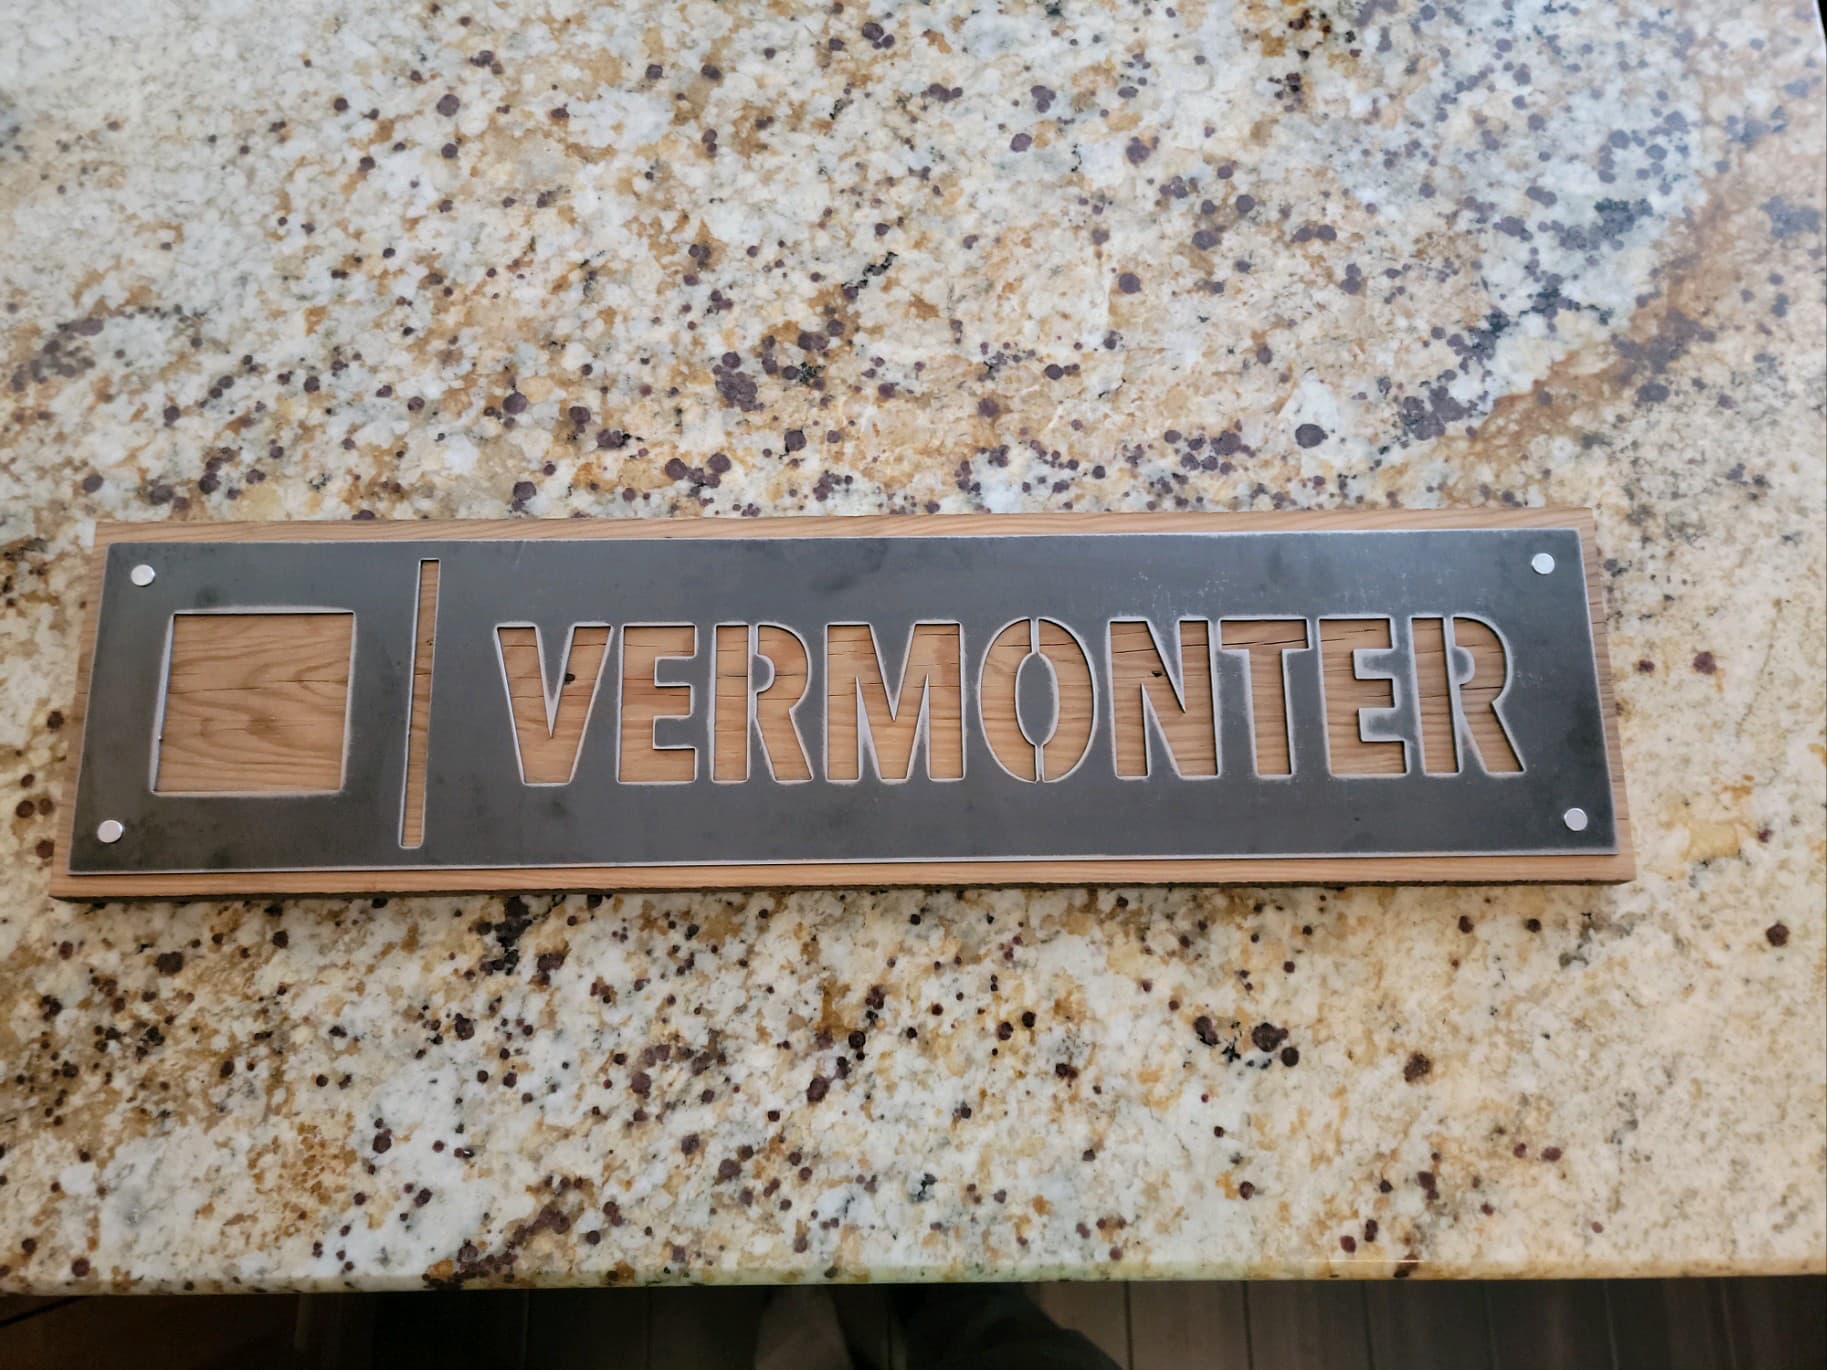
Finished size was thinking just under 2’x2’ or what it scaled in the tall direction after making it almost 2’ wide. (Only used half the table so far, dammed it up to keep the fluid in one side)
I actually didn’t even think to make multi layer, that would make much more sense I think. I do tend to over do it, knowing he cannot put an anchor into the wall there I’ve got to keep weight in mind hahaaa. I was thinking 14 or 16 G.
The extrusion is a fantastic idea as I totally understand the brain hurt. I even developed a lower eyelid twitch on this project so far.
For now I have to walk away, sleep on it. The Fusion and Inkscape are proving to be a real thorn in my side, BUT I refuse to throw in the towel. I am going to have to keep a book when I do something right, it’ll be short . One day I hope to be proficient in these tools so I can give back in a technical aspect like so many of you.
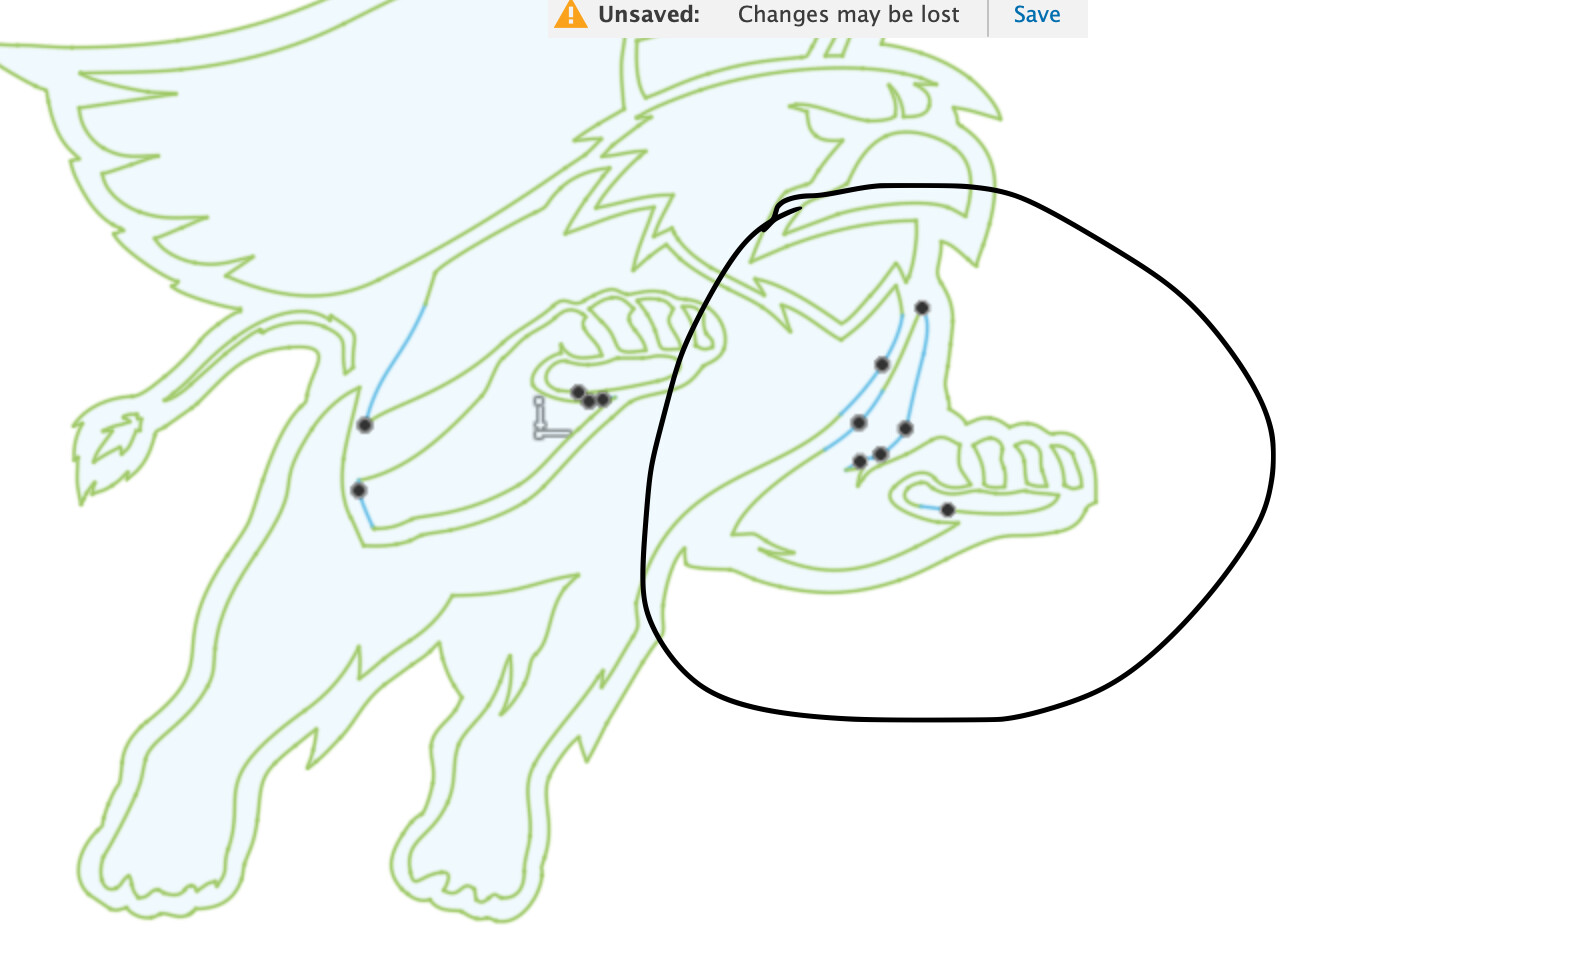
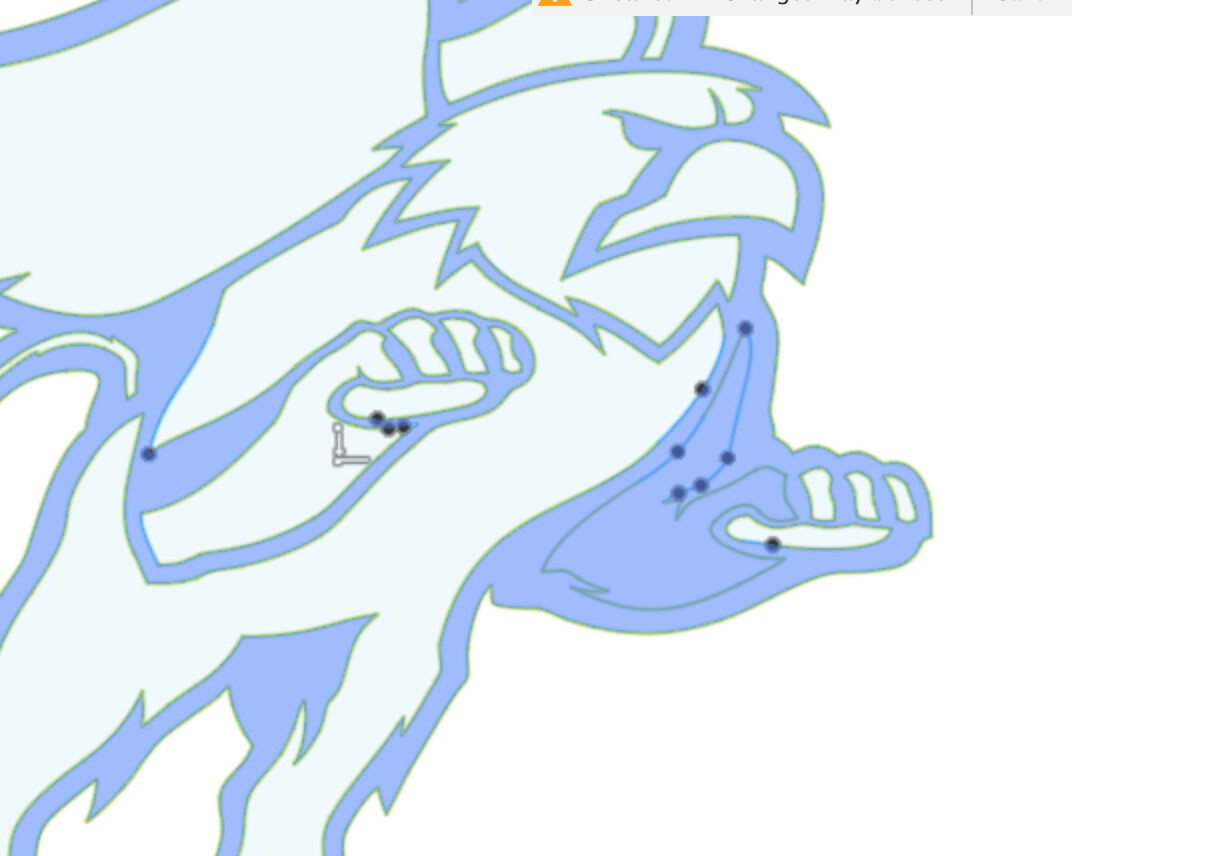
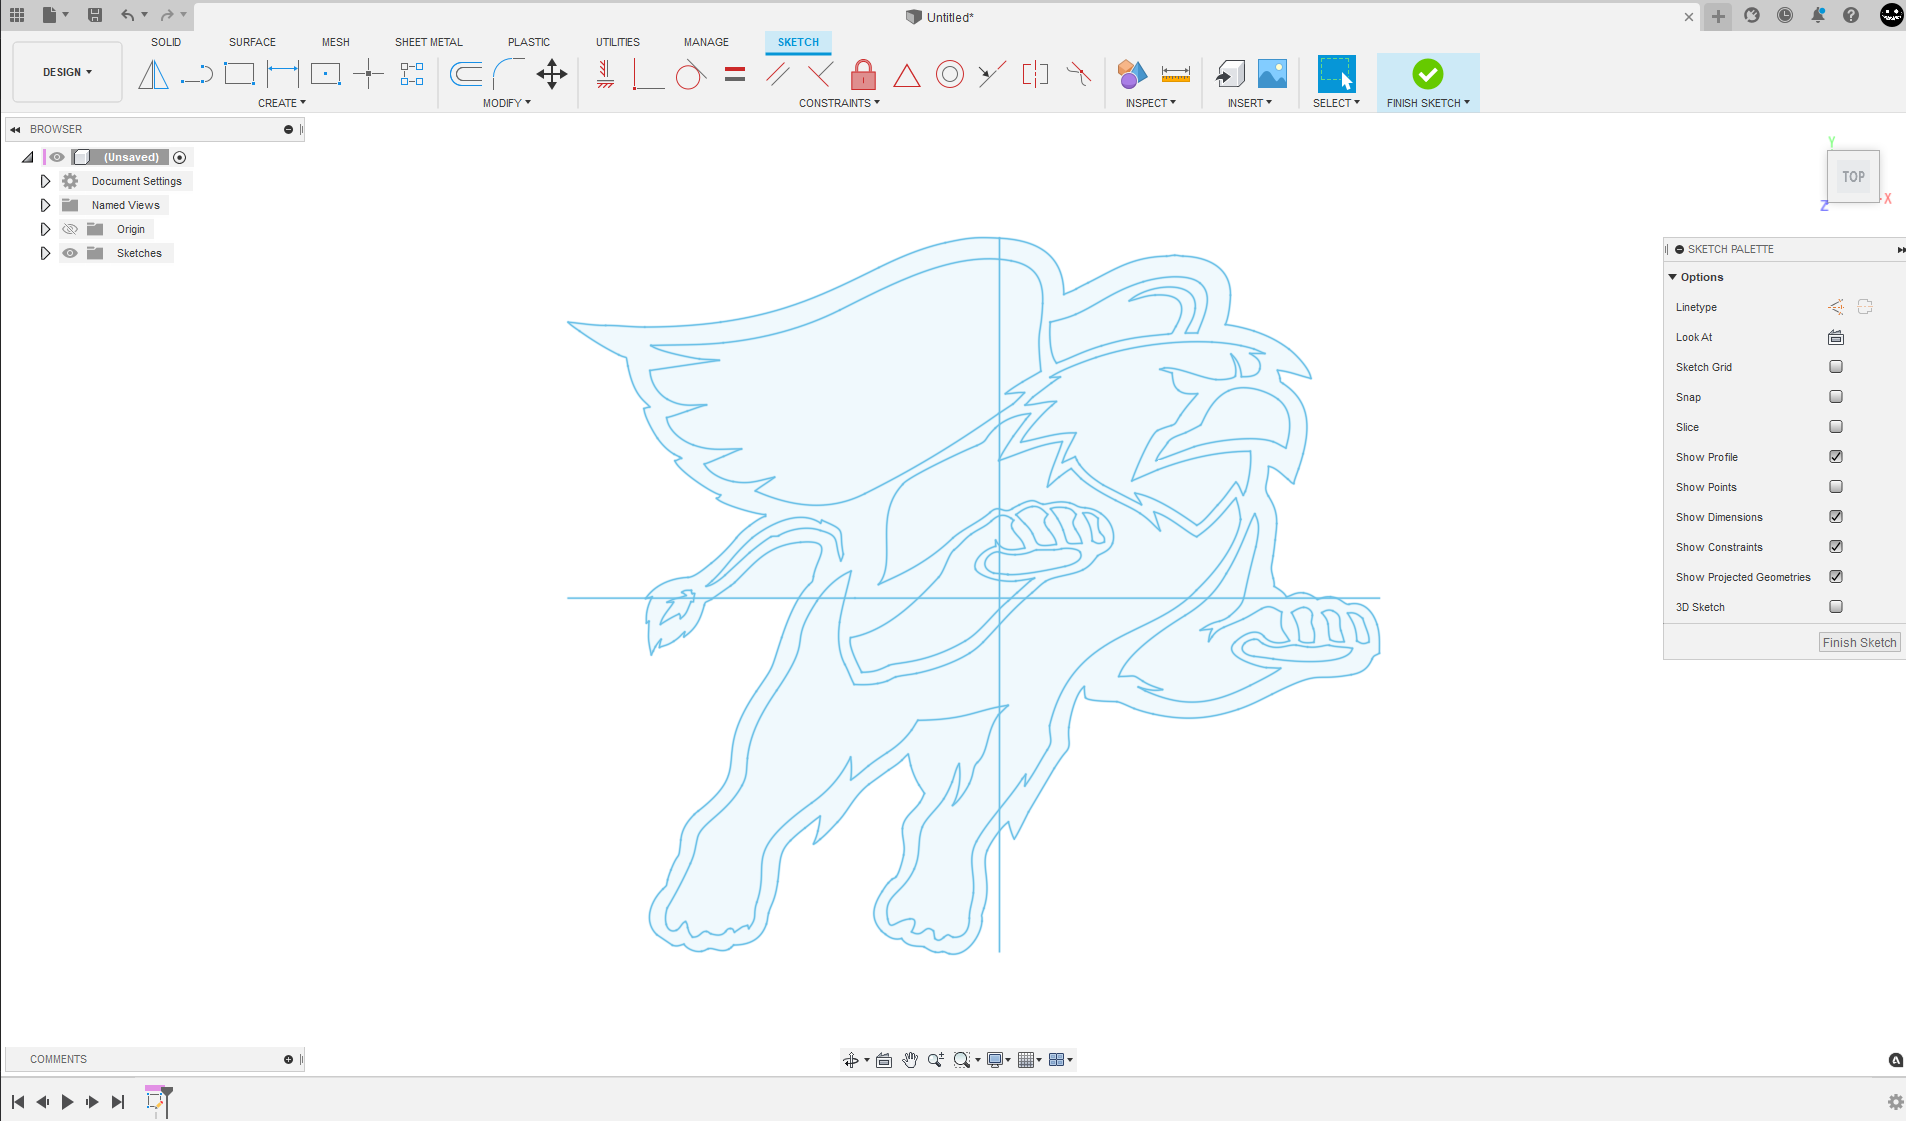
So I would start out by using the red padlock tool to turn all these green lines to Blue.
Green is locked sketch lines
blue is unlocked sketch lines
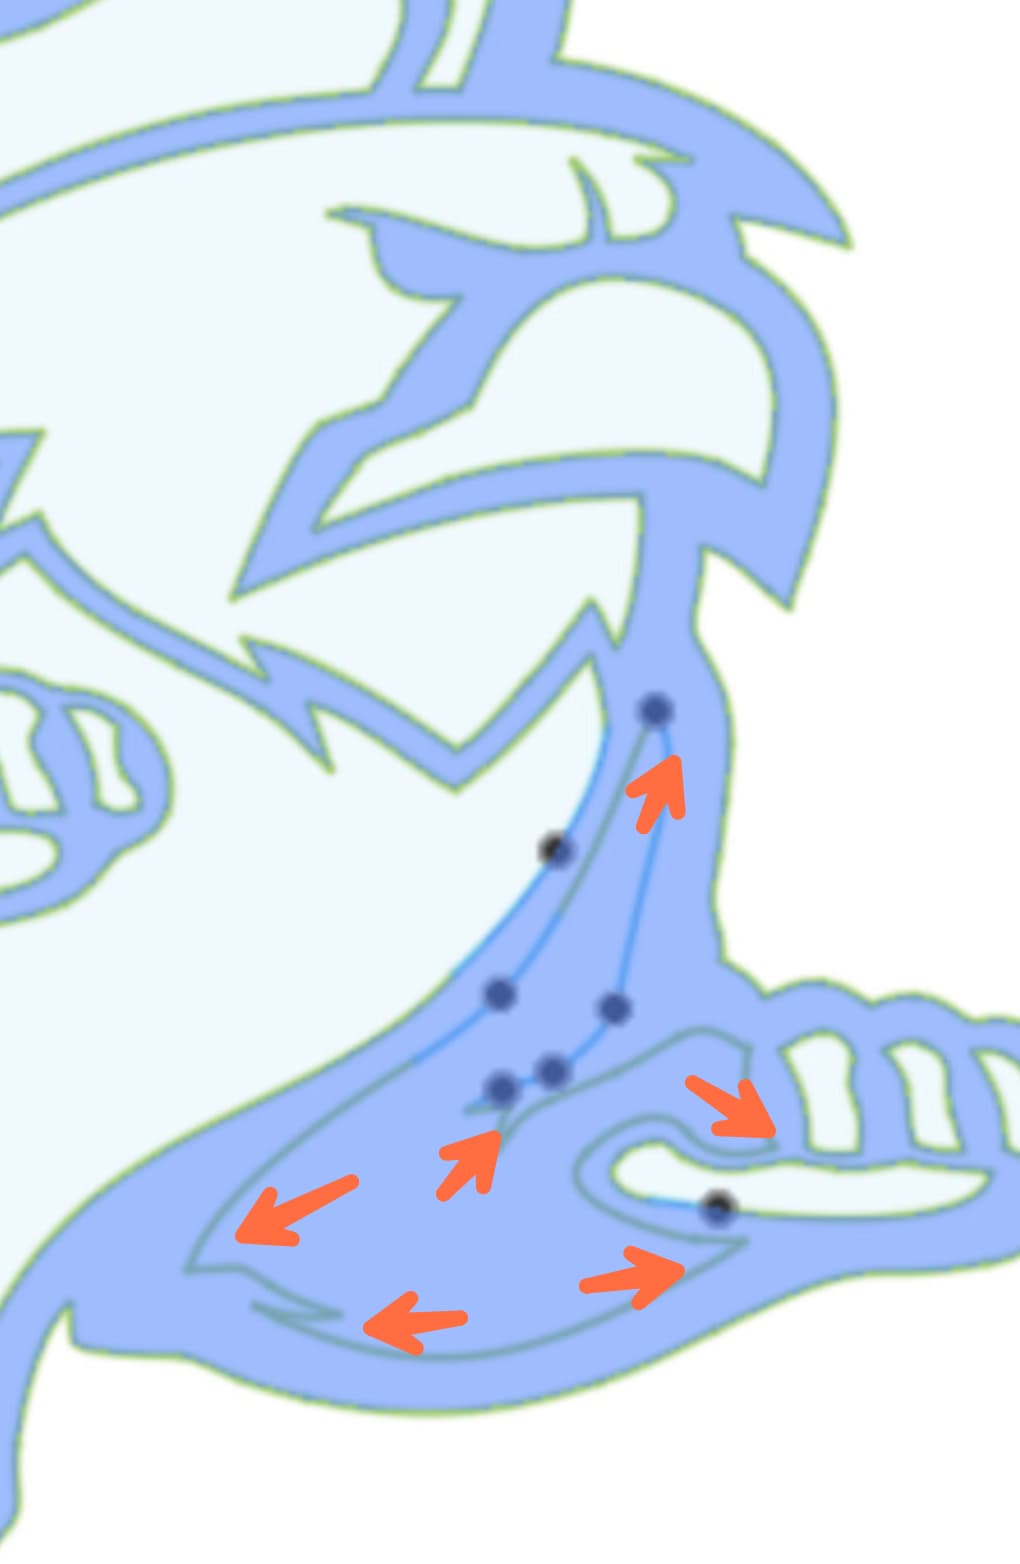
Sometimes when you have a arc ellipse or semicircle cut very acutely infusion has a hard time recognizing those points coming together as closed.
There is a add-on for Fusion 360 called sketch-checker that can help with actual open gaps. But in this case I would try to knock those sharp corners off with the radius tool or even just with the line.
I’m sure not all of these points are causing the issue probably just one.
There’s a technique in Fusion called " divide and conquer" method to find gaps and errors like this. There are several good posts about it on the fusion 360 forum site and there’s a few good videos on YouTube about it.
The basic idea of the “divide and conquered” method. Is that you just take the line through tool run it through that space that’s not making a connection and then you can tell at least which side of the line the gap or error is on it’s just a way of narrowing down where your error is.
If you post that SVG you’re using that I could show you how I would accomplish it with your drawing.
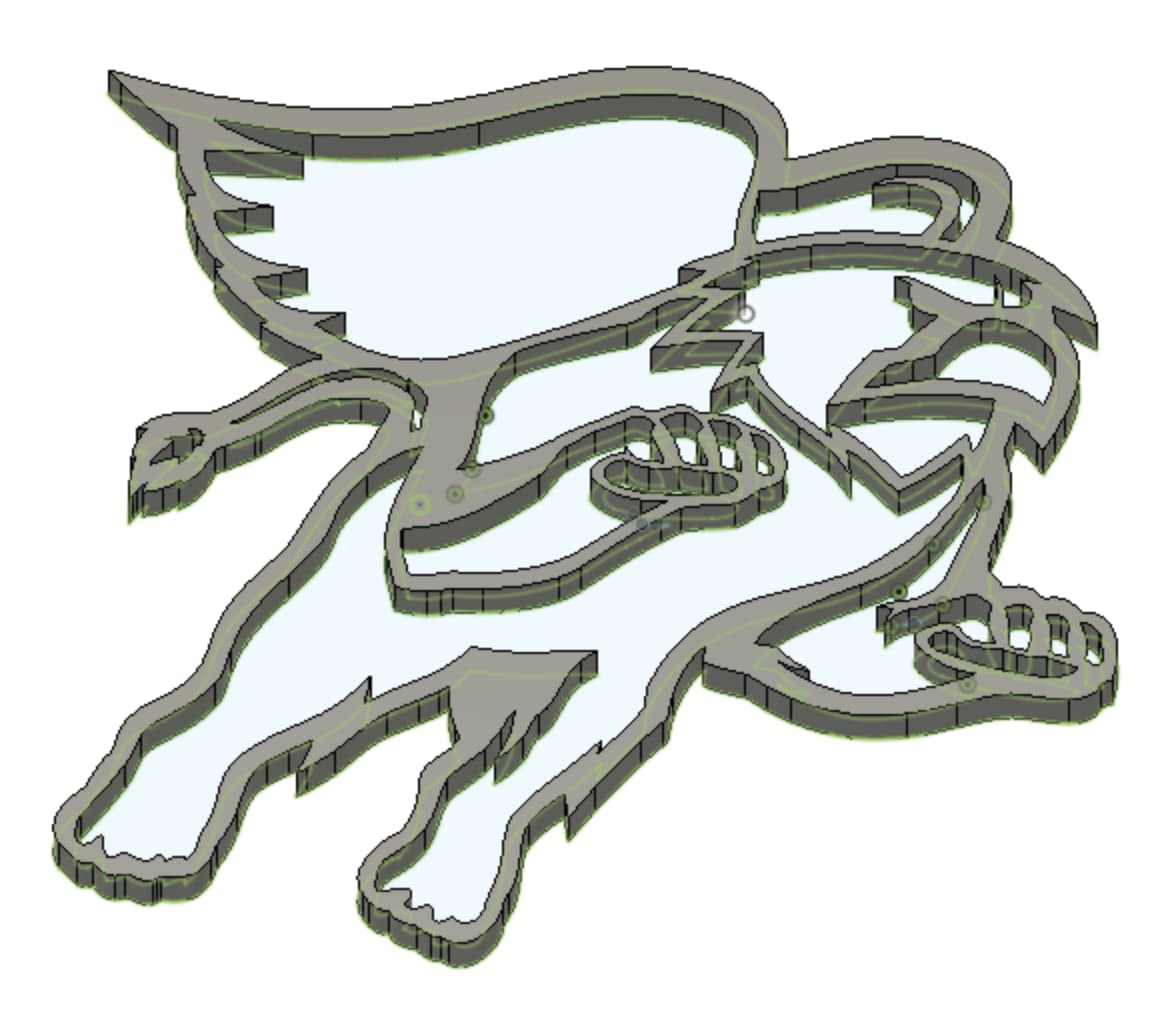
Awesome thank you for the info! I will post it when I get home a little later and try what you suggested as well. That arm inside the body I got to clean up a little bit it looks a little jank. For the most part I think I got it looking pretty decent and nothing’s going to fall out unintended. Had to add a couple supports to connect some areas but it looks somewhat natural… As natural as a griffon looks I should include.


 . One day I hope to be proficient in these tools so I can give back in a technical aspect like so many of you.