Shouldn’t that say “Swift”, in honor of the biggest star in football… ![]()
lol, I would never for that degenerate disgrace of a woman.
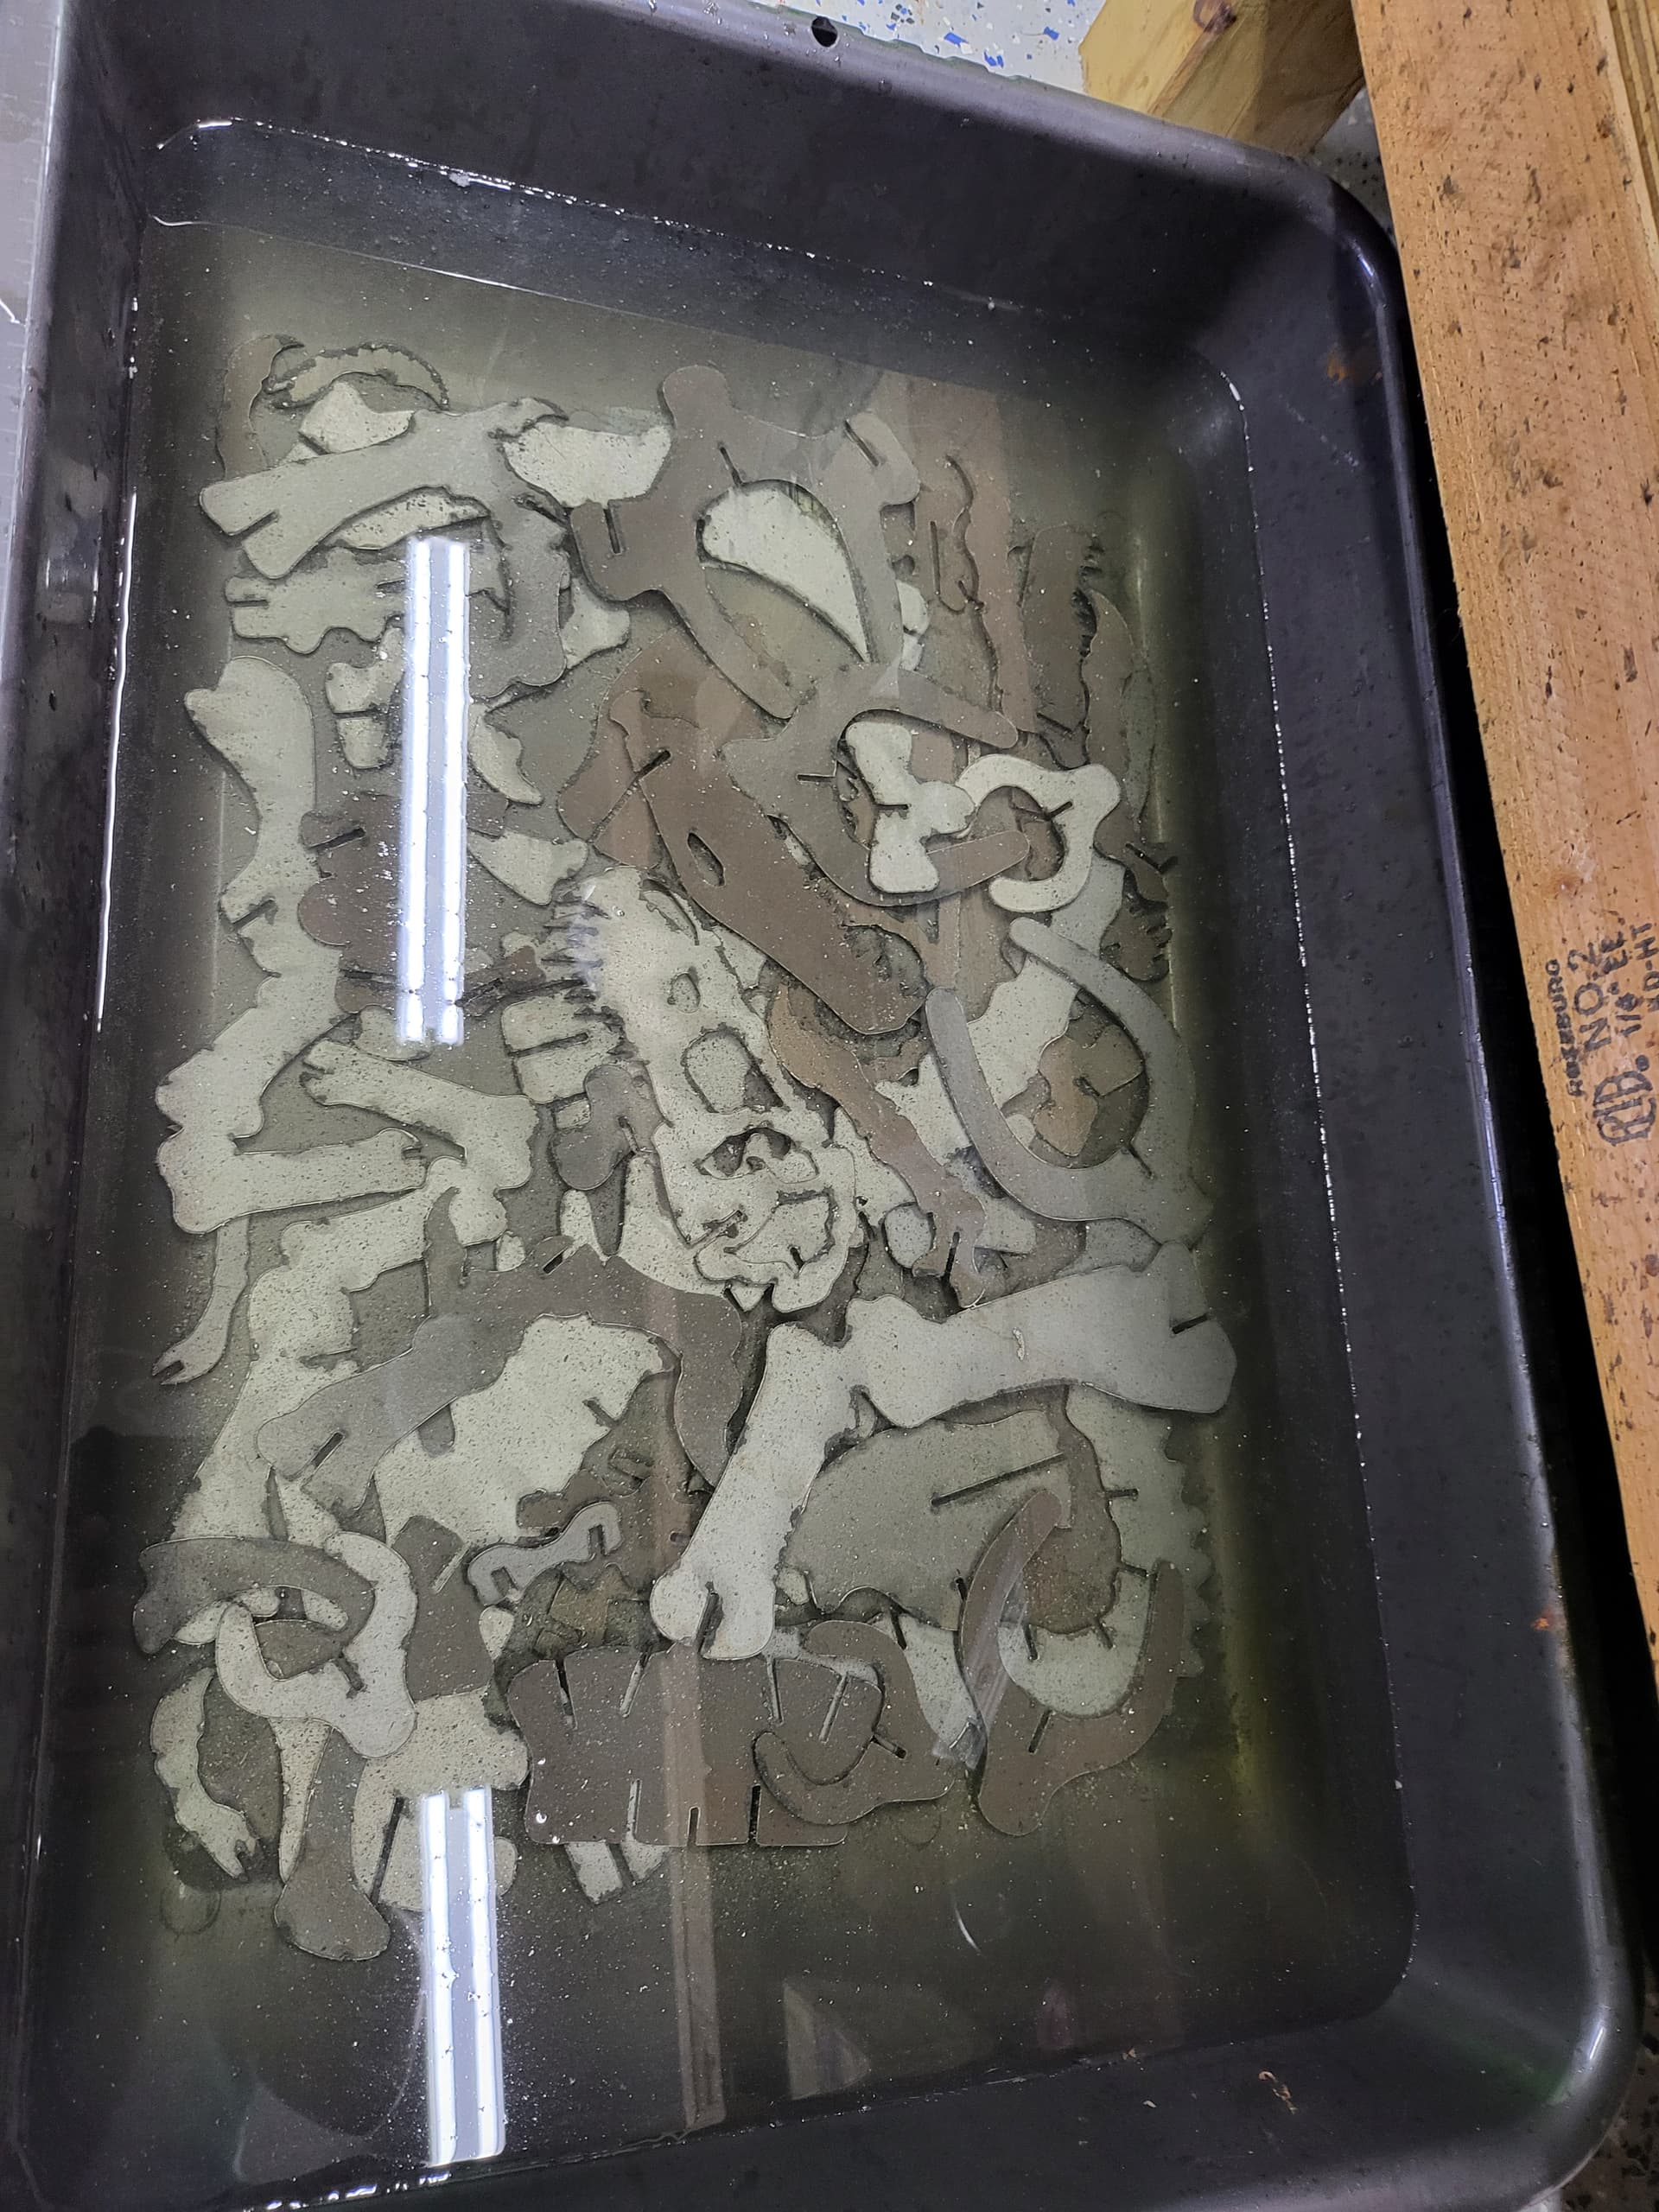
Okay, so I found the dino skele seller on etsy, bought the template, and printed out a set of the parts for the 37" 11ga version, however my slot size wound up being .100 - .110 on .120 thick steel.
How do I adjust my kerf width to compensate for this? It’s currently set at 0.060 kerf and nozzle diameter (although I’m cutting with 1.1mm nozzles, 0.0433 in).
Do I just need to set my nozzle diameter and that should fix it?
Wow…that is interesting idea since it might possible to gain that small amount. Try center compensation and see how much that removes. Next try right compensation and see.
Here is normal way in design but it’s painful…
Hey Don, since the slot size reduction is pretty small, could he just scale the entire ketch down to where the slot was the right width? Not sure how much overall size of the dinosaur he would lose, but might be worth a try.
As I initially mentioned, you need to scale appropriately.
Most of those dino plans are for laser; I know because I talked to the author myself and helped him create a few more files.
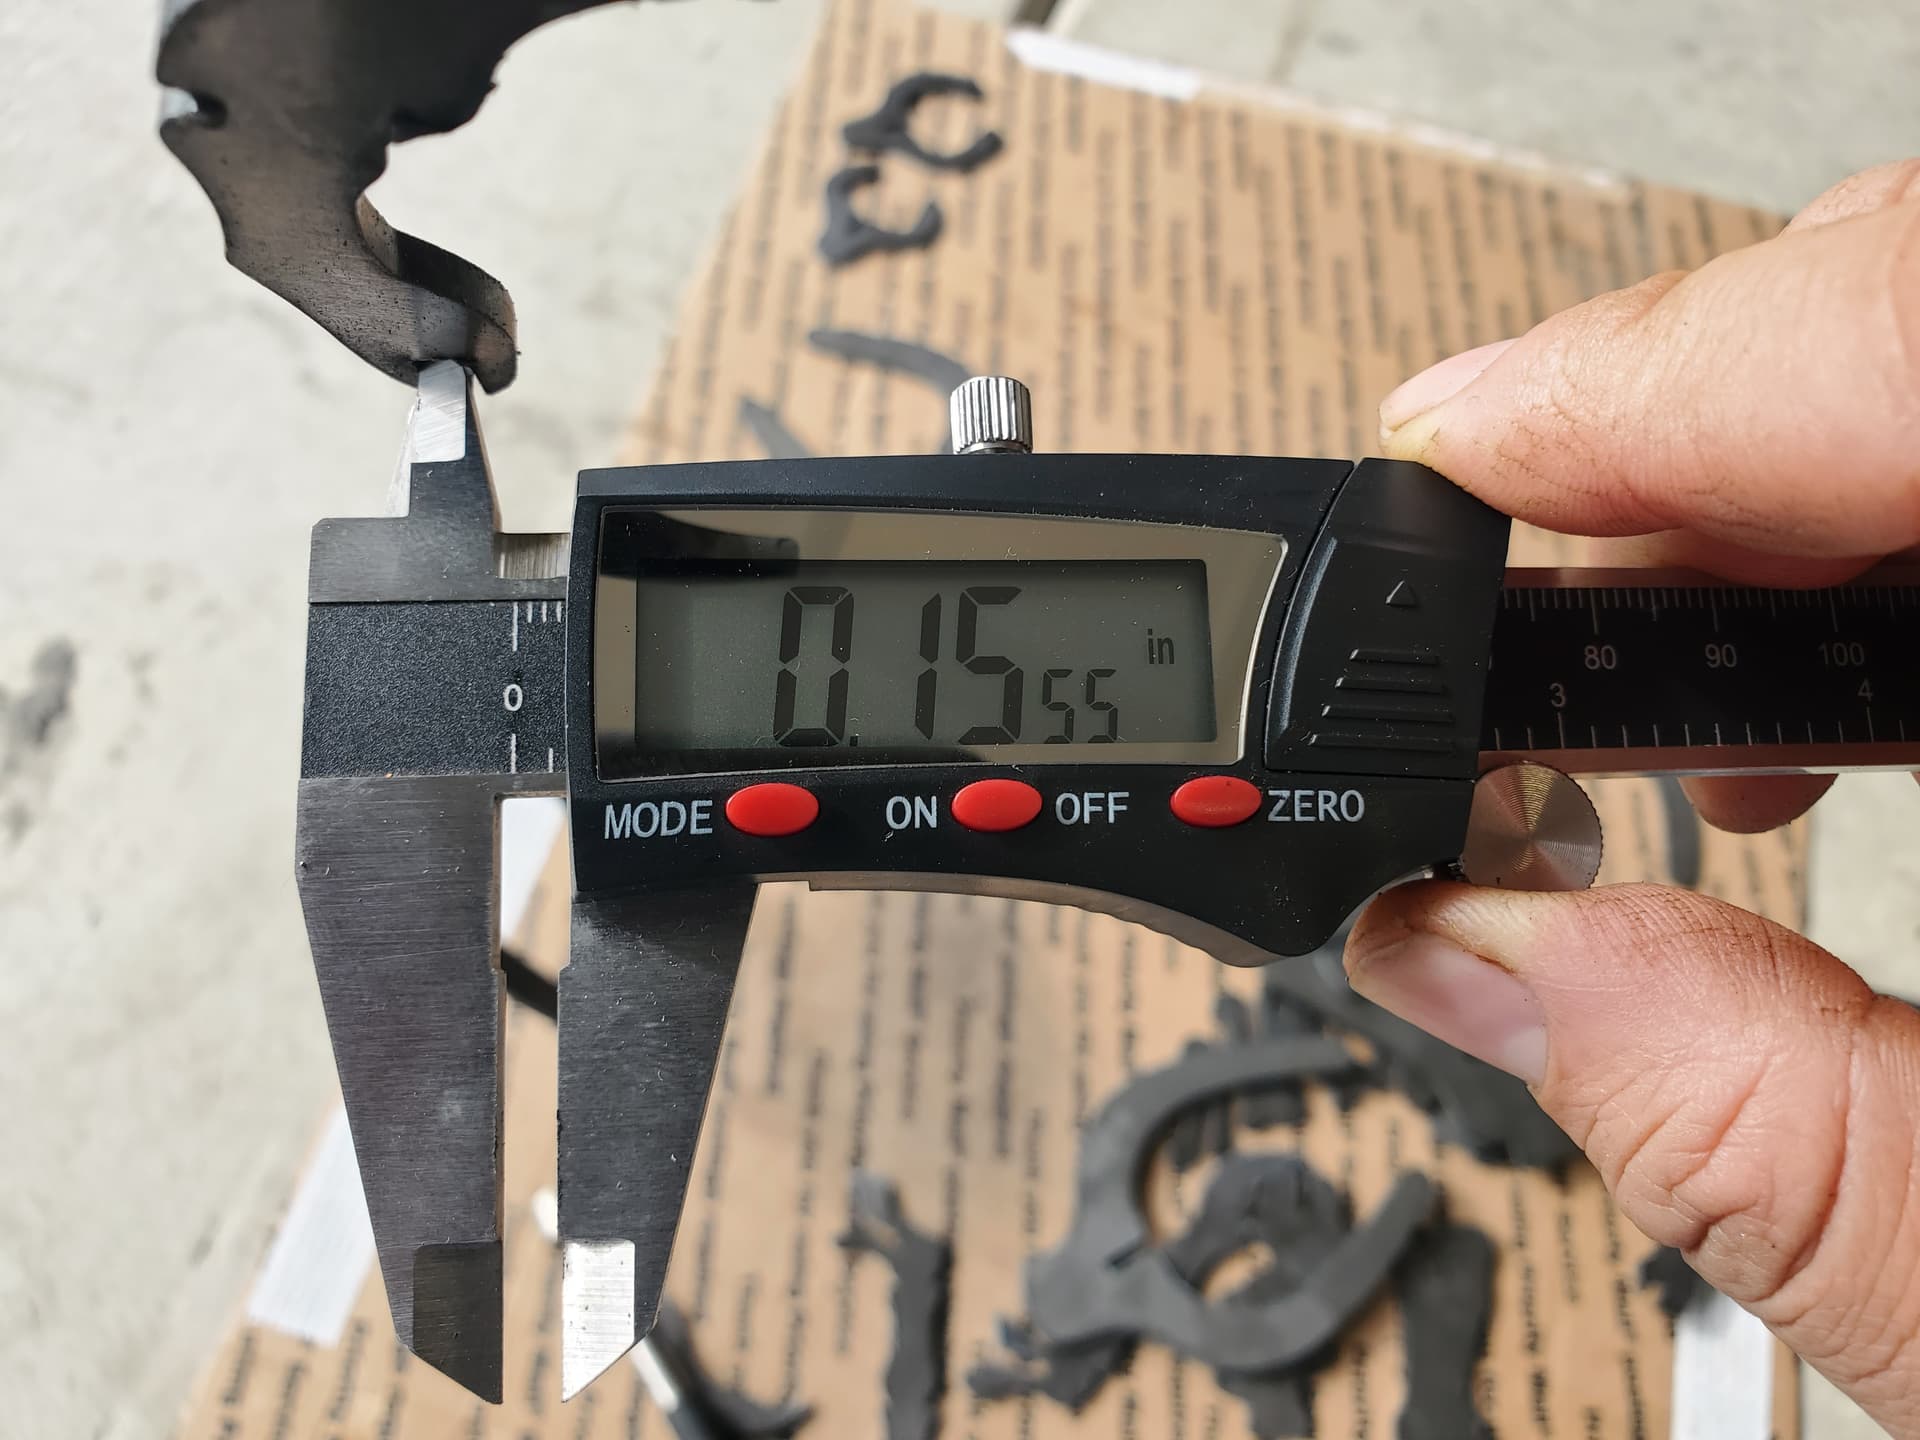
I cut my pieces to have slots at .02 of an inch larger than the 10 gauge I used so I ended up with an opening of 0.154" for a perfect fit.
I read it the opposite way. Sounded like design was meant for 12 ga and he used 11ga. He would need to make Dino bigger. Your idea is exactly right if that is correct.
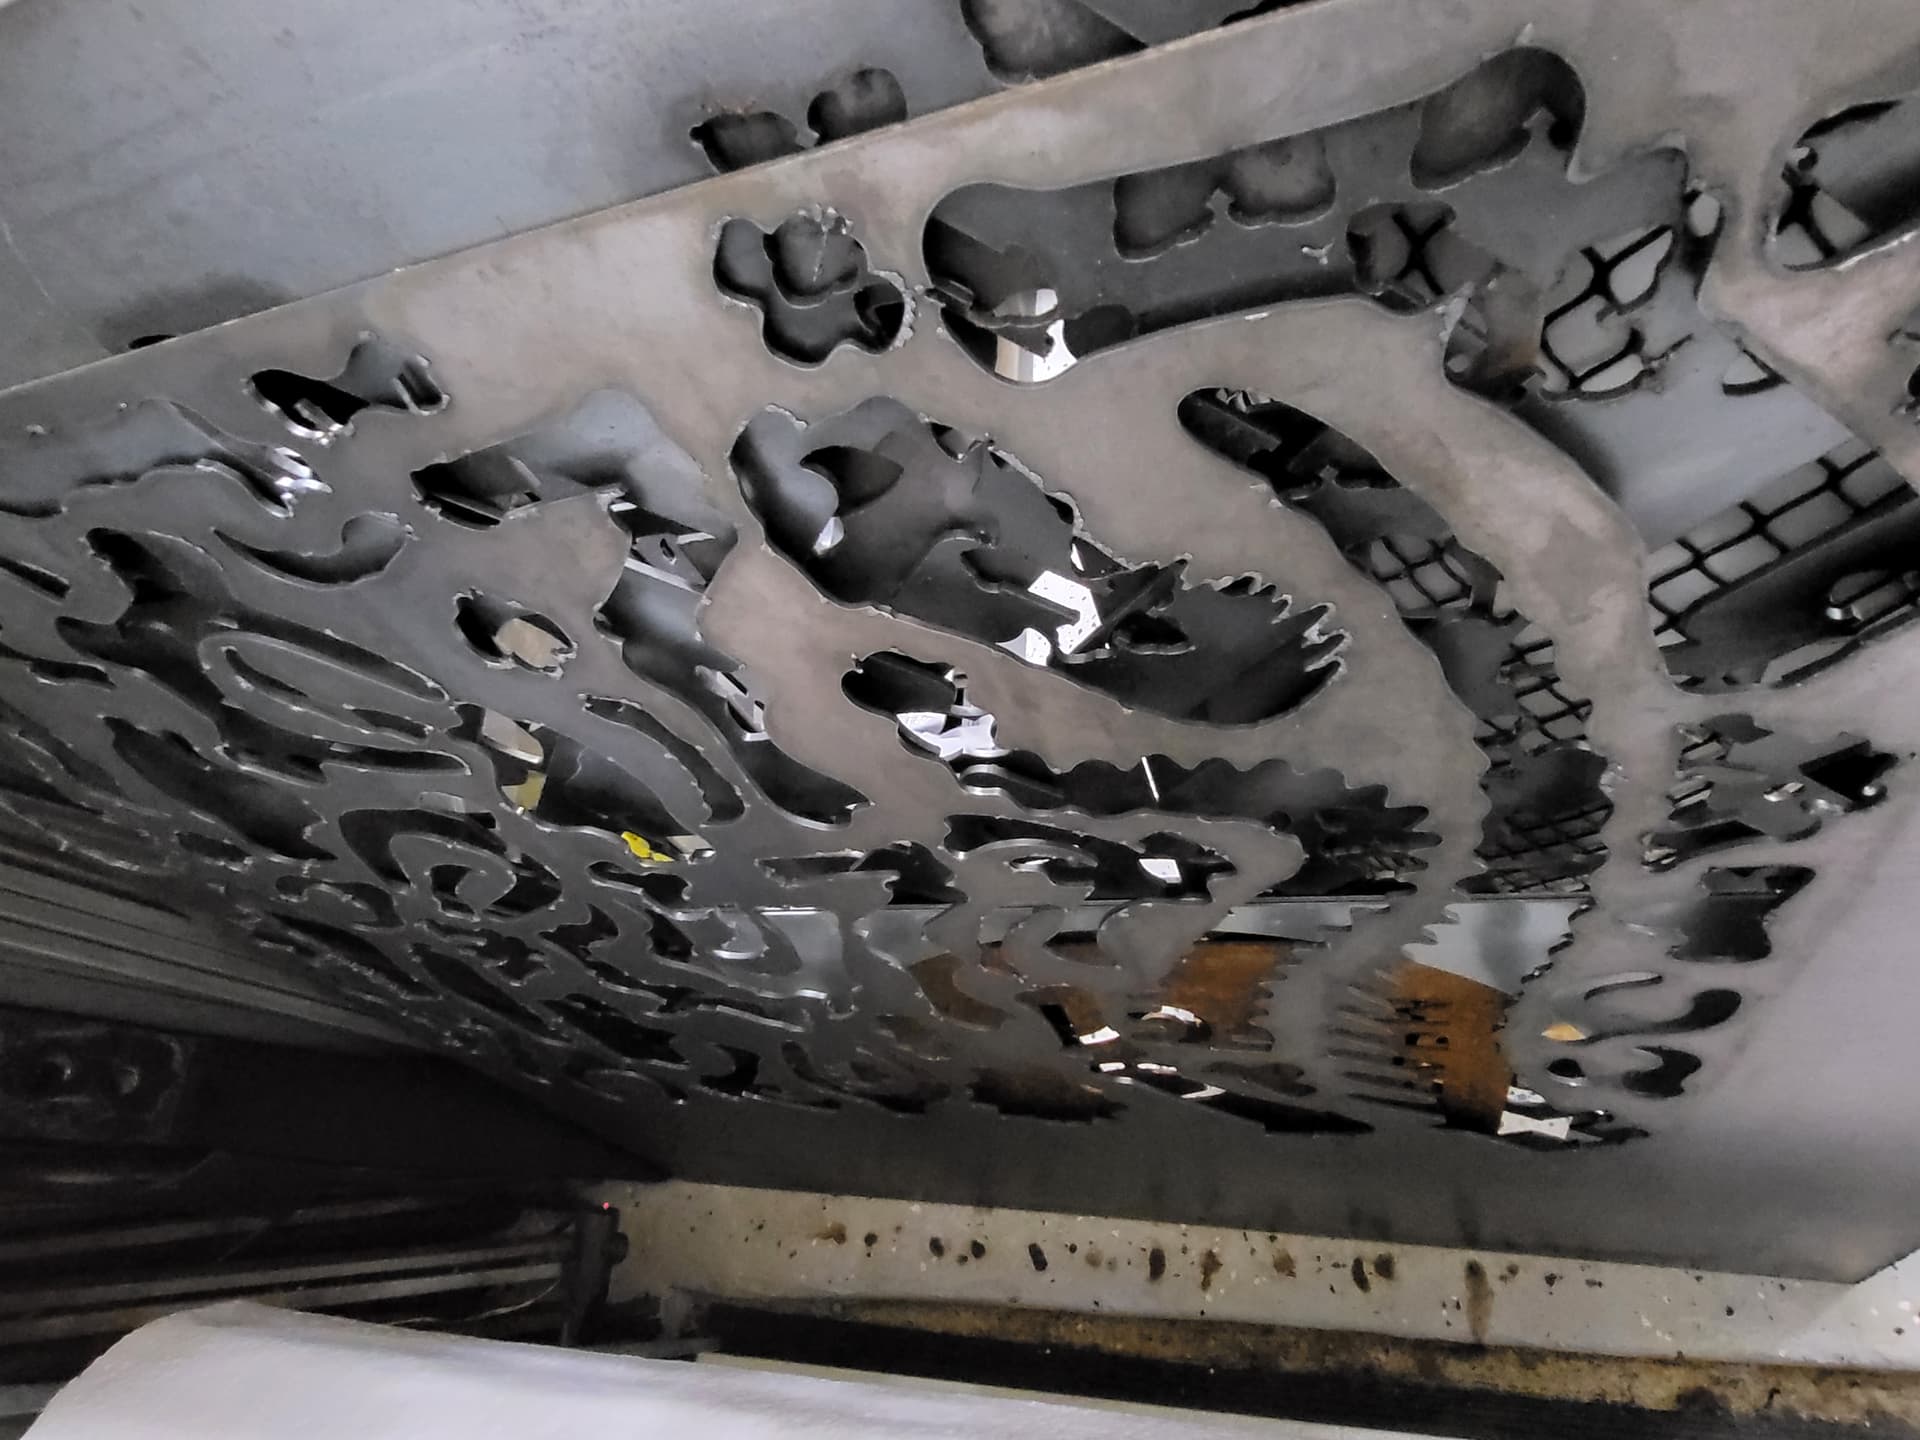
Looks like a lot of grinding but is salvageable just labor intensive
My 10 gauge comes in between 0.130 to 0.134
My slot openings measured below
As mentioned, scale to what you use
If you make a coupon that has specific inside and outside measurements for the gauge metal you are cutting, you will find exactly the settings that produce the inside/outside cut you are after.
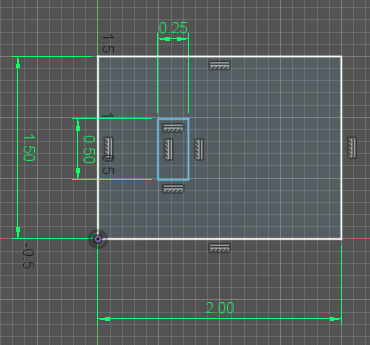
It will be specific for whatever gauge you are testing the coupon on. In other words, just because it is accurate with 10 gauge, it might be different with 0.25 inch plate. Each metal would need to be tested separately.
Steps to take:
- Find out your best cut for amperage and speed.
- Now run the coupon. Measure inside and outside dimensions.
- Adjust your kerf width (in your tools) as needed until you are within a few hundredths. You won’t be dead on on both so there are compromises.
- Now that you have your settings, give yourself a few hundredths for clearance.
- In the drawing then make sure the gap fits your specified gap with clearance and you should be golden. If they are all off, resize the whole drawing until you have your number.
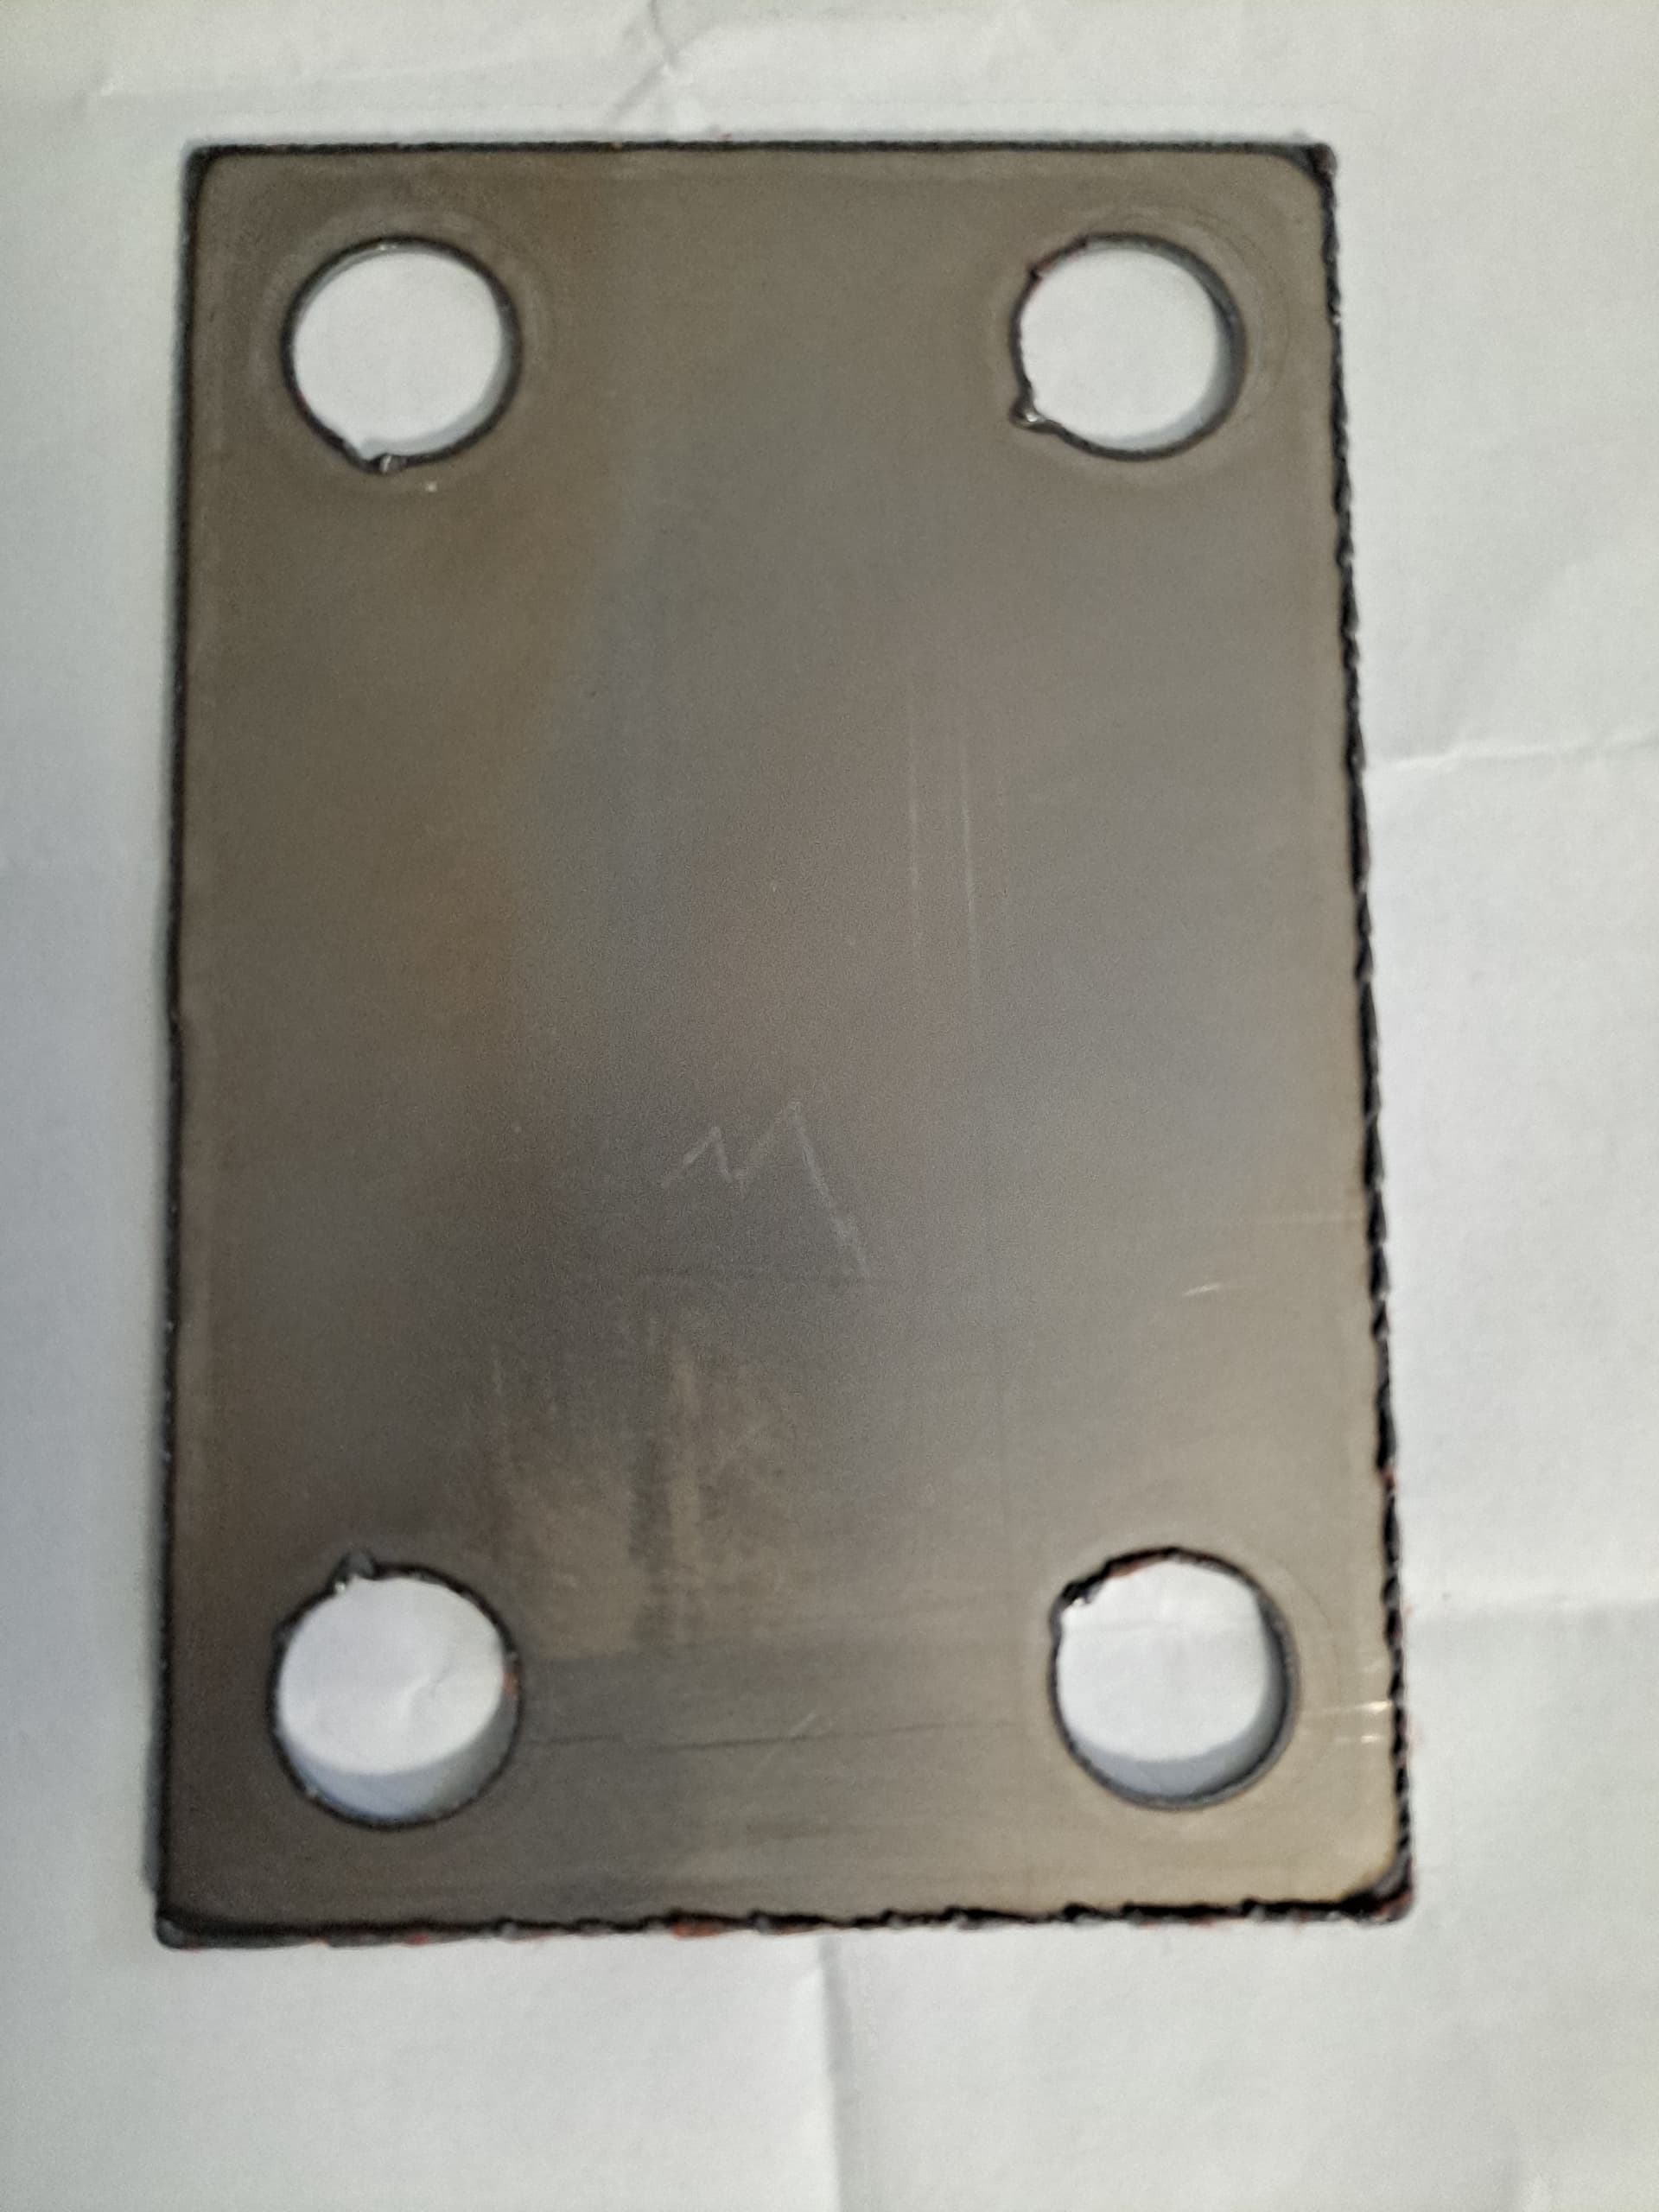
When I cut my small bird the slots were to tight for 10 g so I put 3 cutting disks on my mini grinder to enlarge all my slots. (THIS IS NOT THE SAFEST AND NOT RECOMMENDED!) You really need to watch the two outside disks they get very thin and could fly apart.
LOL! We have all been there. ![]() And ‘most’ of us survived it. Wouldn’t that be a topic?!
And ‘most’ of us survived it. Wouldn’t that be a topic?!
I cut a 16 gauge 40" x 30" sign for a friend of a friend today. The backplate is 18 gauge. They want it painted black with white background.
They gave me a jpg of the farm scene to start, but they wanted the Lab dog and people added, I replaced the original tractor, all the detail on the barn was too small, the tree didn’t look right,… I think I redrew 95% of it before I felt confident clicking on “Start” in Firecontrol ![]() I still gotta cut a backplate for the lower hanging sign.
I still gotta cut a backplate for the lower hanging sign.
The owner is going to make a wooden frame and they are going to hang it at the entrance to their driveway.
I’m satisfied with the results.

That is really nice Bret. You have some great details in that tractor.
Us Hoosiers love our tractors! Got two myself. Not quite that big though.
That my friend is one sweet looking sign!
That is freaking awesome
Love the detailed line work
I finally got my pro up and running today. First cut part after a long struggle. Now to start fine tunning everything. Any suggestions would be appreciated.
Fine tune it! Best suggestion yet!
Very nice Detail!