I am new to this and am enjoying the adventure.
I have the table assembled and successfully ran the ‘break in’ program, and completed running air to the plasma cutter, and am now turning my attention to the water and water handling.
I decided to go with Sterling Cool as it appears this is a good product to control rust and to keep the water somewhat clean.
I see where many people implement water storage systems, where they transfer water from the water table to storage barrels, and then have a method to transfer the water from the storage barrels back to the water table.
What is the purpose/advantage of storing the water in storage barrels instead of just leaving it in the table? Is evaporation a concern? If yes, can you cover the table with a tarp, would that reduce evaporation?
Thank you,
I don’t love the tarp idea personally, it seems to me that you will still have some amount of evaporation but now it will be confined to the terrarium under the tarp. It will be all over your machine instead of the shop. I’m sure someone on here has done it and will either say I’m crazy and it works fine or confirms my suspicion. If you have it on wheels and want to fill it close to the top you have to take some out anyway. In my opinion, it is just a tidier solution. You don’t have to do it but for me it’s a hobby and just one more part of that.
I use compressed air to fill it back up so I have way less than a $100 in it.
Thank you Scott for your reply and insight.
I don’t know what to expect with leaving water in the table.
Usually stagnant water will grow algae but, I understood that Sterling Cool would keep the algae out, and it would be relatively clean water other than the color will be dirty/brown looking.
I guess my primary question is ‘why’? What problem(s) are you resolving with a water storage system?
Yes Sterling cool is really nice. I ran some cuts without it before I had my water handling system done it makes rust in plain water really fast. The why for me was to
- get it out of the table so that it didn’t evaporate
- be able to filter it, which I am doing passively via settle in the tank
- When you move a table on wheels the fluid sloshes around and gets out making a mess and wasting it
- it makes it easier to pick out the chunks from the table on an ongoing basis rather than a big clean out where the water table has been getting progressively more shallow and less effective, until you can no longer stand it and stop cutting to clean it out.
I’m sure others can add to that.
The tarp will trap moisture and cause your machine to rust. I bought the expensive stuff to put in my pro but found 20 mule team borax works just fine. I’ll sprinkle a little when I’m refilling my table and its good to go. Of course my Pro table only holds 7 or so gallons and it just evaporates and I’ll add some more. Can’t wrap my head around the water storage everytime I cut with fresh water it looks nasty afterwards and I personally wouldn’t want to keep it in a tank…
It’s amazing when you put it back into the table from the tank it looks brand new…
It truly does! Plus there’s much less moisture from evaporation within the shop corroding my mill, lathe, etc
Hello Scott,
You raise good points for implementing a water handling system.
Are you able to provide a parts list, drawings/pictures of the plumbing of the water pipes, and plumbing of the air lines?
What things would you have done differently?
Thank you
Hi Greg I will get some stuff together for you. I am still evolving it. I would probably cut bigger holes and then use a flagging tool to create the flange. As it is I got some larger ID stainless drains but had a lot of trouble getting them welded in. I ended up putting a pretty good warp in the table. I think I’ll probably wind up cutting the originals out and putting in the bar sink drains. Other than that it was smooth sailing. I’ll get you a few pictures but use the search function in the upper right you’ll find tons of stuff.
heres what i did… keeps evaporation down to a minimum, easier to clean out, and can control water level.
Thank you to the forum members for your helpful replies. I am planning to move forward with a water storage system and use pressurized air.
I have some shower drains laying around and thought I would use them even though they will be a bit higher than the pan surface. At first I was thinking of installing one shower drain in the middle of each pan, and then use a shop vac to vacuum up the water and debris.
Then I was thinking of placing 2 shower drains in the front pan as close as possible to the front edge, and after the water has mostly drained out, to then get a floor jack and lift the back of the table a couple of inches, so the remaining water runs to the front of the table and down the drain. Do you think this will work or… will it put too much stress/racking on the machine???
It would seem that a lot of silt will end up in the storage barrel and thus need a simple way to disconnect the plumbing, so I can pull the barrels out and clean the inside of them.
Also the air line needs a method to allow air to escape from the barrel, a breather, when draining the water into the barrel.
Question: I watched a YouTube video of a guy building a storage barrel system, and for the pipe to drain water to the barrel, he extended it into the barrel, almost the length of the barrel. Unfortunately this is one of the videos where the author thinks that playing a music sound track is more beneficial than explaining what you are doing and WHY. Why extend the pipe into the barrel versus just stopping at the bung cap???
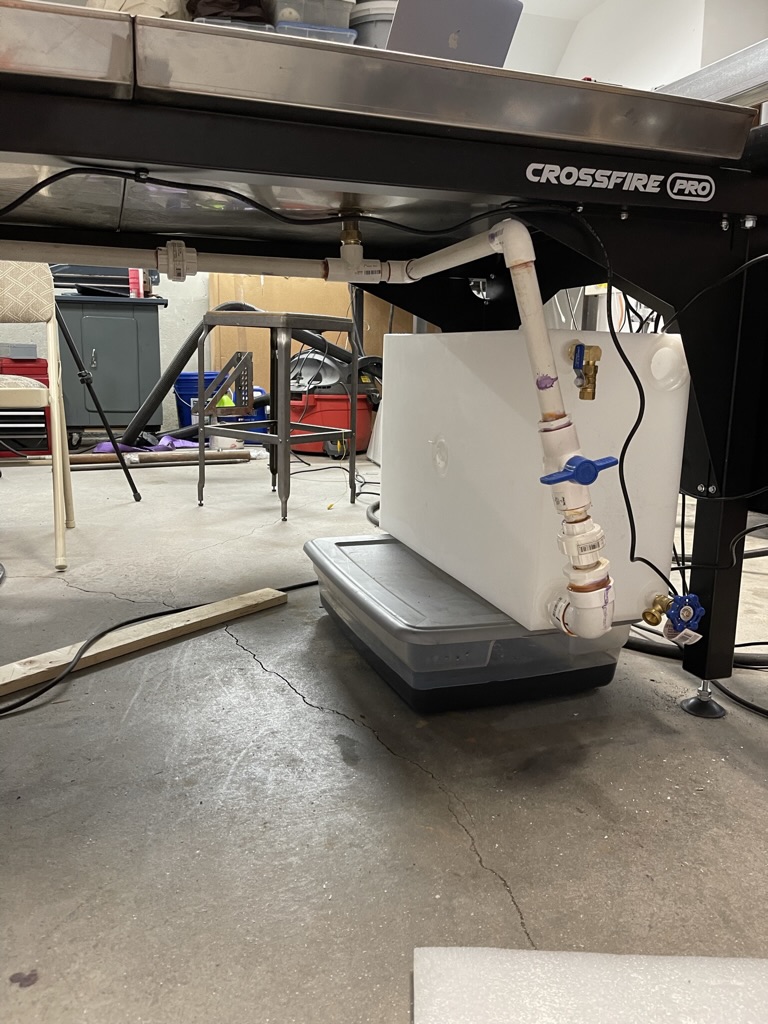
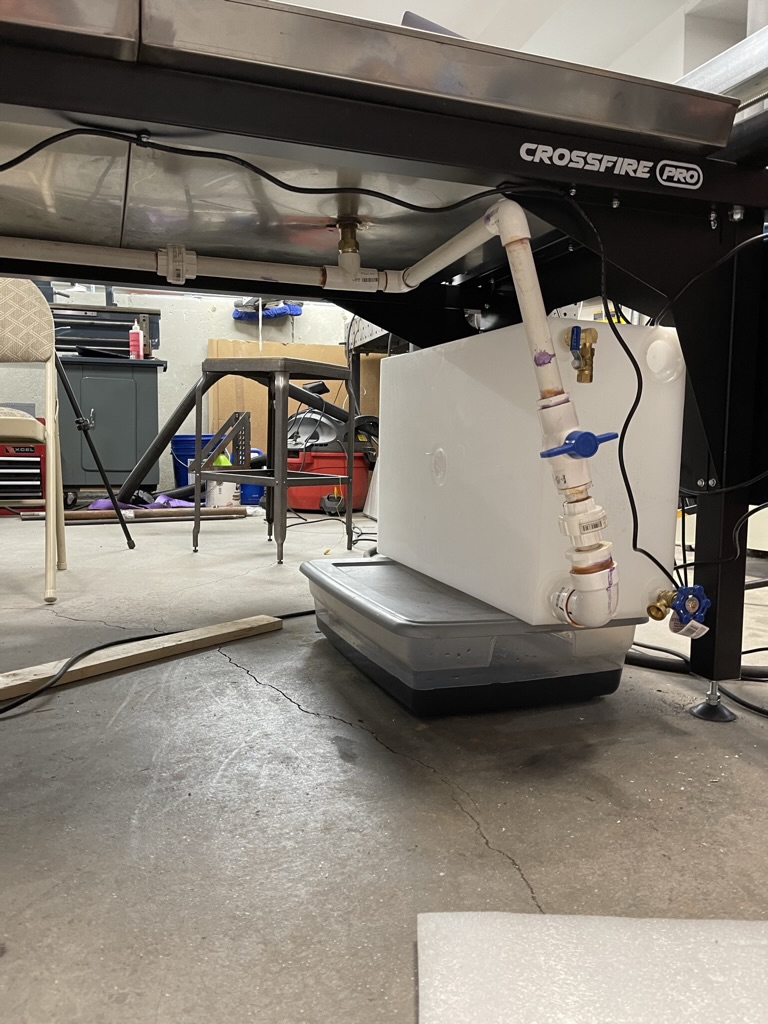
He left it longer probably to act as the stand pipe. If I understand your description of it, if he stopped at the bung there would be no way to get the water back out of the barrel. I will work on some info for you tonight or tomorrow. In the mean time here are a few not so great pictures.
The point of draining to me is the opportunity to filter. It also makes cleaning the bigger gunk easier and saves the concoction of your choice from evaporation between major jobs. Draining without filtration seems pointless, so how do people do that, is my question?
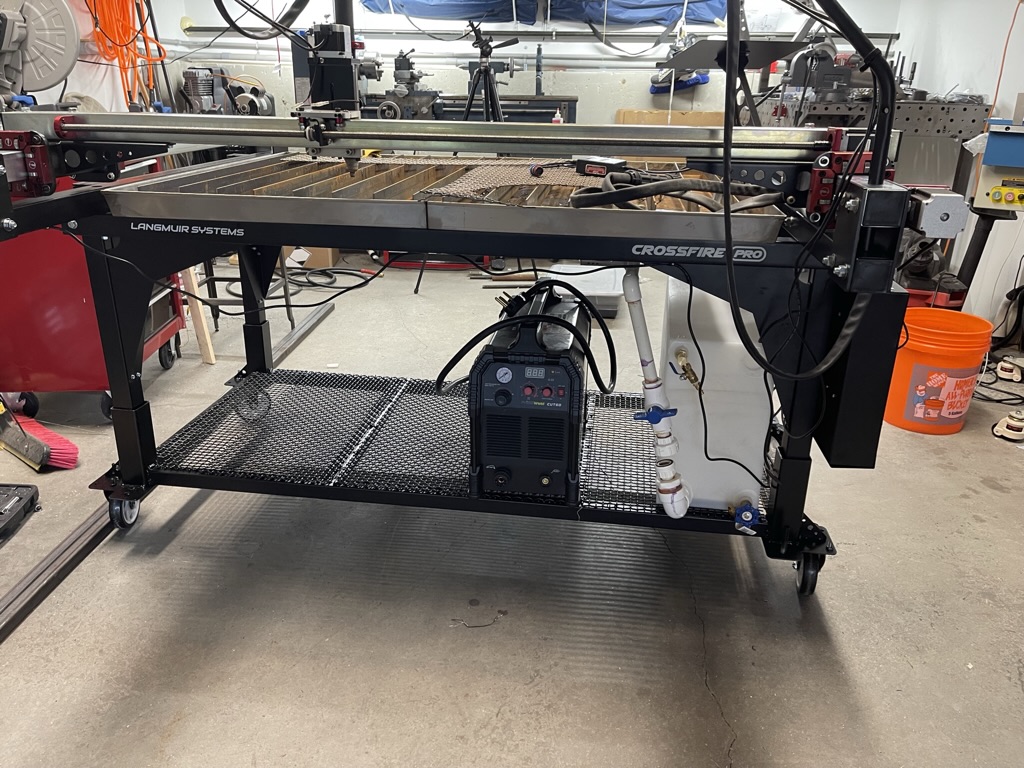
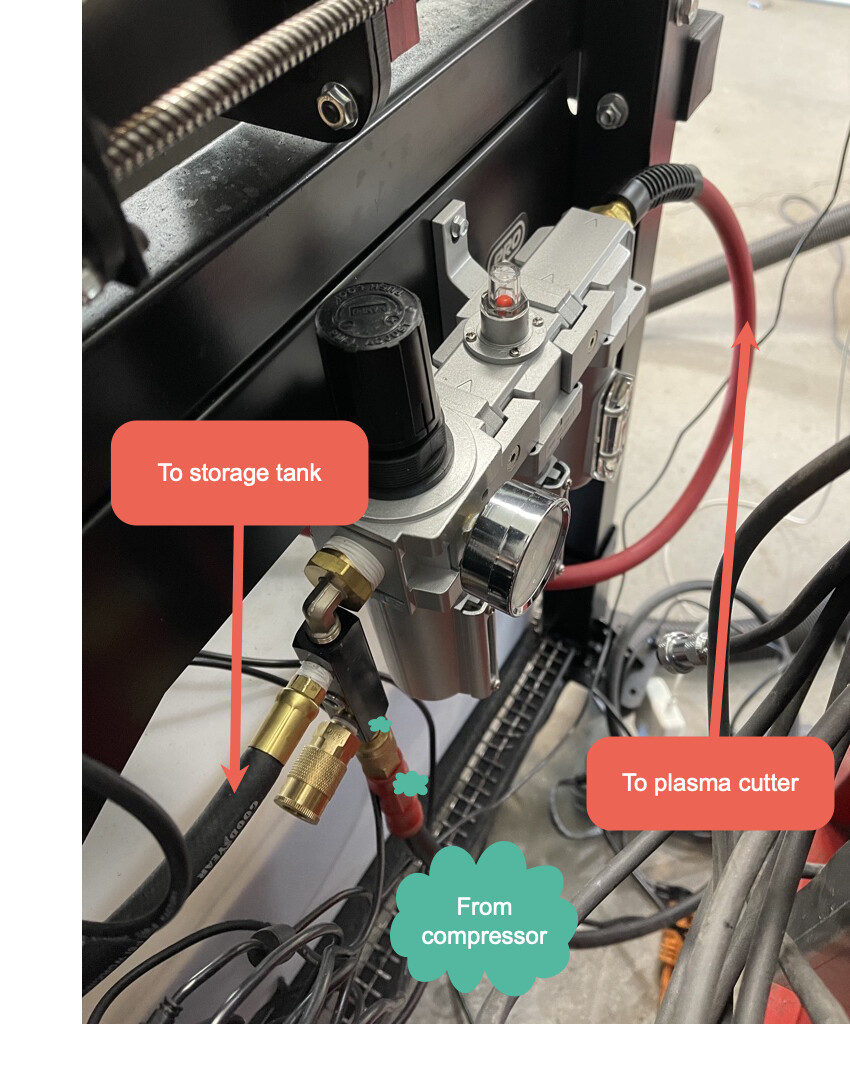
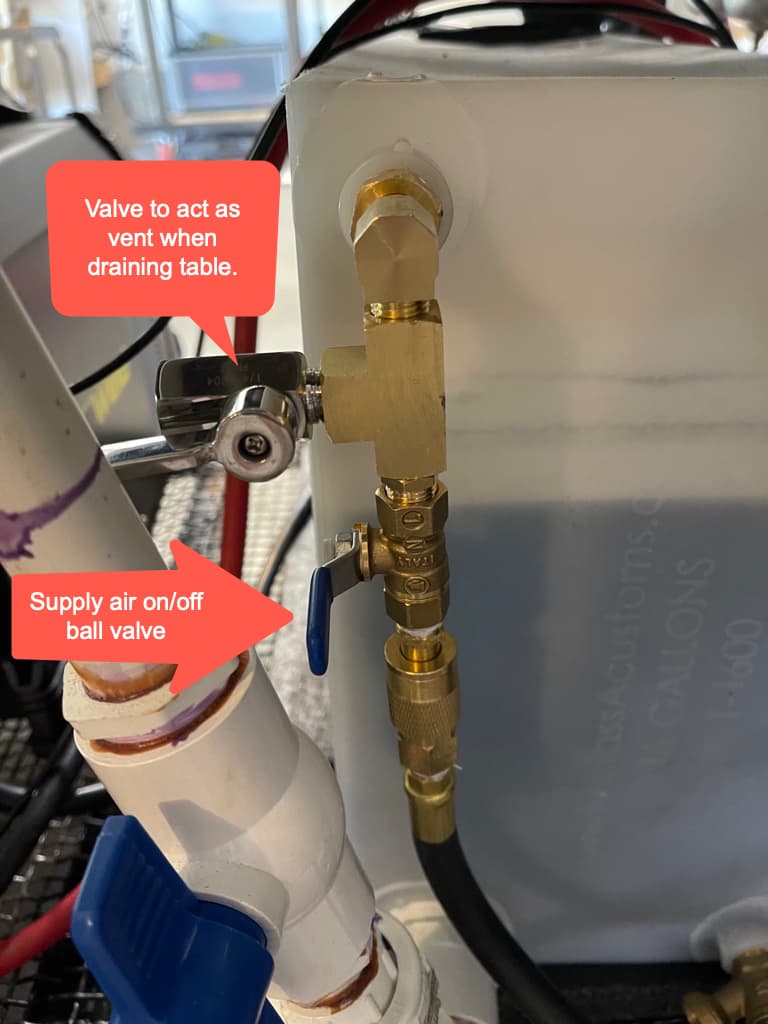
@GregL here are a couple more pictures showing the air side. Sorry it took me so long. I wanted to change the air fittings around a little before I sent it and I just got to that today. I added a tee and another valve to act as the vent so that I don’t have to disconnect the hose from the ball valve. As I hope you’ll be able to see I come from the compressor to a manifold, the manifold then splits to a hose going to my water tank and to a filter/desicant filter then another hose connected to my plasma cutter. My goal was to minimize time in set up and break down. All of that stays attached except for the line coming from the compressor. Hope that helps and isn’t too late.
Thank you Scott for the additional information.
I received 2 40 gallon tanks that I hope will fit between the XR braces/supports, 13.5". (keeping my fingers crossed)
I don’t know what I was thinking that a 55 gal barrel would fit in there
The tank has a 1.5" female NPT to use for the input/output drain.
For your drain pipe does it extend into your tank or does it end at the tank bulkhead, bung hole… not sure what you call that point.
If you do extend a pipe into the tank, how far? What type of fitting are you using that will screw into the bung hole, connect the external pipe coming to the tank, and then to connect the internal pipe that extends into the tank???
I can’t clearly see what fittings you are using to connect the drain pipe to the bung hole of your tank.
Thank you
my tank has two 1.5" NPT female fittings and 2 two 1/2" NPT female fittings. You can see that I have the lower left fitting attached to a 1.5" NPY PVC fitting screwed into it with no additional piping inside the tank. If I were standing the tank on end I would need a pipe inside the tank to act as a stand pipe.
here is a link to the PVC fitting to give you an idea
https://www.homedepot.com/p/Charlotte-Pipe-1-1-2-in-PVC-Schedule-40-MPT-x-S-Male-Adapter-PVC021091400HD/203811646
Greg
Please share if your tanks worked and where you got them. Also pics would be nice as I am looking at ideas for my XR
Thanks
Knick
Hello Knick,
I don’t have it up and running yet, still working with design and gathering parts.
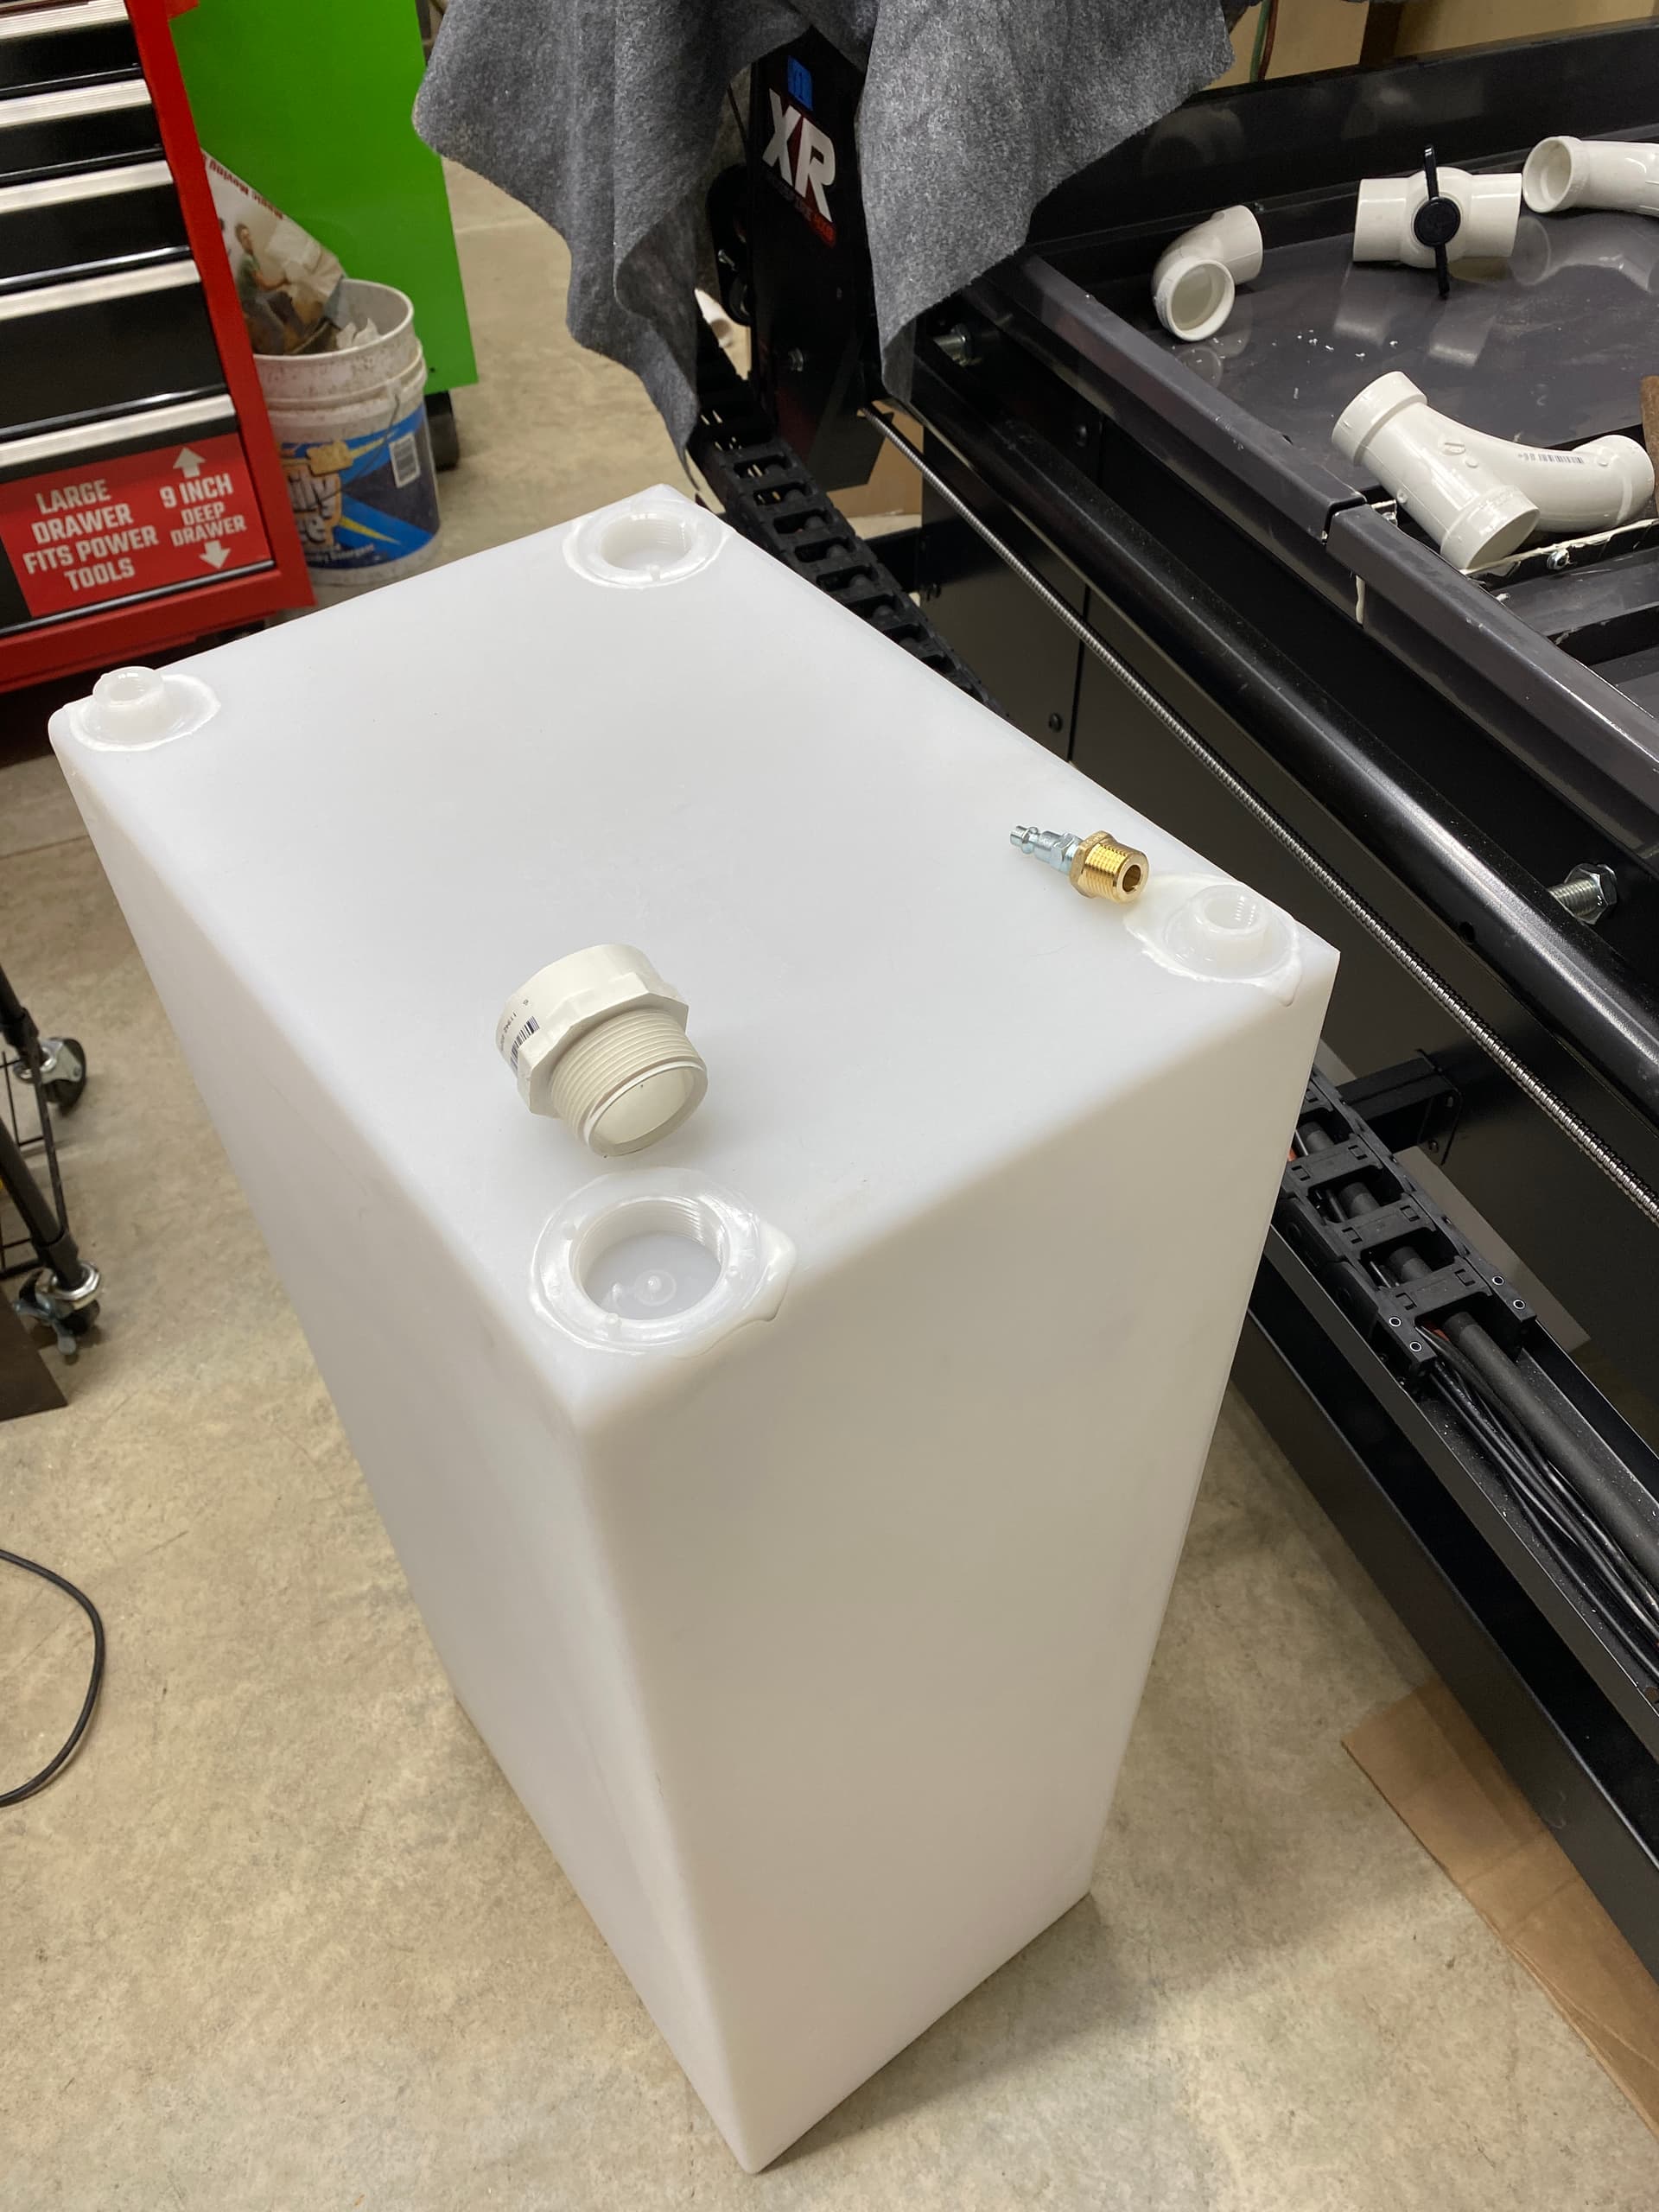
The above pic shows the RV storage container, 40 gallon, 13" x 18" x 39". It has 1 1/2" and 1/2" openings, and I show the fittings that I am planning to attach to the container.
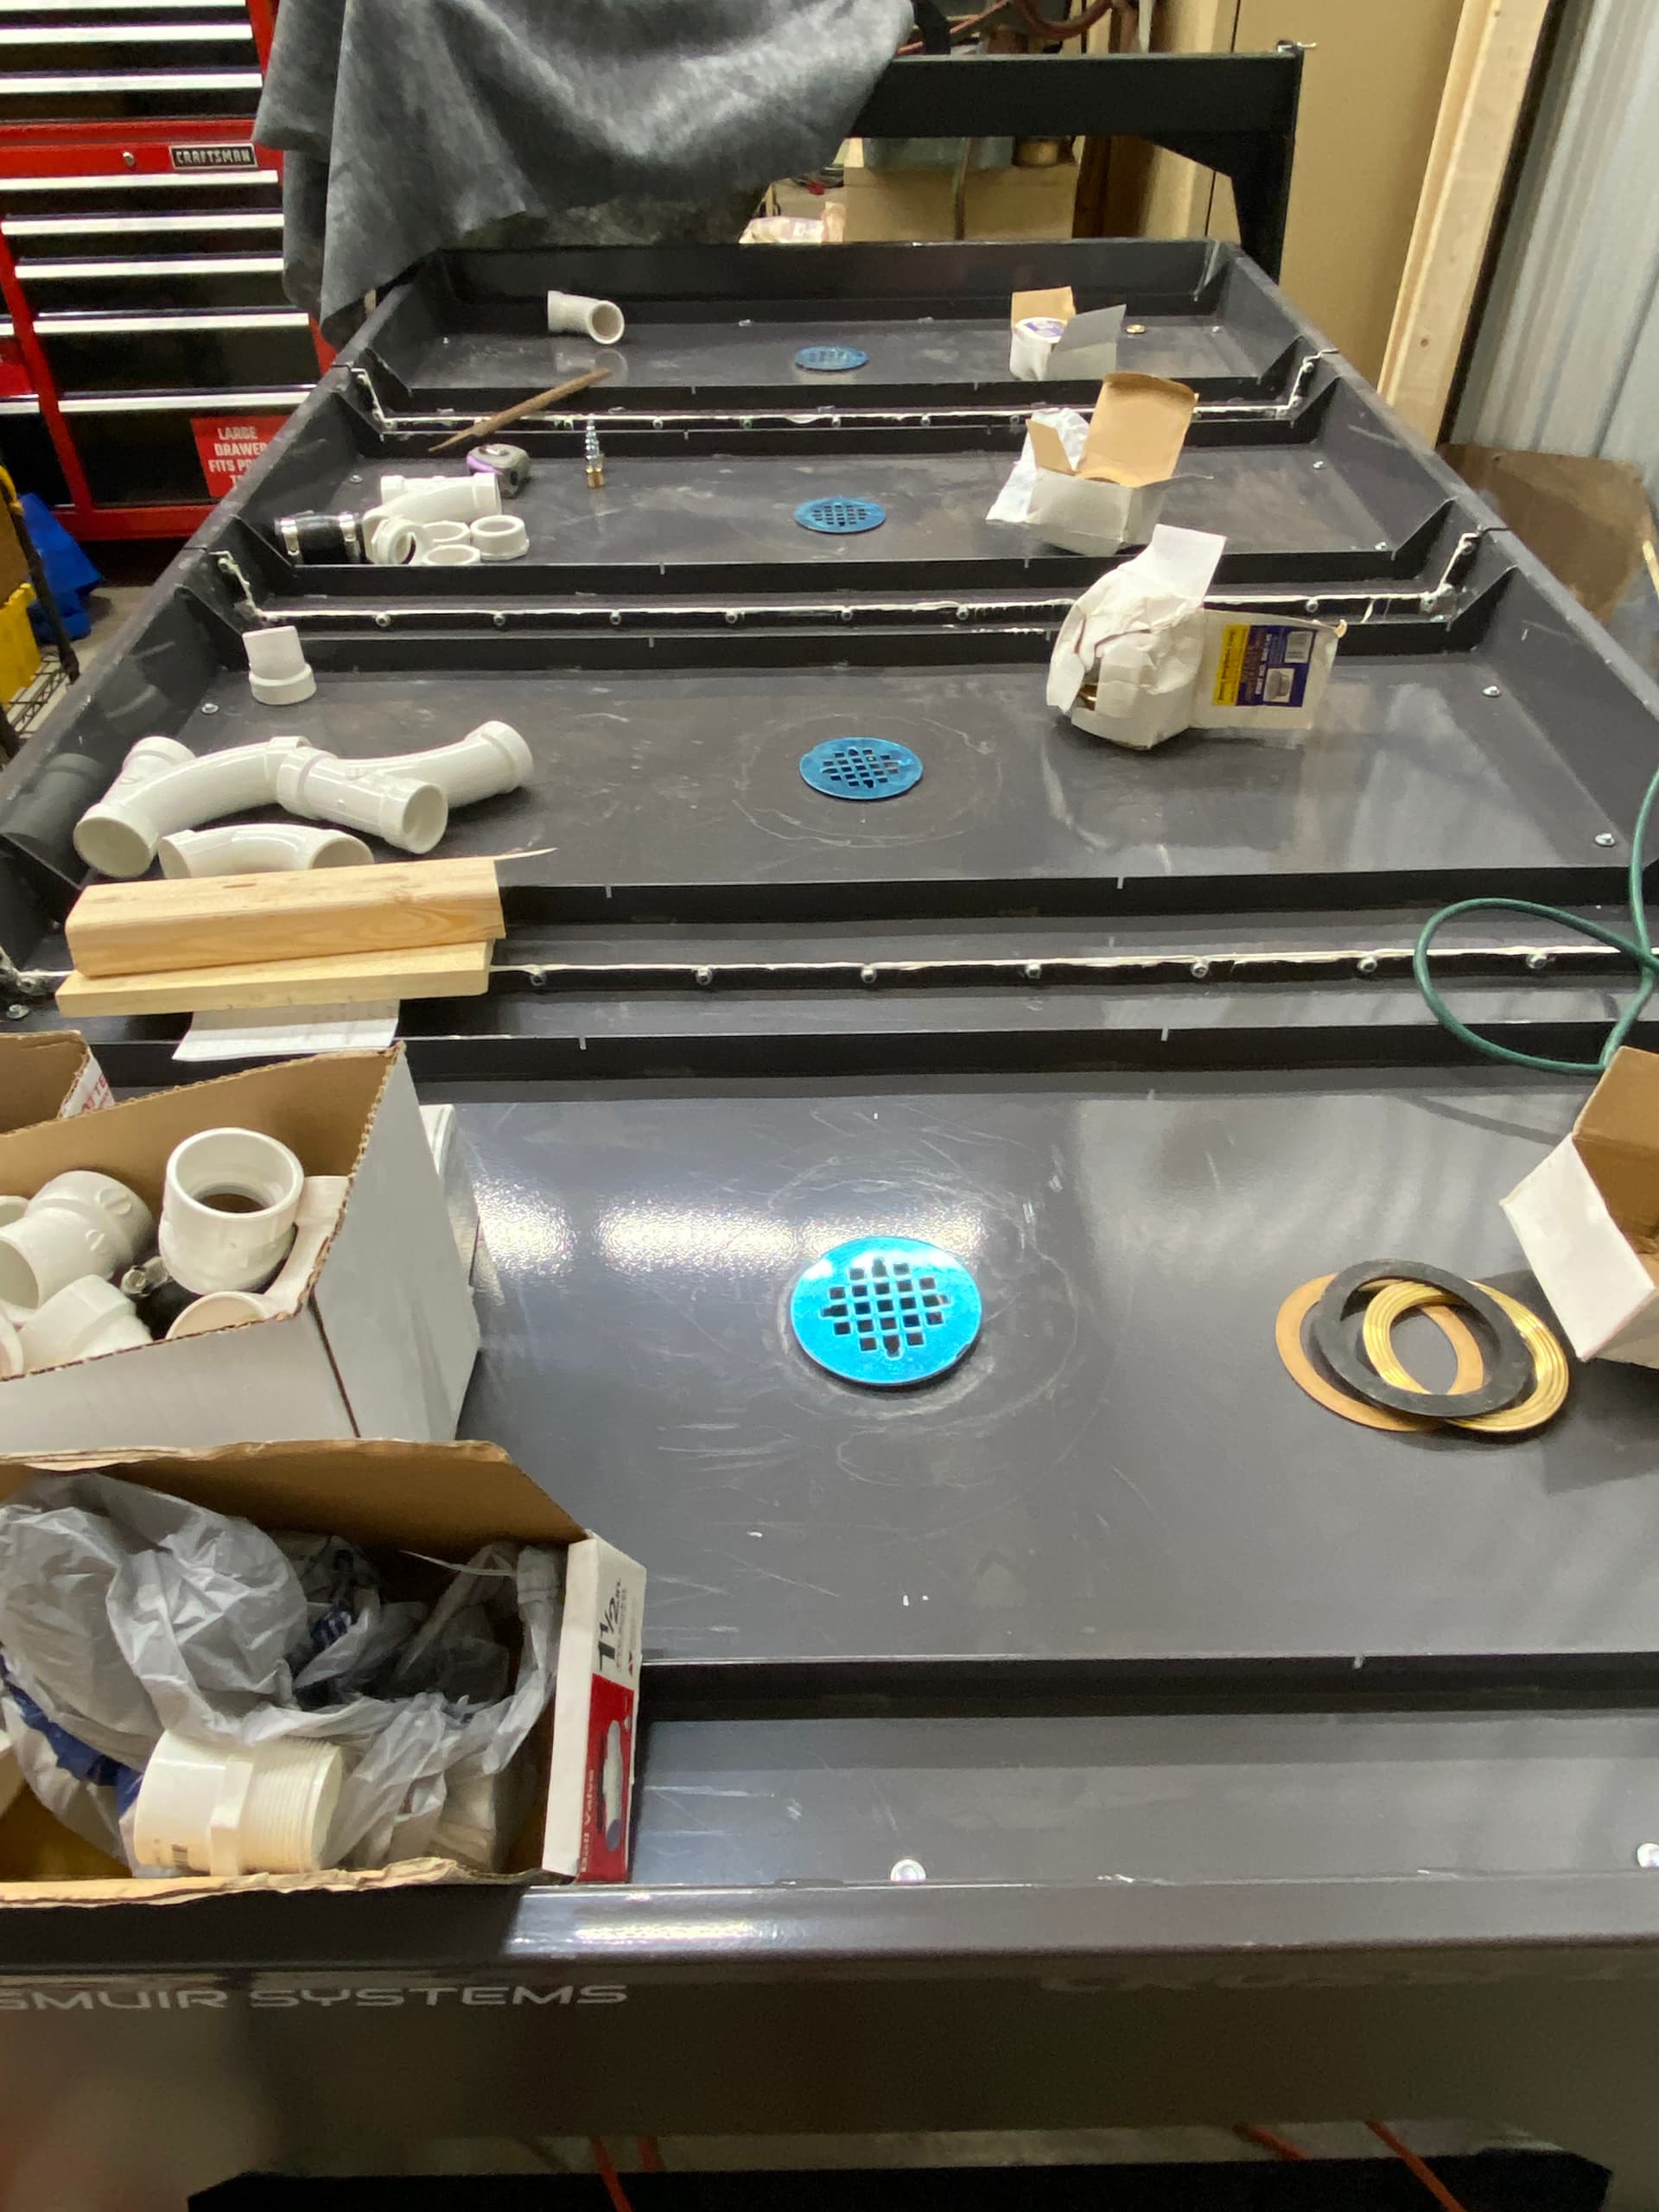
The above pic shows the 4 shower drains that I installed.
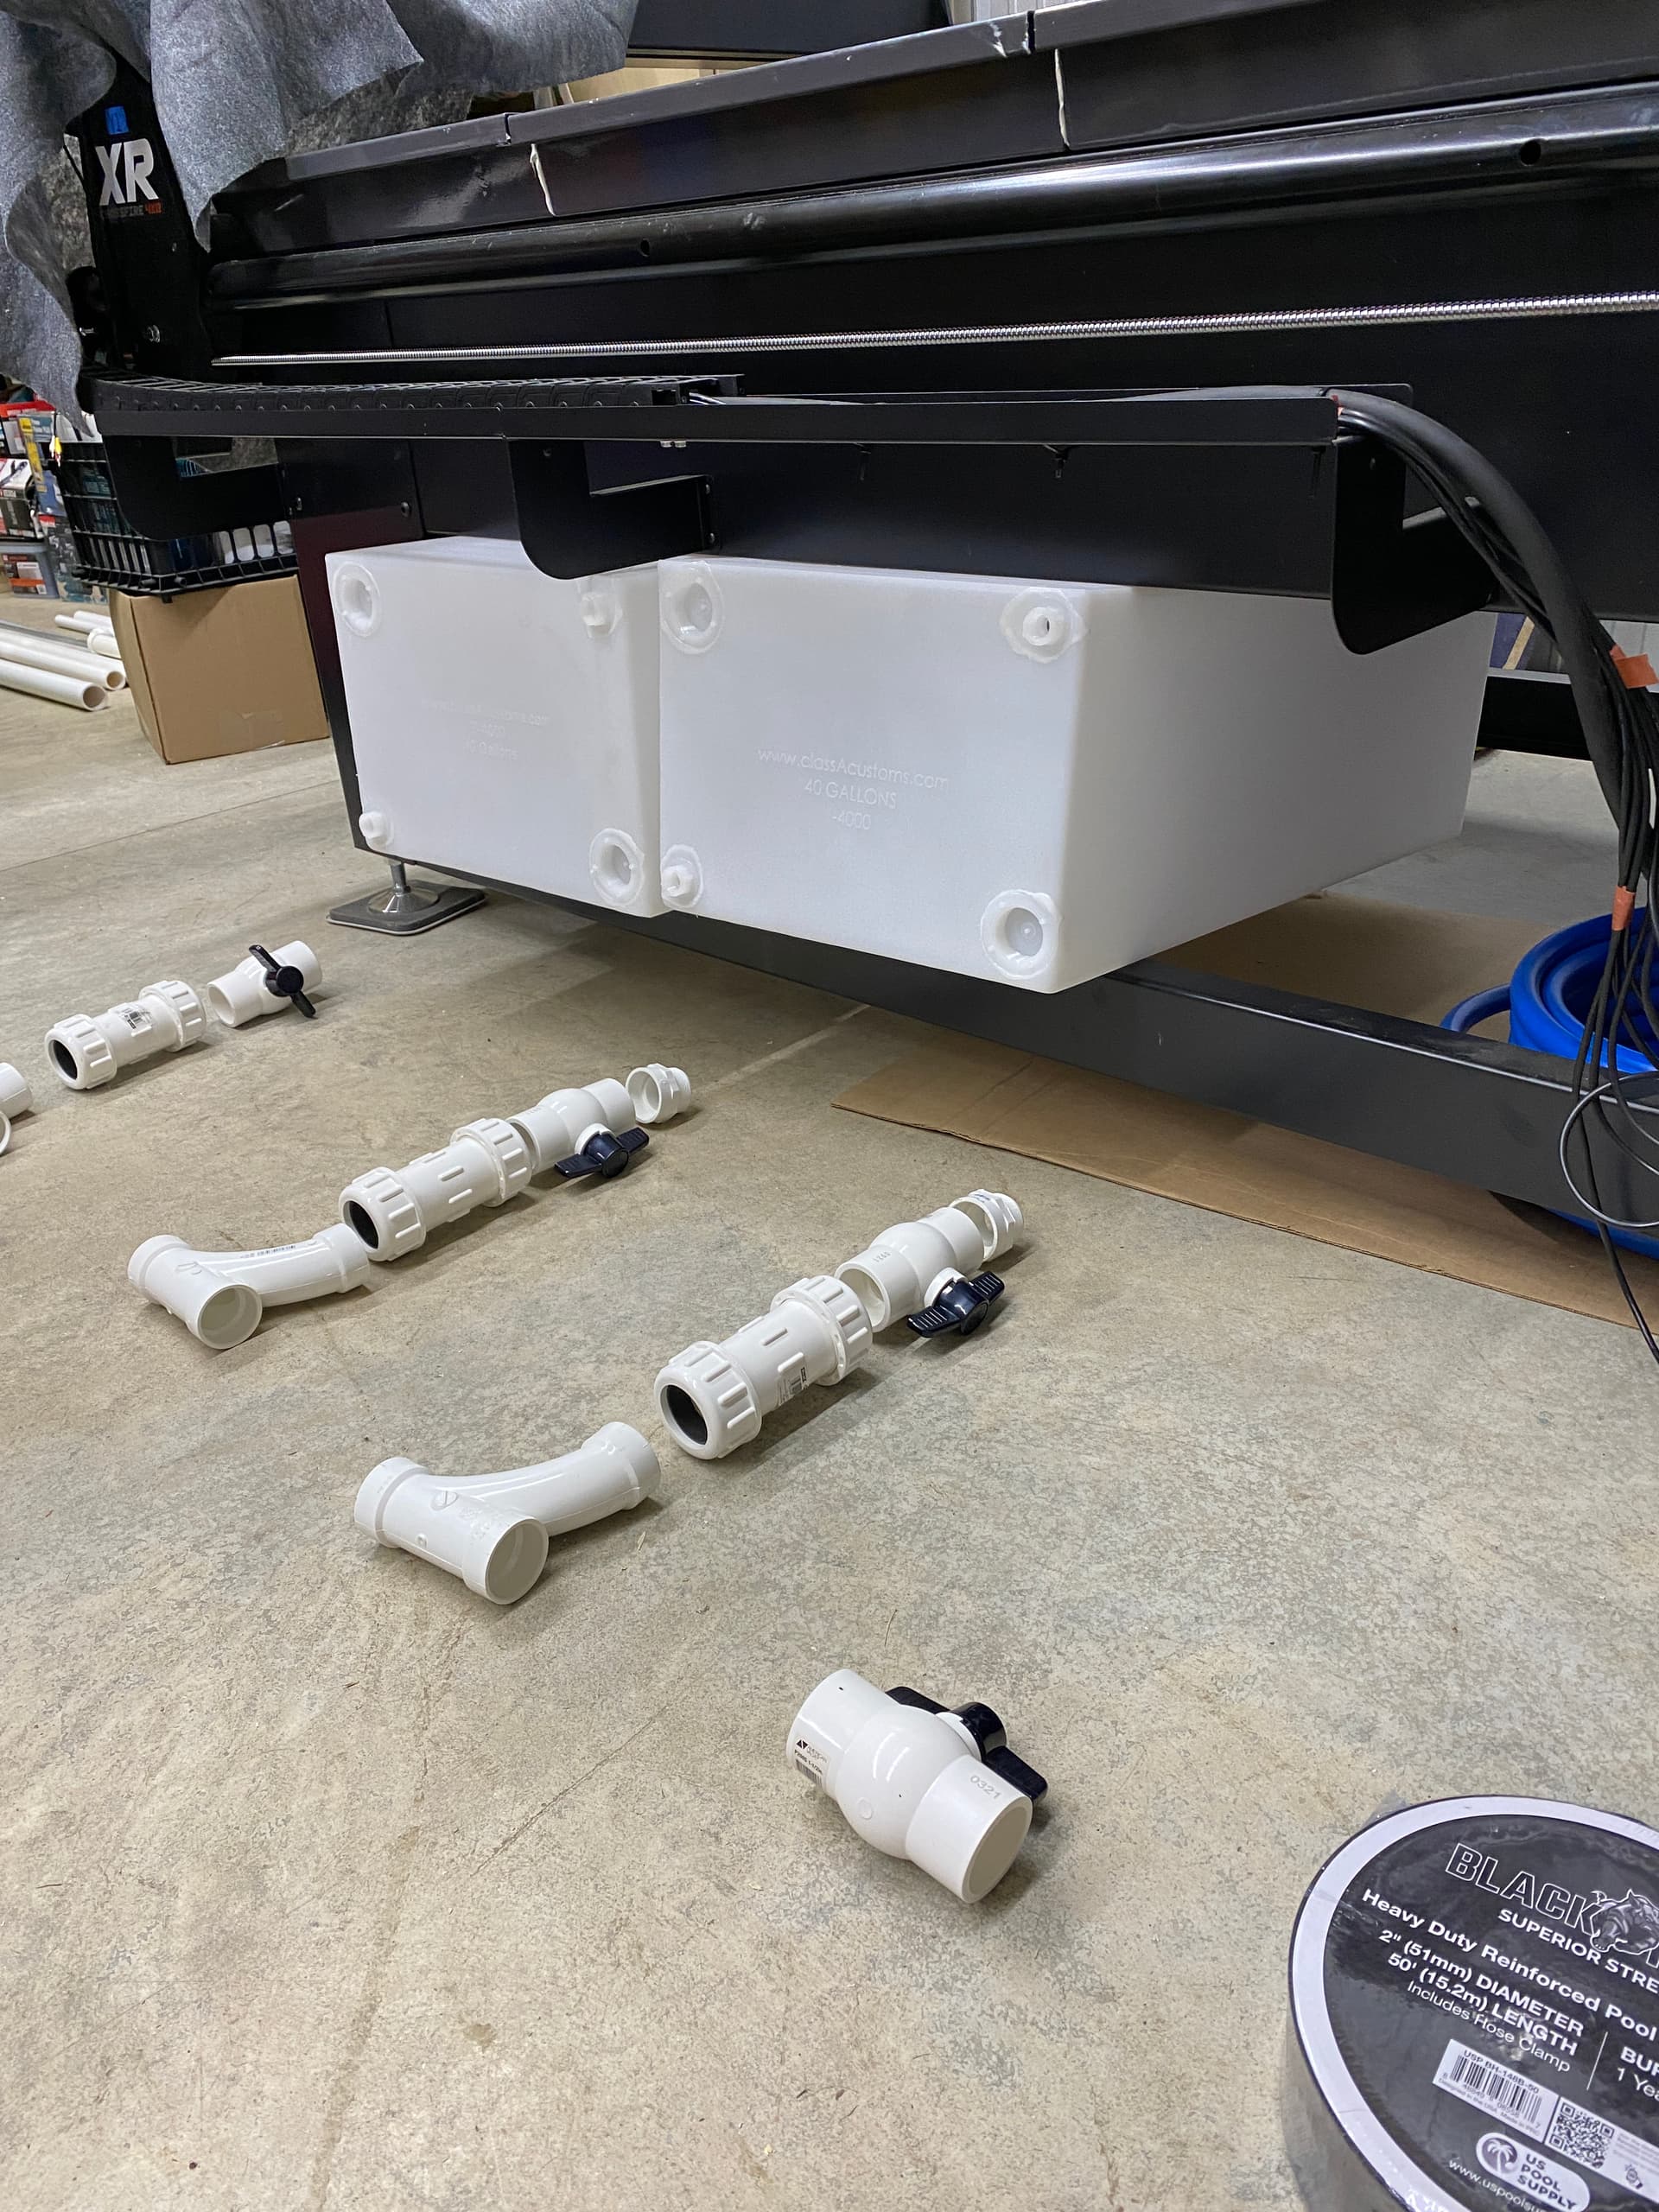
The above pic shows the 2 containers under the XR. Not sure of the orientation of the containers that I will use. This pic show the containers access from the left side of the XR however, after adding the fittings to the container, I estimate that the total length is around 58" and so some of the plumbing would be sticking out the left side of the XR, and I am afraid it will get hit and possibly broken. Plan B is to mount the containers facing the front of the XR but, may be more difficult to access the valves. Plan C is to rethink the fittings that I am currently planning to use to shorten the distance of the plumbing from the containers.
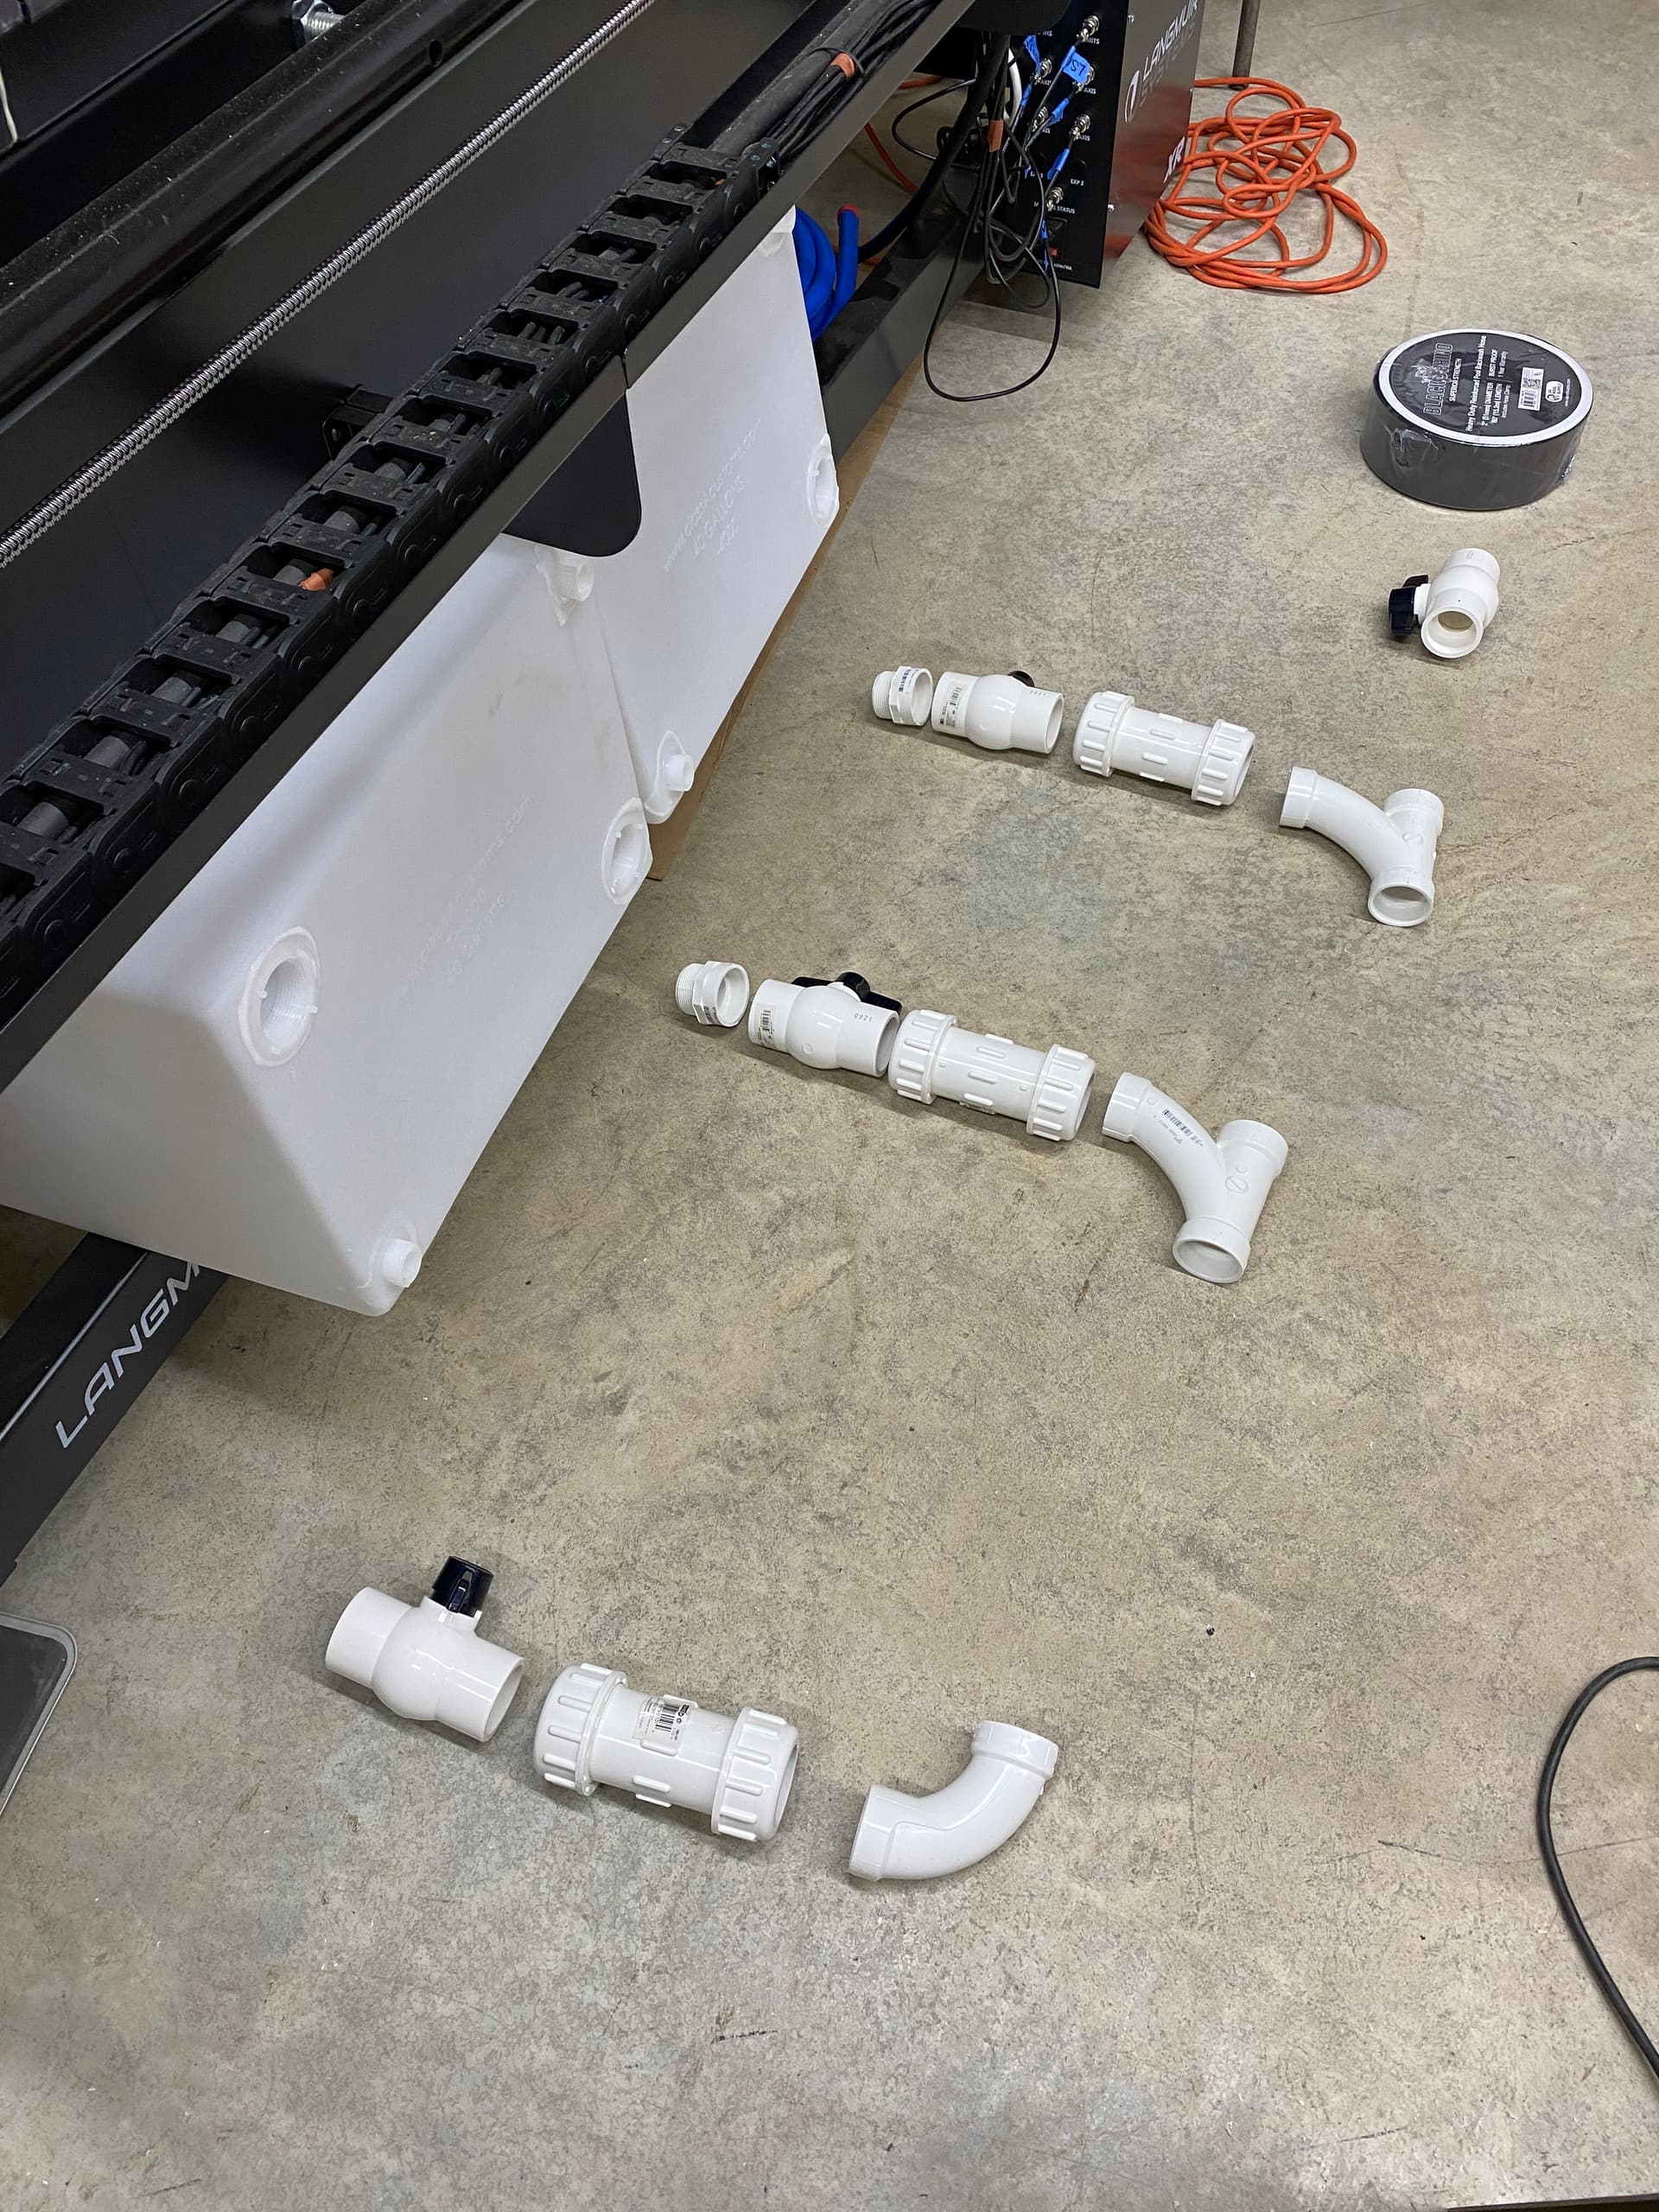
The above picture gives an idea of the fittings I plan to use.
Water from the table comes down the fittings to the left, a valve, union, elbow
Next is a Y, union, valve to feed the 1st container
Another set of, Y, union, valve to feed the 2nd container
Last is a valve that will be opened to drain the water through the black lay flat hose to the yard.
I want to connect the lower plumbing with unions so that I can disconnect the unions, pull the pipe out of the way, and then pull the containers out from underneath the XR in order to wash out any dirt/debris that is in the container.
In order to shorten the distance that the plumbing extends from the storage container, I am considering removing the valve to each storage container.
Ideas/comments/suggestions are most welcome.
Some Amazon links
Water storage container:
https://www.amazon.com/dp/B01B898H9C?psc=1&ref=ppx_yo2ov_dt_b_product_details
Lay flat hose: https://www.amazon.com/dp/B089LPBQB7?psc=1&ref=ppx_yo2ov_dt_b_product_details
Hi Greg
Thanks for taking the time to show me your set up.
I had been watching C/L for some type of tank that might work and I stumbled on a used Aluminum tool
box like you see in the back of picks. So I grabbed it and and I am in the process of making the tool box into a tank. I am plumbing my quite different then you are.
I am using typical DWV PVC fittings like you see under your sink. I will send you some pics of my set up so you can see the route I took.
May take me a few days but I will post something and maybe that will help you plan yours.
I am curious to hear about how y’all go about cleaning the silt out of your tanks?
I imagine it doesn’t have to be too often.
Is it much work to disassemble?, clean out?, dispose of?