Got my Crossfire Pro up and running and made my first big cut with it yesterday. A 4x3 sheet of 1/4 inch steel. Using an Everlast 82i at 45 amps 45ipm with 1.1 nozzle (waiting on 1.0’s to show up). I cut quite a few smallers parts out and I noticed that some are better than others that are cut back to back. It’s like I get a bevel that comes and goes depending on where the cut is on the part. I am going clockwise on outside and CCW on inside cuts. Wondering what I can do about that. I do have a refrigerated air dryer, desiccant bead filter, and a motorguard filter that have all been recently added.
You need to work on air supply filtration and drying, looks like you have a lot of moisture going through torch. Moisture kills consumables. Do a search on here about clean/dry air set ups. You will have a minimal amount of bevel with plasma cutting. You can play with settings in cam software when you set up for material/tool settings.
4 Likes
I’m a little bit at a loss for that at the moment because I did get a refrigerated dryer, all new plumbing, a small desiccant dryer and a Motor-guard filter so I have thought that would all remedy the issue. The dryer was not cheap and I figured it would be doing a better job than it is apparently doing
How does the air get from the compressor to the refrigerated dryer? Is it plumbed straight into the dryer or is there time for the air to cool some before it gets to the dryer? In other words, is there any effort done to pre-cool the air before reaching the dryer unit? What do the desiccant beads look like…have they changed color from when you started?
Check the torch assembly to be sure that there is no significant play with the z-axis/torch holder.
When moving the gantry slowly around the table, is there any areas that seem to drag/surge during this motion on the lead screws? They may be binding or need lubrication or bent.
1 Like
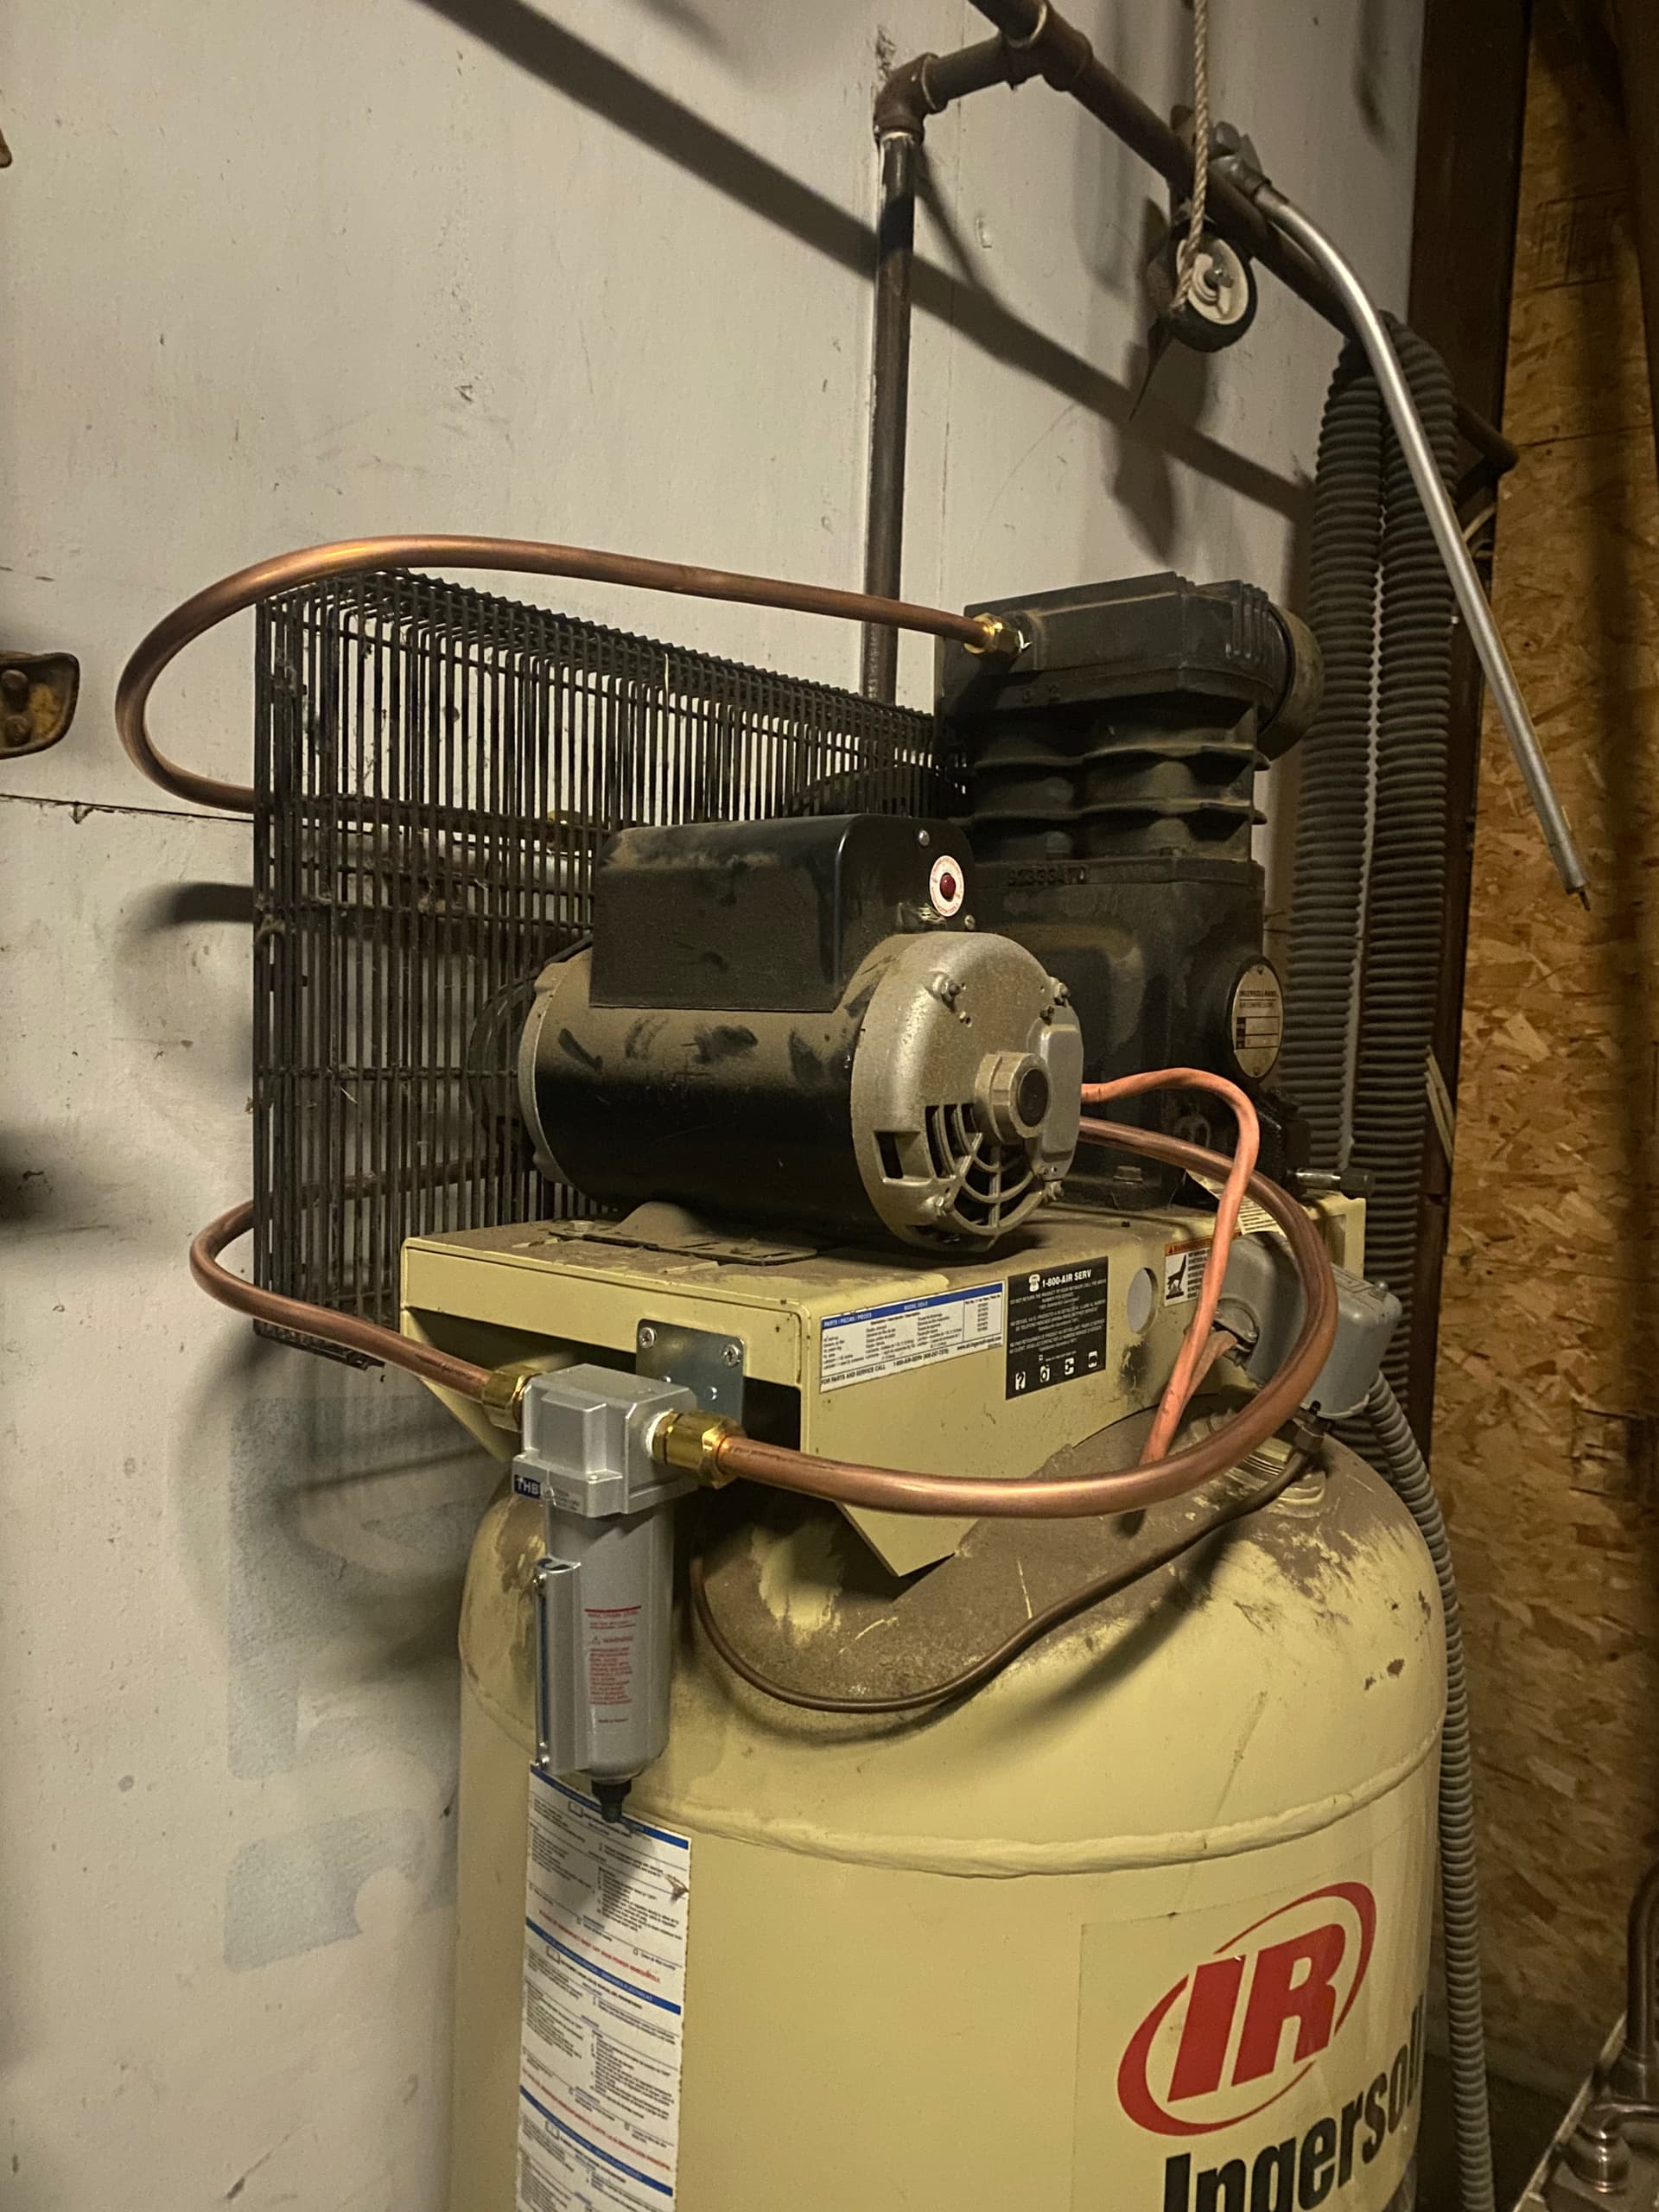
We have 1” black pipe coming out if the compressor and it runs for probably 10-12’ directly into the dryer. Dryer temp is at 35° F and has two internal filters on it. I had the beads dried out and ran the air through the cutter for 30 minutes just a bit ago and they had already began to change colors so I guess moisture is getting past the dryer for whatever reason.
I will have to move it around slowly but I ran the breakin program quite a few times and it didnt have any issues. But will have to try going around at a slow speed
There’s always going to be moisture getting past the dryer hopefully it’ll be moisture that only condenses at the sub four degrees Celsius dew point range.
The reasons you could have access moisture getting beyond the refrigerated air dryer.
Your refrigerated air dryer is too small to deal with the capacity.
And or
You’re not sufficiently cooling the air coming from your compressor to near ambient conditions before entering the refrigerated air dryer.
Why this is important is because you add an excess of both latent and sensible heat loads to the refrigerated air dryer.
The desiccant beads job is to remove moisture from four Celsius down to minus 40 Celsius pressure dew point.
I change out my beads other time I cut , which is probably Overkill but it’s how I like to run.
How big of a desiccant cell do you have?
I usually like to have a drip tee installed before my refrigerated air dryer to capture any liquids or solids before it enters the equipment.
Do you have a standard water separator in your airline anywhere ?this just mechanically removes aerosols and liquid moisture. this uses fins or some other device in the airstream to cause a change in direction drastic enough in the air flow to have these aerosols and moisture drop from solution.
1 Like
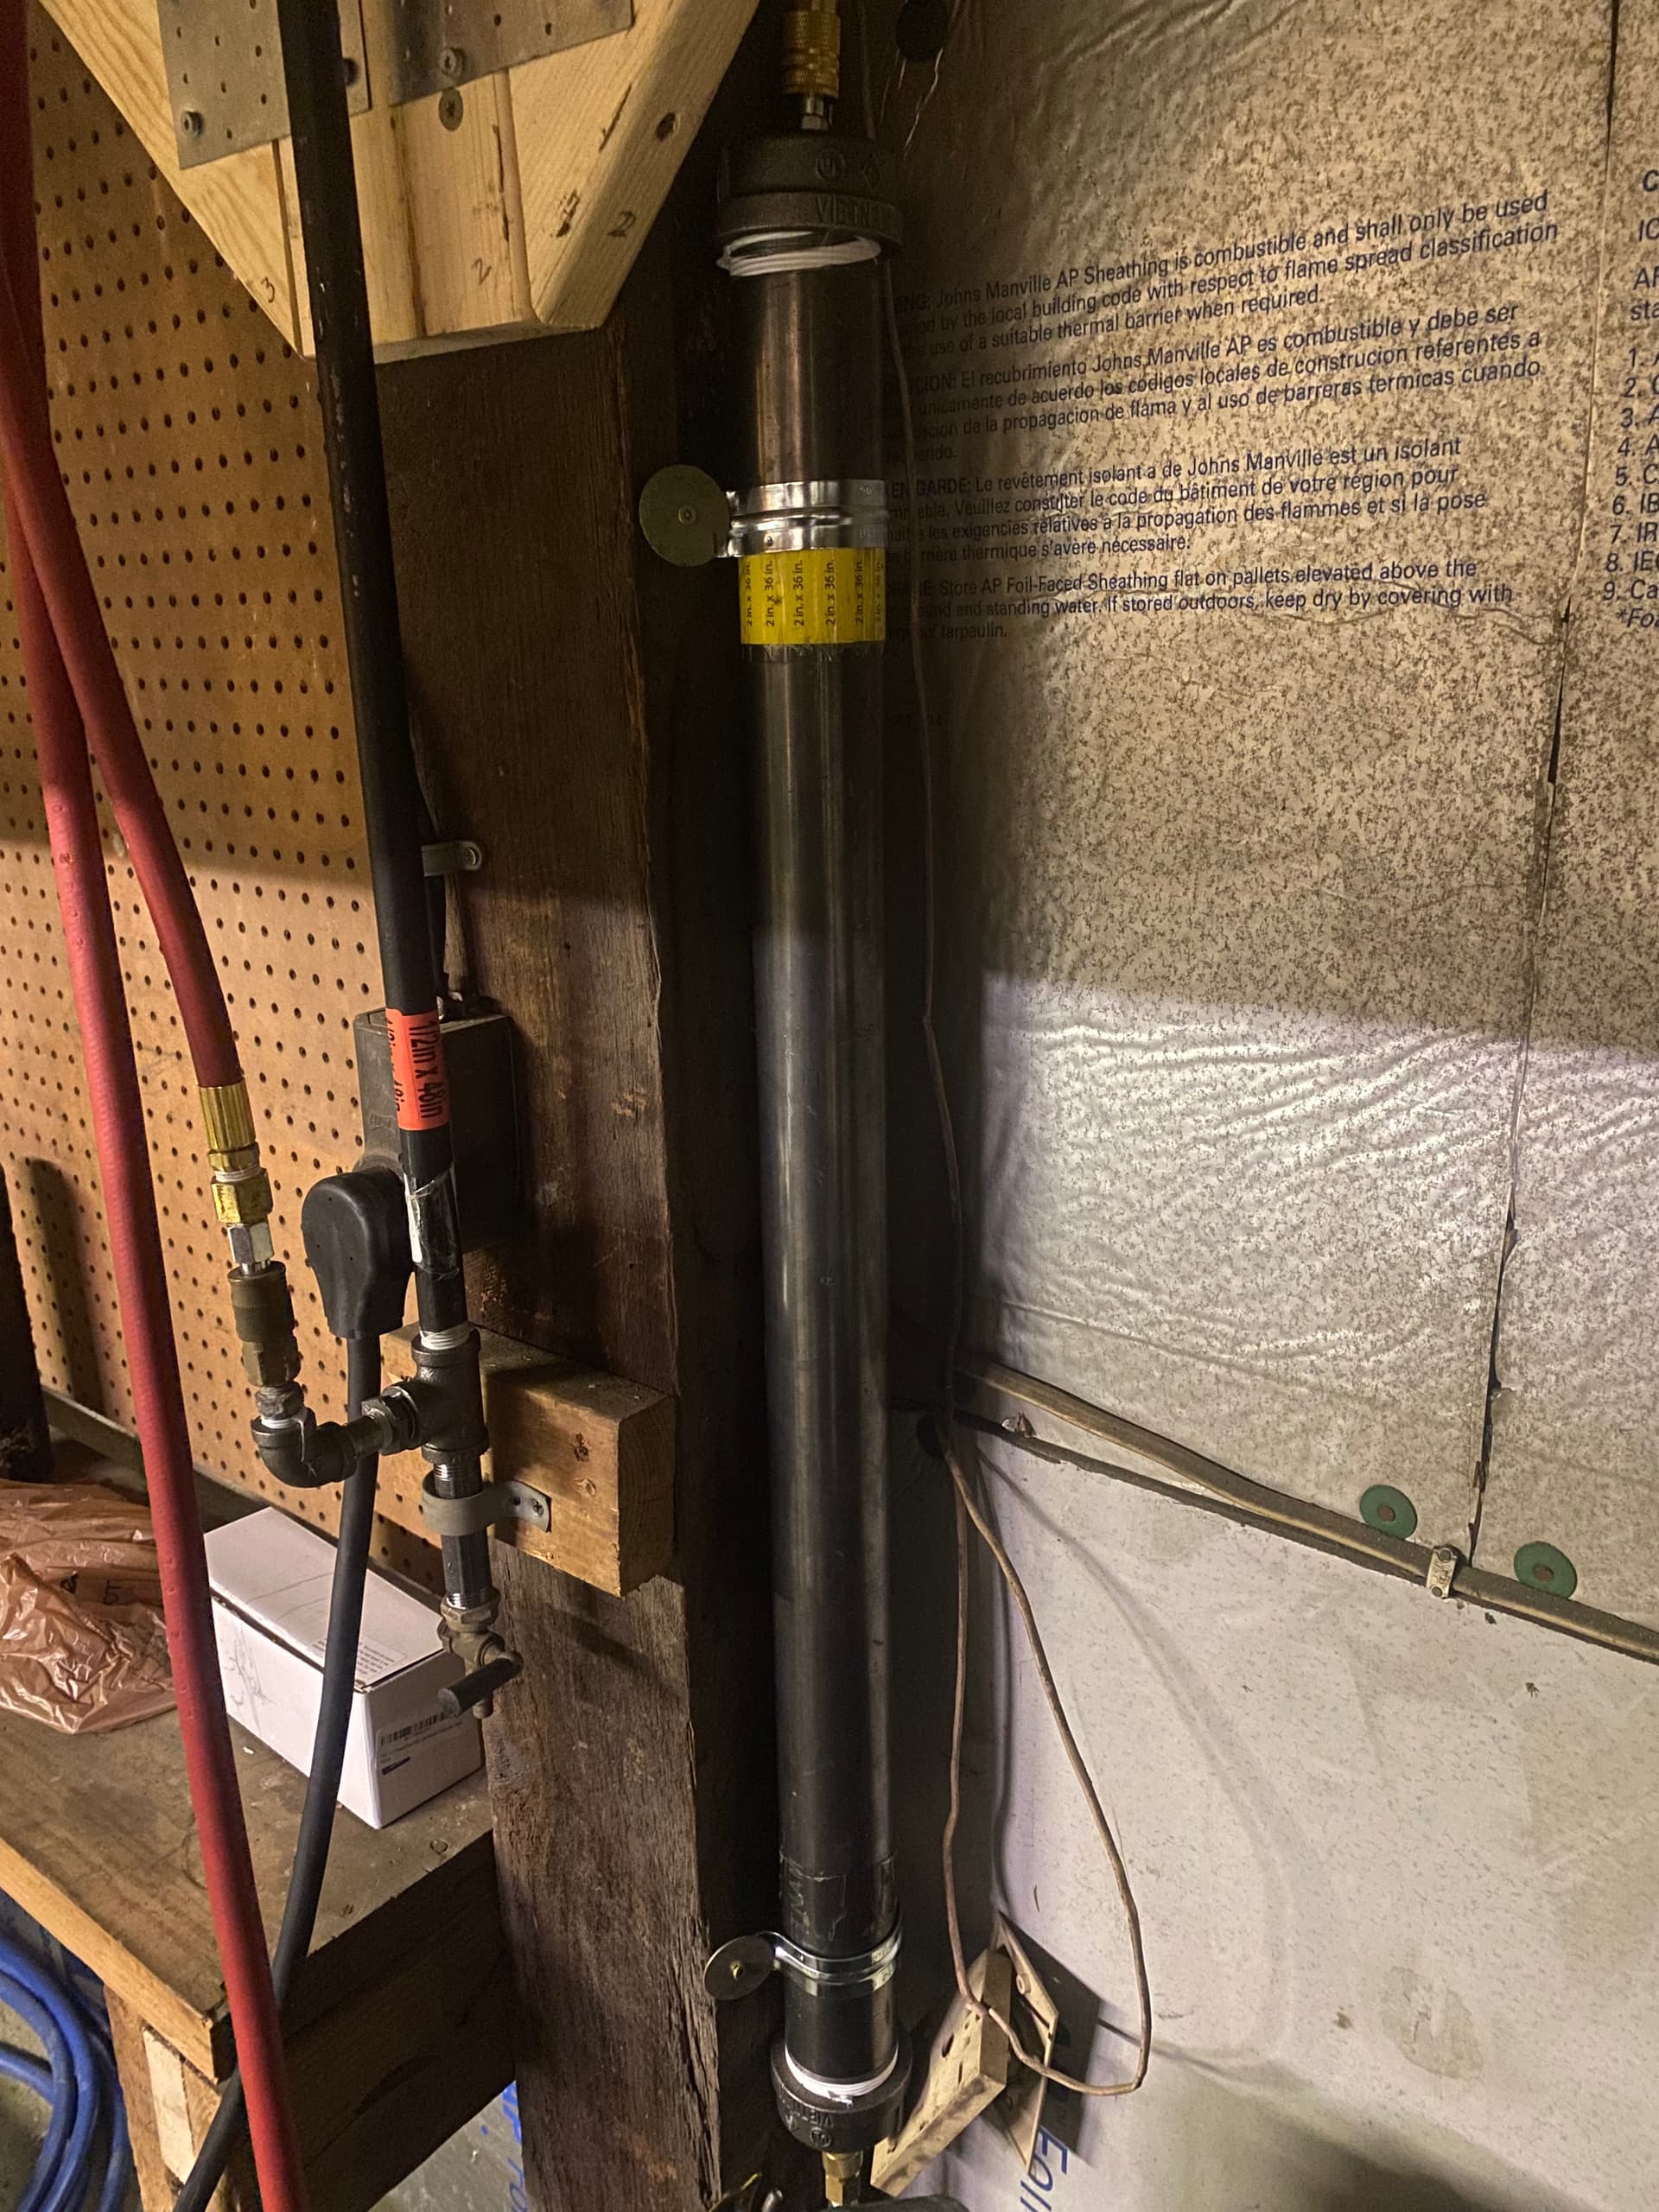
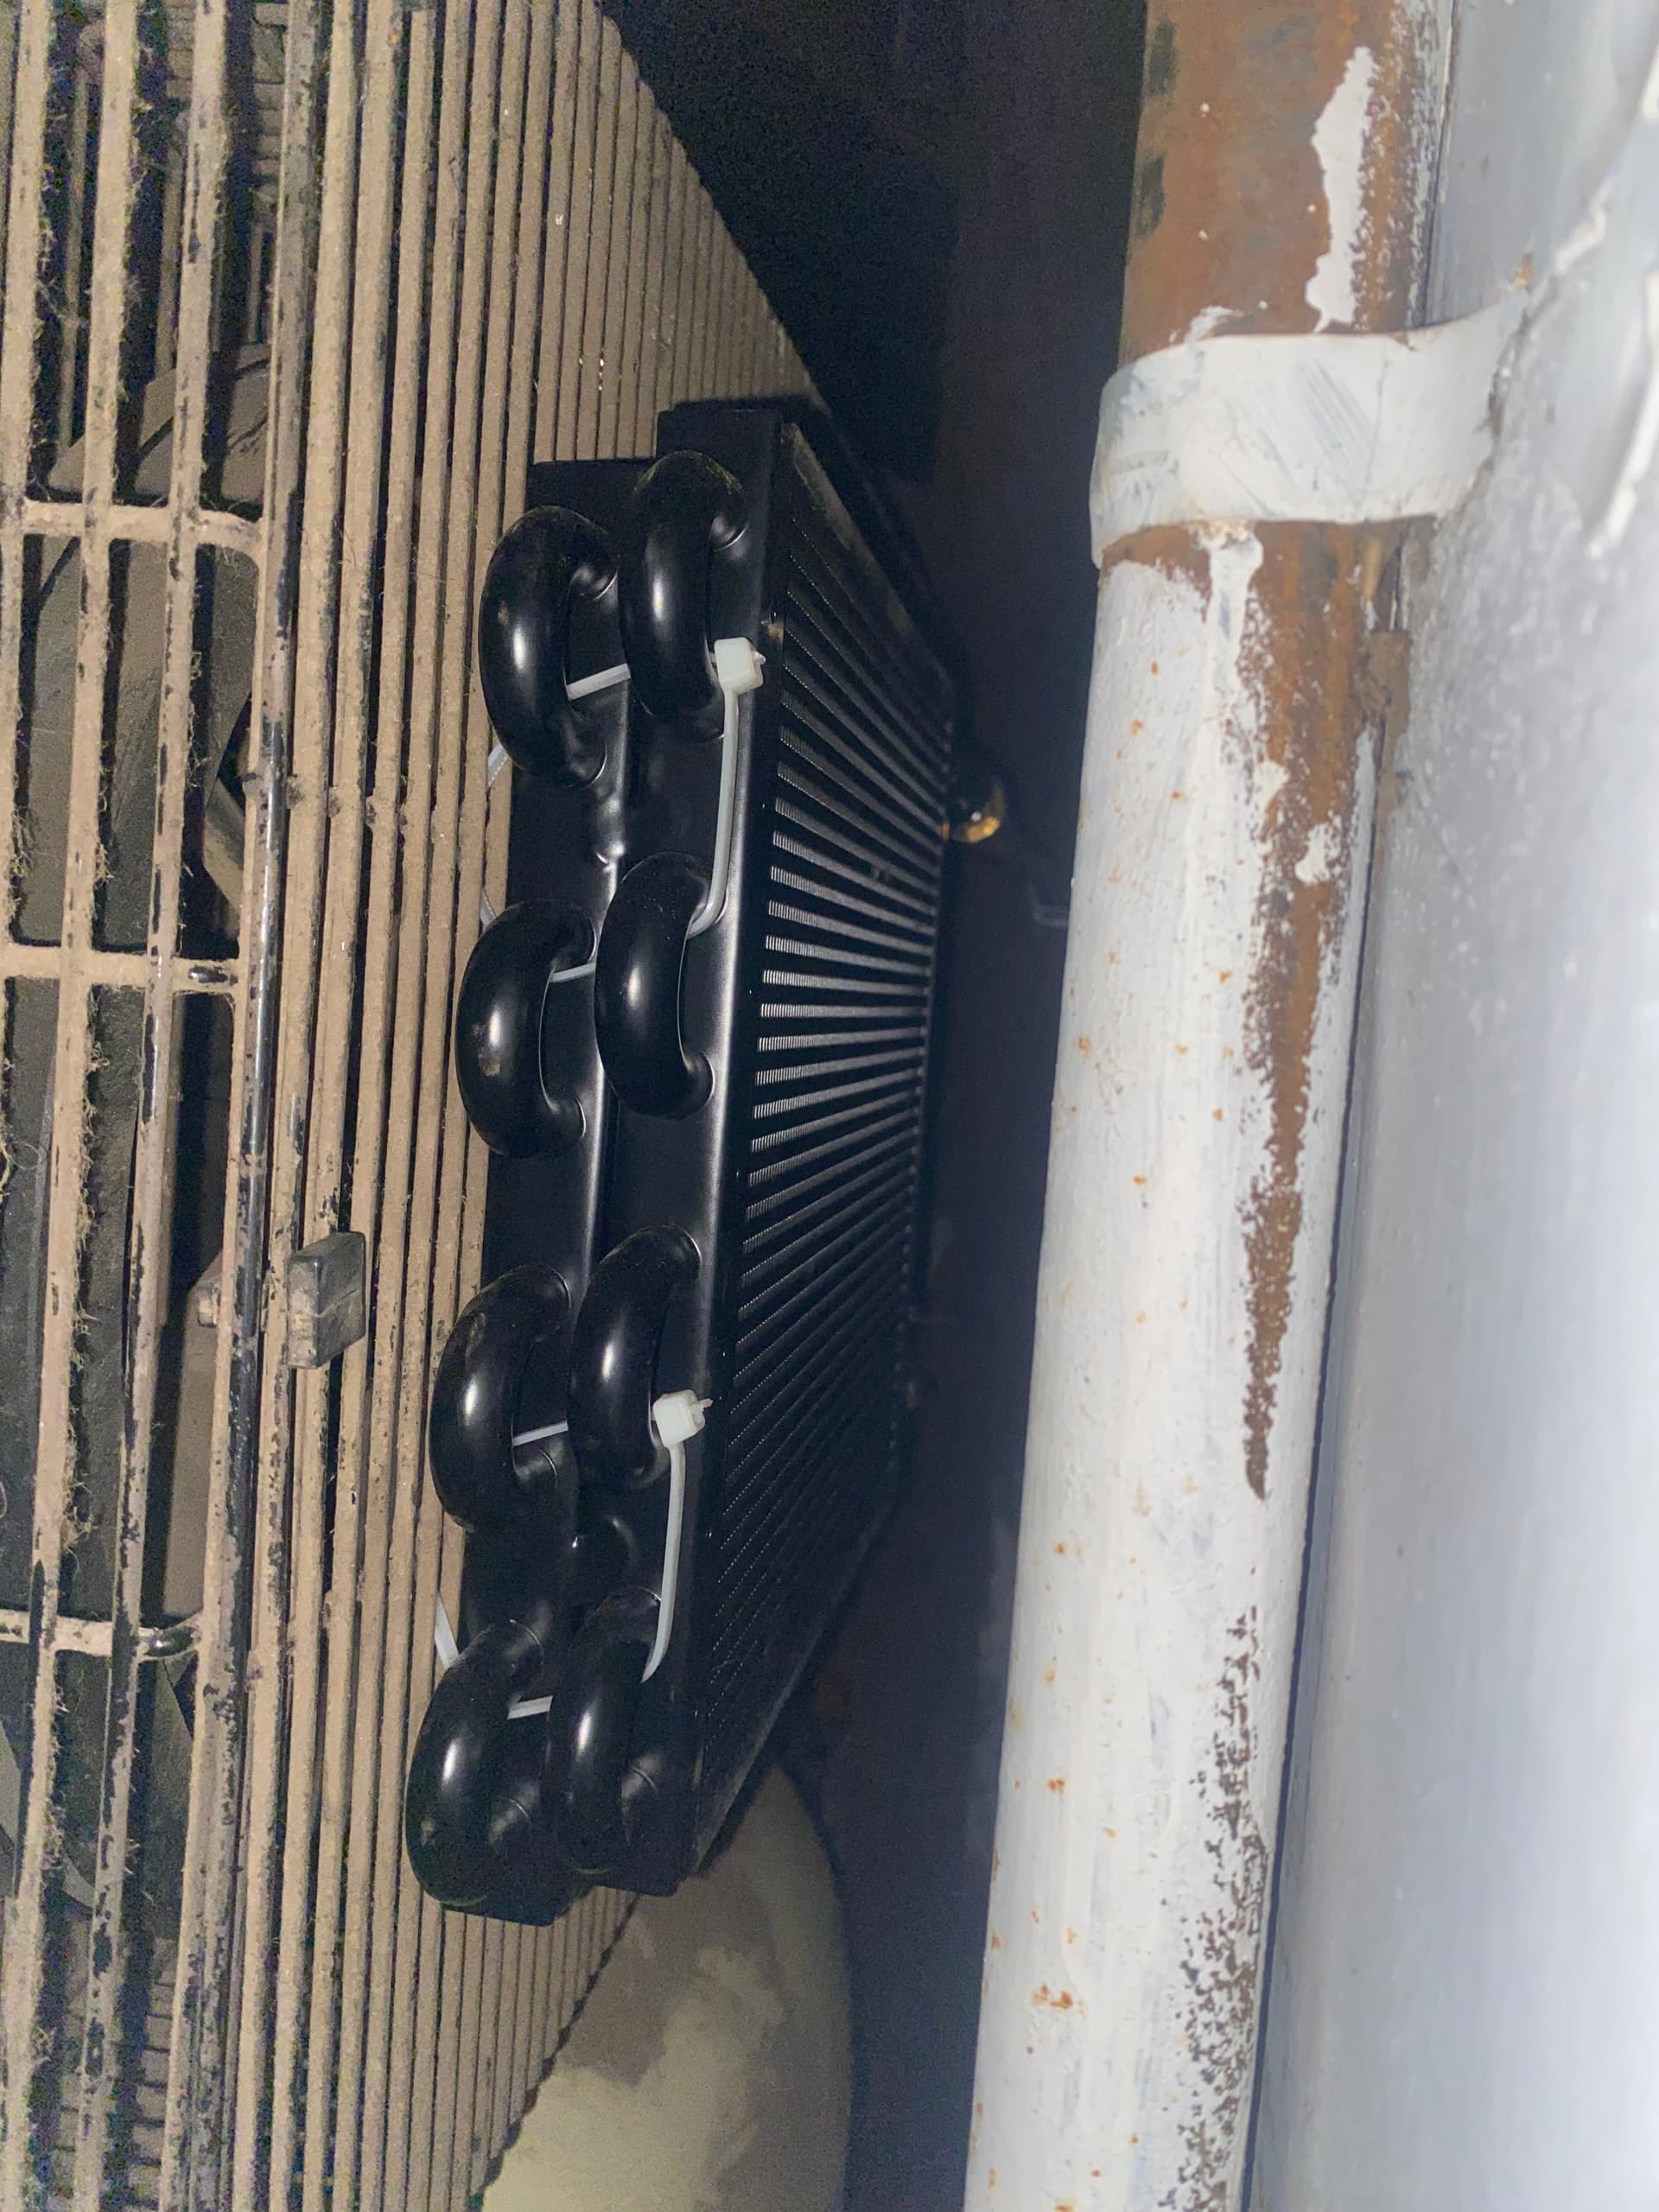
Here are some examples of what some have done to help pre-cool their compressed air. I am not sure how hot the air is coming out of the air compressor but a temperature sensor on the tube from my compressor unit to the tank measures 248 degree F when the compressor is running.
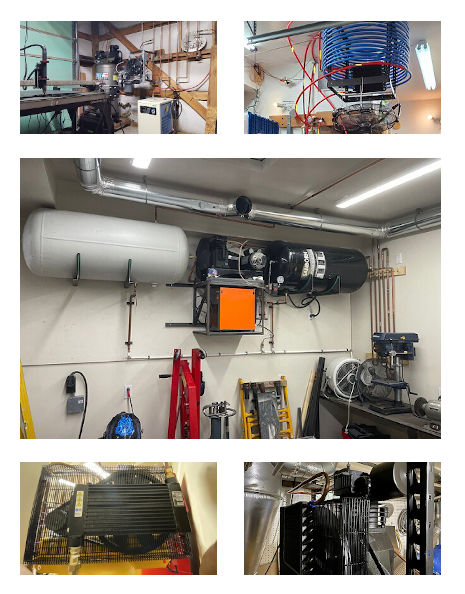
First image: Cooling copper pipes then transmission cooler with fan before refrigerator air dryer.
Second image: Cooling coil of Pex tubing, transmission cooler with fan before refrigerator air dryer.
Middle image: Cooling copper pipes, the transmission cooler, before refrigerator air dryer, then goes into “dry” storage tank.
Fourth image: Transmission cooler taking advantage of air compressor fan for dual duty.
Fifth image: Another transmission cooler with a fan.
Most everyone has a water trap built into their system to try to get some moisture out before it reaches the refrigerator dryer unit. Many report similar to you that without the pre-cooling, the desiccant beads simply cannot keep up with the moisture. There are some that don’t need any of this or very little of this.
1 Like
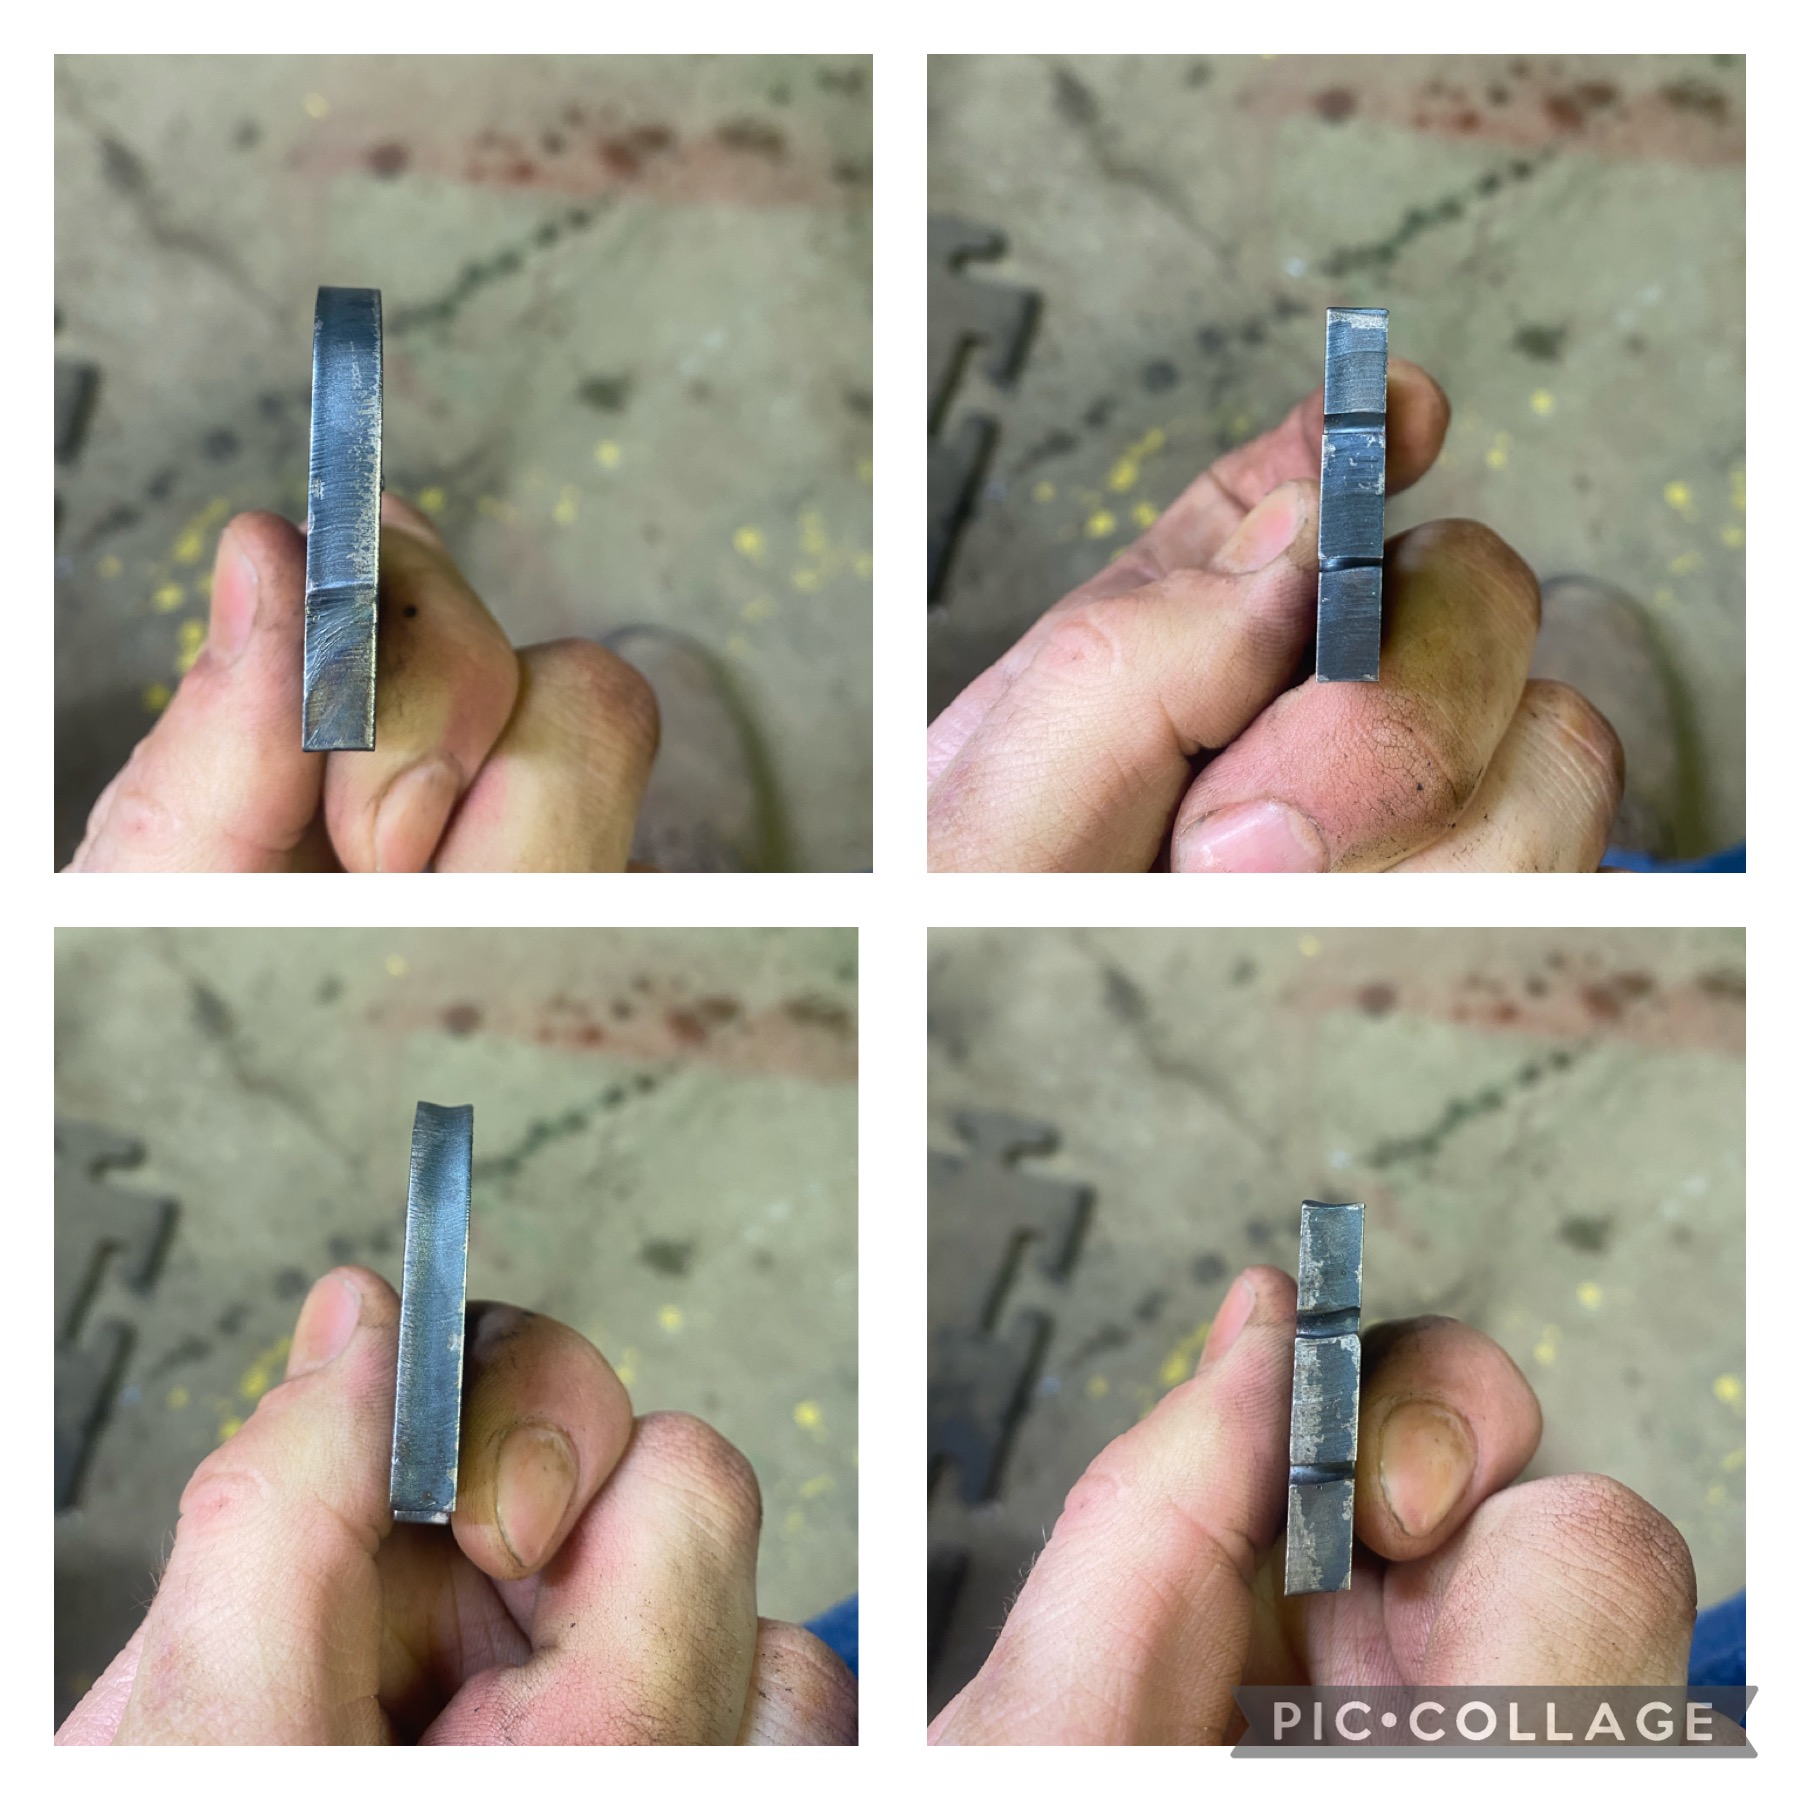
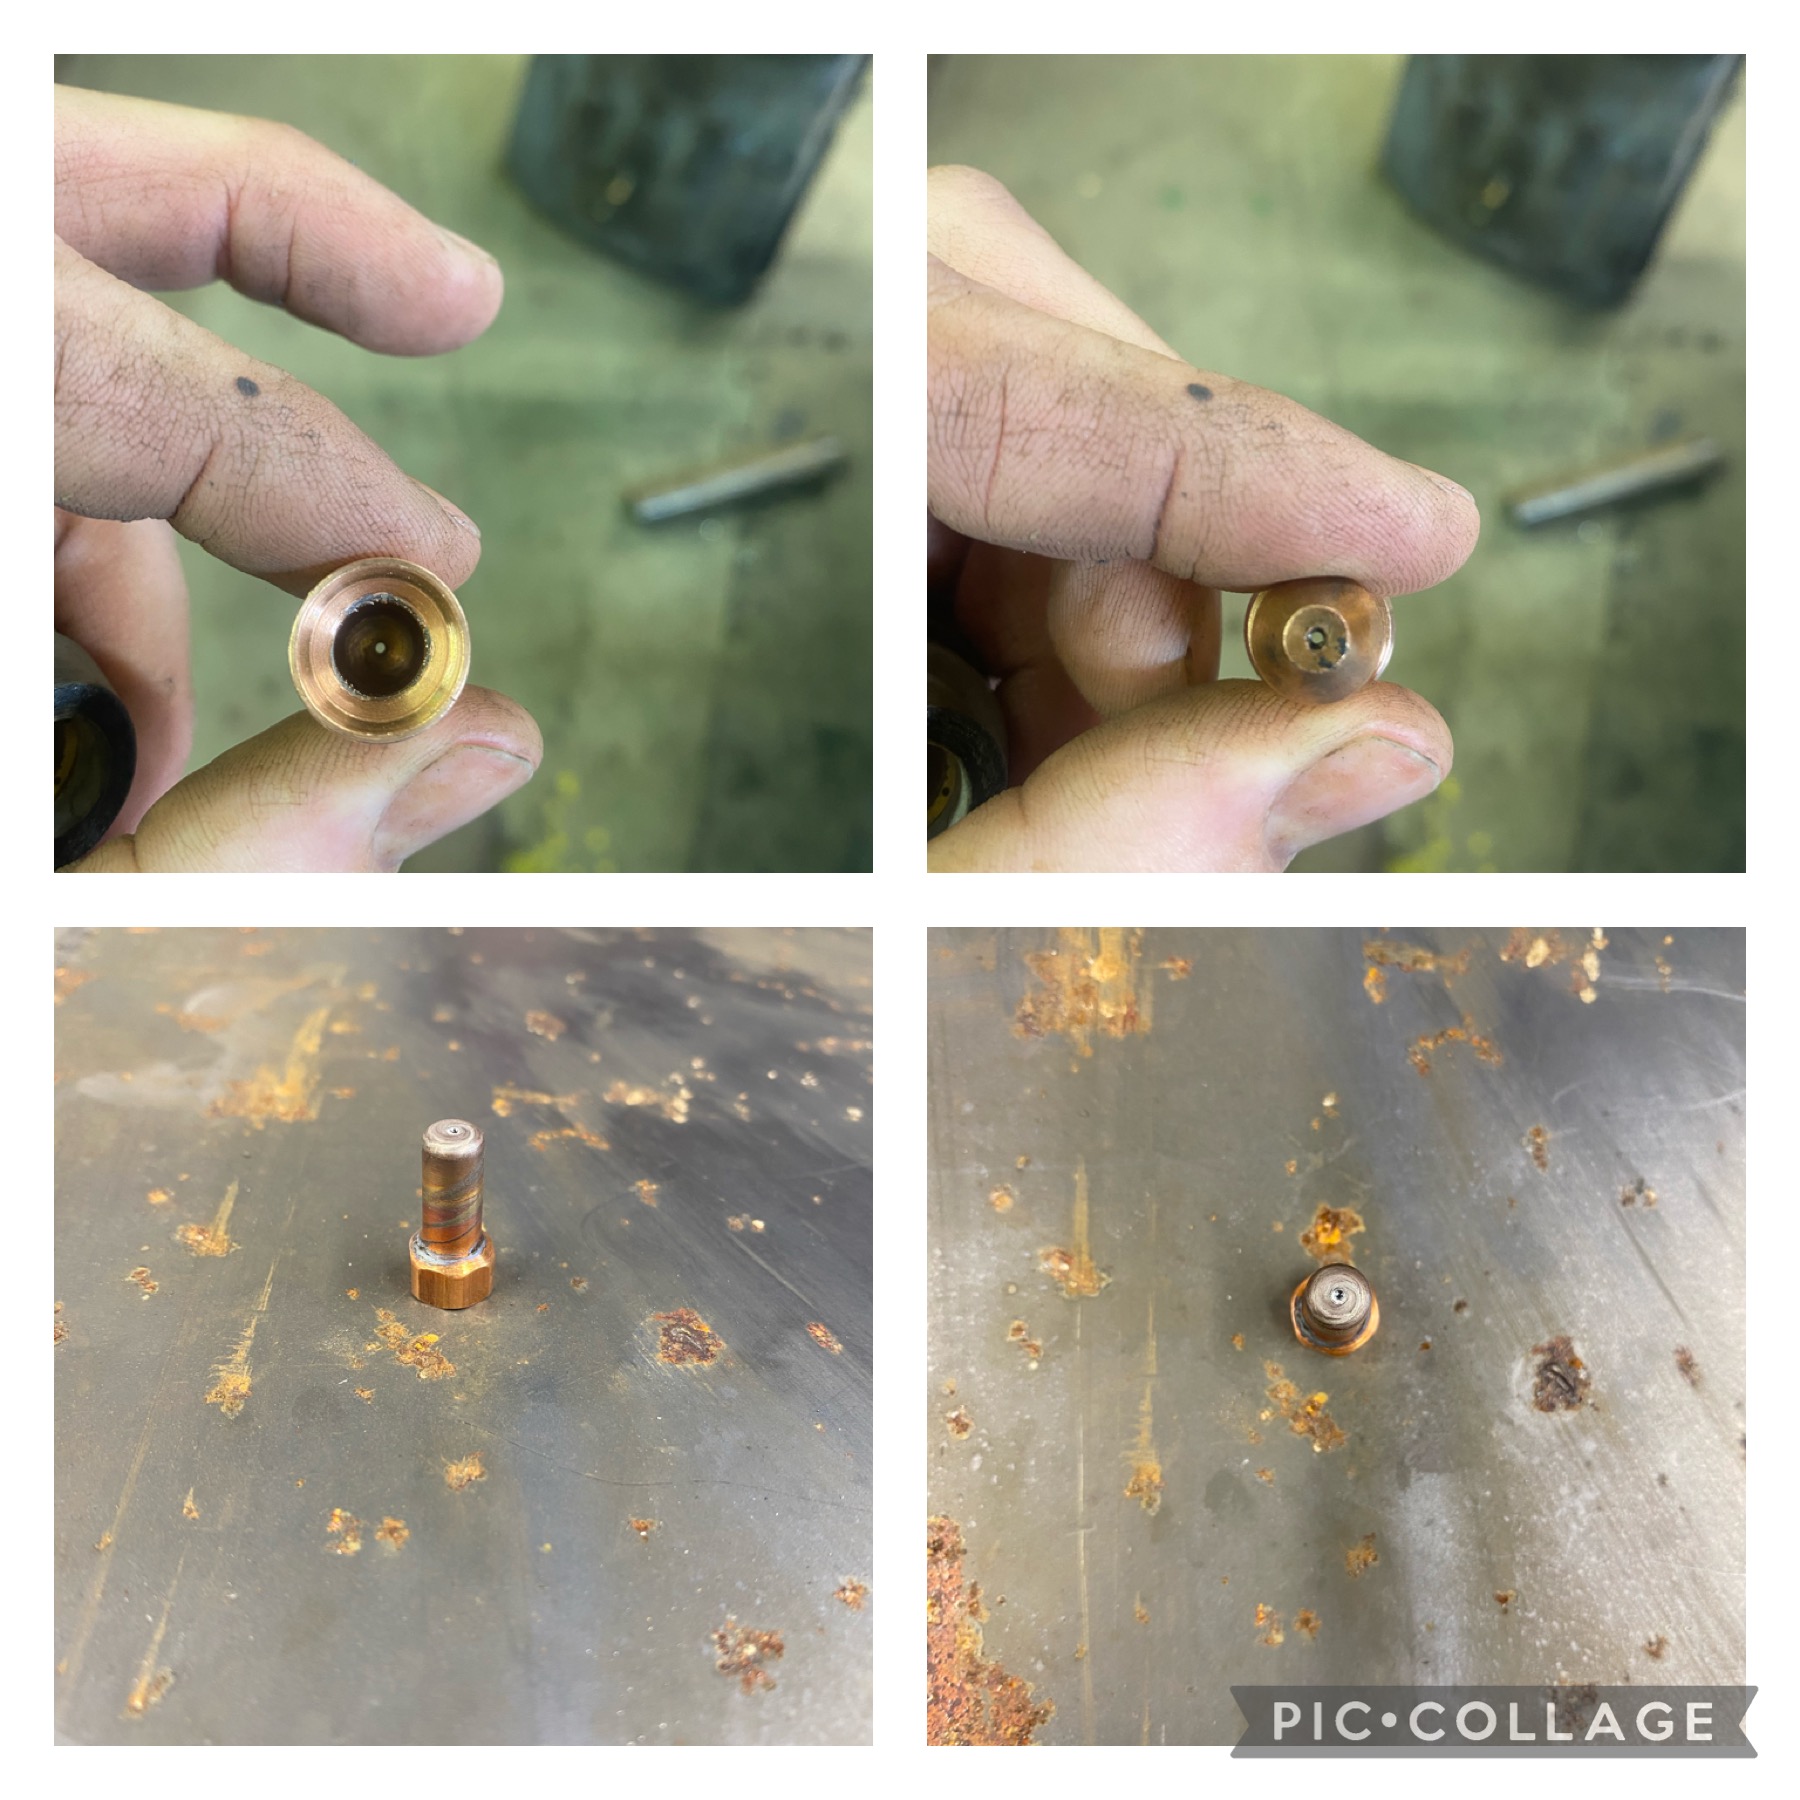
Your electrode is worn out. How many Pierce’s. I usually get about 1200 and mine look like that.
The dryer that I have is rated for 35 CFM and compressor output is 30CFM. I am not cooling the air prior to the dryer which sounds like something I need to be doing. I do not have a standard water separator at the moment either. Just an air filter that is with the small desiccant reservoir, which only holds maybe 5 ounces of beads.
Its hard to tell in the other pics posted and I just want to clafiry, if I were to add a trans cooler is that plumbed in right after the compressor output before the tank or just after the tank and before the dryer?
Both of those components are size well.
The average plasma cutter needs about 6 CFM for hand cutting and about 9 CFM for mechanized cutting.
This is almost always required. If you post the model number of your refrigerated air dryer I can look but it’ll likely say on the data plate and in the manual , a minimum inlet temperature. It’ll likely be something around 30 to 50° c
This is not enough desiccant for 9 CFM. We’re trying to achieve in minus 40° pressure dew point so the recommended amount of desiccant would be approximately 0.2 to 0.3 pounds per CFM of compressed air.
9 CFM * .25 = 2.25lbs
About a quart of beads is more then ideal.

I’ll let someone else answer this question I have a different take on that situation than most.
- Your conditions will vary
2 Likes
The dryer is a Mikropor MK-US-35.
Did you make your own canister to hold the desiccant beads?
great dryer! way overkill for this application.
But it still has similar constraints to a standard refrigerated air dryer.
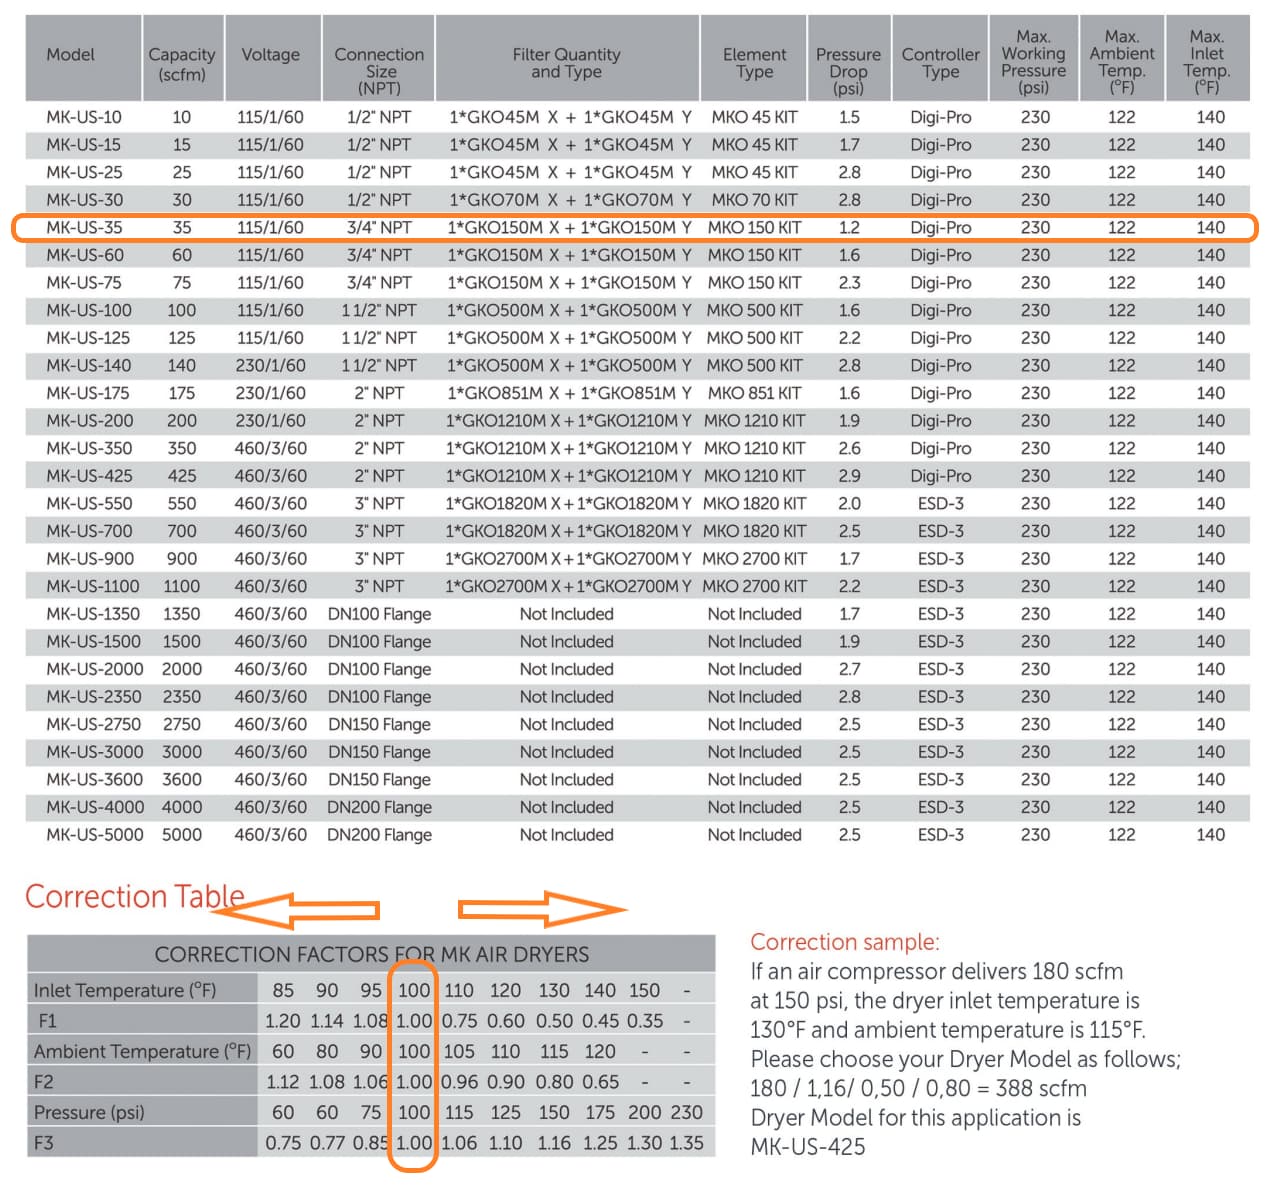
Check out the Correction Table at the bottom and it is pretty telling how the inlet air temp effects the machines capacity . all the nominal ratings are at 100 f anything over this temp and you can start to derate this machine .
no. Mine holds about 1.5 lbs to 1.75 lbs so not “ideal” but still good . I switch beads every other session .
3 Likes
After reading this post, I think my bead holder is too small. Approximately how many cutting minutes do you consider a session to be?
I know you cut a lot more than us amateur guys, so just trying to understand how many minutes you are getting before you change your 1.02kg (trying to teach you Canadians the metric system ![]() ) beads.
) beads.
2 Likes
This has been debated and people are convinced on both sides that they are right so there is no agreement other than “there is evidence that both sides agree that there needs to be pre-cooling before the refrigerated dryer.”
Here is a topic worth reading:
1 Like
you can not really calculate or ask that question…
it all depends on how good your drying is before the beads…
I have an elaborate compressor system of a copper wall cooler…2 60 gallon tanks and a refrigerated air dryer between the tanks…I can cut over 2 hours of torch time now before I even look at the beads…
before…every day I would change them…
1 Like
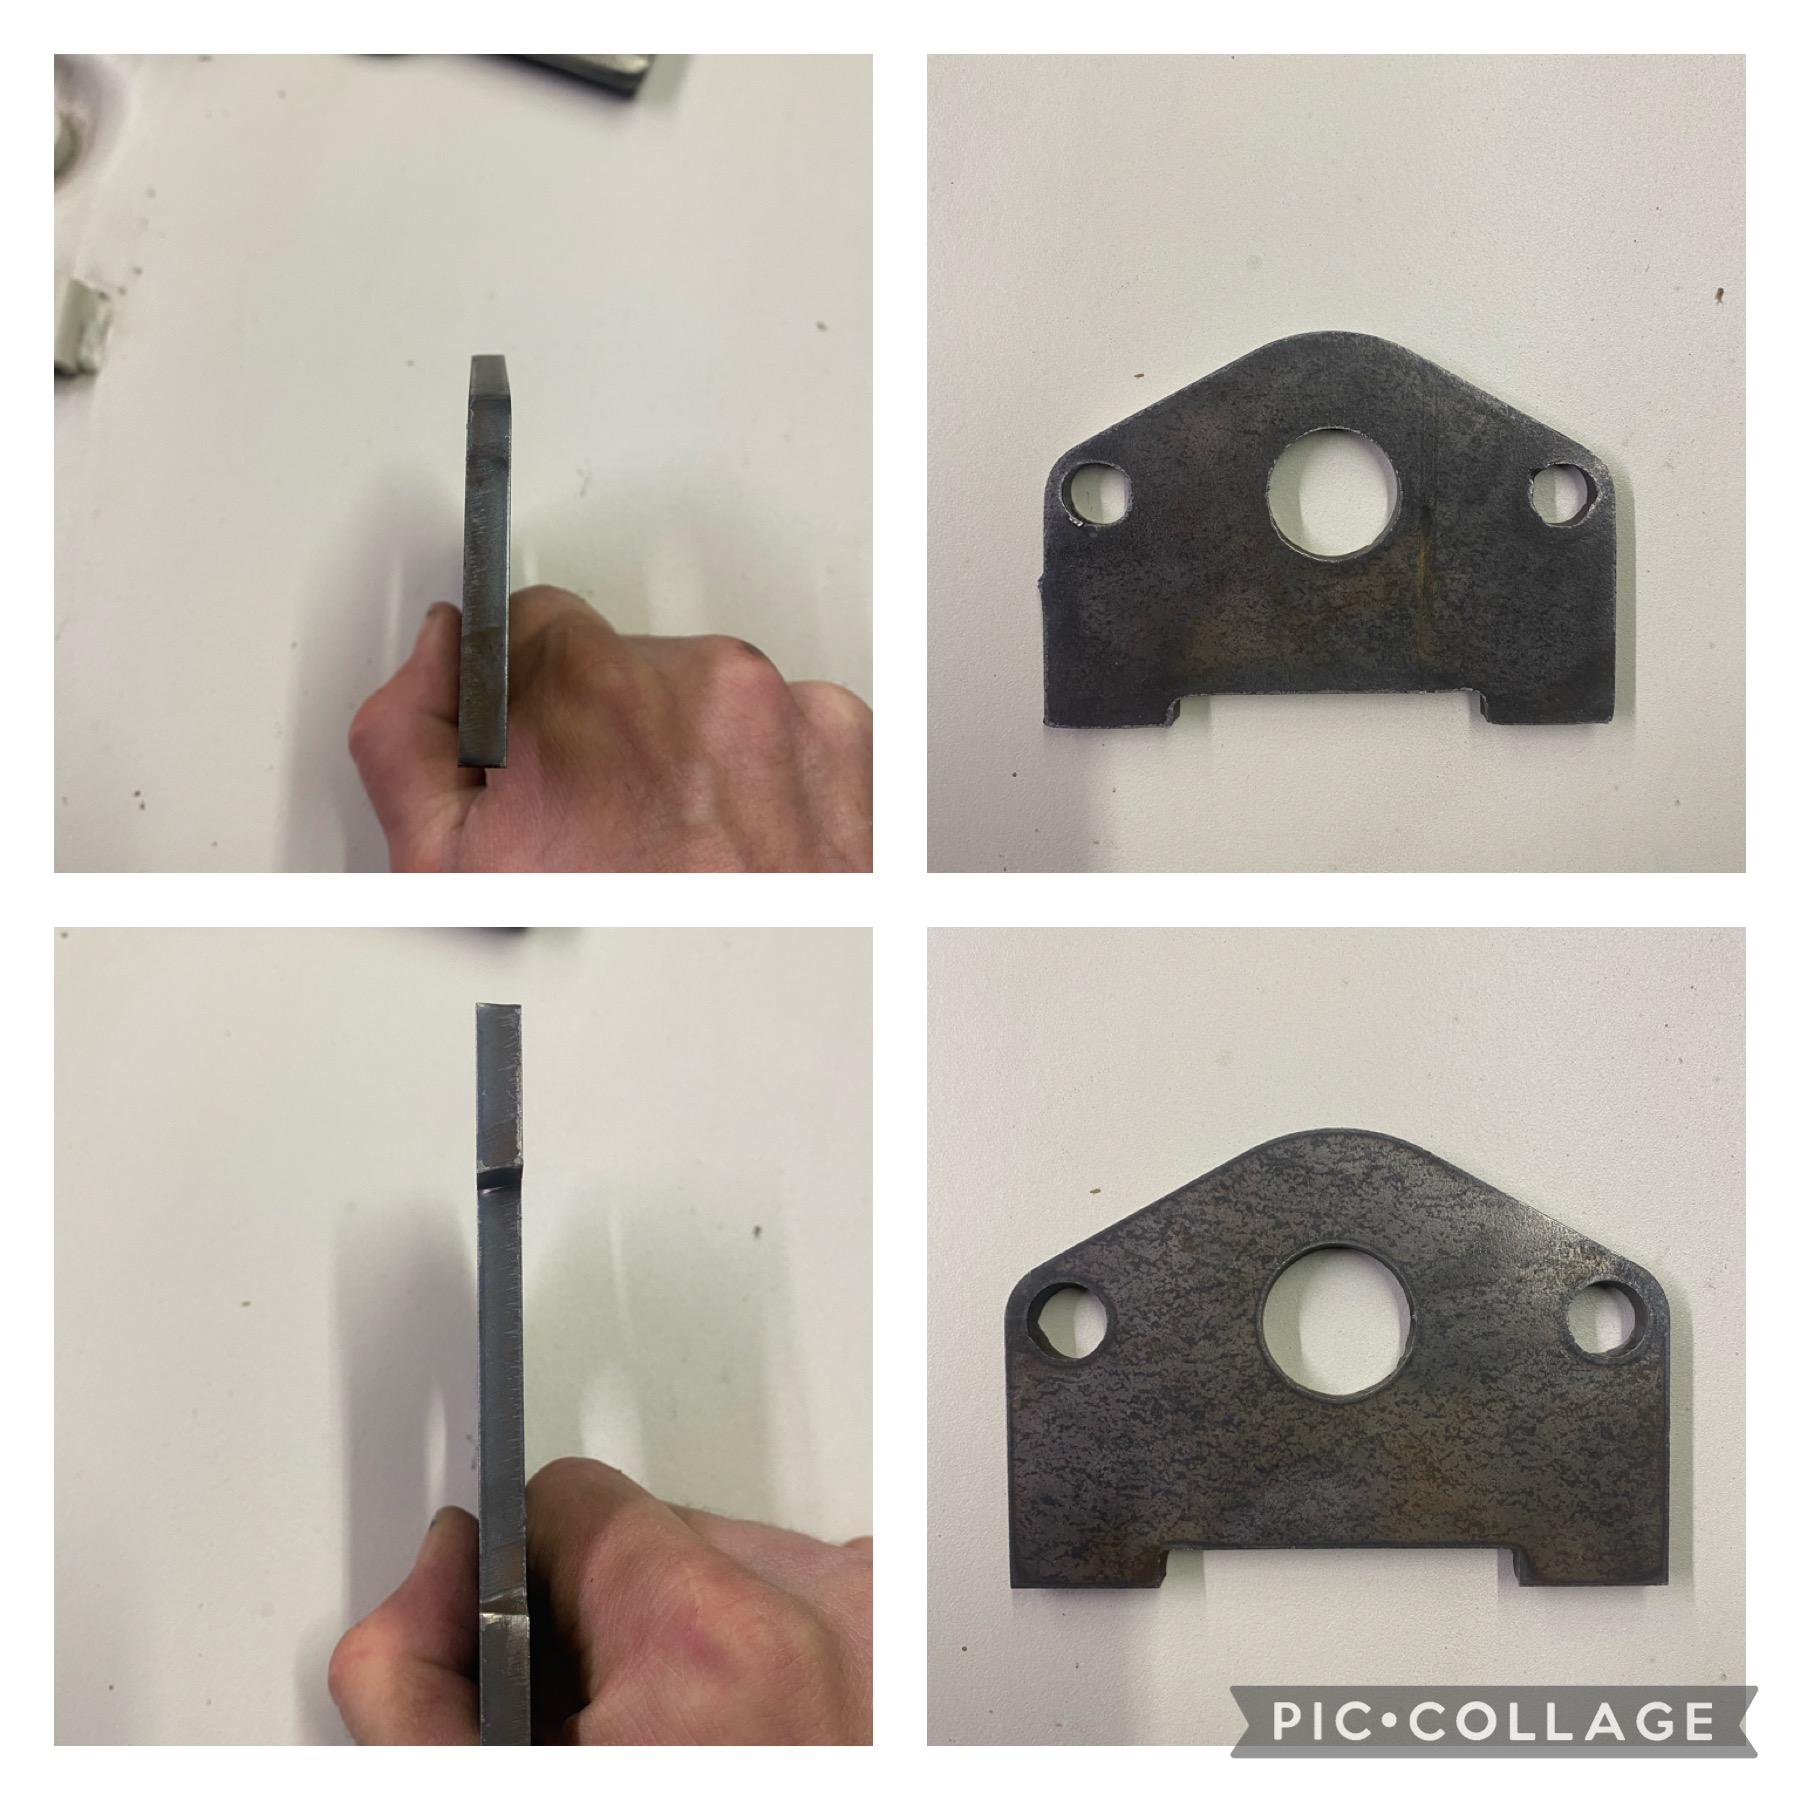
Spend the last couple days making some mods to the air supply system. I added a cooler and water trap between the compressor and tank and added a 3lb desiccant canister after the refrigerated dryer and before the motor guard. Made 4 cuts after that and heres a couple of them
3 Likes
Wow! Looks good. I noticed that sometimes the holes have a divet. Perhaps you are using 90 degree approach with the lead-in. You might try a lead-in radius of like 0.07 inches and a lead-in sweep angle of 170 degrees and see if it smooths that a bit. The lead in might be a bit slow and is also causing it to burn away more material. The large hole has a great shape.
I may be over thinking it but your smaller holes are probably incorporating “feed optimization” and the large hole is not. The slower speed with optimization is complicating the process to get the perfect hole.
But I would call it a success.
1 Like
Yes in this program I was running 45IPM with feed optimization set at 60% (28 IPM) .05 radius 90° lead in and .2 lead in distance. Kind of still trying to get the settings dialed in for holes.
Only thing I dont have is a real square inside corner on the backside of the work. The corner itself is tapered from top to the bottom diagonally. Not sure if I am being too picky or if that is something that is achievable
That is 1/4" metal so if there is even a slight tilt on the table, you will get a significant bevel. My water table is a bit off kilter and I was cutting 1/4 yesterday. Worse bevel I have ever seen but then I realized that is how it was sitting on the table. My bad.
You may be a bit picky but you should be. Strive for improvement. Nothing wrong with that. But take the “WIN” when you get it. I think that is why there are many who like the lighter gauge metals: Not only is it cheaper but you don’t get/notice the bevel as much, cuts fast and you get a lot more mileage out of the consumables.
Obviously, if you see the bevel always in the same location with all cuts, there could be something to do with the way the torch is being held: whether it is the z-axis or how the torch is seated in the bracket.
Speaking of being picky. I got this machine to make brackets and supports. My wife keeps wanting me to make jewelry with it. (I am exaggerating, but she expects it to look like something that was cut with laser).
2 Likes