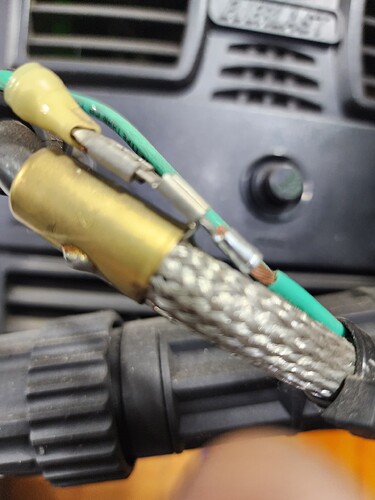
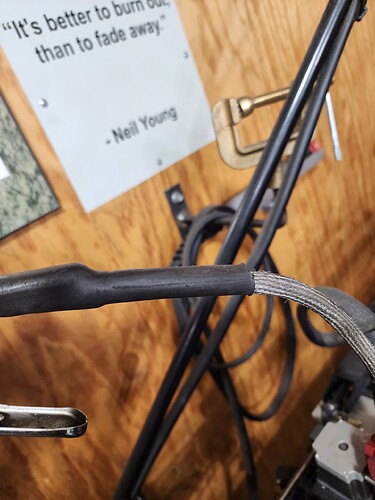
Made it up myself. Everything is available online. Copper buss bar was from McMaster Carr. Be glad to help you if thats what you like.
Again, if you don’t have a problem now or have someone tig welding at the same time your probably OK.
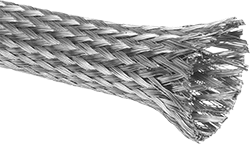
With out going way back, did you say you thought the SS braid on work cable would be the most beneficial?
I am not having any trouble but I thought I might add that.
Its either Ss or copper I’ll have to check.
It probably copper. I’ll look it up in little and send you a link.
McMaster Carr
5537K27
5349K45C
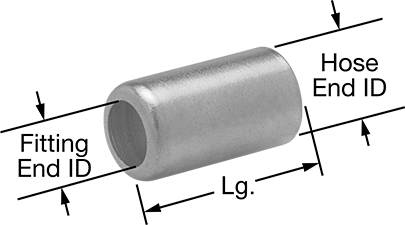
Solder brass caps onto copper braided tubing. You will need to ream out the end of collar to fit work cable. Also solder terminal end on plasma cutter end to run to copper buss bar.
Folks. Can I even diag anything from my previous cuts based on the fact that my Cut60 was defective and failed?
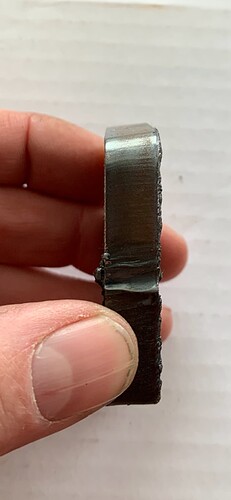
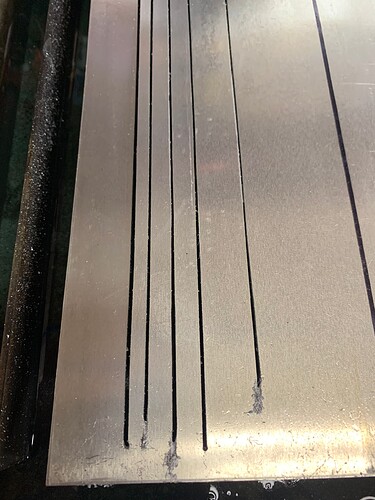
One thing that was consistent in all of the cuts from the most screwed up to the most dialed in is that I’ve been getting substantial taper on the Top (Y+) and Right (X+) sides of outside geometry cuts, and perfectly straight cuts on the Bottom (Y-) and Left (X-).
I’ve read every thread I could find on the subject of taper, and it seems that in every instance that the torch mounting was off, there was an opposite taper on the off-side, and in every instance that bad consumables were to blame, a consumable change fixed the problem.
I have changed consumables 4 times, and have not seen any difference in this taper or which side it occurred on. And in my most recent cuts (prior to machine failure), for the first time, I had the swirl ring installed correctly (it was backwards from Primeweld), and that made no difference, either.
The only thing that I can wrap my head around is that maybe the torch lead, which on the Primeweld machine torch is absurdly thick and heavy is influencing my torch angle in those two travel directions (the Langmuir mount is quite flexible) and not the others.
I realize that the correct approach would be to wait for my new machine to arrive and then reevaluate the situation, but, as I’m stuck here waiting (again), I can’t help but obsess about things a bit.
Also, can someone confirm that slowing complex geometry TO a factor of 60% and not BY a factor of 60% is the correct move:
40ipm x 60% = 24ipm vs 40ipm - 60% = 16ipm
Thank You!
The plasma arc comes out the tip in a slim football shape. If you can picture your torch height putting the wide part of the football in the middle of the steel. Try a higher cut height or a lower one depending on which way the taper is being cut. Also the larger the tip orfice the wider the profile. Hopefully that will help you.
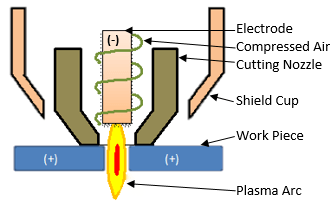
This is definitely possible, with it setup normally lower your torch to about cut height and then try wobbling (gently) the torch mount, it shouldn’t move, if it does move you may need to adjust your Z axis bearings
this comes from a hypertherm article
How can I cut better holes?
“* Slow down, especially if cutting holes smaller than 1” in diameter. The feed rate for holes under 1” should be 60% of the feed rate suggested in the manual for cutting that thickness at the power level.
"
60% of the feed rate so
is correct
here is a link to the quote about
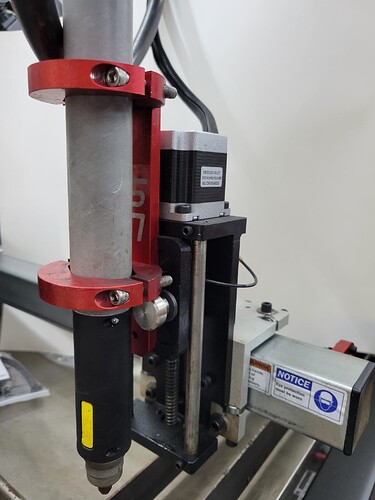
If I wiggle it with some force it definitely moves, but all the flex appears to be in the mount itself. The Langmuir mounting “bar” is actually a tiny bit sloppy in the Z-axis groove allowing some X axis deflection, and either it or the mounting strap seems to flex a bit allowing Y axis deflection. I have my torch mounted as per the recommendation of George and others, to keep the clamp off of the torch head, which definitely exacerbates the flexion.
(not my picture, but how I have my torch mounted)
With the torch mounted this way, a tiny bit of flex in the mounting translates into quite a bit at the nozzle, but I can’t perceive any flex while the machine is cutting, and the angle is substantial.
Regardless, I’m thinking the Primeweld machine torch needs a more substantial mounting, sort of like the piece @ds690 engineered; I just need to find somebody who can print one for me. Though I’m not sure that will solve this problem…but it would eliminate another variable.
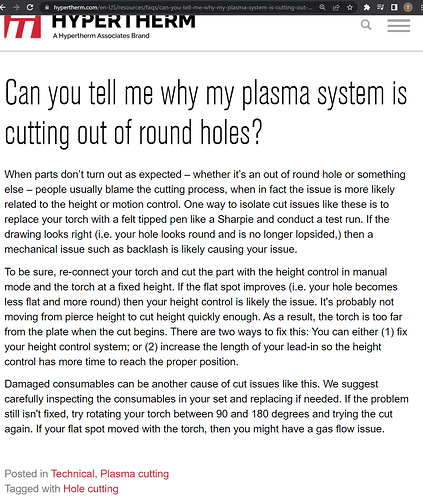
Here is another good article from Hypertherm on hole cutting
Can you tell me why my plasma system is cutting out of round holes?
INTERESTING bit about rotating the torch…
Interesting, indeed.
PM me your address. I’ll print one and send it to you
Thank you sir!
So…I’m just very confused…
I should probably start a new topic because so much has changed since my first post. I have my replacement Cut60 cutter up and running. I ran a pretty successful program last night on some 1/4” steel. The cut had some weird angle on some of the tighter inside geometry, but overall it was very clean. I spent the rest of the evening running test cuts on 1/4” to get a nominal voltage setting for future projects.
Today, I tried to do some test cuts on 14ga aluminum (0.064”), because that’s my next big project. I’m using the book settings for the Cut60 of 30A and 127ipm, but increasing the air pressure slightly to 60psi. I’m manually setting the Z-axis to 0.060” with the motor unplugged, and then cutting a 10” long straight line with a pierce delay of 0.8 seconds (because someone told me that’s the minimum you can do on the Cut 60).
The first cut was flawless producing a rock-steady 87 volts, a perfect pierce, and practically non-existent dross.
The next cut was also pretty nice, but voltage started off low at like 25v it didn’t really pierce all the way through for the first half inch or so.
On the next cut I bumped the pierce delay to a full second, and it still didn’t pierce the material for over a half an inch. Again, the voltage started off at like 25v and it was only at 50v halfway through the cut. It eventually got up to about 75v.
I know I’ve got a bit of warpage occurring, and with the z-axis off it’s not compensating, but I’m manually resetting the cut height at the start of each cut, so the fact that it won’t pierce the material seems very strange to me.
My consumables look brand new still.
Any thoughts?
PS-the 4th cut was run from the other side; it didn’t pierce either.
Addendum
After pacing around angrily for 20 minutes and then taking a bit to write this post, I went back and plugged the Z motor back in, did an IHS loop straight line cut with a 0.150” pierce height, and 87v nominal setting, and the line cut perfectly with a 0.8 second Pierce delay. I’m not sure if it’s pure luck, or the fact that I didn’t cut anything for half an hour or so. I just don’t know enough yet, I guess, to make these kind of judgement calls. ![]()
I would try slowly reducing that delay. I seriously doubt that the Cut60 needs that long of a delay. I use a .3 second delay on 14ga aluminum with my Everlast 52i. I’m running Firecontrol version 20.6.2, though. From what I’ve seen, the 21 series of Firecontrol is much more sensitive to arc voltage errors.
Whoever told me that 0.8 was the minimum said that it had something to do with a communication delay between the plasma cutter and Fire Control; went over my head. My very first cut was on some 22ga, and I had it set to a 1/2 second, and it didn’t complete a single pierce, but the rest of the program cut perfectly. Granted, I had a lot wrong with my early settings, but I just completed IHS tests on a variety of material, and I’m convinced I was actually pretty close on that first cut.
I use a Cut 60 and have regularly used pierce delay times less than .8 seconds
Huh. Interesting. I don’t really know what to make of that. I guess I’ll have to try going lower, but I’m getting inconsistent pierces at a higher setting, so…I don’t know.
If pierce delay time is to short it will cause misfires. So a .5 sec delay should work fine. This has nothing to do with piercing the metal. This is the time it takes from the time the single from the controller takes till the plasma cutter fires the pilot arc. If its not piercing the metal that is in the settings torch height is to high.
Torch height in this case was set manually with a feeler gauge (0.060”) and an allen wrench right before starting the cut. I’m watching the screen, because I’m trying to see the voltage readout, but, the arc sounds “lazy” compared to how it normally fires, and it takes a couple seconds to build up to full cutting voltage. It’s really odd, @mechanic416.
Voltage drop ?
