Hello,
In addition to the steps below, I have installed a brand new circuit board and wiring harness.
Here is how the testing went.
1: PrimeWeld 60
2: Set on 2T
3: The torch did fire.
4: Skip
5: Plugged in correctly and soldered
6: Relay Click’s
7: LED light’s up when it would be cutting.
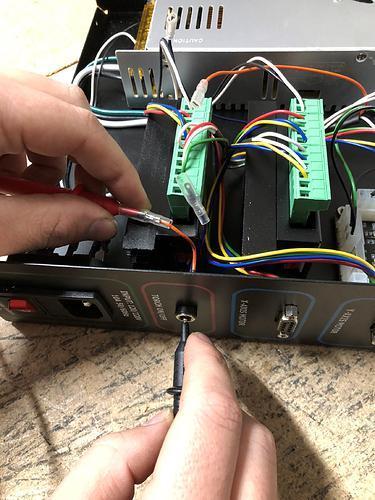
8: I have NO continuity between the pin and the barrel when a Manual Torch Fire is initiated. (However, I did have continuity when I ran the cut in regular mode as if it were normally cutting)
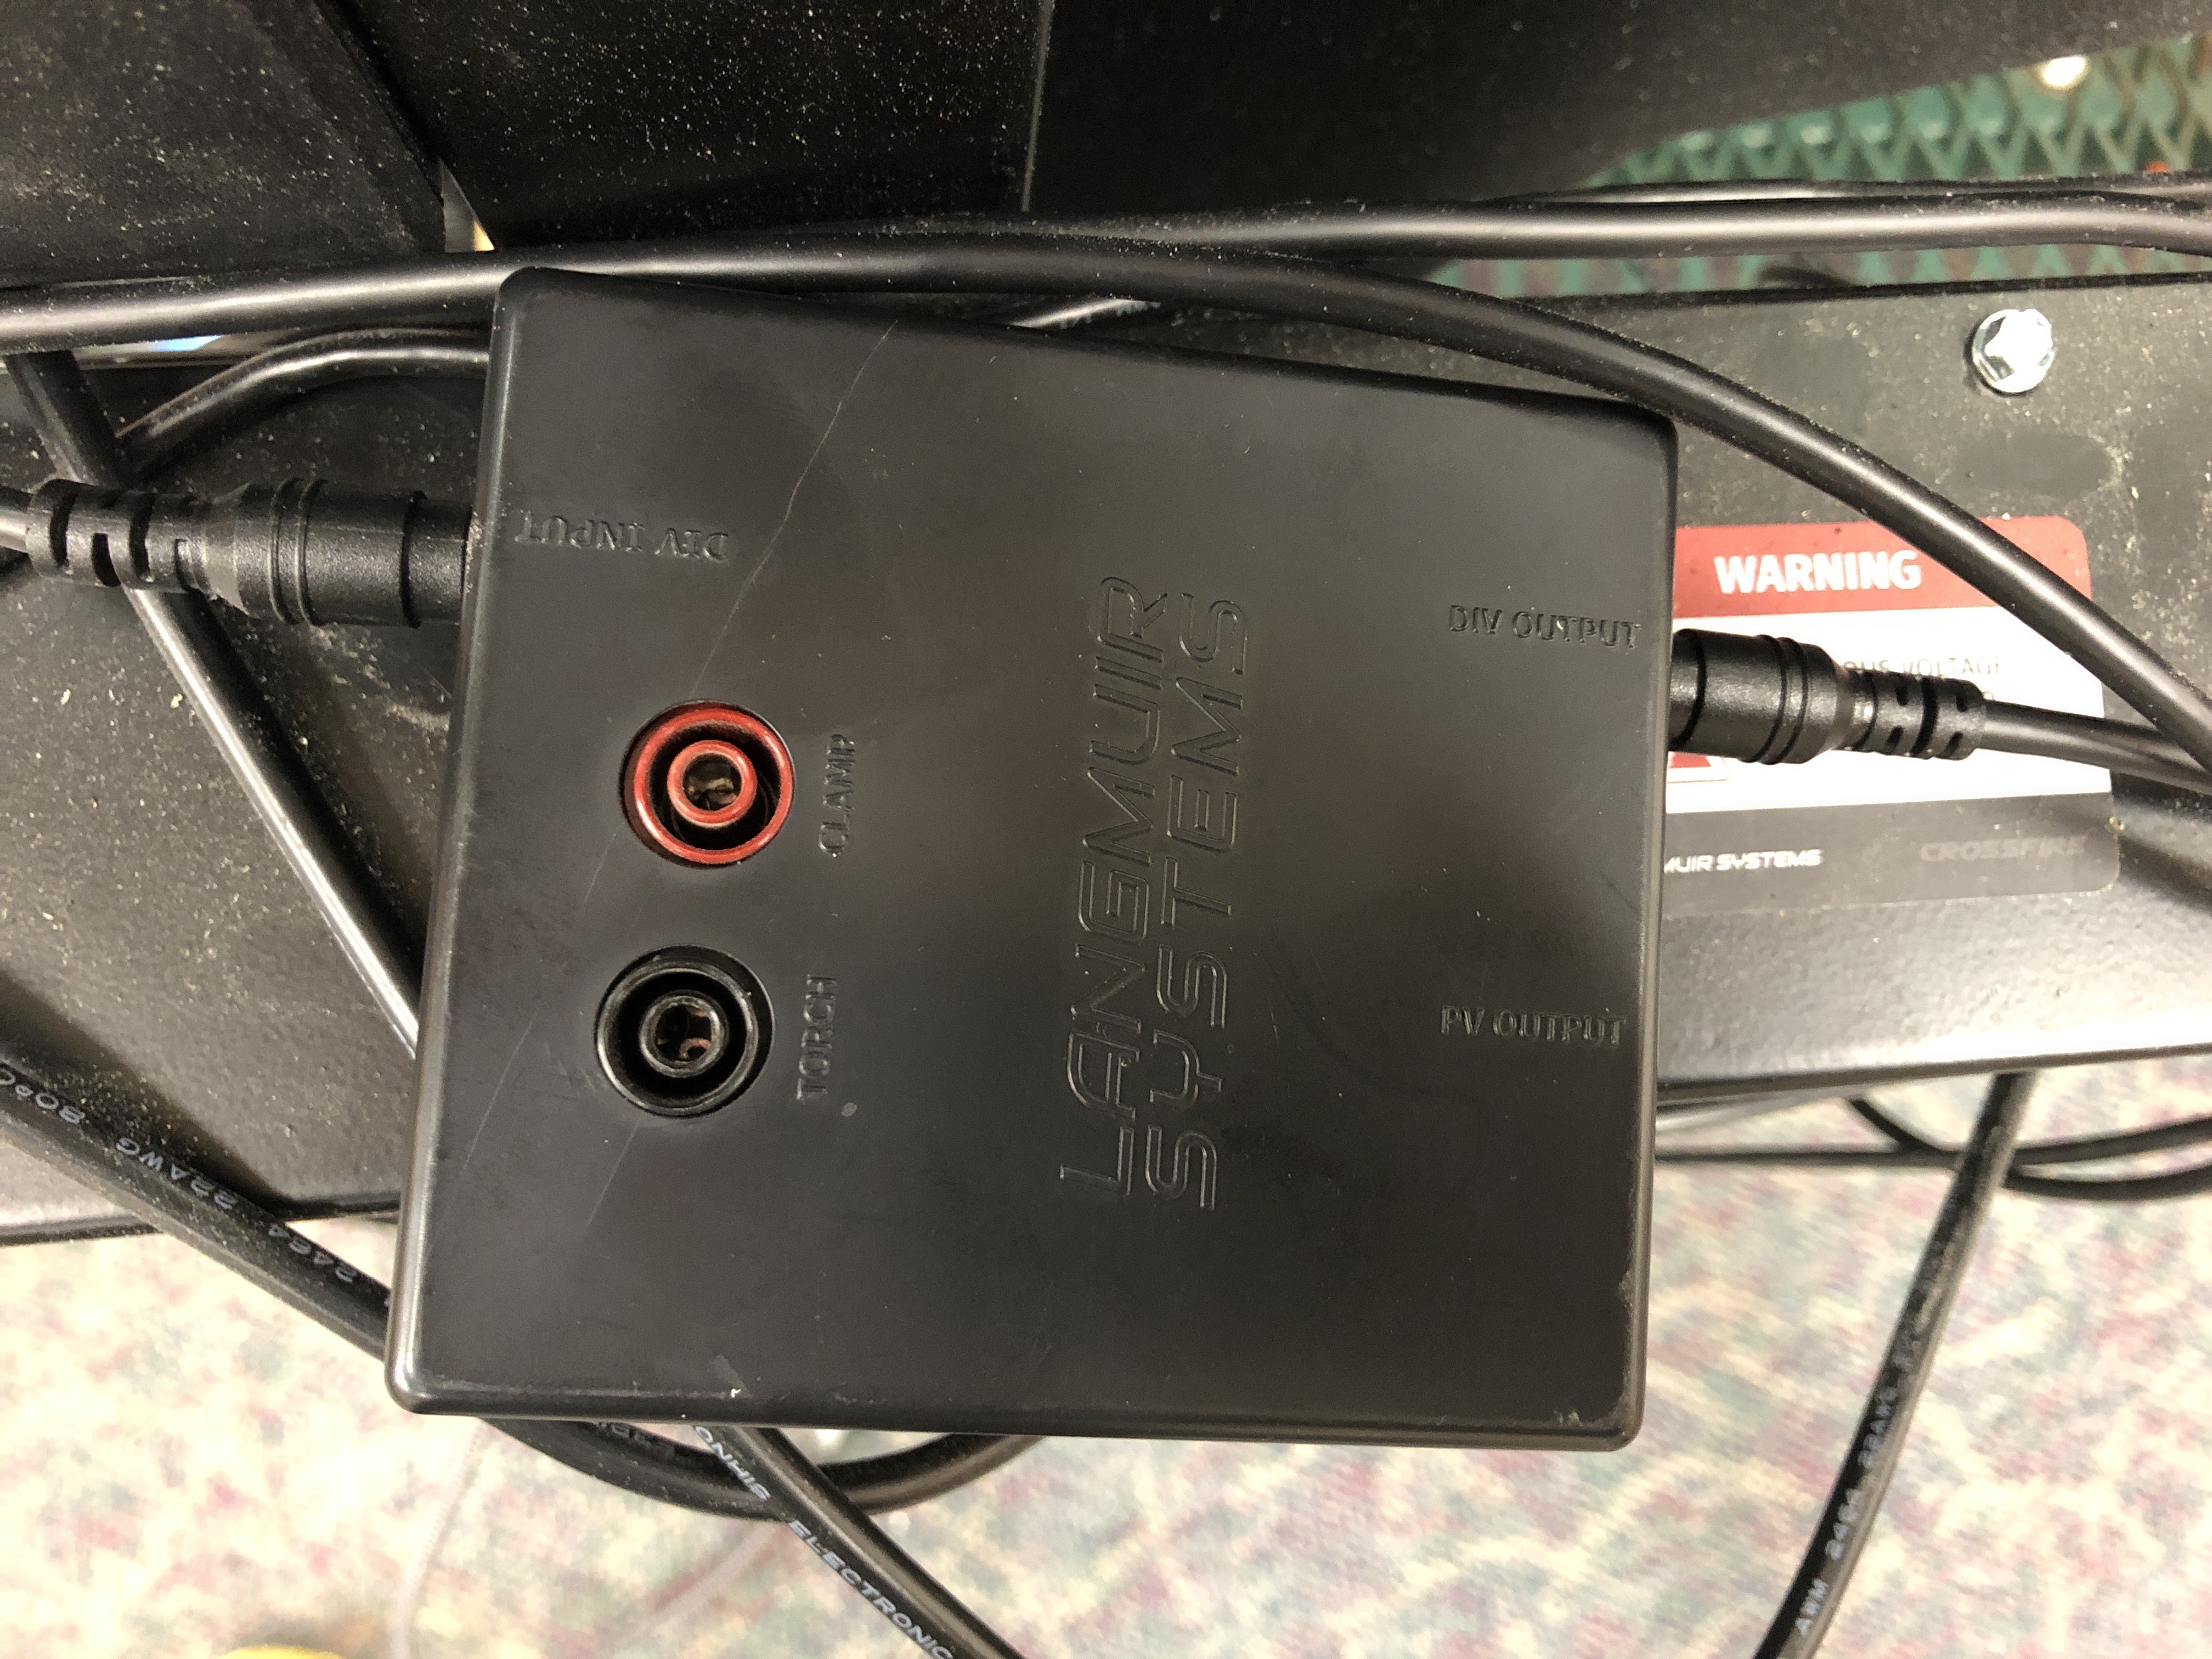
9: I have continuity between the orange blade to the outside barrel.
I have continuity between the purple blade to the inside pin.
Please let me know what you think.
Thanks
PS I am emailing from a different email. Please continue to respond to : robert.cooper@airgas.com or your welcome to call me.
Bob
918-710-1764
On 01/23/2024 8:43 PM EST COOPER, Robert robert.cooper@airgas.com wrote:
Bob Cooper
---------- Forwarded message ---------
From: Langmuir Systems <support@langmuirsystems.com>
Date: Tue, Jan 23, 2024 at 1:56 PM
Subject: [Langmuir Systems] Re: CrossFire PRO - Tech Support
To: Bob Cooper <robert.cooper@airgas.com>##- Please type your reply above this line -##
Your request (119659) has been updated. To add additional comments, reply to this email.
Langmuir Aksel (Langmuir Systems)
Jan 23, 2024, 11:56 PST
Hi Bob,
Thank you for letting me know which plasma cutter model you are using with the CrossFire PRO. Did you have a chance to check the other troubleshooting steps 2-9? (Step 4 does not apply since you are not using the Razorweld 45 plasma cutter, you can skip that step.)
Step 2. The first thing we will check is the 2T/4T switch. If your plasma cutter possesses this feature, make sure that it is set into 2T mode. Click here for more information about 2T/4T mode, and for the 2T/4T switch location on the Razorweld 45.
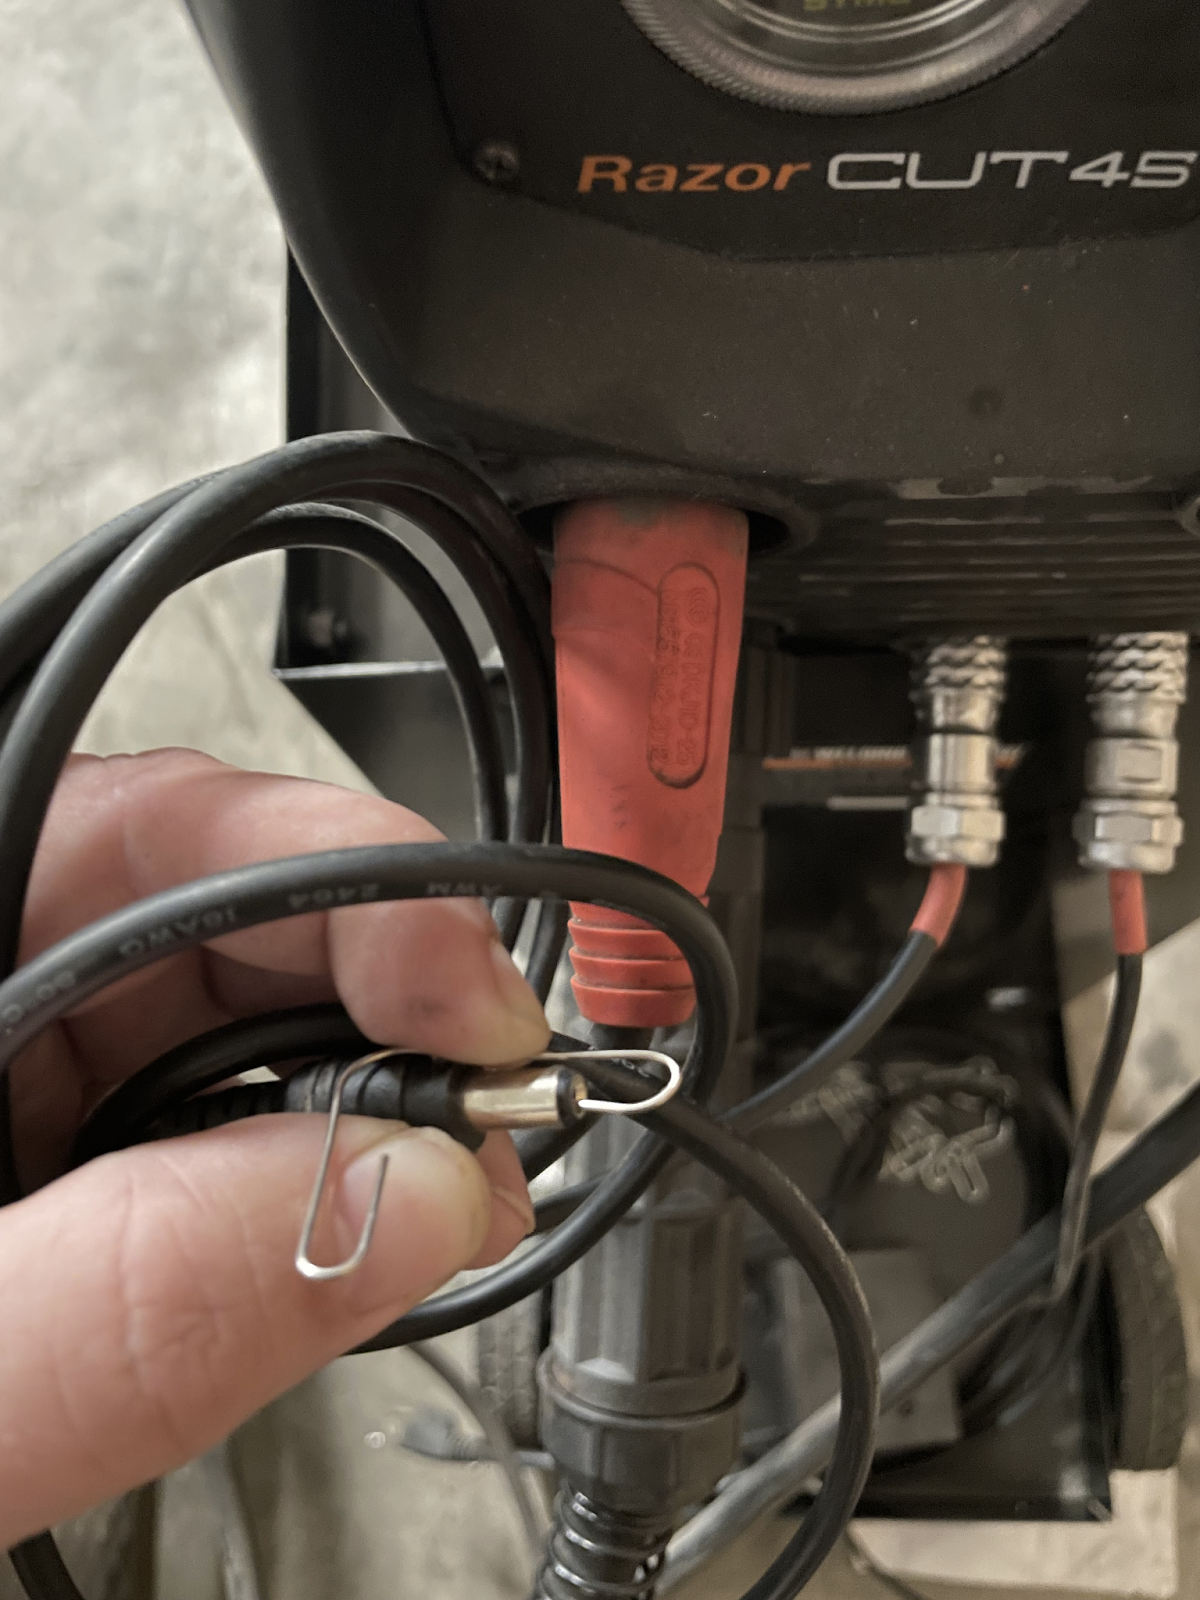
Step 3. The torch firing cable that connects your plasma cutter to the CNC electronics enclosure might be faulty. Will the torch fire if you short the torch firing cable? To test this, you will need the plasma cutter powered on and set in a safe position to fire the torch, and the torch firing cable unplugged from the “torch on/off” port of the control box. Once your plasma cutter is powered on and in a safe firing position, use a paperclip (or other thin piece of conductive metal) to bridge the torch firing cable’s inner pin to the outer barrel. Doing so should force the torch to fire.
Step 4. If you’re using a plug-and-play Razorweld 45 purchased from Langmuir Systems, perform Step 3 with the torch firing cable plugged into both ports on the front of the Razorweld 45 to rule out an issue of the plug-and-play ports being swapped by the manufacturer.
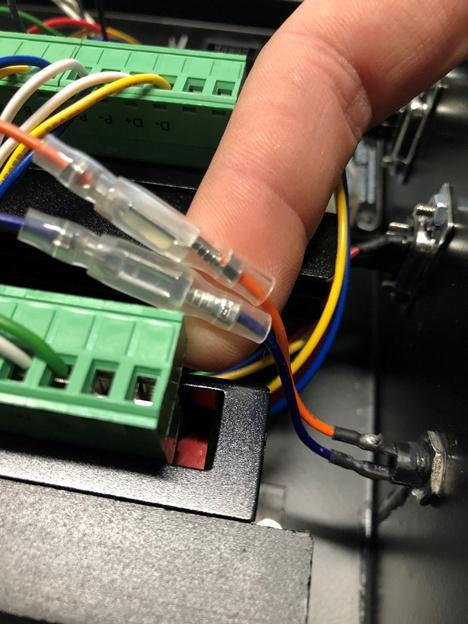
Step 5. The torch firing port may have become disconnected from the motion control board. Inspect the blade connectors (orange and purple wires) in the clear plastic sheathing and make sure that they are plugged in correctly. Also inspect the backside of the torch inlet port and be sure that the connections are soldered on securely.
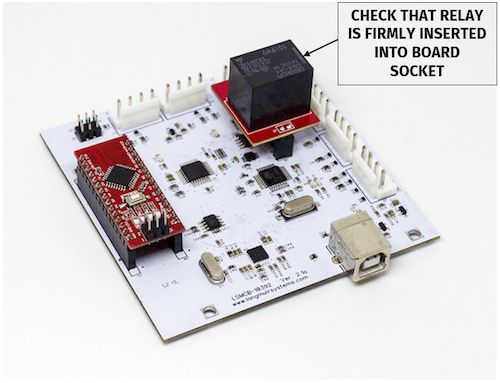
Step 6. The torch firing relay might be faulty or loose. Ensure that the relay is firmly seated into its socket of the motions control board. The relay makes an audible “click” noise when switched from the open position (torch not firing) to the closed position (torch firing) and vice versa. If you power off your plasma cutter and initiate a manual torch fire in FireControl, can you hear the relay “click”?
Step 7. While checking the torch firing relay, also look out for a red status LED near the relay. The LED should illuminate when the torch is supposed to be firing, and should not illuminate when the torch is not supposed to be firing.
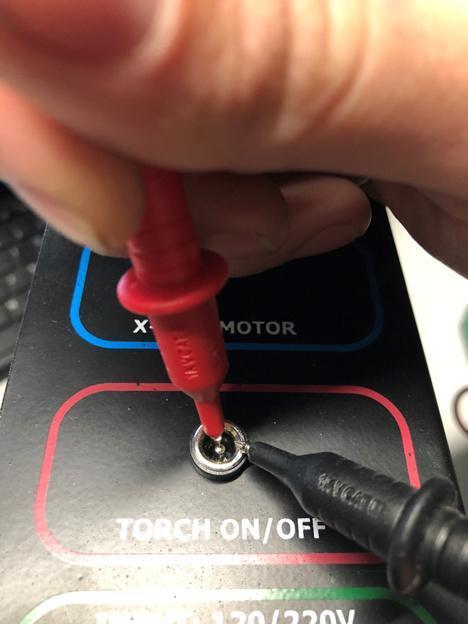
Step 8. We’ll also check that the relay is properly passing the signal along to the port. With your multi-meter in continuity mode, place one probe on the outside of the female barrel connector and one probe on the pin inside the barrel connector at the Torch On/Off Port. In FireControl, click Manual Torch Fire. You should have continuity between these two pins when a Manual Torch Fire is initiated. Be sure to click Manual Torch Fire again before plugging your torch back in to disarm it.
Step 9. The torch firing port might be faulty. Next we are going to check for continuity through the torch inlet female barrel connector on the electronics enclosure. Unplug the orange and purple blade connectors from the main wiring harness. With your multi-meter in continuity mode, place one probe on the orange blade connector and touch the other probe to either the outside barrel or the inside pin. You should have continuity to one of these. Next, probe the purple blade connector and probe the barrel connector again (if the orange had continuity to the inside pin, then probe the outside of the barrel connector and vice versa). If you are not getting continuity through both of these blade connectors to the port, you will need to have your inlet port replaced.
Jan 23, 2024, 10:44 PST
Bob Cooper
Jan 22, 2024, 20:37 PST
Primeweld 60
Bob Cooper
Jan 22, 2024, 20:01 PST
Hi Bob,
For now, keep THC disabled while we troubleshoot what is causing the torch not to fire. Please follow the torch firing troubleshooting process below and let me know the result of each step:
Step 1. For starters, which plasma cutter model are you using with your CrossFire PRO machine?
Step 2. The first thing we will check is the 2T/4T switch. If your plasma cutter possesses this feature, make sure that it is set into 2T mode. Click here for more information about 2T/4T mode, and for the 2T/4T switch location on the Razorweld 45.
Step 3. The torch firing cable that connects your plasma cutter to the CNC electronics enclosure might be faulty. Will the torch fire if you short the torch firing cable? To test this, you will need the plasma cutter powered on and set in a safe position to fire the torch, and the torch firing cable unplugged from the “torch on/off” port of the control box. Once your plasma cutter is powered on and in a safe firing position, use a paperclip (or other thin piece of conductive metal) to bridge the torch firing cable’s inner pin to the outer barrel. Doing so should force the torch to fire.
Step 4. If you’re using a plug-and-play Razorweld 45 purchased from Langmuir Systems, perform Step 3 with the torch firing cable plugged into both ports on the front of the Razorweld 45 to rule out an issue of the plug-and-play ports being swapped by the manufacturer.
Step 5. The torch firing port may have become disconnected from the motion control board. Inspect the blade connectors (orange and purple wires) in the clear plastic sheathing and make sure that they are plugged in correctly. Also inspect the backside of the torch inlet port and be sure that the connections are soldered on securely.
Step 6. The torch firing relay might be faulty or loose. Ensure that the relay is firmly seated into its socket of the motions control board. The relay makes an audible “click” noise when switched from the open position (torch not firing) to the closed position (torch firing) and vice versa. If you power off your plasma cutter and initiate a manual torch fire in FireControl, can you hear the relay “click”?
Step 7. While checking the torch firing relay, also look out for a red status LED near the relay. The LED should illuminate when the torch is supposed to be firing, and should not illuminate when the torch is not supposed to be firing.
Step 8. We’ll also check that the relay is properly passing the signal along to the port. With your multi-meter in continuity mode, place one probe on the outside of the female barrel connector and one probe on the pin inside the barrel connector at the Torch On/Off Port. In FireControl, click Manual Torch Fire. You should have continuity between these two pins when a Manual Torch Fire is initiated. Be sure to click Manual Torch Fire again before plugging your torch back in to disarm it.
Step 9. The torch firing port might be faulty. Next we are going to check for continuity through the torch inlet female barrel connector on the electronics enclosure. Unplug the orange and purple blade connectors from the main wiring harness. With your multi-meter in continuity mode, place one probe on the orange blade connector and touch the other probe to either the outside barrel or the inside pin. You should have continuity to one of these. Next, probe the purple blade connector and probe the barrel connector again (if the orange had continuity to the inside pin, then probe the outside of the barrel connector and vice versa). If you are not getting continuity through both of these blade connectors to the port, you will need to have your inlet port replaced.
Jan 22, 2024, 19:30 PST
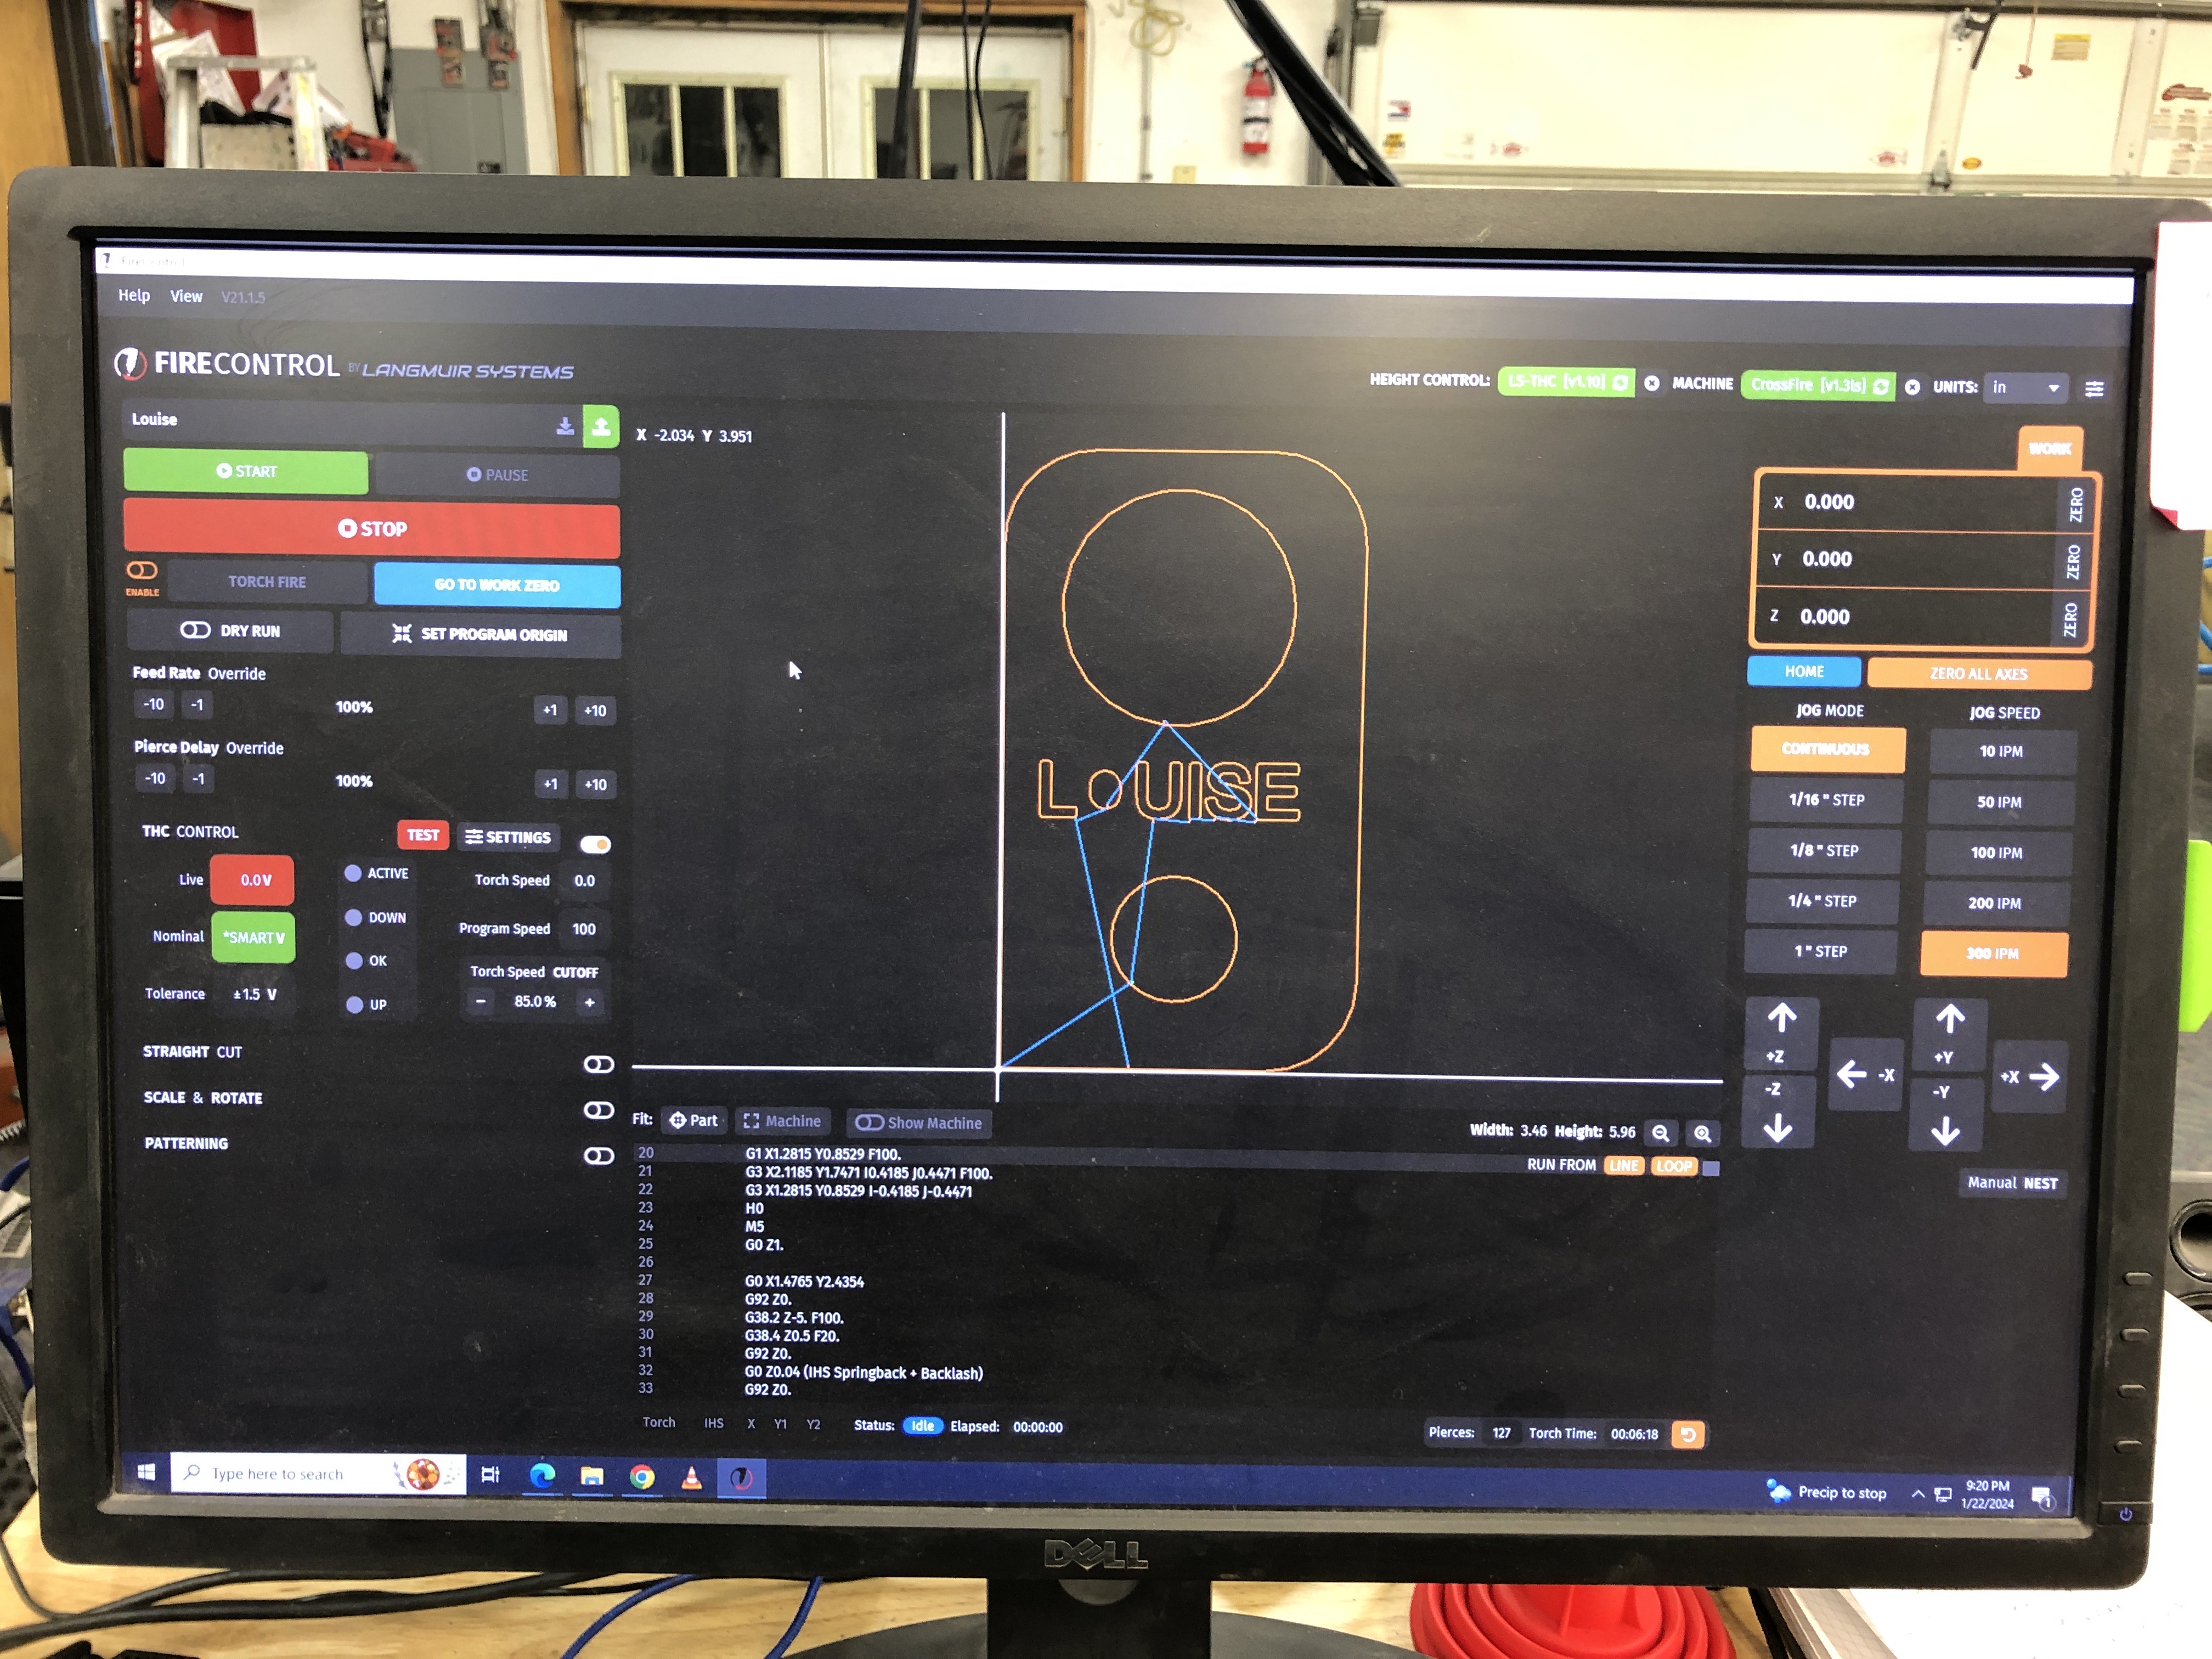
Everything appears to be hooked up properly. About a week ago I cut this very image on the screen with no problem. Now all of a sudden it will not fire off automatically. For some reason when I go through the test procedure and it gets to the step 4 and is supposed to fire it just goes to the 5th step and tells me I did not punch the button. BTW the voltage is divided. I think I answered this wrong on the little survey.
Sorry, getting really frustrated.
Bob Cooper
On Mon, Jan 22, 2024 at 7:49 PM COOPER, Robert <robert.cooper@airgas.com> wrote:
Hello,
I disabled the THC button but the torch still does not fire. It runs the path but does not fire. I can make the torch fire by squeezing the trigger.