Langmuir just sent me a die survey to complete so they know what will be going on with my press. I signed up for all the dies in 16". The cost of each one was lower than I expected, but it still will shock some.
DIES PDF.pdf (205.4 KB)
PUNCHES PDF.pdf (151.6 KB)
4 Likes
same, price isnt bad. at the same time, i own the mr1, would be neat to make some lol
1 Like
Yup, punch and die survey is here, now what to get?
Am I correct that the press comes with no punches or dies? In Langmuir’s videos it looks like they are using a full width four way die? If so, how is it fixed to the frame and can we get it full width?
I’ll be spending the next week trying to pick out a range of dies that can bend the stuff in my head, without breaking the bank.
Looks like I’ll be going back to the finance committee for more funding… again.
I like the price but hope they eventually come out with standard 85° dies. The 4 way will work for now. My opinion is get the 4 way and the smallest acute die along with maybe the 1" acute. As for the tops get the gooseneck and the acute goose full lengths plus one 8" of each. That way you can cut them to make custom sizes to fit between your bends. Our Wila die sets at work standard lengths are 20", 8",4",2",1½",1¼",and ¾".with that combination you can make almost every inside bend within a ¼". I’m only going to get two of the 16" v punches I’ll keep on full size and cut the other one as needed. Reason being is you can bend everything with the gooseneck but I’d use this for heavy plate.
2 Likes
I’m going to get all of them and be done with it.
Take a look at this place for tooling ideas. https://midwestpressbrake.com/
1 Like
Ok so you guys may not like this!
I need to be pointed in a direction to help me learn the basics on punch and die selection.
I have no experience on a press brake so feel free to make fun of me! ![]()
With that said I definitely won’t be doing any complicated bends obviously.
But would like to have more than the bare minimum
1 Like
FYI, anyone with a plasma table could cut and weld their own tooling for bending thick parts. Having perfectly smooth punches and dies matters less once you get to bending 1/4"+ thick material. You can cut and weld 1/4" or 1/2" plate into many of the punch segments you would need.
Check out the Swag Offroad brake for the 20T HF press, and their tooling if you aren’t sure what I’m talking about.
3 Likes
Ok here is what I found so far if anyone else is looking
press-brake-capacities-brochure.pdf (4.1 MB)
(826) CI Press Brake Operator Training - YouTube
3 Likes
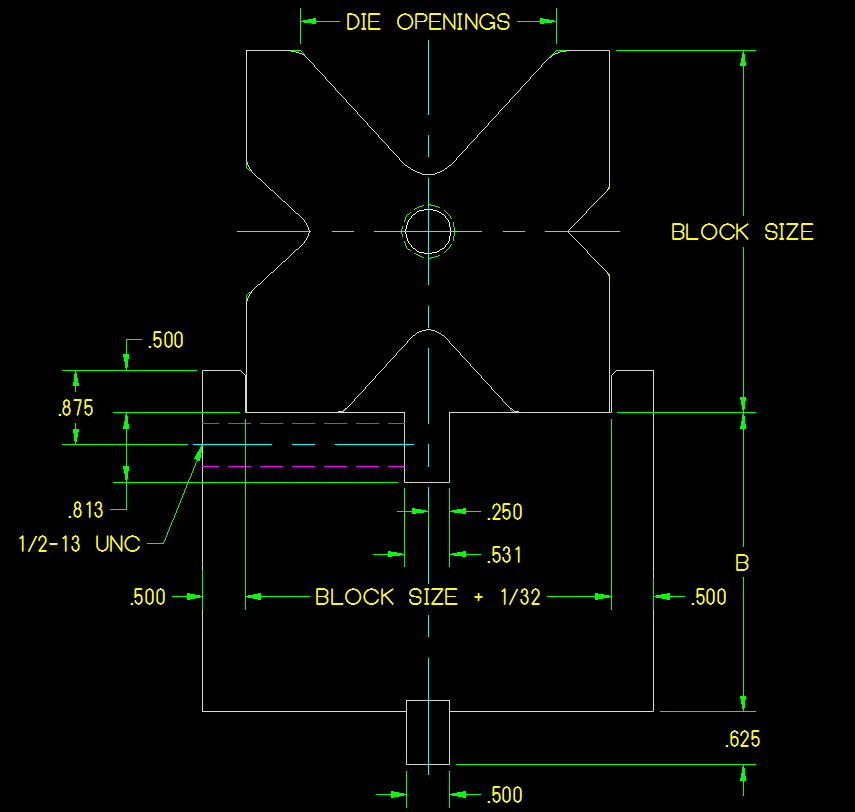
I haven’t received the tooling information yet so I want to thank BigDaddy for posting the PDF’s. I have done some preliminary CAD work based on the advertised 9” open height. My concern is that the bed comes with a block permanently welded to it with the slot for installing the bottom dies. That slot is commonly in the top of the bed and will have set screws on both its front and rear faces so a riser block of the required height for the tools to be used can be adjusted to align with the center line of the ram. The block that is shown in all of the pictures and videos eats up much of the open height limiting the height of punches and dies that one can use. It also makes poor use of the available 4 inches of stroke. Keep in mind that when setting up press brake tooling, the first job is to install the punch tooling in the ram. Then a riser block is fitted into the bed and the dies are adjusted to the punch center line using the opposing set screws in the bed. Once that has been done, the punches and dies can be exchanged without further adjustments. That is why the ram always has opposing set screws and the riser Bloch has them only on their face. I hope this makes sense.
4 Likes
My mistake. The last sentence should have said “That is why the BED always has opposing set screws and the riser block has them only on its front face”. My apologies.
2 Likes
Knick,
Two questions that need to be asked before giving a meaningful answer.
- What kind of bends will you be working with?
- What is your range in material thickness?
Tooling can get expensive really quick. I’m opting for the entire package LS is offering because I can use all of them with my designs immediately and lost time is money.
That being said, their current offering, to buy everything, will set you back $3,637.70 before tax and shipping.
If I were you, I would think about what you will primarily be using the press for immediately and make my initial tooling decisions based on that to get started.
Once you get familiar with the machine and your skillset progresses, your initial question will answer itself.
An option you can play with is 3D printing your dies. 3D printers are a dime a dozen and it really is a viable solution to thinner material bends.
Here’s some videos.


Here’s a video of different types of tooling that you may not even be aware of.

5 Likes
Thank you, I have a loot to research!
Making a 3D printed embossing die set to press my logo in thin steel has been on my to-do list for a while. It’s amazing what some guys have bent with 3D printed parts.
2 Likes
Wow! Thanks for the 3D printing info, I have a few printers so this might be a great option for some custom stuff.
I’ll mainly be bending 1/16-1/8” aluminum to get my feet wet. Mainly making boxes like this…. I have been outsourcing them and want to bring in house. So if anyone can recommend which tooling to begin with, I’d be super appreciative. I’ll wind up getting all the stuff, but can’t afford it all in one shot.

1 Like
This is an excellent read.
I always try to make sure my tooling covers 95% of the material I’m bending at a minimum.
By the looks of the picture you posted, a 90 Degree Box Forming die should be the ticket.
https://midwestpressbrake.com/products-2/90-degree-box-forming/
Just make sure your flange clears the die.

3 Likes
Ive asked about how the 4 way die is secured multiple times and havent gotten a respone yet.
I have been wondering that question myself.
Reviewing the pictures the bottom tool support has the .5 American Style Tool holder slot.
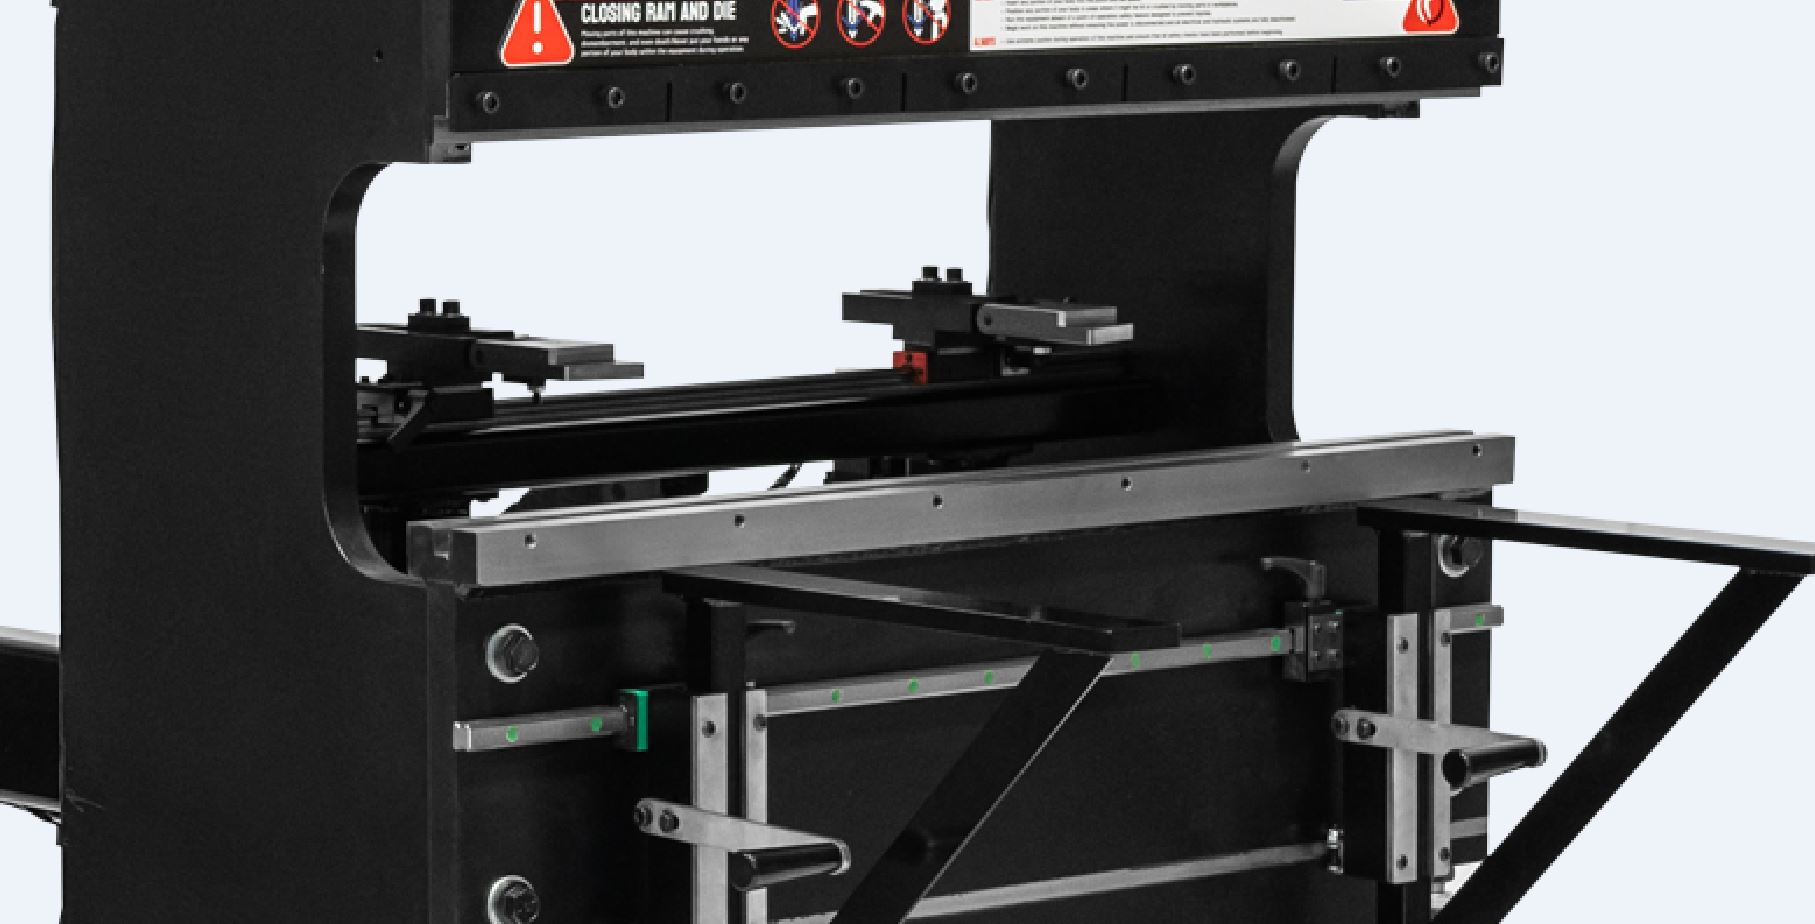
The machine should be using a 4 way die riser block for accuracy.
As you can see in the promo pics, the 4 way block looks like its just sitting on the rail.
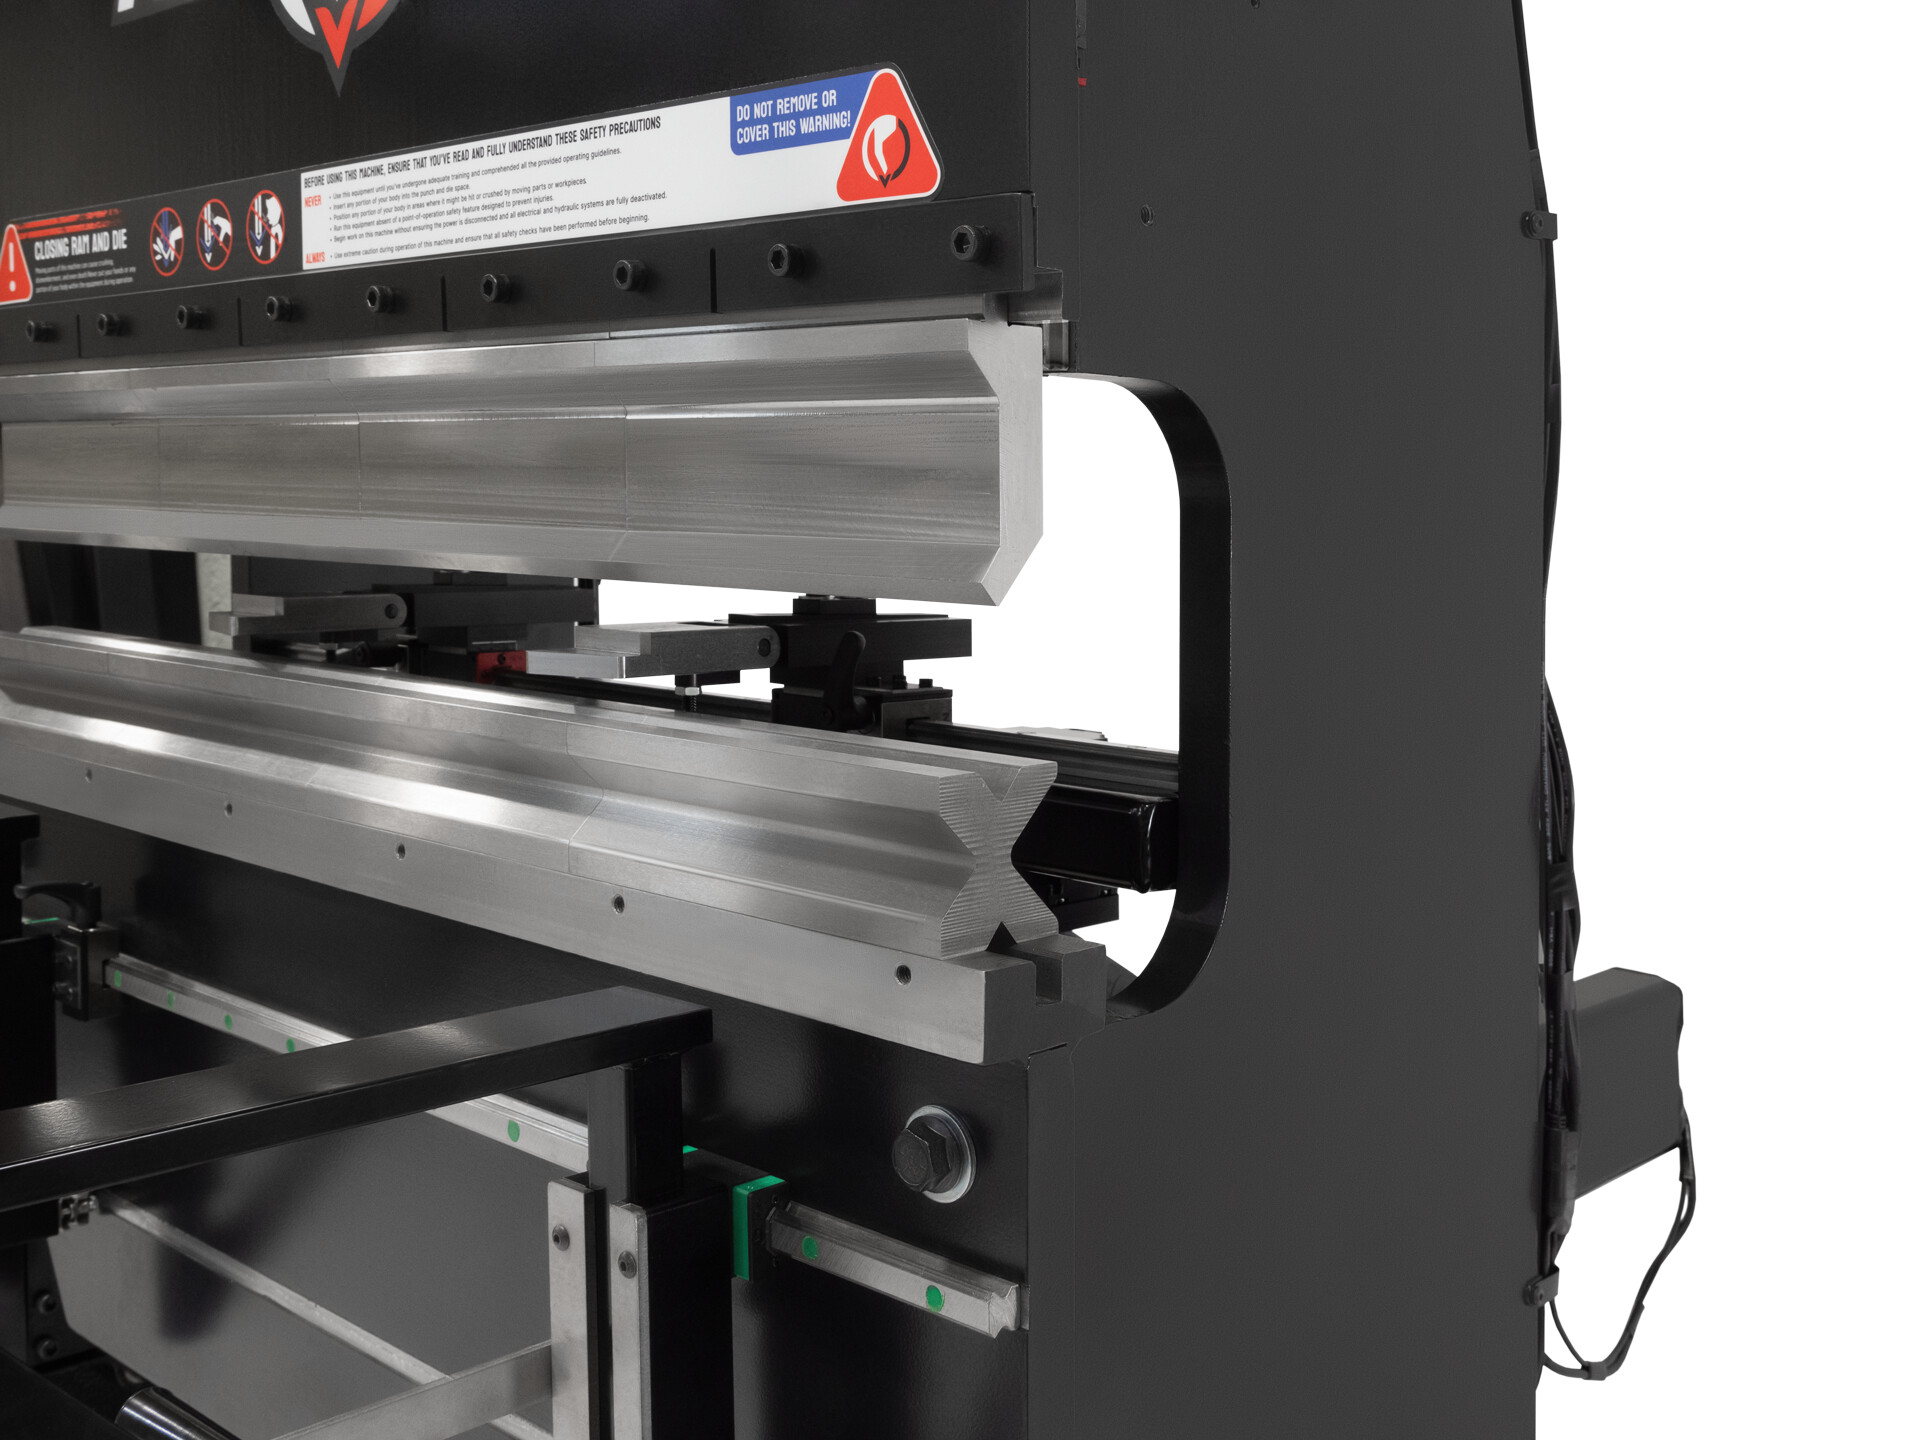
This got me thinking they may end up doing something like this to retain working room…

Right now its a mystery. I know I will work it out one way or another.
It they go with tabs I will end up making my own low profile mount based off this design. Mine will not be as thick or tall.
4 Likes
I asked about full width dies and punches. Doesn’t make sense not to offer them. Still haven’t got a reply .
Now I see in the pic above they put two together.
That’s not too bad for price. I just bought 4x 3’ sections of a very similar sized 4 way die at an auction for $620. Used mint condition.
Another die option to keep in mind is polyurethane dies from eBay. I wanna say a 4’ section is about $150 bucks. They make them up to 1.5". I have a 1" and a 5/8" poly die. I love them. They don’t make any marks on the metal, hold up pretty well, and you can cut and grind them any way you want. They sell blanks too if you had a CNC router or mill and wanted to machine your own. I’ve bent many many parts of 10g on my 1" die and it shows a little wear but still works great. I’ll just buy another when it’s dead.
4 Likes