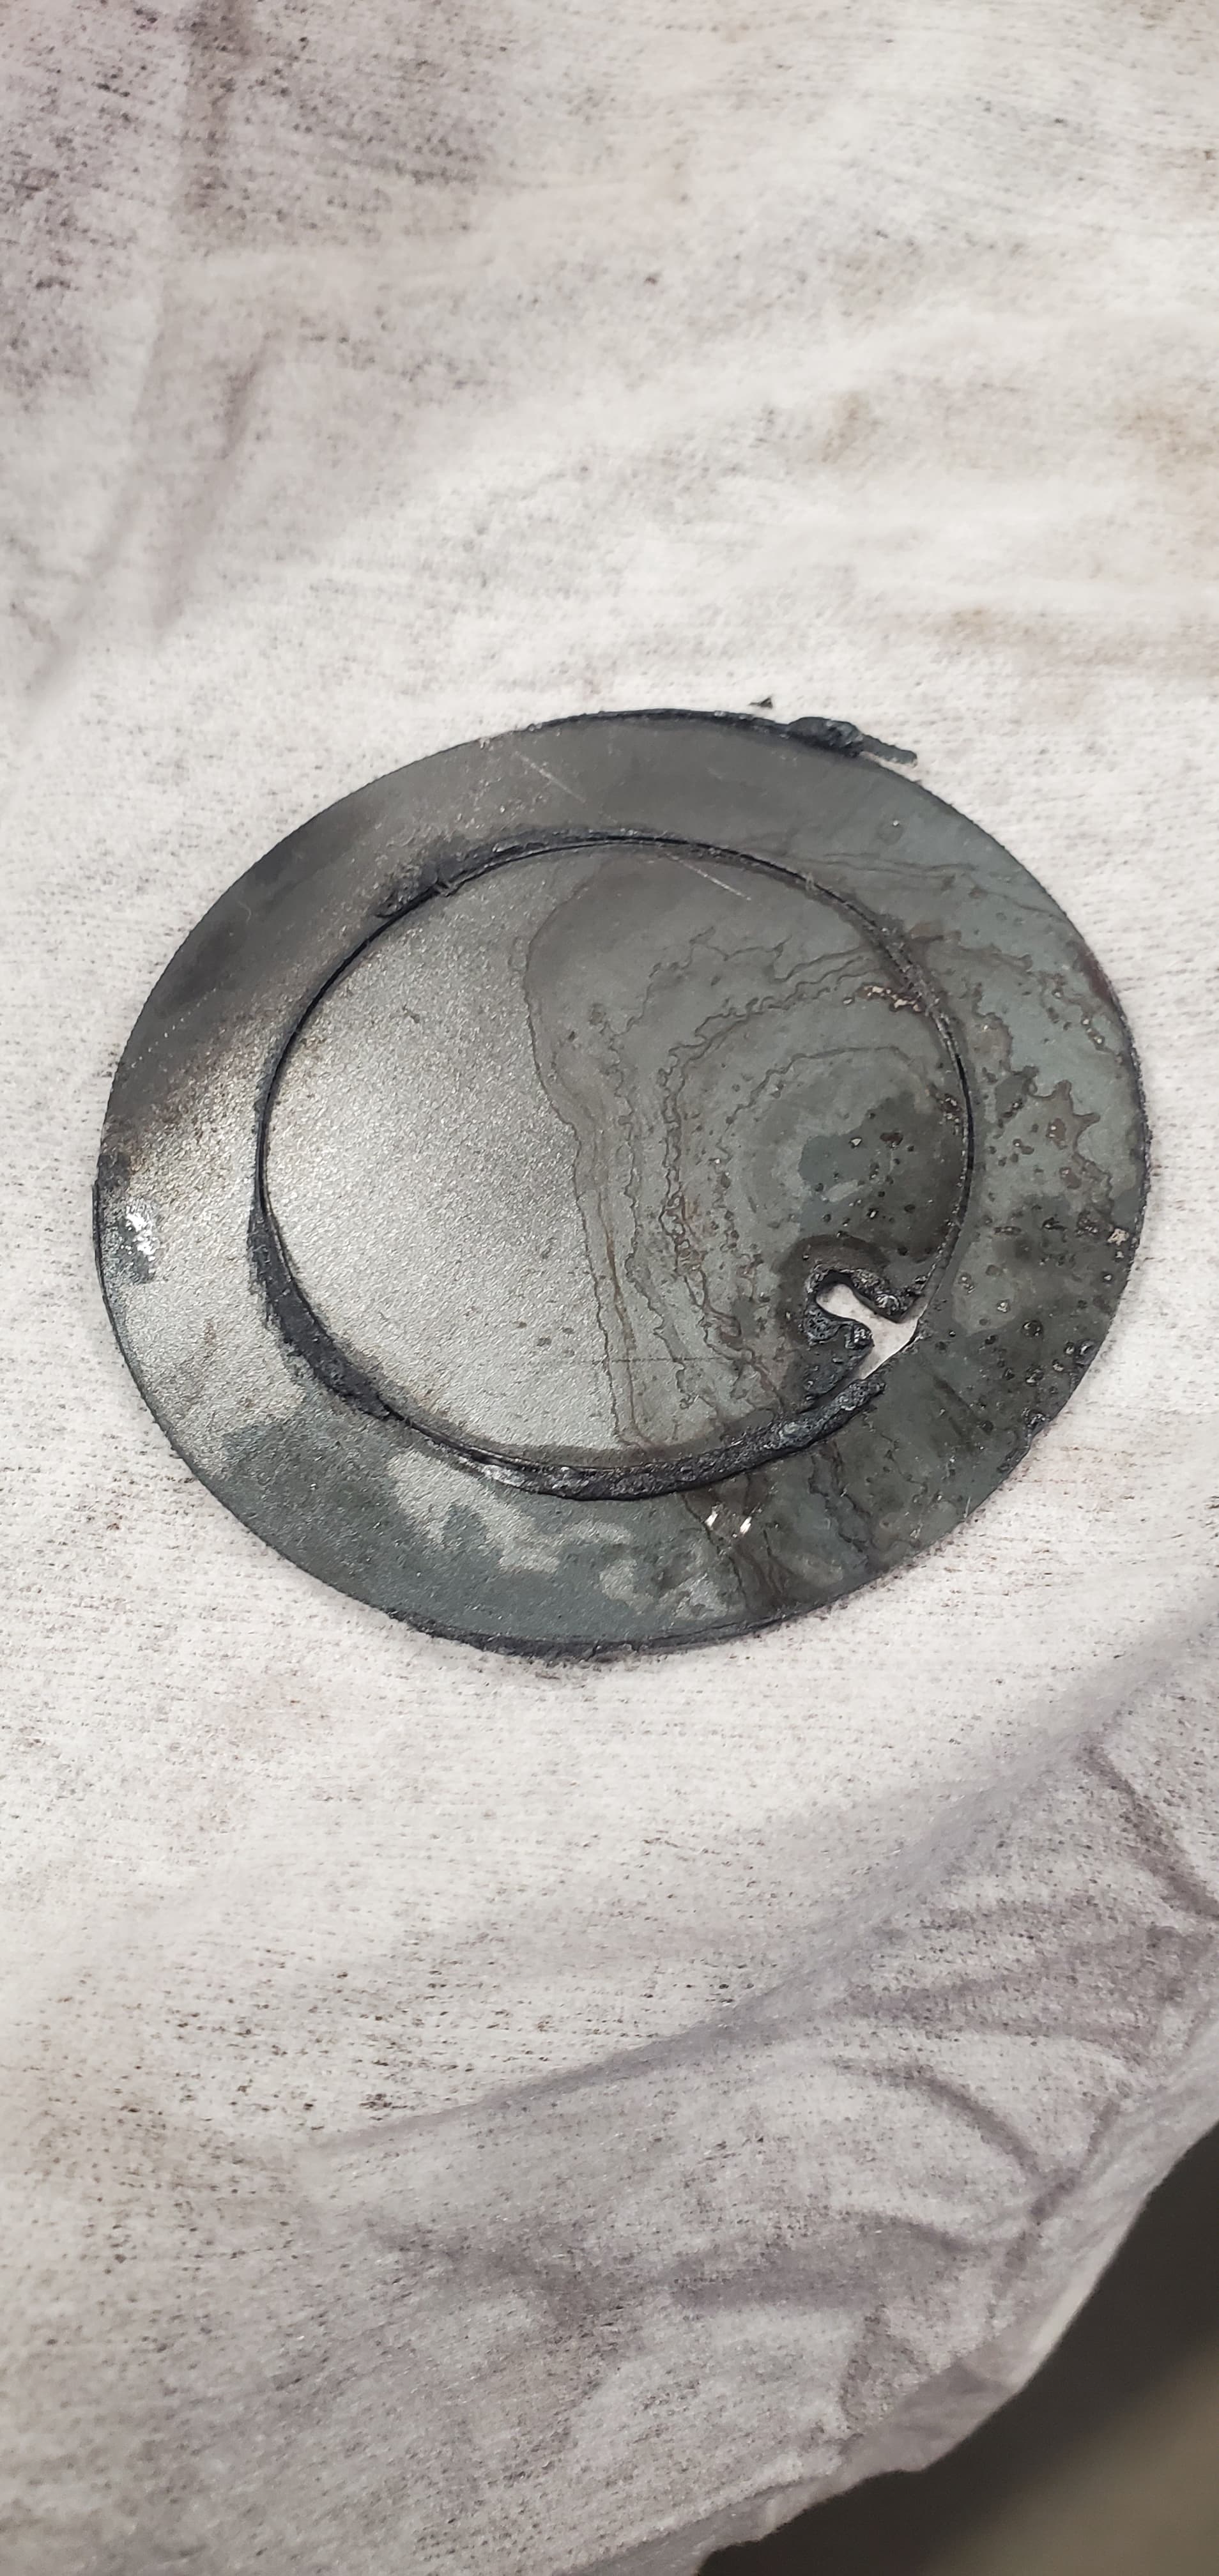
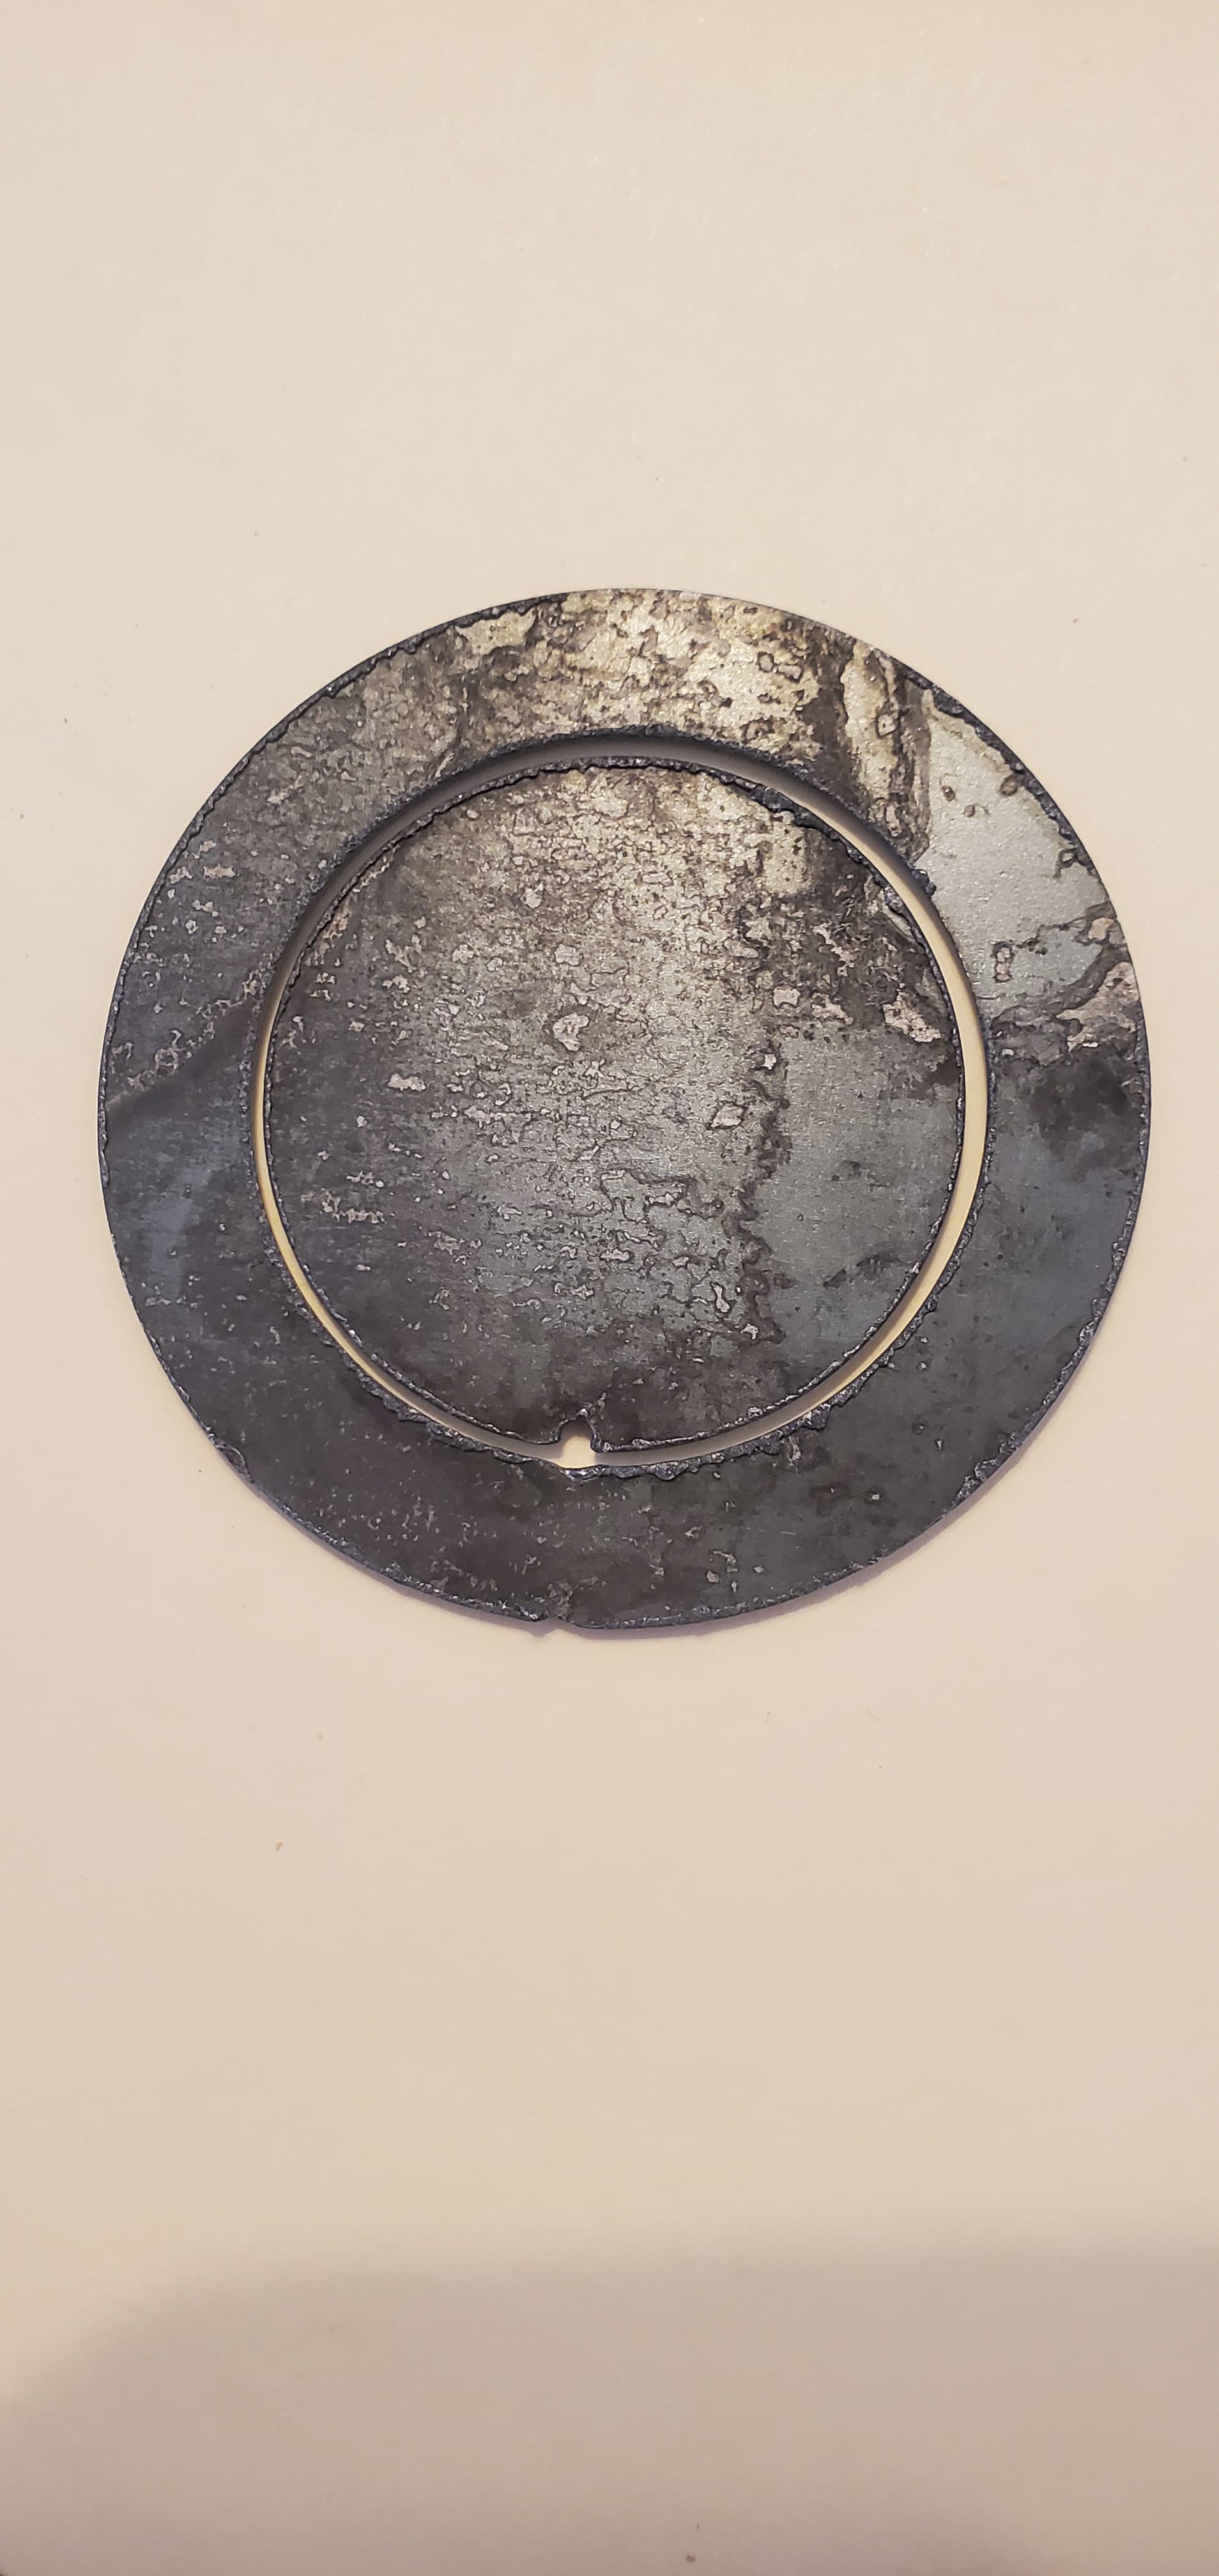
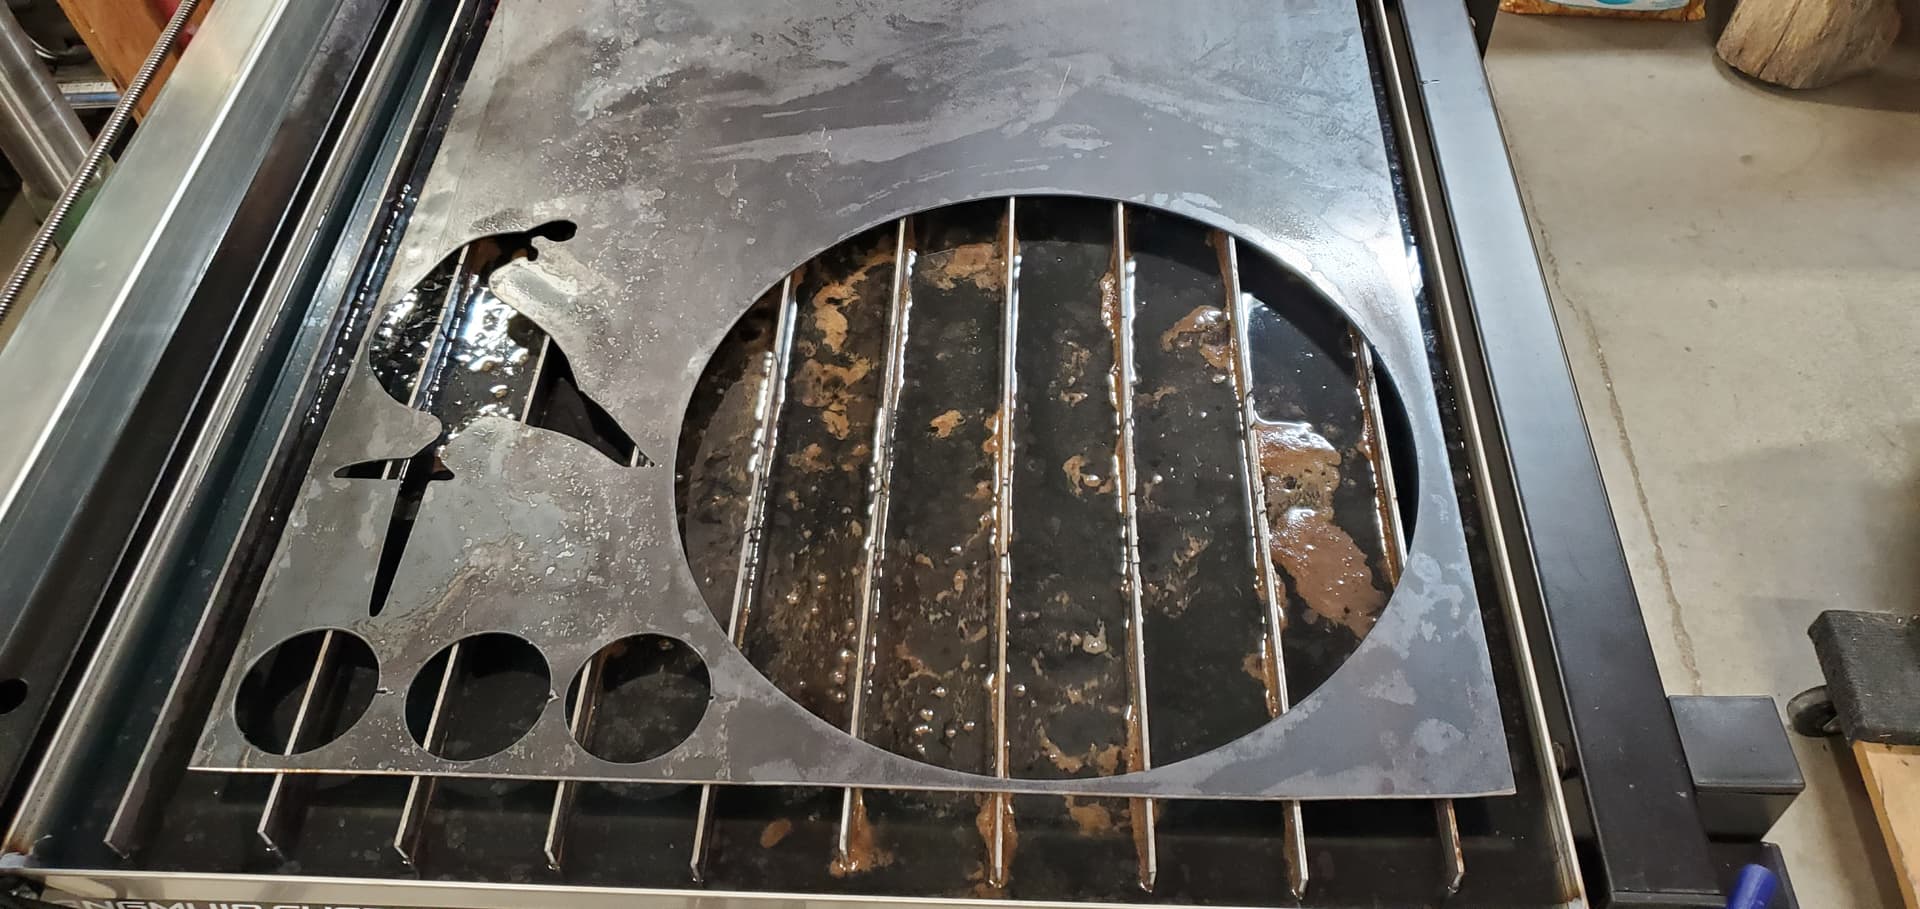
I need a spacer for my bar sink drain modification, I only need one but I thought I could improve on the cut so I made two. The second one did turn out better, either one will work. Designed in Fusion 360.
This first one had a lot of dross, and it was stuck both and inside and outside to the main sheet. For some reason I didn’t have the tool setup right or the post processor. And unfortunately I didn’t write it down the post processor settings, but if I remember correctly.
Cut height .12
Pierce Delay .5
Pierce Height .12
The tool settings
Kerf .023
Feedrate 350 in/min
Cut and Pierce height .12
Pierce time. .5
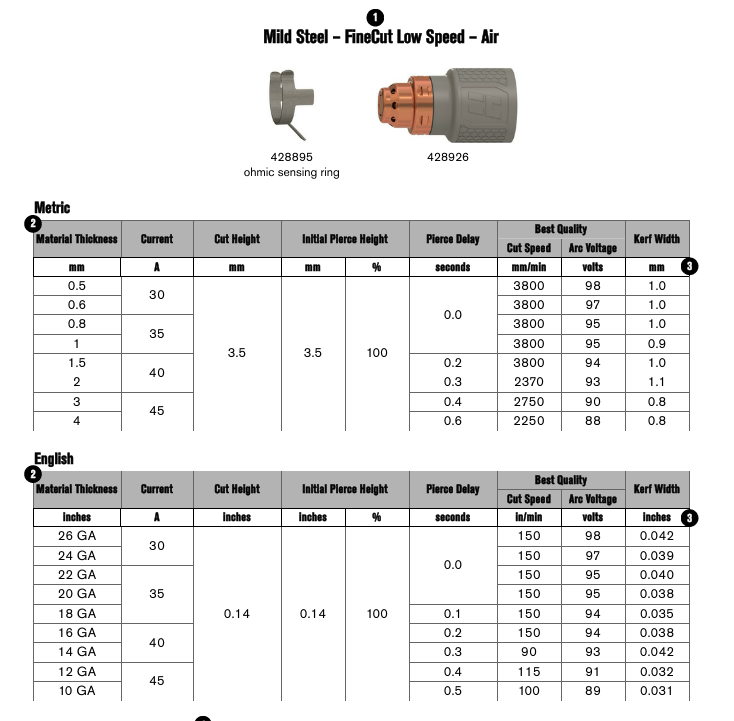
For the second one I took the readings from Hypertherm’s literature for fine cut low speed.
Kerf .036
Feedrate 150 in/min
Cut and Pierce height .14
Pierce time .2 That was too little FireControl stopped and gave me a warning.
I was wondering about that. I have a Hypertherm Powermax 45 Sync, the cut chart says .14 cut height for fine cut low speed, so that is what I did. I see in the Powermax 45 XP it says .06 for a cut height, along with about everything I read says .062. I’m going to go try it, I don’t need another washer but there small and don’t take up much room.
I’m not a Hypertherm user. I wish I were, but the Hypertherm Sync people can help you get set up. Go out and cut some metal; it’s the best way to learn. Remember to attach your work clamp to the metal being cut. That’s rule number one.
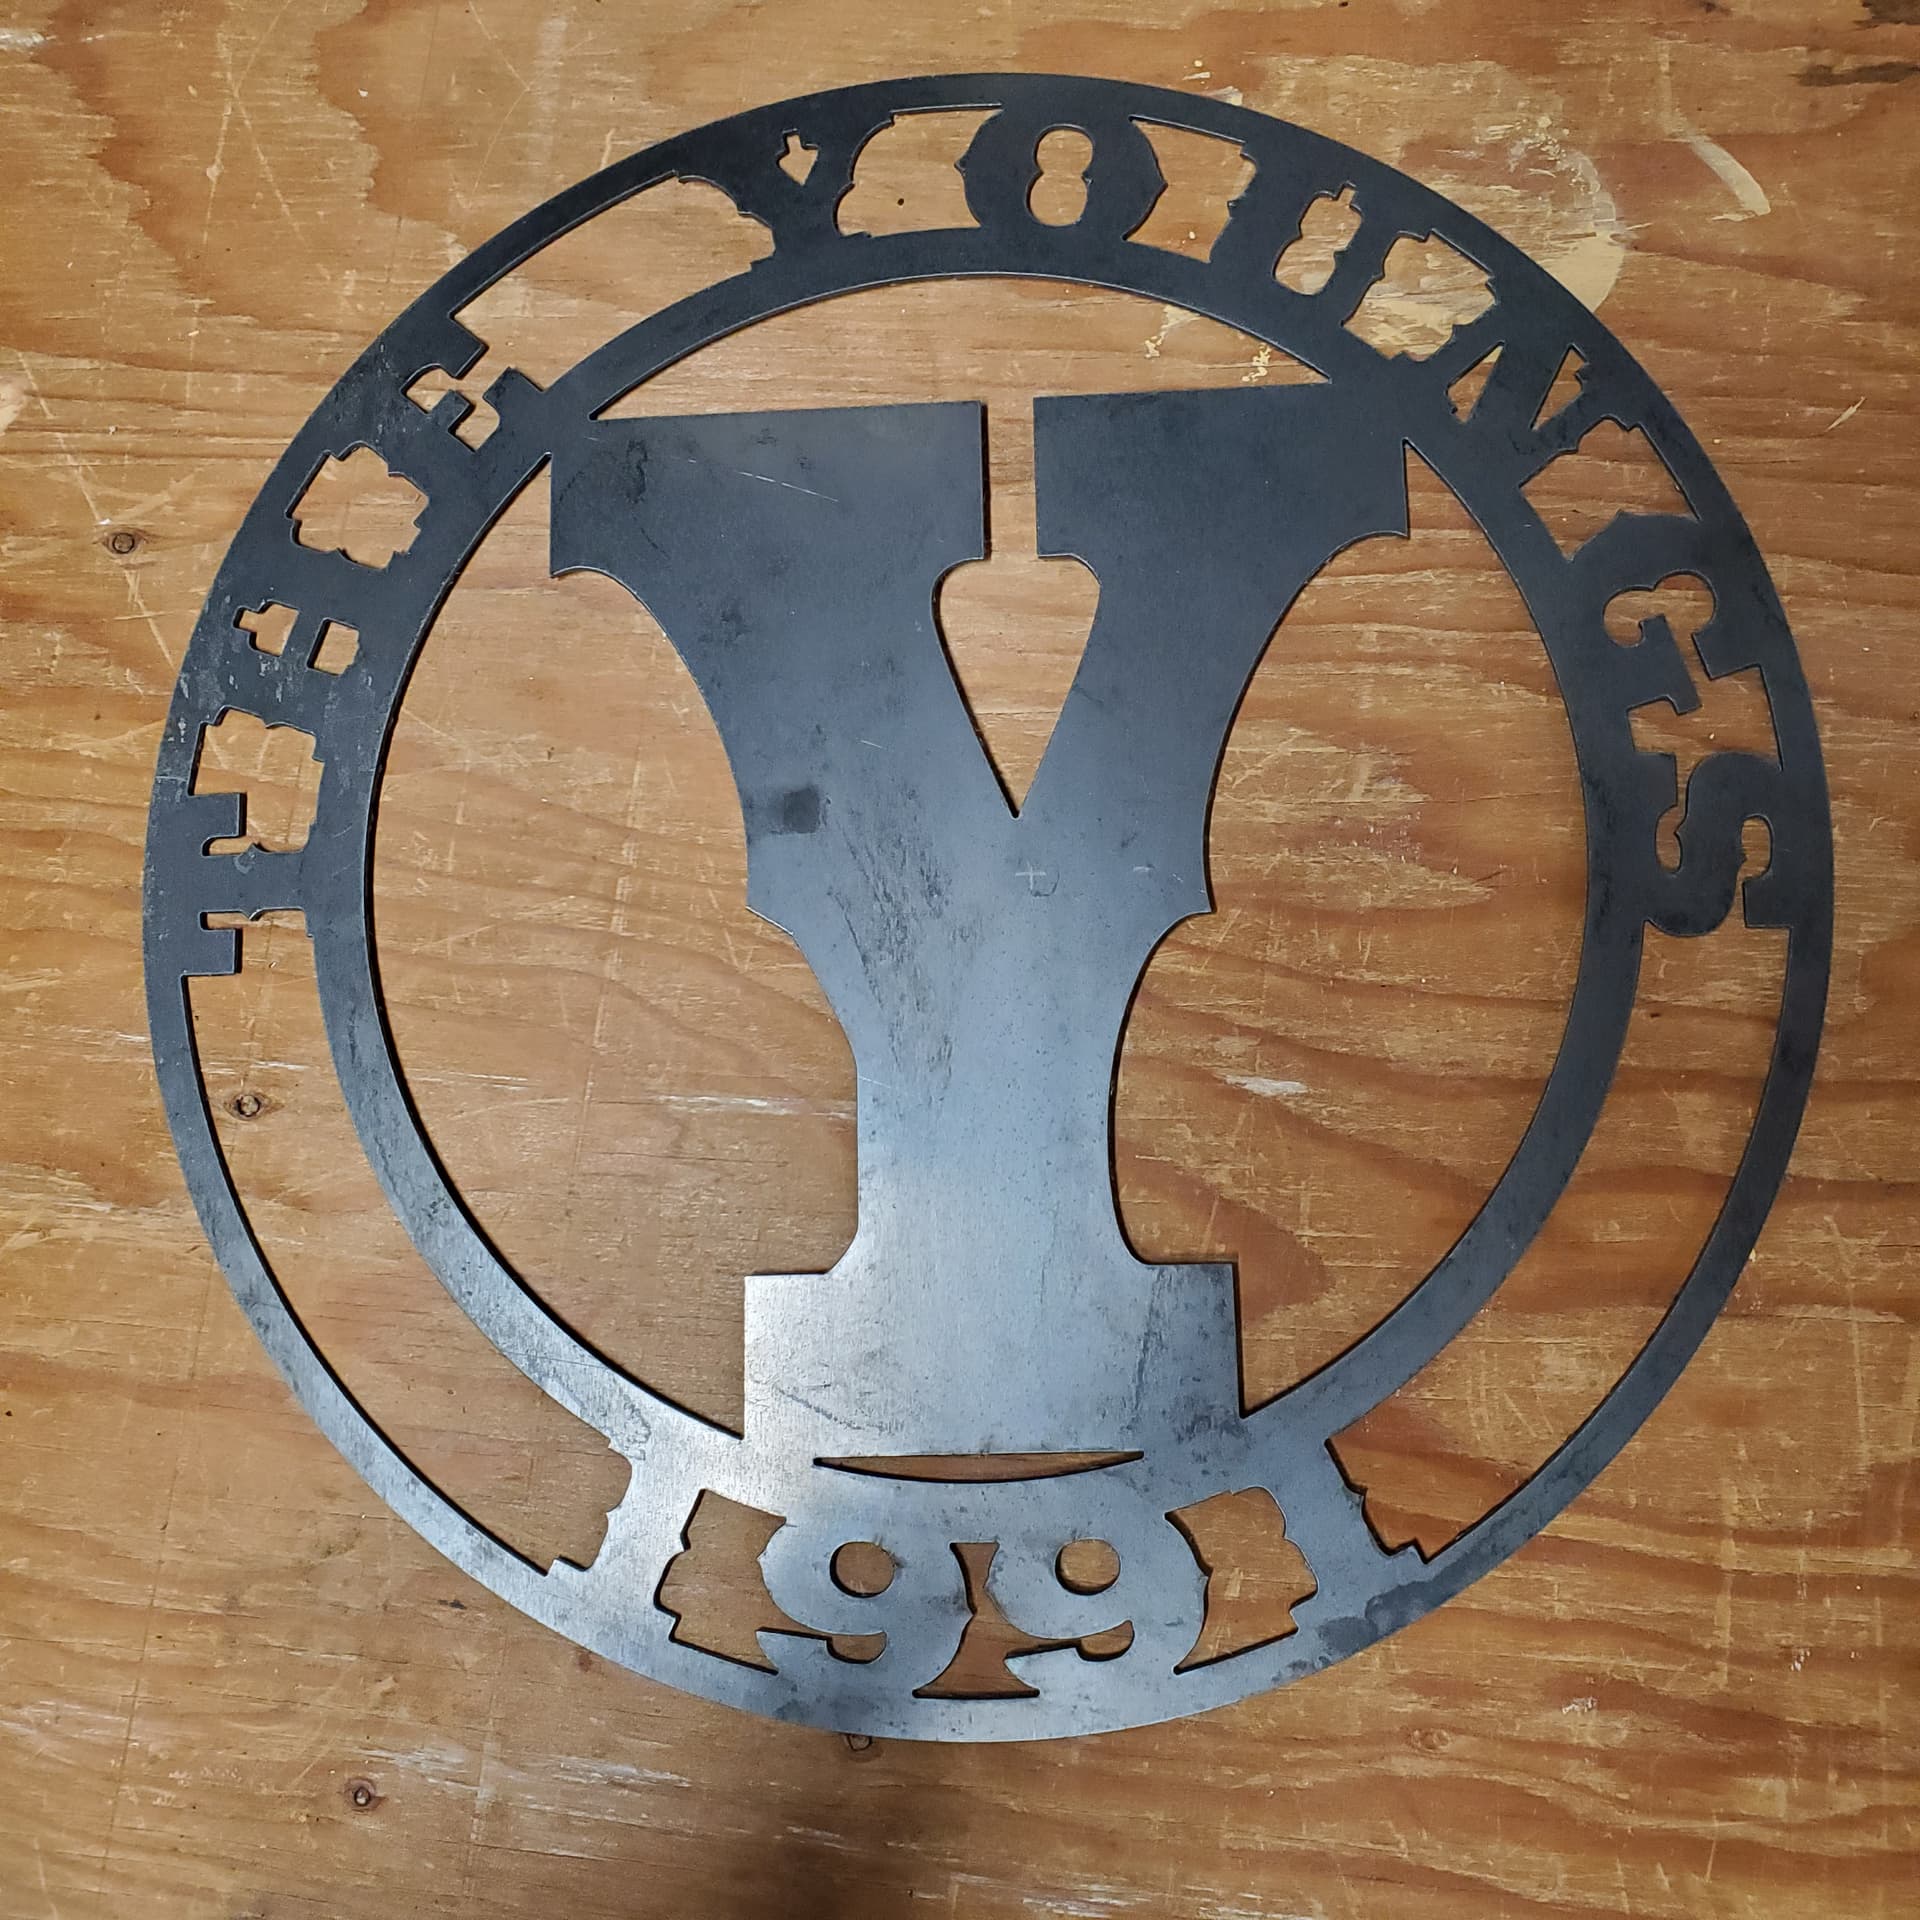
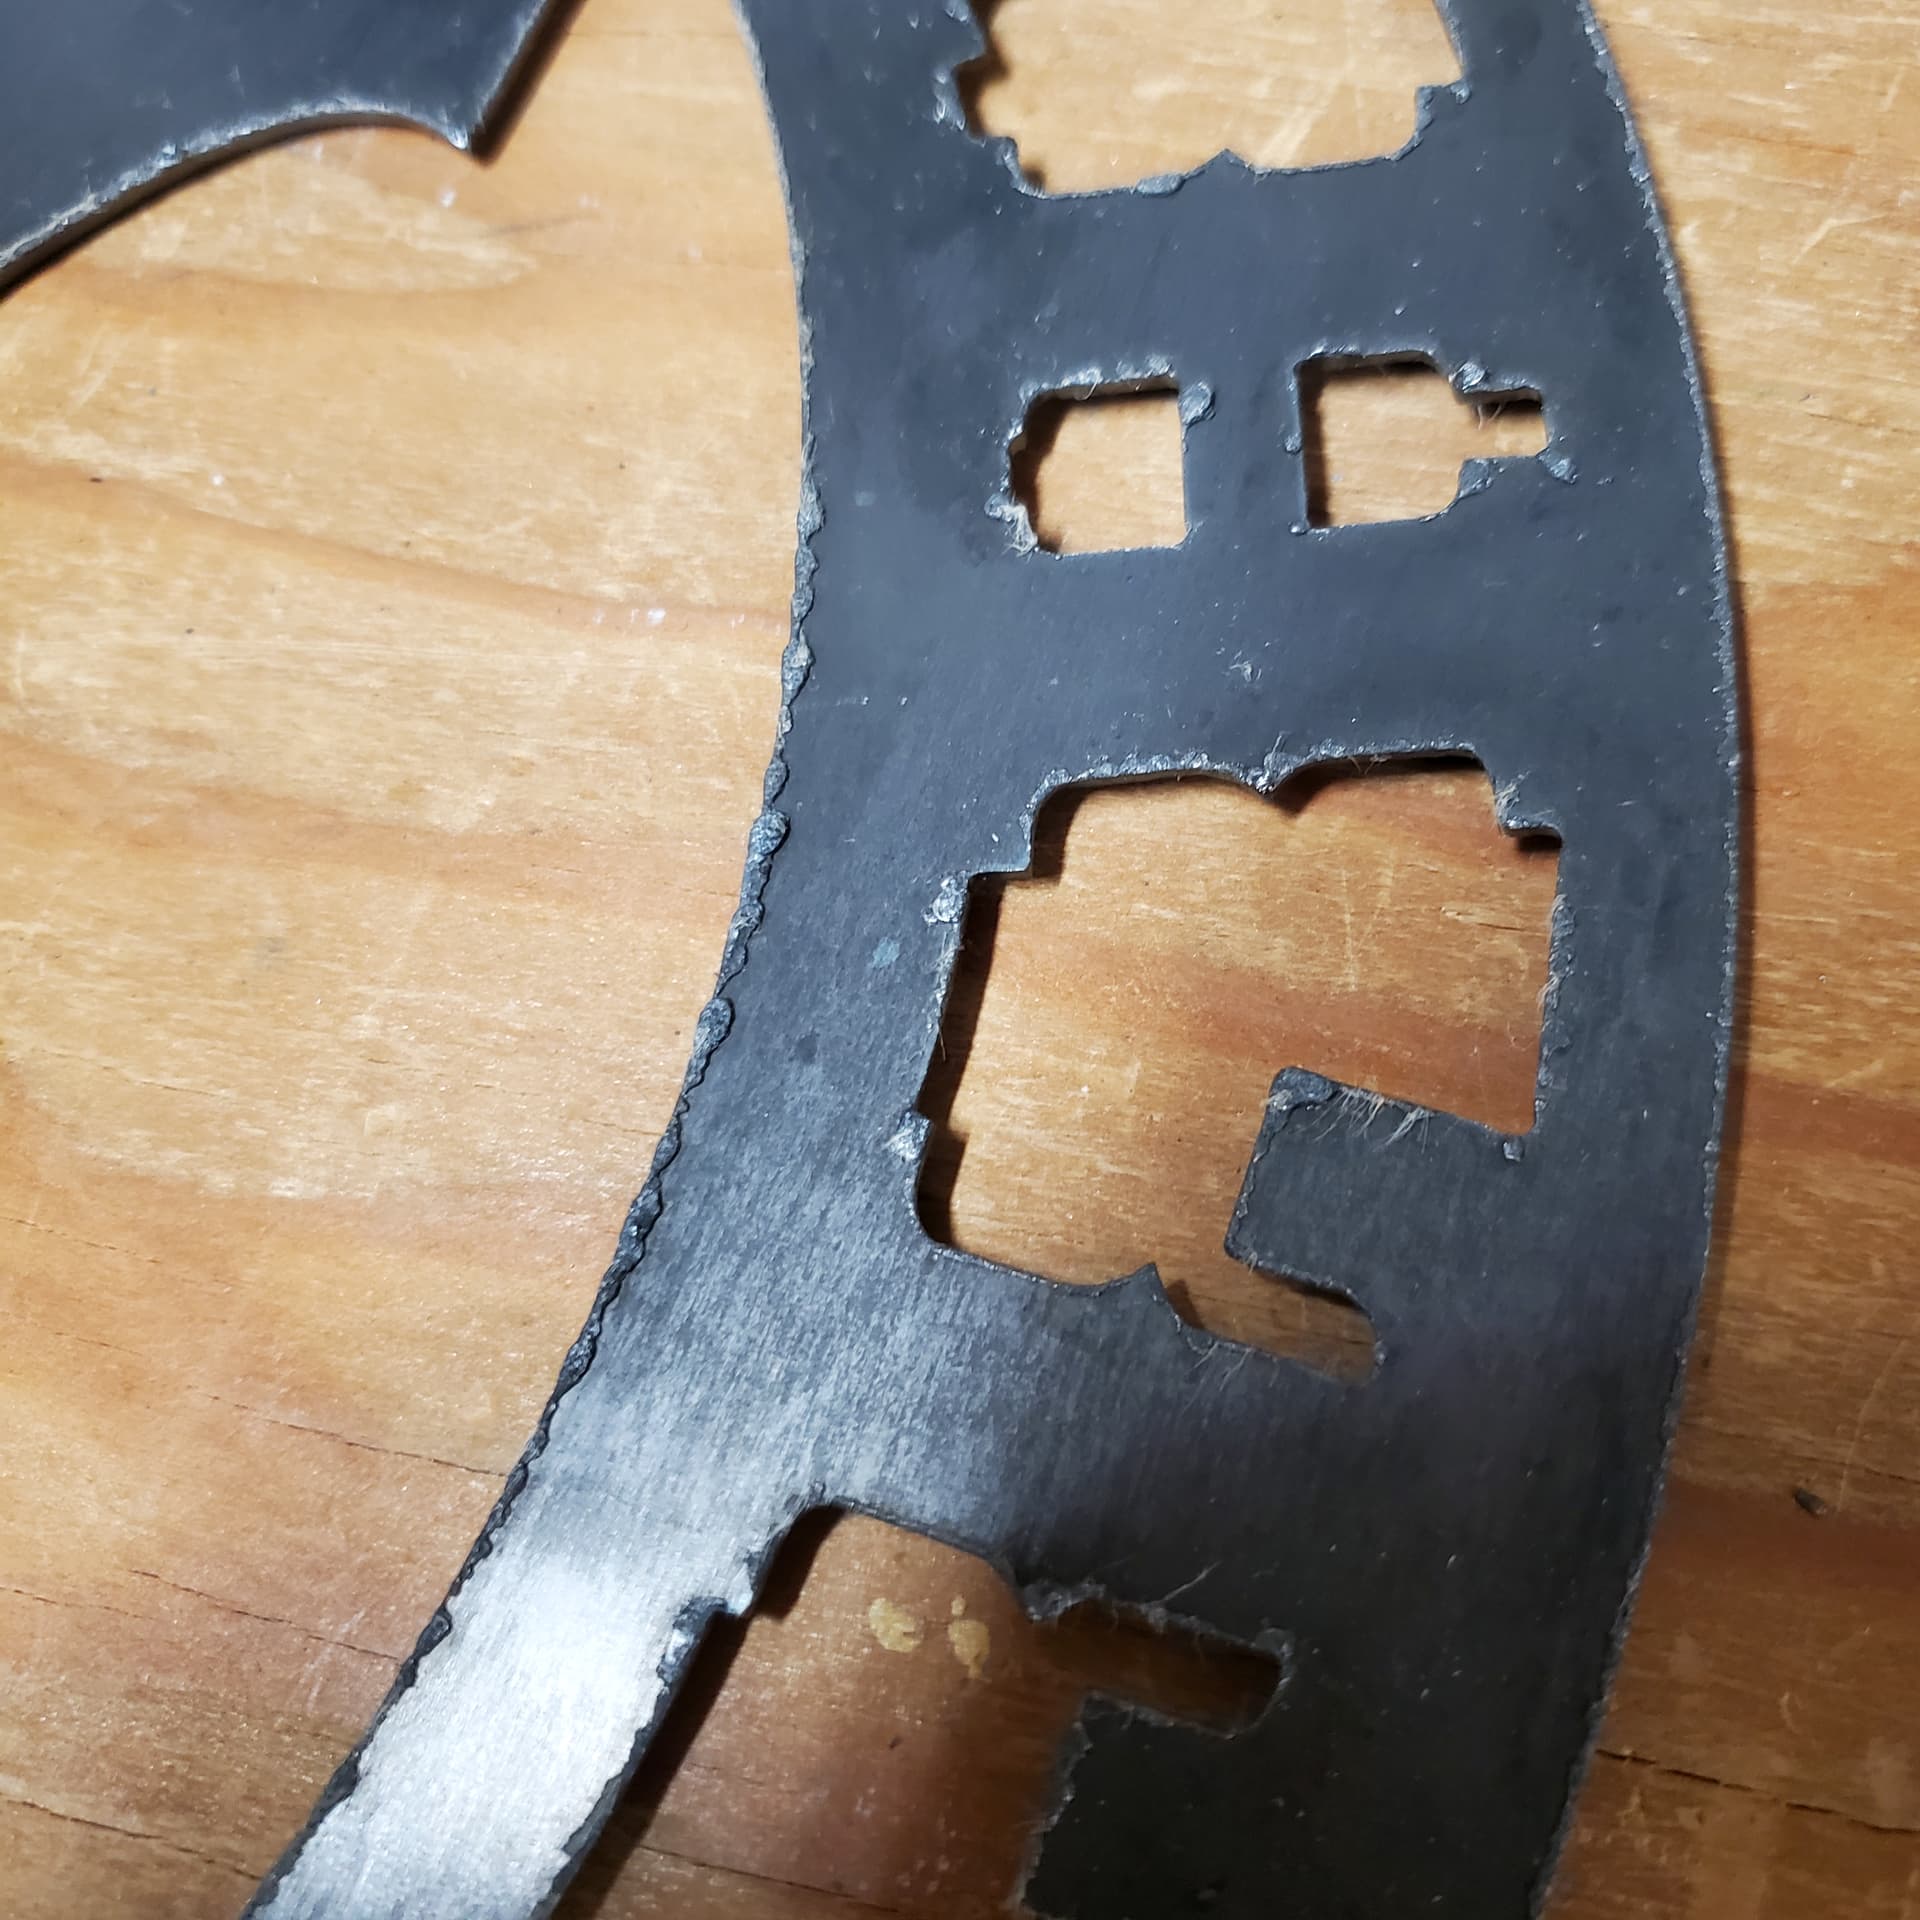
Yes I am using fine cut consumables, 16 gauge by the way. I did a couple more cuts this evening. For the first day of cutting I’m more than happy. The little spacer were not enough for me to get a voltage reading. With the Quail I was seeing 92 volts at .14 cut height, I should have left it there. For the sign I lowered the cut height to .1, the voltage dropped down to roughly 82 volts. (I thought I was shooting for 84 v, I got back to the house and see I should have going for 89 volts) . Anyway the sign turned out really good, a little too much dross but I’m happy.
And for the first day I thought I did pretty well, I didn’t even waste a lot of metal.
That’s because Hypertherm starts measuring the pierce time after the torch fires. But Firecontrol starts when the command is processed. You need to add .2 to .3 seconds to their book value to account for the time it takes for the relays to trigger and the torch to fire on the Langmuir. Otherwise the HT charts are usually pretty close.
Your cut height is set appropriately for a SYNC machine (pierce height and cut height are both 0.14) but I would check to see what is the real cut height. Interrupt while you are cutting a sample and see what the actual metal to torch tip is. If it measures 0.14 inches, that is fine. If it is more then investigate further.
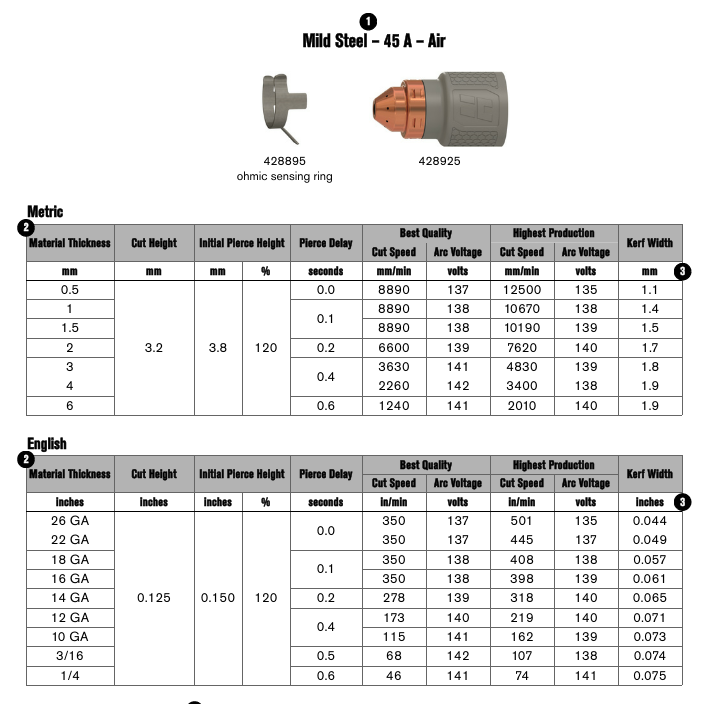
Here is the cut chart for steel with 45A SYNC:
Where are you “Manufacturing” your gcode file? (Fusion or SheetCAM)
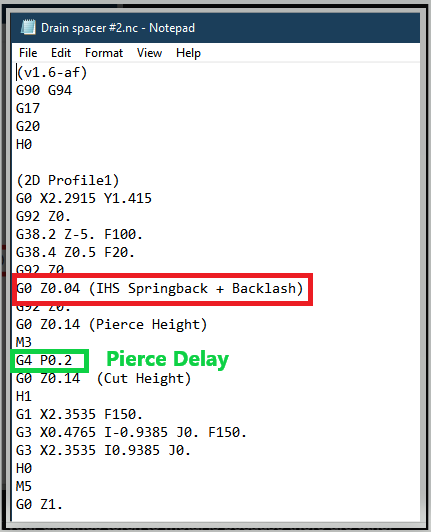
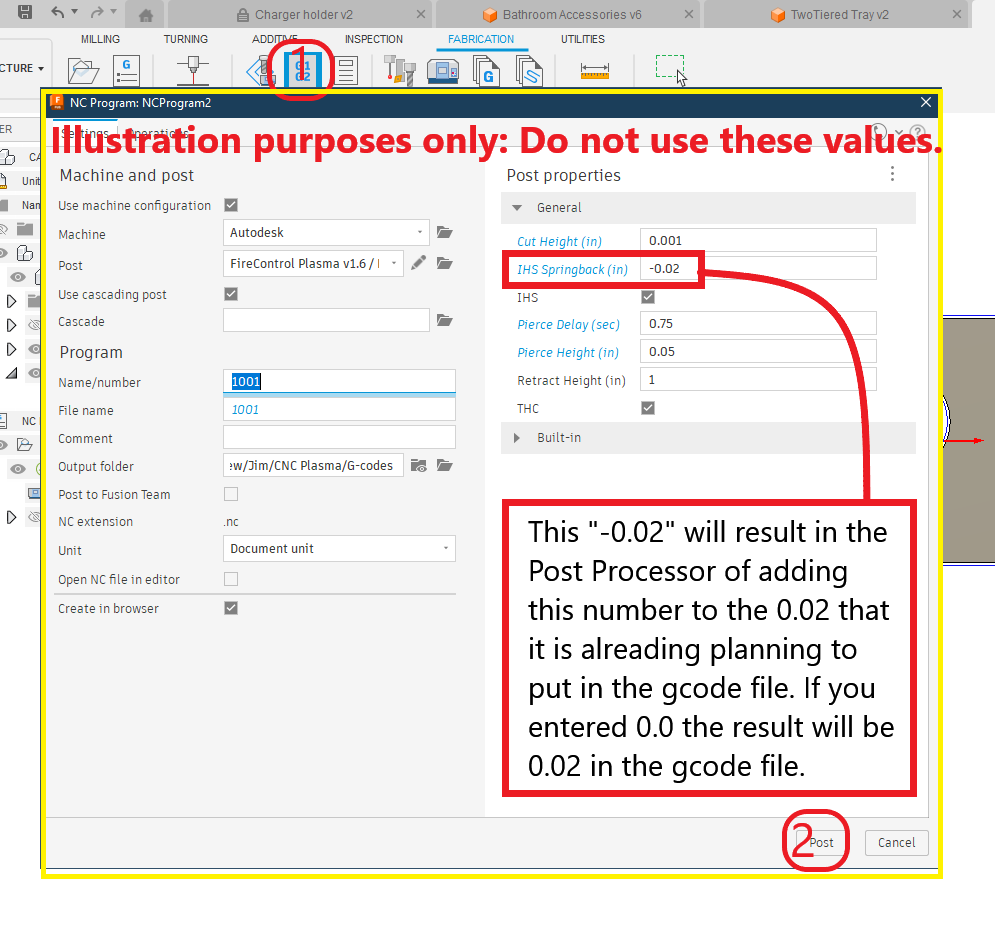
If you have more than 0.14 inches look at the gcode. Under the backlash/spring back it is possible that you have a larger value, perhaps “0.04 inches.” That would be because you entered 0.02 inches in the Fusion post processing screen.
Please share your gcode file or paste the first 20 lines.
If your work lead was not attached to the metal, amperage set too low, cut speed too fast or air pressure too low or inadequate air you would get the result that you are showing.
I would still do the test cut and see what your distance torch to metal is because there are other reasons that it varies. But lets assume you are at 0.18 inches. What I would do is in the post processing screen enter “-0.02”. This will subtract 0.02 from the 0.02 that Fusion plans to add.
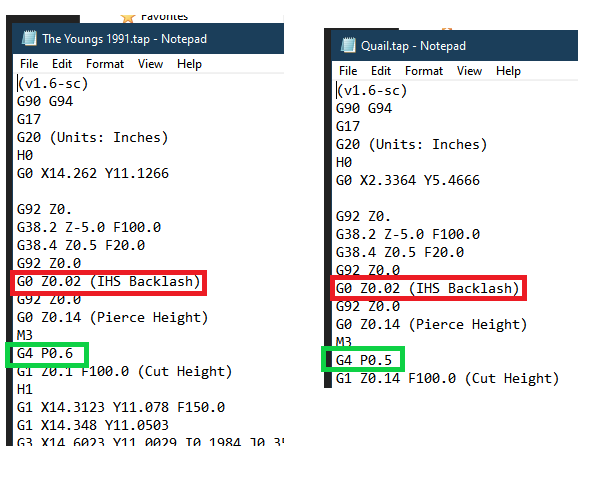
On the Quail FireControl still stopped after the first cut. After it stopped Firecontrol allowed me to regenerate (I’m assuming the gcode) and start at the next cut. In FireControl I added 1% to the pierce delay and hit start, it finished at that point.
So I regenerated the code for the sign and set the pierce delay to .6 it cut with no problem.
So, I should not set any springback at all in the post processor?
I wouldn’t. But as I say, test your cut height first. Find out where you really are.
Here is a bit more information on testing your cut height without cutting any metal:
As for the pierce delay, I would leave it at 0.6 for now. The worst case is you will see a slight blemish at the lead-in. Once you get things set right with cut height, then you can go to 0.55 for the pierce delay (or lower).
nothing to contribute regarding this discussion BUT the reason I am responding is to thank all the participants of these discussions for taking the time to share what has been learned. I’ve had my Pro for over a year now and my BIGGEST problem is not having enough time to become proficient in using it.
Reading this forum is helpful! My thanks to all who contribute !!!
I got a chance to play around a bit. When I ran the test program I measured .072 at cut height.
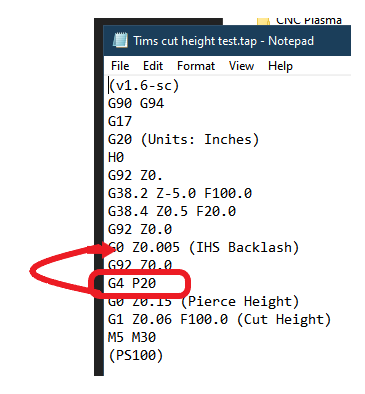
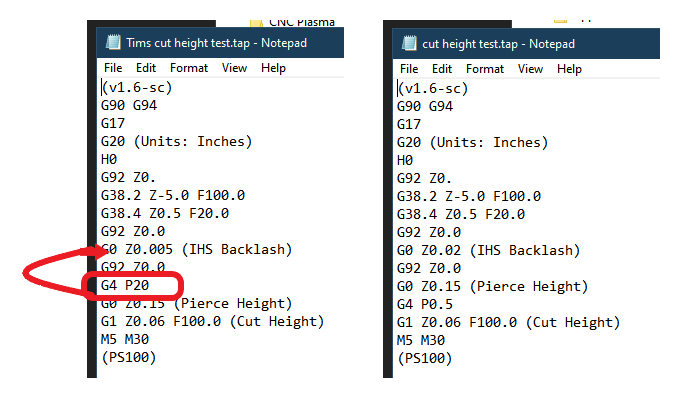
I modified the g code a couple of times until I ended up at .005 IHC Backlash before I measured .060 cut height. I put a pause in after the IHS command and I could only measure .0015.
Please supply the gcode? I am not sure how the pause could influence the cut height unless you paused before the cut height and then you would have “pierce height” which would be “0.15 inches.”
IHS = Initial Height Sensing this is how the torch knows the height of the plate at the start of each cut..
Once this is established then the THC can raise the torch to the cut height called for, once it starts moving.
So your saying a .0015 was a little tight?
the difference between .0015 and .001 is less than a piece of aluminum foil.
If you measured .0015 your IHS may not be working
OK, I guess I wasn’t clear, Sorry. I’m still learning the terminology and the whole CNC thing.
I had put the pause in after the IHS command to measure the torch height at that point. In my mind it should be zero, it should match the spring back of the material.
So, I just went to the shop and setup a dial indicator on the plate. I have 3 thousands (.003) of spring or compression of the plate. I set the IHS command to .003 and at the pause I could not get a feeler gauge in between the torch and the plate. I also watched the dial indicator when the torch first came down it depressed the plate .003 then came back up to zero. Then after the 20 second pause it proceeded to Pierce height then cut height of .060 and that is exactly what I measured.
It’s a little different then last night but I think I did a better job this morning.
So, all that being said, when setting up to cut something a person really needs to know how much your plate is going to flex before setting the IHS command, is that right?
You are pausing right after the torch touches the plate, lifts back up to allow the IHS contacts to mate again and adding the “0.005”. So naturally you are at the small number