Switched Plasma Cutters - Bevel

Well obviously not 20,000, I think 15,000 would be a bit more realistic :rofl:

You might be confusing me with someone else.

Yes, all cuts regardless of the variable change, have a bevel up top. This automatically points to a table/movement issue. Yet, following the procedure to ensure things are level and square don’t fix the issue and this only began when I removed the CUT60 and put in place the Hypertherm.

Next steps are to see what Langmuir has to suggest, then move onto using the hand torch to see if it makes a difference. If it doesn’t, disassembly will begin.

2 Likes

I believe what @mechanic416 was getting at maybe the cables or something is pulling at the torch causing the issue.

Are you willing to tape or hold your protractor to the torch and make a cut to see if you have a change in angle?

1 Like

I wouldn’t have an issue with that. I’d have trouble ensuring accuracy in the test performed.

Hypertherm suggested two items -

One, do an air pressure check by initiating the built-in function on the Hypertherm

Second, run the hand torch (modified)

I’ll be recording a test cut out and sending them the video along with pictures per their request

2 Likes

I believe with the bevel you are making you would be plenty accurate. It should be very noticeable I would think …

Ok, let’s add what occurred today.

Speaking to Hypertherm, Brian was impressed with the level of information provided but was able to add something. He did request that I perform a specific test cut and record a video of it.

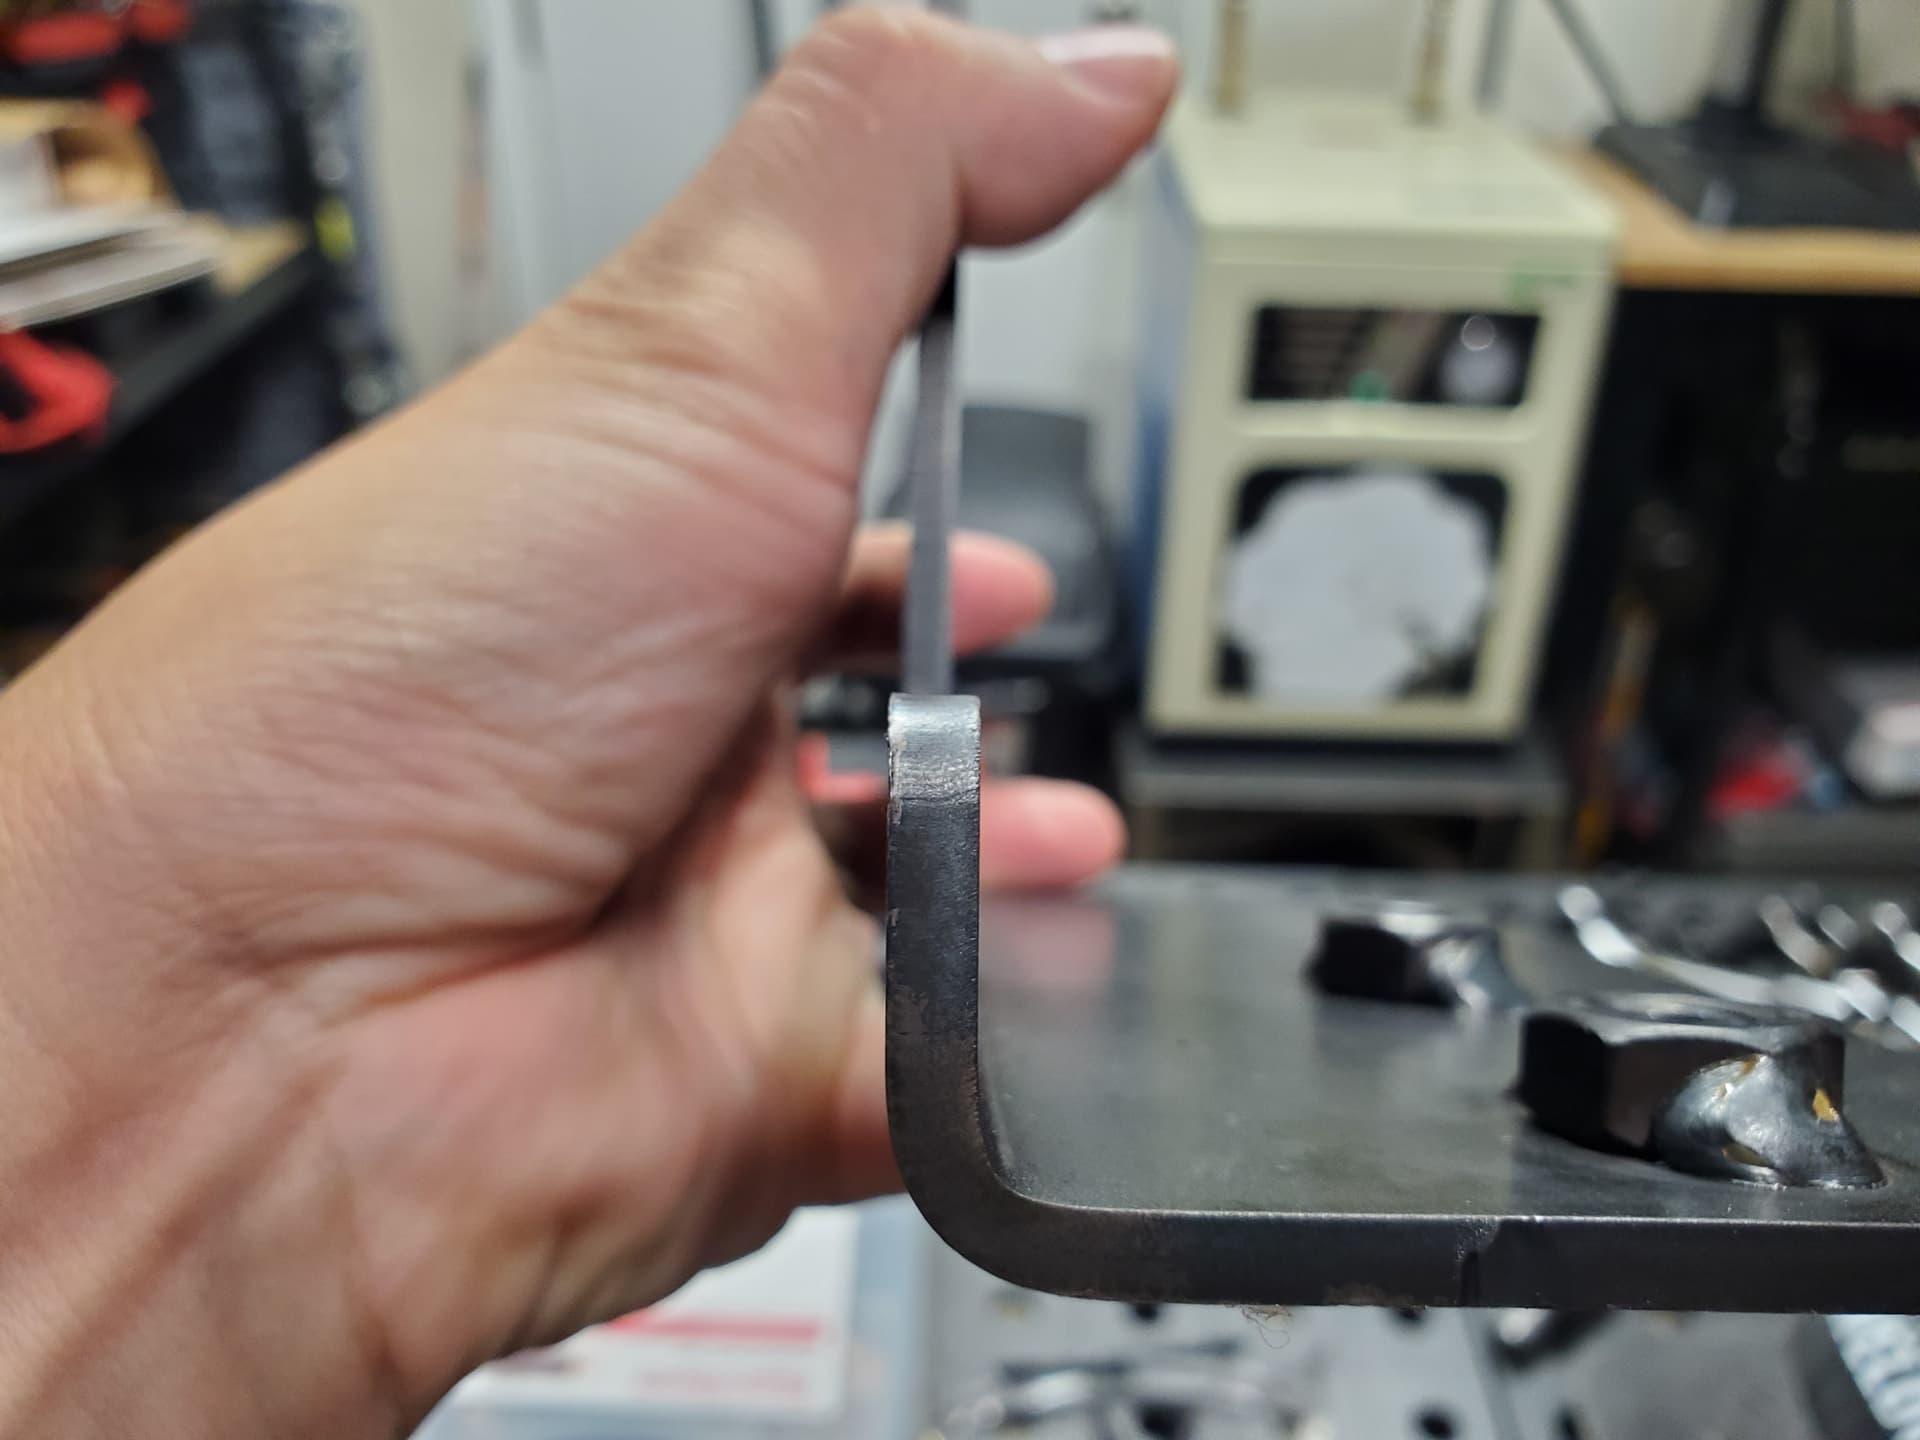
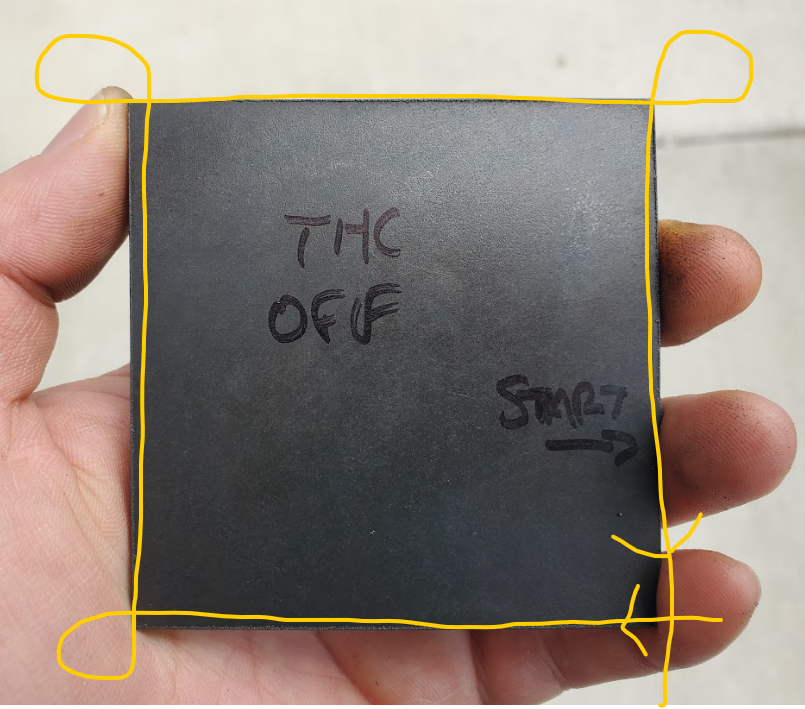
The test is a 3" x 3" square, with no rules implemented, running book speed which is 85ipm, and 0.5 pierce delay at 45 amps.

He asked that I also do a pressure check on my 45XP; this is done by holding the mode button on the front of the machine, and letting it go when “PC” appears on the display.

The number that flashed was “66”. After which, the torch began to push air as if the torch was “on” and the front display fluctuated between 65 and 66.

Brian had stated that as much as 2psi is within range whereas my own machine varies by as little as 1psi.

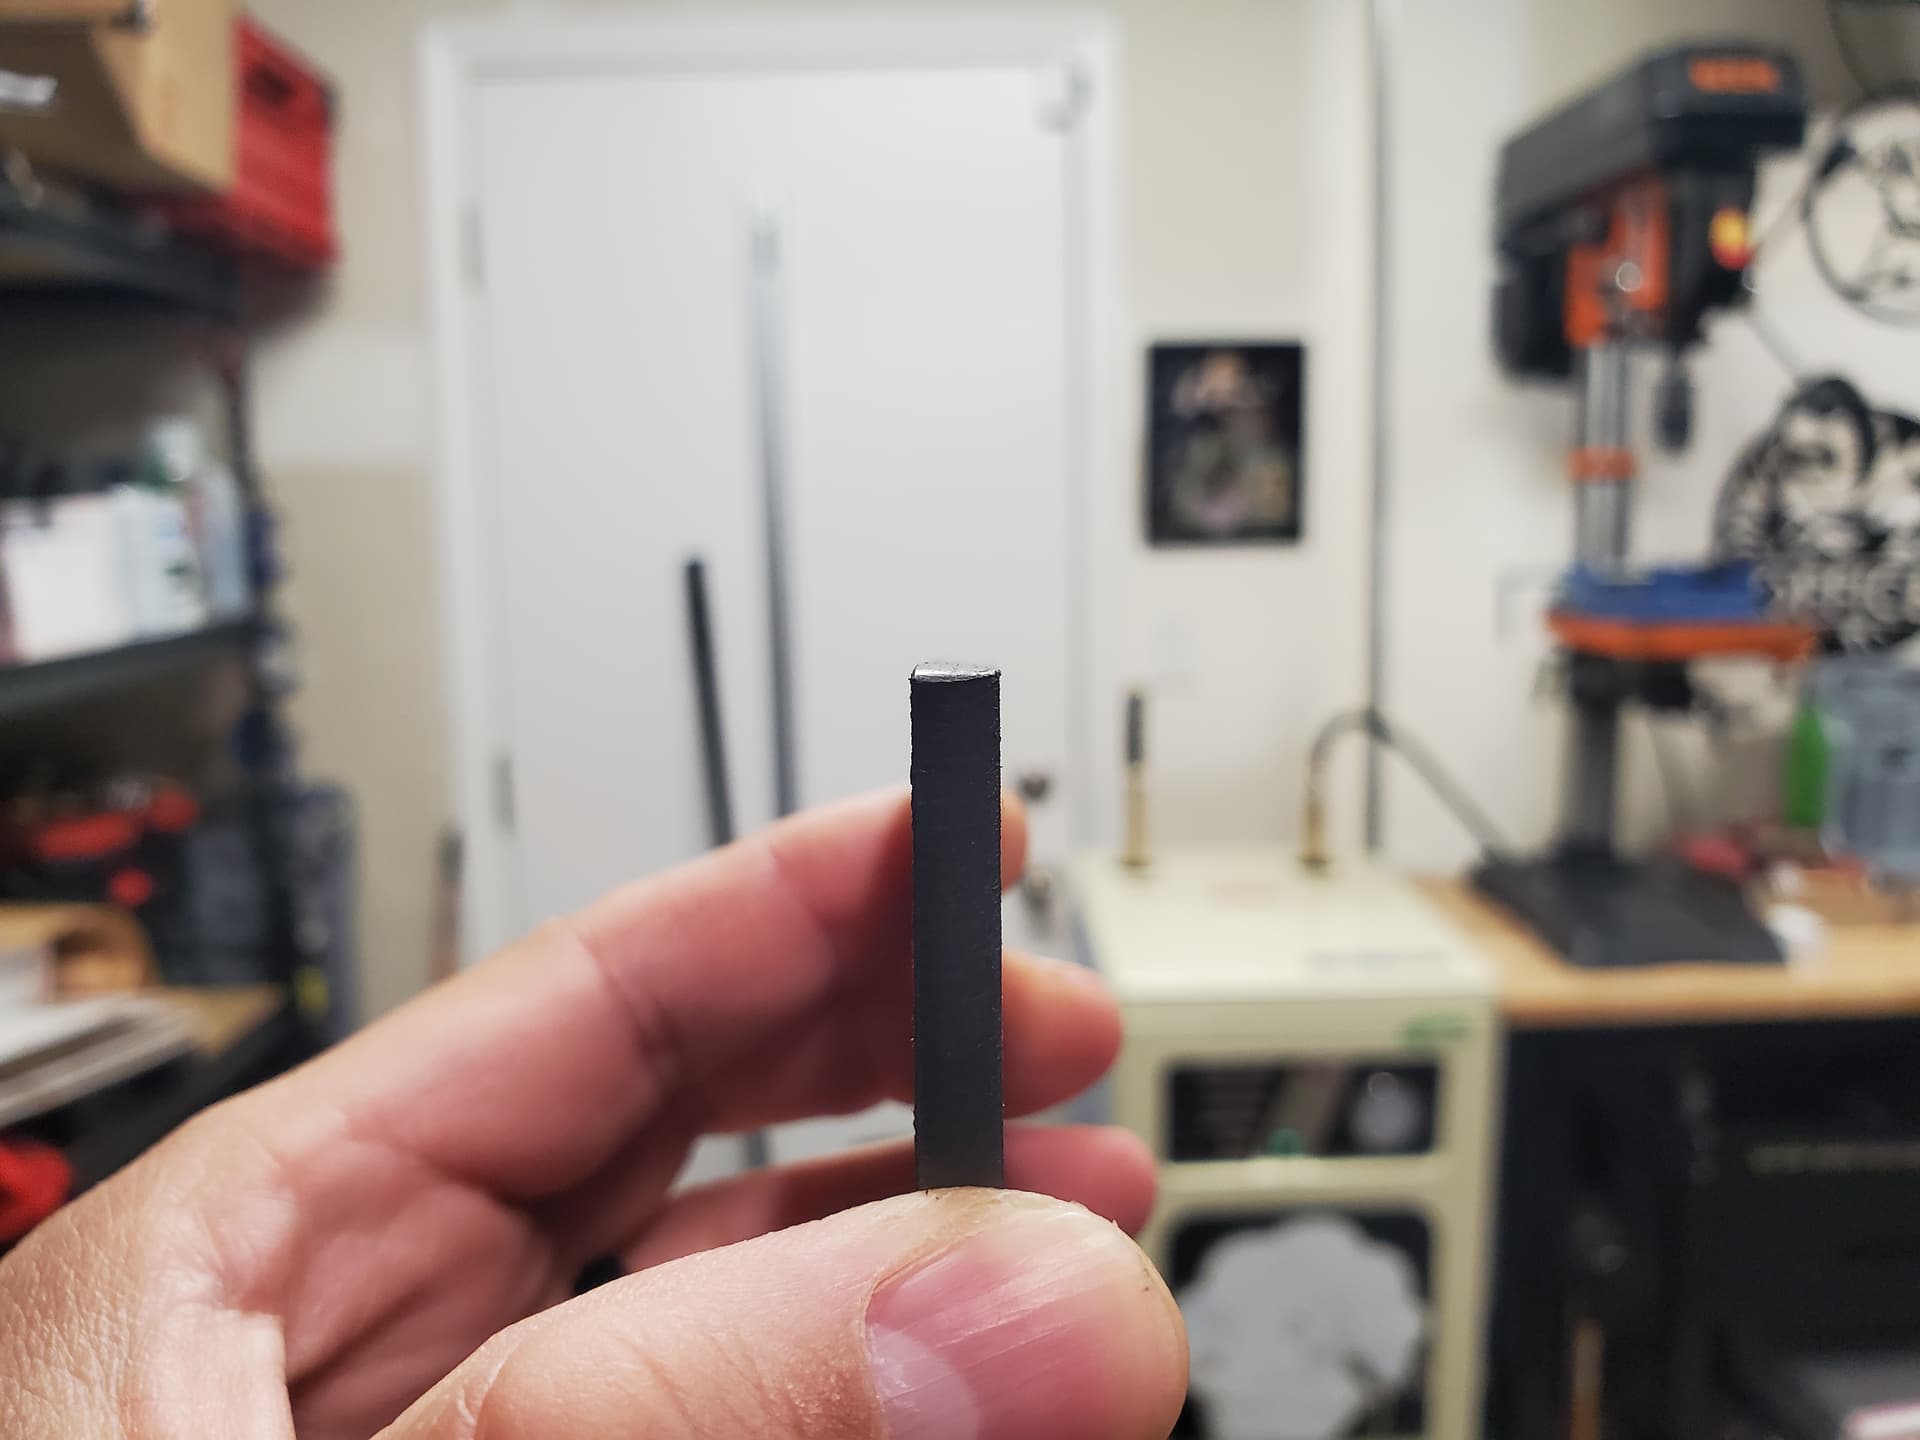
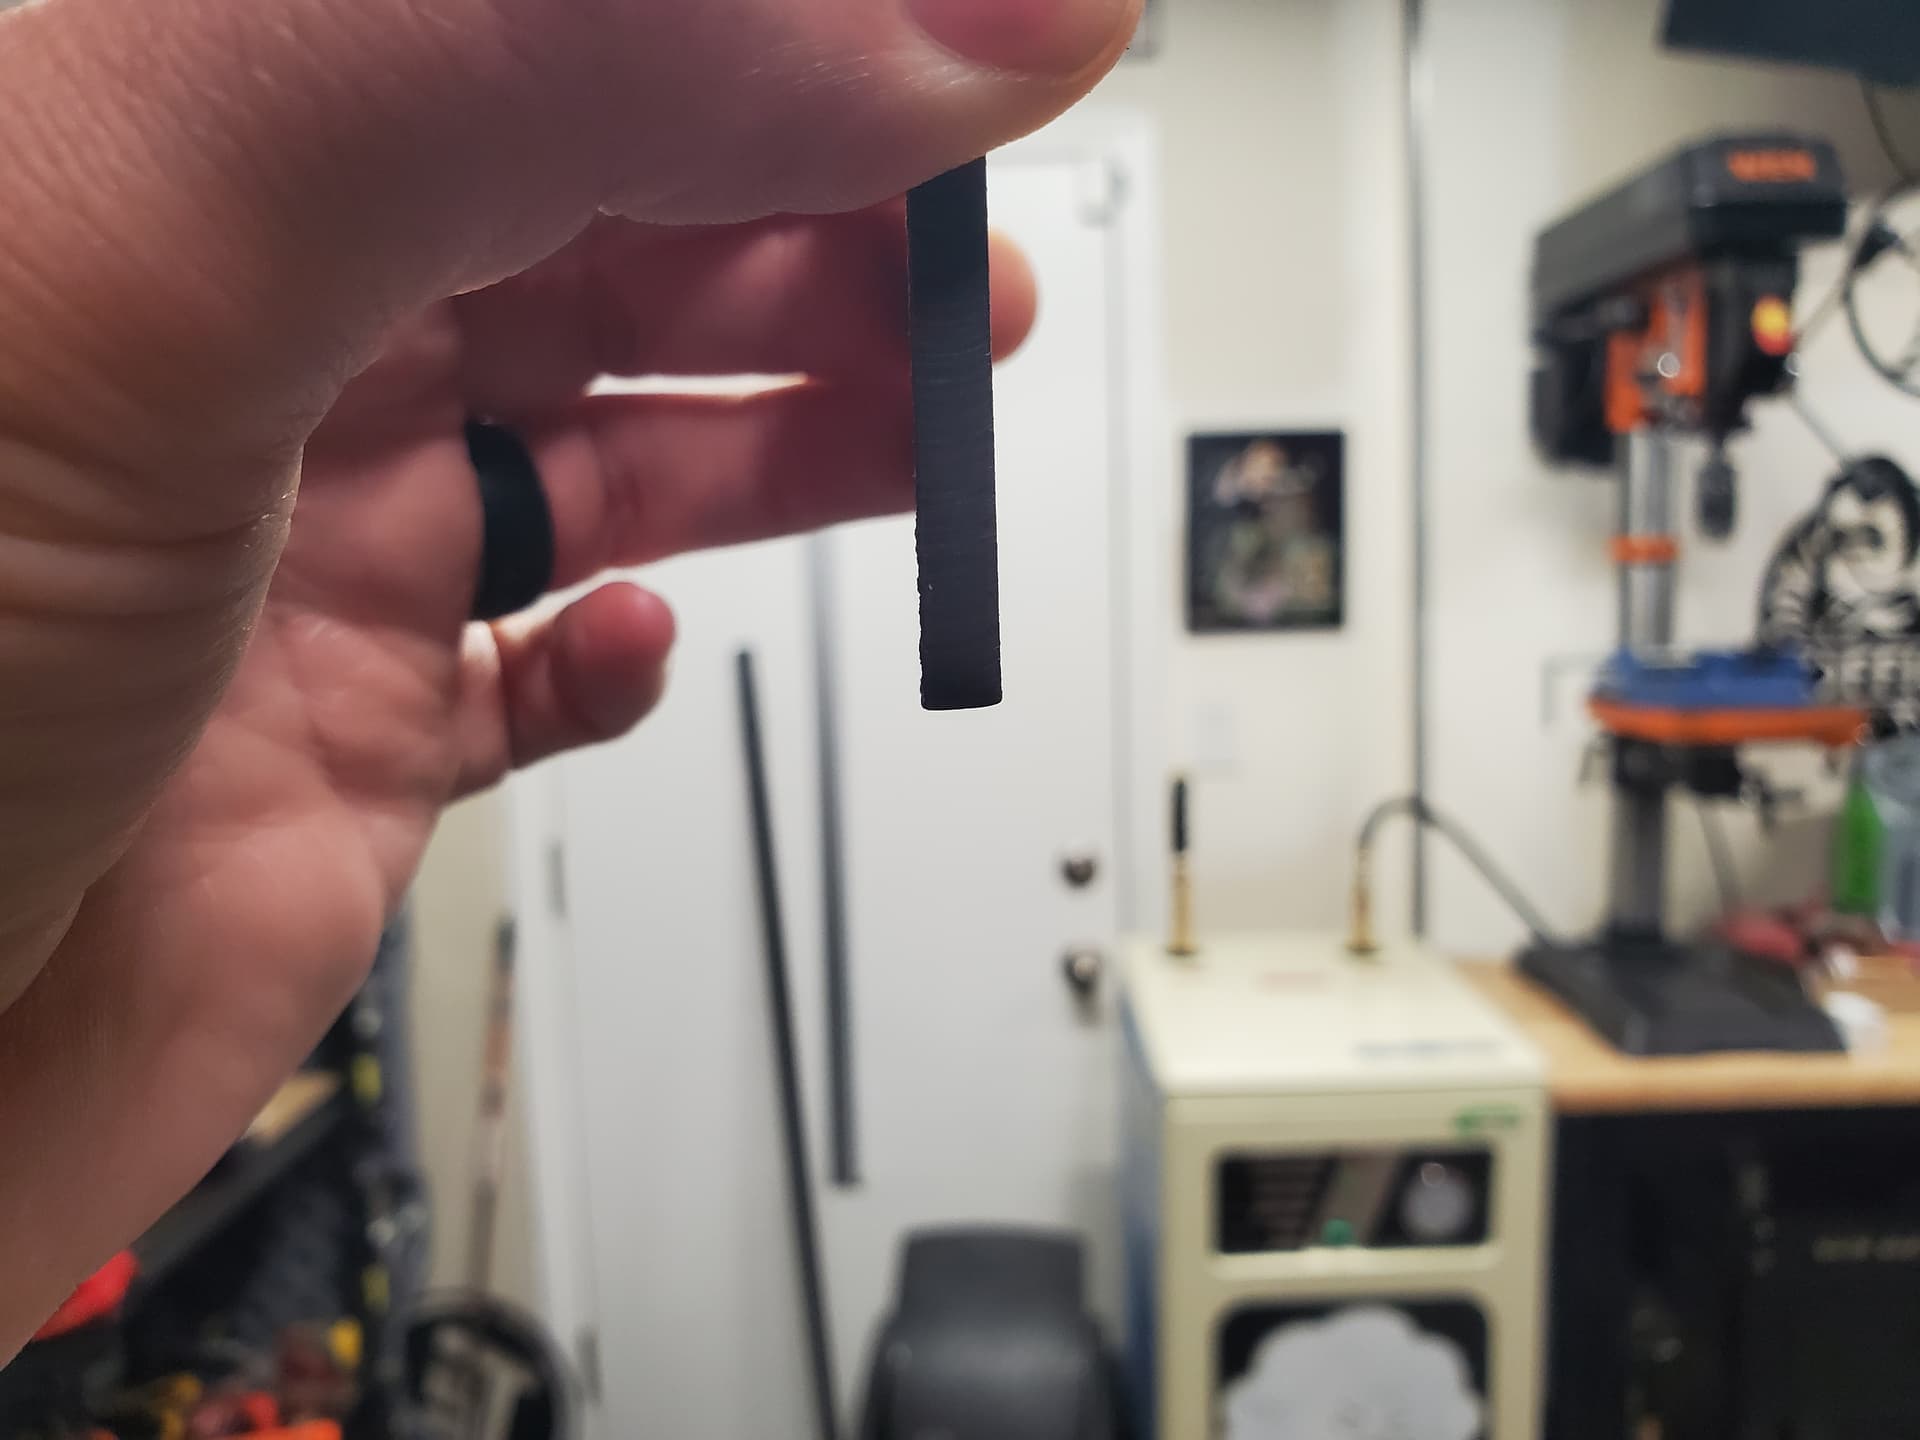
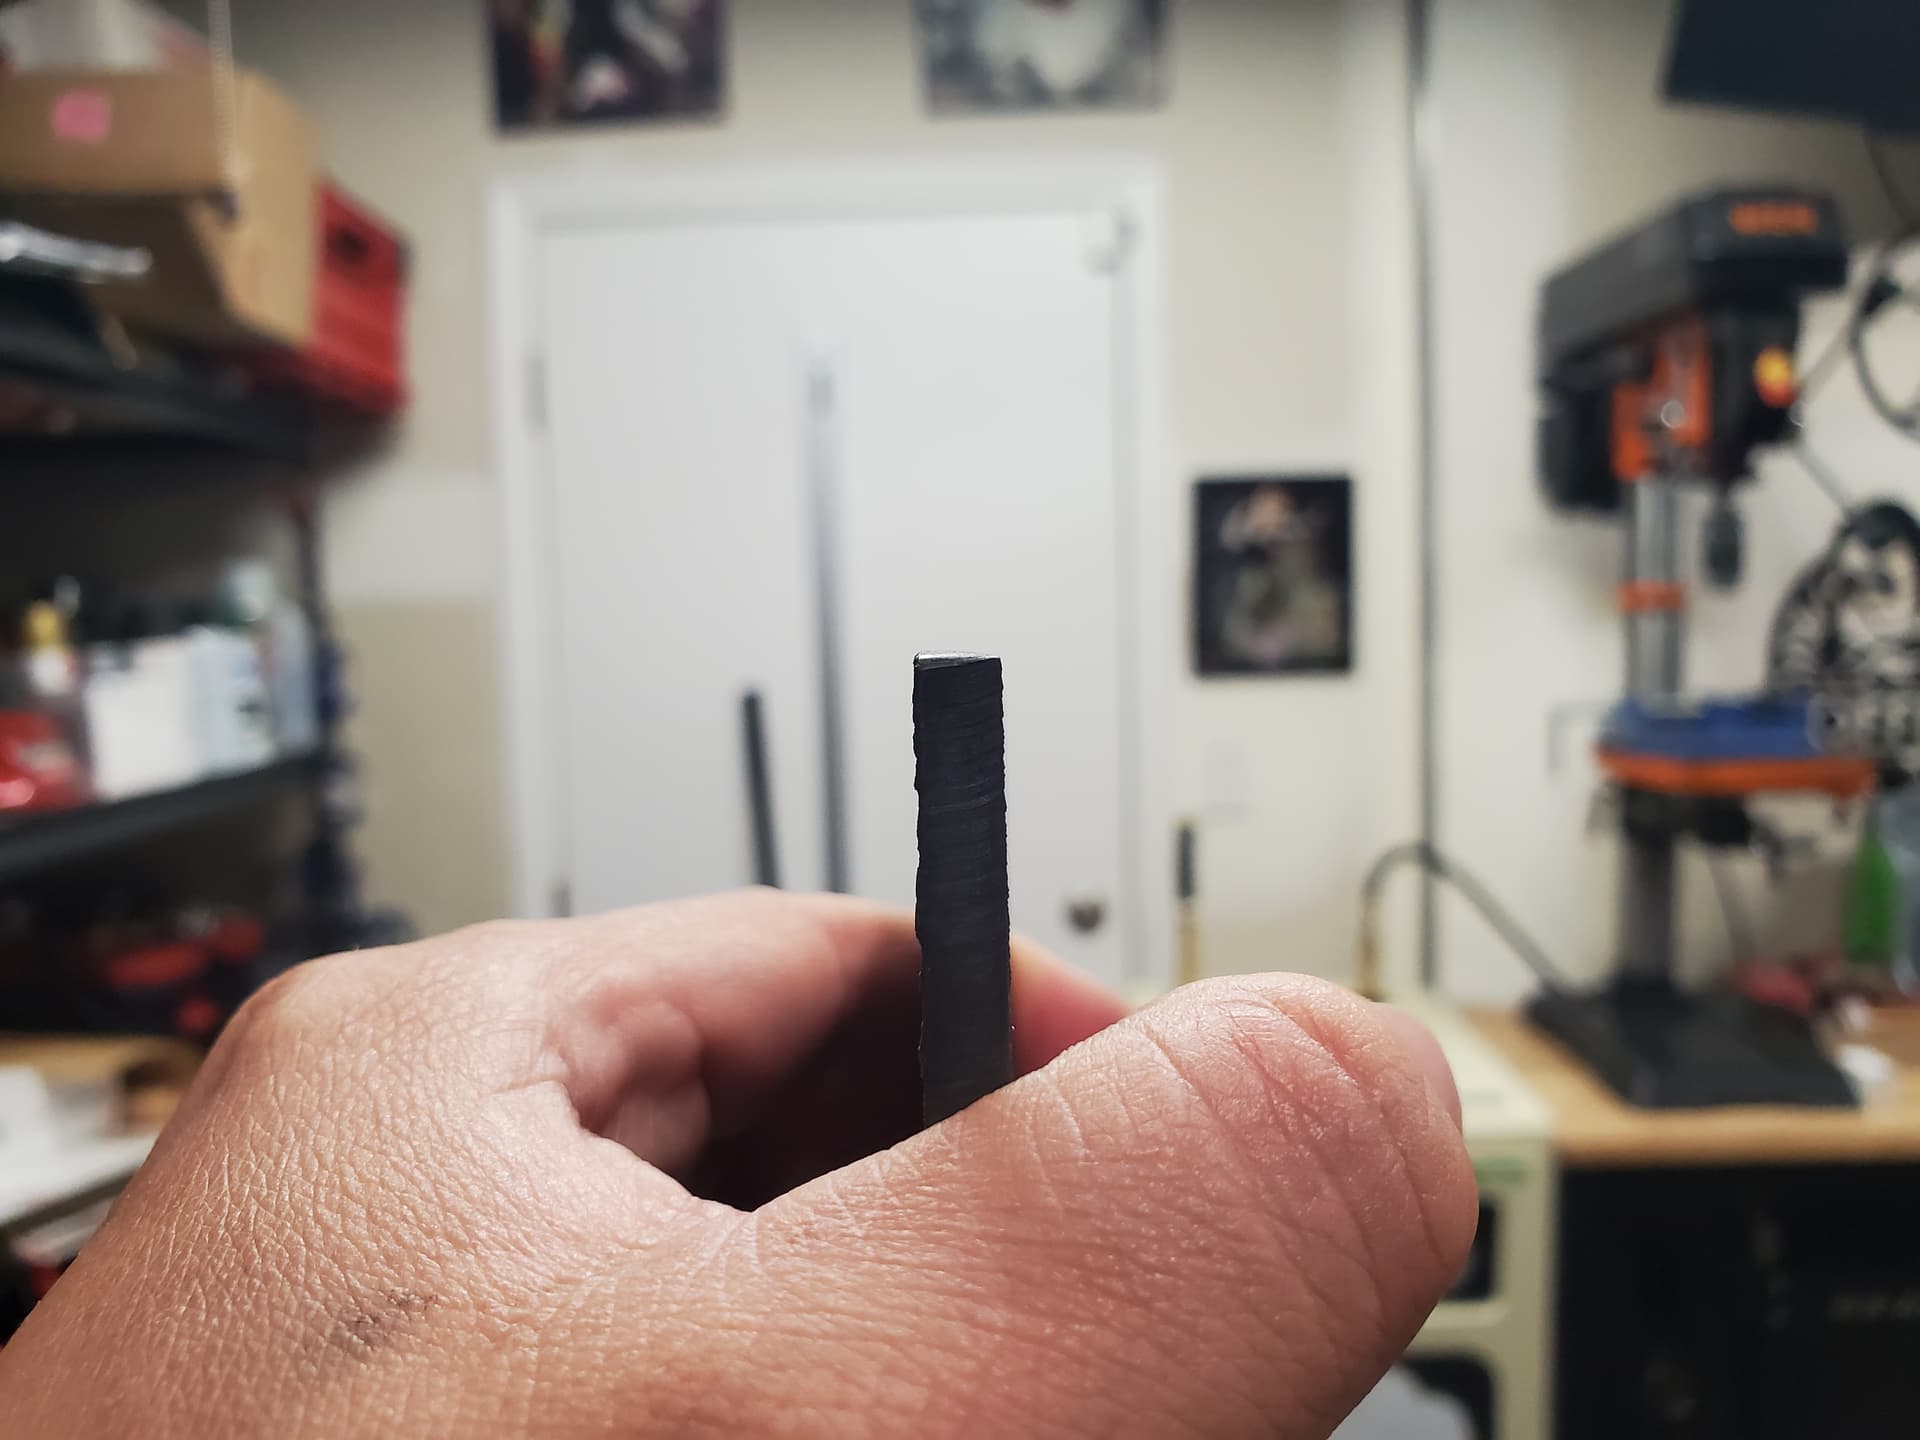
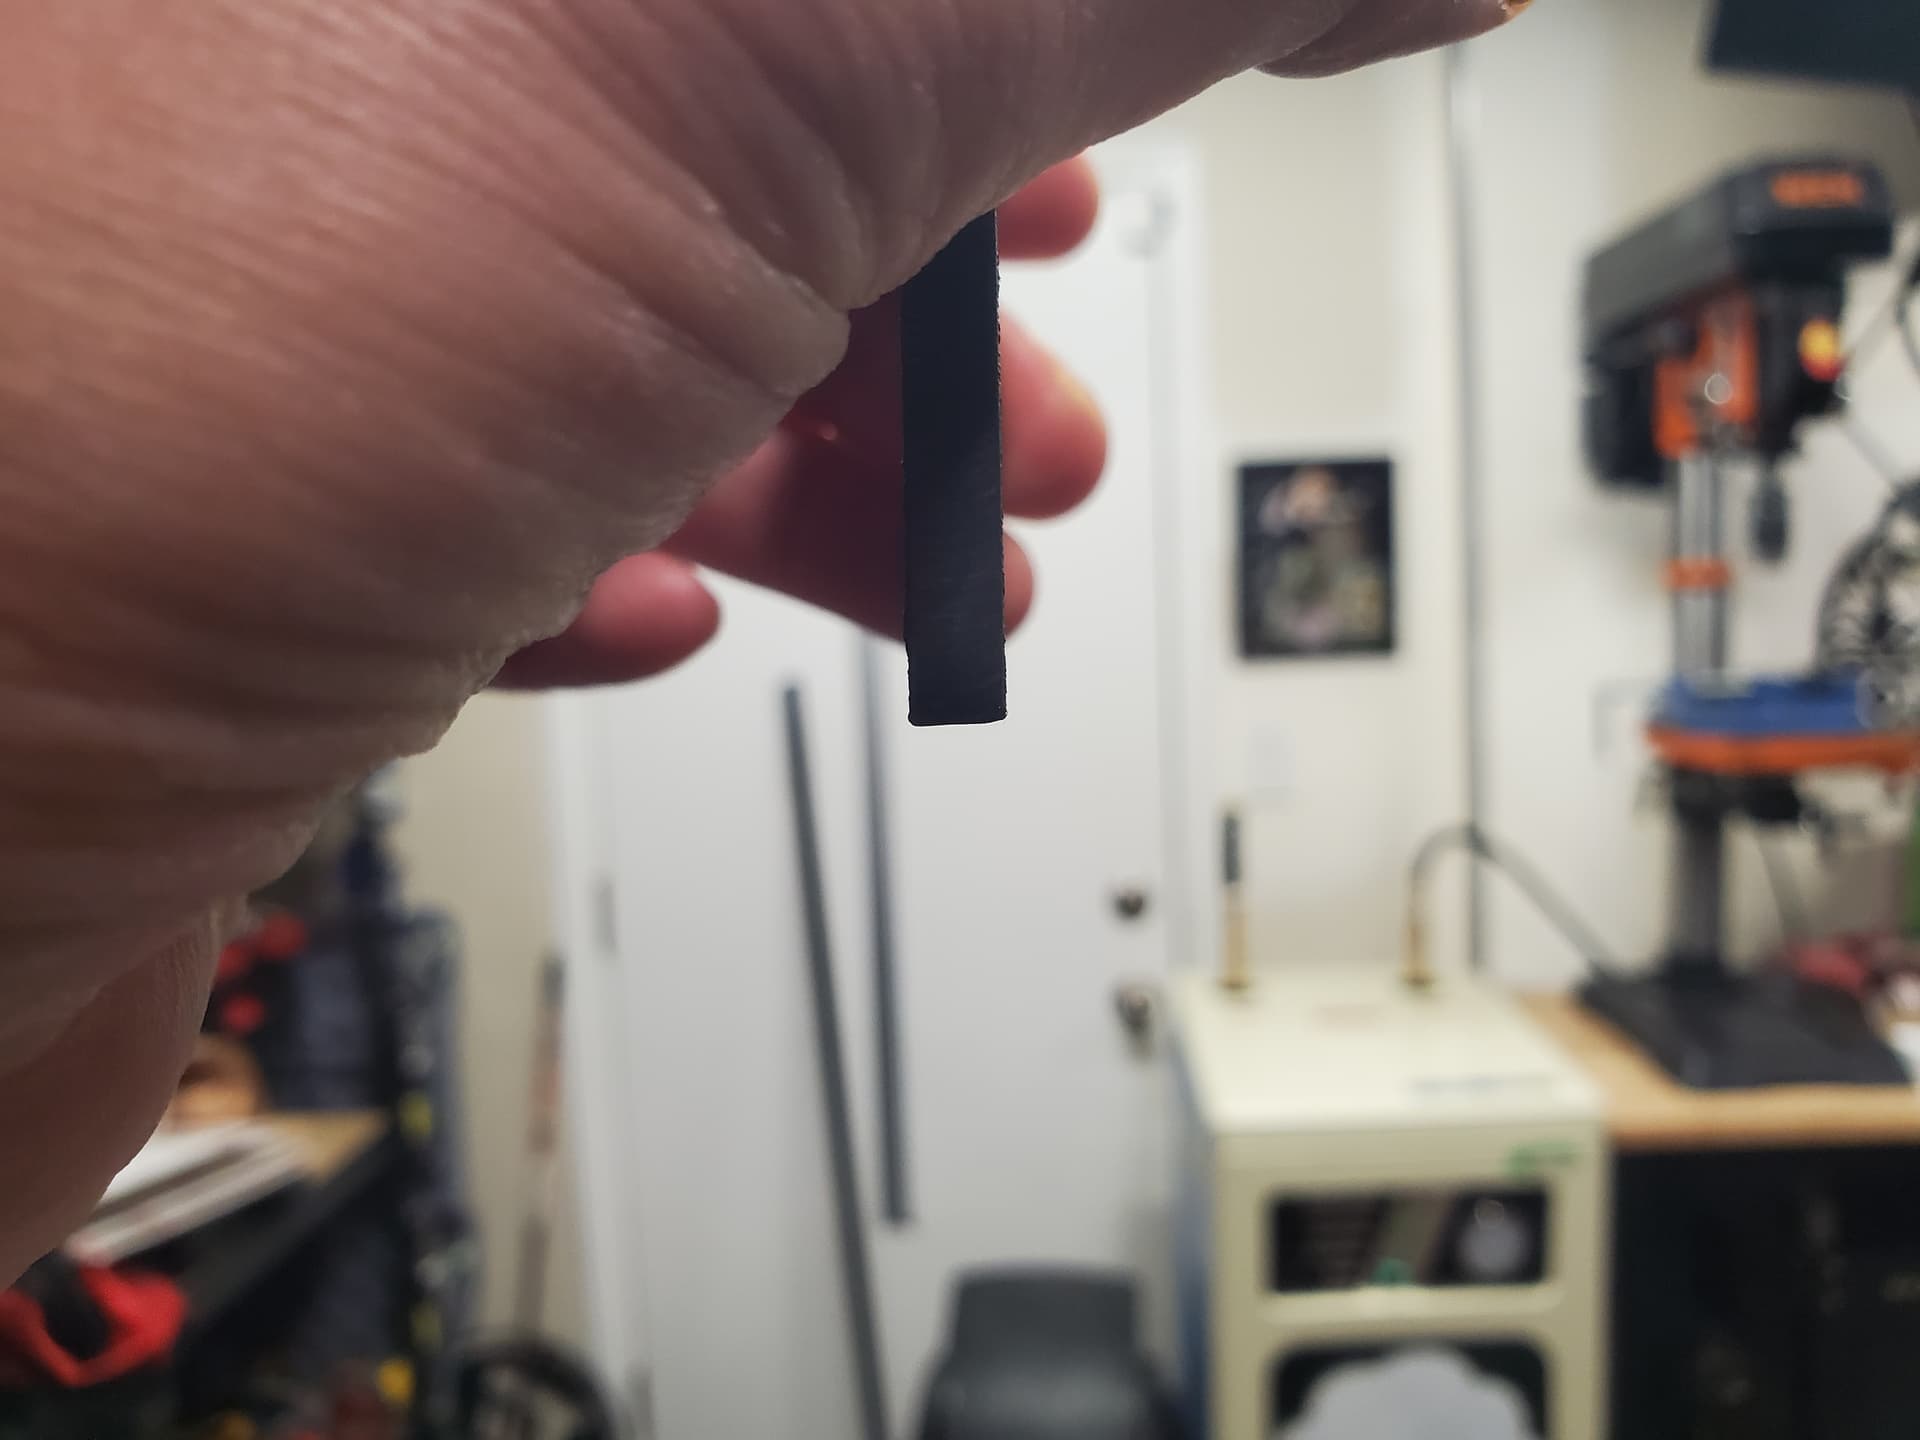
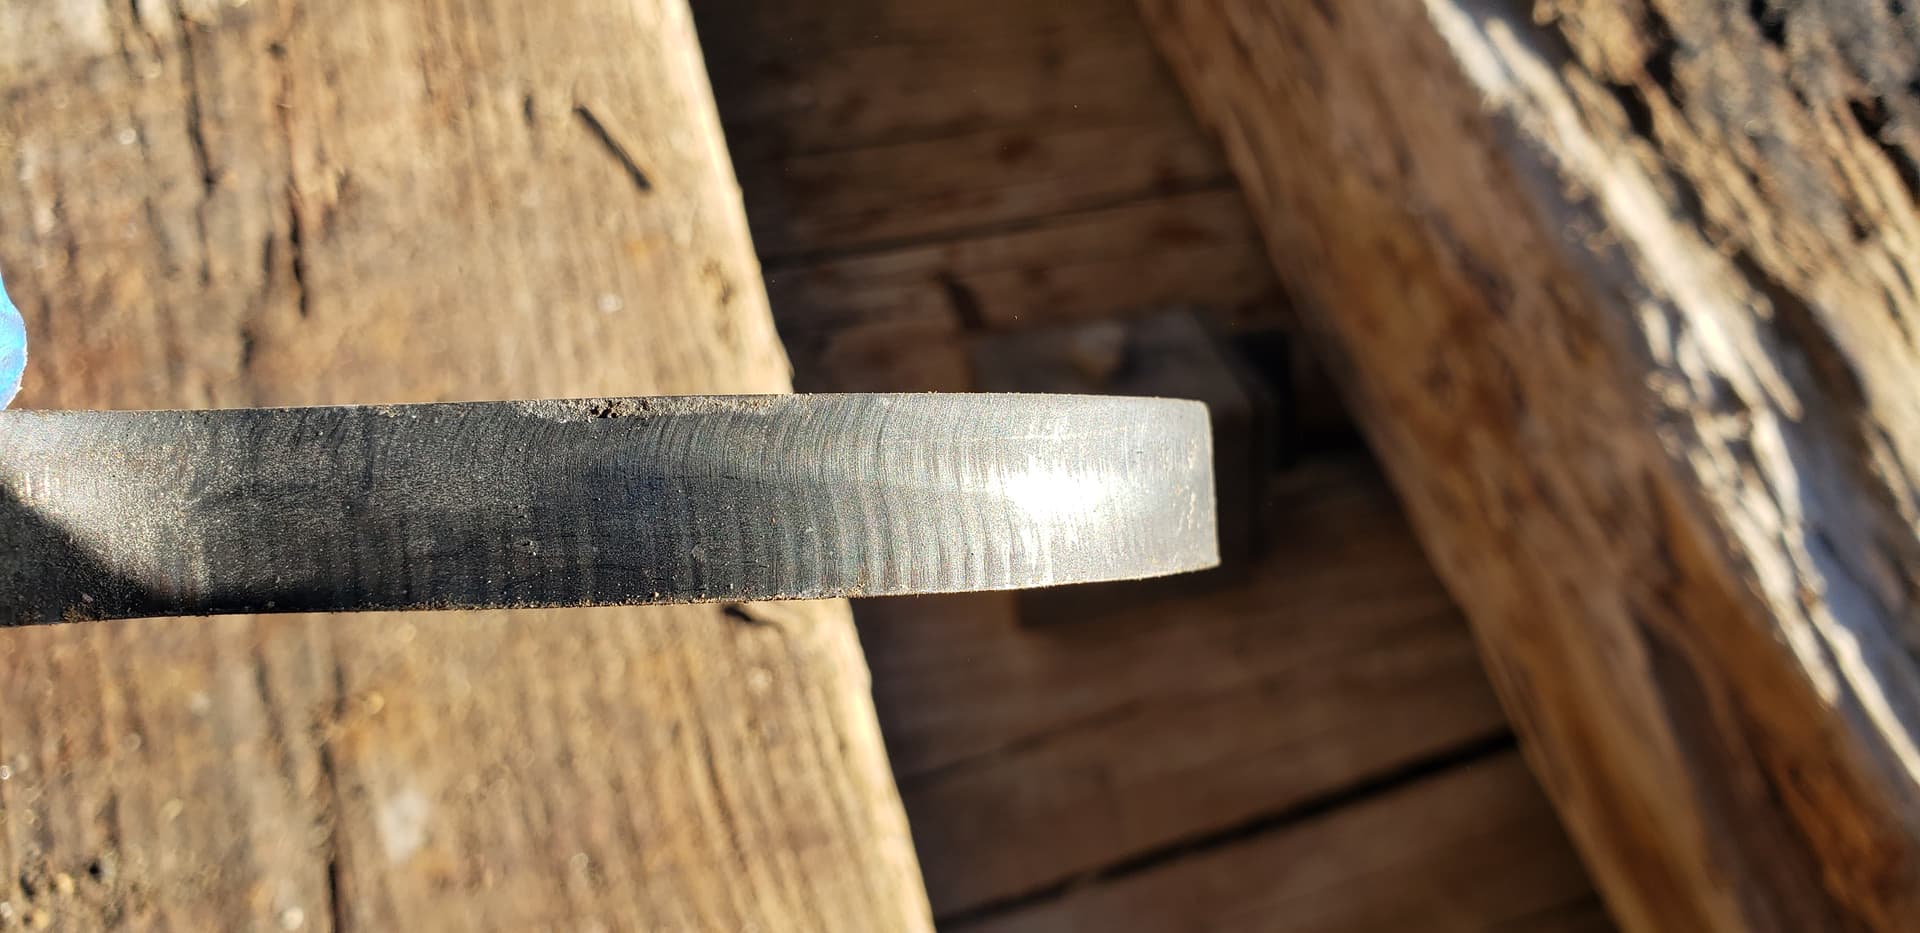
Now the results of the 3" x 3" square are interesting -
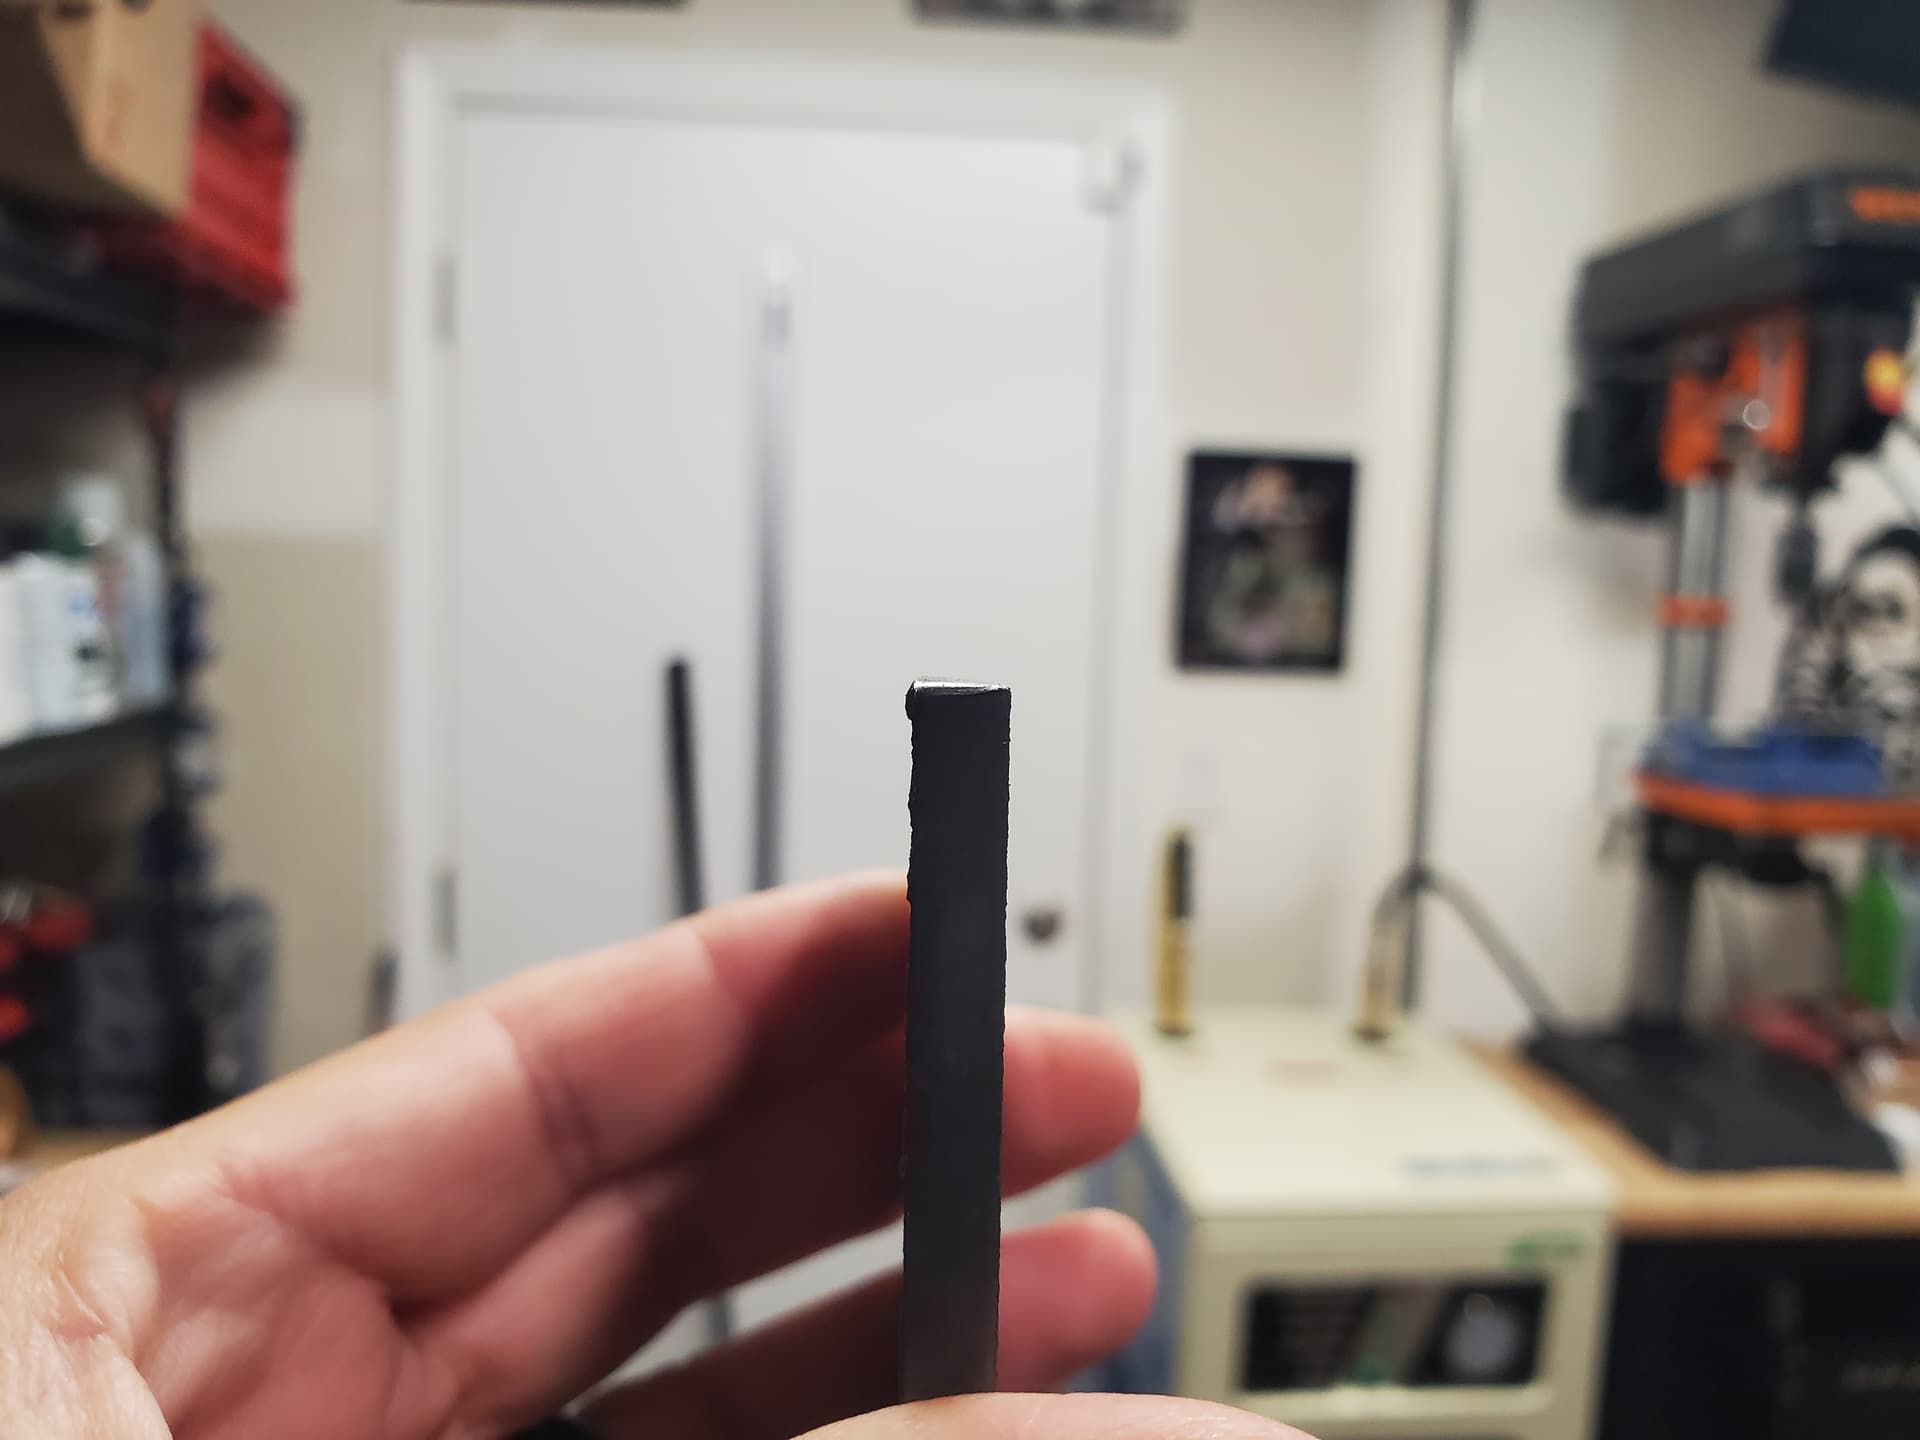
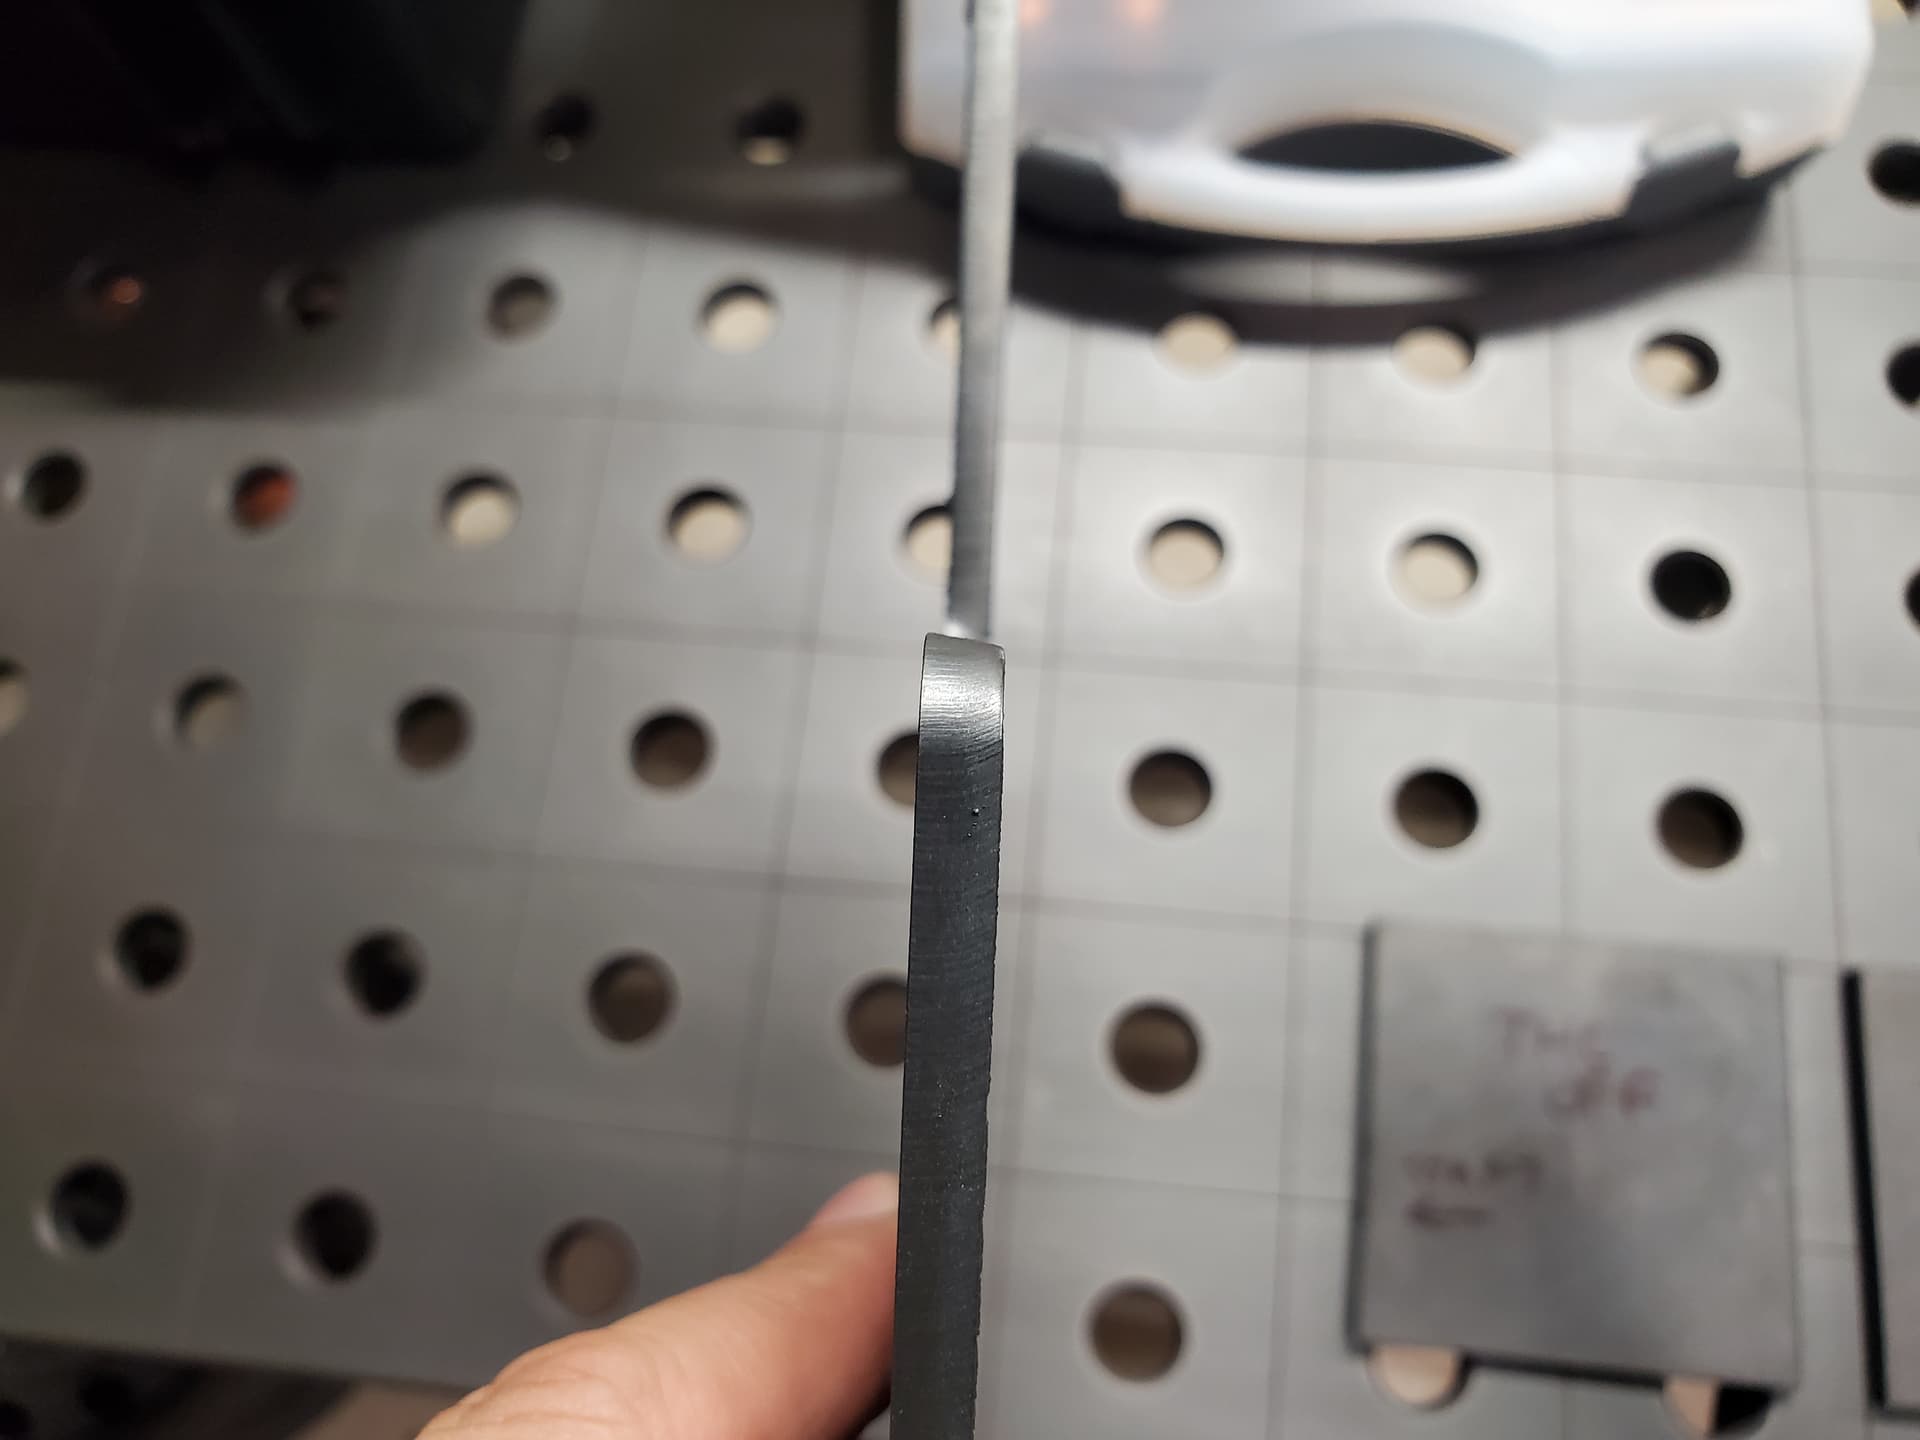
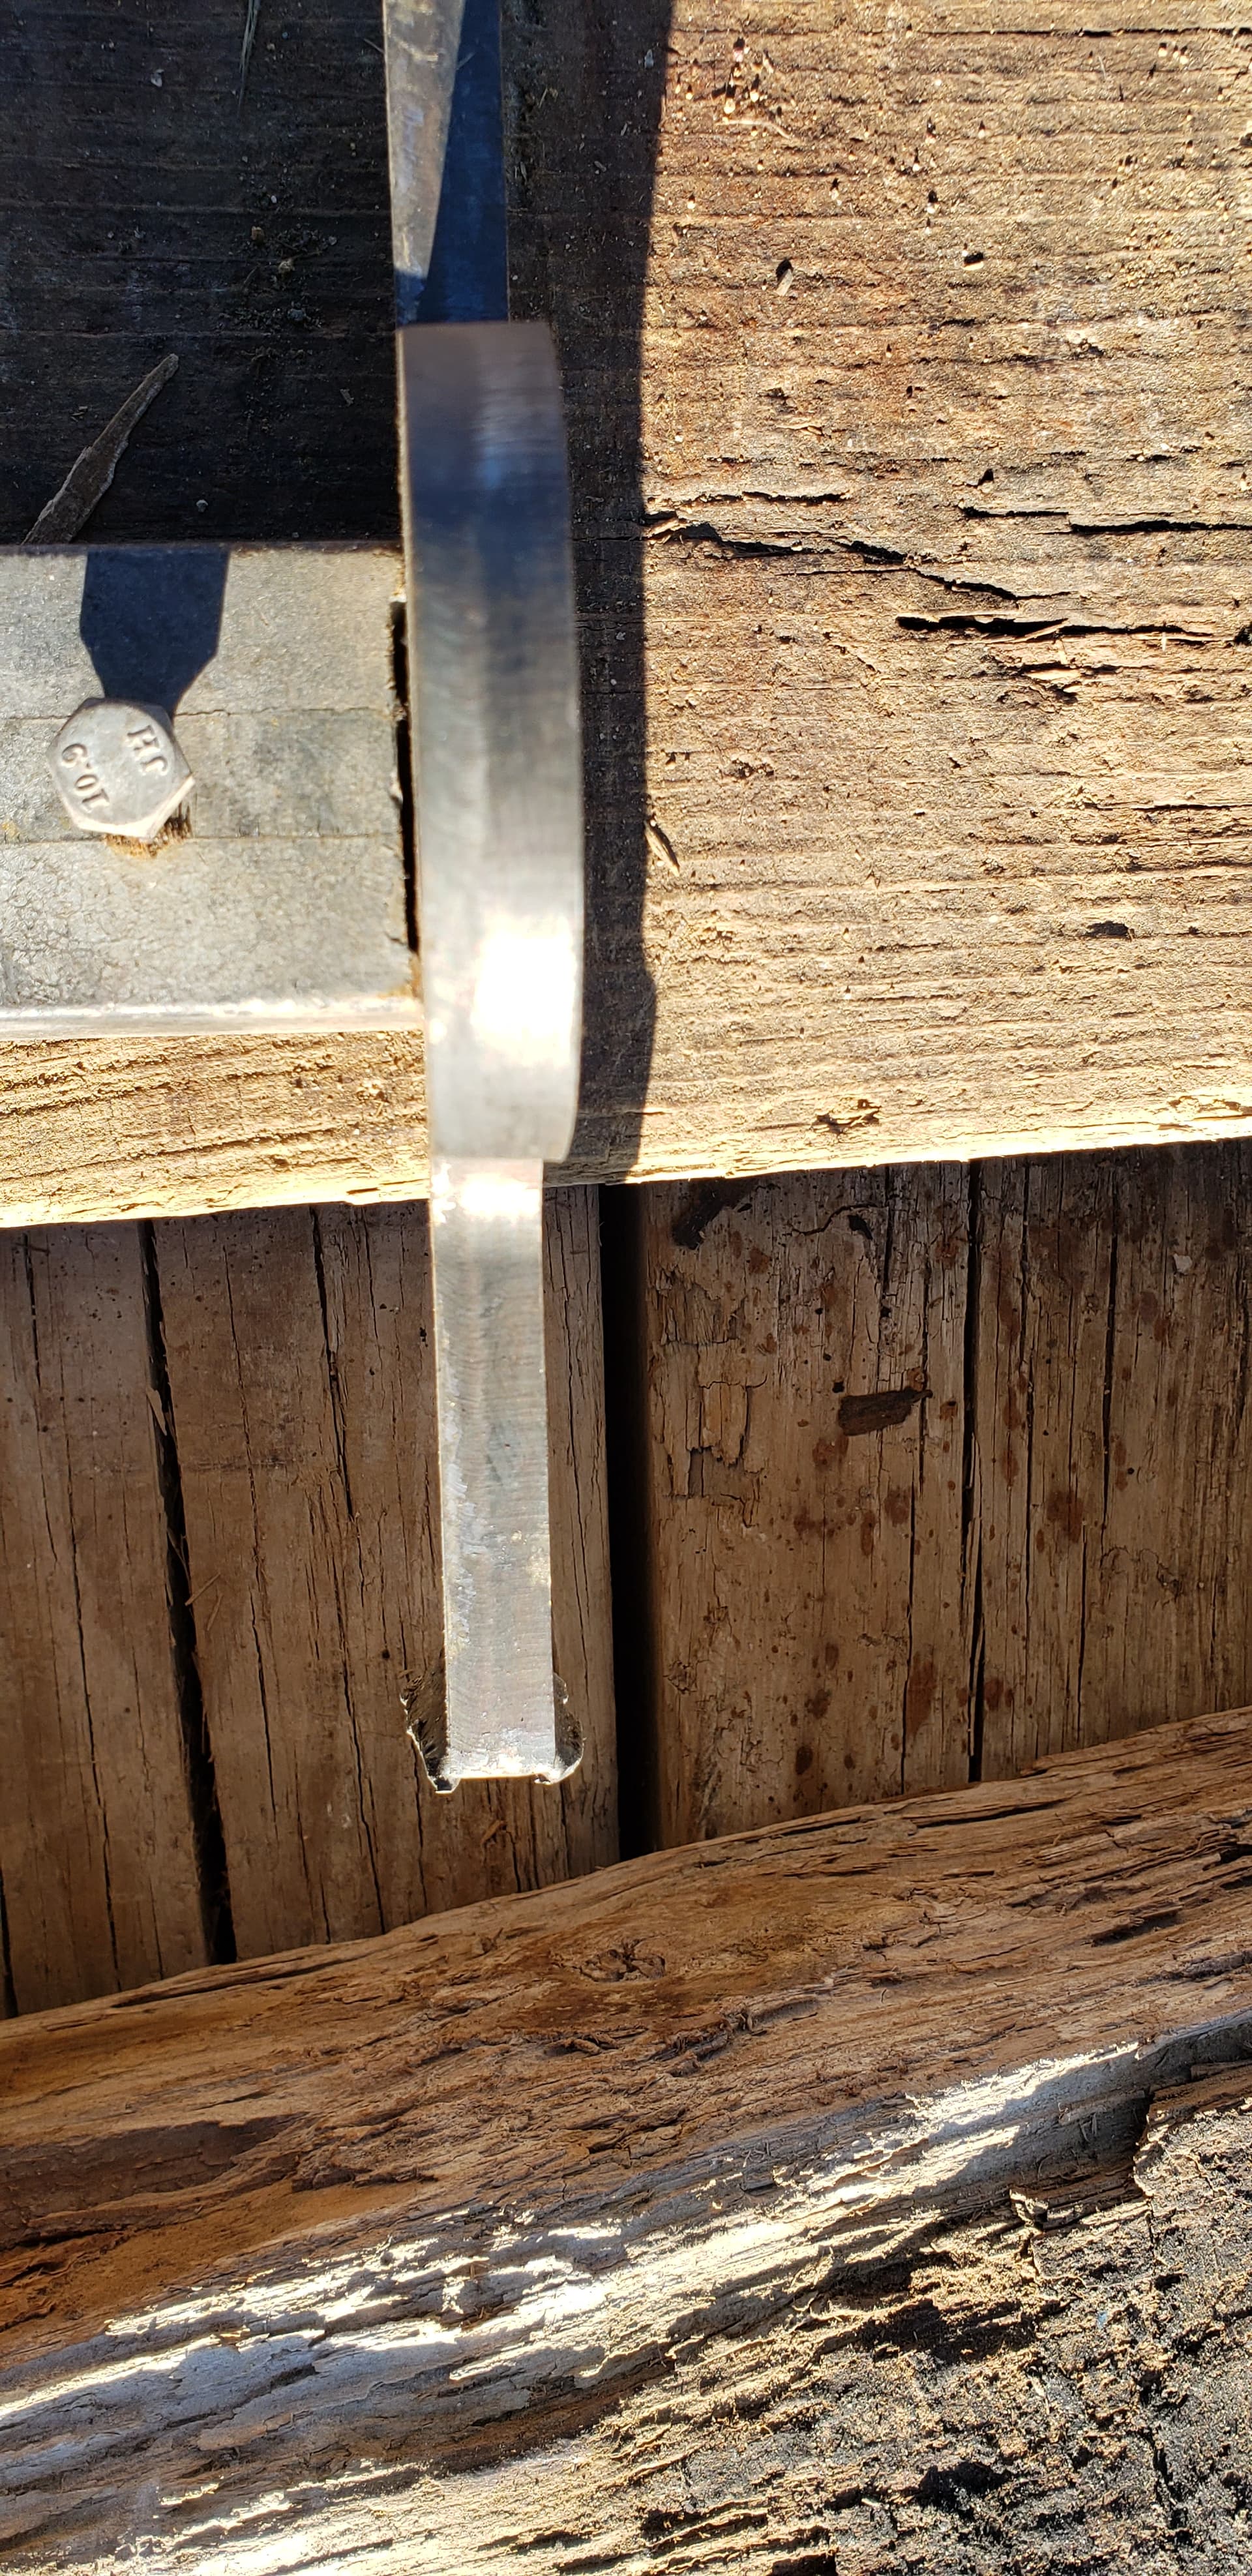
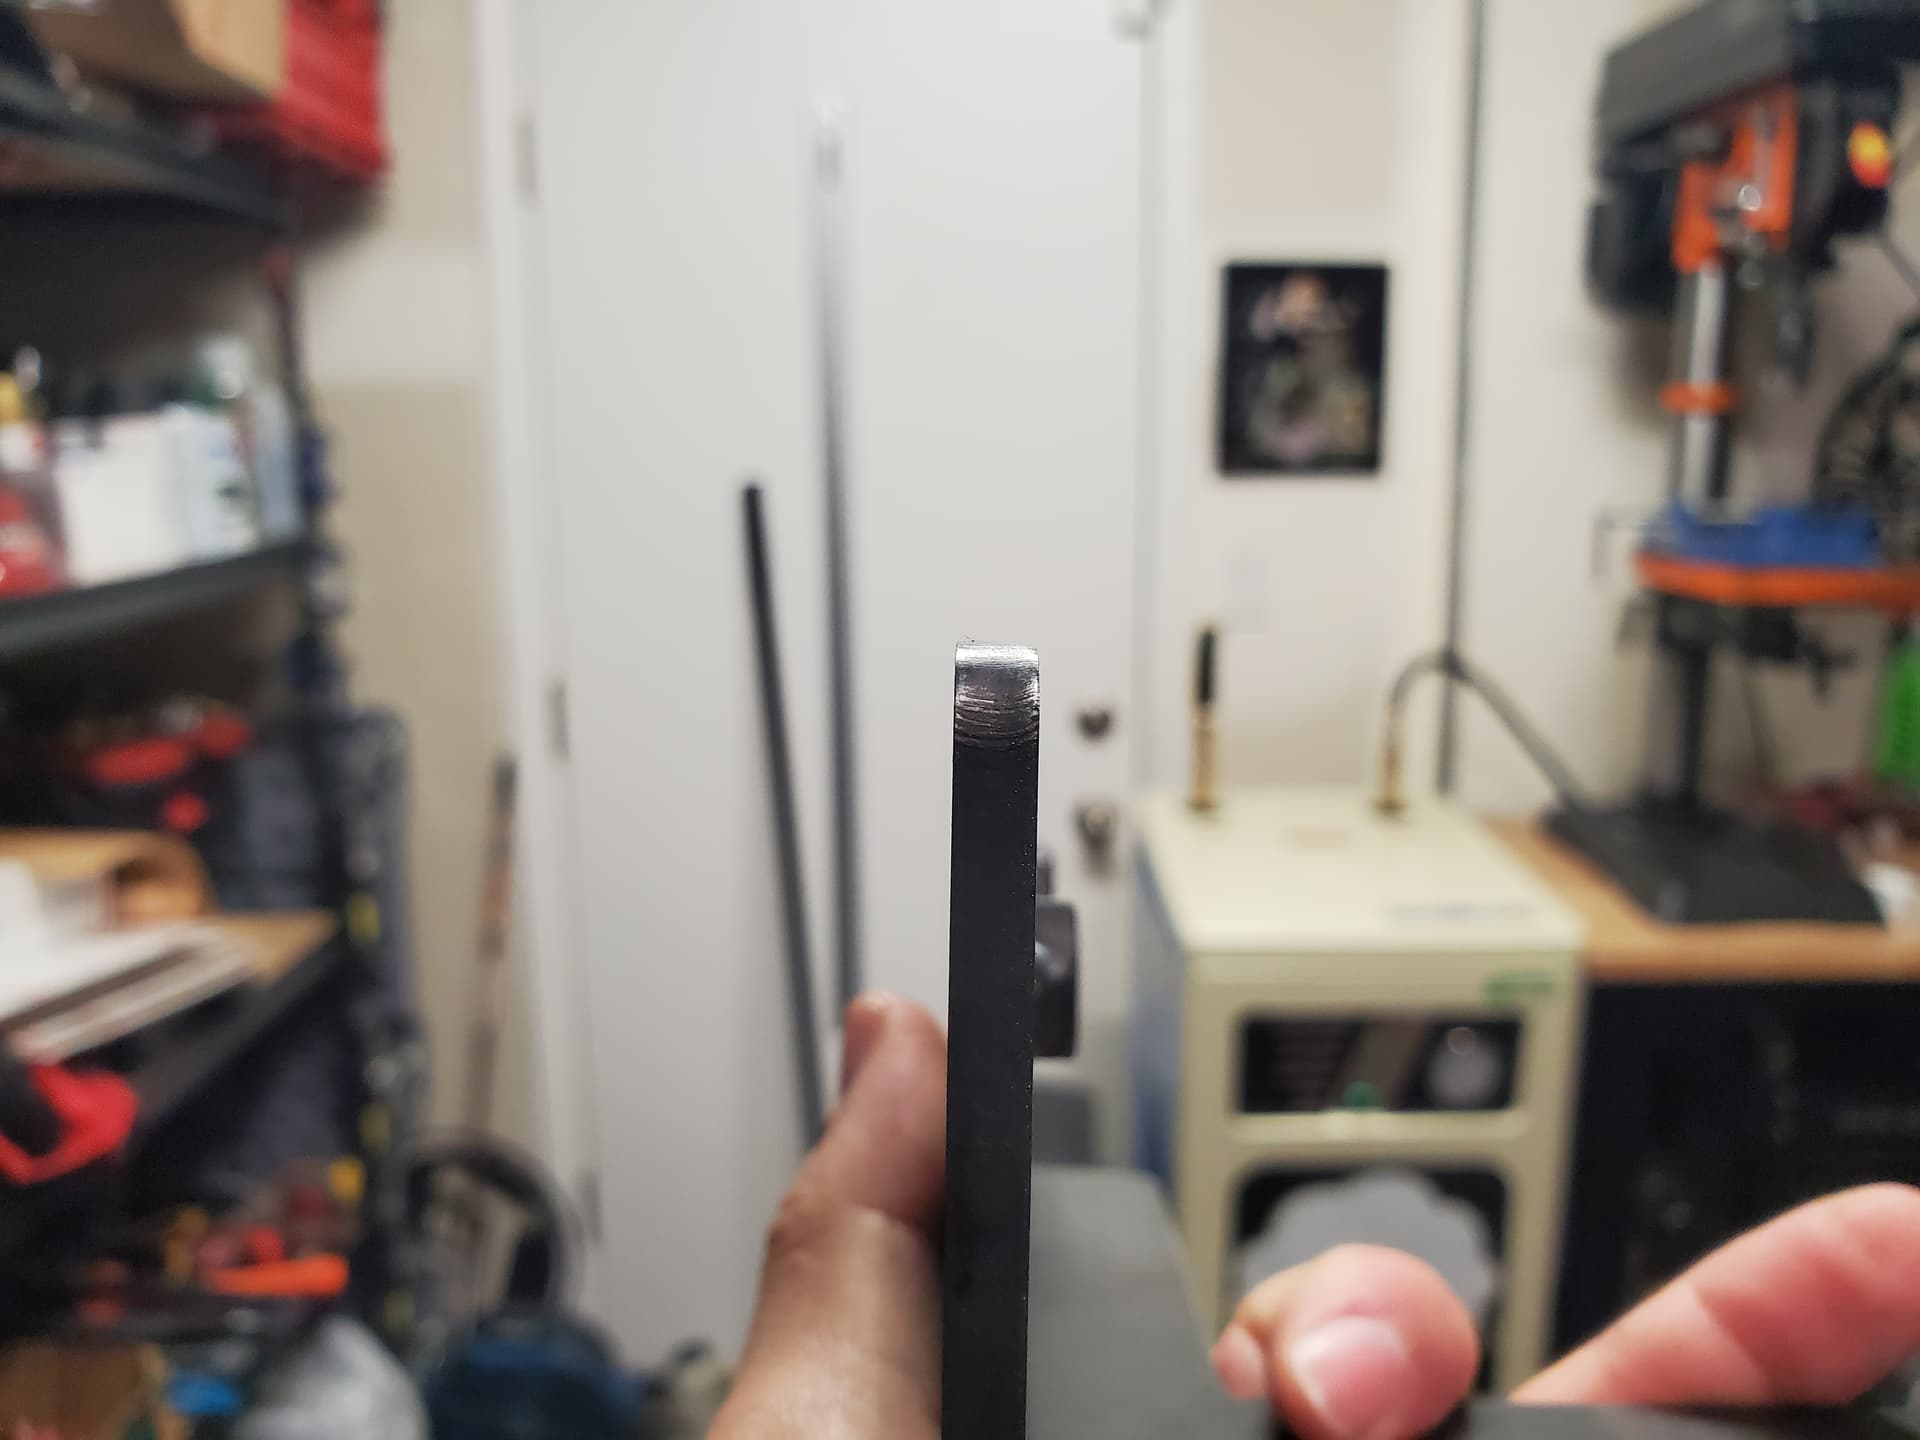
Top edge

Bottom edge

Left edge

Right edge

The test piece here is what I would call more than acceptable, and what I would or should expect my cutouts to look like.

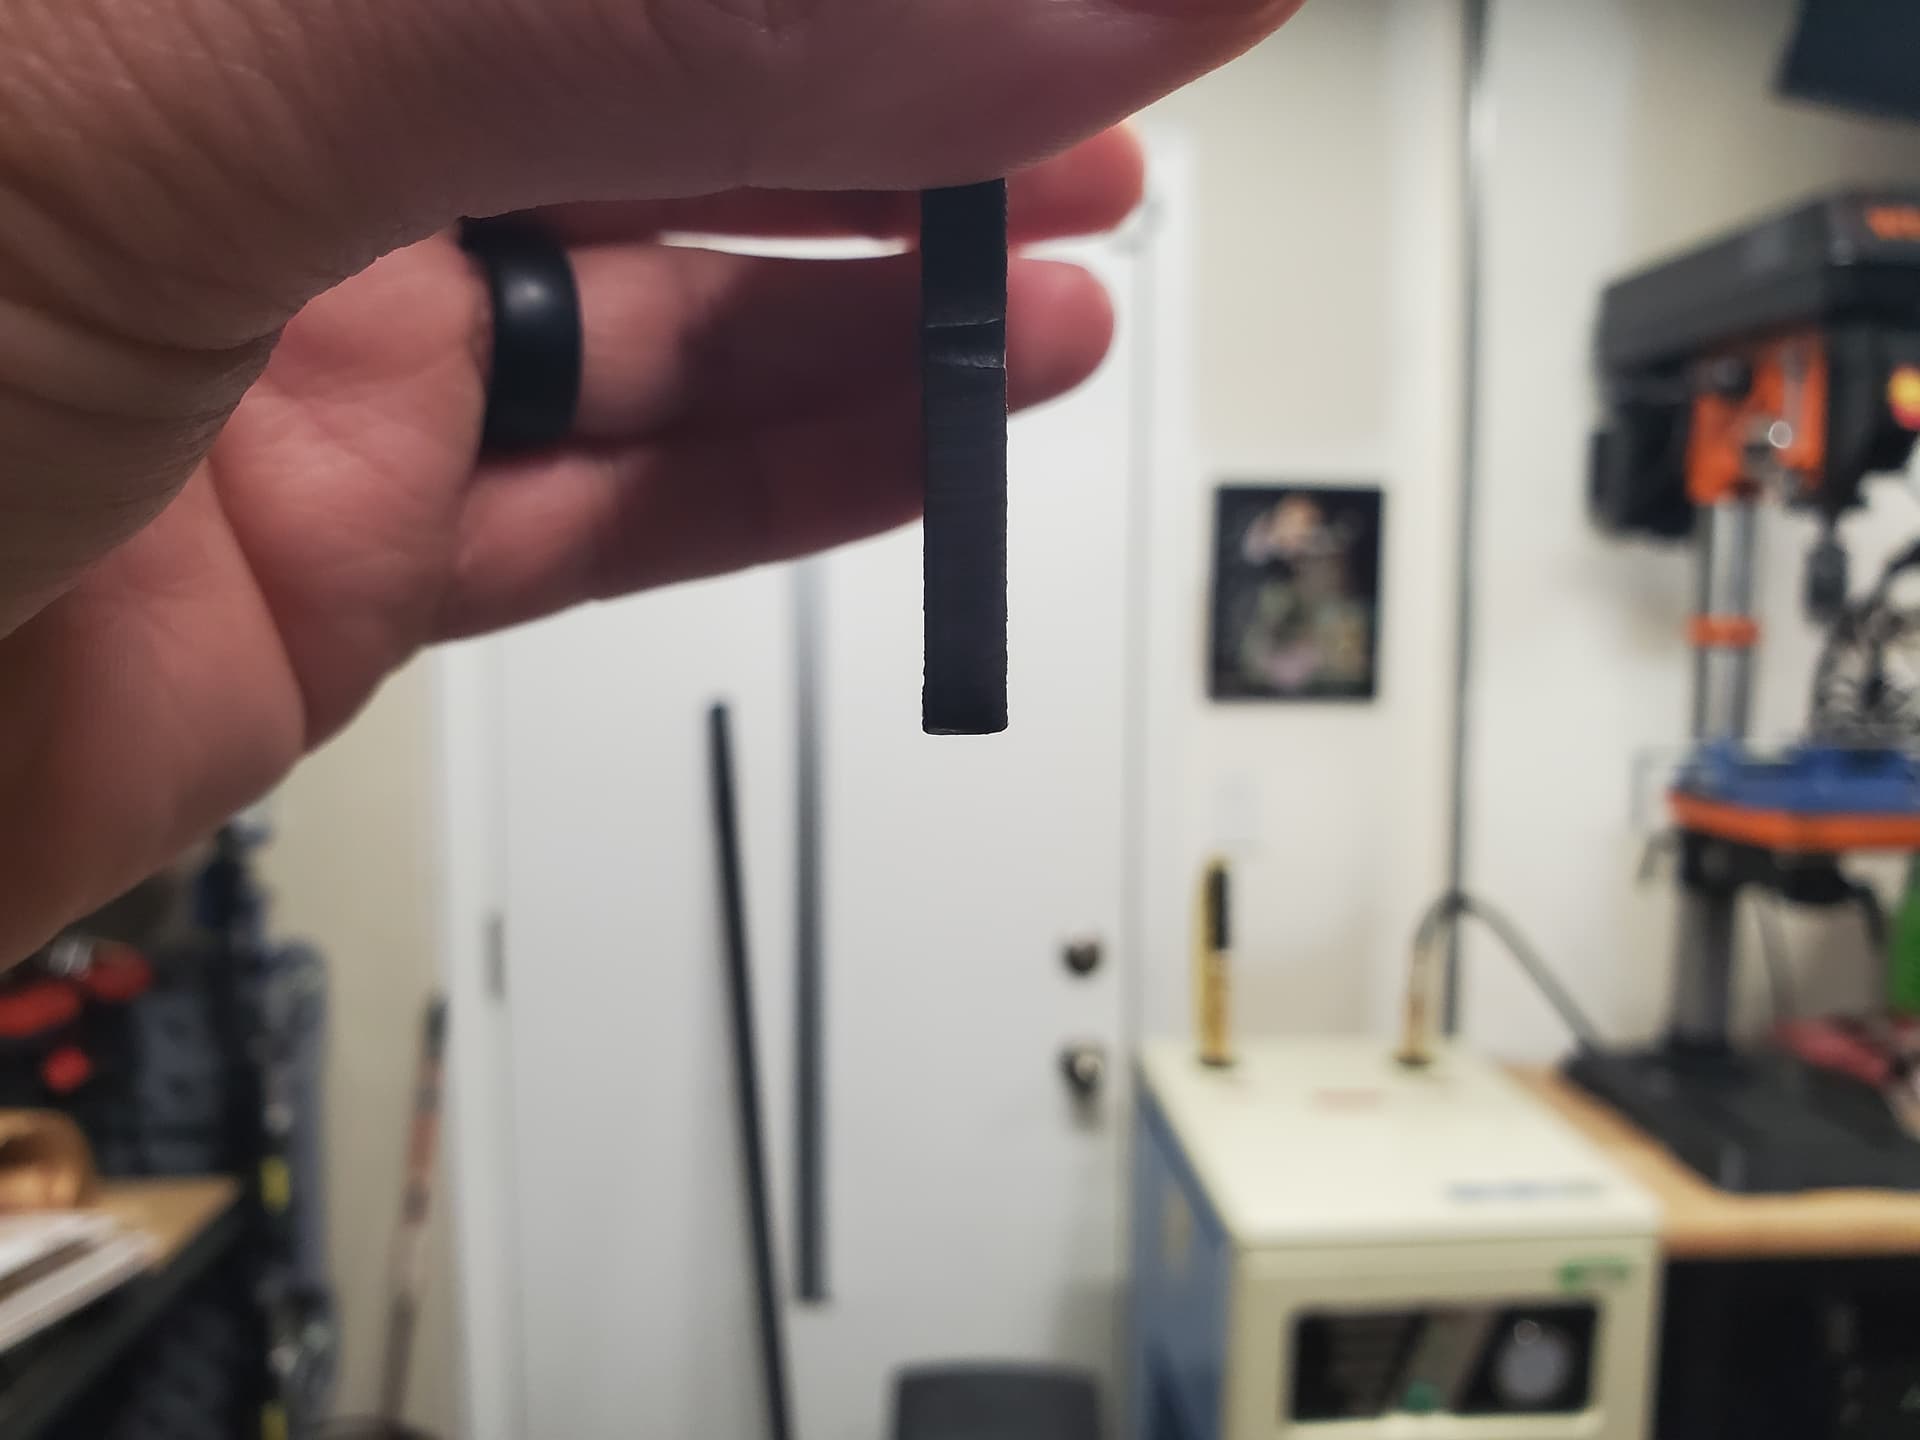
Performing the same test but beginning with the lead in on the left side provided identical results -
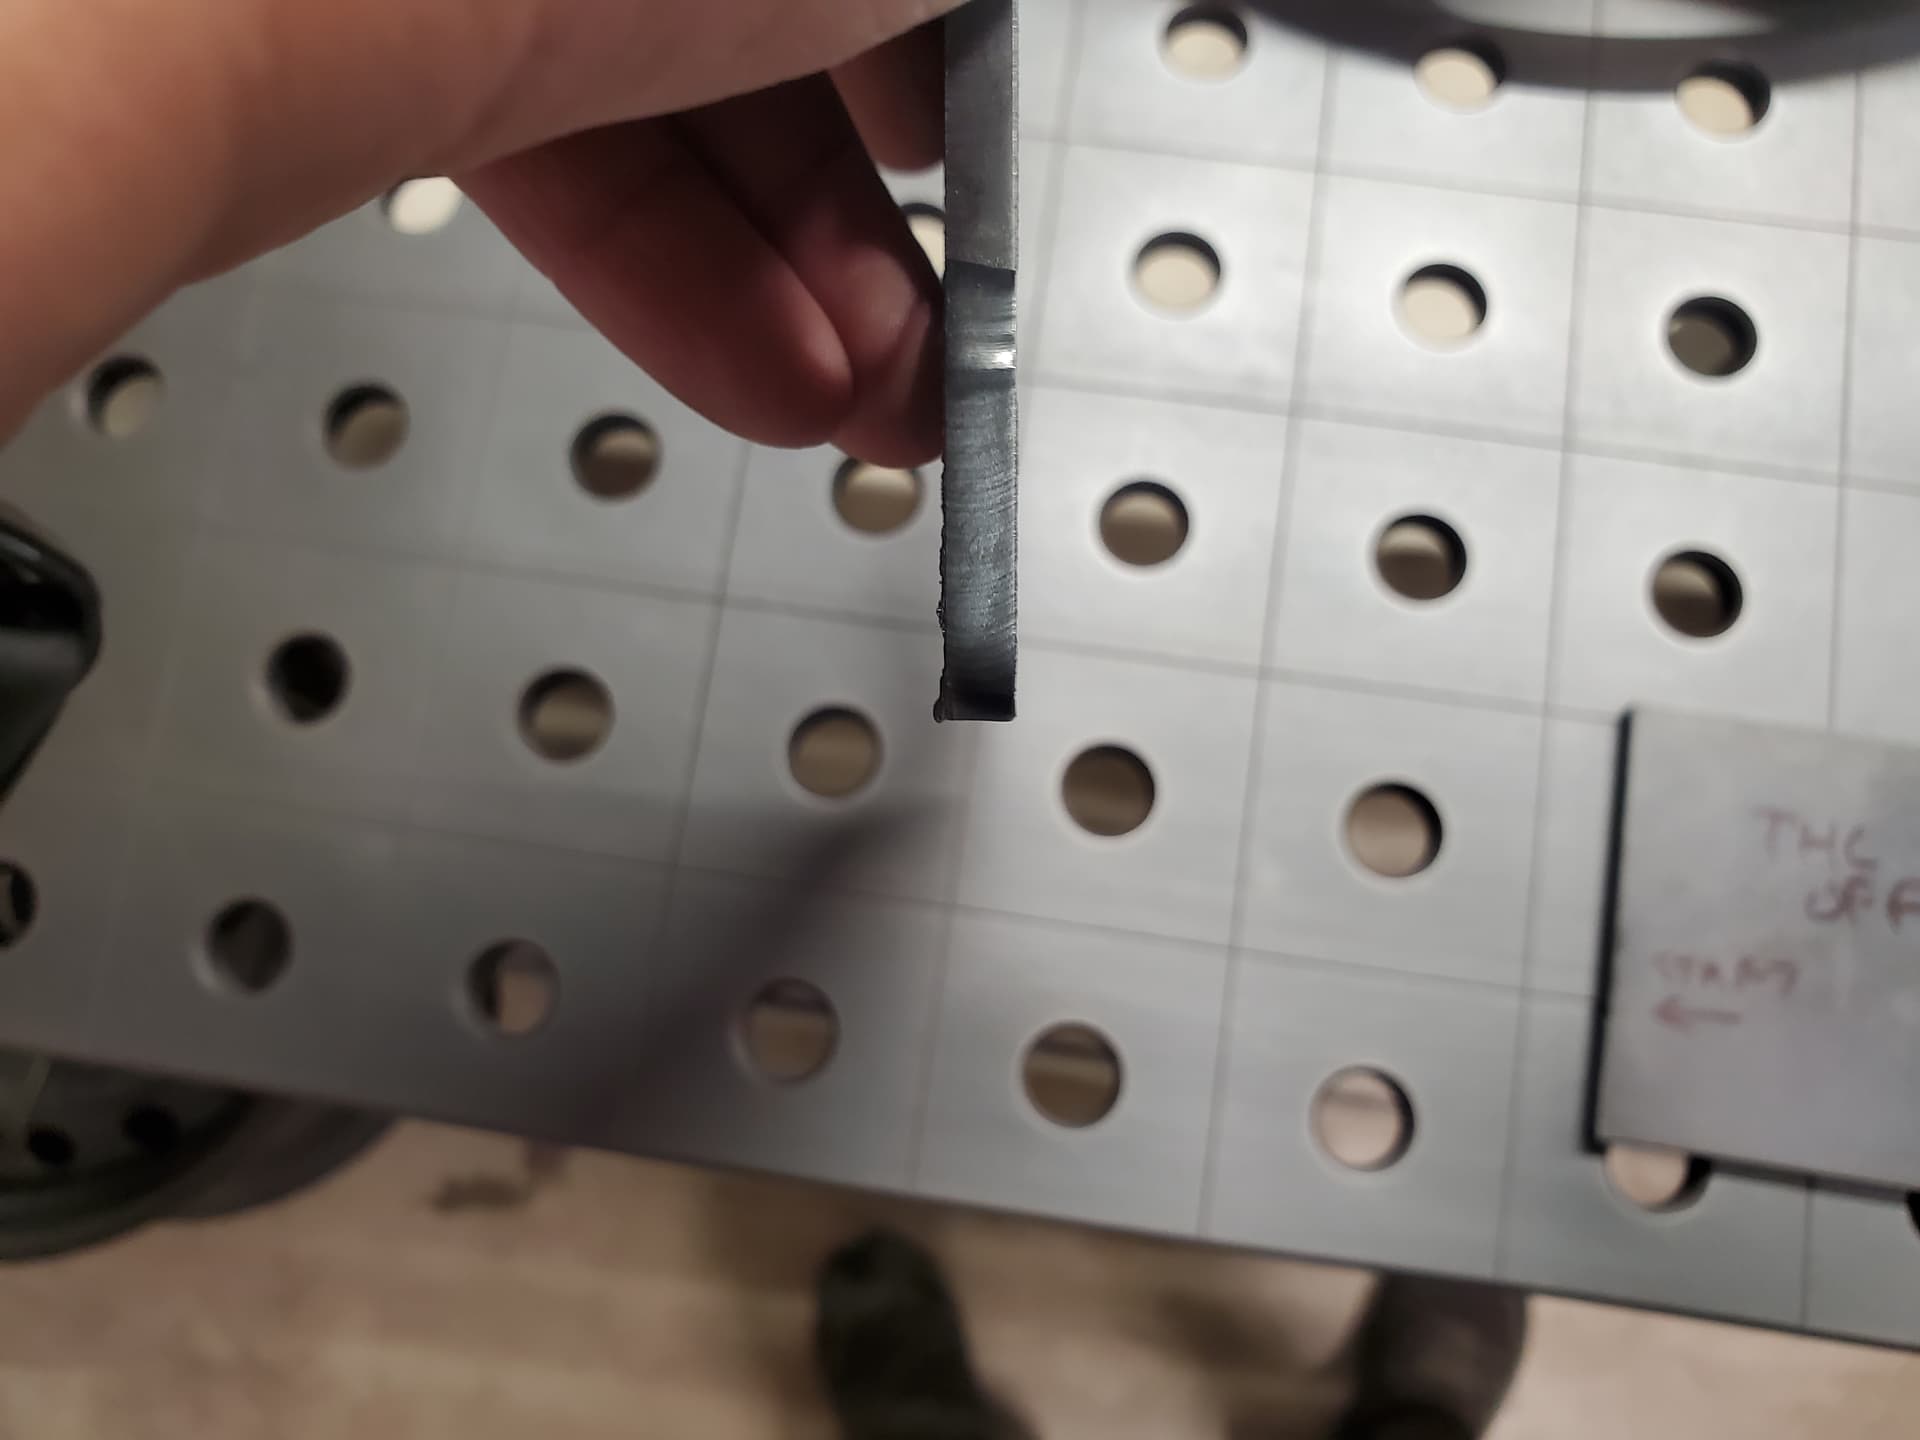
Top edge

Bottom edge

Left edge

Right edge

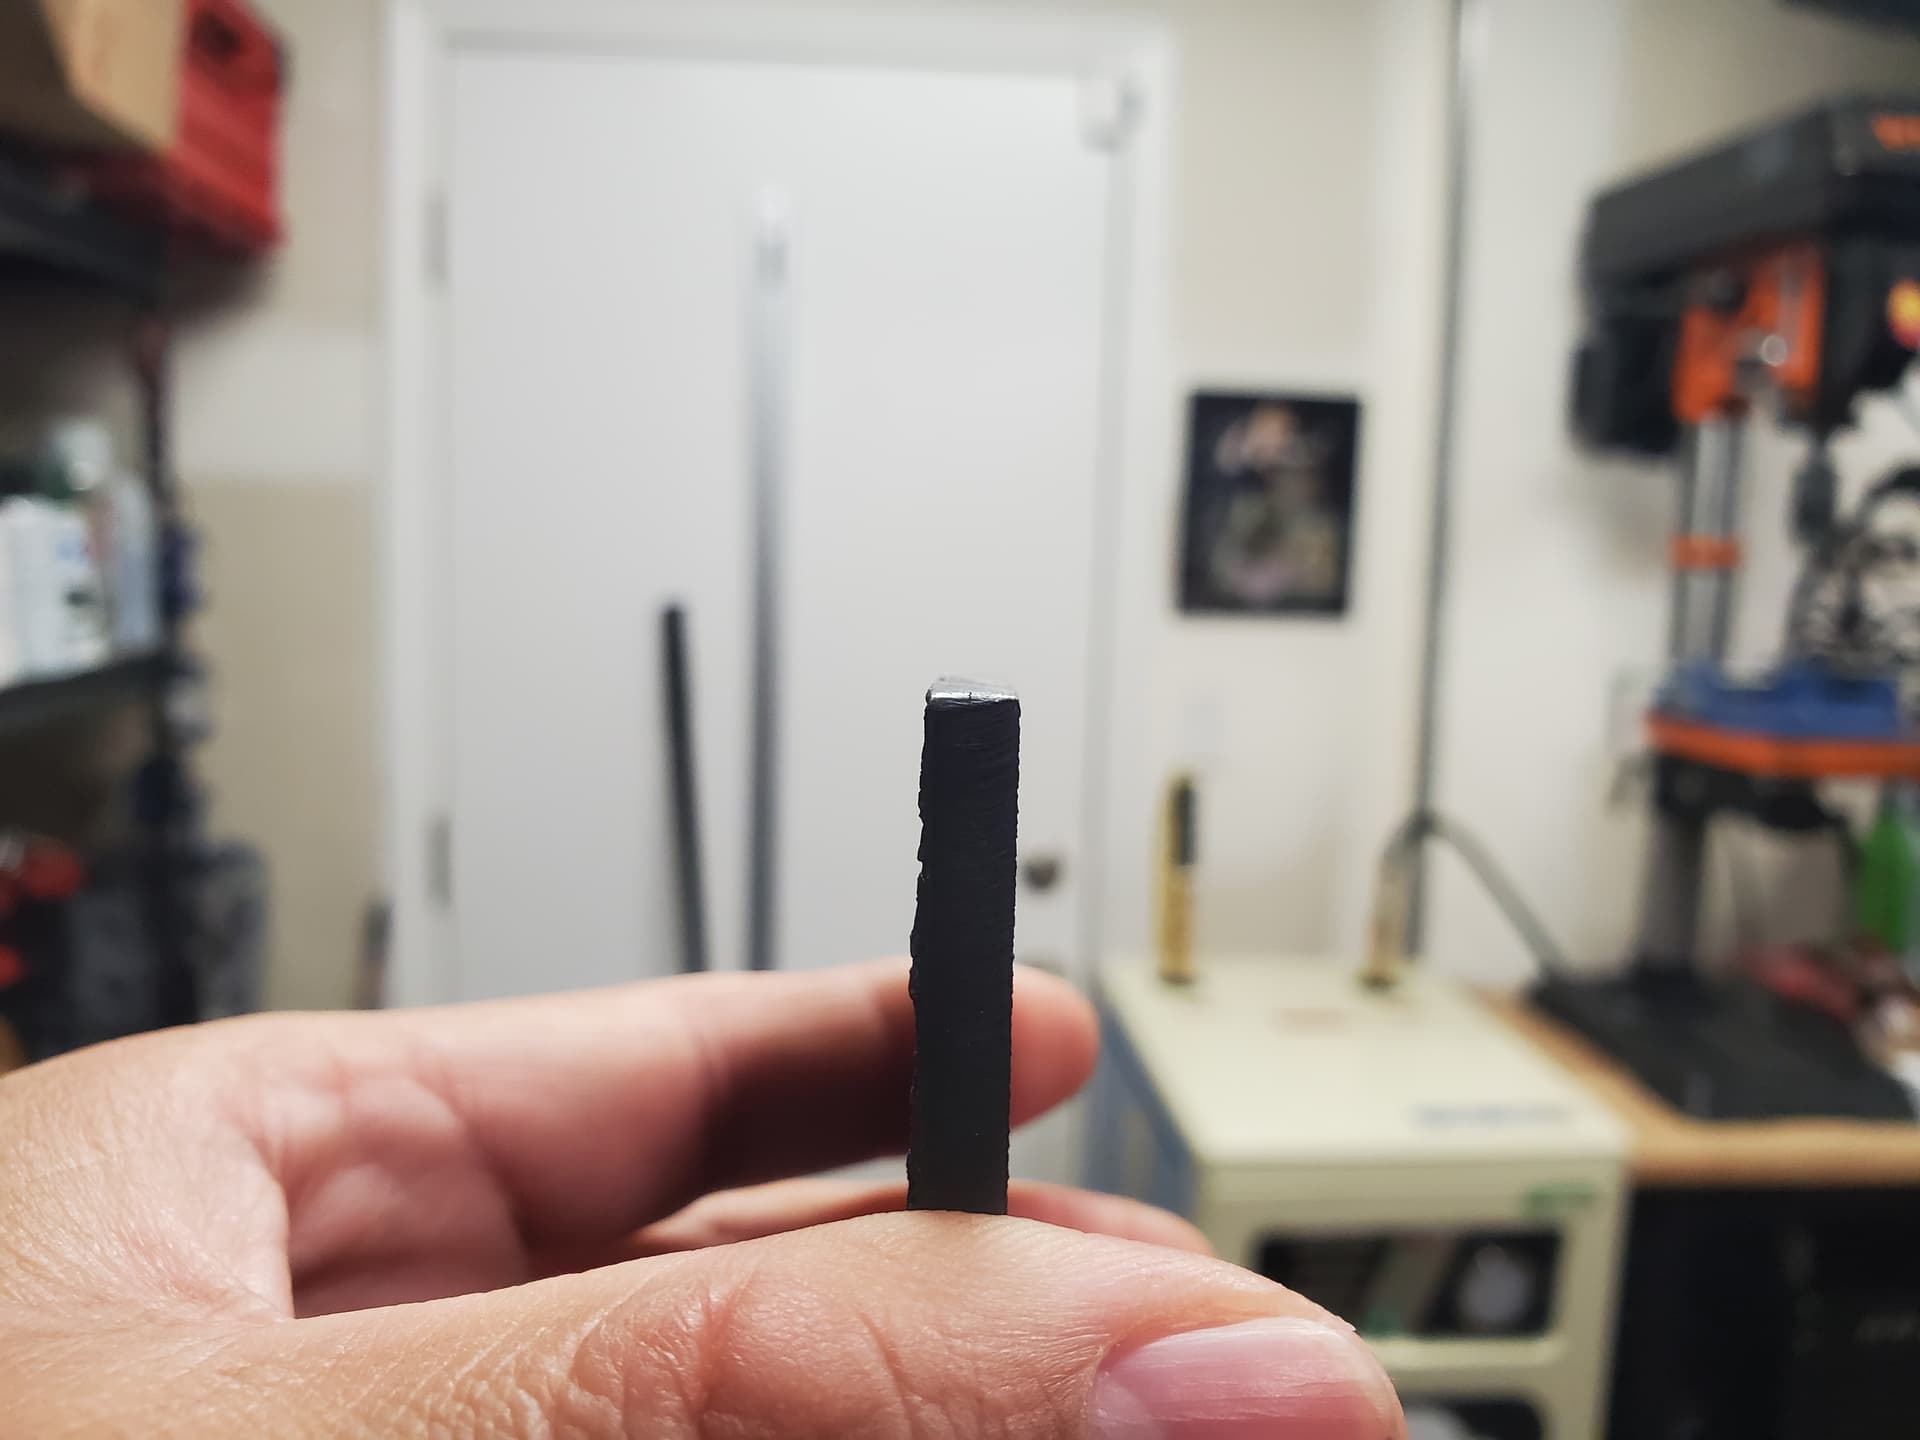
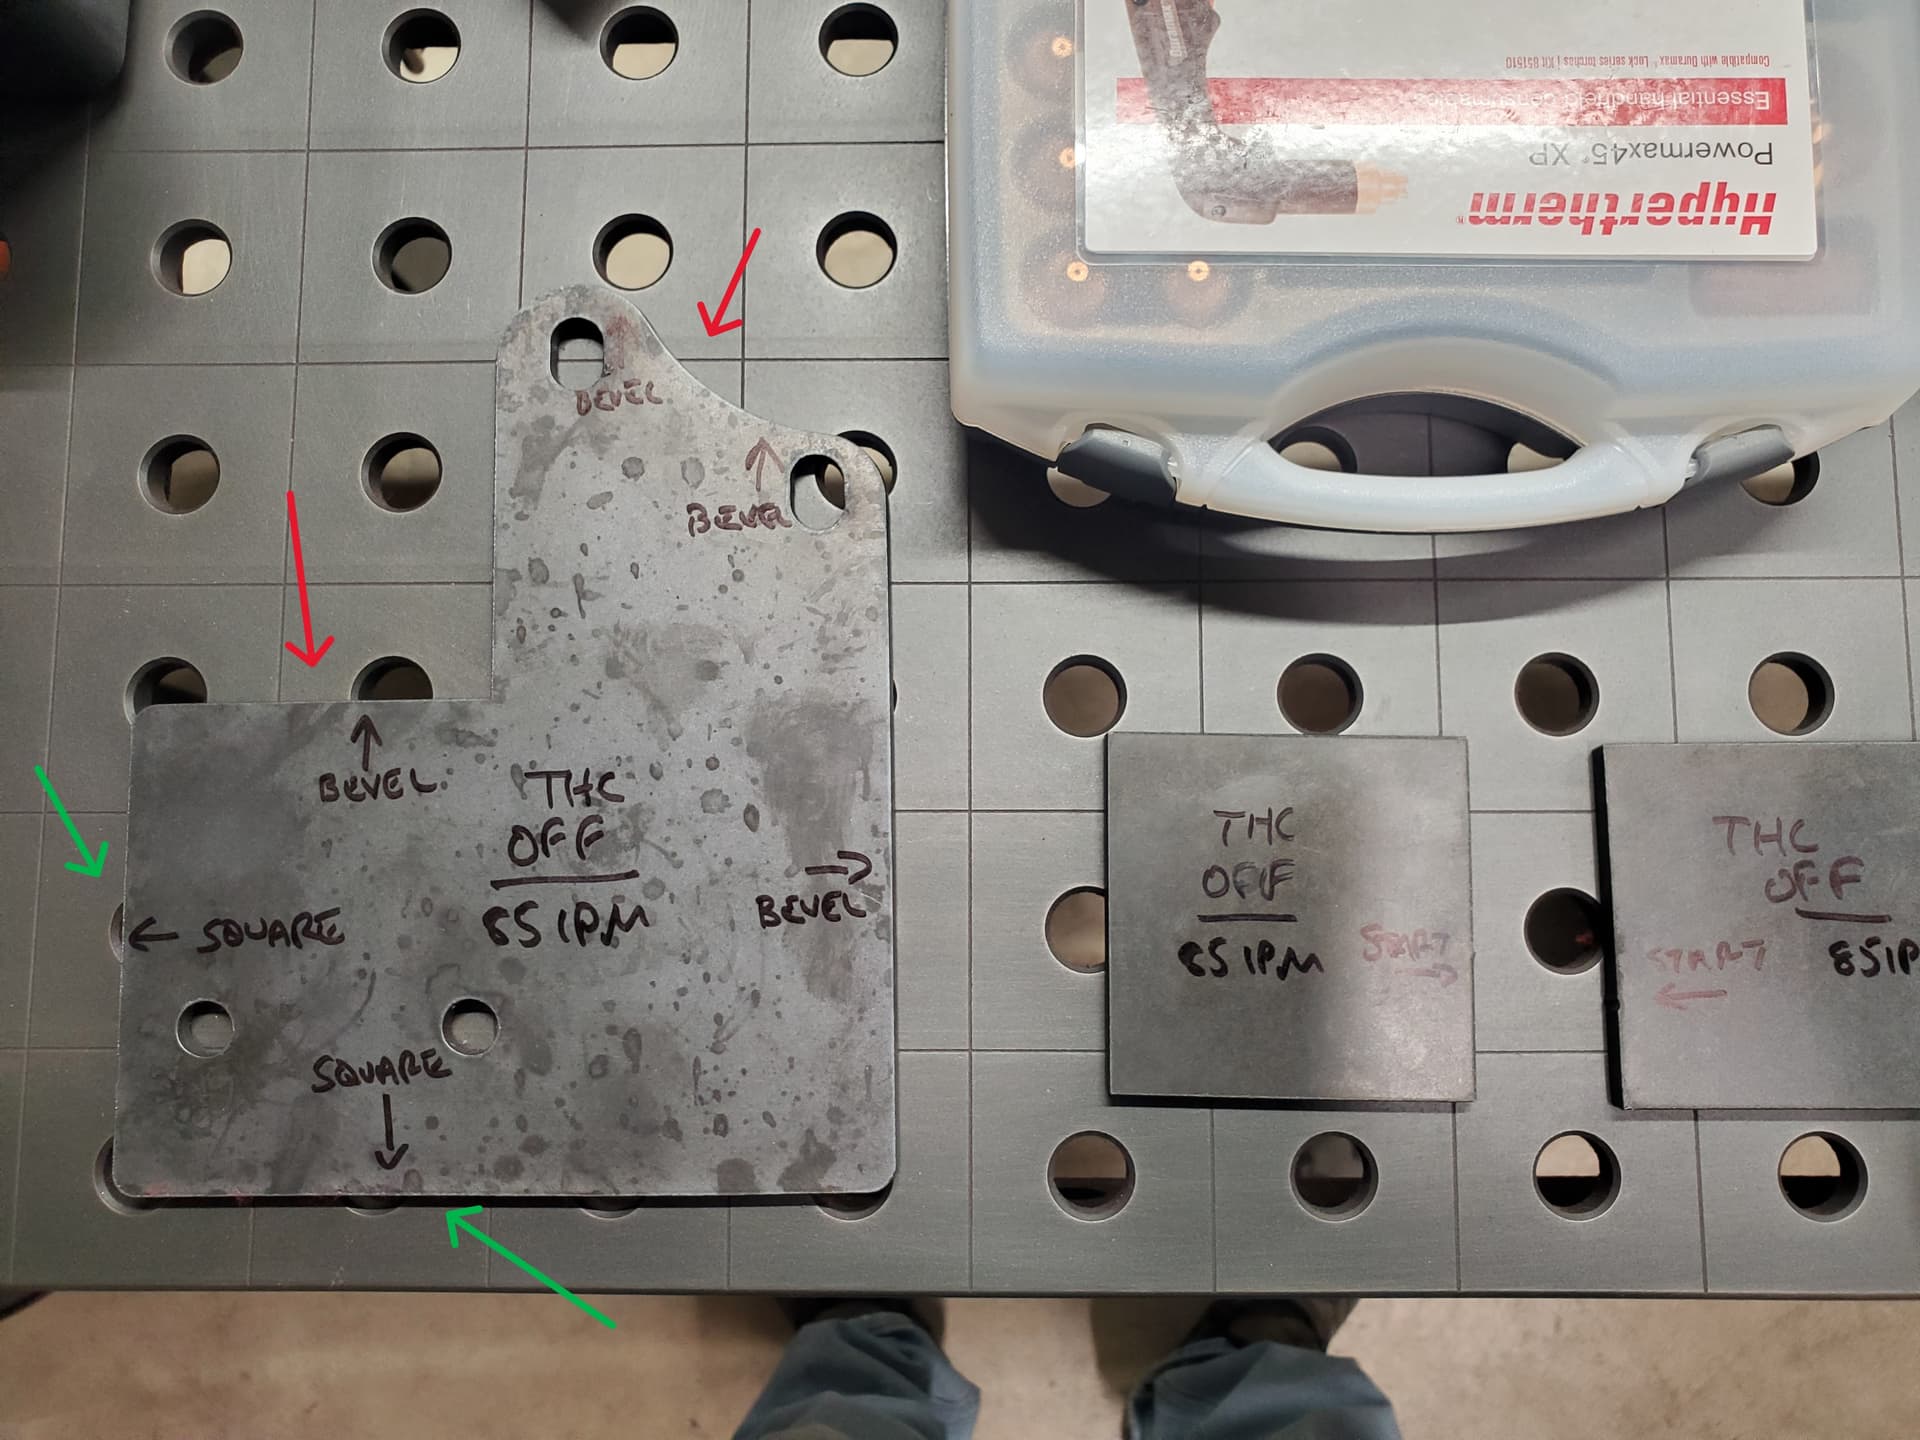
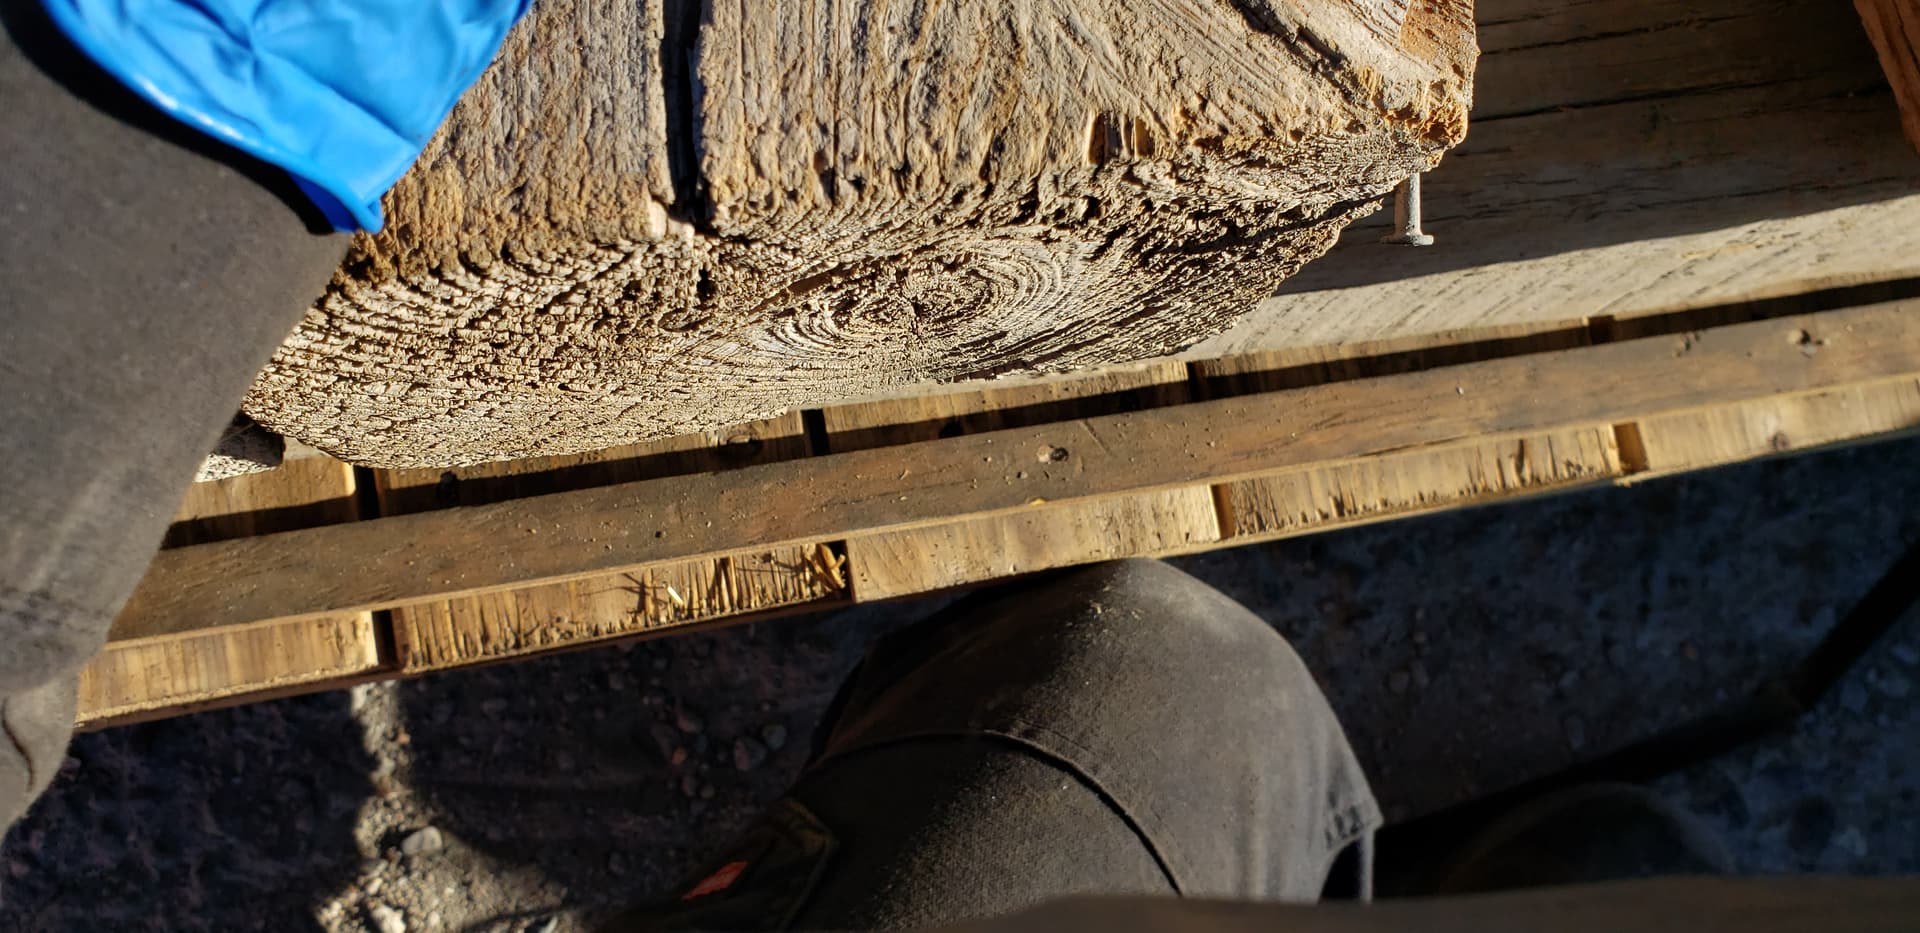
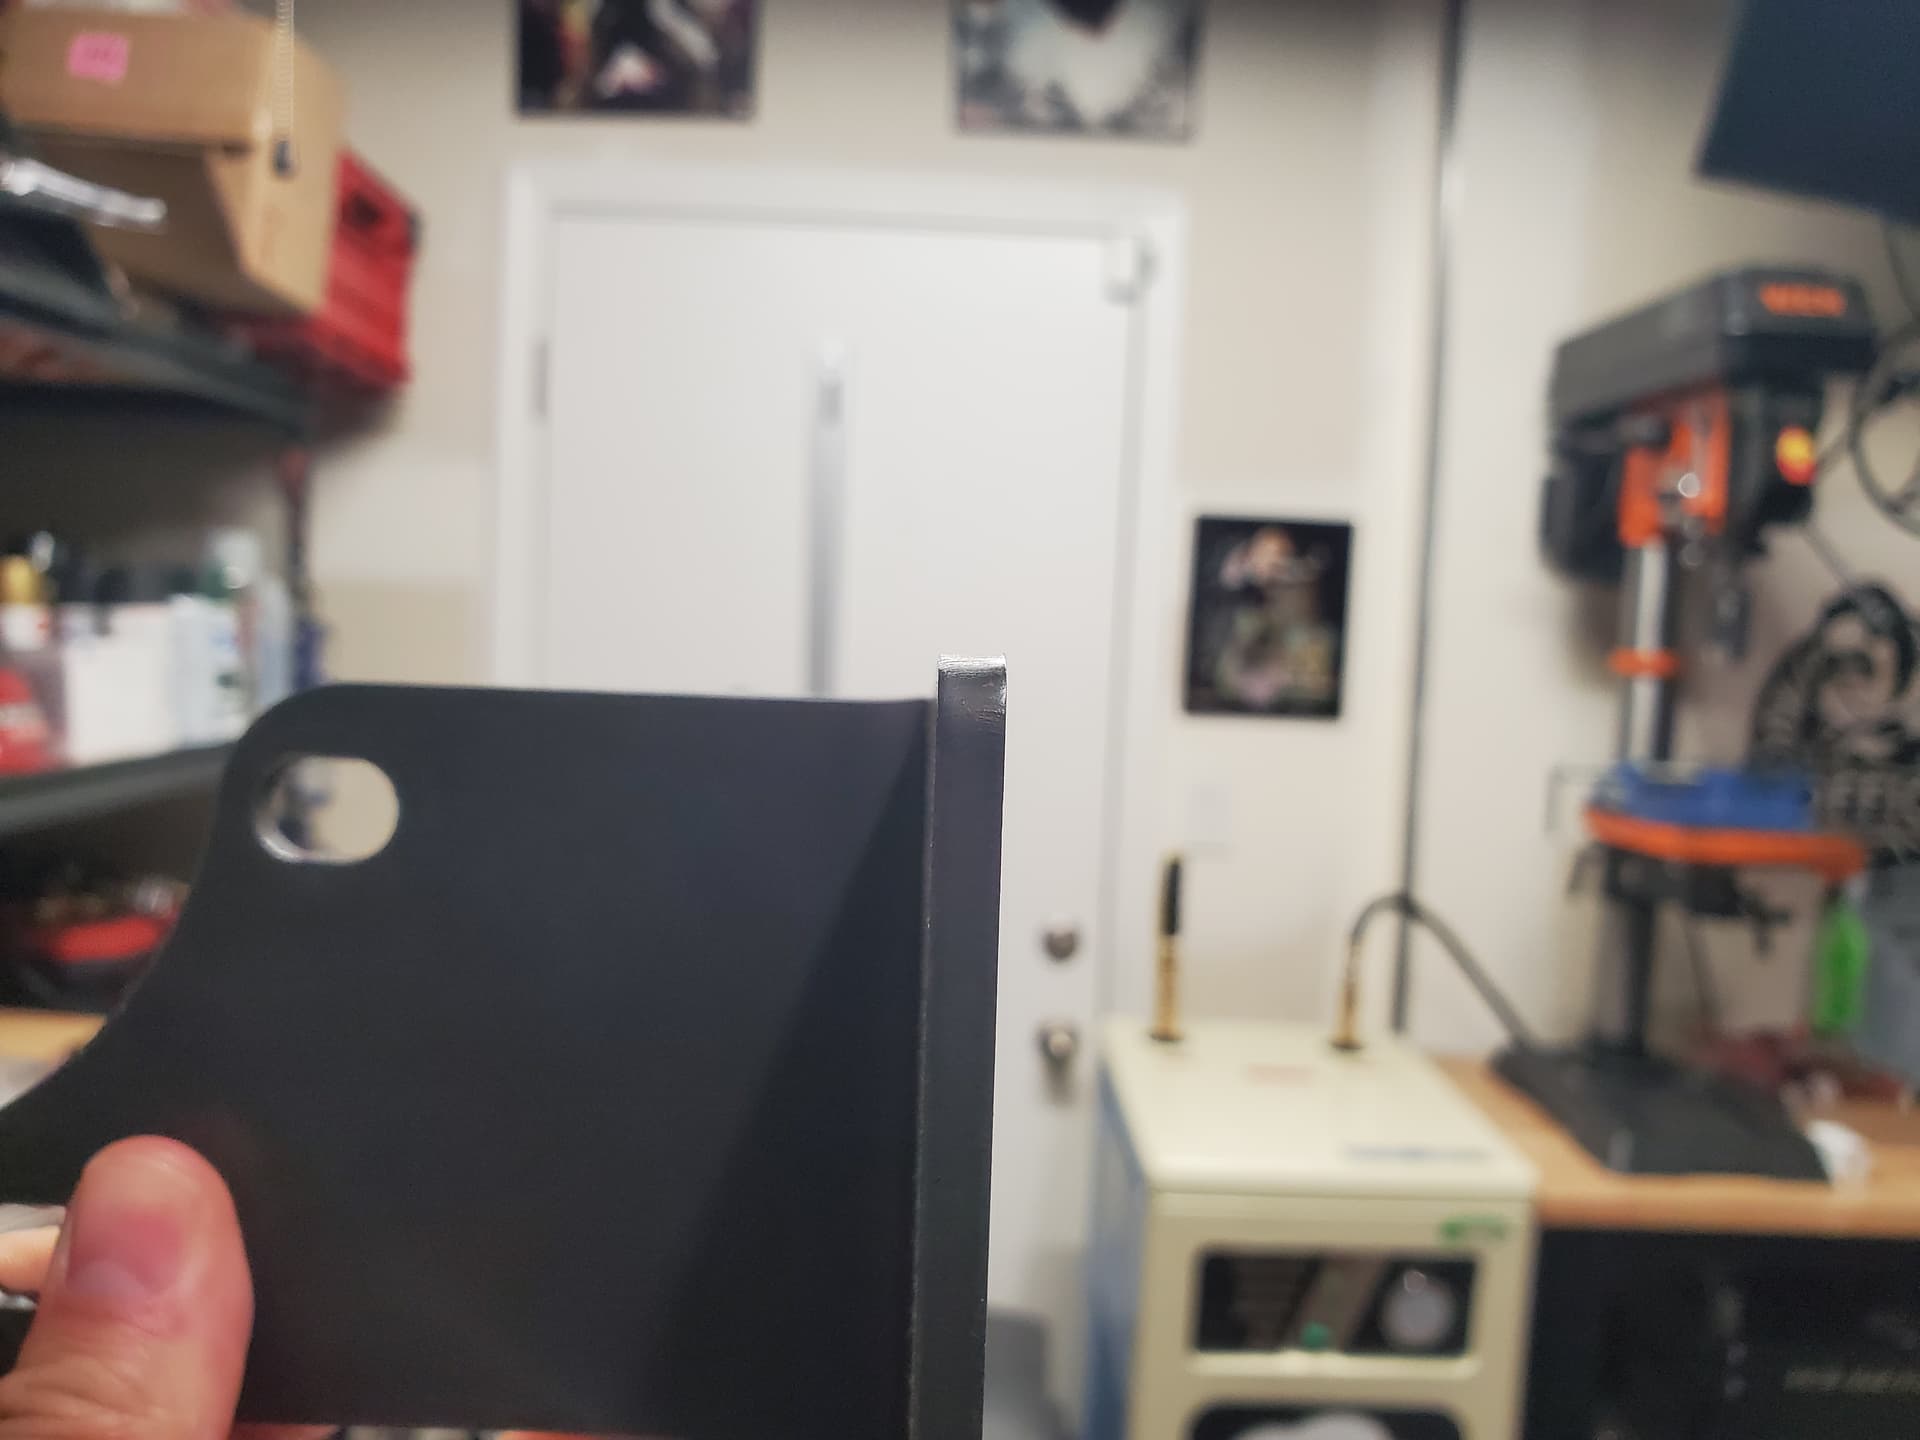
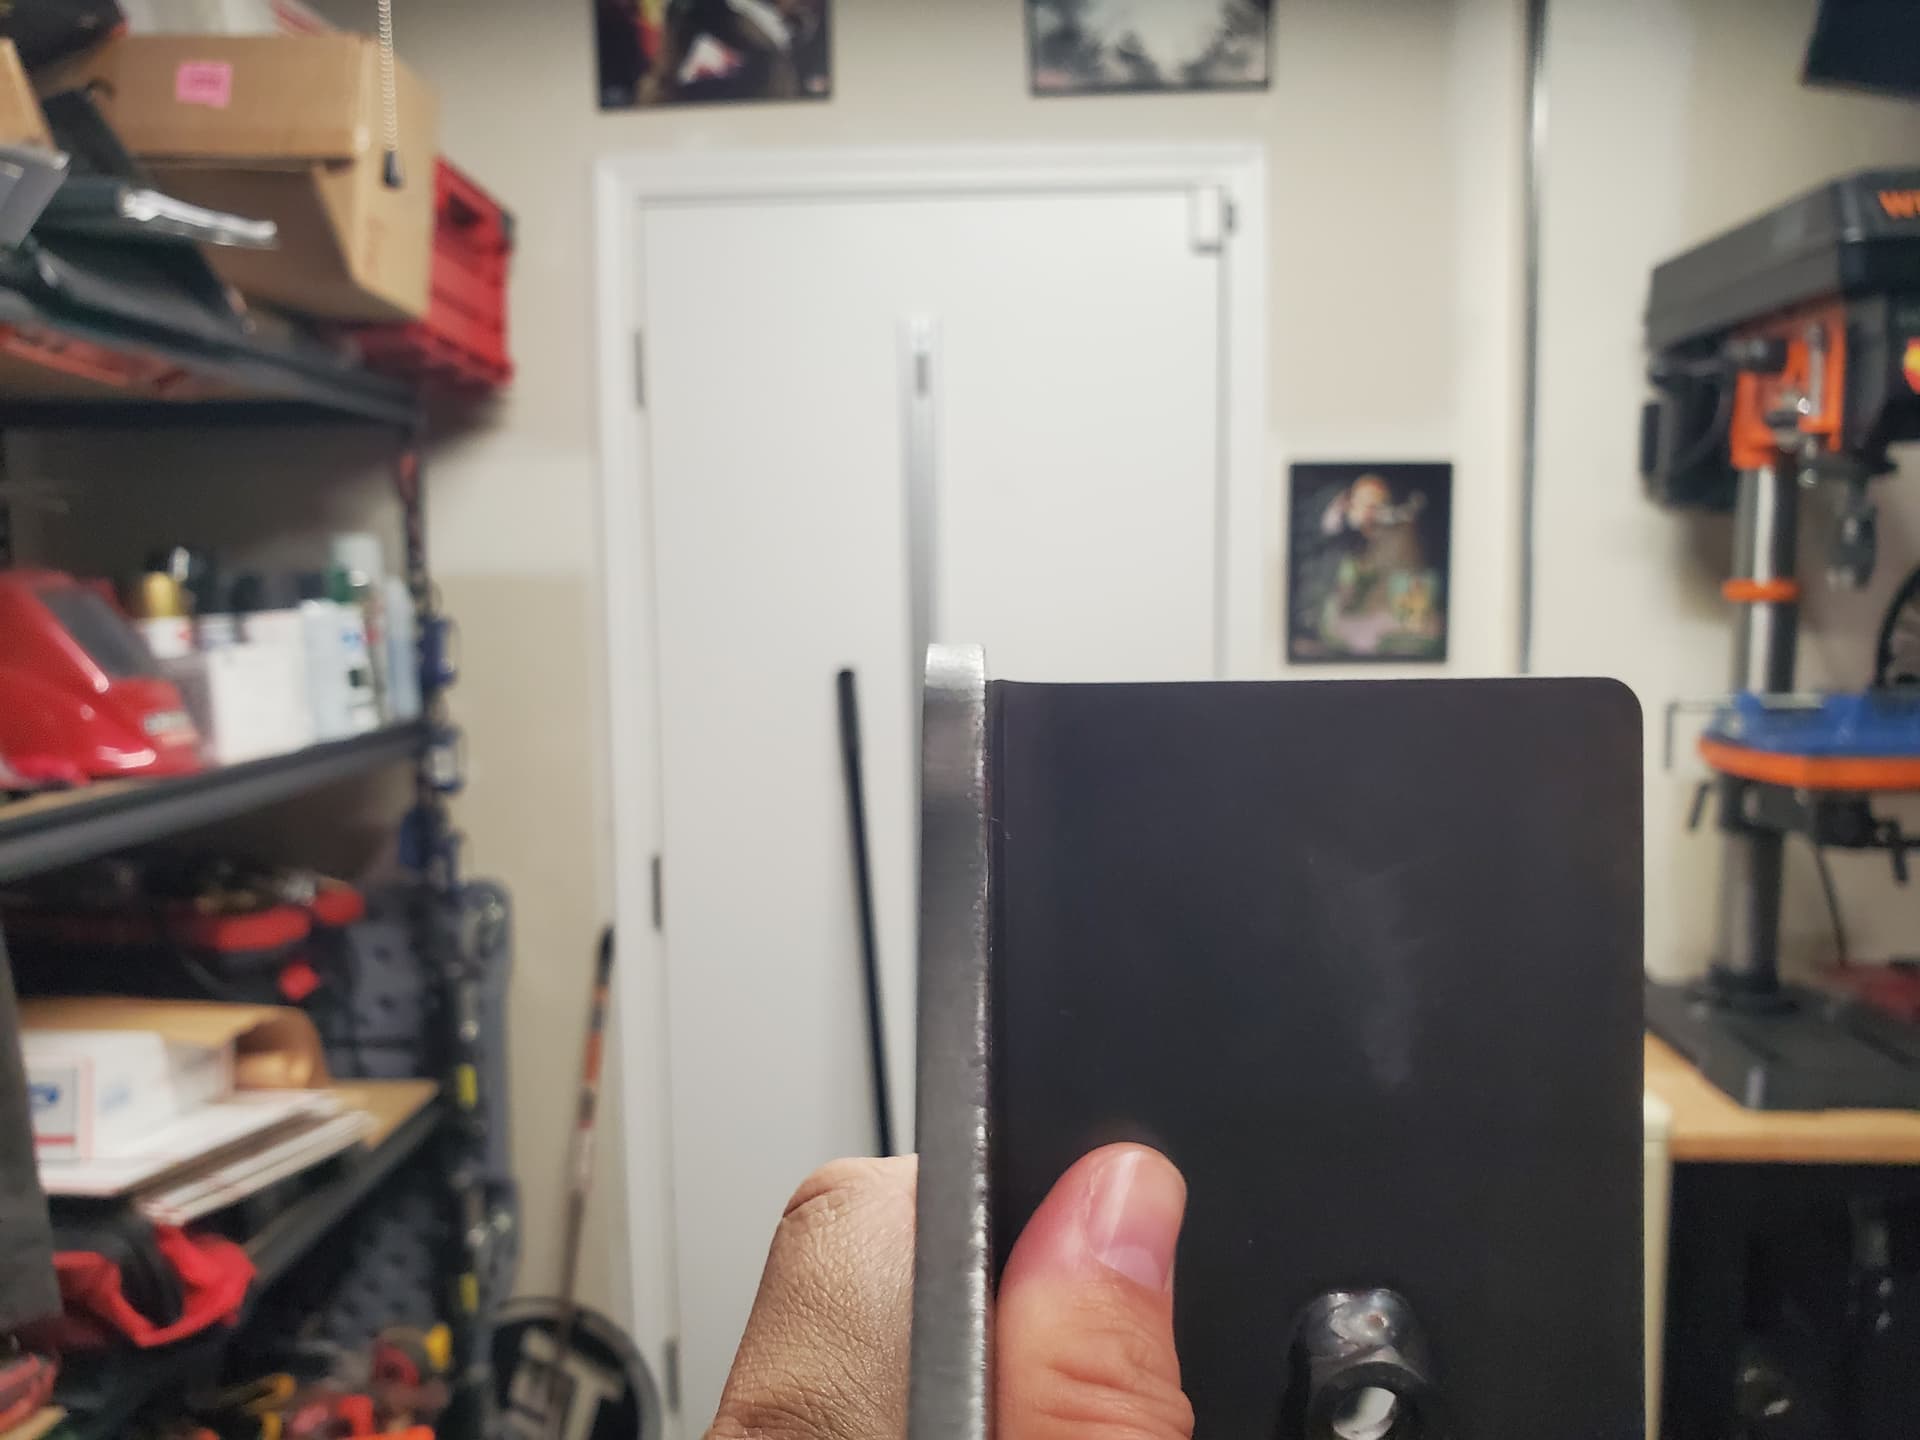
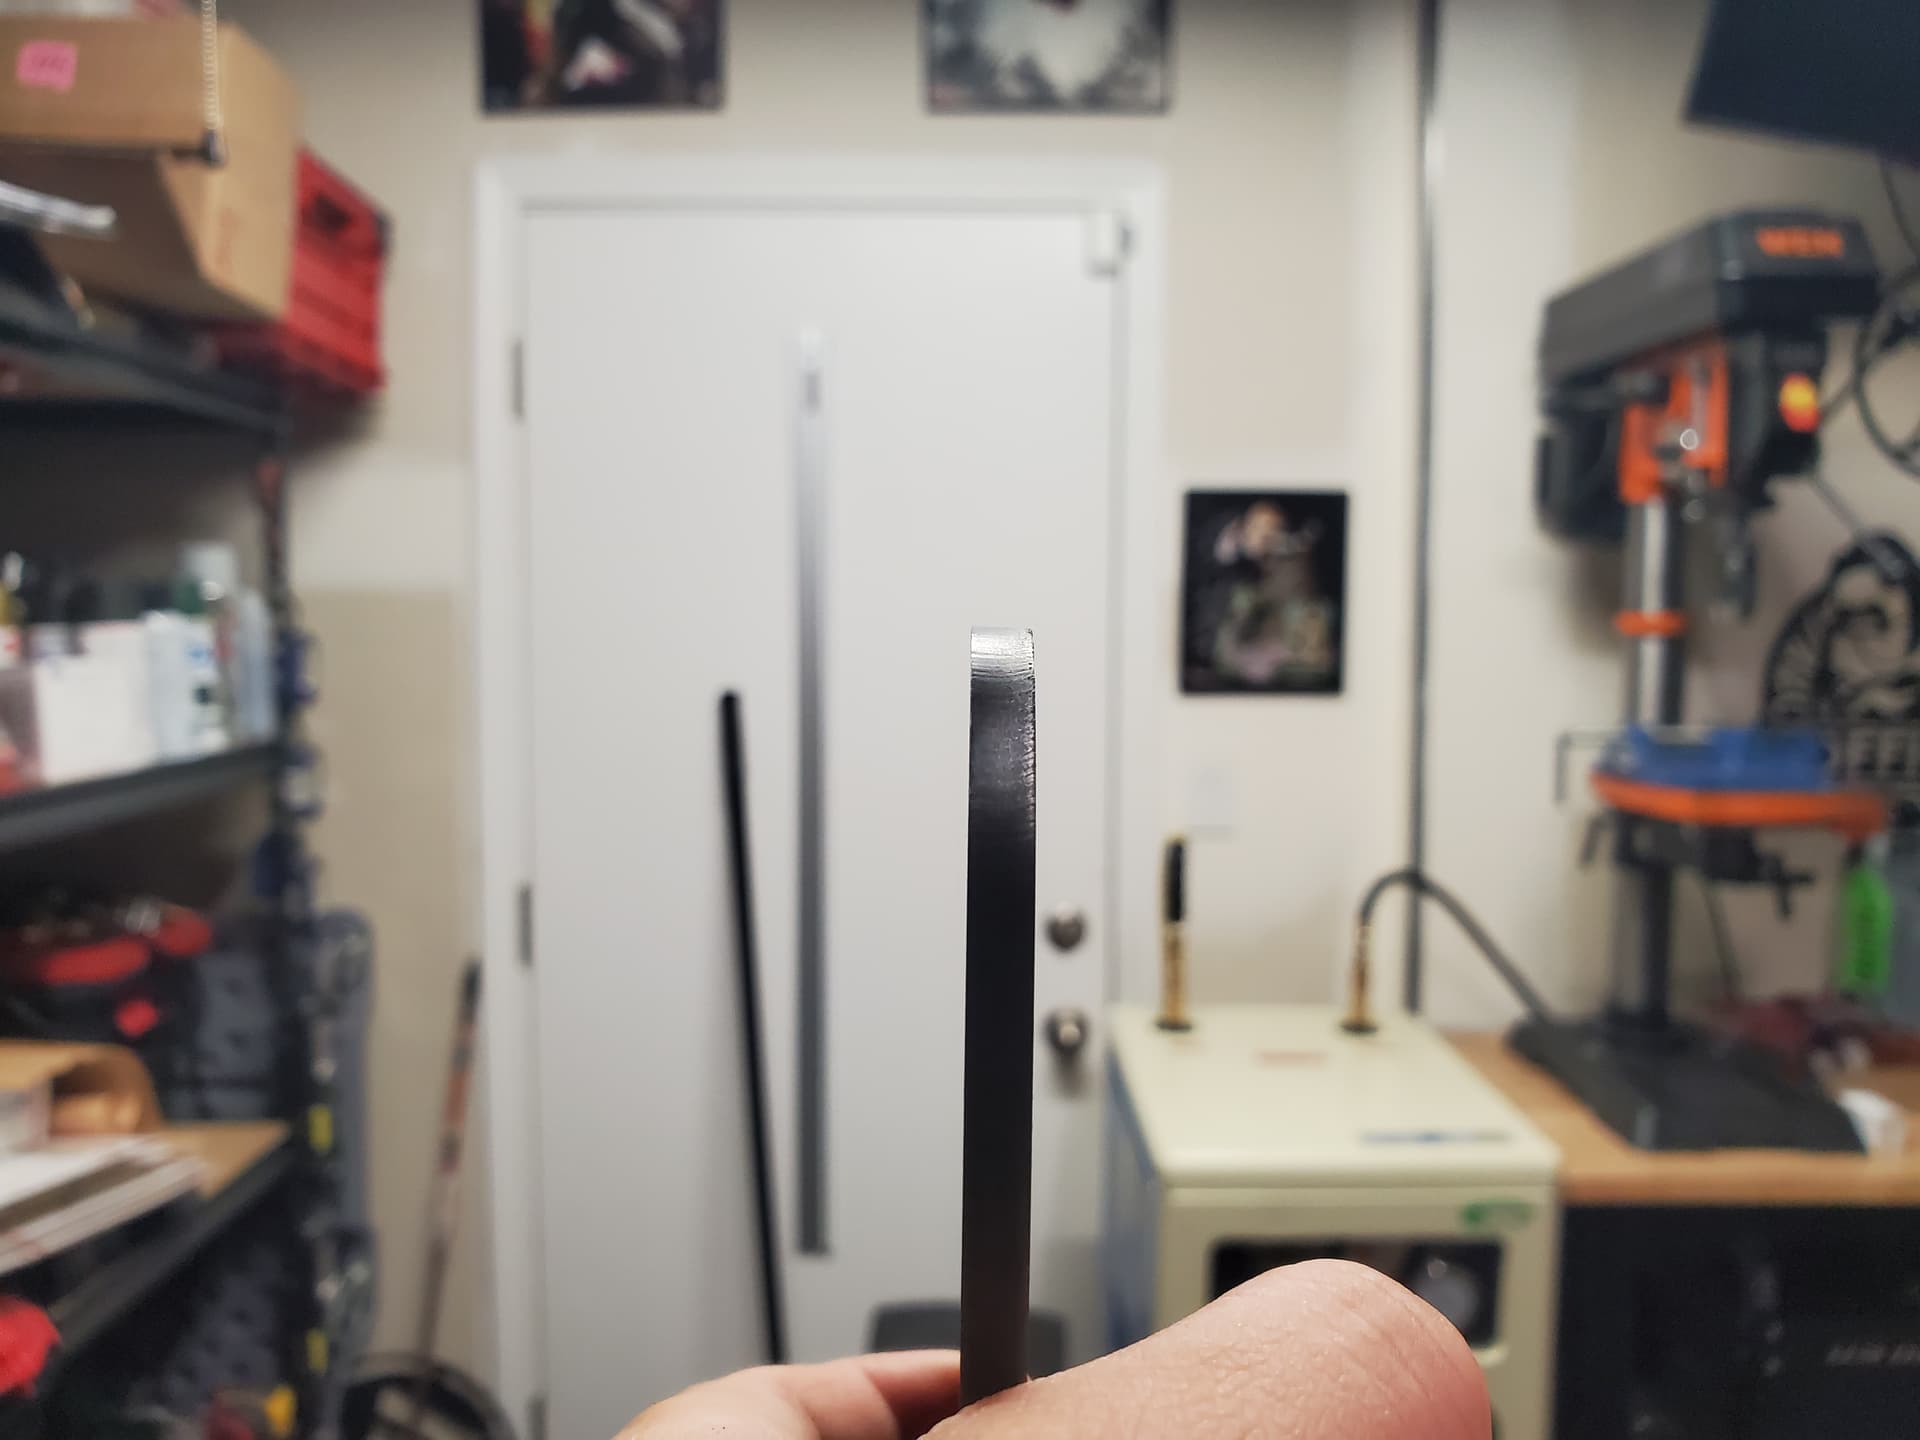
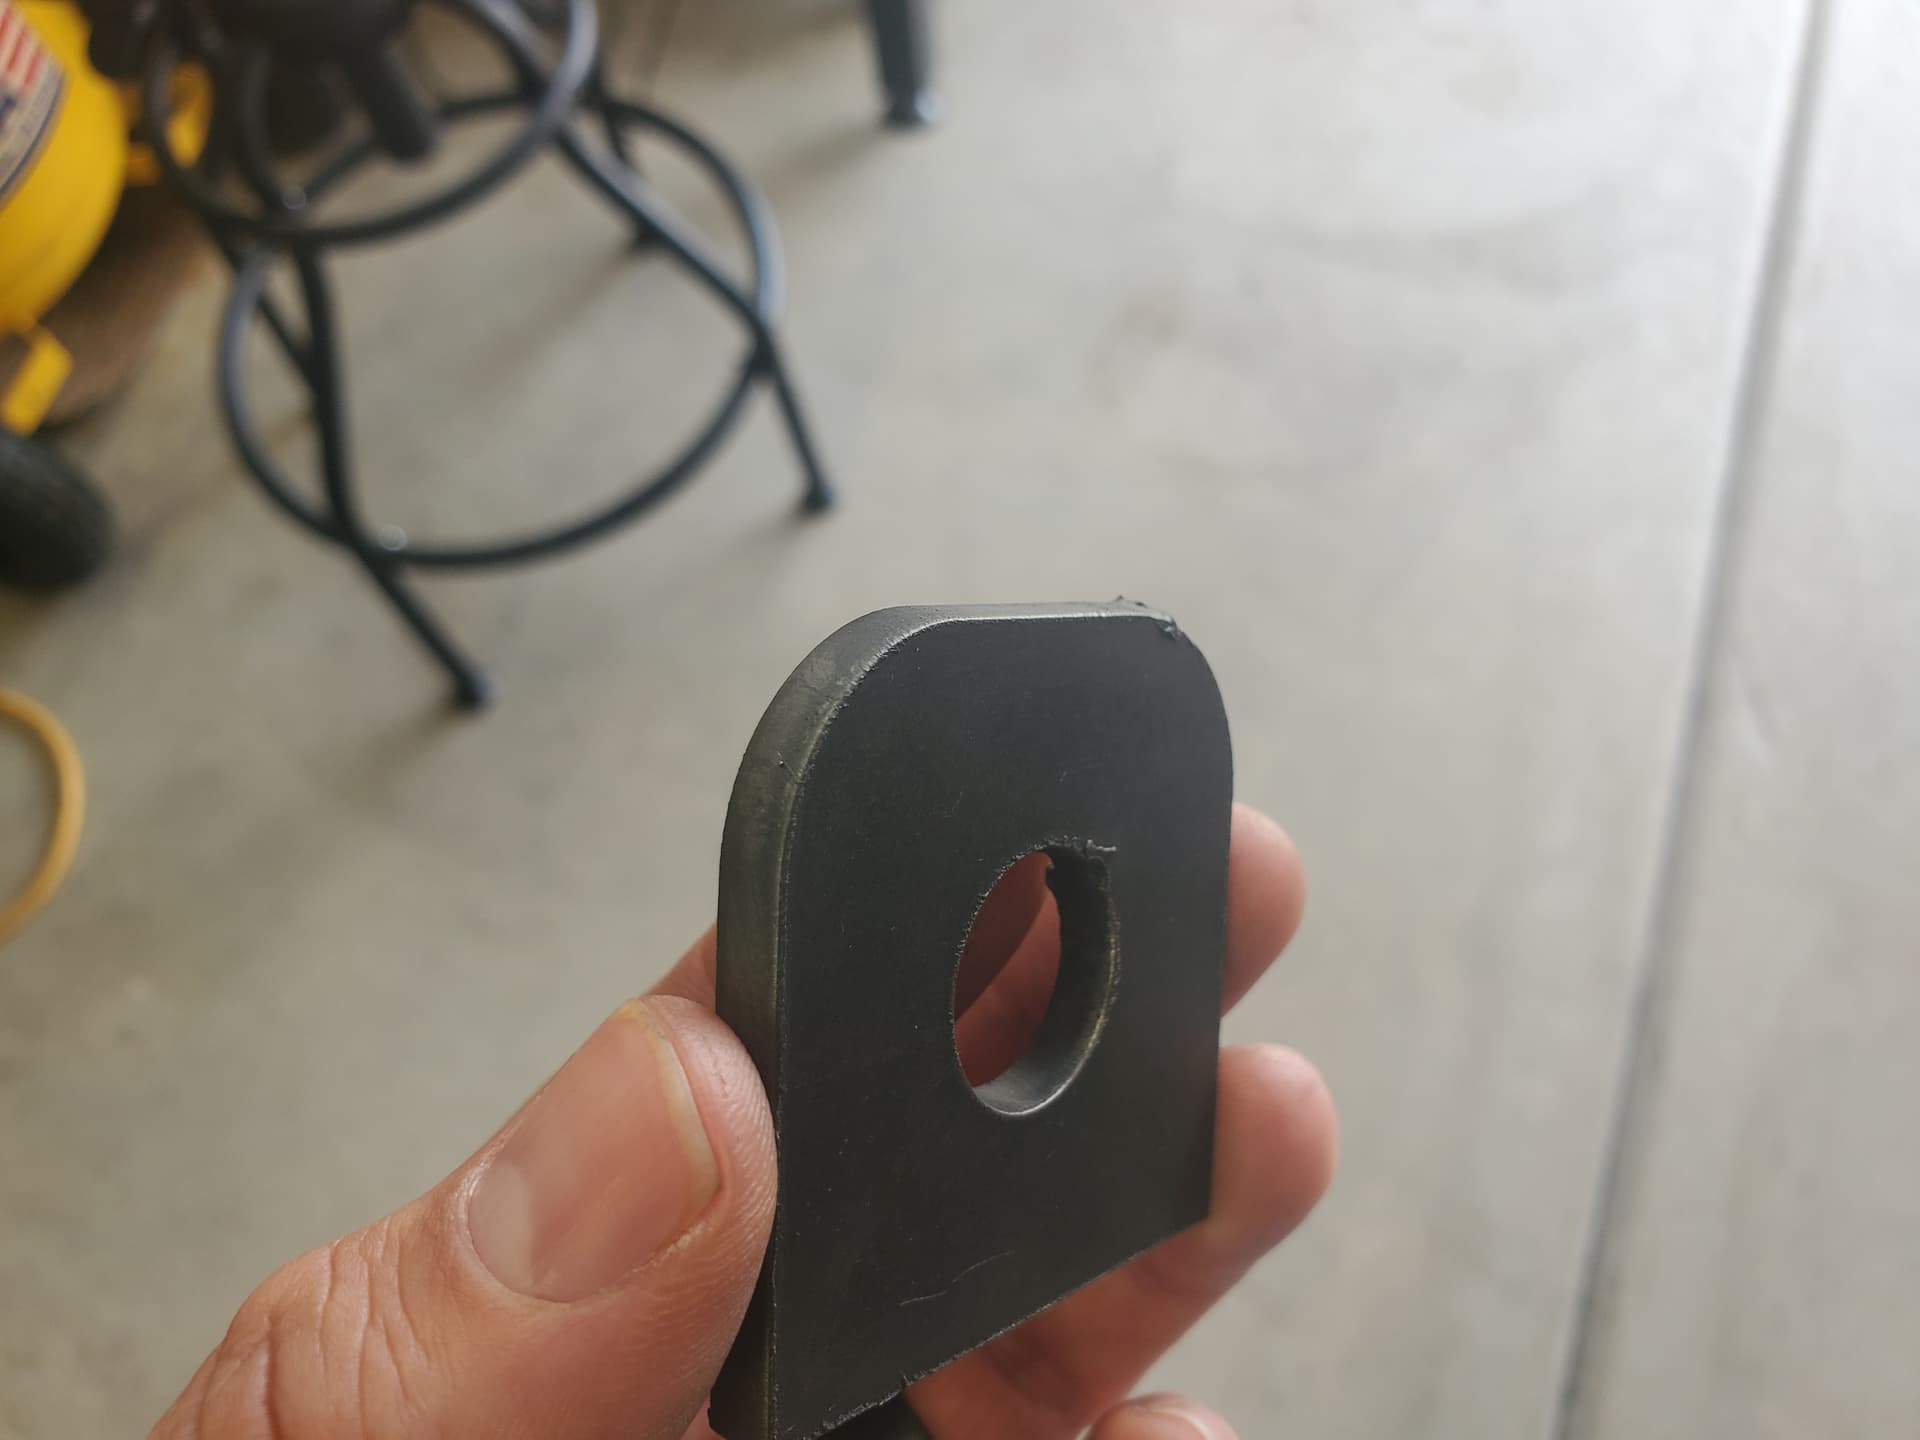
In the same area of my steel sheet, I opted to cut one of my vehicle parts using no THC, with the same 85ipm cut speed and cut height as the above 3" x 3" pieces.

Results were the same as every piece yesterday, day before, and day before that with a bevel up top, and square bottom and oddly enough even, now a beveled right side but square left side
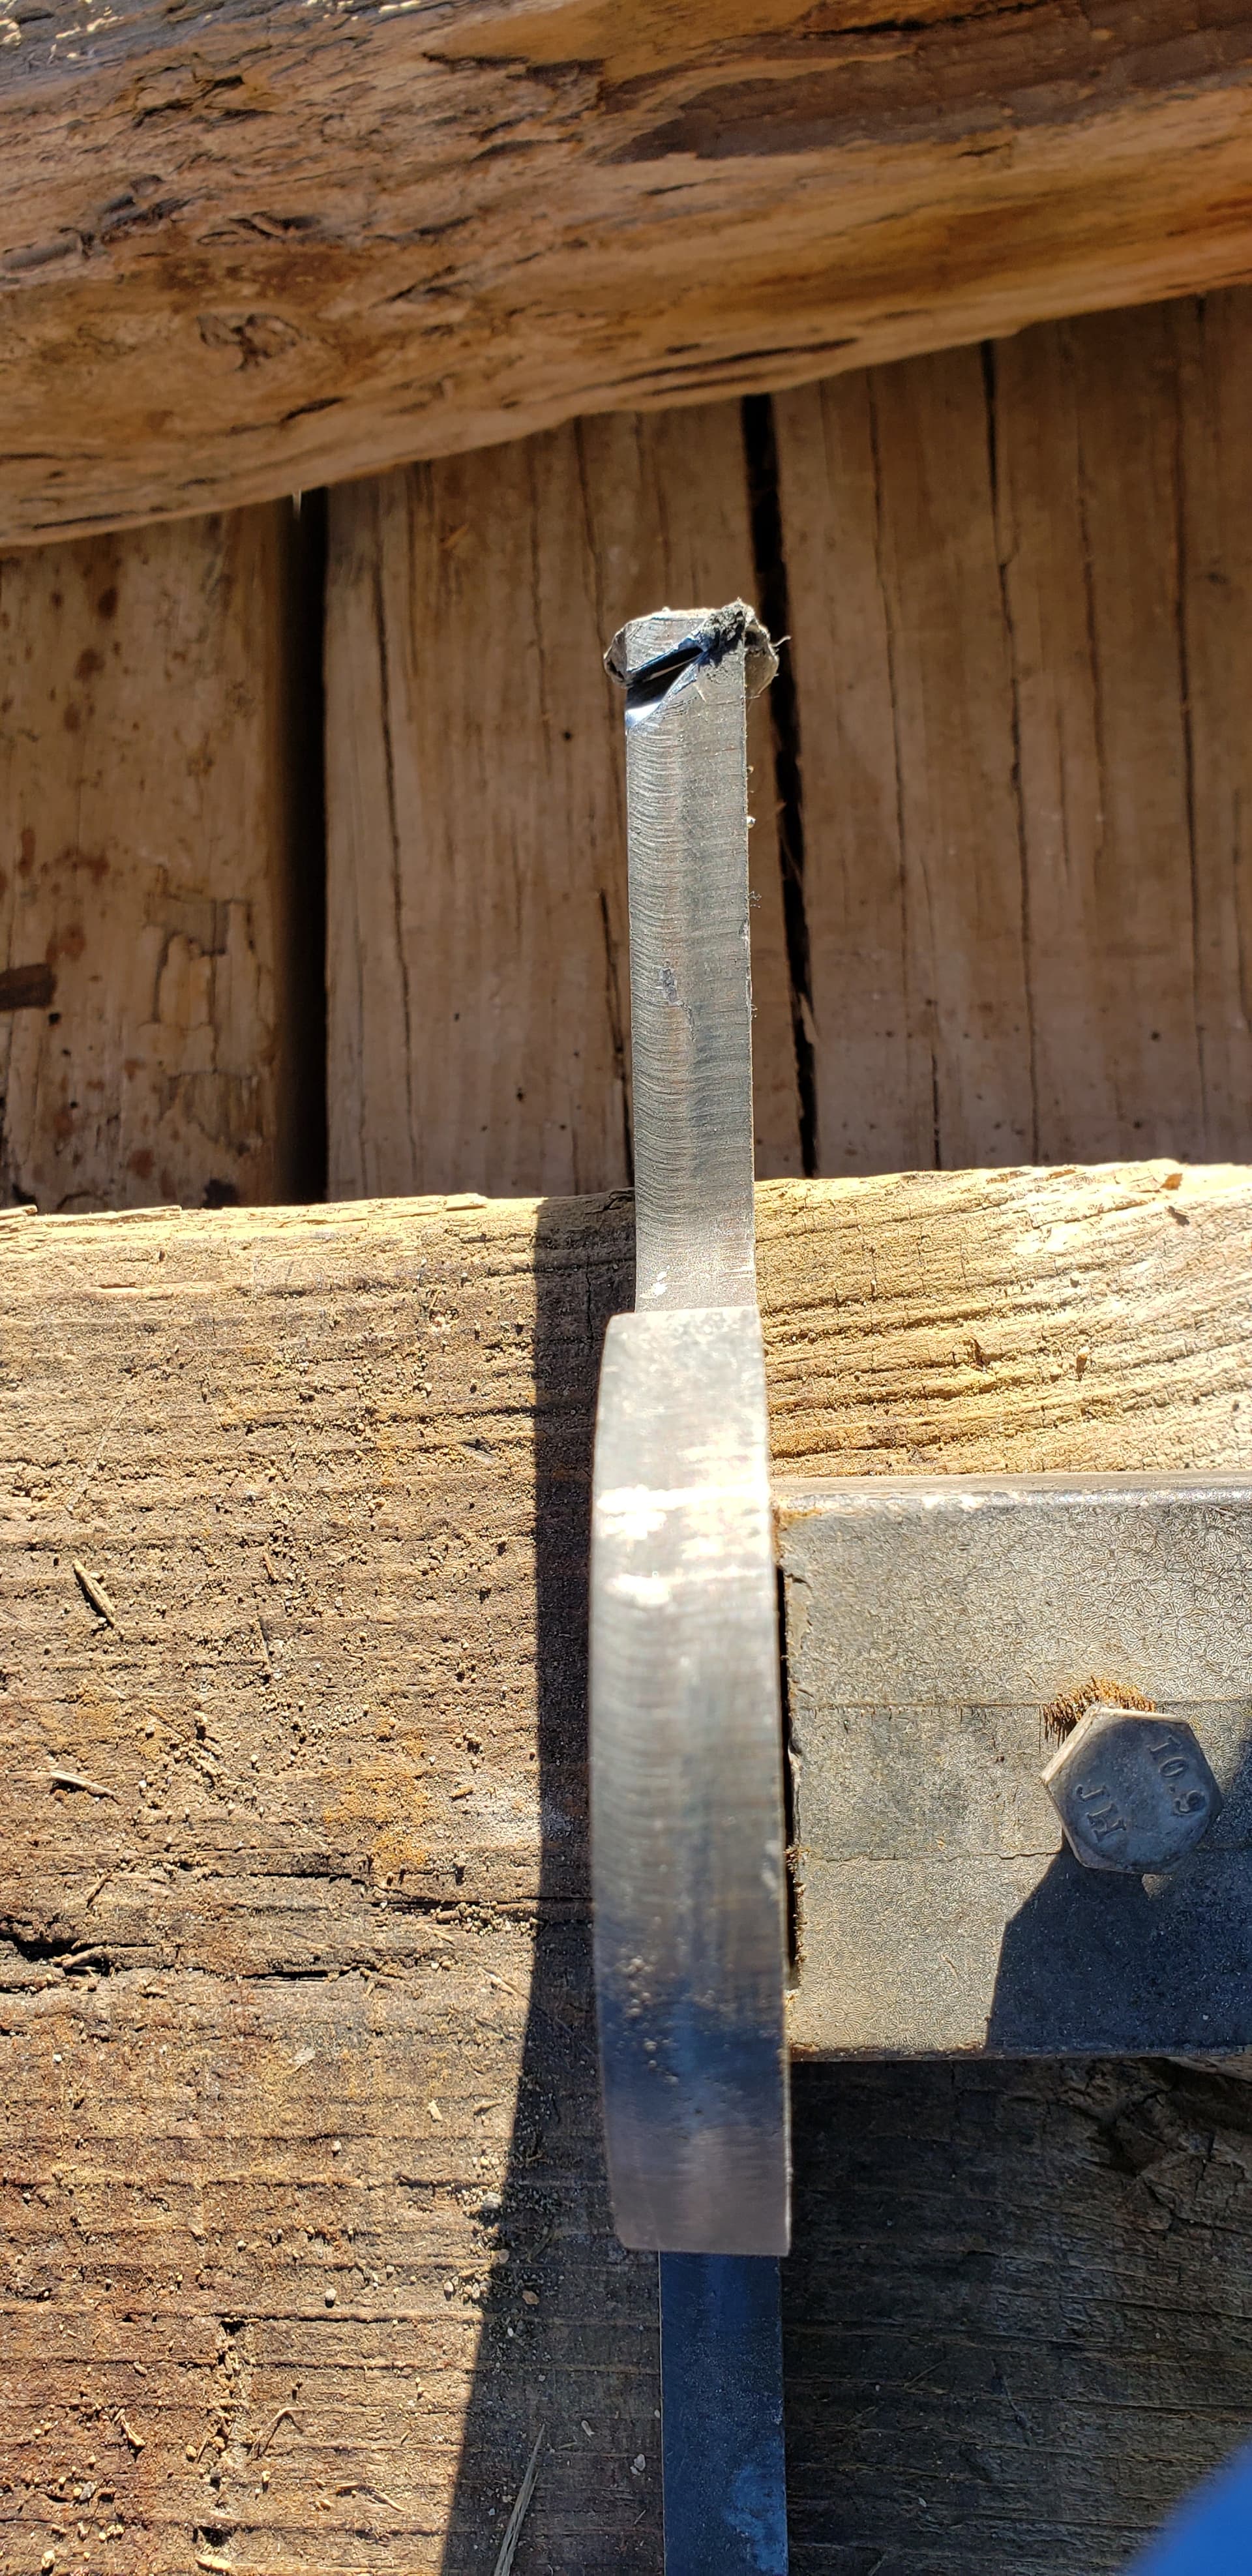
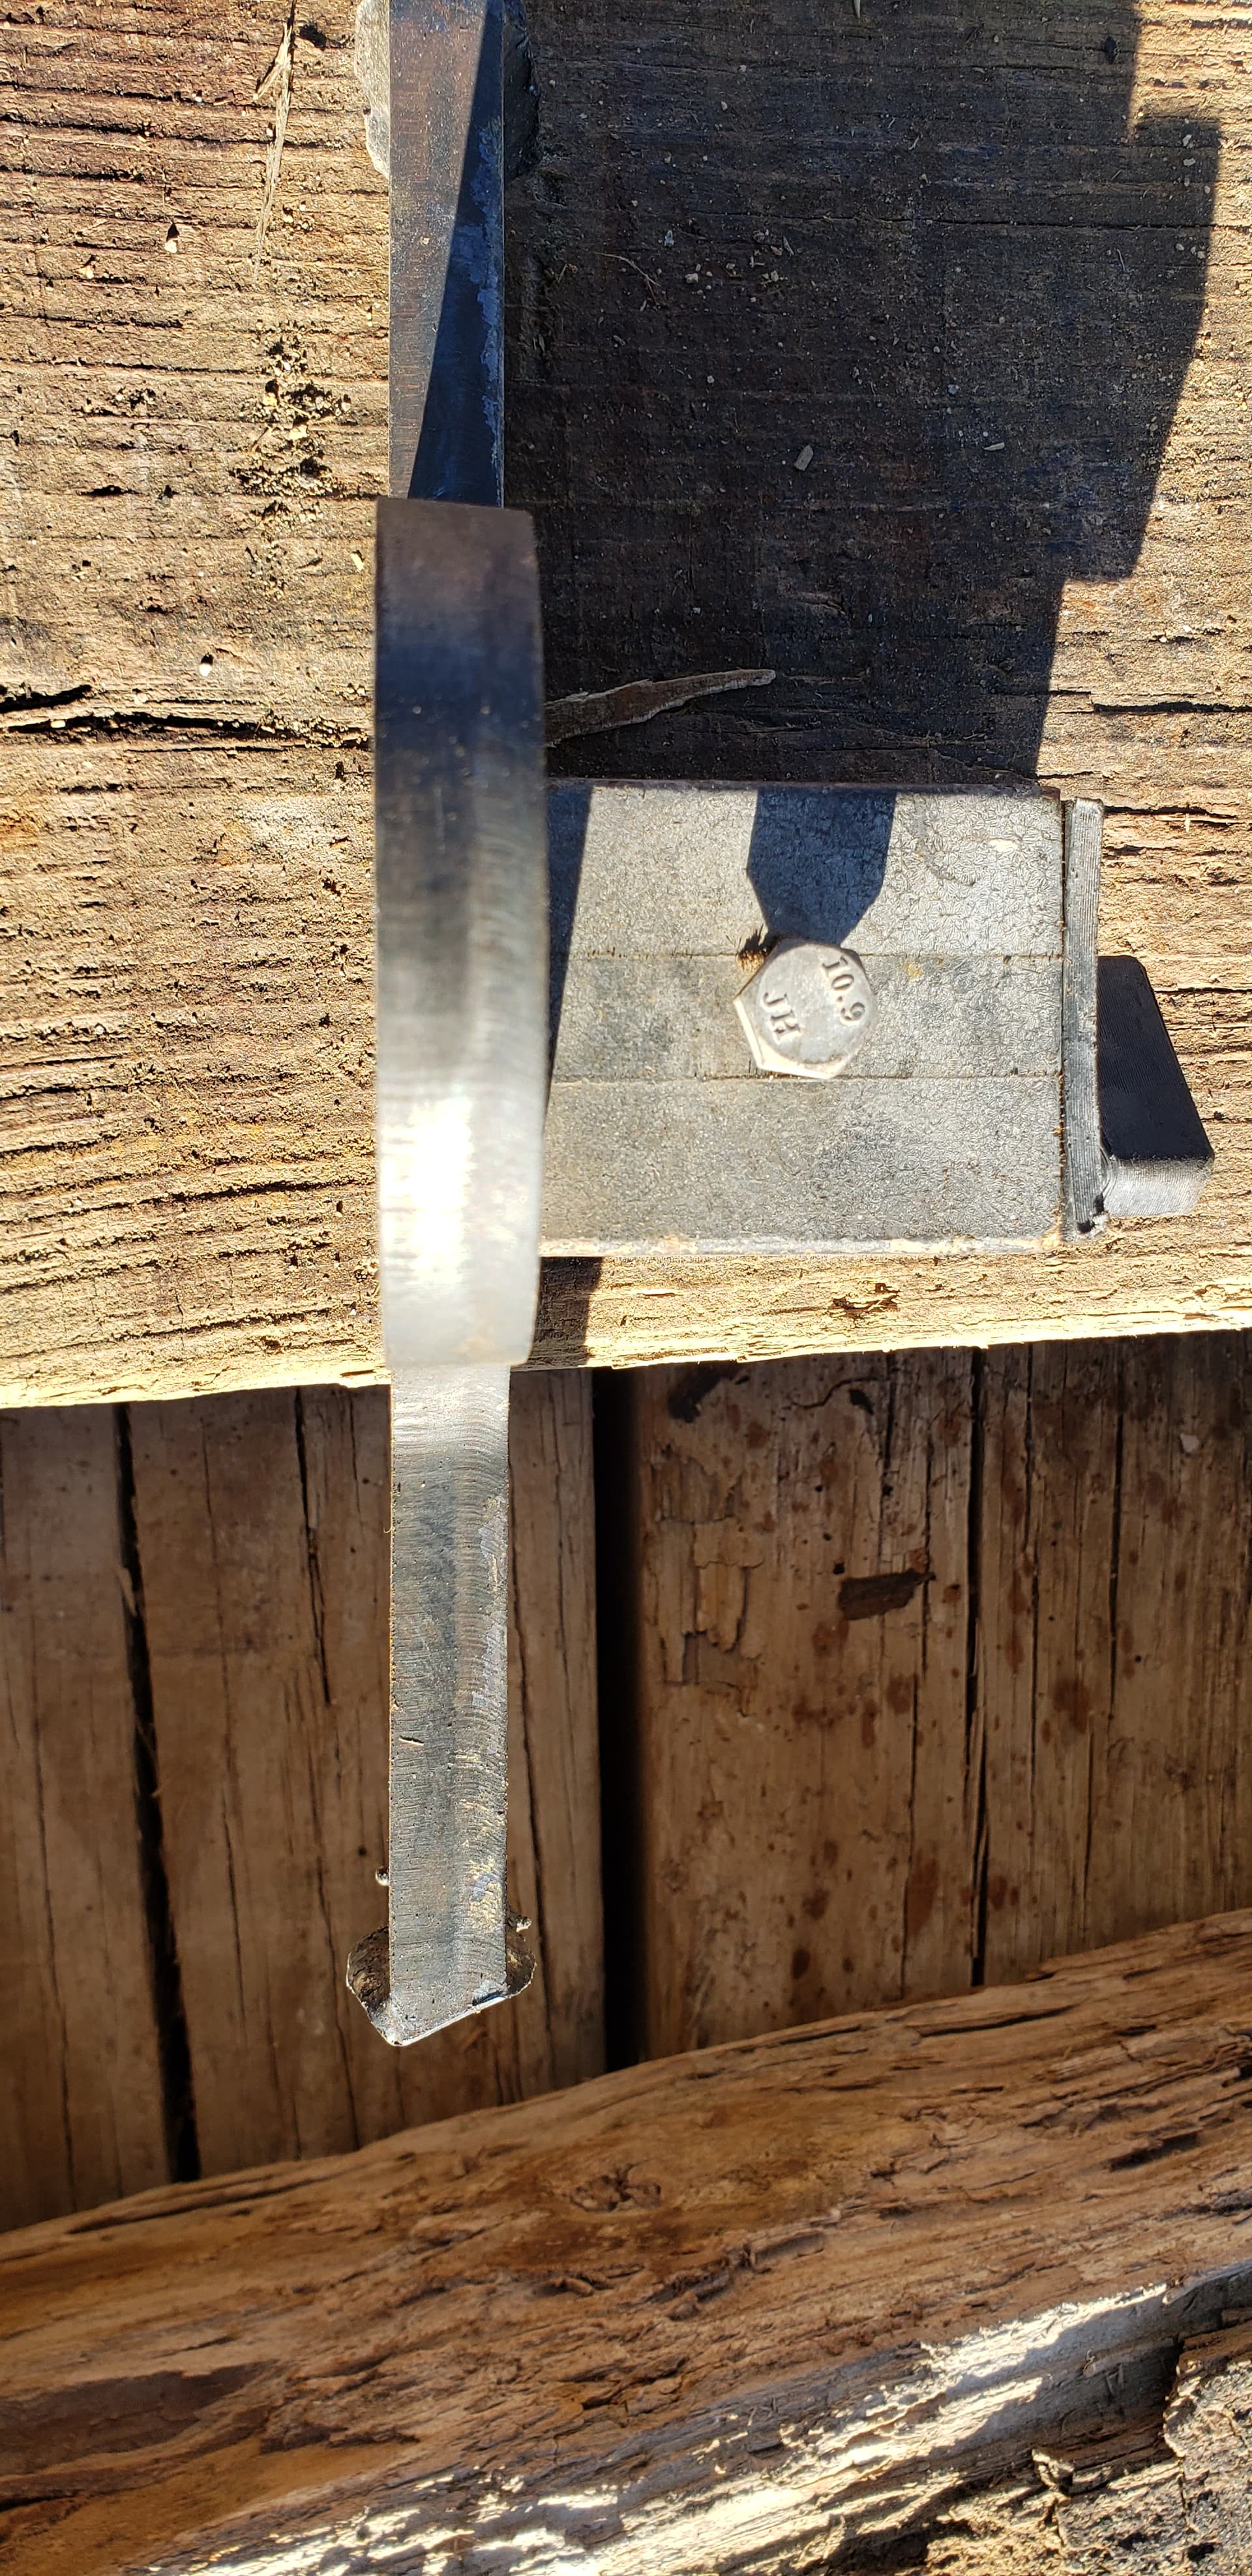
Top edge

Bottom edge

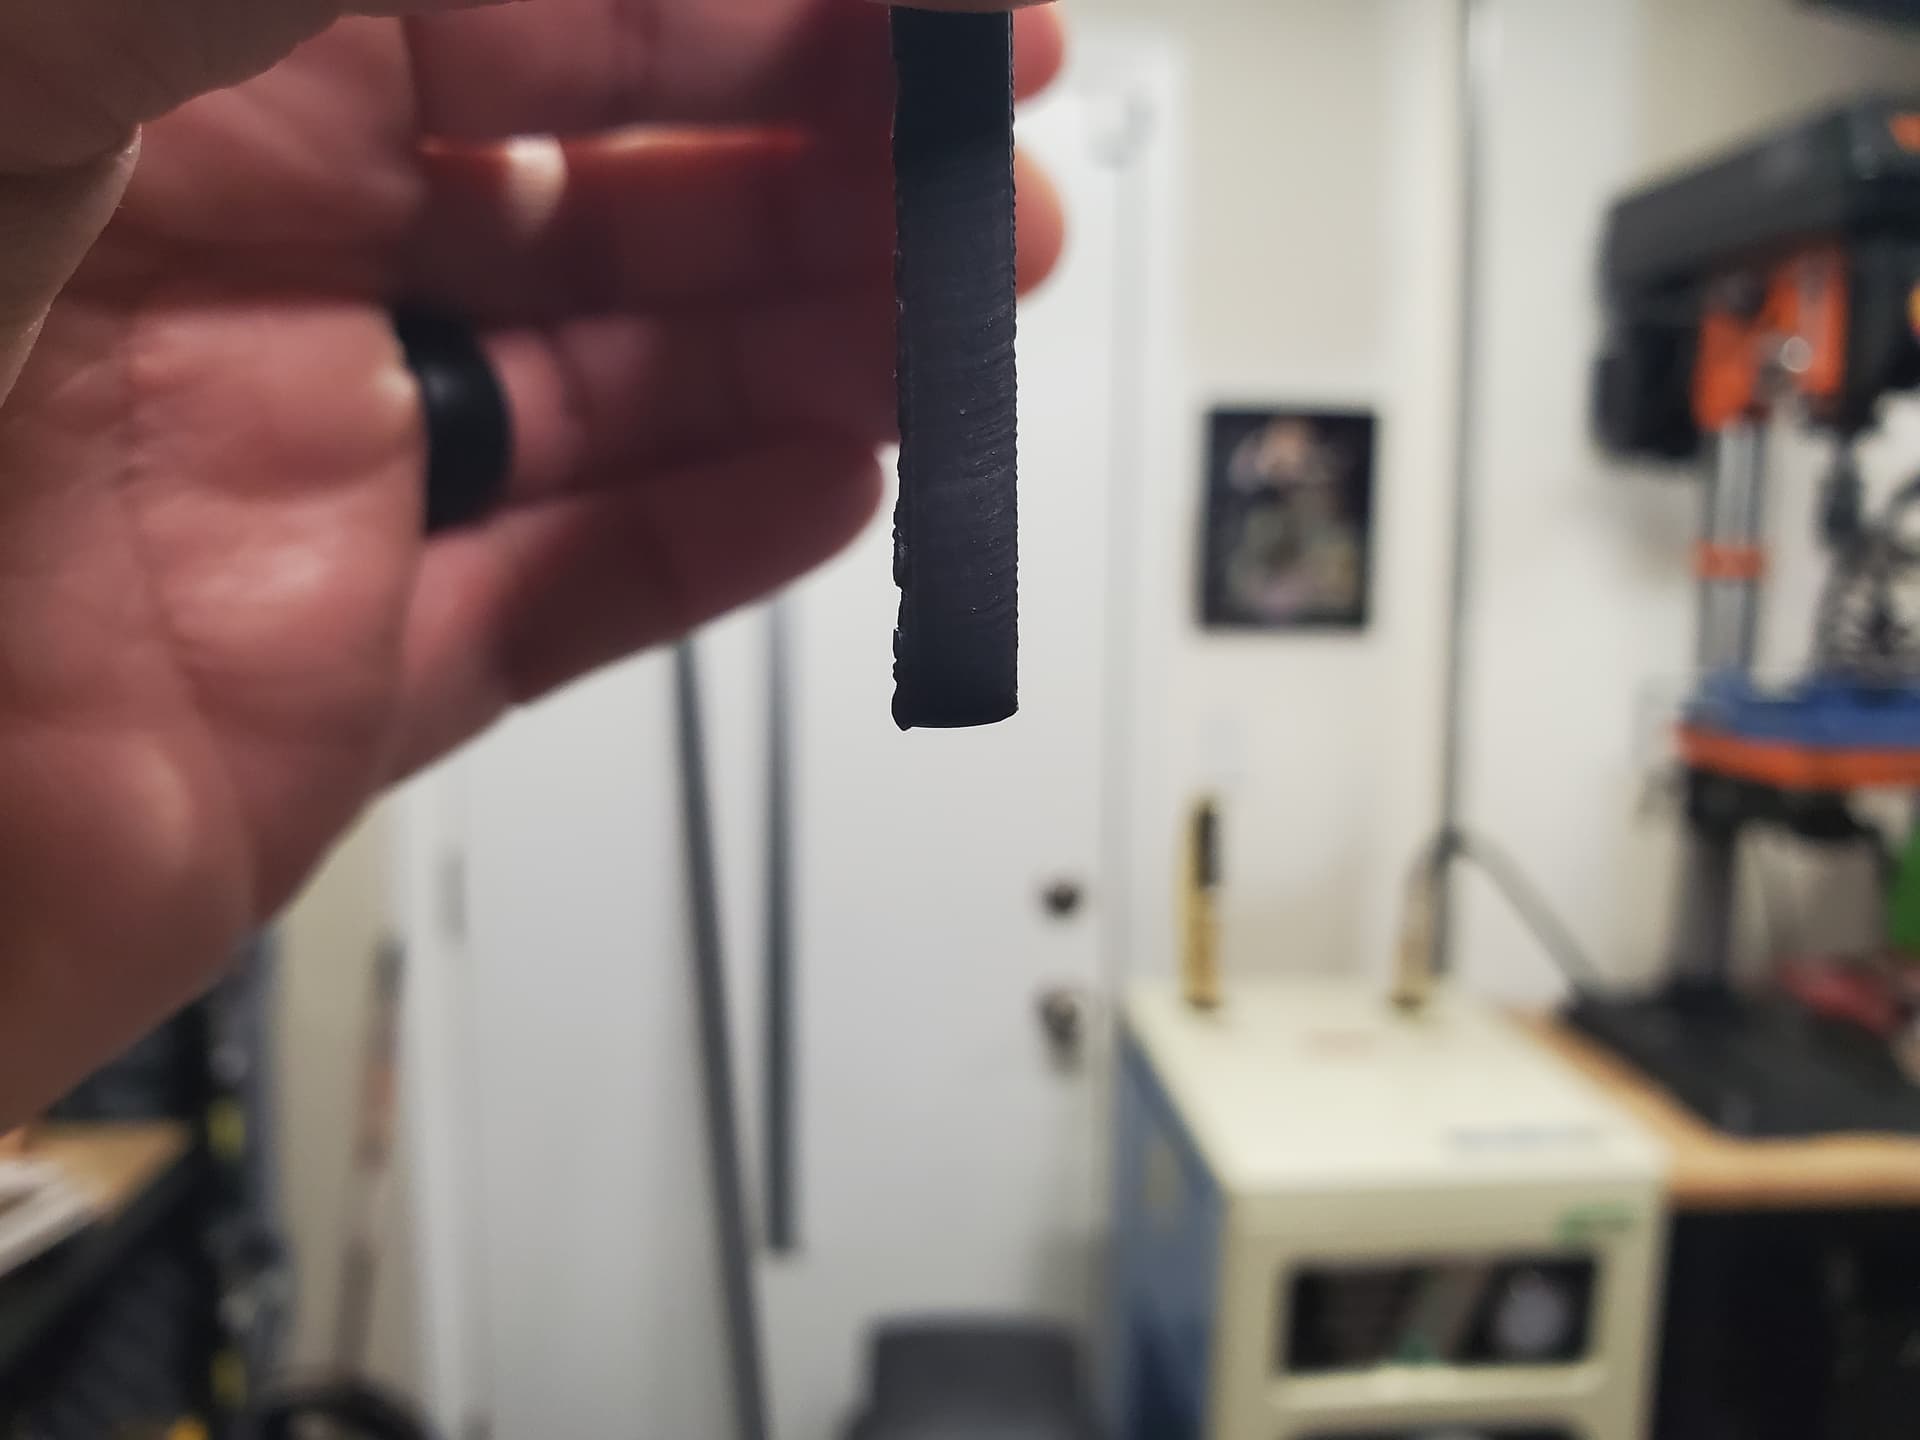
What strikes me as odd is how the top edge, being a 3 1/4" straight edge, can have such beveling while the 3" x 3" square, on the same axis, does not even with the same parameters. And yes, before you ask, the bevel is not just at the radius but extends through the entire length of the top edge.

Since I was able to perform a great 3" x 3" cut out, I want to chalk this up to a user-end issue (ME).

But, I’m not sure where to start considering I’ve ran with and without THC in my testing, I’ve tried everything from 123.5v to as high as 130v nominal, as well as having smartvoltage running for a programmed cut height of .025" (which measures to .06" with feeler gauges).

I have run speeds as low as 60ipm to as high as 90ipm, including Langmuir’s test file that ran at about 72ipm or something like that.

Here’s the test file if anyone wants it, as the processing was done on their end

Test Cut RTC.nc (1.1 KB)

Running their file, also resulted in a square bottom edge and top beveled edge like my truck part.

1 Like

The edges that are beveled is that edge being cut over a table slat. Might be cause of a bevel?

It’s a shot in the dark.

Brandy new consumable set. Lead in on the LEFT, so the top is the first uninterrupted edge to get cut, same settings.

Put the old set of consumables back in and repeat.

Try cutting one without the shield, Might need the “unshielded” shield.

2 Likes

Not sure how this can occur, the slats run perpendicular to the bevel.

Not to mention the bevel as mentioned, occurs all over the table on all cuts.

Here’s my sheet which includes the recently posted pics from last night.

Done all that, with Langmuir’s testing and my own.

Lead in was on the left in my own tests, new consumables (again).

Only thing not performed is running without a shield.

1 Like

I think we all might just be dealing with a fun plasma cutting table phenomenon. These two brackets came from Caterpillar equipment. I am fairly confident that they’re CNC plasma table is dialed in a hell of a lot better than any of ours.


1 Like

@Sticks

Here’s the exact same design piece, cut in the same orientation, cut on the same table, but from my chinese plasma cutter.

I’m not new and I’m not expecting perfectly square cuts, I think that’s where the misinterpretation is occurring.

As you can see by the above piece, there’s the tiniest bevel present and that is what I expect.

But with the Hypertherm, with every setting adjusted, in different areas of the table, and many items having been gone through for days, it is odd to get bad beveling on one edge regardless of the variable changed.

I will be installing my CUT60 back on the table but only after every option Langmuir and Hypertherm suggests has been exhausted.

1 Like

Keep us posted

I will!

We have varying levels of experience in this very forum, much of it being significantly more than my own experience for sure.

It’s why I opted to provide info when @brownfox requested the details.

I am still siding with the issue being more ME related, with the Hypertherm being suspect #2, and the table being suspect #3 in that order.

But it is odd that I am only seeing this with the Hypertherm, even after making both programmed changes as well as physical changes (and/or confirmations).

I’ll post back when they provide more suggestions, and the result of those suggestions.

1 Like

Well, Hypertherm made a suggestion to do this, to perform my cuts like this (marked in yellow, starting on the X axis at the bottom right) -

Or incorporating this cut feature -

Mind you, if you scroll up to where I performed a 3" x 3" cut for Hypertherm, the results themselves were much more acceptable even the way I processed the file which in my mind, debunks the suggestion to cut with the weird cut paths.

So instead, a friend took my test cut file, and actually performed a REVERSE CUT so the outside cut was done counter clockwise.

Resulted in the same bevel up top and nearly flat bottom.

So, the plus side is that, it most likely is the table itself. Something about the X axis movement might not be exact even though there is no binding or change of movement throughout the entire cut envelope of 48" x 33". Or maybe I meant to say Y axis even though the top beveled edge is a torch movement from LEFT to RIGHT. I don’t know. I’m ok with disassembly though.

I just find it odd that a perfect square design, cuts with “acceptable bevel” but anything else doesn’t…even if the design incorporates a square in it.

My only question before I strip down the X and Y axis tubes is, will performing this modification to my 45XP hand torch all that is needed to make it act like a “machine” torch? I am aware I will need to zip tie the trigger and I’m ok with that.

I just want to incorporate my hand torch (new, never fired) and see if I get the same results.

And in case anyone missed it, my 45XP is connected to my control box via CPC so it already has torch on/off as well as divided voltage.

Having done a few test cuts on the CUT60 again (reconnected it), gave me much more square cuts using the same pattern so everything is now on the bench.

It’ll take me some 2, 3, or even 4 weeks just to start disassembly and maybe start putting it back together.

Yes, the CUT60 performed better but I wonder if the Hypertherm just showcases flaws in the table than the PrimeWeld; the theory being that maybe my table’s frame isn’t fully square anymore suddenly.

One would think that if table is out that far, then the severe bevel would show no matter what torch was used? Maybe there is something going on with the Hypertherm torch Internally??

A Bad lot of torches? Over years?

I have the same problem, I don’t like it, I wish I could count on square cuts 100% of the time, just accepting the slight bevel that is inherent with flame cut.

I have accepted it, the nature of the beast and if I need that near vertical face on what ended beveled, I grind.

The pics I posted of the 1/2" brackets cut by my local Caterpillar Equipment fabrication shop in Aurora, there is one edge that has the bevel, where the corresponding edges do not.

There is another fab shop (that I refuse to do business with - quality issues) that the same crap was happening on some parts cut, and I was there to approve or reject. Guy could not get it figured out. 1/4" thick brackets cut on a 12x20 table with probably a 200A or 300A cutter (I’ve seen the 2" stuff cut from that table). New consumables, checked square, calibrated (?), “I just can’t get it to cut that edge”

@Kwikfab - did you try rotating the test piece 90* or 180* to see if the bevel kept showing up on the “top” edge? I know. Too late, already switched out.

2 Likes

I would hope.

Good thing is it’s still under warranty being only +2 weeks old. Bought it new from Baker’s Gas.

2 Likes