Looking for some tips on what everyone does in best attempt to control sheetmetal warping when cutting on the plasma table.
Ive got the crossfire pro and although it can cut 48" wide or so most of my projects are within about 24"x24"… but not always. Ive been buying my sheetmetal in i believe they’re about 4x8 and having them cut in have so easier for me to store. So most time when starting from a fresh sheet its about a 4ft x 4ft piece.
The material ive been burning lately is 20 gauge… measures about 0.03".
I have the water table and using the table additive fluid.
I would say most of my projects are more hobby and “decorative”… using that word loosely lol. But i believe they call it more like scalpting. So i end up with alot of pierces… lot of small cuts and nany times close together. Id guess that many of the projects burn for 5 minutes before complete…
Id speculate that my feedback here would be to ad some pauses maybe in between each cut… or maybe pause every minute for 60 seconds or something. Perhaps this will just be more a trial and error and hopefully learn what works as i go. Just thought id reach out and see what some of the great minds here do for these situations.
Thanks guys for all the information! Been a wealth of knowledge here!
I was gonna add too… this project im doing now i originally cut the main decorative work onto a 17" x 22" piece on 20 guage. It had some minor warping.
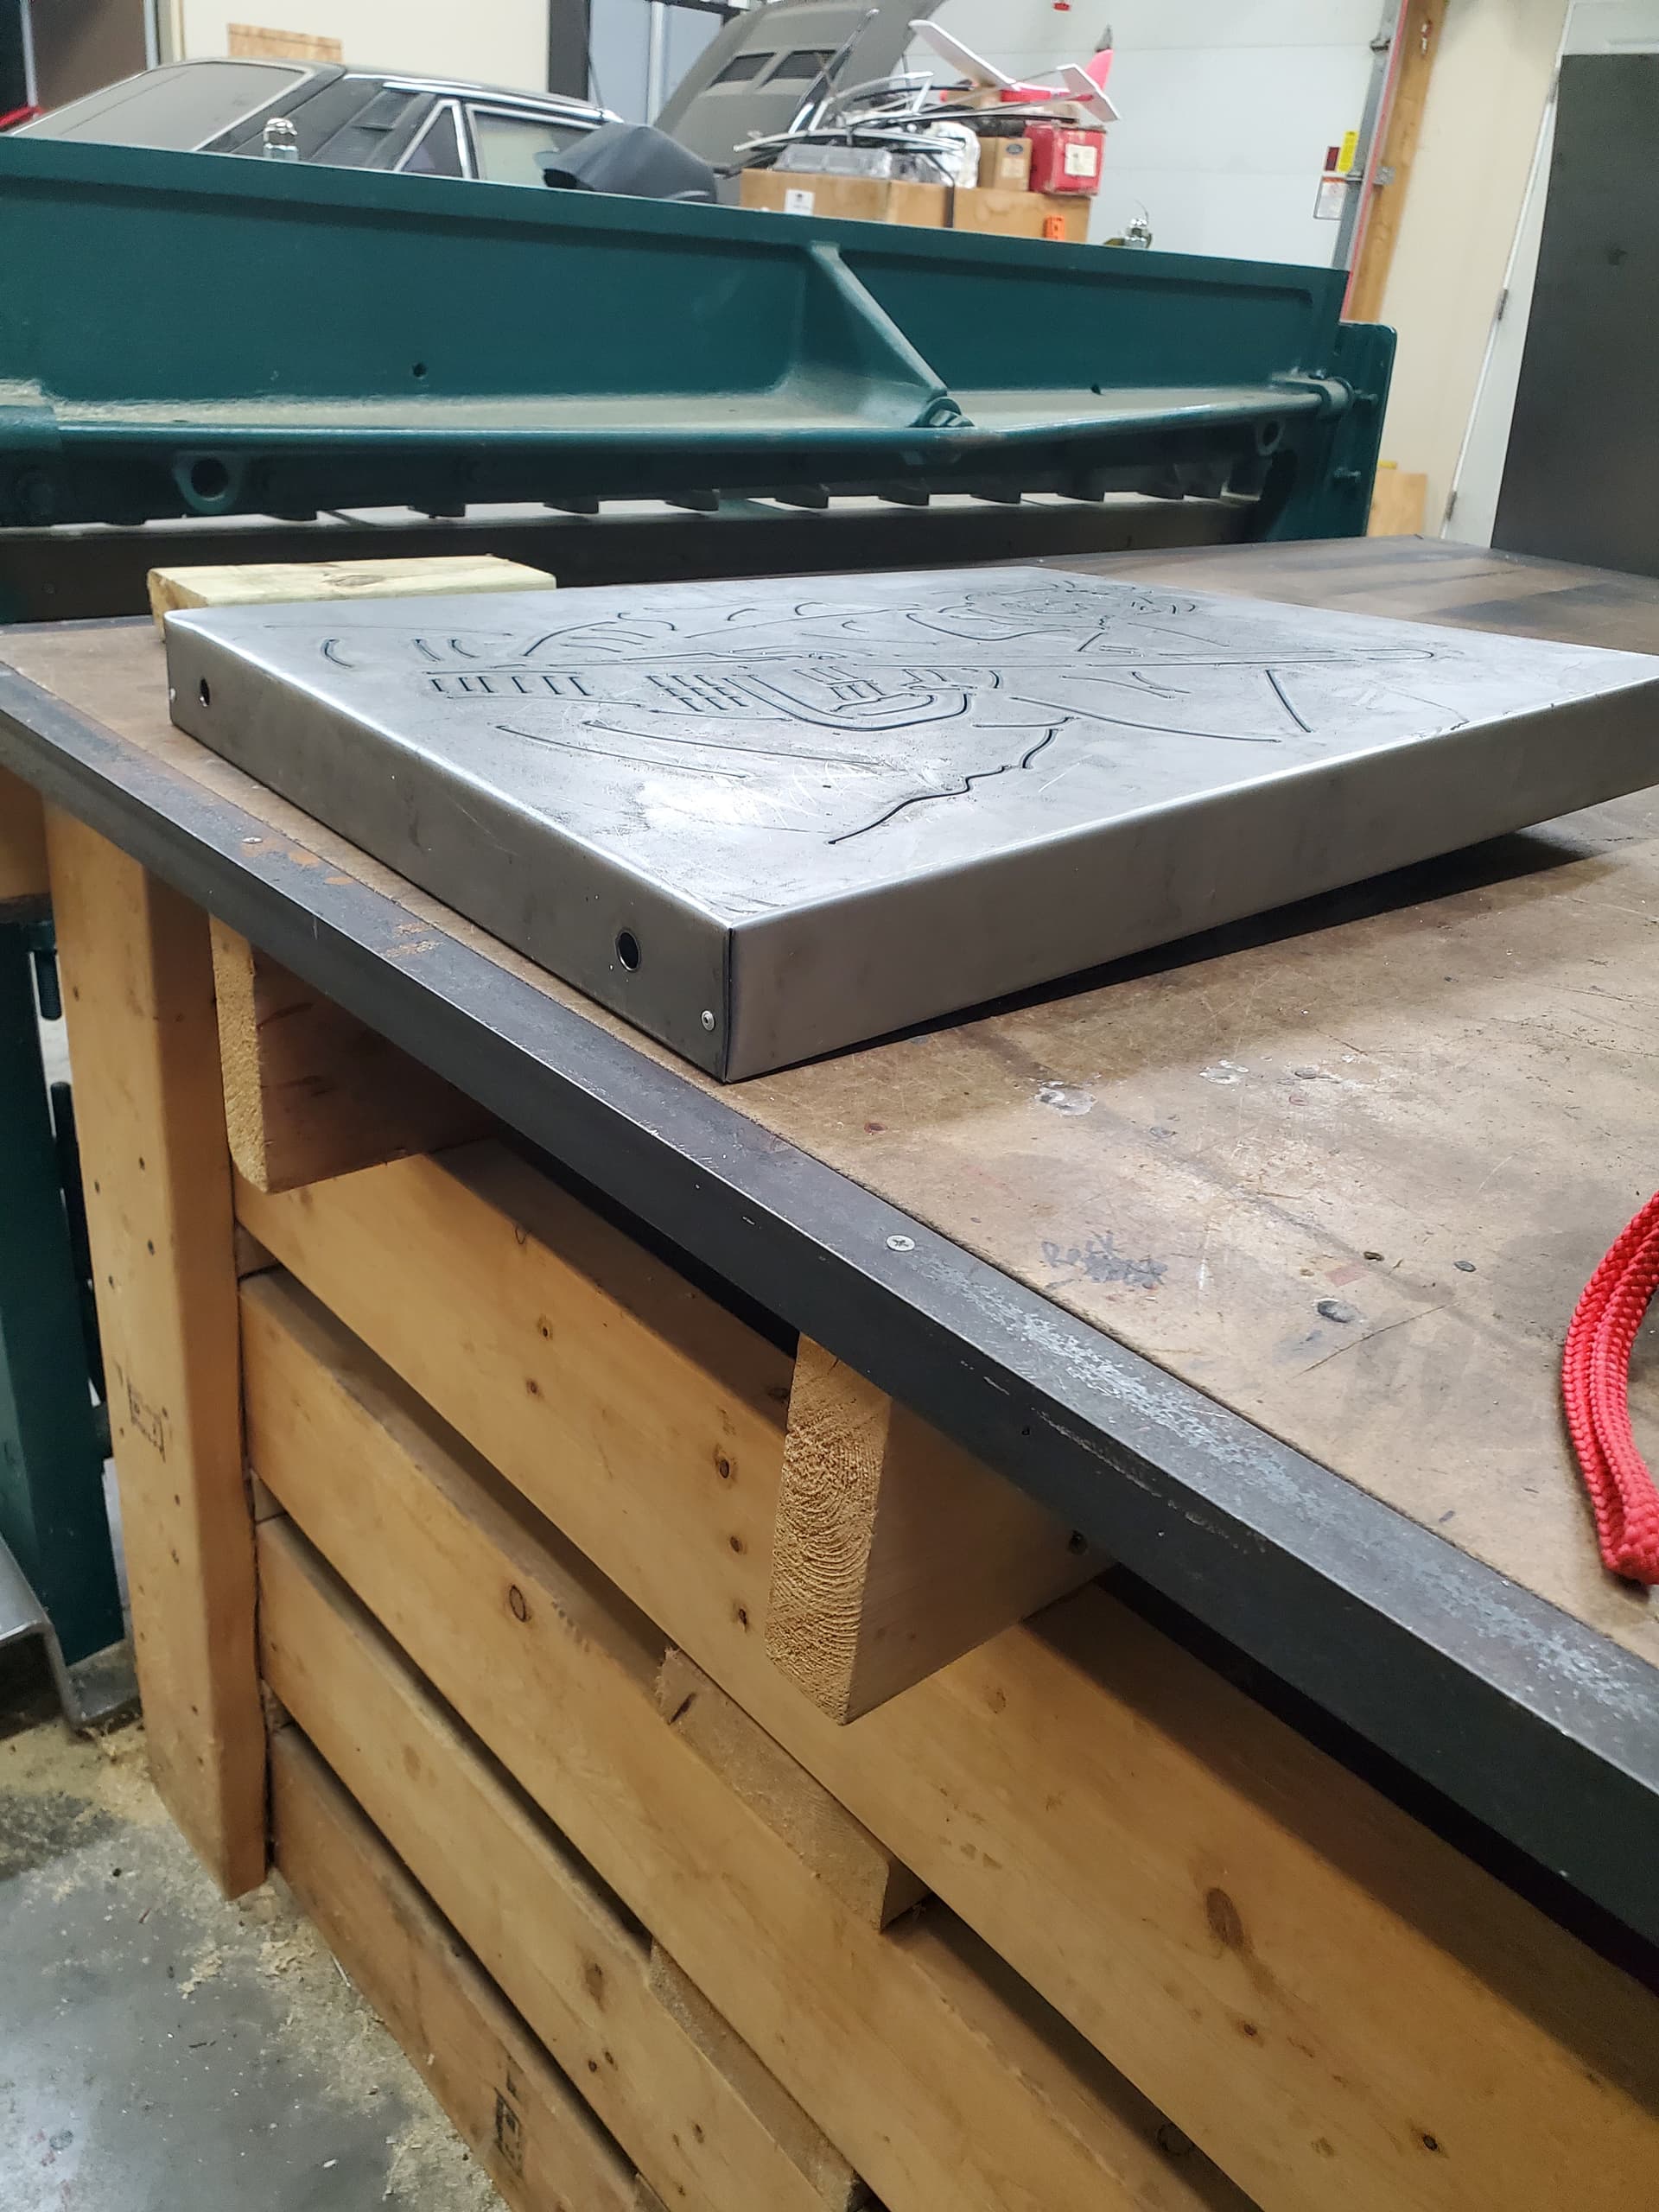
I then out of smaller pieces of 26 gauge bent up a 2" deep frame to go all way around and behind the main piece… then pop rivet everything together. It turned out ok… but i thought i could just build the frame/backer right into the main decorative piece. So i drew that all up and burned it out now figuring it will save a ton of time making more of them down the road. Well it is a ton faster!!!.. but that warp was impossible to get out of the metal. So essentially its luke a picture on the wall… but the warp created this awful twist in it. Would like to correct this for future projects.
I had the amperage down to about 20 (per the guide sheet i got on this forum from somewhere).
I had the speed set to 65. I know it can run way faster (also per that guide sheet). However i wasn’t sure with all the tight tool path if it would cut very well or at worse be hard on the table and all the mechanics of it. It actually was cutting really nice. A little dross on the back but not substantial.
Thats an excellent point on filling the water table to the max. I guess i hadn’t thought of that. Something im just thinking of now is i got a piece of 1/8" sheet metal laying on the bottom of both water pans. And then the slaps sitting on top of that. I added the steel pieces after hearing of others burning through the pan. So i just thought to drop that 1/8 pieces down as a little protection for the pan. But now thats putting those slats up that much higher. So probably all more reason to run the water level higher. Great point you make!
Ok cool. I will look for that and optimize that. Perhaps whatever its set at now maybe slow it by twice or maybe 3 or 4 times.
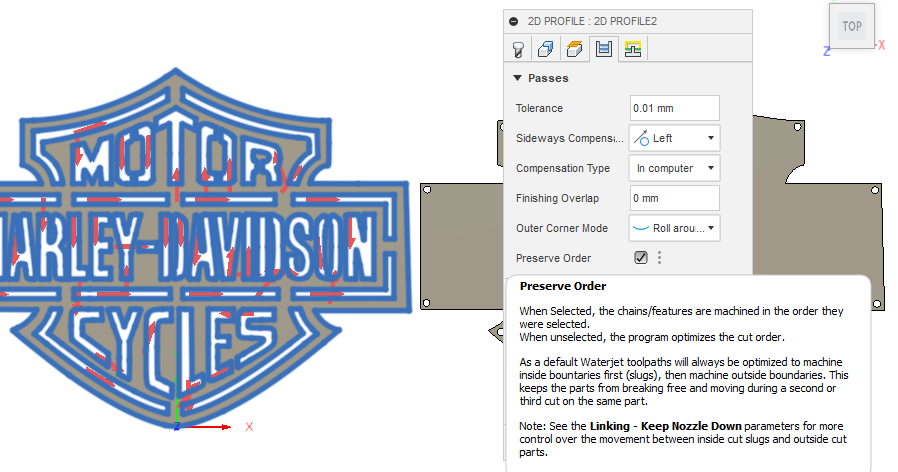
I know in Fusion when setting the tool path you can select each cut in the order you want the machine to cut. So maybe instead of making a bunch of cuts in one area i can have it move around the piece more as its cutting. Idk…
I like that idea with slowing the rapids. And maybe even just inserting a few pauses here and there as i feel it needs them.
You could spread out your cuts to allow some cooling between close cuts. In Manufacture setup, you can individually select each cut IN A SEQUENCE THAT WILL SPREAD OUT THE CUTS, then select the “Preserve Order” funtion.
I use it a lot to allow me to react in case of tip-ups that might wreck my cut.
With thin material and really detailed work you’re going to have issues with deflection when the IHS touches down.
Detailed stuff and text is mostly what I do. I tried 18 gauge for a bit and couldn’t stand working with it. I can’t imagine what a pain 20 gauge would be. I don’t go any lower than 16 now.
Filling the table up all the way and getting your plate off the bottom will help a bit. You really don’t need the extra protection plate unless you’re cutting 1/2 inch on a regular basis. You could also cut new slats to be a little shorter.
I cut a 4 foot sign with a lot of text, even with toolpath rules keeping each cut 16 inches away from the last I still had to hold it down in places due to warping. I think at a certain point when you’re removing material it’s going to change how the sheet lays.
Sorry for ghosting ya all after the great help! … busy with new work and such!
I attempted several changes. For life of me when i was trying to make the changes with selecting all the pieces in a sequence that bounces from one side to the other of the sheetmetal to spread the heat more evenly i kept messing up with how i was selecting all the individual line geometries/segments… theres gotra be a hundred or more in just this one piece. Unfortunately id get 3/4 through and somehow id select the entire thing and for life of me could get back out.
I tried once to maybe create seperate cutting pages incase i mess up when creating them i dont lose the entire thing… but just that one setup. But threres so many cuts its difficult to keep track of what ive already got selected to cut on a different cutting sequence. Eventually i gave up and decided to just fill the table all the way as another commenter here advised and just run the same cutting program as i did before but pause for nearly a minute in-between each pierce/cut. After the compressed air would shut off id pour a few cups of water over that area to cool the sheetmetal. Took forever to burn this one piece and it certainly seemed to make a difference in deflection and warm!.. however once i put it too the metal break it became obvious i still didn’t get enough of that warp out of it. Unfortunately! Lol! Frustrating but thats how it goes. Its only 22 gauge… i was hoping to build the backer into the main art piece so it would save time putting it all together. Not that im planning to make thousands of them… but maybe a few for friends and people into the same sh1t im into! Lol!
So will probably have to build the backer as a separate pieces… (pieces)… put the backer together and then pop rivet the main “art” onto the backer. This is basically how the first one i did went. Only dif was the backer i completely layed out and cut by hand. It all assembled nicely and finished product wasn’t too bad. Just figured i could do it better and faster.
Ill see if i can post a pic here of this last one…
I have the first one hanging on the wall and it hangs perfectly flat against it! But these last two with the backer built in proved the warpage would just make it impossible to achieve what i was after.
Might be down for the count… but not totally out of the game!
Happy sheetmetal burning!
Thanks everyone for all the help!