Ok. Wondering if anyone has any charts for cutting speeds and amperages with the razor cut 45 with machine torch broken down by gauge.
Honestly just figured out that the knob on the front of the machine is useless when using the THC and have to program my amperage in with fusion 360 when generating the code.
Was wondering why I was getting some massive dross when cutting the 18 gauge steel, and saw it was programmed at 70 in/min at 45 amps.
Started speeding it up and cutting the amps back but also will be moving to a 20 ga and would prefer to not have to do the trial and error.
So far I only have. 18ga, 20ga and 7ga in my garage. If anyone has any input on the feed rates and amperage for these I’m all ears. Prefer clean cuts not just speed.
Just so you know, the amperage setting in Fusion has no way of changing your cut amperage or the THC settings. Amperage can only be adjusted at the machine face, and THC target voltages (if you’re not using Smart Voltage) must be entered by hand in Fire Control.
While cutting a few days ago I tried turning the knob down on the front of my plasma cutter and I got no response in the cut difference. Was cutting 18ga steel sheet and turned it completely down. Also tried all the way up and no difference.
Now how do I set the amperage that I need for the given thickness of material? Or where do I enter this in the fire control dashboard. I am assuming that I am using the smart voltage as just to be sure I run the test before I begin cutting each time.
I honestly haven’t played around with fire control much past adjusting the feed rates plus or minus. I just assumed that changing the amperage in fusion changed it for the system.
Or will the smart voltage automatically set it for me as it’s cutting?
No worries. We all start this journey with some pre-conceptions’.
We also run a RW45 and Fusion, so I’ll take a stab at your questions.
For the 18ga, what settings (Pierce Height, Pierce Delay, Cut Speed) did you have entered in Fusion? In our case, we run 18ga at 40-45A, .15" Pierce height, .06" Cut Height, .5s Pierce Delay, 200 IPM Cut Speed. (With standard consumables.) I’ll also leave THC in Smart Voltage, as I haven’t had any issues with it yet.
What amperage to set? I prefer to match my consumables. Until recently, I cut everything from 18ga to 1/2" at 45 A. Cut speed and Height are the variables. The only way to adjust amperage for a RW45 is the dial on the front.
THC will adjust the height of the torch to match a predetermined value. With Smart Voltage enabled, THC will sample the 1st 1/4" of cut, then adjust torch height up/down to achieve the target. The key to remember here is Smart Voltage samples the beginning of the cut, after the pierce. If your pierce delay is too long, it will throw THC out of whack, and as such, your cut height.
Correct. I’ve found 40-45A to be a good setting. Pierce and Cut heights I try to keep the same (.15" / .06"). I have speeds pre-programmed into my tools in Fusion (one for each material thickness), so the only thing I need to change when I post is the pierce delay. (Thicker material = more delay.)
I will also say that Feed Optimization has greatly improved my cuts in small areas. I’ll set it to ~60% of the cut speed. (Note - THC will temporarily turn off when the speed drops.)
Size, length & type of Lead-in / Lead-out will also change based on what I’m cutting, but I’m sure you’ll pick this up as you progress. (Besides, I’m not certain anyone here completely agrees on what the “best” options here are!)
Welcome to the community Michael. I am in complete agreement with Terrance with his advice.
To make things simple right now, just keep your amperage at the max setting then you only have the speed to adjust. You will start playing with the amperage when you see that you might be blowing out some of the detail with too hot of a stream.
To give you some other things to consider as you start to explore cause and effect:
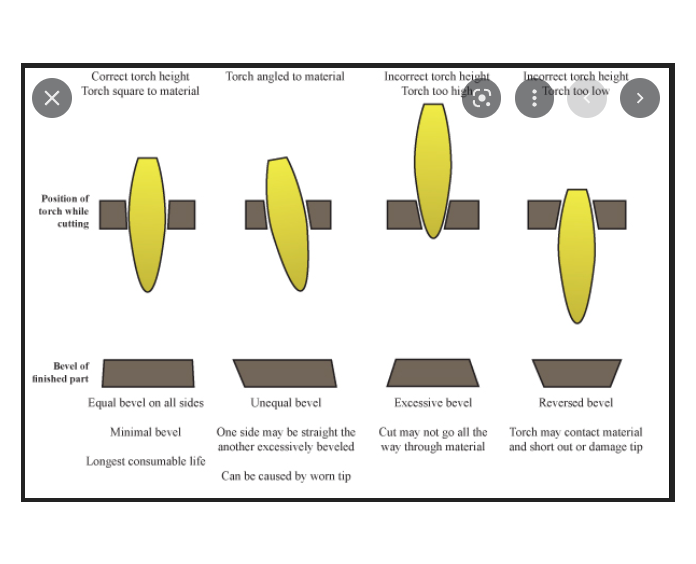
The cut height is very important for the quality of the cut. Lots of dross on the top indicates you are moving too fast or the torch is too high. Conversely, Lots of dross on the bottom side indicates too slow or torch is too low. You will also see a bevel to the cut if the torch is too high (sloping away from the top) and if too low (sloping under the plate).
Realize if you are moving too fast on small radius, there will be a bevel to the cut as well. That is why it is advised to use “Feed Optimization” to slow down the torch on these details. You will get more bottom side dross but correct for the bevel cut and get a more complete removal of material for the hole.
If you are going for artistic designs, the bevel might not matter and in the interest of minimal to no dross, focus on the speed that minimizes the dross.
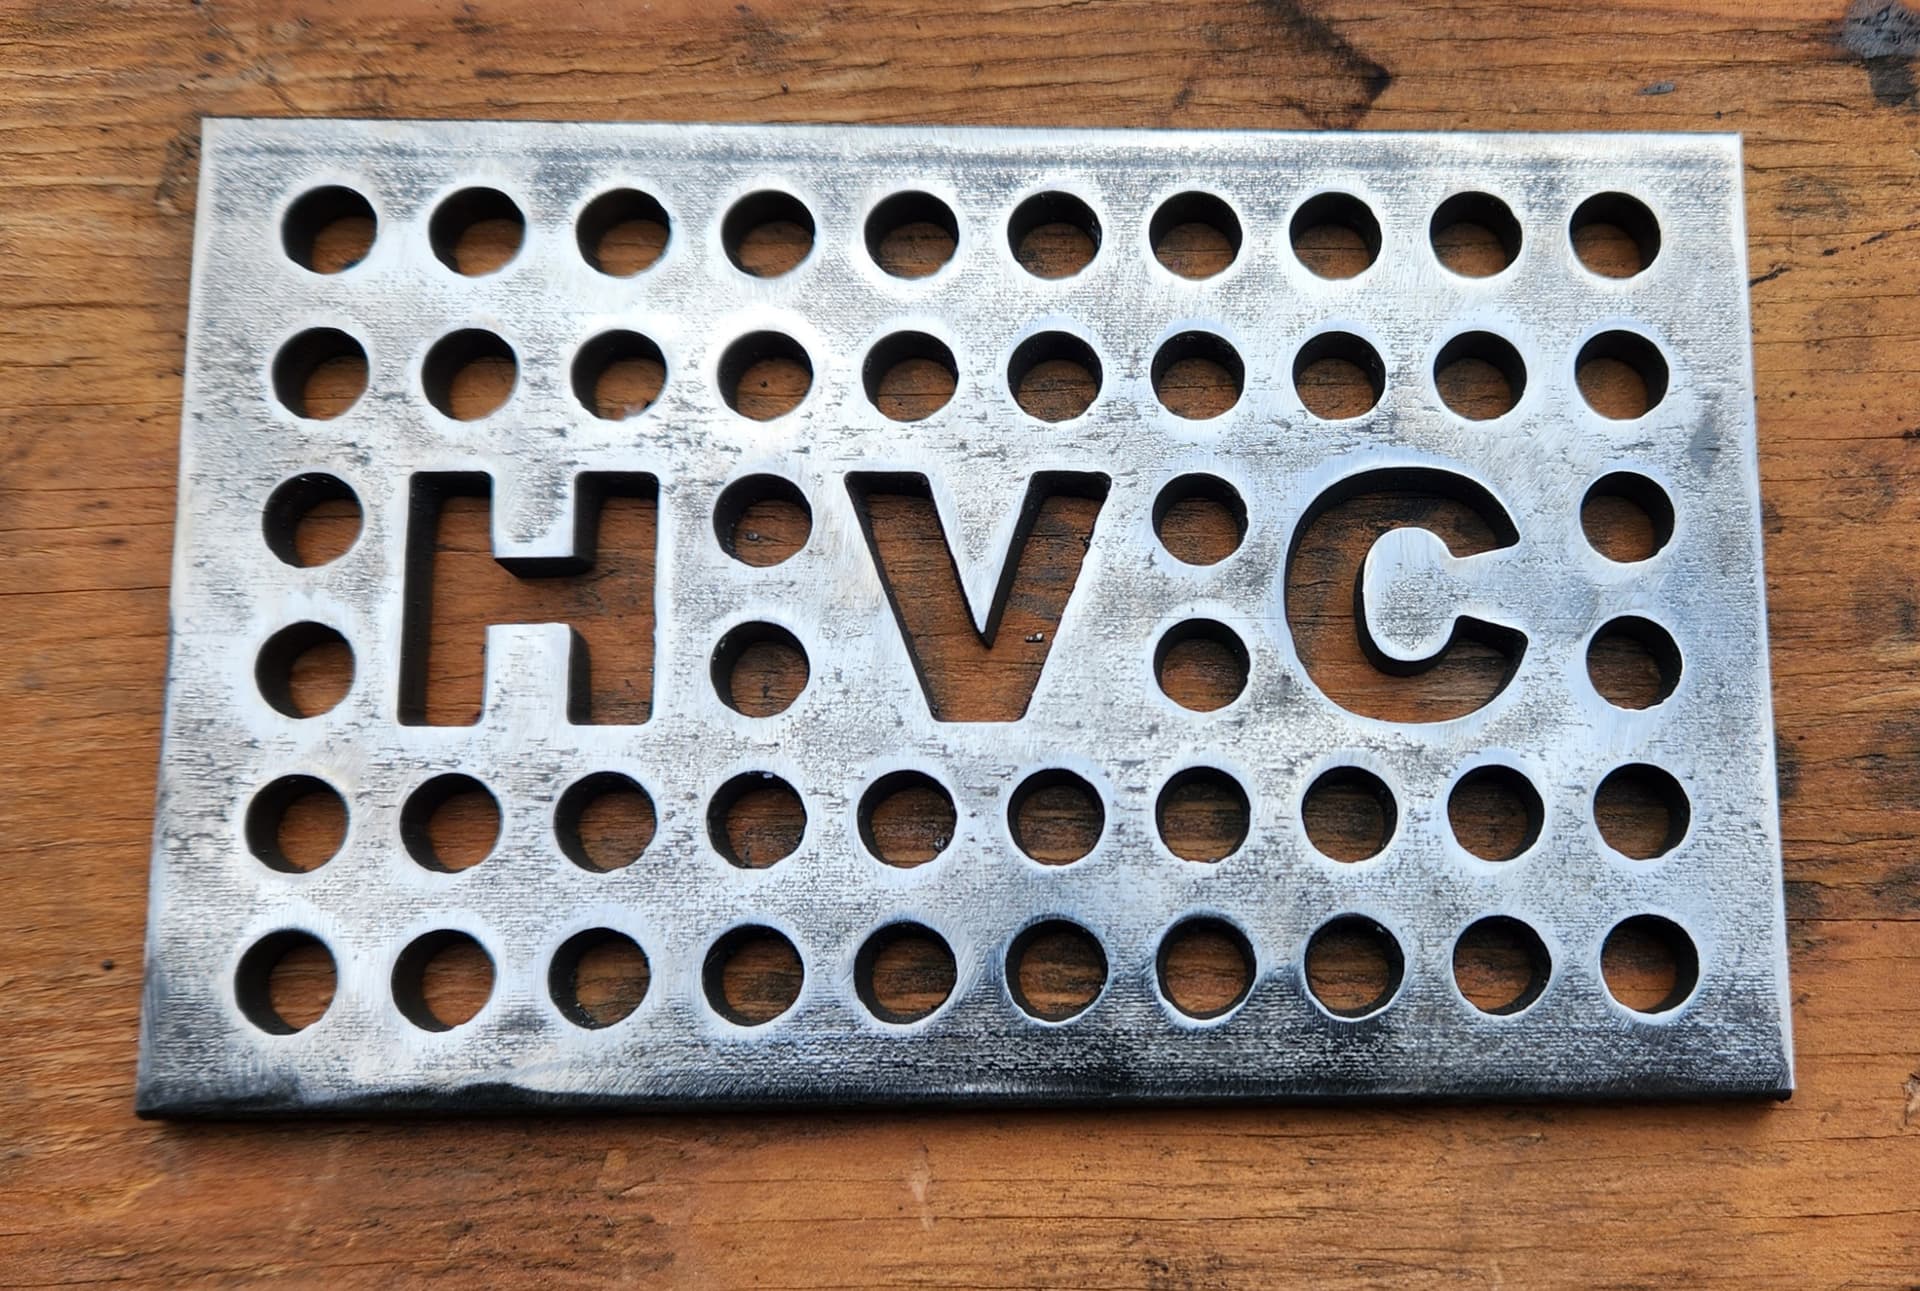
And don’t forget to check your consumables regularly. You may be making all sorts of corrections with speed, amperage, and cut height and then realize that the nozzle or electrode were beginning to fail. I would say the nozzle is the most often overlooked item. If you see that orifice expanding and/or no longer a perfect hole then it is no longer focusing the energy of the plasma torch. Your cuts will be affected. Early on, if I swapped out my electrode and nozzle and saw that it made no difference, I set them aside as still having life. Use those saved consumables when you are going to make utility cuts such as brackets for the barn or something with lots of piercings that is more for function than looks.
Here is an example of something I cut out with “partial spent” consumables. It is an ash grate for my rocket stove. No one will ever see it but all of those holes could put unnecessary wear on new consumables.
Thank you both for the advice. Drawing the parts is the seat part. Up till now I’ve honestly been just hoping the feed in fire control. Most of the things I cut are smaller like the bills Mafia sign on the fire share pages. People seem to really like them. I am about to try my hand at a 4" dia ornament but idk if it will come out or not due to lead in and some small script. Will see how it goes
So you might have trouble creating cutpath using “left” compensation so what you’ll want to do is do some test cuts using “center” compensation. These test cuts will give you an idea of spacing you need from cut to cut. If this makes no sense please let me know. If your getting into really detailed stuff you might want to consider fine cut tip if available for your machine.
Idk if there is a fine cut tip for the razorweld 45
I’ll take a look and see if there are any fine consumables for it. I did play with the center cut a few cuts ago and it melted a bit of steel on about a 1/4 wide sliver it was making. And good sir I do understand the offsets . Grew up machining. And have been for about 20 years now. Just getting into the plasma cutting. Have run lasers in an industrial setting in the past also.
Thank you much for the help and yes I will probably need more advise in the future.
If you post your dxf or f3d, a number of us would be willing to CAM it for you and explain what we did. @DonP and @TinWhisperer will sometimes do a video so you can see how they pick things. Others will show screenshots and descriptions at key places to help you see what/why/where fors.
But if it is a small item, practicing and making mistakes will really help you understand what is going on. If you get to sticky points, send some pictures and we will give your our best guess of what happened. Sometimes we hit, sometimes we are way off and you are the Sherlock Holmes of the adventure. That is the thing: this is an adventure. Embrace it.
If you have this torch, you can get the fine cut tips:
And @mechanic416 can hook you up. He sells them and is a very respected member of this forum.
Thank k you for the information. Searching forums can sometimes be difficult especially when your at work. So I do appreciate people not jumping down my throat for not searching but honestly I didn’t even know there was a fine cut option so I would have been not searching for the correct things.
As of now I use fusion 360 to post the code through their cam. I’m guessing that most on here like something else to use?
I am retired and enjoy helping out if I can. Some may say I am an “enabler” but I just did a quick search for “fine cut razor” and could not find the actual thread that I knew existed. I had to check my history as it happened to be a thread I was active so I knew it was somewhere. You are so right, searches can sometimes be the “needle in the haystack.”
If you have the Stock RW45 machine torch there are no fine cut consumables for it.
I have aRW45 w/mach torch and cut everything at 45amps. I have never cut less than 14ga so keep thaat in mind. I just change my speeds depending on thickness.
Here is a cut chart for the razor weld it wil give you some ideas to start, I only used it to get close and than went from there.
@mechanic416 has fine cut consumables for the RW45. They rock! I did have to tweak cut heights, pierce delays, but the out come was .039 kerf on 18 ga. Cut speeds were a guess as well, but it seems to work well. I run his fine cut at 25-30 A.
I found this detailed article that was published by @mechanic416 on another forum. I believe it is relevant or perhaps George will weigh in on it here. George goes into a lot of detail with good information. I believe some of the conflict of what consumables work in which torch is that they will “sort of” work in different torches but George then says in a follow-up post on the same thread: “If you want better performance out of your plasma cutter get the consumables made for the torch.”
The trouble with Razorweld and there torch numbers is they don’t always match the consumables the torch takes. Razorweld has changed torch’s about 5 or 6 times from the time they started selling them. So the best way is to look at the pictures of the consumables to see if they match the ones you have and don’t go by what the seller states will fit.