I must have lucked out After I switched to the Raw voltage through the Cnc Plug my Prime 60 has worked with out issue . The only thing I noticed was lower than average voltage due to the 100K resisters in the Raw Voltage line to the CNC Plug. The Machine I have is a second generation Machine. I have two torches so one can stay with the table.
Primeweld has their TECMO 60 machine torches back in stock for $299.
I ordered mine at about 2:00pm and it shipped same day, with free 2 day shipping.
2 Likes
I wired up my gen2 Cut60 according to the guide shared here. Made sure to be as careful as possible but she will no longer fire. Fires up, sounds good, can activate trigger from torch or through the laptop and hear the familiar solenoid click but no arc…tried this both with and without the table connected…just air activation and a misfire.
Opened up and found a crispy looking component on the black wire side board. I’ll have to troubleshoot this but in the end I would encourage anyone who wires up a gen 1 or 2 unit to be very very careful.
If you could post a few pictures of how you wired it and the damage it may be helpful for future users.
How did you go; Raw or Divided?
I wired for raw voltage coming off the torch and work clamp leads on the inside of the machine using the cables provided by langmuir systems to do so. The guide used was also from here (can’t recall the creator) for those who had gen2 cnc port plugs to help avoid the known issue with wiring completely through the cnc plug on the machine. I can’t see or smell any damage but she won’t arc so…
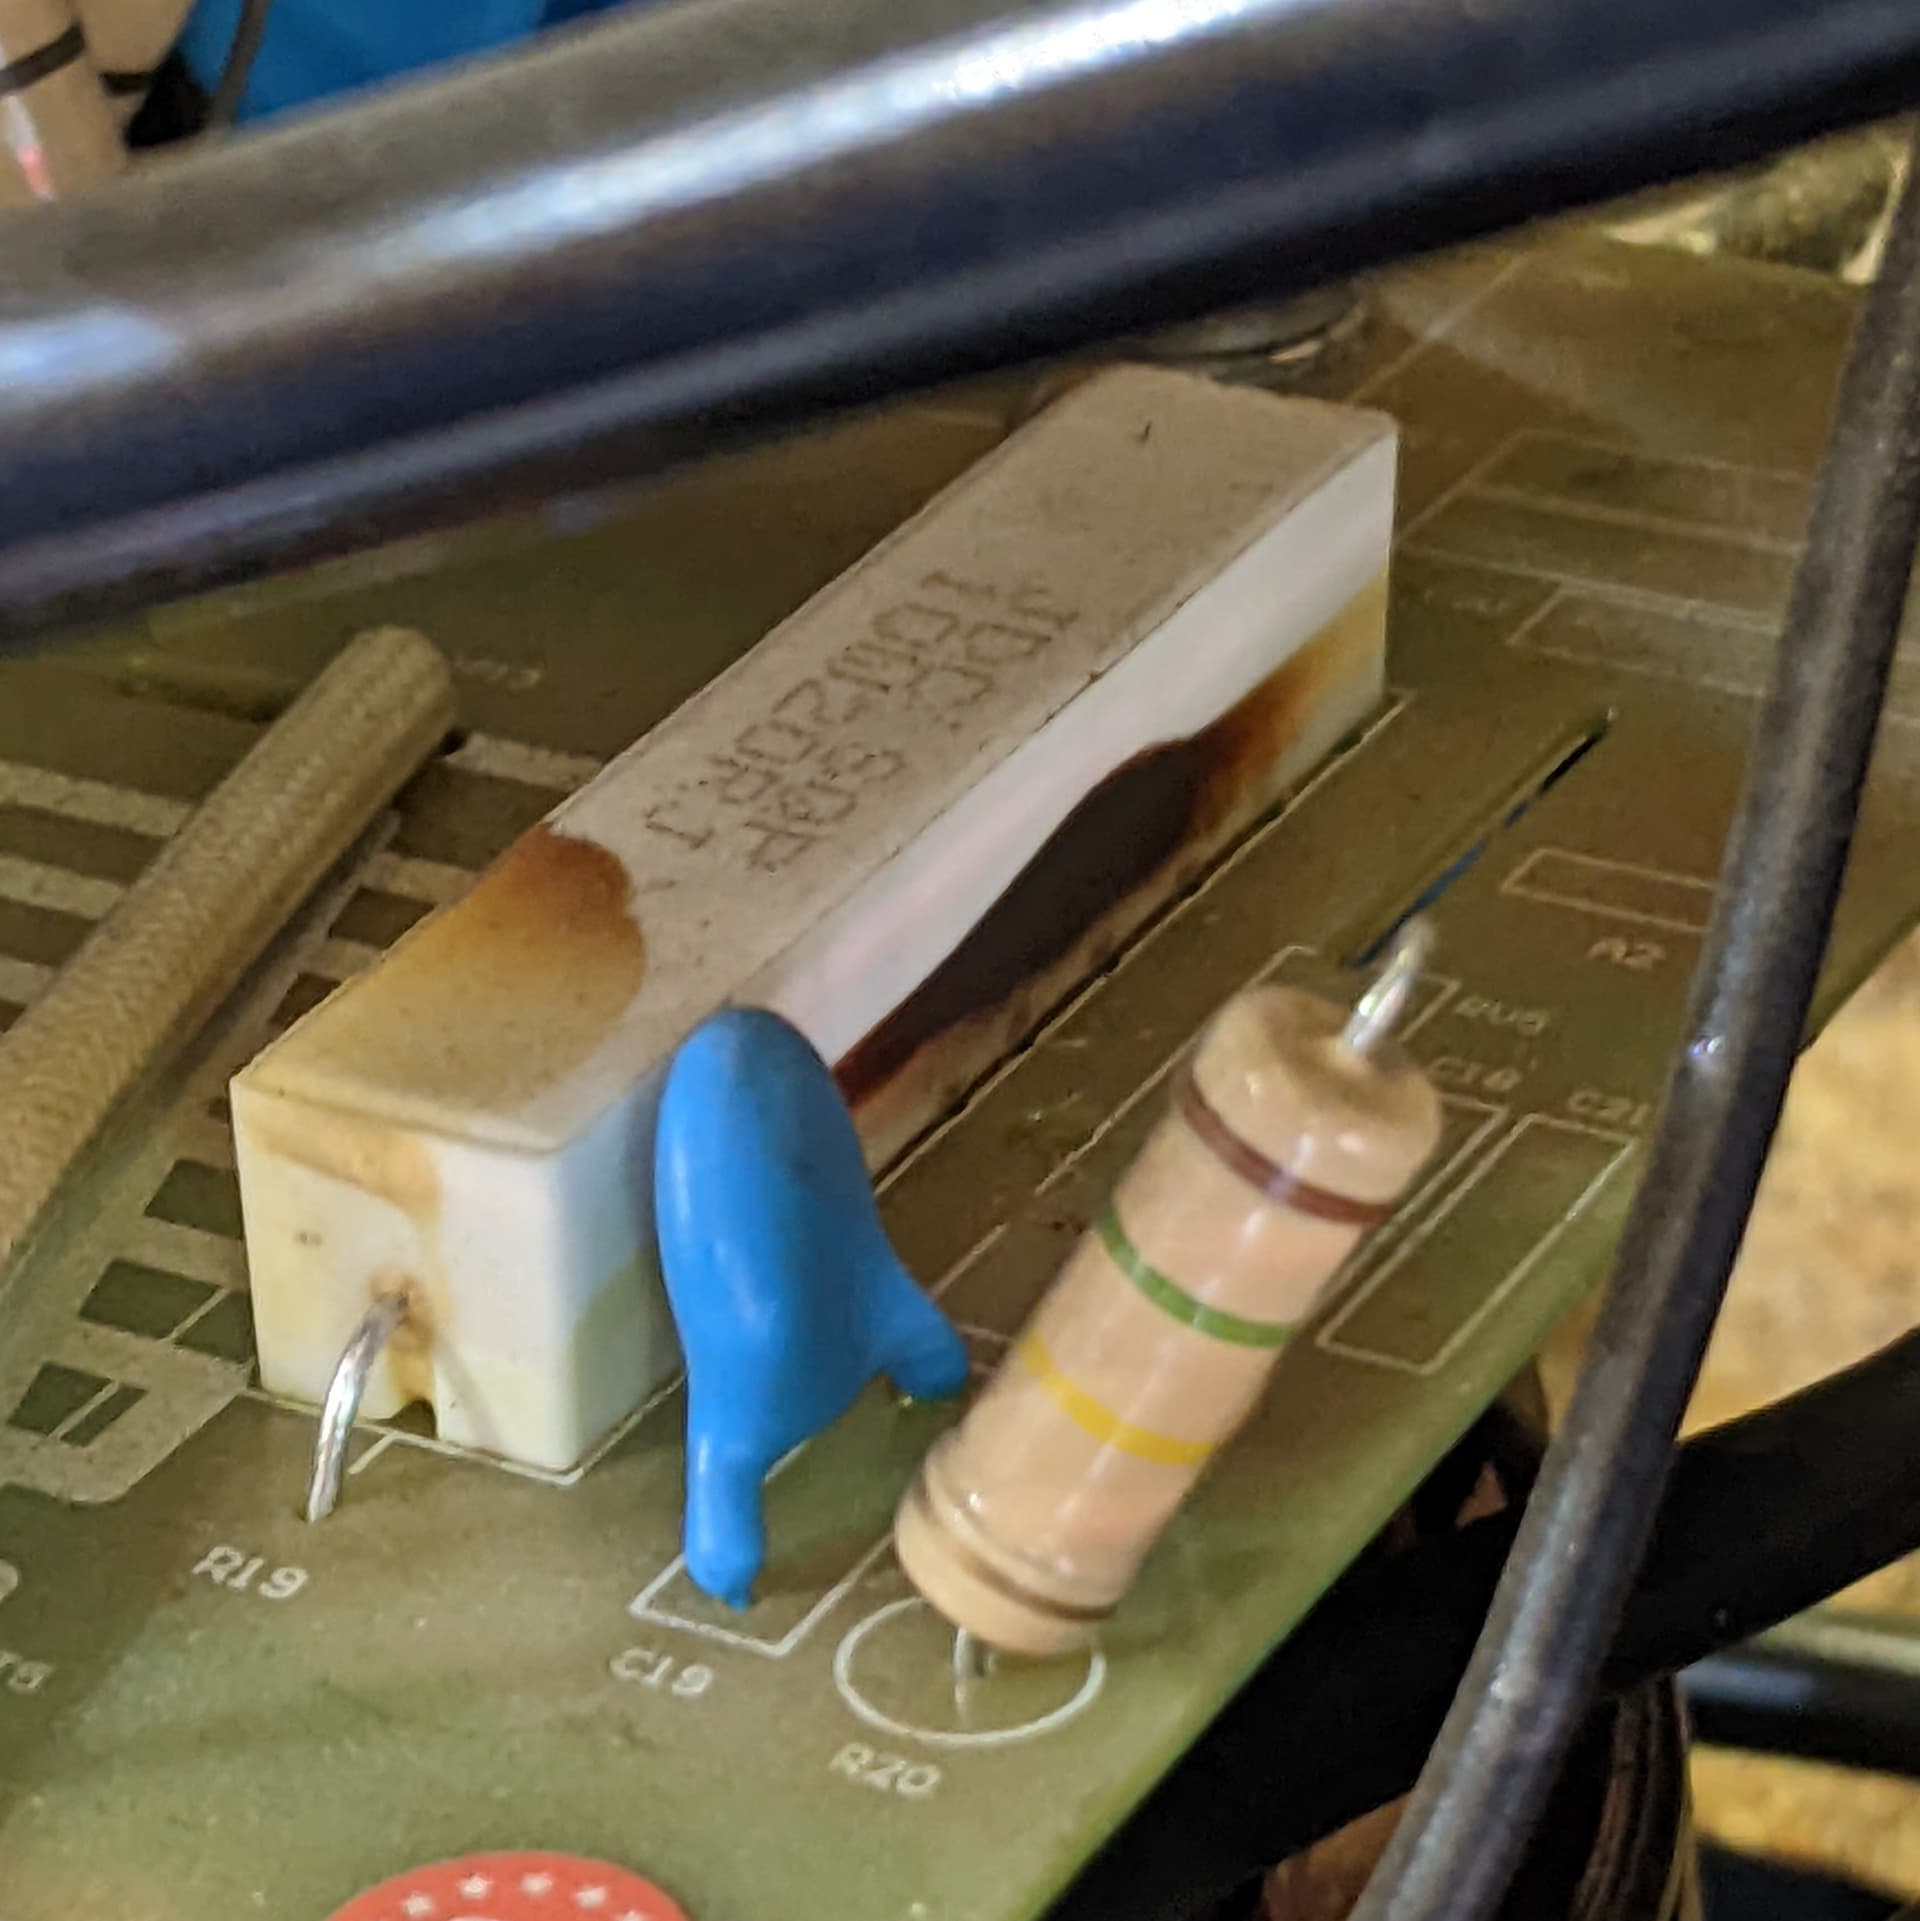
Included is the 1 part of the circuit that has me wondering but the board itself shows no signs of damage.
Do you have a picture of how you wired it?
1 Like
Can you post a link to the guide you used so we can remove it if it is incorrect.
Also can you post a picture of how you did wired it.
i posted a write up above for hooking it up RAW. I’m assuming that’s what he used. pretty straight forward. Havent heard anyone having issues until now.
@Wnyguy please post pics how you hooked up the leads.
1 Like
Could be, but I don’t want to assume anything .
I want to know exactly what document was used and how it was executed before we get too carried away.
1 Like
@Wnyguy Can you identify what board was burnt up based on this simple overview wiring diagram or the exploded diagram.
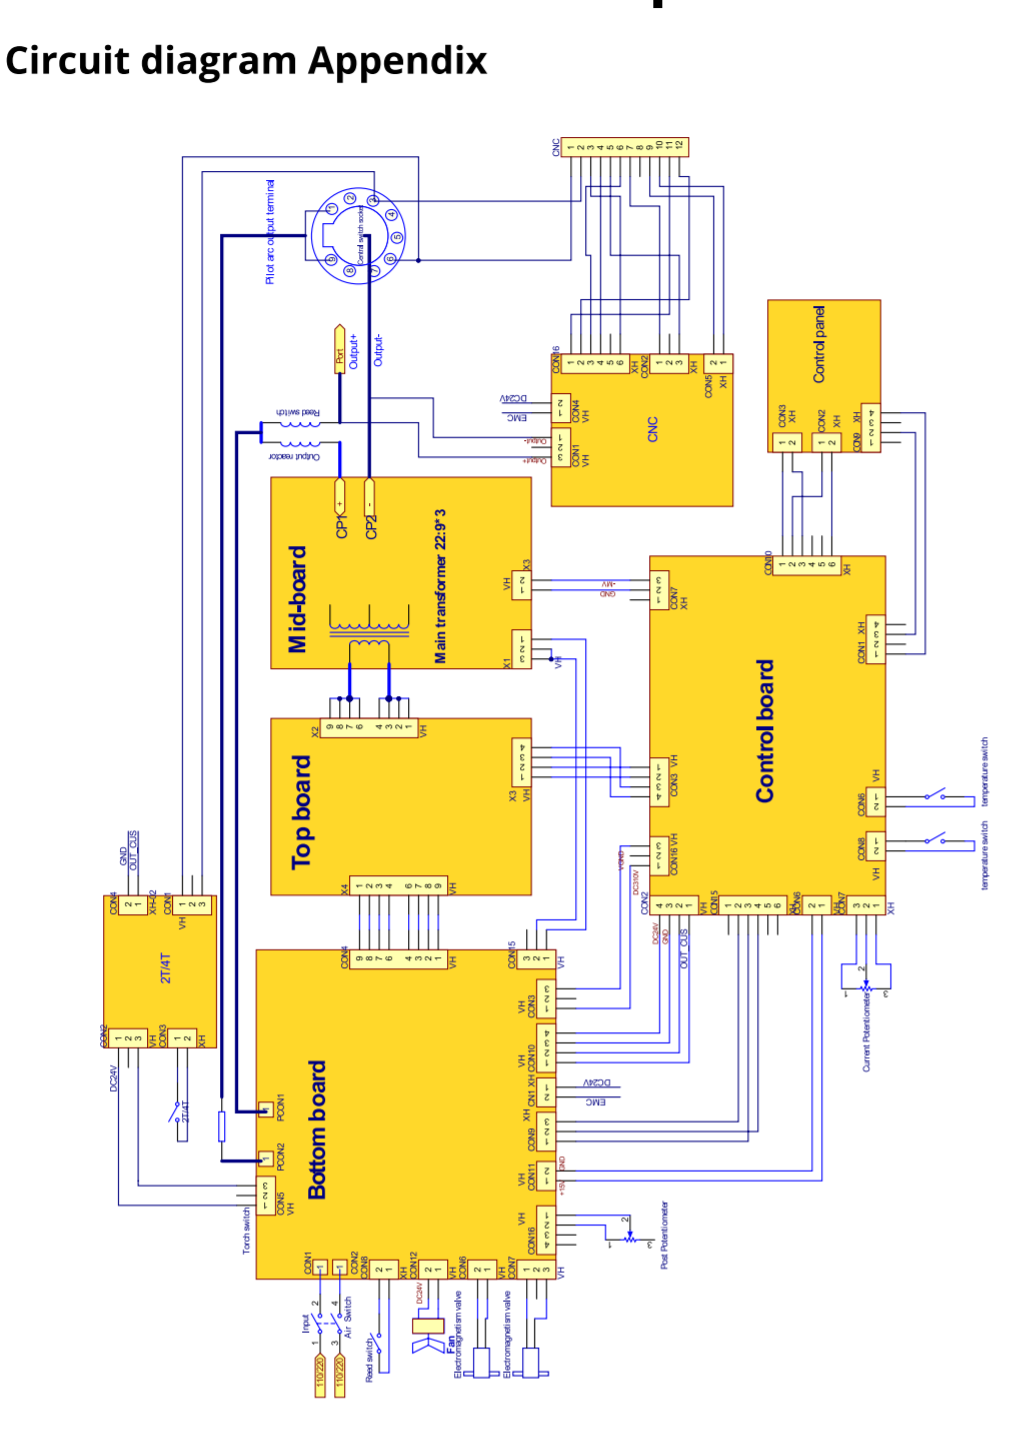
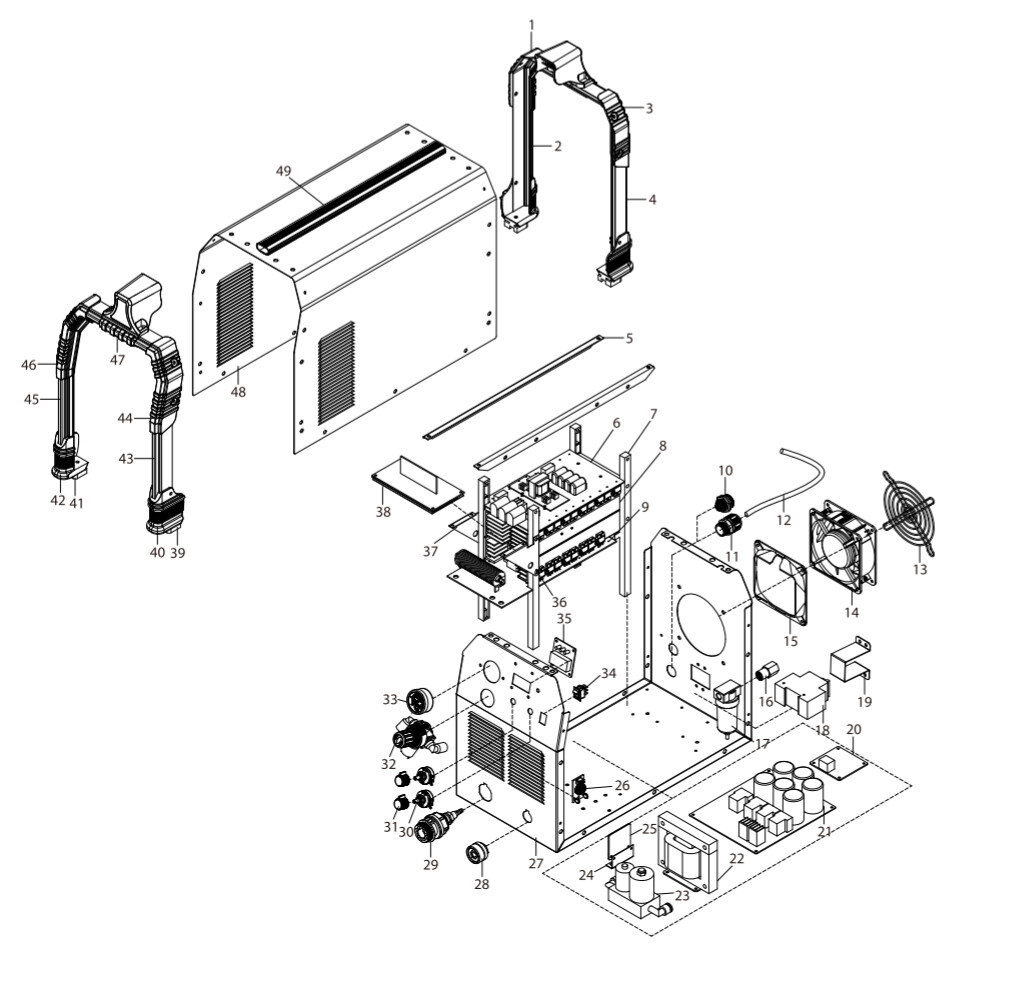
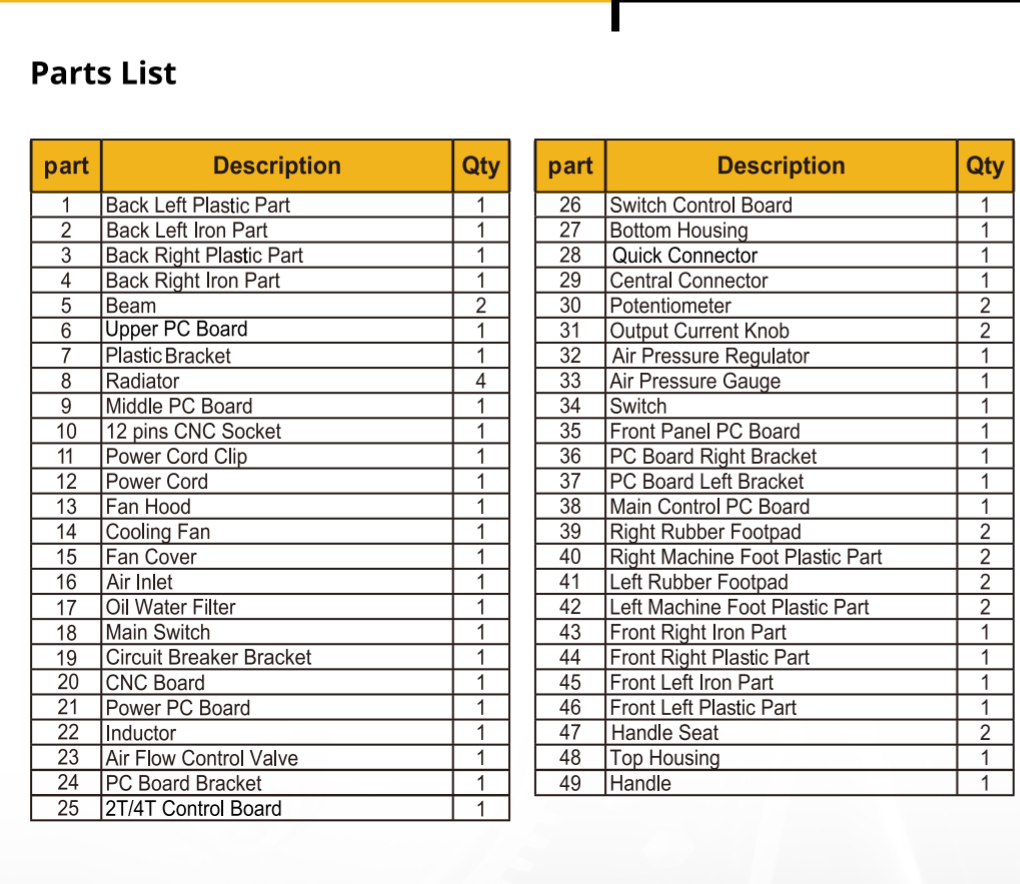
I’m guessing that’s going to be the top board (upper board) but let us know
The picture shown is from the #38 board I’m pretty sure and, yes, it was nicaDd’s installation guide. Everything is buttoned up at the moment so I’ll have to pull it apart to take pics and will do so tomorrow. I fiddled with it more and removed the leads and set it back to pure factory, tried 120v but it’s the same. I triple checked the guide when I first installed everything and went back in today to verify the installation per the guide and comb through in case I knocked wire loose or forgot to reconnect something which, wasn’t the case as the guide is so simple that the only thing that could have happened is one of the few leads bound to the bolt mounting points would have been hanging there in place. I’ll post again when I get images.
1 Like
So the torch doesn’t fire even when pressing the trigger on the torch?
I referenced your guide. No problems whatsoever.
Seems there was another one on here I also referenced. Both showed the same thing.
Only difference was the method of getting the wires out of the case.
That is not burnt, that is the way a lot of them are.
Unhook everything from the controller and see if the torch fires and cuts by hand. If it does then its in the controller some were or wired wrong.
The unit should still be under warranty if it does not fire when hand cutting.
Also make sure all the consumables are in place and the cup pins are clean and making contact with the cup.
If Primeweld can’t help you with this you can contact me.
2 Likes
The solenoid for the torch to fire clicks but it does not fire. OSD is normal, air activation is normal.
I have tested firing both manually with the gun and through langmuirs system and it acts identically.
I have removed the langmuir wires and put the unit back to factory wiring with same result.
I am going to swap to an old used tip to see if it fires as I replaced the tip hardware as part of the installation to make sure my cuts were clean while testing. It’s the only other thing I had touched as part of the process.
I will keep you in mind @mechanic416 . I’ll be taking pics later and placing them here. If those look like that then it’s fine. It’s the only one in the case that does and it’s unusual to me for as white as every other similar module is…that said…I could pull out my meter and test (which I could do anyhow just cause for troubleshooting). I don’t remember it looking that way before but that doesn’t mean I looked that hard as I knew the unit worked great…had already had 18 months of trouble free use until this.
I see those resistors like that a lot. Also make sure your air pressure is at least 65/70 psi on the gauge on the plasma cutter or it will not fire.
1 Like
Good Call.
Even in @nicaDd raw voltage walkthrough PDF that same 10 Watt 20 ohm resistor has discoloration marks on it. No doubt a resistor would get hot. It’s basically that it’s a little electric heater in a piece of ceramic.
1 Like
I’m wondering if you forgot to put the swirl ring back on and causing it not to fire.
Make sure you can press in the electrode and it should spring back out. There are also 2 small pins on the rim of the torch head where the cap screws in… those should also spring back out when pressed.
3 Likes
Ill second checking the swirl ring… unfortunately I am speaking from experience here. ![]()
![]()