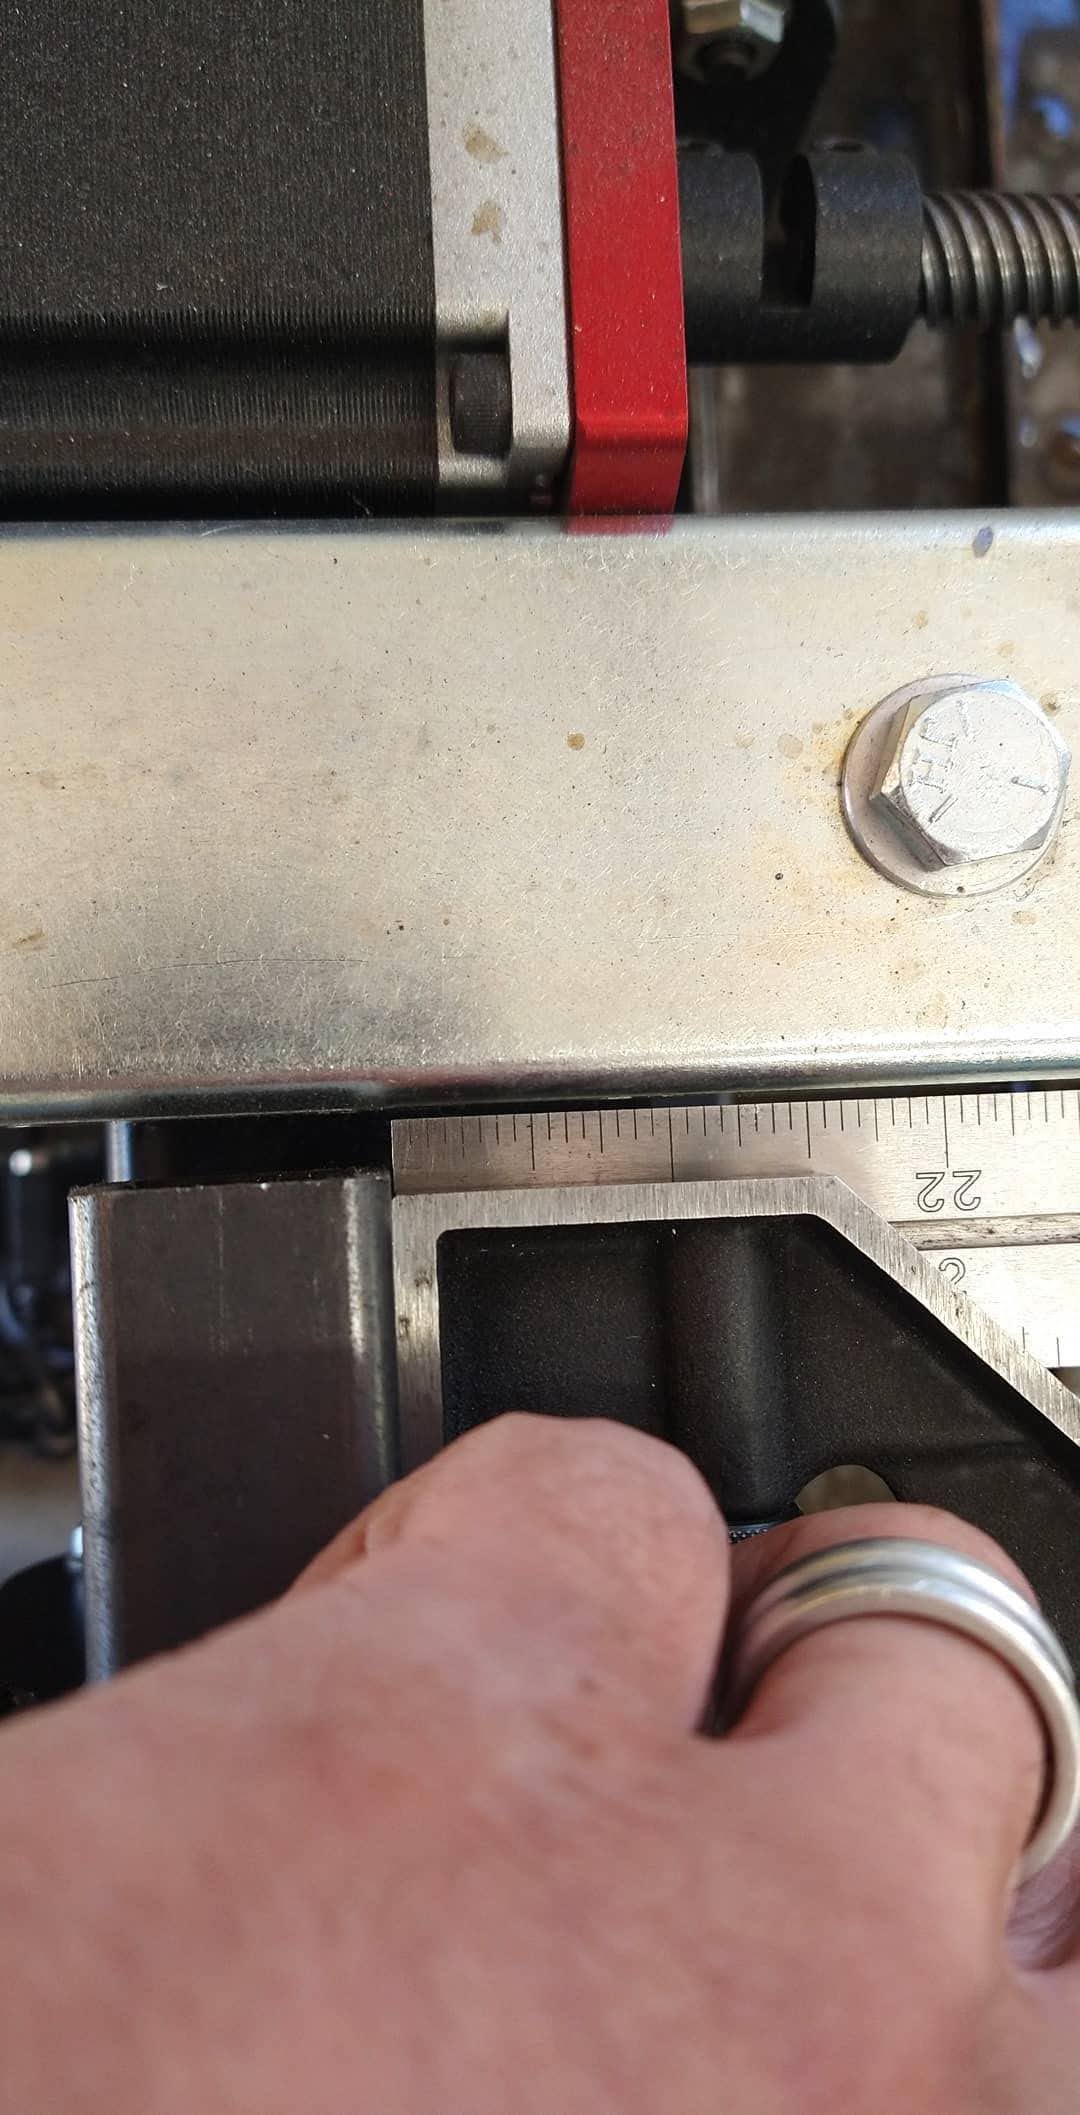
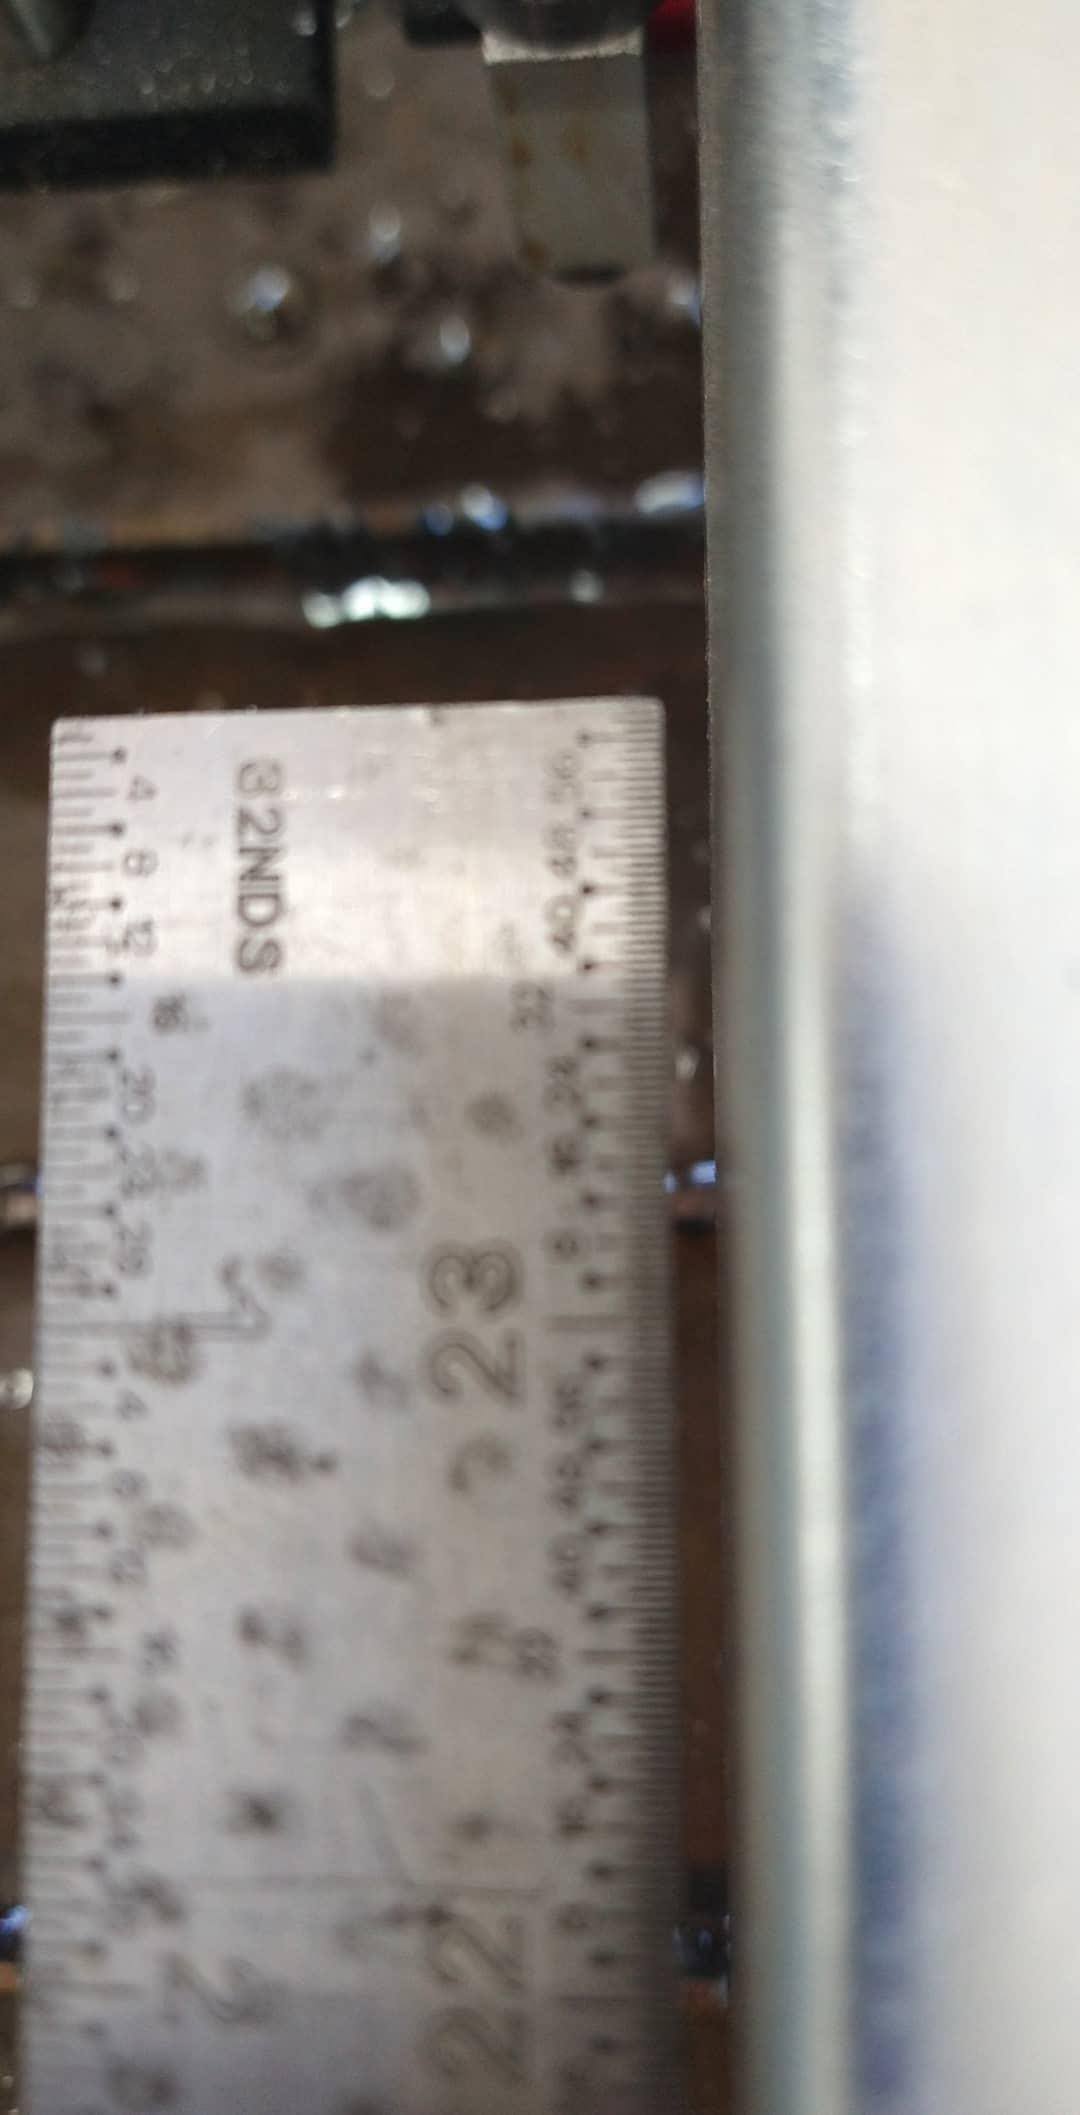
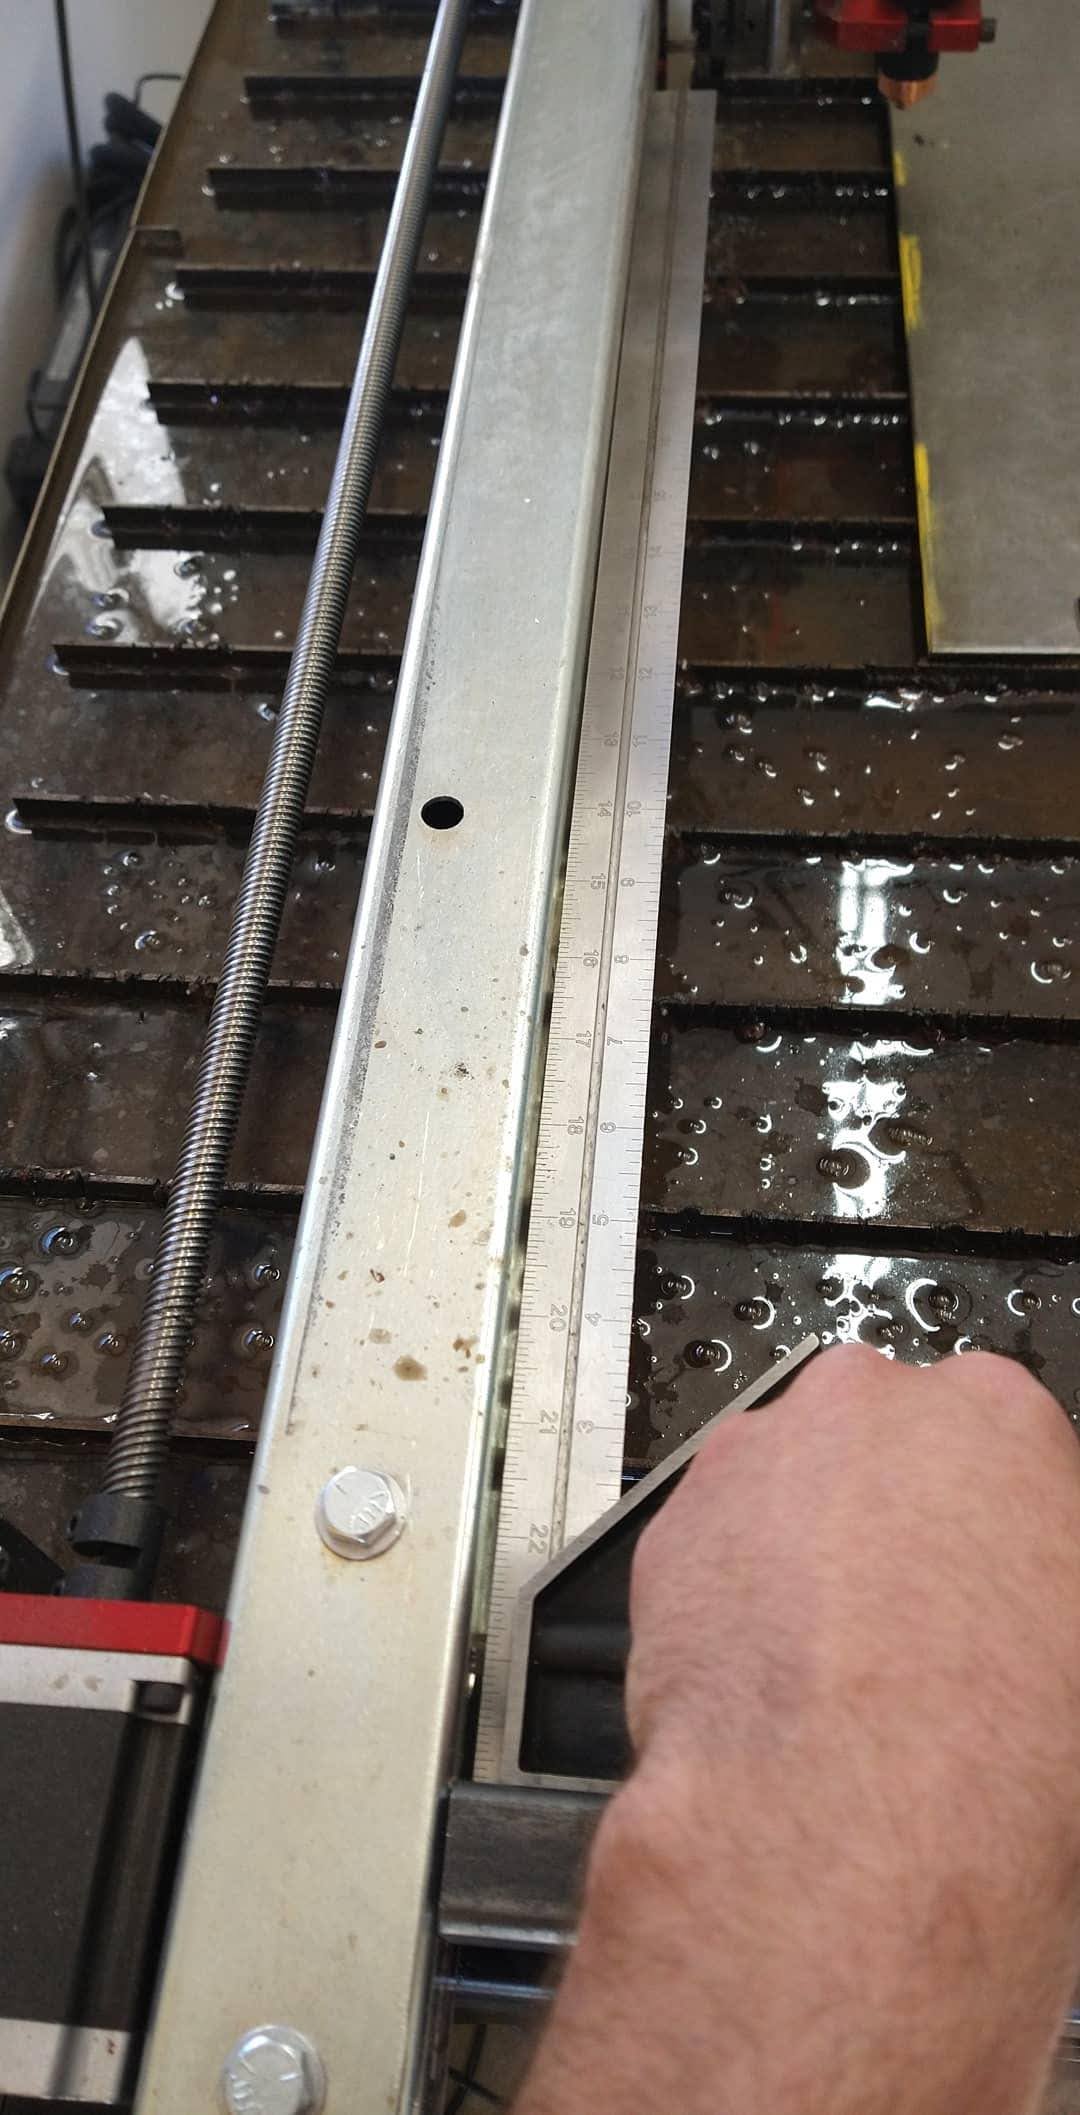
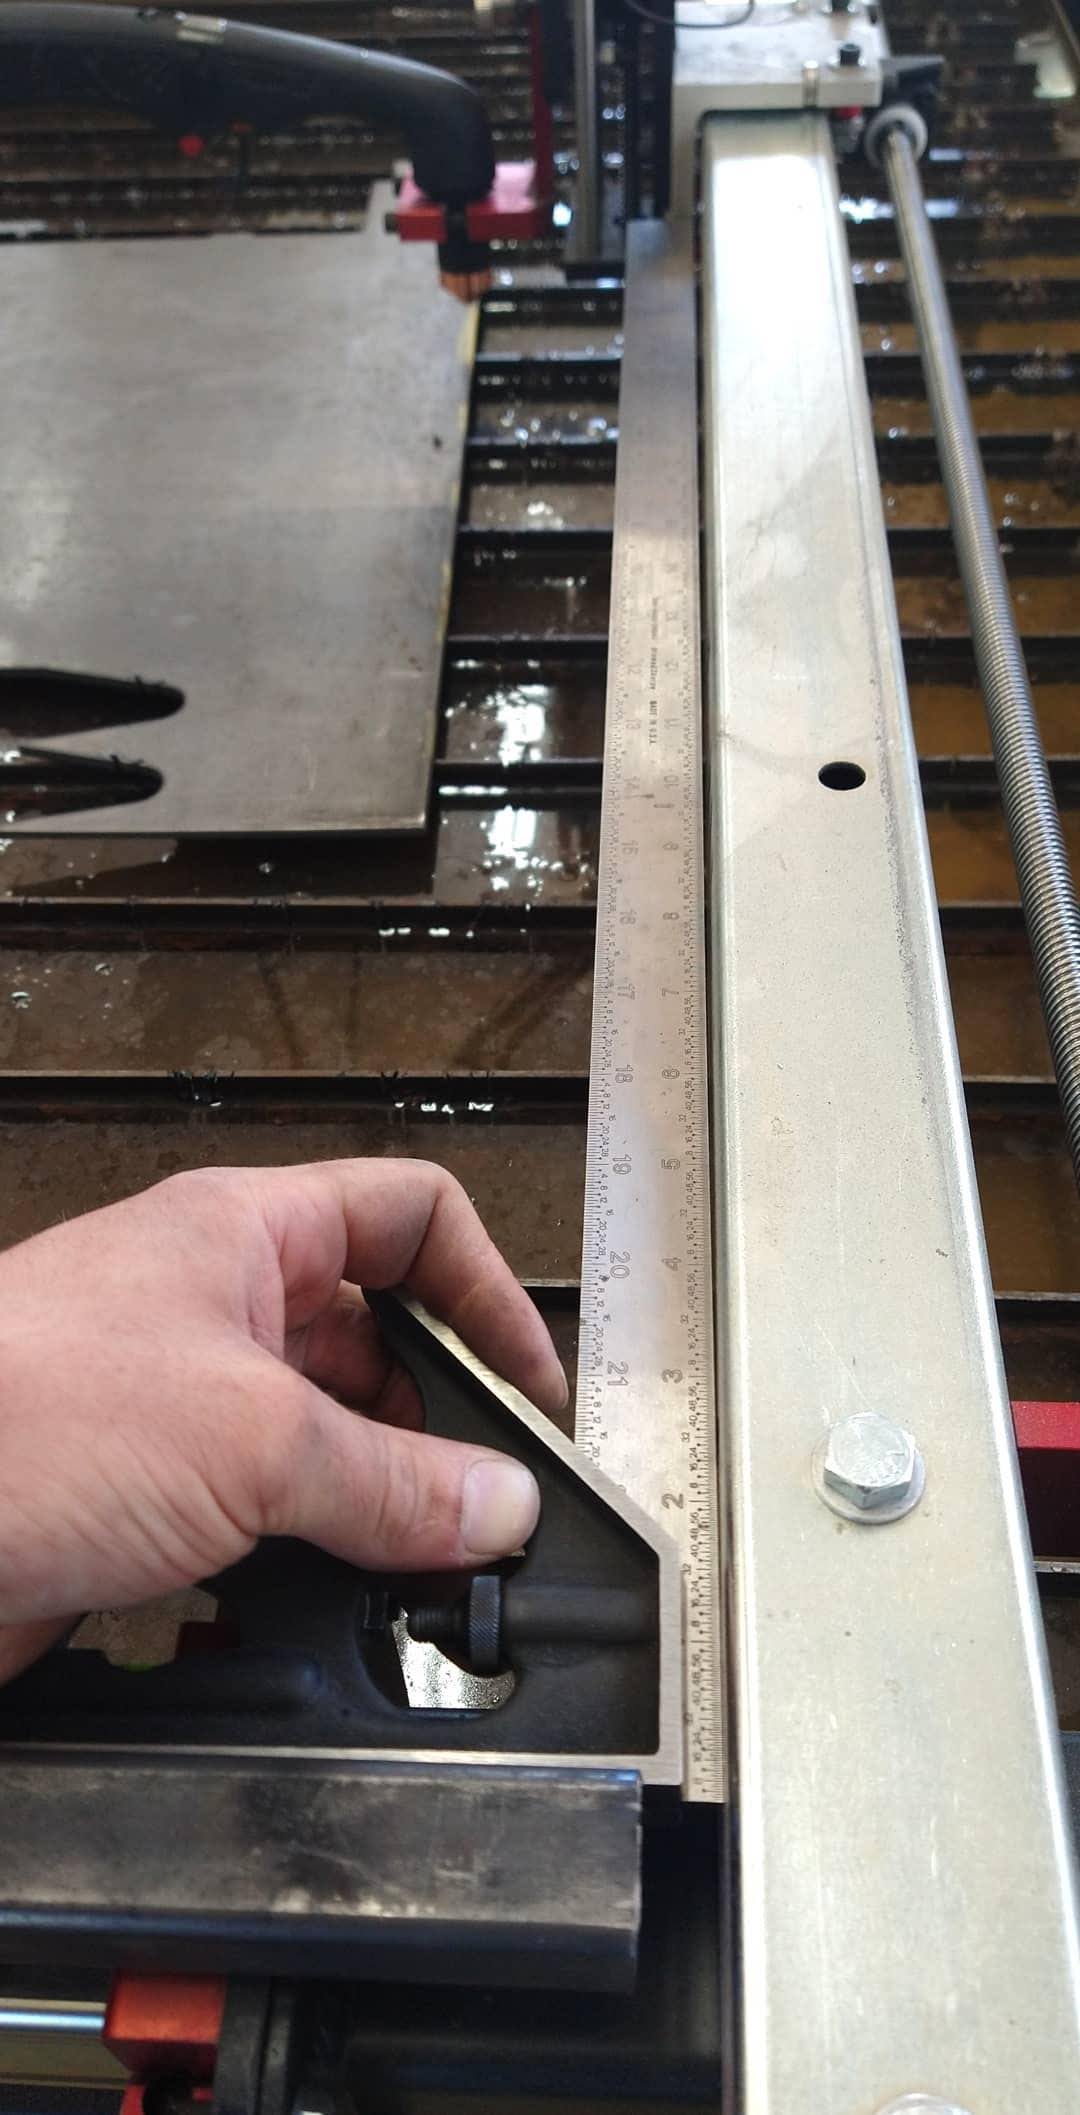
I decided to check my gantry for squareness to the y-axis, and found it to be off around 1/8" over my 24" square. I loosened the 4 hex bolts and 2 allen head bolts that connect the x-axis gantry tube to the black y-axis bearing mount brackets, and was able to move it using the slop of the bolt holes which improved my squareness by about 1/16". There wasn’t enough slop using that method to get it fully square. How else can I improve this now that my table is fully assembled and operating? The pictures of the full square show before I made the adjustments, the close up shots are how it looks now.
1 Like
The best way to square the Y axis to the X axis is to do a test cut of a square edge and then measure that with a square. Then with the machine off turn one of the Y axis lead screws the proper direction to correct the squareness error in your test part. Cut another test part and see how it compares.
I think you’ll find that with the machine off you can spin one the lead screws to get that side to move a good 1/2" while the other side remains stationary.
2 Likes
Should also use a good framing square (18x24) also, for better accuracy. The variances in the rail can throw off a short based square that samples a smaller area on the rail.
1 Like
Wouldn’t the matchine just go back to its previous misalignment as soon as you zeroed up against the hard stops?
I am having the same issue post assembly the gantry is not square and adjusting the rails won’t fix this. Please help.
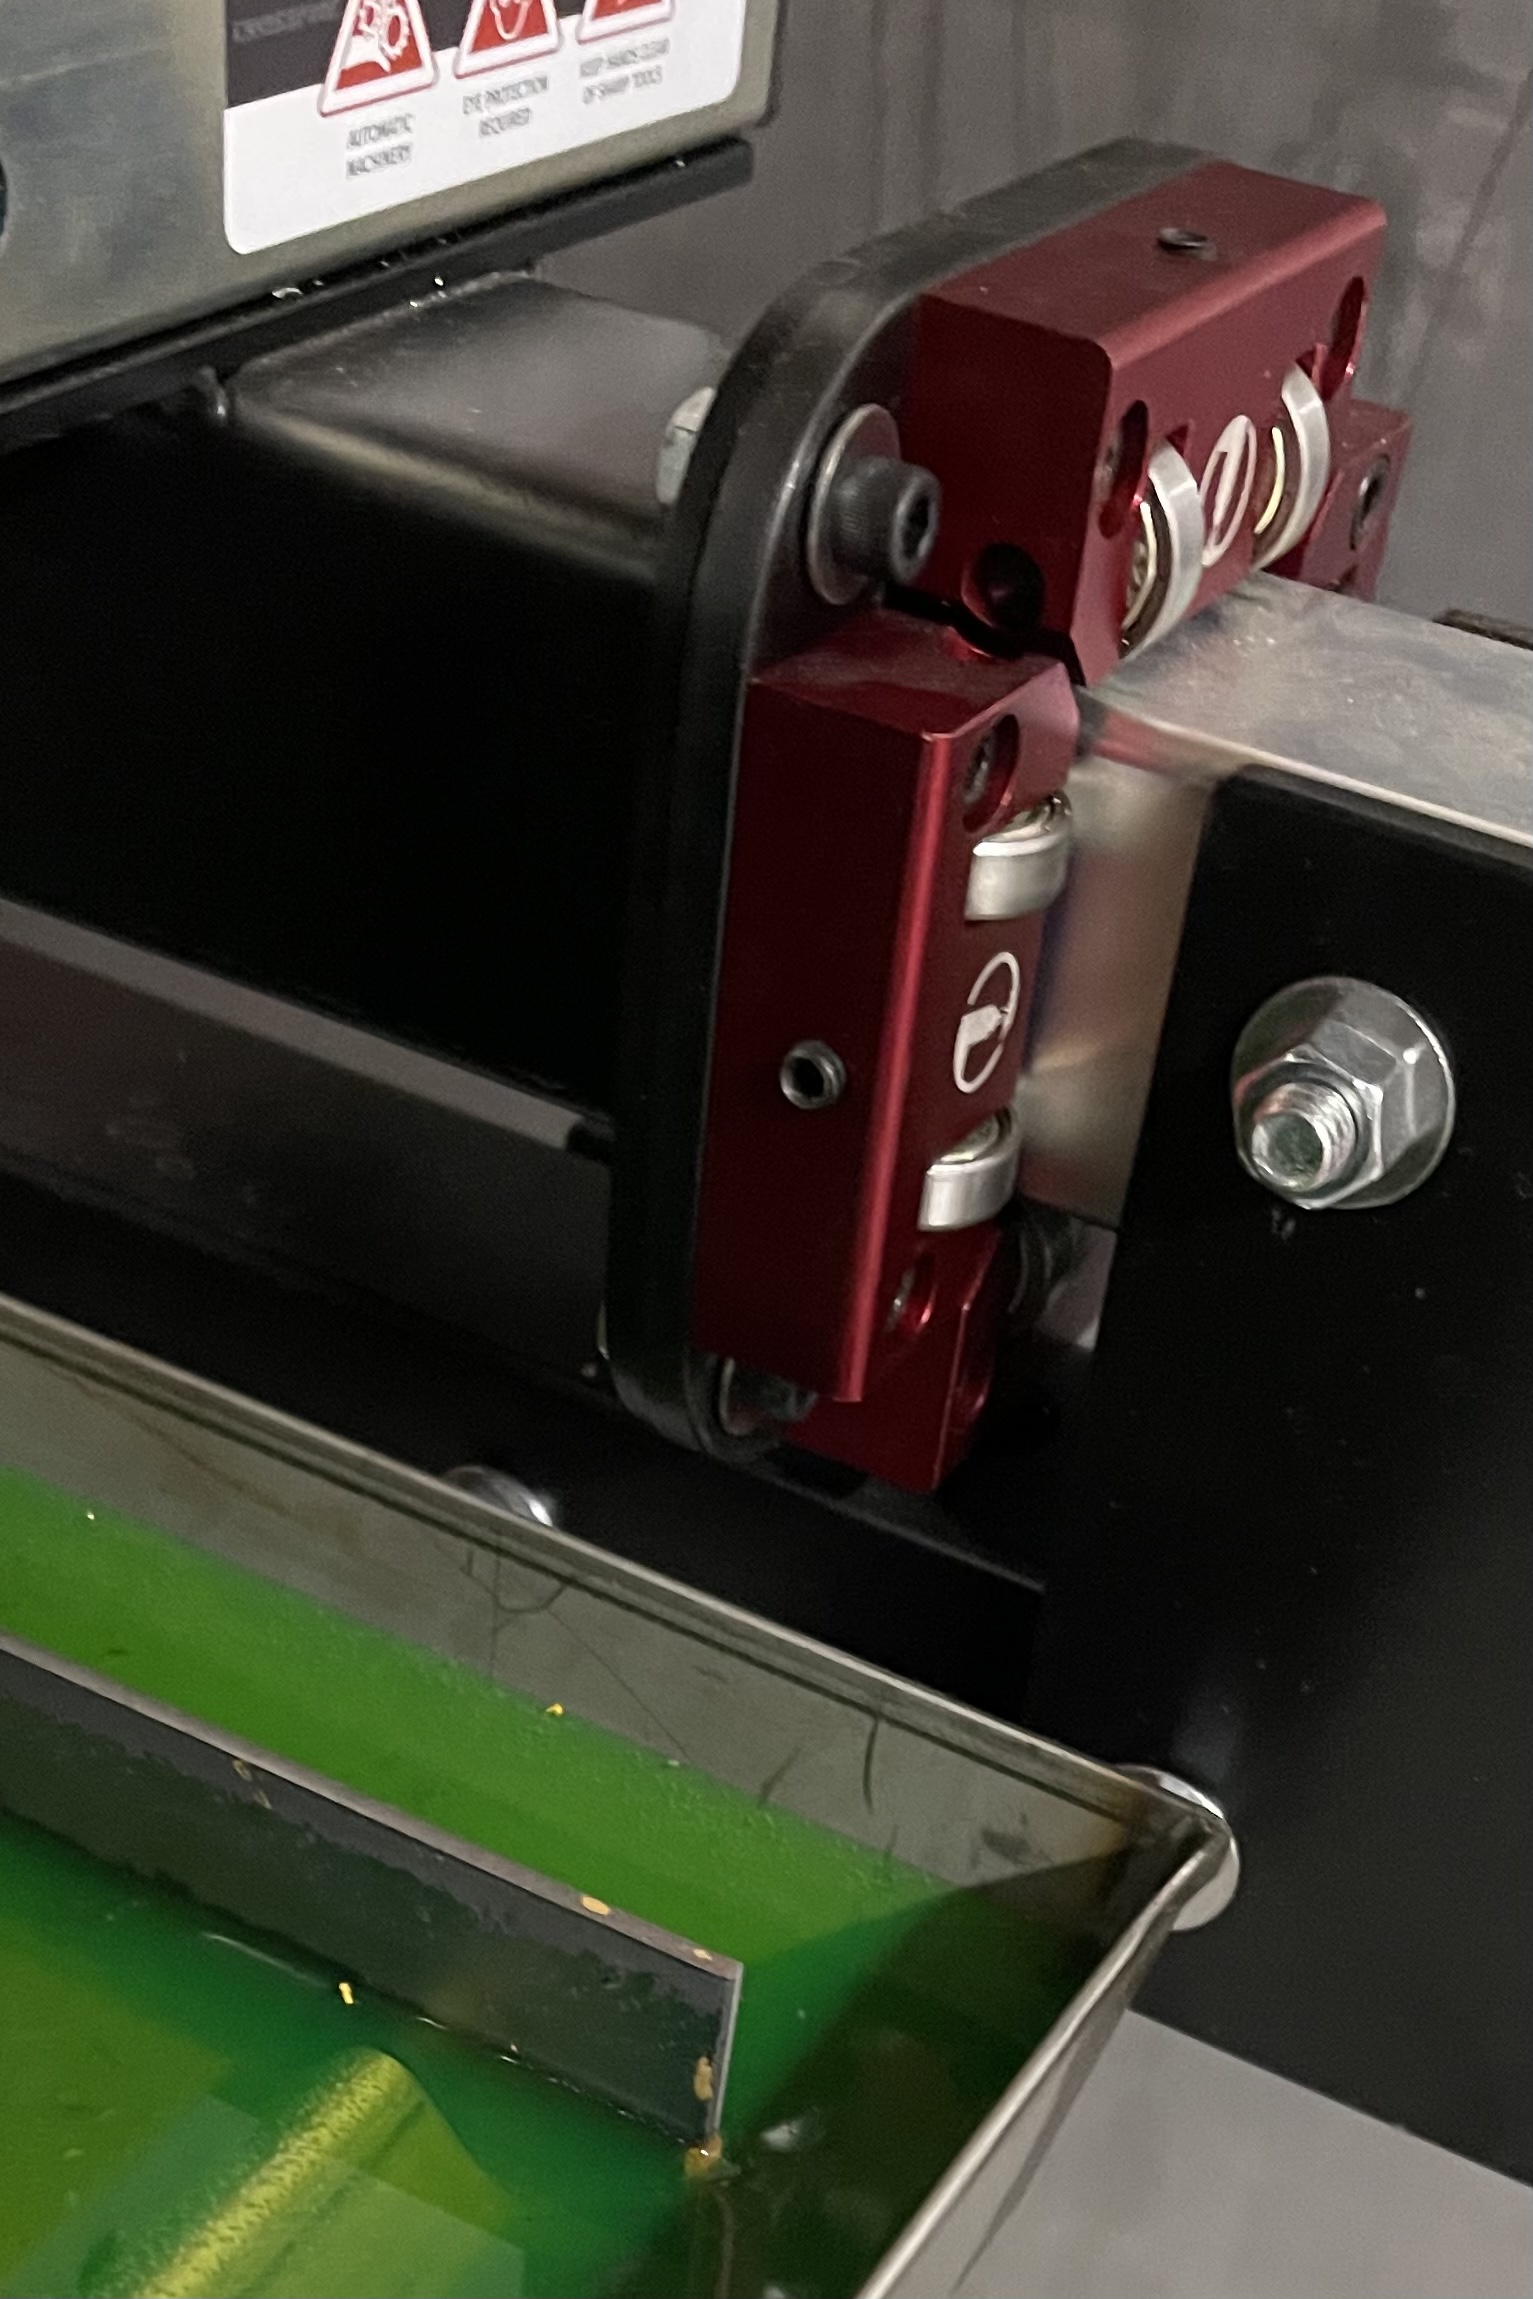
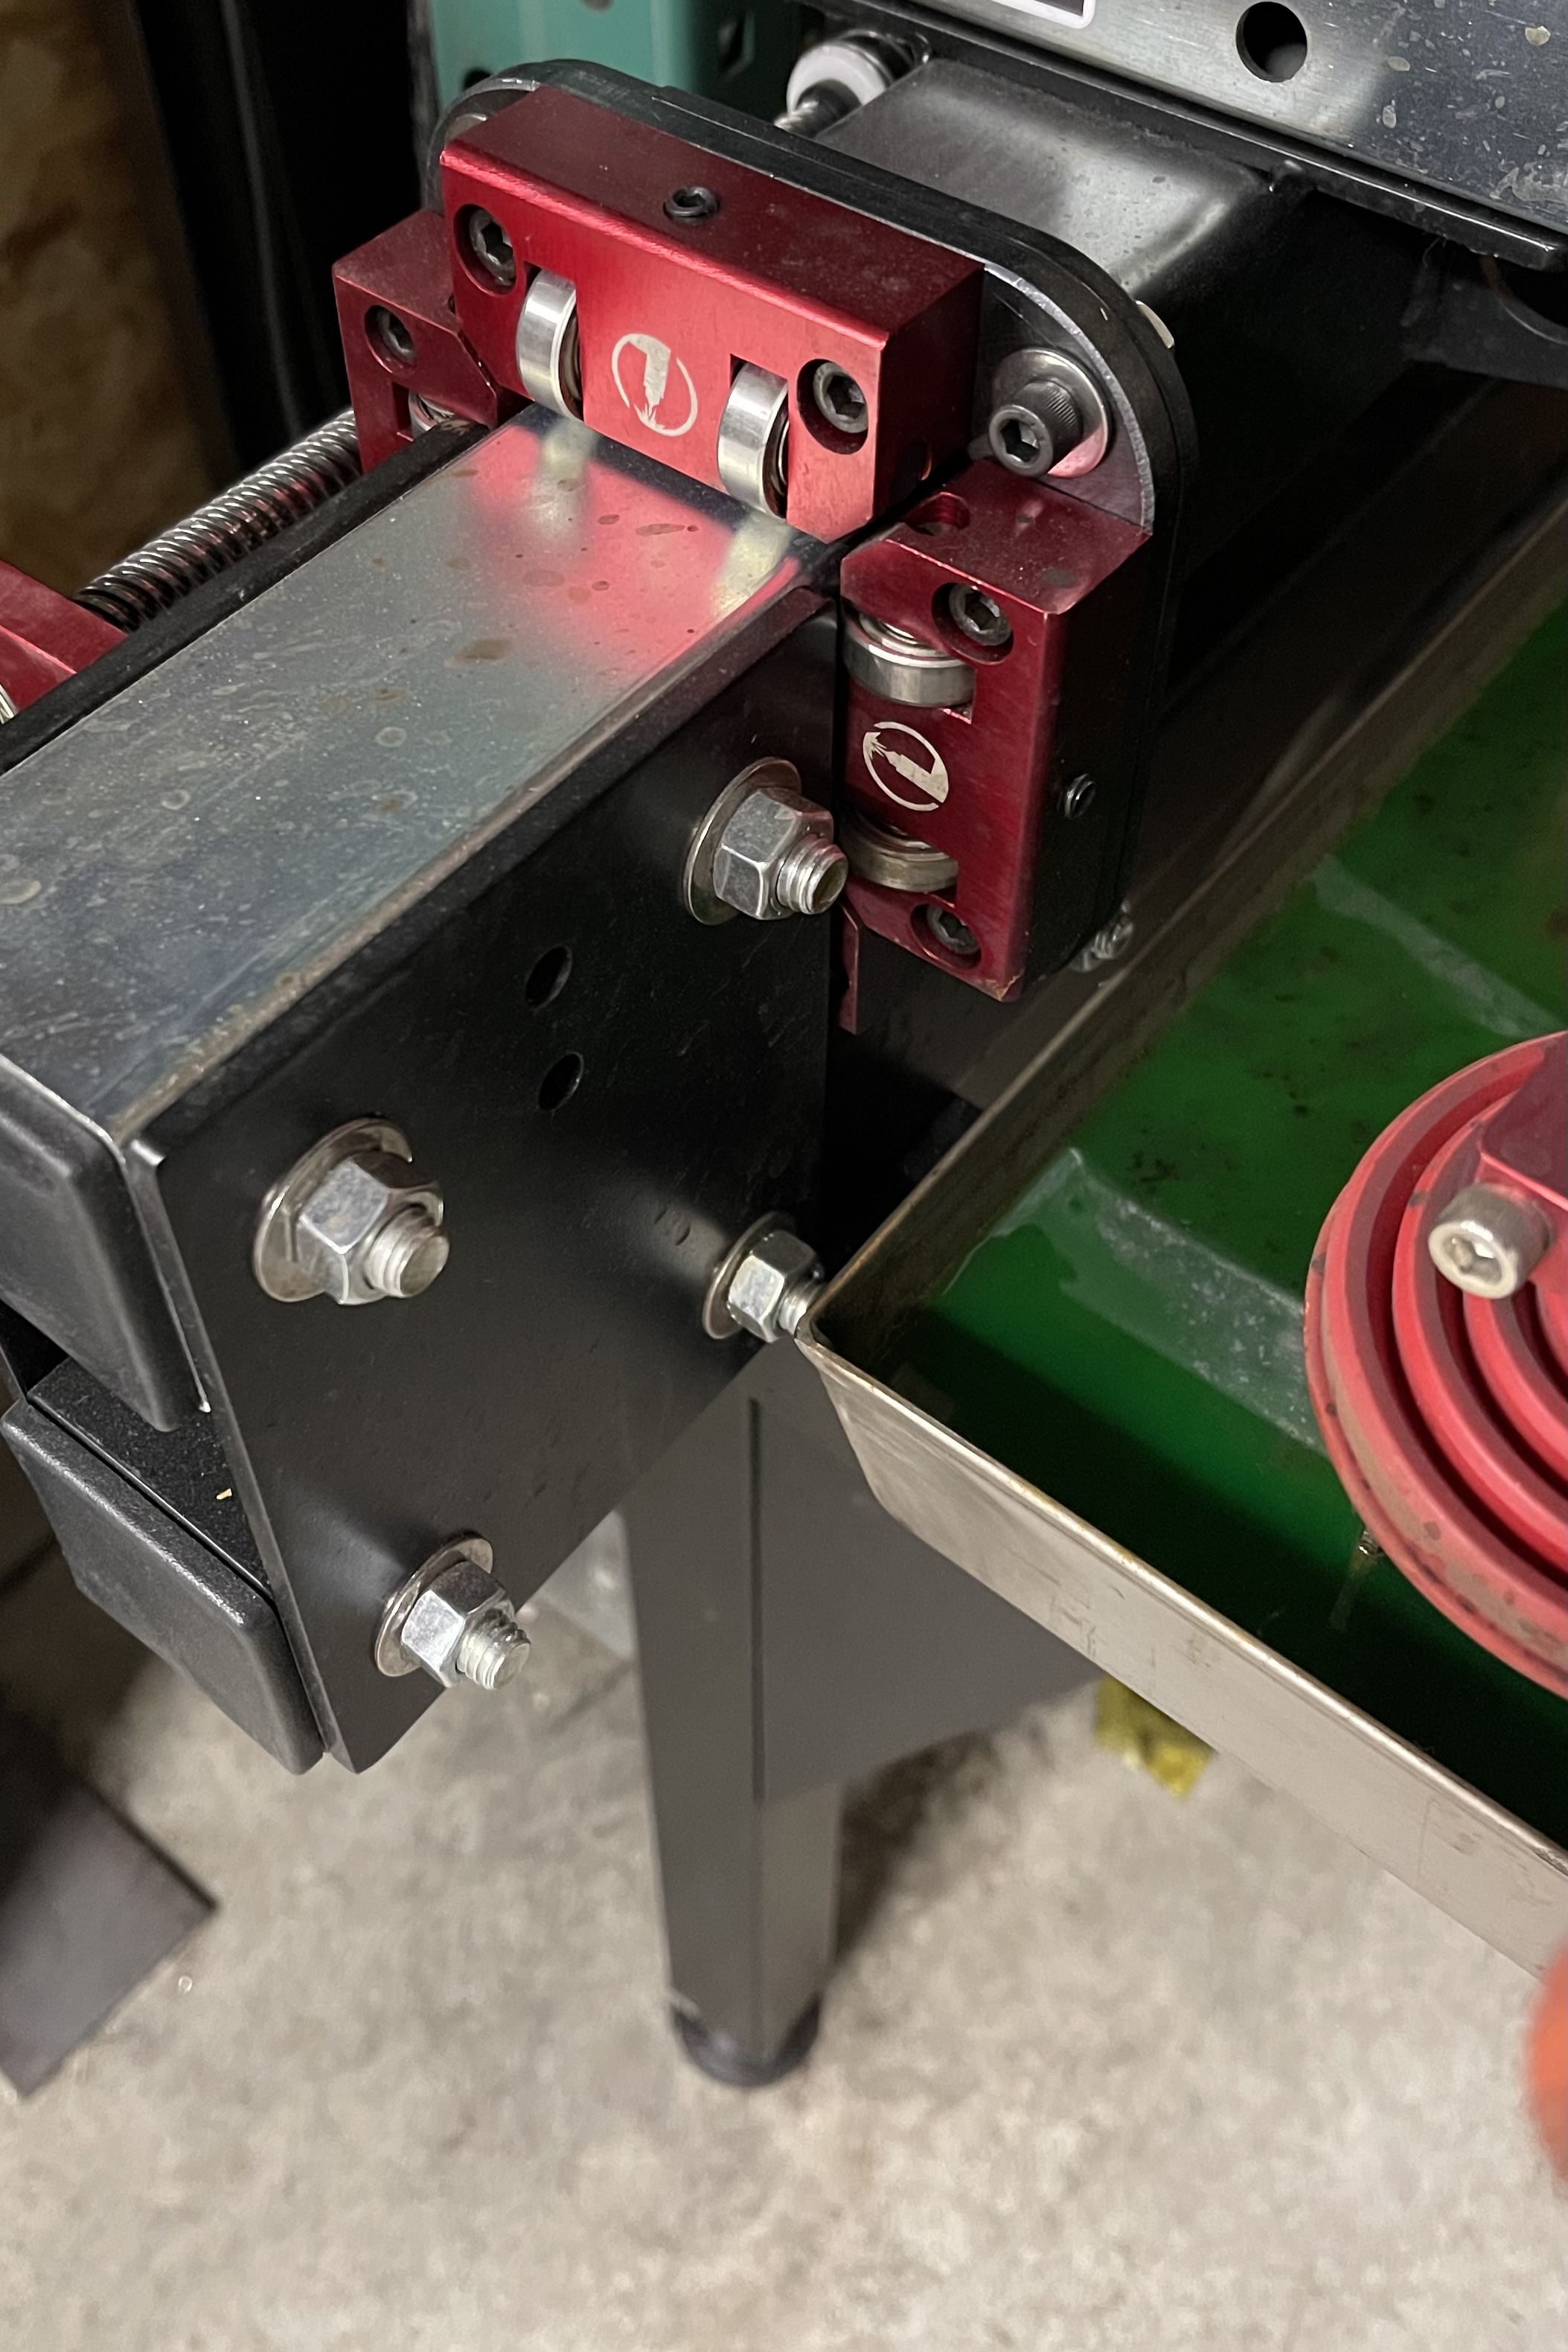
Here are the right and left side differences.
Thanks for any help.
If your frame is perfectly square, you can loosen the gantry to carriage bolts, with the power off, turn the lead screws by hand until the bearings are tight to the stanchion plates. Then retighten the gantry bolts.
I always make sure she starts out square by turning each by hand to the plates, before turning the table power on.
1 Like
That’s a pretty significant difference there. Something else must be going on.
Thank you RMLLC, I will try this and let you know. Brownfox, I totally agree. I thought the side screw rails would fix this with the break-in being ran. Thanks for the help.
Brownfox, I totally agree and figured the break-in would have fixed this. It did not and I have undone the side screw rails and tried to straighten it, when I tried this it seemed to put a lot of stress on one screw rail. I didn’t want to cause too much friction, so I released the tension and assumed it would fix. No luck. I would appreciate any suggestions you might have. Thanks.
It’s not uncommon for people (myself included) to put a lead screw mount in the wrong place. With the lead screws off do the y axis bearing blocks slide smoothly and end up even at the stanchion plates?
If so loosen the motor couplers, put then gantry against the stanchion plates by turning the lead screws , then retighten the motor couplers.
2 Likes
I know this is an old reply, but why zero against the hard stops? I never hit them on purpose. I’ll jog to them and nudge until I’m about .0625 away.
Sure sounds like what we need are adjustable end stops on the Y axis stantion plates to adjust the Y axis 0 relative to the X based on a hard stop for each side of the Y axis.
Then you have the best resolution to the problem, no good way to quickly rezero after a crash or messing with any of the motion control components in the Y axis assemblies, and no easy way to adjust for assemblies that vary in their squareness.
It’s what the big boy machines do. No reason we can’t duplicate.
Thanks, I will give that a try and let you know.
I always start with a new piece of material against a fence to the left and a material stop to the front, then I run X and Y to hard stops left and front then bump the X and Y in 1/4" with the step feature and zero the program. This way I am always starting from a known and repeatable zero position. If you are cutting a large piece and you have a tip up that you miss that snags the torch and the machine loses position and it drags the sheet a little you can stop, reset the sheet to the fence and stop and run the X and Y to hard stop zero, bump it in 1/4" reset the program to zero and now advance and resume from where it stopped.
It shouldn’t hurt the machine to bump against the hard stop. I operate and repair automated lights used in theaters, they can have a dozen stepper motors to control the various functions. They all zero them selves on start up by running up against a hard stop, they make a hell of a racket when starting with all the servos homing.
I wouldn’t reccomend banging against the stop but getting it close and ease it in. The couplers are the weak spot on these machines.
1 Like
I agree, if you can’t get the machine square enough that both sides of the gantry can’t reach a hard stop at the same time there needs to be an adjustable stop so you can physically zero the machine when something loses a step. Otherwise the machine won’t have a correct reference point while cutting.
That totally makes sense. That’s the only way to get the same zero point each time, thanks for the idea.
It wouldn’t be hard to add a plate with some thumbscrews and set nets to the stanchions to make a n adjustable hard stop.
1 Like
Yup, just make sure it’s strong enough not to flex in an inconsistent way, and use a jam nut to lock the setting in place. You don’t want your zero wandering over time.
You should be able to have slots cut into it to mount it without even removing your stantion plate bolts, just loosen the 2 you mount it with.
Brownfox, this totally worked and now both rails start and end at the same location. Thank you for the help!!
Thank you for the idea about the squaring the gantry by releasing the gantry bolts. It worked. 
2 Likes
Only for the purpose of squaring the gantry when setting it up. I will let mine touch @10ipm, Then back in (2) 1/16 steps on each axis. Then I zero.
Have never hard crashed into the bolts or stanchions. I rapid till close, then drop the speed and sneak up on it…lol
Others will run into the stop @300ipm and wonder why their bearings don’t hold up… A good rubber stop on each rail end would be a good addition. I often need every inch though…