This youtube video describes modifications to the standard torch holders that allow for two axis alignment of the plasma jet. NC files are provided to make the modifications.

This youtube video describes modifications to the standard torch holders that allow for two axis alignment of the plasma jet. NC files are provided to make the modifications.
Great video.
You went into some nice detail.
Do you think a aluminum version of your assembly would work as well?
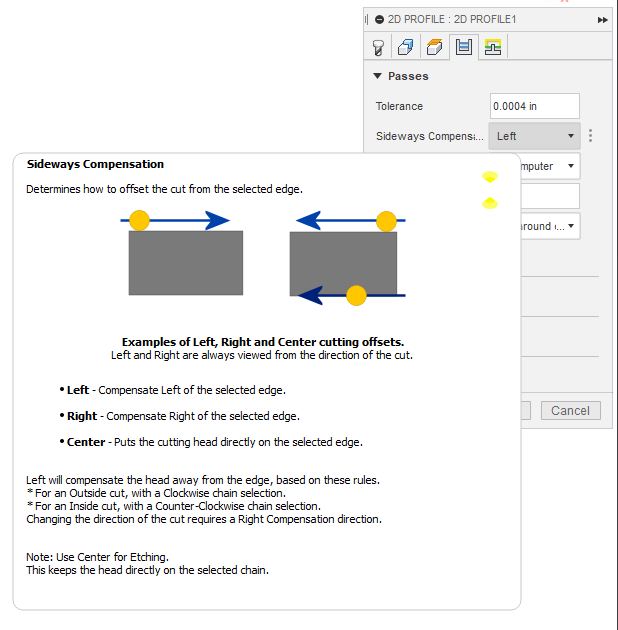
At 2:30 to 3:05 you talk about Fusion’s sideways compensation and how you have to choose what you want better sides applied to the inside cut or an outside cut.
Could you elaborate on what you mean by that?
Left compensation is the standard I believe.
Here’s a screenshot from Fusion 360. There is a notation about Left compensation.
You can adjust the X axis carriage tilt to accomplish the same thing. The bearings on the X carriage are adjustable and can allow the carriage to tilt forward or back. Your system makes it faster and easier to adjust, but the same result can be achieved by adjusting the tilt of the X carriage.
I do not think that is a very good idea. The most adjustment that you can get is 3.5 deg. But that would also mean that the bearings are not carrying an even load. You would be running the bearings on their edges.
This would wear grooves in the x carriage. I don’t think Langmuir would recommend this.
You can make them out of aluminum. Refer to the
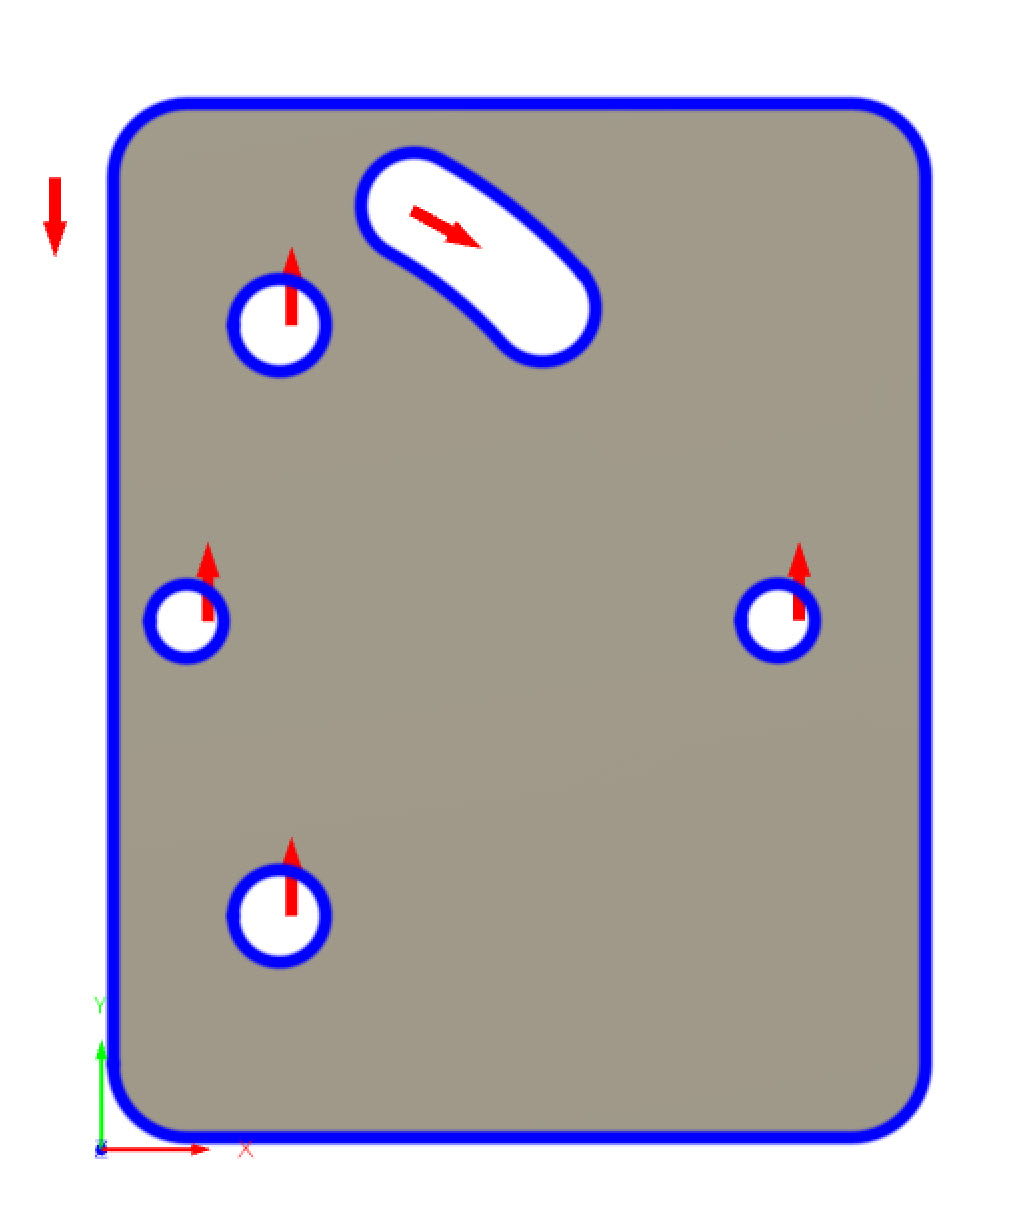
From this display, you can see all the inside loops cut on the right side, but the outside loop is cutting on the left side.
I tried to download your dropbox file for YouTube and it didnt work for me.
could you post F3D file or upload it to fireshare.
When using left sideway compensation those red arrows do not relate to the final toolpath direction.
when using Center they do.
What they do show is if they are in the inside of a contour they on cut on that side of the line and if they are on the outside of the contour they will cut on the outside of the line. ( on odd shaped or smaller contours this may appear random)
I tried to explain it once on this post. In my example with the circle the red arrow does not corollate to final toolpath direction, yet the toolpath generates correctly for plasma.
If you watch this live stream i just made . the toolpaths at the end confirm the proper toolpath direct rules even though i only used one click to select while using left compensation.
back to your alignment device in the video.
When you do put in a brand new set of consumables do you have to do the test and correct for the rotation on the XY Plane again?
I noticed you mentioned consumable wear I think that more applies to cut height.
I know sometimes the nozzle isn’t drilled quite on center maybe that could be some of the effect?
That was my thought as well. If the plasma stream is off axis to the torch body, its probably the nozzle and electrode to blame and that will change with a new set of consumables.
Try the links now. They should work.
Thank you.
Could you please post a DXF? I may what to use different parameters then you did in the *.NC files posted.
They are loaded
I have released the latest DXF file for an improved holder. It has the same form, fit, and function as the two part mount, but only has one mount plate. You will need to source two shorter bolts, as the Langmuir bolts are now two long. You can access the DXF file through the description section of the youtube video. I have also provided a link to a picture of the new mount in the youtube video description.
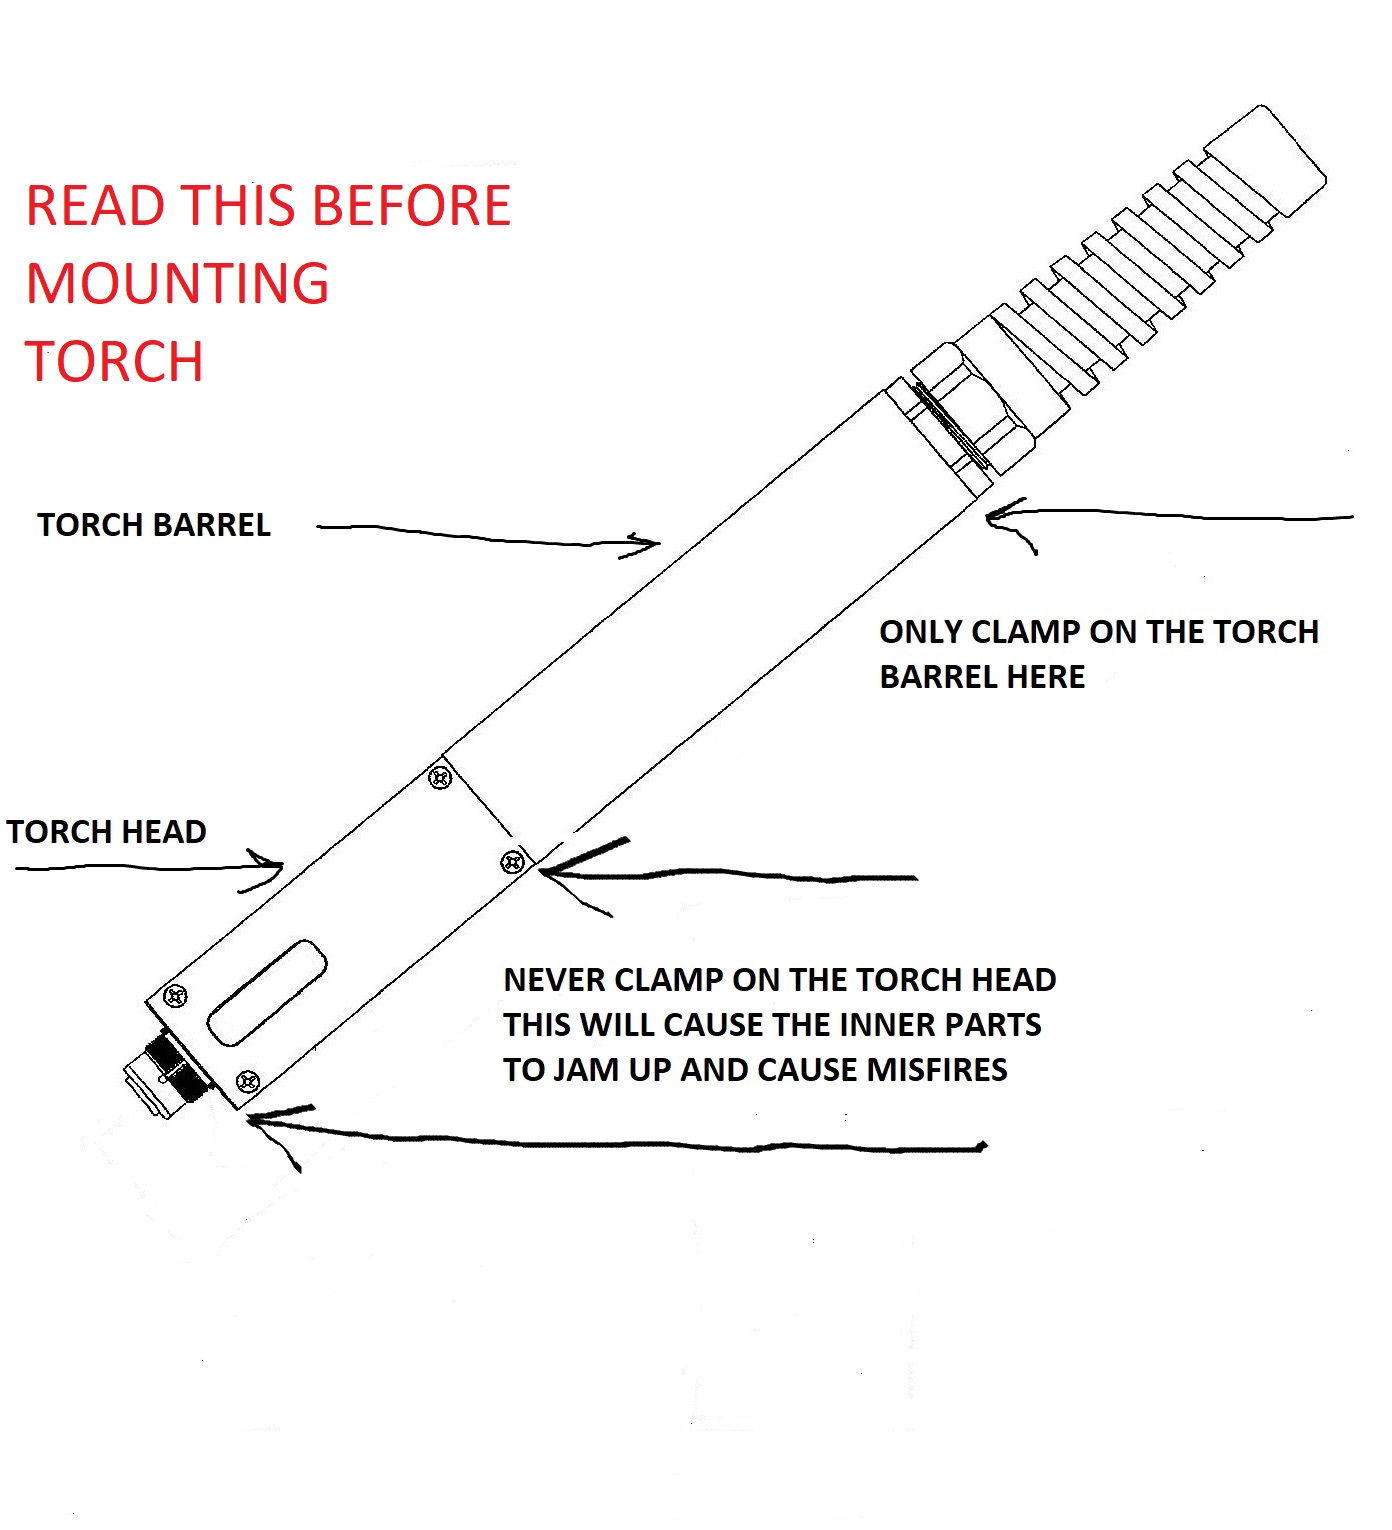
You are absolutely correct. If you were to tighten the lower holder too much, which I don’t, then you would have the possibility of damaging the lower torch. Again, I only tighten the lower clamp slightly. I tighten the upper clamp more firmly, but not all that much. The problem with the Razorweld machine torch, is that the upper metal sleeve is very thin and not very rigid. You can easily overtighten the upper clamp and cause problems and distortions in the barrel. I actually think the lower thermoplastic shaft is more rigid and stronger than the thin upper metal shaft. If you look at a hypertherm barrel, you will probably find a very rigid and strong structure. You get what you pay for.