I’m very close to pulling the trigger on purchasing a CrossFire PRO but have another question about it’s capabilities. To be honest this question may not really be about the tables capabilities but a question about plasma cutter capabilities. I need to be able to repeatably (2,500+ per year) cut a hole in a part that allows for a 1/4-20 bolt to go through it in 1/8" 5052 aluminum. I had some discussion in the last day with Langmuir concerning this. They said plasma cutters get a little “wonky” cutting holes around 1/4" in diameter in that they have issues cutting a perfect circle at that size and under. I will be cutting these holes at .255" or .26" to allow the bolt to pass through the hole. Does anyone have experience with plasma cutting holes for 1/4-20 bolts?
A second, but related, question I have concerns the actual plasma cutter. I am starting to lean towards a Hypertherm Powermax 45 for the plasma cutter due to its’ comprehensive positive reviews. Can I assume that the actual plasma cutter I am using has a big impact on these small hole cuts for precision? I’m confident it does but since I know nothing about plasma cutters, I thought I’d ask.
I think @Agent86 reference above is a good one and might give you what you need. For my part, I don’t try to cut accurate holes below 5/8", mainly because I don’t have to. In your case, where you’re in production, maybe it’s necessary.
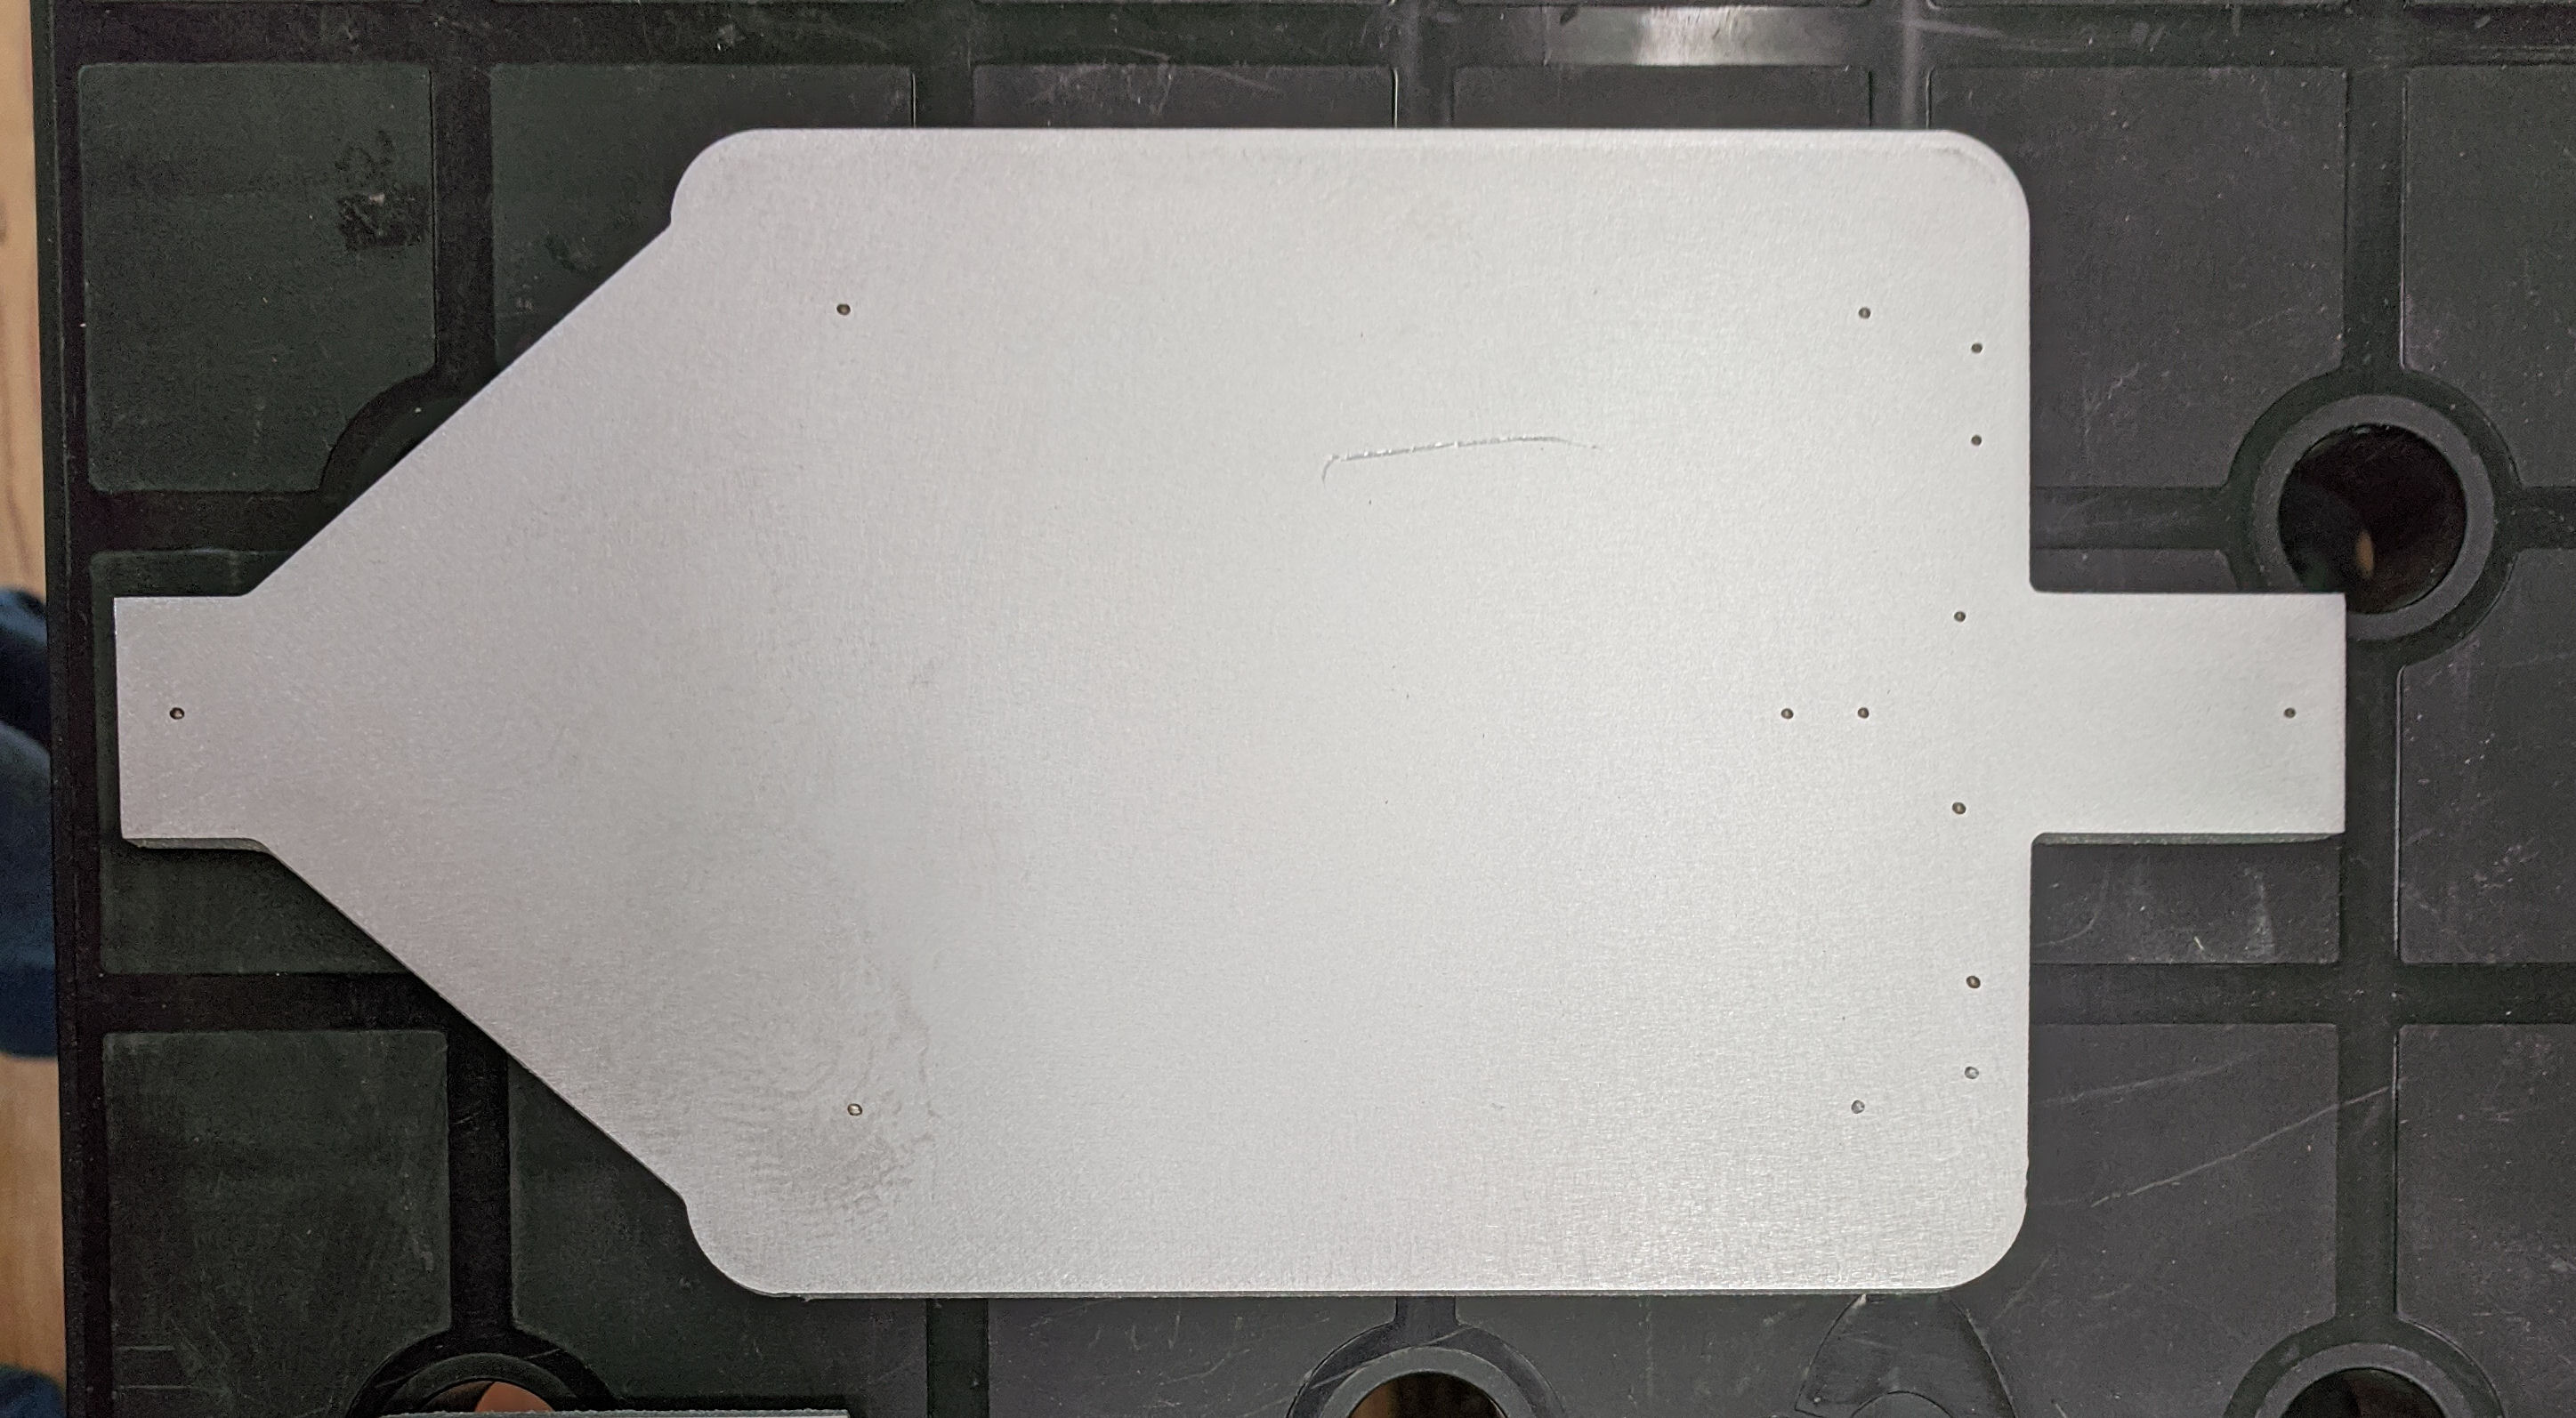
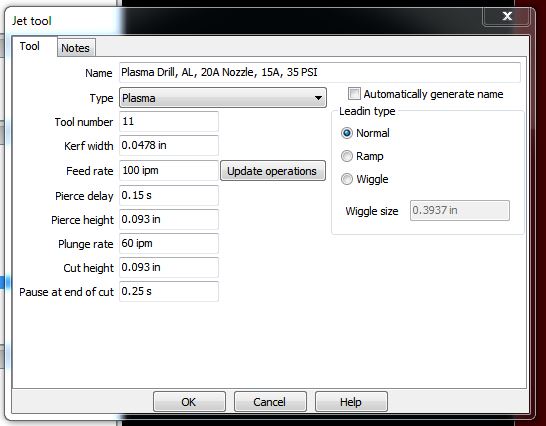
In my case, however, what I want is accurately positioned holes and, to do that, I simply burn a mark in the plate using the same CNC system as the rest of the piece. To burn a mark I do all ‘holes’ first and I do these with a 20A nozzle, run the cutter at 15 Amps (my cutter’s minimum), 35PSI, cut height of 0.093", and pierce delay/time of between 150 to 250 mS depending on material. This gives me a very nice and accurately positioned ‘peck’ in the material. I use this ‘peck’ to subsequently drill this hole on a drill press. Very accurately positioned and perfectly sized hole. Extra operation? Yup, but I can’t get a better hole and still gain the benefits of a CNC Plasma cutter. BTW, after all the ‘holes’ are pecked, I use G-Code to do a ‘tool change’ and replace the nozzle with the proper cutting nozzle for the rest of the job.
Just an alternate idea…
FWIW, I should add that I’ve cut 1mm holes this way, accurately positioned and sized.
so in your design, you actually have a circle where you want the holes to be and then use the drill tool for the holes and it’ll do a pierce in the middle of those holes?
Exactly so. In the example I have above, the holes are four different sizes, 7.2mm, 5.2mm, 3.2mm, and 1.0mm. The pierce is the same in all cases.
Note that, in SheetCam, you need to specify min and max sizes for Drill, the defaults are 0.043 to 0.05something. I reset these to 0.020 and 0.625 because it’s only the large holes that I’ll cut out with the plasma cutter.
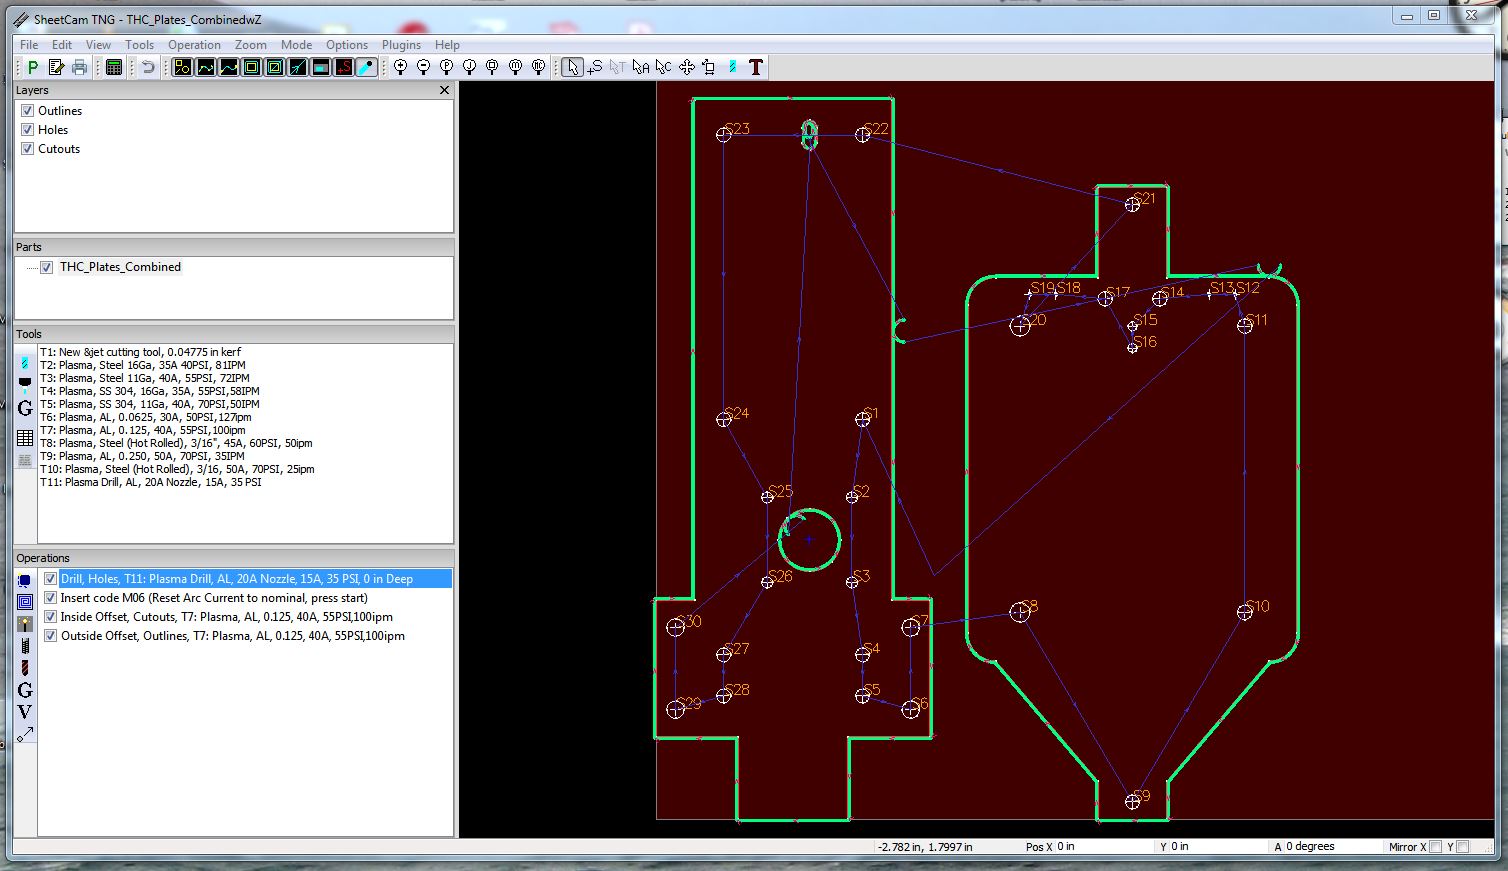
As a follow up, here is a screen capture of my SheetCam setup for this job. Note that I combined two parts in this job and set up three layers:
Holes - which are ‘drilled’ using the method described above (Note that the holes are exactly as drawn in the CAD tool),
Cutouts - which are conventional inside cuts (the large hole and the slotted hole since that couldn’t be ‘drilled’.
Outline - where the parts are finally cut out of the stock.
Holes are ‘drilled’ first with the 20A Tip in the torch and then I move to max X and execute an M6 to pause the job so I can replace the tip with a 40A tip. I then press Cycle Start and the rest of the job is cut.
The 20A tip gives me a nice 0.6mm orifice and supports the 15A arc nicely. I can’t be sure of that from any of my larger tips. It’s the whole purpose of the M6 code in the first place. I might be able to use a larger tip, but it’s not that inconvenient and it works!
how did you use the M06? i tried creating a snippet like you did but firecontrol keeps giving me errors… I’ve also tried an M01 snippet and it gets inserted into the gcode but gets ignored by firecontrol.
Ah… it sounds like FireControl is not behaving itself. Mach 3 has a setting in the General Config that enables M6 behavior (although virtually every CNC tool I’ve used honors this code).
For M01 to be useful there would need to be a manual switch on the display that allows the operator to toggle whether to stop or ignore this code. Is there a switch on the FireControl UI?
What choices are there under the ‘Settings’ button?
ISTM, M01 is kind of fundamental to CNC. Never saw a tool without it (or M6 either, although my 3D Printer doesn’t respond to M6. It could use M6 to change filament. Hmmmm…) Even my 3D Printer responds to M0 and M1.
FWIW, I did try doing the marking with a 40A tip and it came out ok. I was cutting some 11G CR steel and just wanted some marks ‘reasonably’ close to where they belong so decided to try your suggestion, leaving the current and air pressure the same as the other cuts, but using the ‘drill’ setting of Pierce and Cut Heights at 0.093, pierce delay and end cut delays at 150mS. It worked so well that I’ll probably use this unless I REALLY care about the mark position and just want a tic.
Thanks for probing on this!