I am learning that Ebay is becoming cheaper and a bit more selection than Amazon. I search both places now.
Returns on Amazon are still infinitely better.
I am learning that Ebay is becoming cheaper and a bit more selection than Amazon. I search both places now.
Returns on Amazon are still infinitely better.
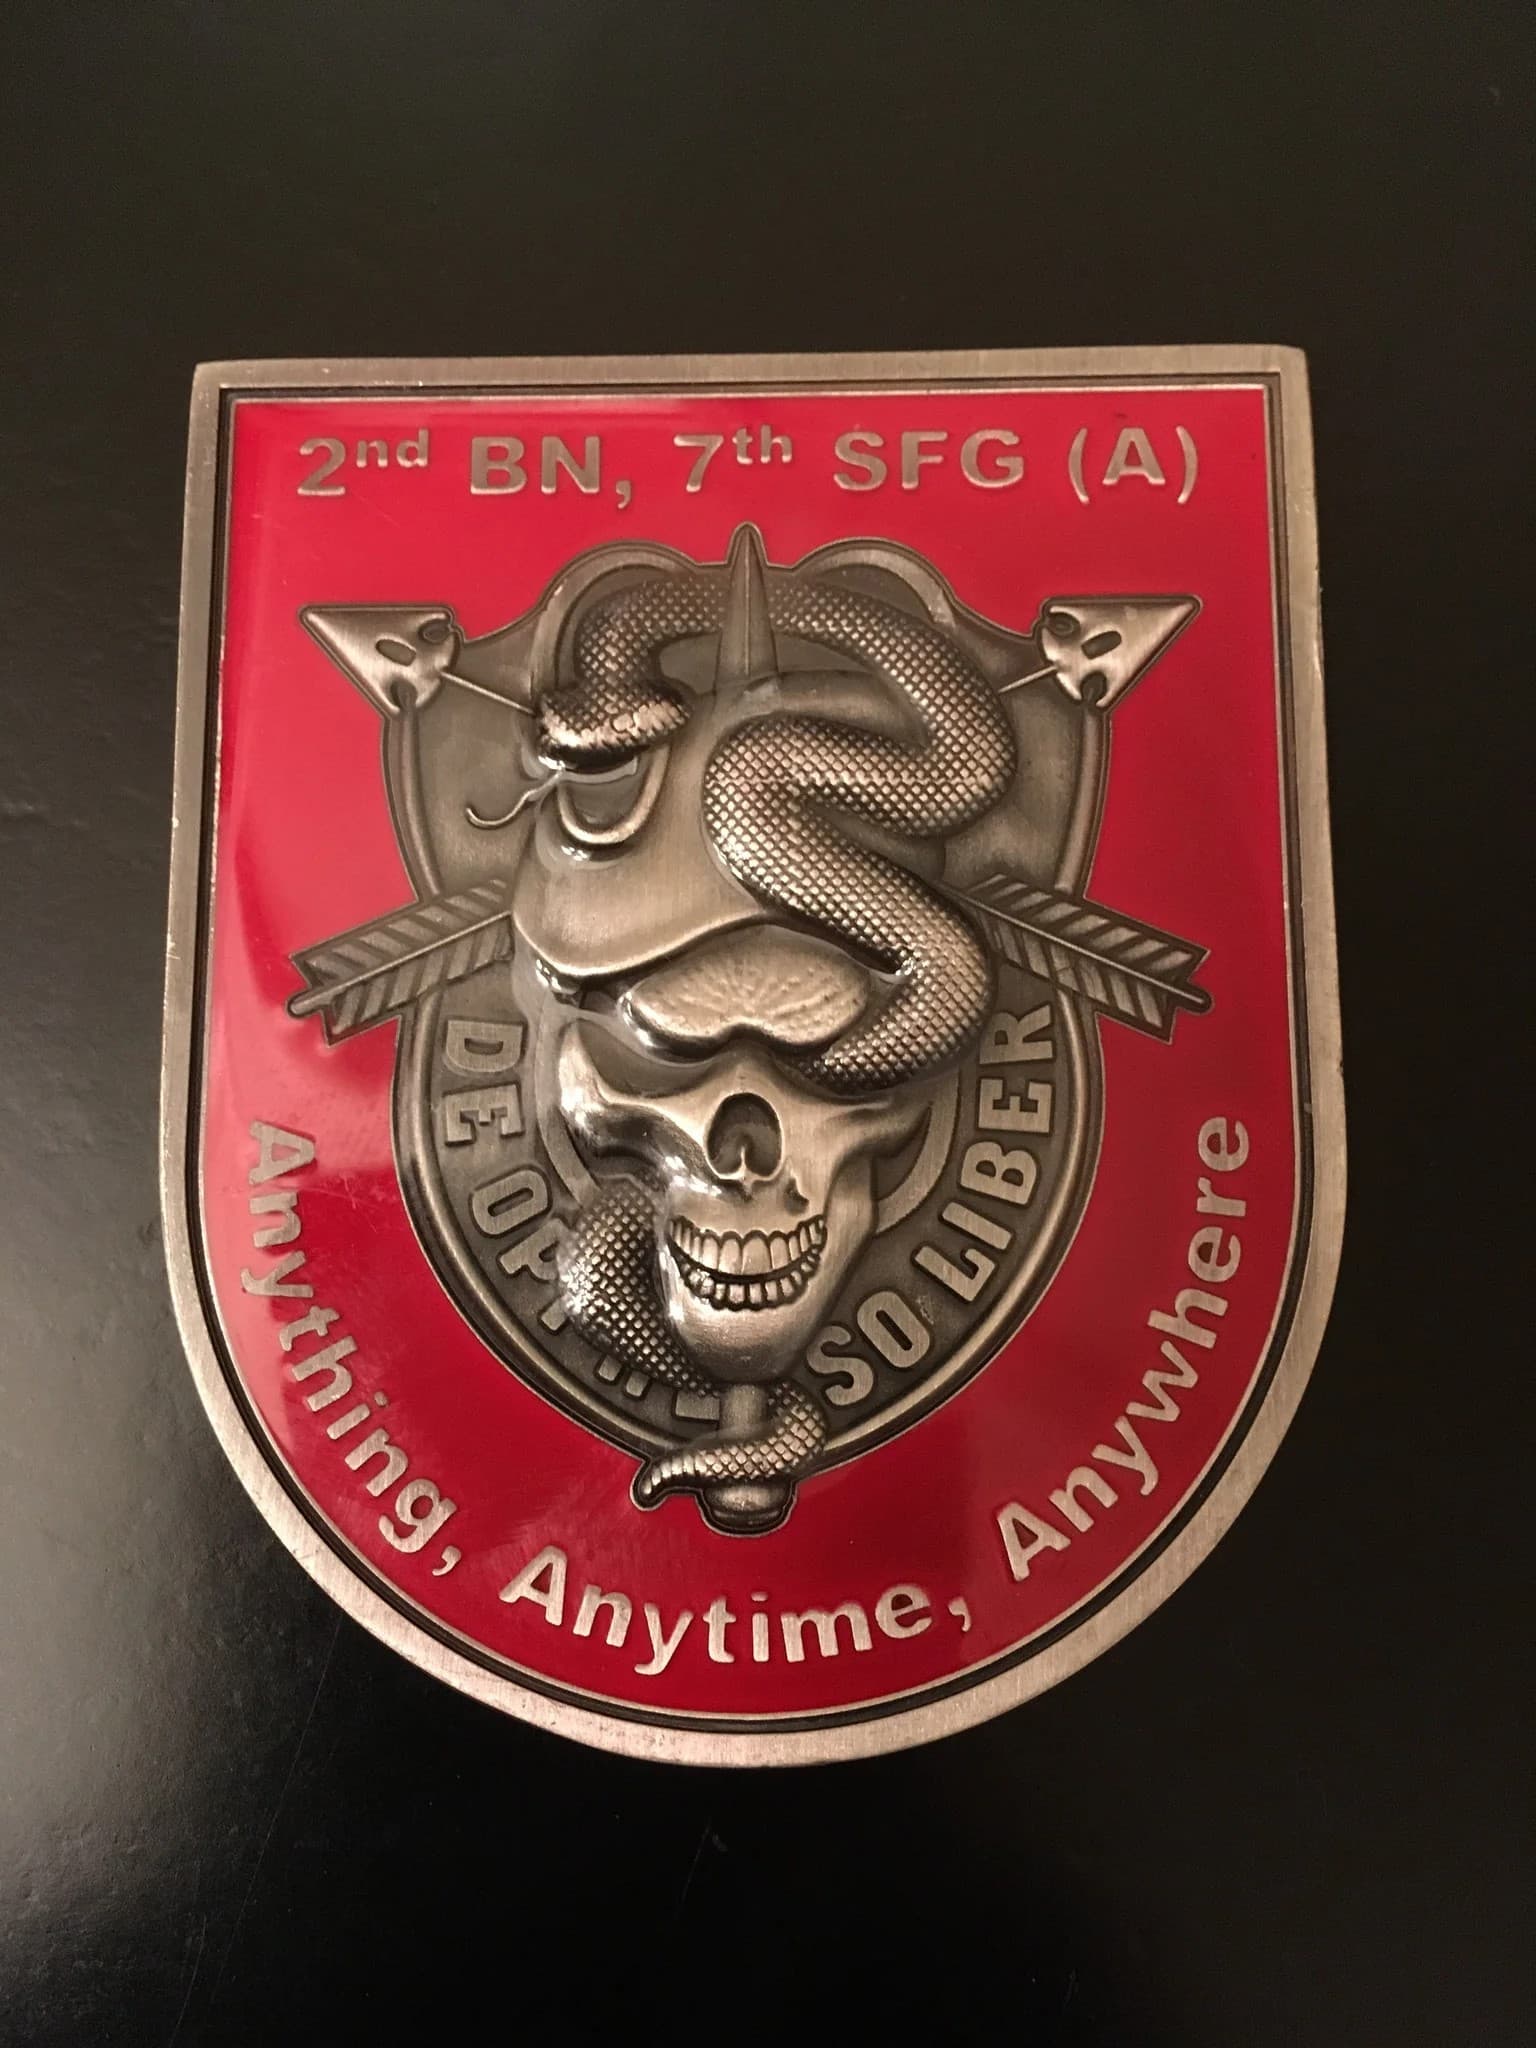
Question guys. My SIL asked if we can do a plaque for his uncle who is retiring this year. Attached is the emblem he would like to have on it. Is there any way this can be created in fusion and, if so, can y’all put up with bothering you when I get stuck (which is often) and give me a general idea on what the best process or flow chart in fusion
. Or, better yet…any of you feel up to the challenge of doing this? Don’t mind compensating for the effort.
The snake skin will be a trick.
Are you planning to 3D print or plasma cut? Too much fine detail for plasma.
Plasma is definitely out of the question for the skull and snake, I was thniking 3d that would be best and overlay it. Second thought is 3d the entire emblem in a low bas relief style and attaching it to the rest of the piece. Either multi color or have another SIL paint it for me.
Either way, would like dimension to it but a very low profile
I’m just at the beginning of the design thoughts. Not even sure if it’s possible or probable
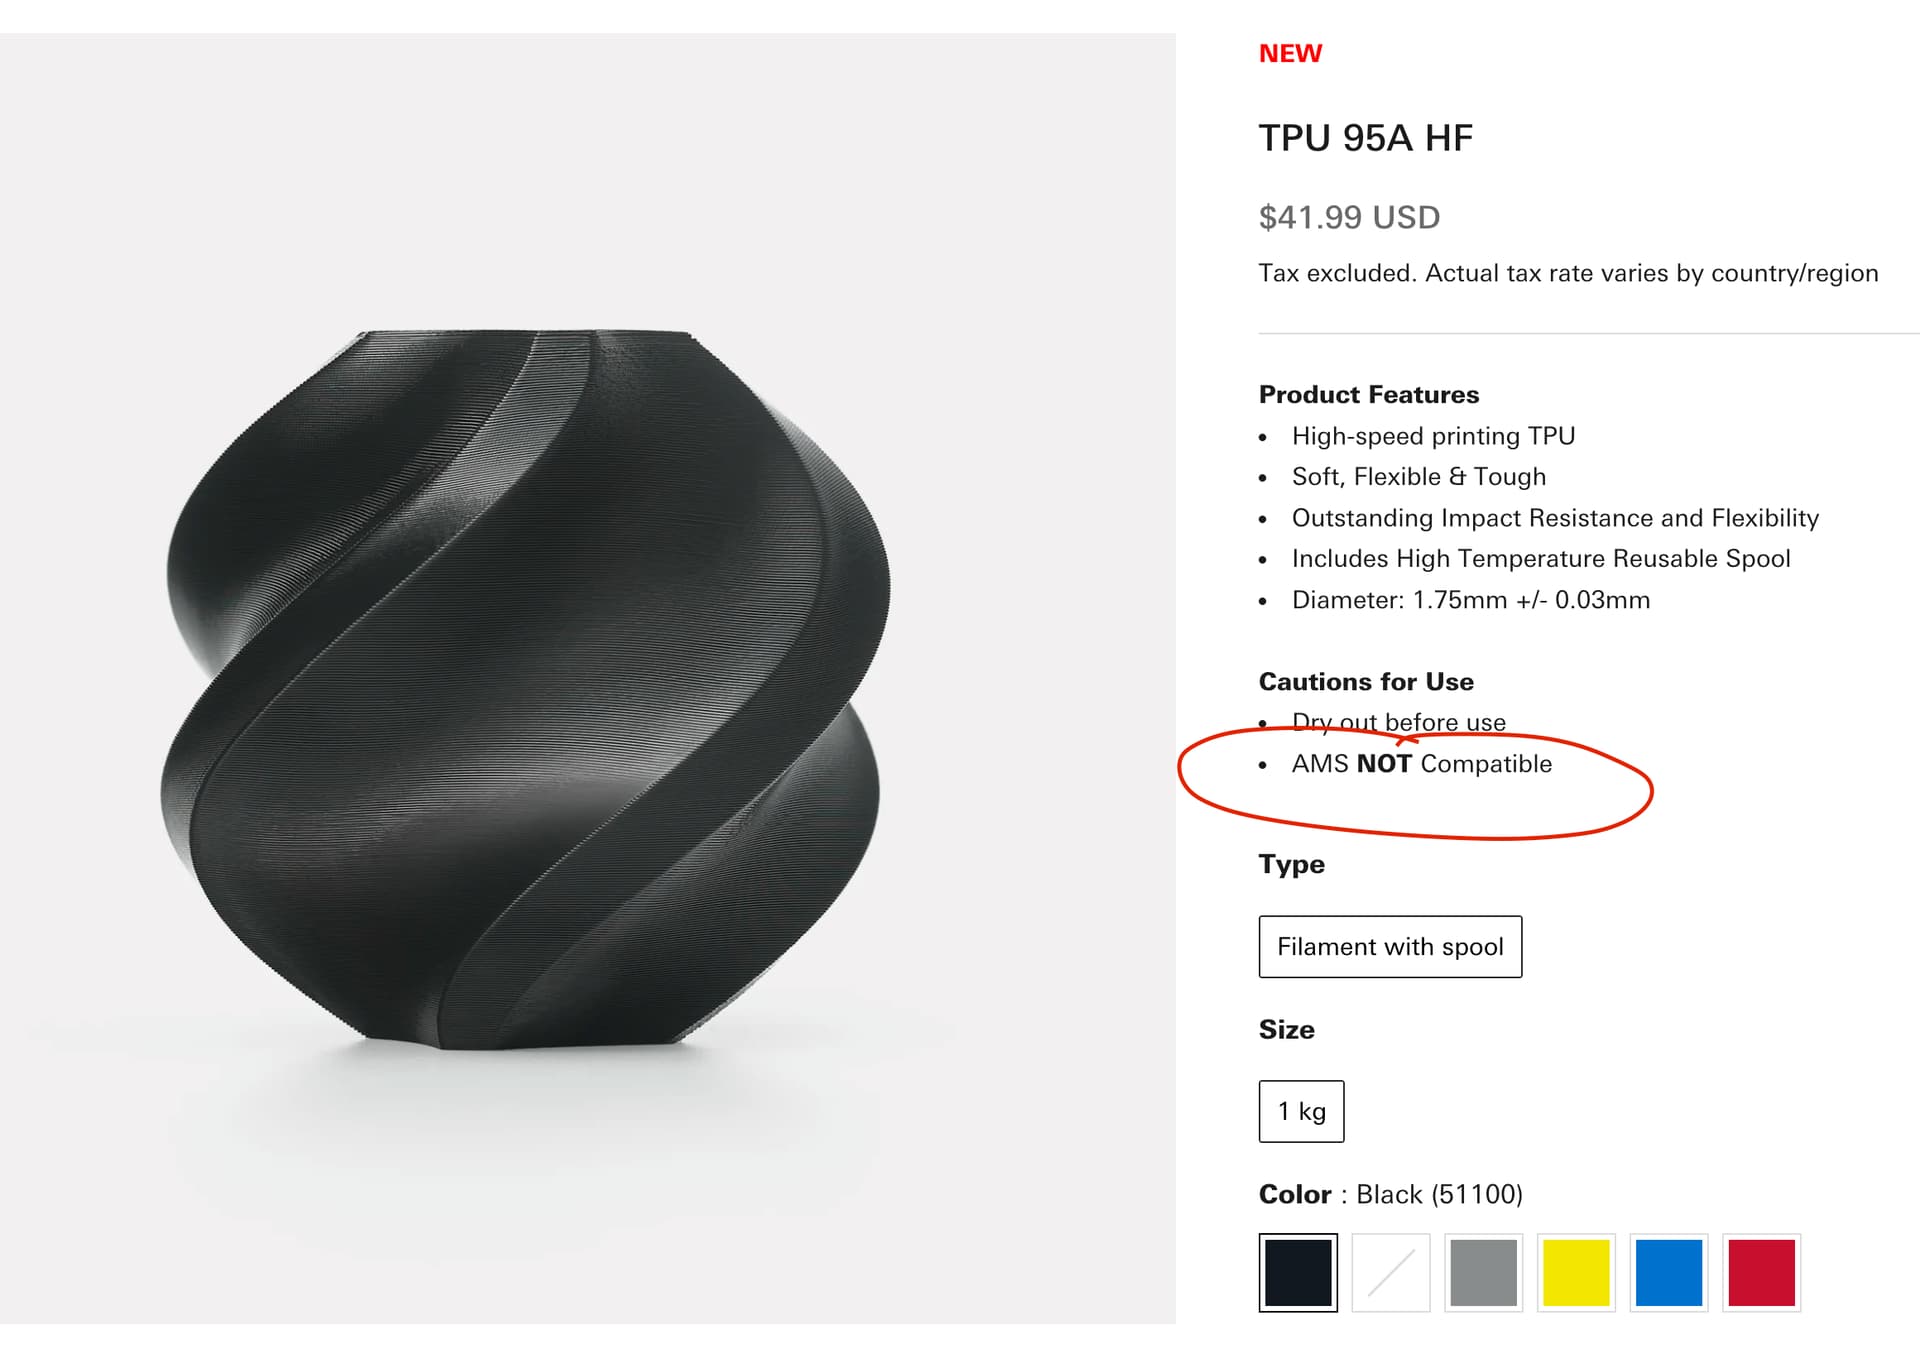
There are no TPUs compatible with the AMS that I have seen from anyone. I’ve printed TPU for the past year on my X1C via the manual external spool straight from a filament dryer. BL new high speed TPU is no different in that it should not be used in the AMS.
You might try to find a service that does 3D scanning.
You might also try this search engine: https://www.yeggi.com/
To see if anyone has already done such a rendition.
And then try to find the skull and snake
Spent all last night searching and researching. Plenty out there of 7th SFG but none with the 2nd bn emblem on it. I may have to just go with the simpler 7th alone but was hoping to add the pizazz of the rest of it. Like I said, I’m in the early stages of planning on it. Figured I’d at least get some good guidance and ideas from y’all.
I’ve got a good 7th file, just not the other one
You might want to try an AI 3d model generator, using that picture.
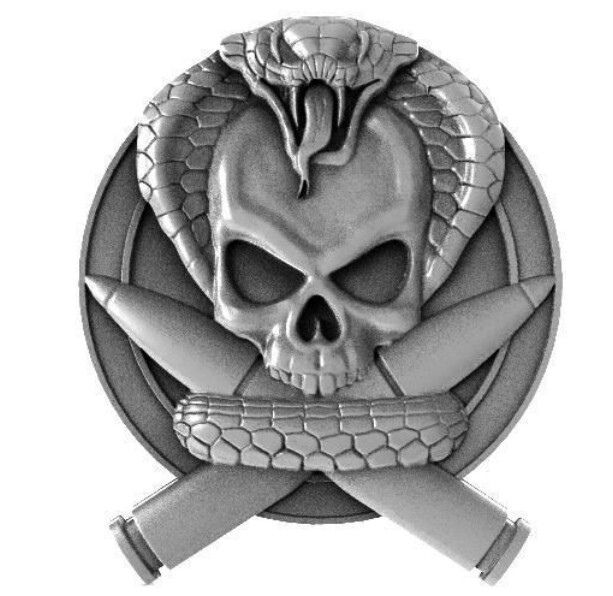
I know everything that has to do with symbolism is sacred but if you didn’t mind a slight departure here is a skull that you could superimpose on the 7th SFG symbol.
Might consider adding a number 7 to the front of this esty 3D file for $10. You could do backer in metal. GL and it’s a cool project!
US Army Special Forces Crest De Oppresso Liber Badge 3d Stl - Etsy
Found that last one last night. It definitely is a contender for adding it to the project. I’m just trying to exhaust all options for the other one before I resign myself to just going with that emblem instead of the specific one.
You could always have someone etch in wood with a laser. That would get your 3d and fine details
Could do the skull and snake with fusion canvas feature.

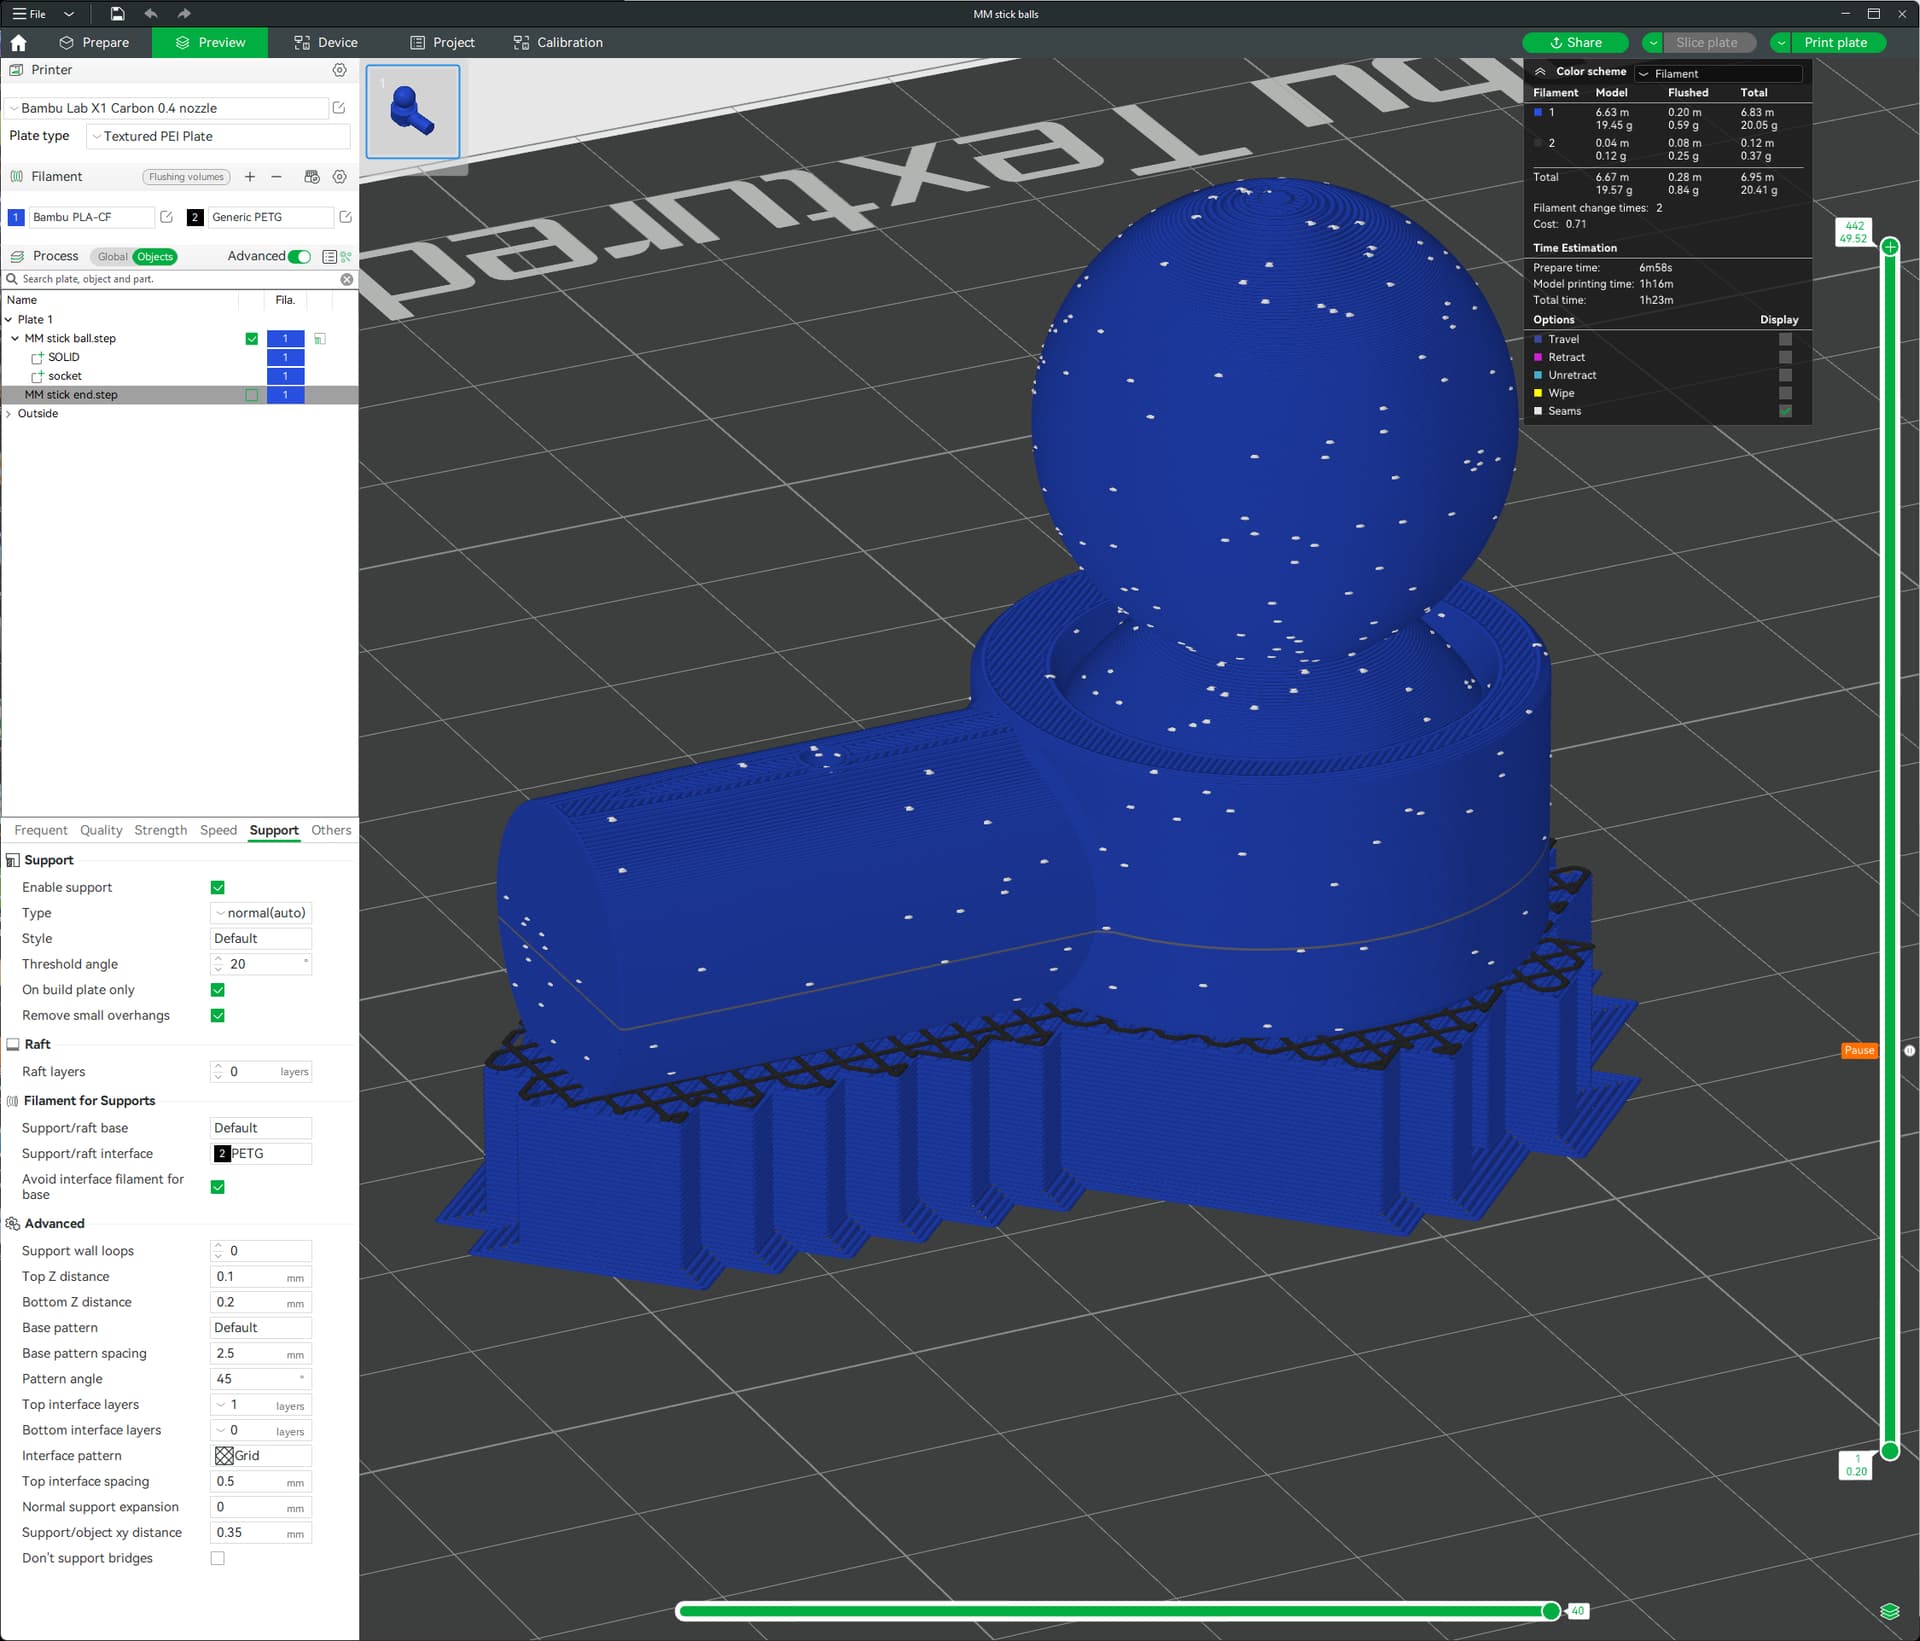
Here’s a support tip, if you’re printing PLA, use PETG as support (and the reverse). Bambu Studio has the ability to set the part/support raft layer to a different material. See “Support/Filament for Supports/Support-Raft Interface”, show in black here. Here the slicer puts a single layer of PETG between the support and printed part.
I liked that information a lot Craig. I have been reading that PETG and PLA do not play well together for strength so I am glad to see you have tried it as support material. That was my plan.
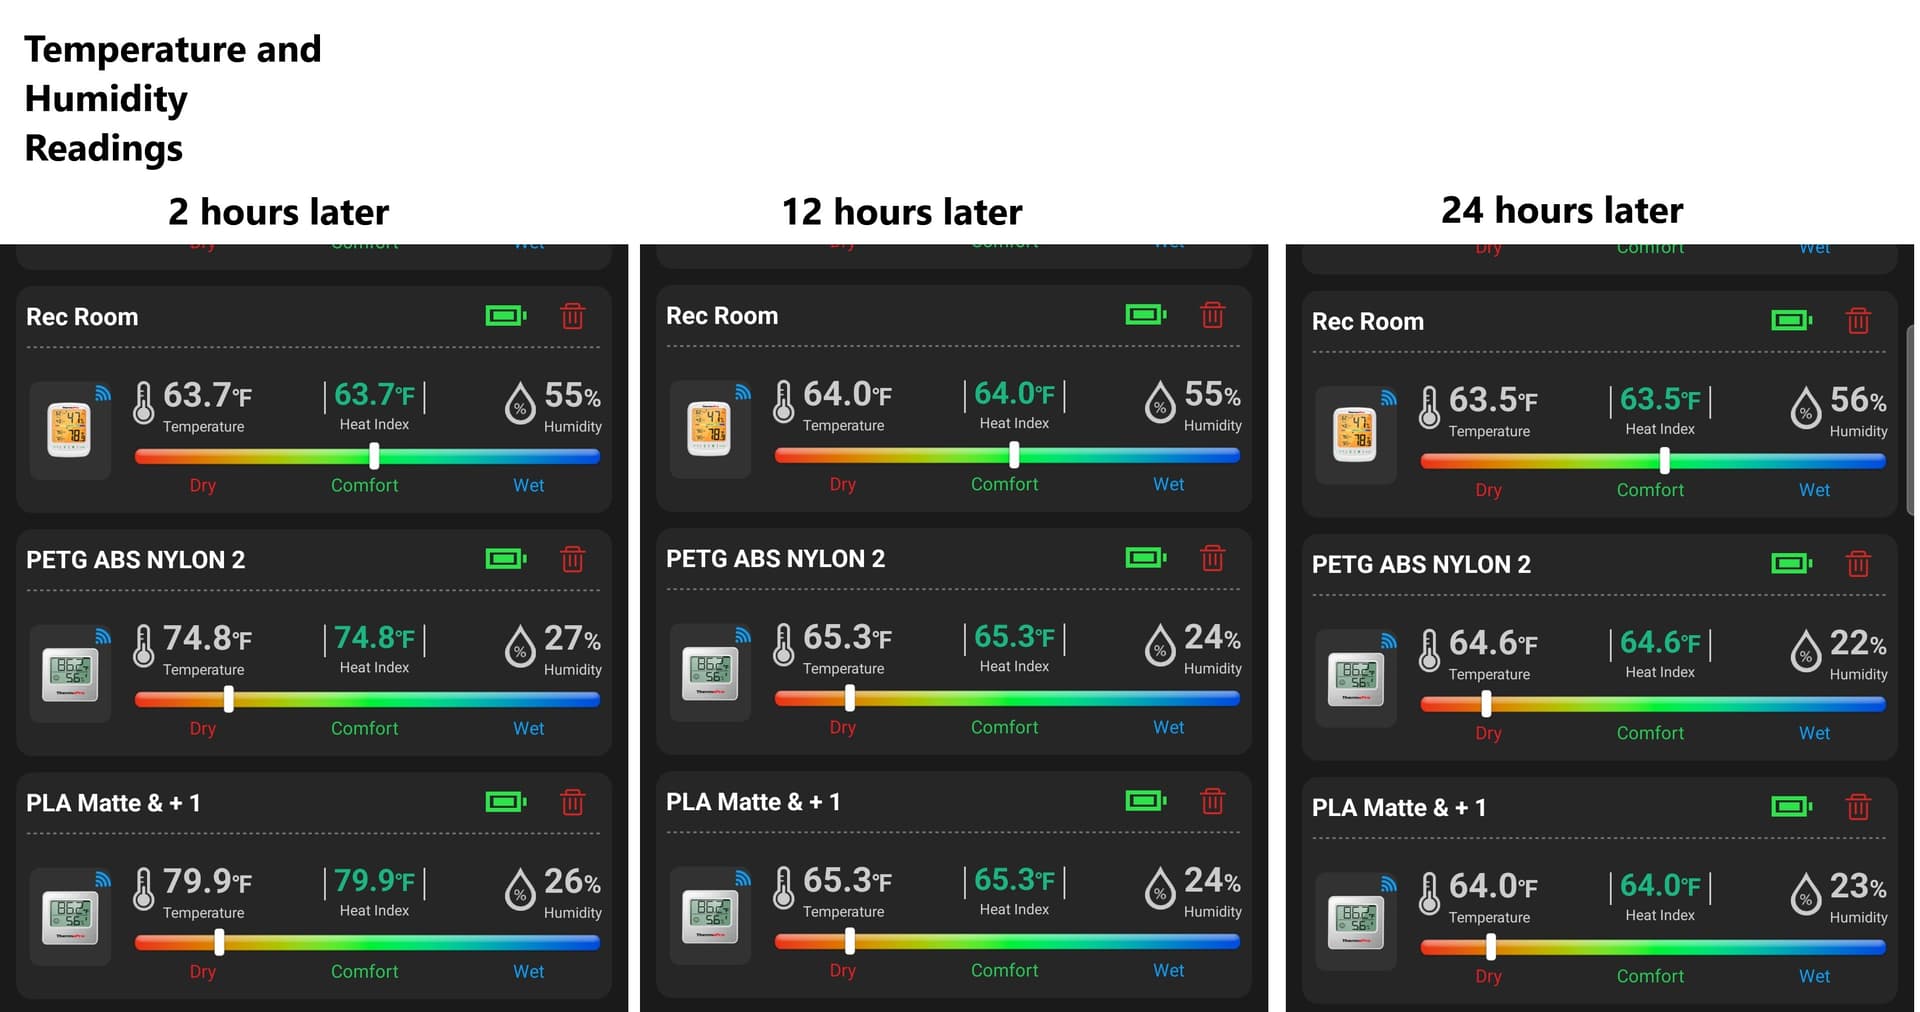
I have been receiving lots of filament, awaiting my printer. Needless to say, I was starting to worry about the storage condition since the Rec Room, is in a daylight basement. It has a dehumidifier running constantly but in the winter has humidity of mid 50’s.
I then remembered my success with drying Traeger pellets for the woodstove, successfully in my finishing room. The heat source is a wood stove in this 10 x 8 foot room. I has several exhaust fans and a ceiling fan for good circulation.
I put all of the filament in there cardboard cartons in the room and got the stove running. The room was up to 85 degrees in no time. The important thing I realized is heat is only one of the things that helps to dry: there needs to be some exhausting of that warm, humid air to really bring down the humidity. The humidity in the room began at 70%. after an hour it was about 64%. Temperature rose to 100 degrees but the humidity was still around 58%. I turned the big exhaust fan on for 20 minutes and the humidity dropped to 50%. Every so often, I would turn on the small exhaust fan for 20 minutes over the next 24 hours and maintained the temperature above 90 degrees. The humidity was finally at 25%.
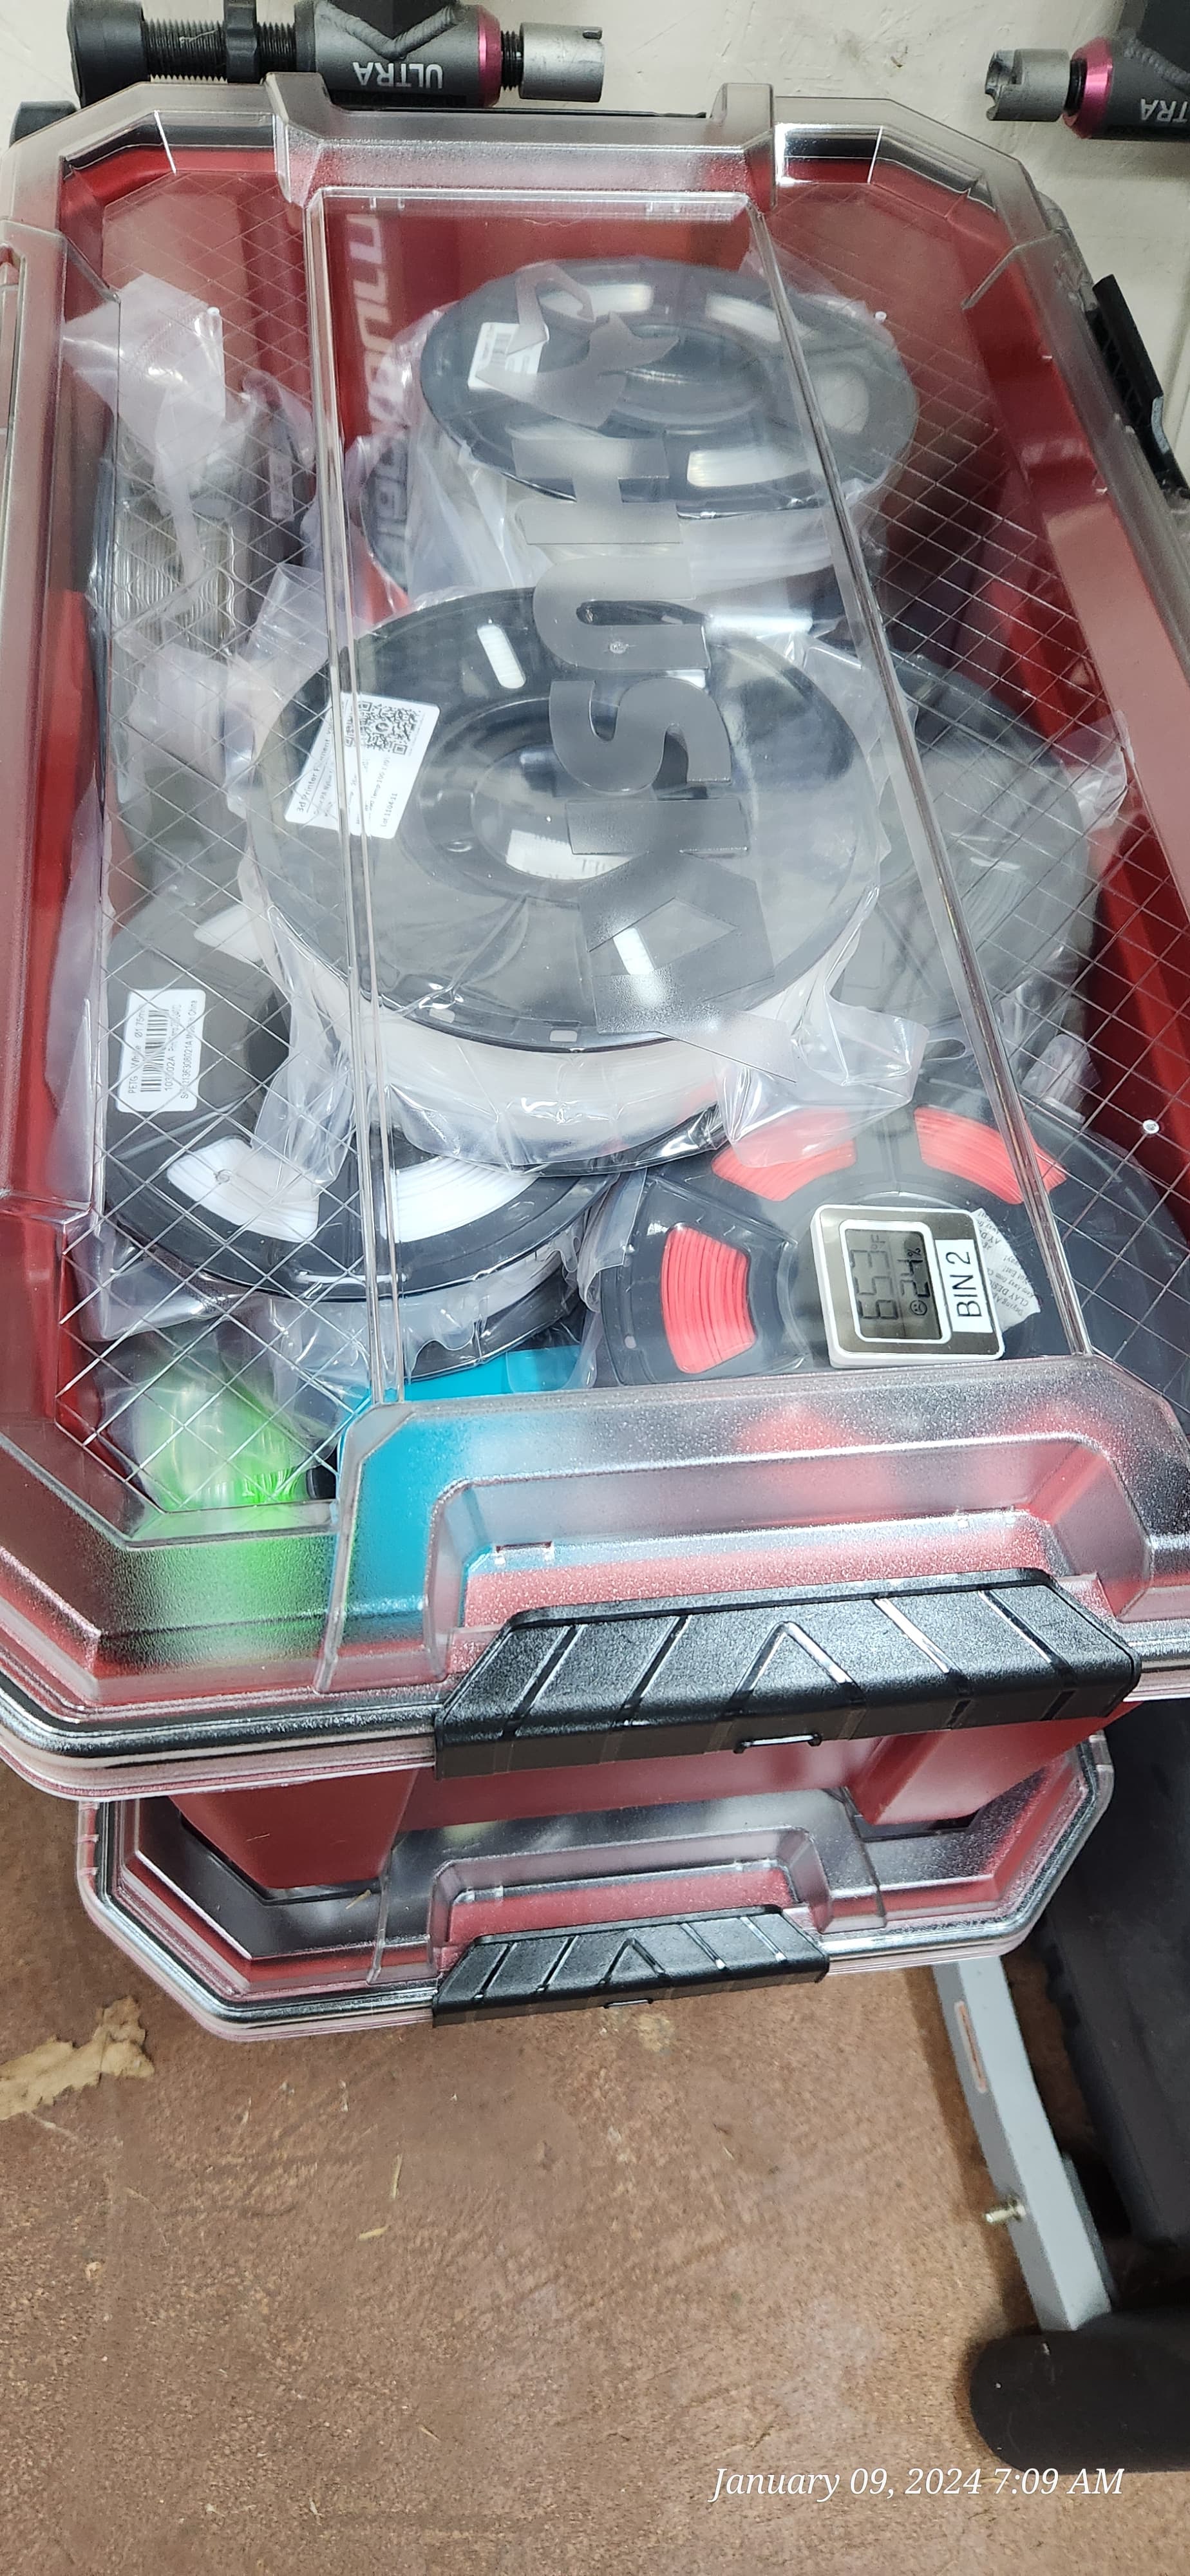
I boxed the filament up in two waterproof Husky 20 gallon containers, suggested by @apynckel while still in this hot, dry room. All spools are still sealed. Some are still in their cartons as well. They were sealed shut, each container with three (20 gram each) desiccant packets and a Bluetooth temperature/humidity sensor that keeps a running track of the readings and can be viewed on an app.
I then moved the containers into the Rec Room and you can see how the readings of the Bins changed. Much to my delight, the filament is showing humidity readings (low 20%) similar to what the hot finishing room was reporting. So I think these Husky containers are truly airtight and very much worth the $29 price tag.
Now I am afraid to open them. I don’t want to lose the low humidity. My thought is that I will plan to warm up the finishing room and remove the filament only when it is in that environment then I will not have any moisture issues.
Most of my filament will be in the AMS boxes with desiccant packets. I also have a filament dryer box that I hope will dispense the external filament that does not work in the AMS container.
You may find that sometimes filament is not dry when it’s packaged. Ideally, open filament, dry, then store in air tight container.

You’re going to love it!