How long is the turn around time to get replacement parts if parts you were shipped are not correct?
Spend the day assembling the Crossfire Pro on Christmas Eve and was unable to complete it. I just sent a support request, but curious what turn around time is. (How long it will be before I get the replacement parts so I can get this assembled). Needless to say, I’m a little frustrated to spend the day in a cold garage to try to get this done before Christmas morning and it was all for nothing.
Contents of the support request:
I have a few complaints… Starting in order of annoyances and ending with issues.
Many of the labels on the plastic bags that the nuts, screws and washers come in are worn off and you can not even read them.
Some of the screws are packaged in the wrong labelled bags. Such as me having two bags labelled “Bag 16, Serrated Flange Nut - 1/4-20” when one actually contained the “Lock Nut, #8-32” which was required for other tasks. I figured this out by process of elimination.
Each bearing block flange assembly has 8 set screws. Out of all 8 set screws, 2 on one flange, are 3mm and not the same as the other 6, which are 1/8"
Either the X-Axis Lead Nut (Bag 31) or the X-Axis Lead Nut mount is not the correct part for this machine. The X-Axis Lead Nut mount has 4 holes. Measuring two holes diagonally is about 2 1/8". The X-Axis Lead Nut has two holes, which measure 2 3/8". It appears, from looking at the assembly photos from both machines, that the X-Axis Lead Nut mount that I received was actually for the Crossfire, not the Crossfire Pro.
Please send two replacement “bearing block flange assembly” set screws so they match the other 6.
Please send me the correct X-Axis Lead Nut mount.
I am at a stand still on the assembly until they arrive. The unit already arrived later than expected. Please expedite the shipping of the replacement parts.
Expedited shipping will be standard shipping from California or Texas, at least that has been my experience. I would be surprised if you hear anything from the company until 2024.
Are all these quality issues related to Langmuir being purchased by shop Sabre? Just wondering if the issues started before the merger or after. Maybe a flaw in QC now.
I received my table with every last part in perfect order but I got mine just before the merger.
I was resolving this issue with Richard earlier this morning, and just now noticed this thread. Just to keep y’all in the loop, replacement components are on their way to him!
We’re aware of the fact that the hardware’s grease can eat at the ink on the bags. Most of the time, the amount of ink affected is minor - if a batch of hardware is a bit greasier than average then it can make the bags difficult to read. We’re working on a way to rectify this, but the grease is vital to the quality of the hardware.
As for the Lead Nut Mounting Tab - these tabs usually arrive to us separate, but we recently received a mixed batch.
We’re expanding our team to ensure we continue to meet production demand - due to this, we have quite a few new folks in the warehouse. I’ll be sure to mention Quality Control to the team.
This issue is being resolved to my satisfaction. Replacement set/grub screws and the correct X-Axis lead nut mount are going to be sent out via USPS priority mail.
Note: langmuir-reilly. I have purchased other CNC machines (X-Carve, Shapoko, etc), 3D Printer kits (back in the day), etc. and the bags of parts have printed labels adhered to the bags. Perhaps waterproof oil-resistant labels, purchased pre-printed by the roll, would be the way to go. I was able to guess what parts I needed for what tasks through the process of elimination, but I am also a mechanical technician. Someone who has never built something like this would have surely been more than mildly annoyed. I do appreciate your very prompt back and forth emails to resolve this issue with me, though.
The big box stores generally have it right for figuring out what belongs were. Most things from Lowes, Home Depot and Ikea have a page with all the parts on them. Those pictures are scaled accurately so you can lay the mystery part on top of the right picture and read the descriptions of the part, size, thread pitch, diameter… I can’t remember what the LS parts sheet looked like I was lucky all my parts errors were me getting excited and rushing.
The replacement parts were shipped out, the same day the issue was resolved, from Texas via USPS Priority and is scheduled to be here this weekend. I am pleased with Langmuir’s support team for their great communication and follow through.
I have EXACTLY the same issue with the X-axis nut not fitting. I submitted a help request 4 days ago with only a response asking me to resend my photos, then nothing since.
I’m just going to fix it because im not going to continue waiting.
I realized the issue on the 24th, but with Christmas I waited until the 26th to email them and post to the forum. After some emailing back and forth the issue was resolved quickly. The parts were picked up by USPS later that same day. The parts have moved from NY to ME and are currently a few towns away and should be here tomorrow so that I can finish assembly.
I hope your issue gets resolved quickly too. Maybe “reply” again here, but reply directly to “langmuir-reilly” so Reilly gets a direct notification. Probably wouldn’t hurt to add your support request number so they have it for reference. Again, I hope it gets resolved for you quickly.
Thanks all, i appreciate the feedback. I’ll add him below. I do olan on working through the issues somehow today regardless because i want my Pro to get functional.
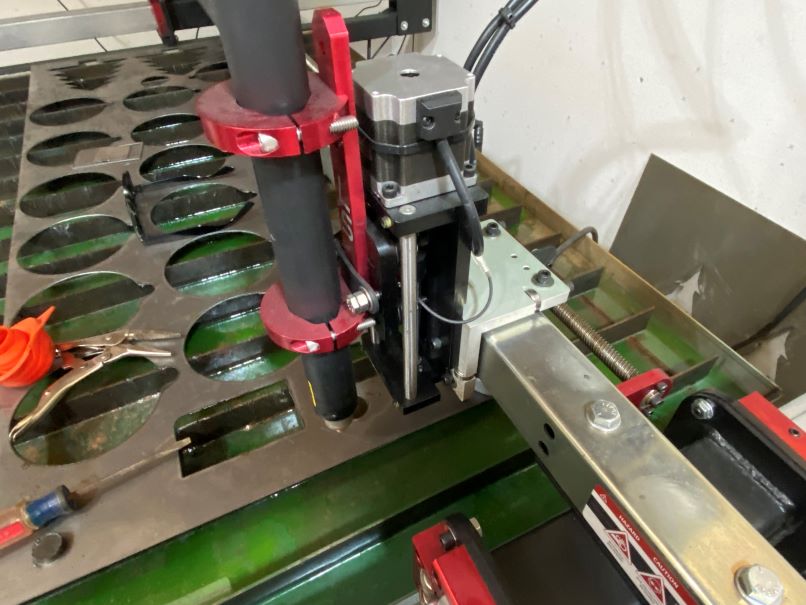
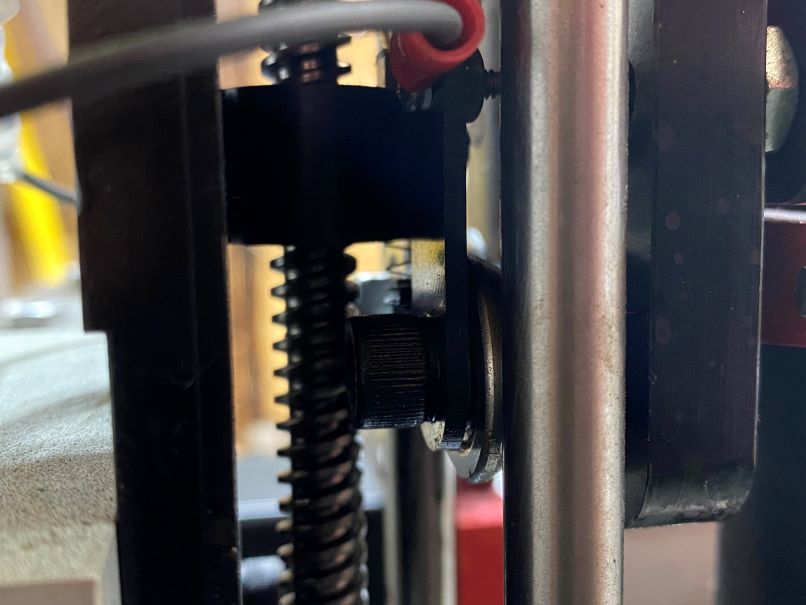
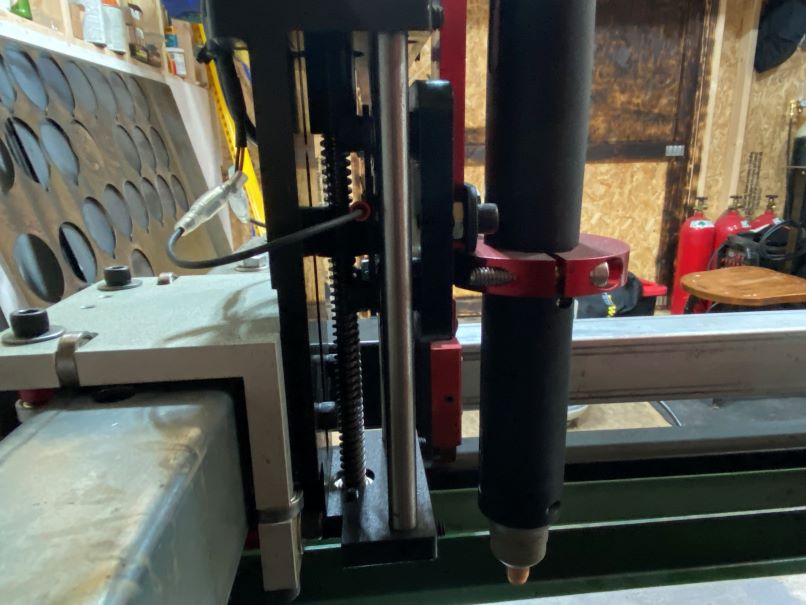
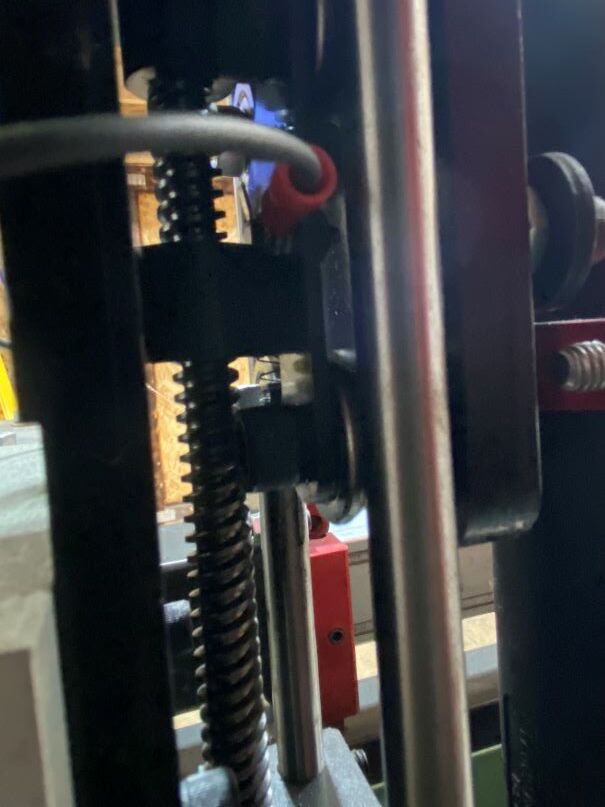
My help number is 117909, and it was a two fold issue. First is the issue described above with the X-axis nut (see attached photo) and also the Z-axis wire which fell off while tramming that axis (see attached photo). Any assistance would be greatly appreciated.
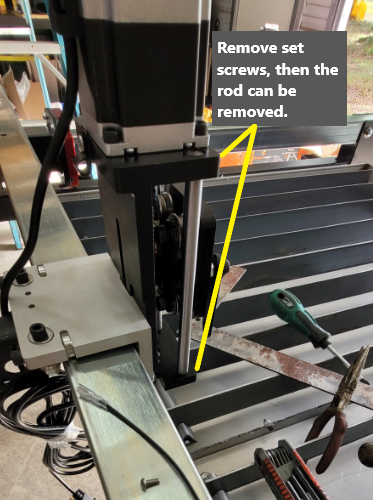
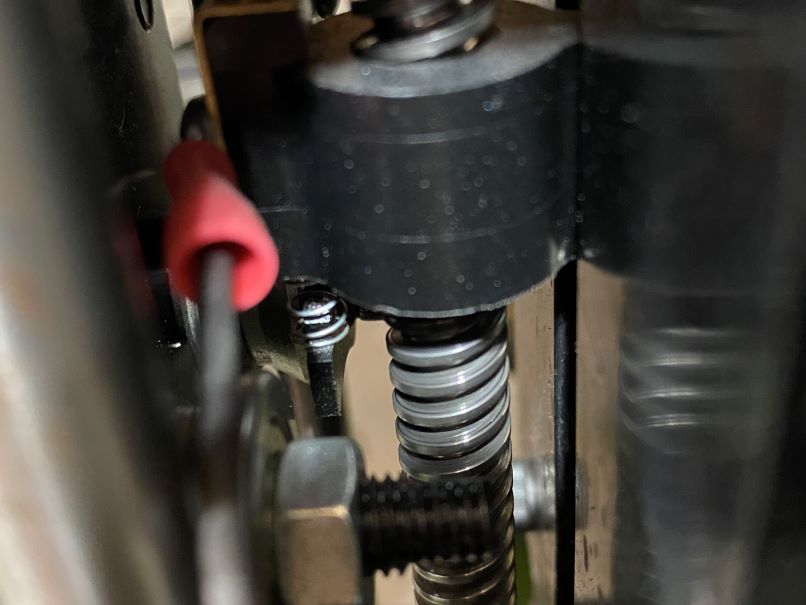
This will be a bit of a delicate task but this is how I would approach it. You need to release the z-carriage that floats up and down. the rod on the left is held in place by two set screws. Once loosened, gently twist the rod to free is up and it will be able to be slid out.
BUT: This will cause the entire floating assembly to fall downward and the spring will fall out. Make note how the spring is located and this will help in re-assembly.
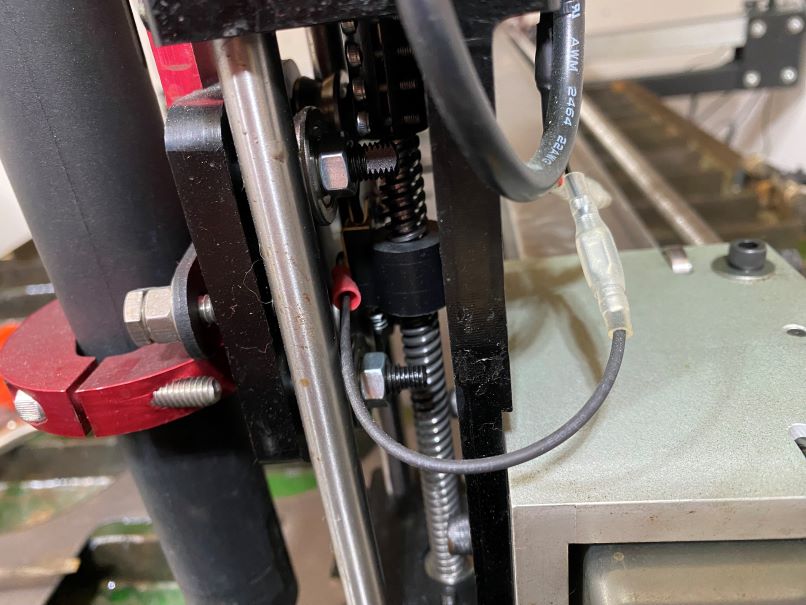
Once the carriage is free, you will be able to easily reattach the wire. I would suggest a drop of blue loctite on the machine screw to resist it becoming loose again. Angle the electrical connector so the heat shrink collar is pointing upward at about a 45 degree angle so it avoids the limit switch (that is how I bumped mine loose - hitting the limit switch).
Remember that during your reassembly of this rod, you will need to position the spring up in the recessed hole in the stationary part of the bracket and the lower part of the spring is resting on a little nub of metal on the lower part. (The ‘lower part’ is the moveable carriage that houses the four roller bearing glides.)
Suggestion: You might have some pieces of foam nearby while re-assembling so that you could wedge that lower bracket upward while you align and position the rod back in place.
Edit: If you need to use force on that rod, take care not to scar any part of the rod where the roller bearing might contact. The very top would be a safe area to use a small channel lock pliers to twist the rod. If you do end up scarring it, be sure to smooth it out before reassembly.
Edit2: If you find that rod to not move easily, you may need to abandon that method and do what I did: removed the top left roller bearing completely. Loosen the lower left roller bearing to the point that the bolt is about to fall out. It is the same amount of tediousness to put it back together but getting the bolt lined up on the roller bearing was a little challenging. I suppose the foam blocks would help.
ChelanJim, thanks for the detailed notes. I had not walked through the disassembly yet because i just moved past that part to try to get the rest of it assembled.
I got tied up today so im tackling this stuuff tomorrow.
Upstategrowguy77, thanks for the offer for pictures and if it is still valid i would appreciate it.
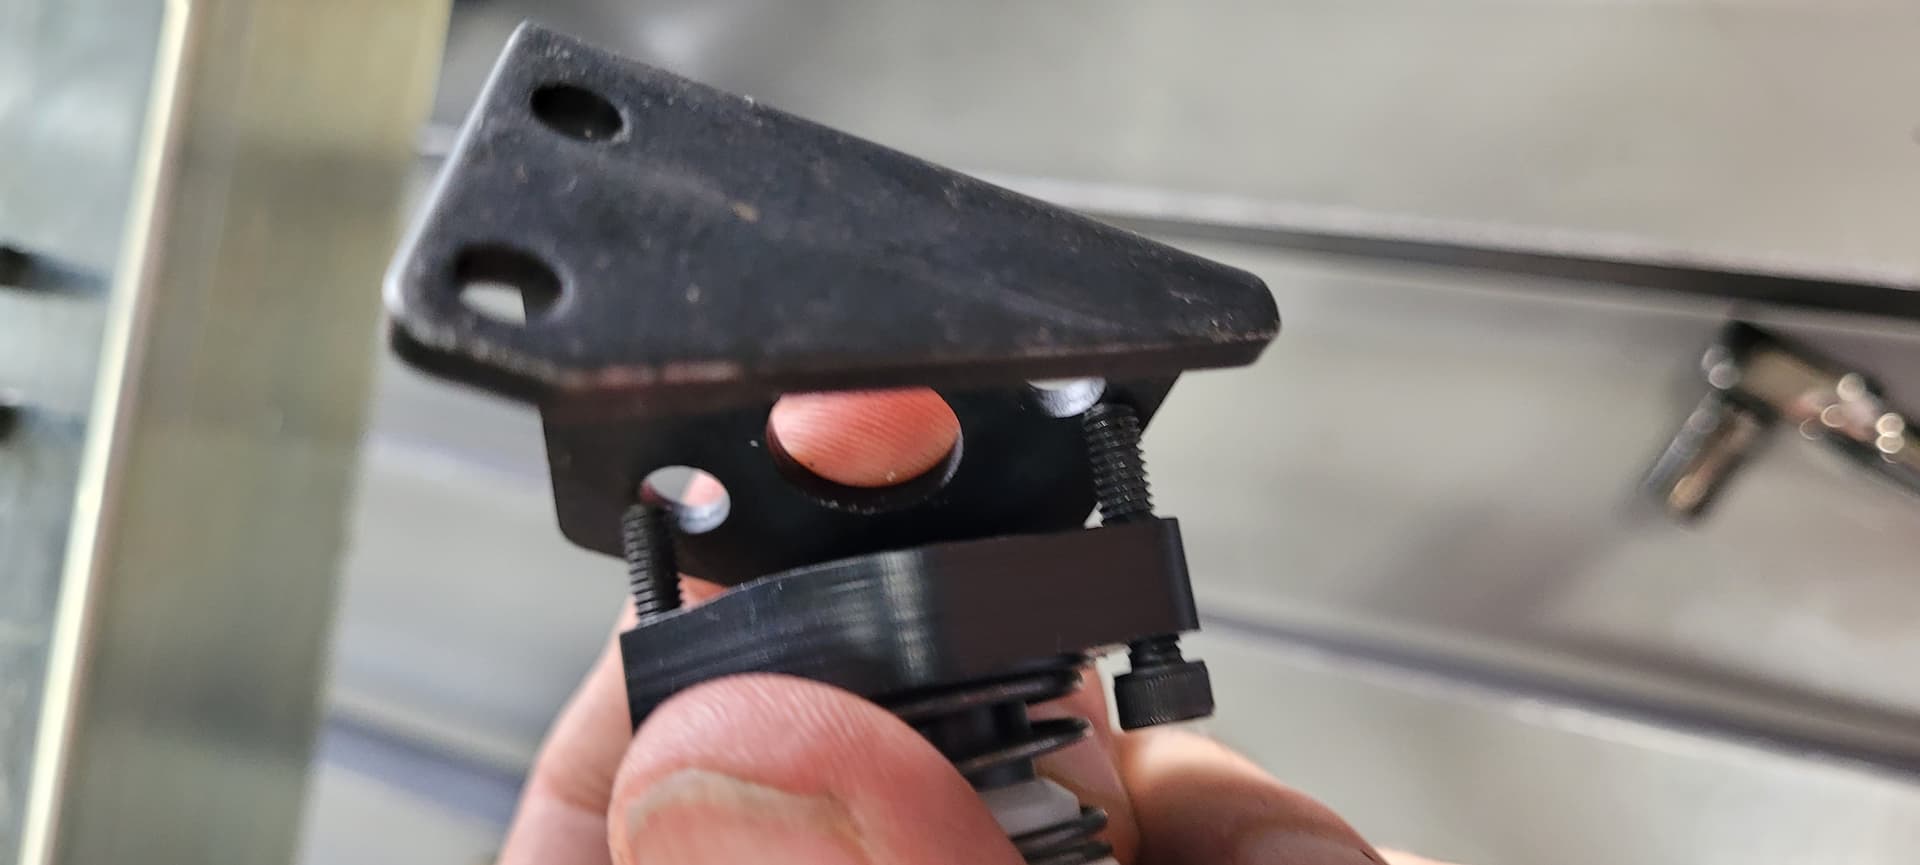
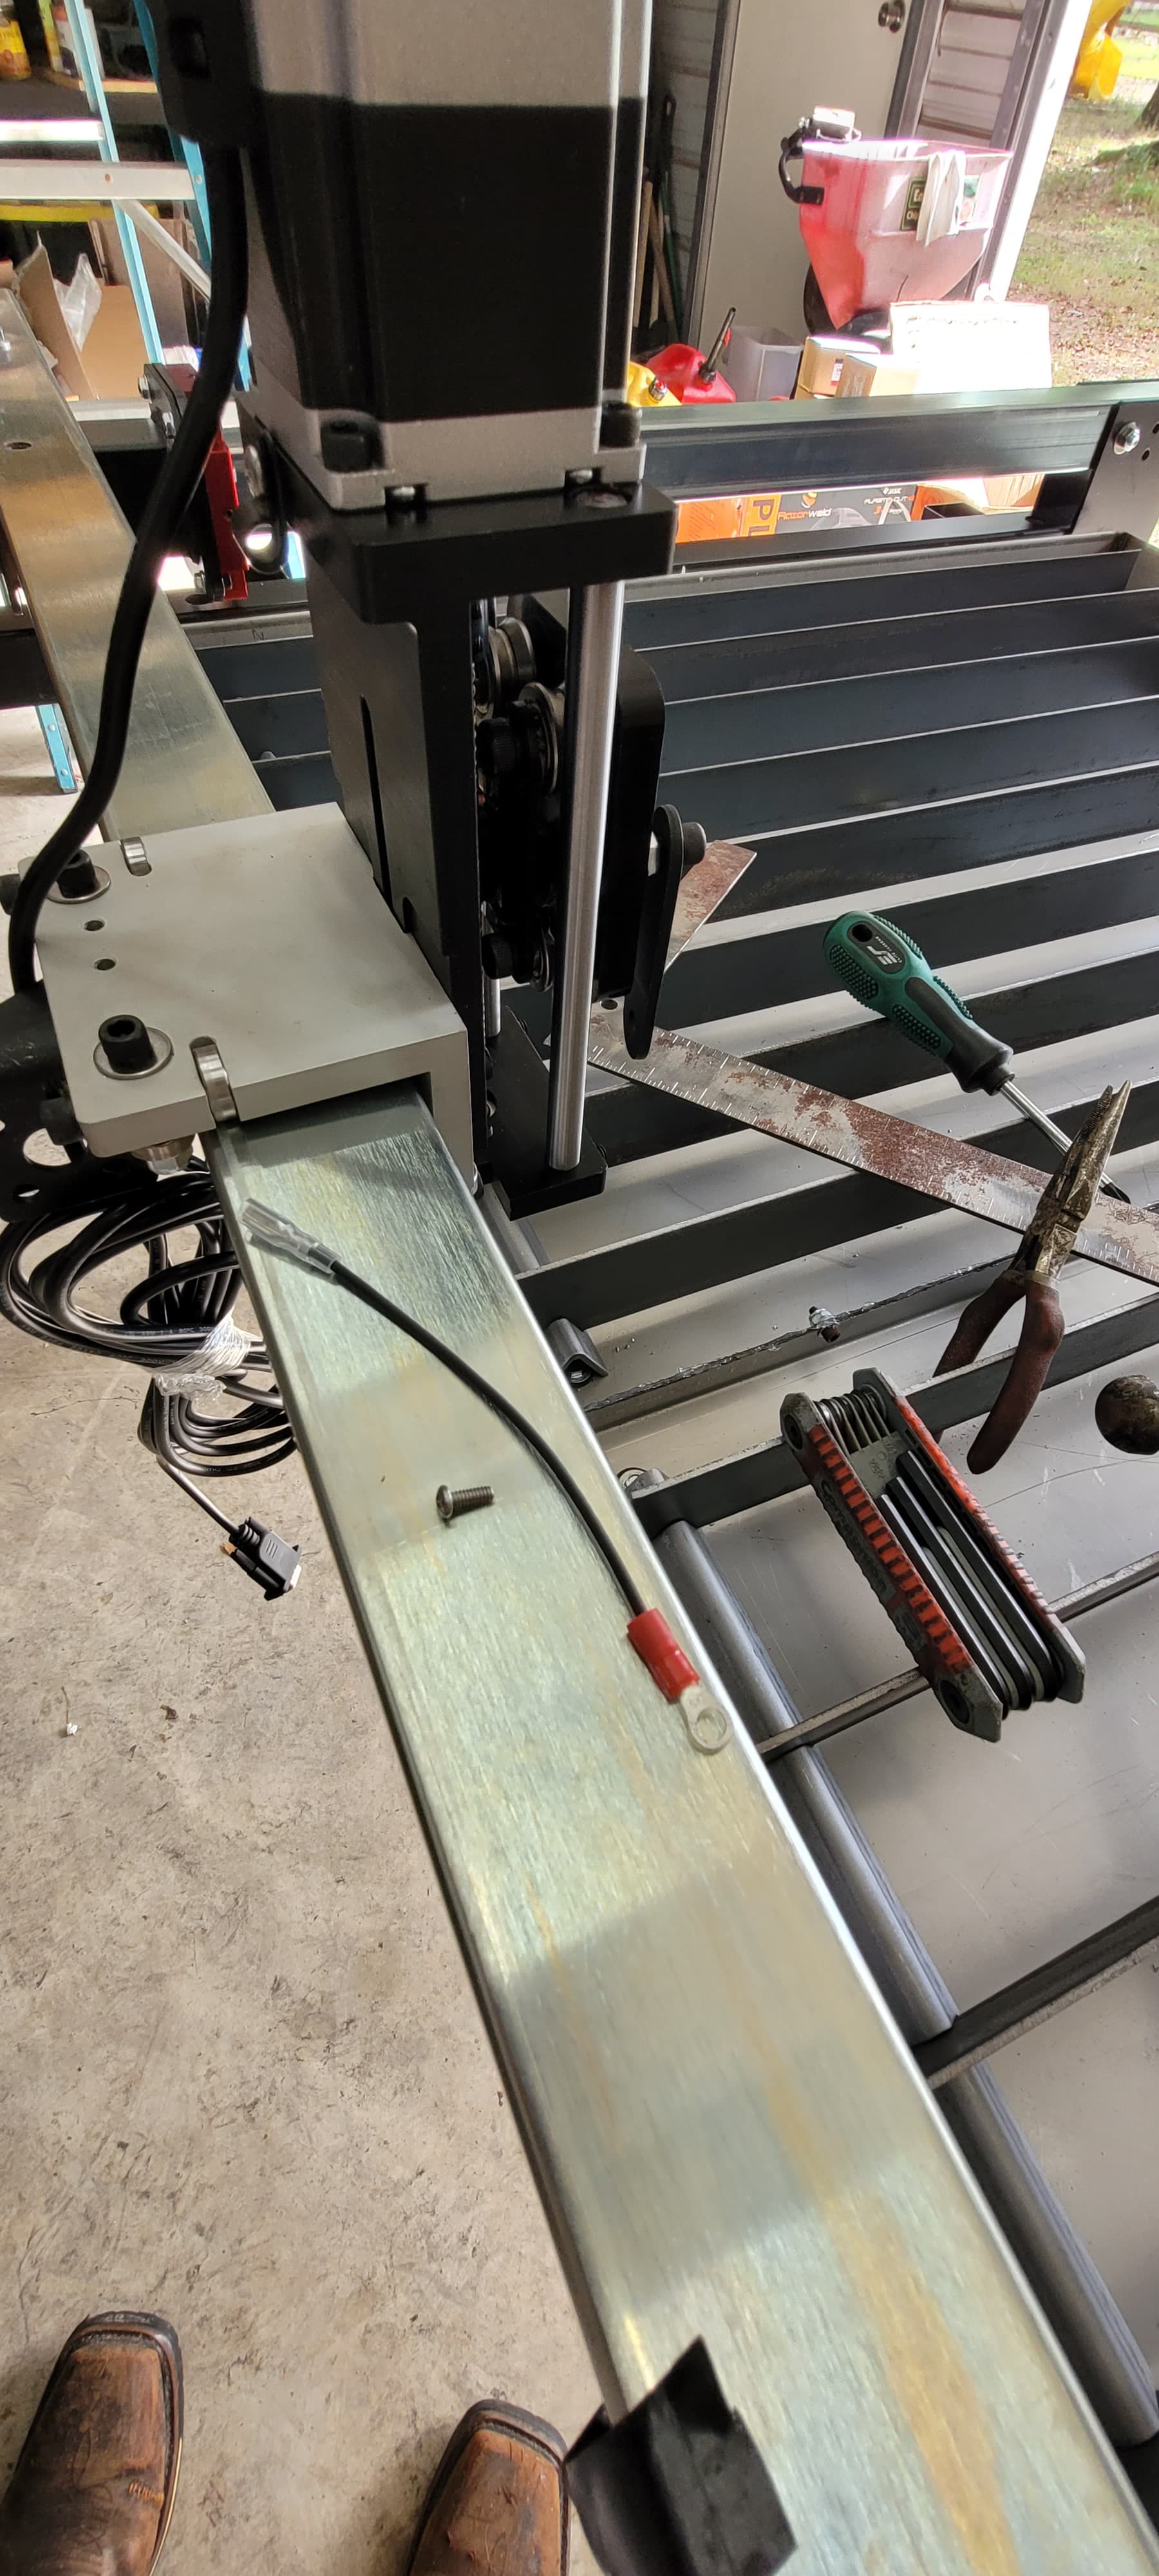
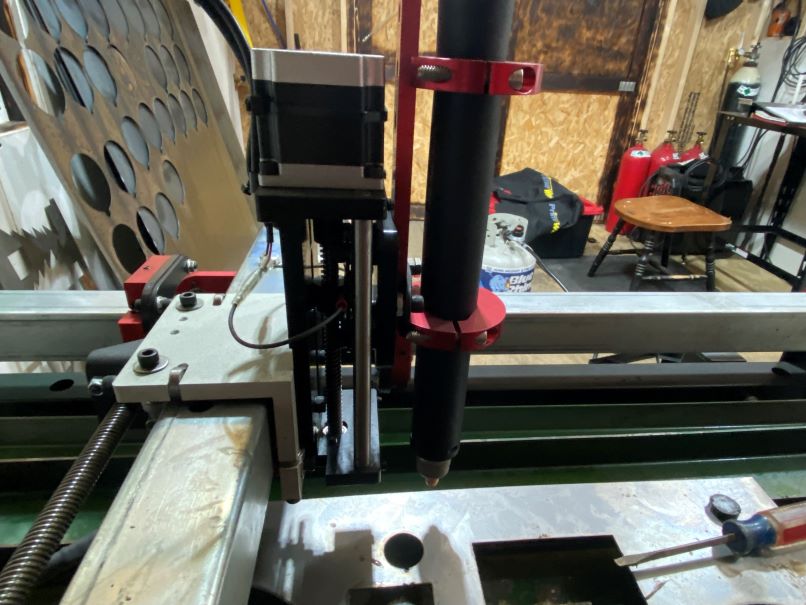
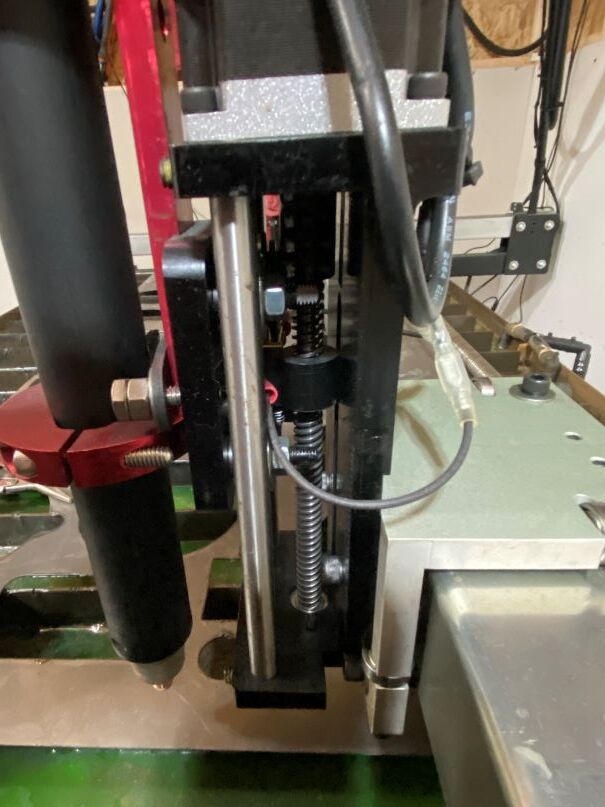
I sent them to you @TLFL also posting them here in case someone else may need them, Sorry for them being small but I had to resize to upload them so if they aren’t good enough let me know and I can email them to whoever may need them,

