Are the raceways aluminum? I assumed they are, and guessed that they would wear out very quickly as a result.
It looks the same as the lazy Susan I found on Ali Express.
https://www.aliexpress.us/item/2251832649875705.html?spm=a2g0o.detail.0.0.707diR7SiR7SgQ&gps-id=pcDetailTopMoreOtherSeller&scm=1007.40050.362094.0&scm_id=1007.40050.362094.0&scm-url=1007.40050.362094.0&pvid=8f02b2ba-4dc1-4f3a-be5e-8005959bae42&_t=gps-id:pcDetailTopMoreOtherSeller,scm-url:1007.40050.362094.0,pvid:8f02b2ba-4dc1-4f3a-be5e-8005959bae42,tpp_buckets:668%232846%238116%232002&pdp_npi=4%40dis!USD!15.00!12.0!!!15.00!!%402101c59516978609381146887e187e!65083489458!rec!US!!AB
I’ve seen a lot of cross roller bearing turntables for under $500. What size do you need?
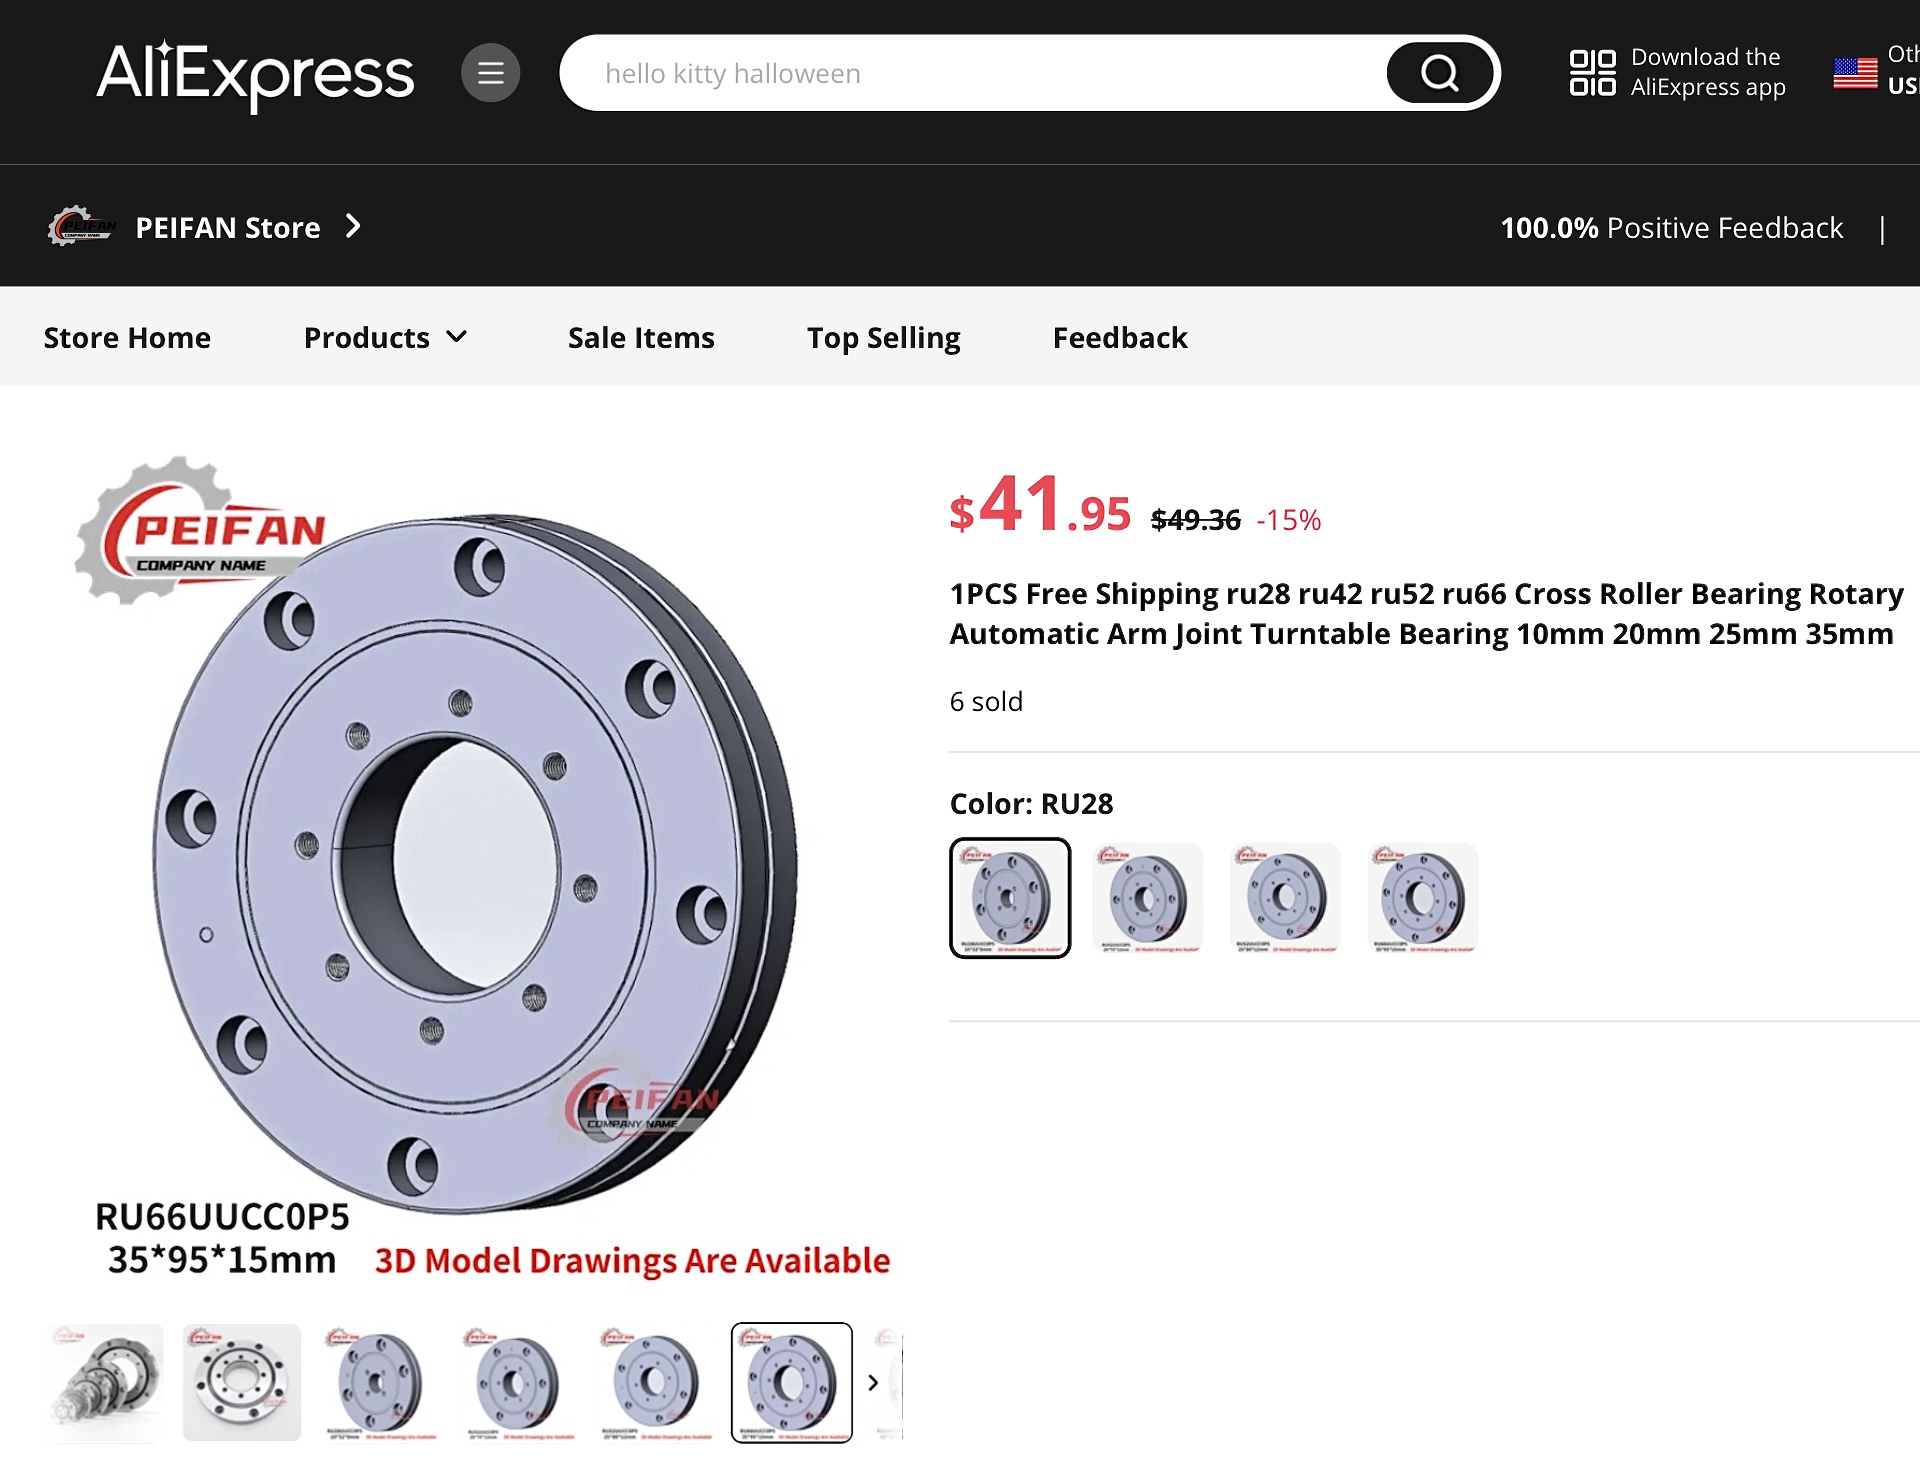
55 mm through hole ID or larger, ideally <100 mm OD
Doing a quick search, these are some of the low profile ID/OD bearings I’m finding.
55/120 RU85
60/90 RB6013
70/100 RB7013
2 Likes
Bit of an update on this build - it’s not dead, just proceeding more slowly since I got a new job.
After using the my “MR-1H” in the config seen in this thread over the summer, I’ve gotten a bit tired of how slow it is. It works well enough, but it’s just a pain to wait around AND have to do manual tool changes. Really takes a whole afternoon of babysitting to make a single part.
I decided to bite the bullet and go WHOLE HOG on a total spindle, drive, and electronics replacement.
Here’s what’s changing.
Spindle:

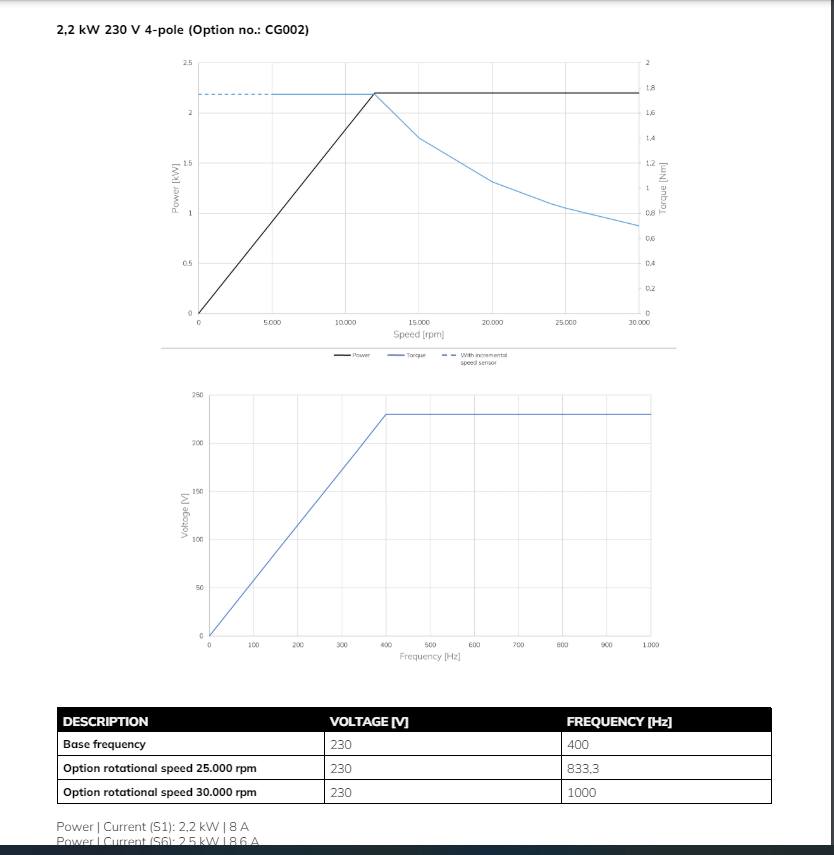
Upgrading to a 4-pole Spinogy X22 spindle. The new unit is ATC capable, uses ISO20 tool holders, but that’s only the start of it.
The X22 spindle will take the whole machine in a much more “Datron-like” direction. It’s a bit more expensive than the CNCDepot options (by about $2k, not including the accessory stuff like water cooling hardware), but it can run at 30,000 RPM and still push about 2.5 HP at peak RPM, by running at 1000hz. I really like how small the ISO20 tool holders are. I’ll be able to fit at least 10 of them in a wine rack style ATC magazine.
The other advantage of the X22 is the weight - only 10lbs. This shaves off about 25lbs from the X gantry assembly, which will make a huge difference in how nimble my machine can be. I’m considering adding some of this weight back in as damping ballast inside the X gantry beam. TBD after vibration evaluation once it’s installed.
The Spinogy X22 spindle has somewhat lower horsepower than the Langmuir spindle, but it still delivers about 2.5HP alongside the much faster speed.
To do -
- New spindle mounting plate
- I will need to once again reengineer the energy chain system for the coolant and air lines needed to run the spindle and ATC.
- New wall mounted layout for the spindle’s liquid cooling system, spindle drive, and other misc electronics.
Drive motors:
Fast spindle speeds will make 3D finishing and HEM-style toolpaths feasible. 3D finishing at 100IPM is just aggravatingly slow.
Now, I’m not absolutely certain that the drive motors NEED an upgrade in order to push much faster feeds, but I am certain that I want closed-loop control on my drive motors to help protect the expensive spindle. I know that even closed loop steppers won’t save the spindle bearings if I crash it at full speed, but it might at least help for lower speed scenarios.
I did some price evaluation on Clearpath servos and found them simply too expensive for what you get. A full Clearpath system would cost upwards of $2.5k, and I think I can get most of the benefit from closed loop steppers. So long as they are sufficiently oversized in terms of dynamic torque and closed-loop, the only major remaining disadvantage is stepper vibration. I don’t think much of the idea of precision encoder feedback on the motor end - given that we don’t have proper backlash prevention in the ballscrew, precision feedback from the motor is rather pointless. Langmuir’s philosophy seems to be that as long as the motor is beefy enough it should hold position, and I largely agree with that.
Obviously steppers aren’t great for high RPMs since they lose significant torque, but I think I can also account for that by increasing the frame size.
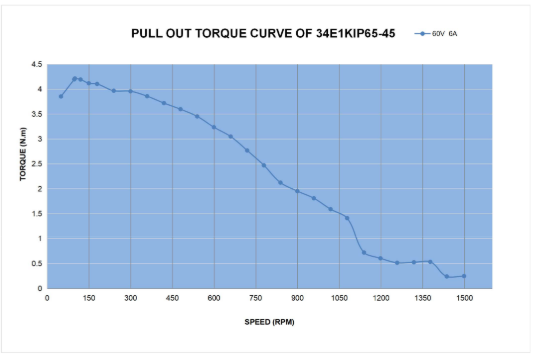
NEMA 34 steppers are also a bit of a balancing act - you don’t want to go TOO big, because then the inductance gets way too high, and that’s bad for fast moves as well.
By combining the big bertha steppers with a 25 lb weight reduction on the gantry, I’m expecting to be able to push at least 500 IPM on rapids.
To do-
- Need new Y rail mounts. Still need to figure out how the new Y mounts interact with the new way covers and the precision limit switches.

- New couplers due to the annoyingly large output shafts. I’m planning to turn some new 14mm-6.35mm couplers out of 12L14 hex bar next weekend.
Electronics:
New drivers and electronics are necessary to support the new larger steppers, as well as the pneumatic ATC functions and spindle liquid cooling, not to mention tool changes on the software side.
I’m upgrading my stepper drivers to Leadshine CS-D508’s, and the system controller to a 7I96S running LinuxCNC. The CS-D508 drivers don’t leave a whole lot of headroom for the Nema34 steppers at max voltage, but I’m hoping that max load is a rare enough event that these can handle the task.
Housing:
I’m at the beginning stages of planning a top cover, as well as panels that fully enclose the under-machine chip bin area. I waited to make one because I expected to need to make changes to the energy chain, and that’s finally happening. Enclosing the machine this way will help in two ways:
- Keeping sawdust from my CNC router and grinding dust out of the machine / coolant loop
- Helping to warm the machine to operating temperature during the winter, while my shop is 45 degrees or below. I built and calibrated the machine at 75F, and it’s pretty obvious that it doesn’t like running at 45F.
6 Likes
Very cool.
I would also expect to upgrade to a 48v PSU for the steppers (or maybe even two of them since you are going with large motors). You could even consider 60V. I switched to a 48v/12A PSU and this enabled the fast rapids that I’m getting (300ipm reliably with stock steppers, you’ll be pushing it even faster).
I look forward to seeing how it all comes together.
3 Likes
I was indeed planning on going with a higher voltage PSU. The CS-D508 drivers can take 48V, but not higher.
Got any suggestions for power supplies?
1 Like
I’m using an offbrand (boystro) 48v/12a Amazon one and it’s working fine for me. The Langmuir one also seemed to be a similar grade.
When I’m really picking power supplies for projects like this I normally look at Meanwell. I didn’t have a chance to look at the amperage specs for your motors, but I’m guessing the 48v/600w one listed here is a good option:
https://www.mouser.com/ProductDetail/MEAN-WELL/SE-600-48?qs=%252B6mEGs9UJHxL%252BTYUfZe8uQ%3D%3D
MrMachineTx mounted his power supply sideways in the enclosure, which was a nice mod to get more space. I bet you could install two of these sideways in the CutControl enclosure if you needed more power.
1 Like
The higher voltage would also help deal with higher inductance of a larger stepper. Always a good solution to get the most out of stepper performance.
1 Like
I need an update on this @amosdudley. I went with stepperonline closed loop steppers and they have been amazing for the price. I’m running conservatively at around 350IPM and a 24KRPM 2 pole. looking forward to how you like the X22. I may need to upgrade my spindle soon and looking at options. I’m already kitted out with IS020 so i’d like to stay there.
1 Like
@MrmachineTX Which closed loop stepper did you use for the Z? That is one that I’m thinking about upgrading (I use the stock steppers).
Thx for the interest! Unfortunately I’ve been a bit occupied with other projects and work, and I need to fabricate a few components to get off the ground. Especially new motor couplers and the spindle mount.
That said I finished up design for those new components this weekend, so now I just need to find some time to actually machine them.
all were online steppers from amazon. 4.0nm. the holes don’t line up but the new stepper aluminum housings are aluminum, so I filed slots into the holes and it made 2 of 4 holes line up for Z. more than enough to accomplish the job. maybe I should fix that…
anyway, I cannot suggest that upgrade enough!
2 Likes
Those steppers don’t have a waterproof rating. Are you worried about that?
Ah, I use that same closed loop stepper for the electronic leadscrew on my lathe. It has served me well in fairly light duty conditions. I might try the NEMA 23 variation for Z.
Is Z the only one that needed slotted?
I put a permanently temporary rubber glove over all of the motors and it is working as expected. eventually I will 3d print covers for everything.
I believe Z and X needed to be slotted with a small round file. The Y rails I believe because they were smaller footprint fit right up.
1 Like
Very cool project! Where are you getting your Lane Mountain sand? Did you have to contact the actual company?
I imagine they usually sell in large quantity.
You can reach out to Lane Mountain and they will give you a reseller list for your area. I don’t know if they supply outside of the PNW.
In the Seattle area, you can get their graded silica sand from Manufacturer’s Mineral Co (manminco) which is near Renton. They were happy to sell me 100 lb bags, they might also do 50 lbs (not sure). They didn’t enforce a minimum order quantity, you just drive up and pay with credit card in their office trailer :).
The Lane Mtn silica sand is good quality - dry, and seems to be properly graded.
I also used some micro silica powder, as you see in the spreadsheet at the top of this thread. I gotta that from a ceramic supply shop in SODO / Seattle. That stuff is more expensive than the bulk sand, but you don’t need as much of it.
Take great care to protect yourself against inhaling microsilica dust. You need a respirator, not just a dust mask.
2 Likes