Hey Guys,
Just Picked up my MR-1. I will try my best to document everything as I go.
@langmuir-daniel @langmuir-mike thanks for the tour. I’m so stoked!
Hey Guys,
Just Picked up my MR-1. I will try my best to document everything as I go.
@langmuir-daniel @langmuir-mike thanks for the tour. I’m so stoked!
How many pallets? I got two different ArcBest trucking company tracking numbers. Hope to have mine real soon.
Can’t wait to see it come alive!!
There is only one 48" x 48" Crate. You may have received an updated tracking number!
Okay thanks. Thought I might be getting two…
If you get two of them, feel free to send the second one to Utah. ![]()
![]()
Excited to see your machine come to life!
While i am not getting one it is exciting seeing these come to life and even more so as people get them and posting pics and video to the group!!


Many thanks for posting this … it’s good to see the machine to get a feel of how it comes … looking forward to your next steps!
You are a hero for posting this… I’m a part of the second shipments group and I’m dieing to get the machine… Nice to see the person responsible for giving you permission to buy this machine pop into the frame there a couple of times. Lol
Thanks for making that video. My machine has made it to Arkansas already on its way to Chattanooga, Tn. I hope to be doing the same thing by Tuesday…
If you are part of it you should post the videos on the Facebook mr1 owners group as well. Be interesting to see the assembly from a customers point of view vs at the langmuir shop.
Thanks for sharing! I am second batch. Still waiting for the email.
Look like you are well on the way. Please post more videos as you get it up and running.
Working on Pt. 3 assembly. Took 6 hours but could have been done in less had I done it right the first time.
Pt.4 is concrete. That was yesterday. Pro tip: limber up and you MUST do it with a helper. 1 mixes concrete and the other levels concrete and taps with a hammer. Had to make an emergency call to the father in law for help. Fortunately I’m on the other side of it and my head is no longer the densest thing in the garage ![]()
@MrmachineTX Can you share some pics of the concrete? I’m sure folks would love to see how it came out.
And yes we agree, the concrete step takes two people.
By far the hardest part of the build was the concrete, but only because concrete is… concrete. I have poured 3 bags of concrete in my life so I was a bit worried I would mess something up. I repeat: do it with help. 400lbs of concrete does not mix itself. also use a concrete basin, not a 5 gallon bucket.
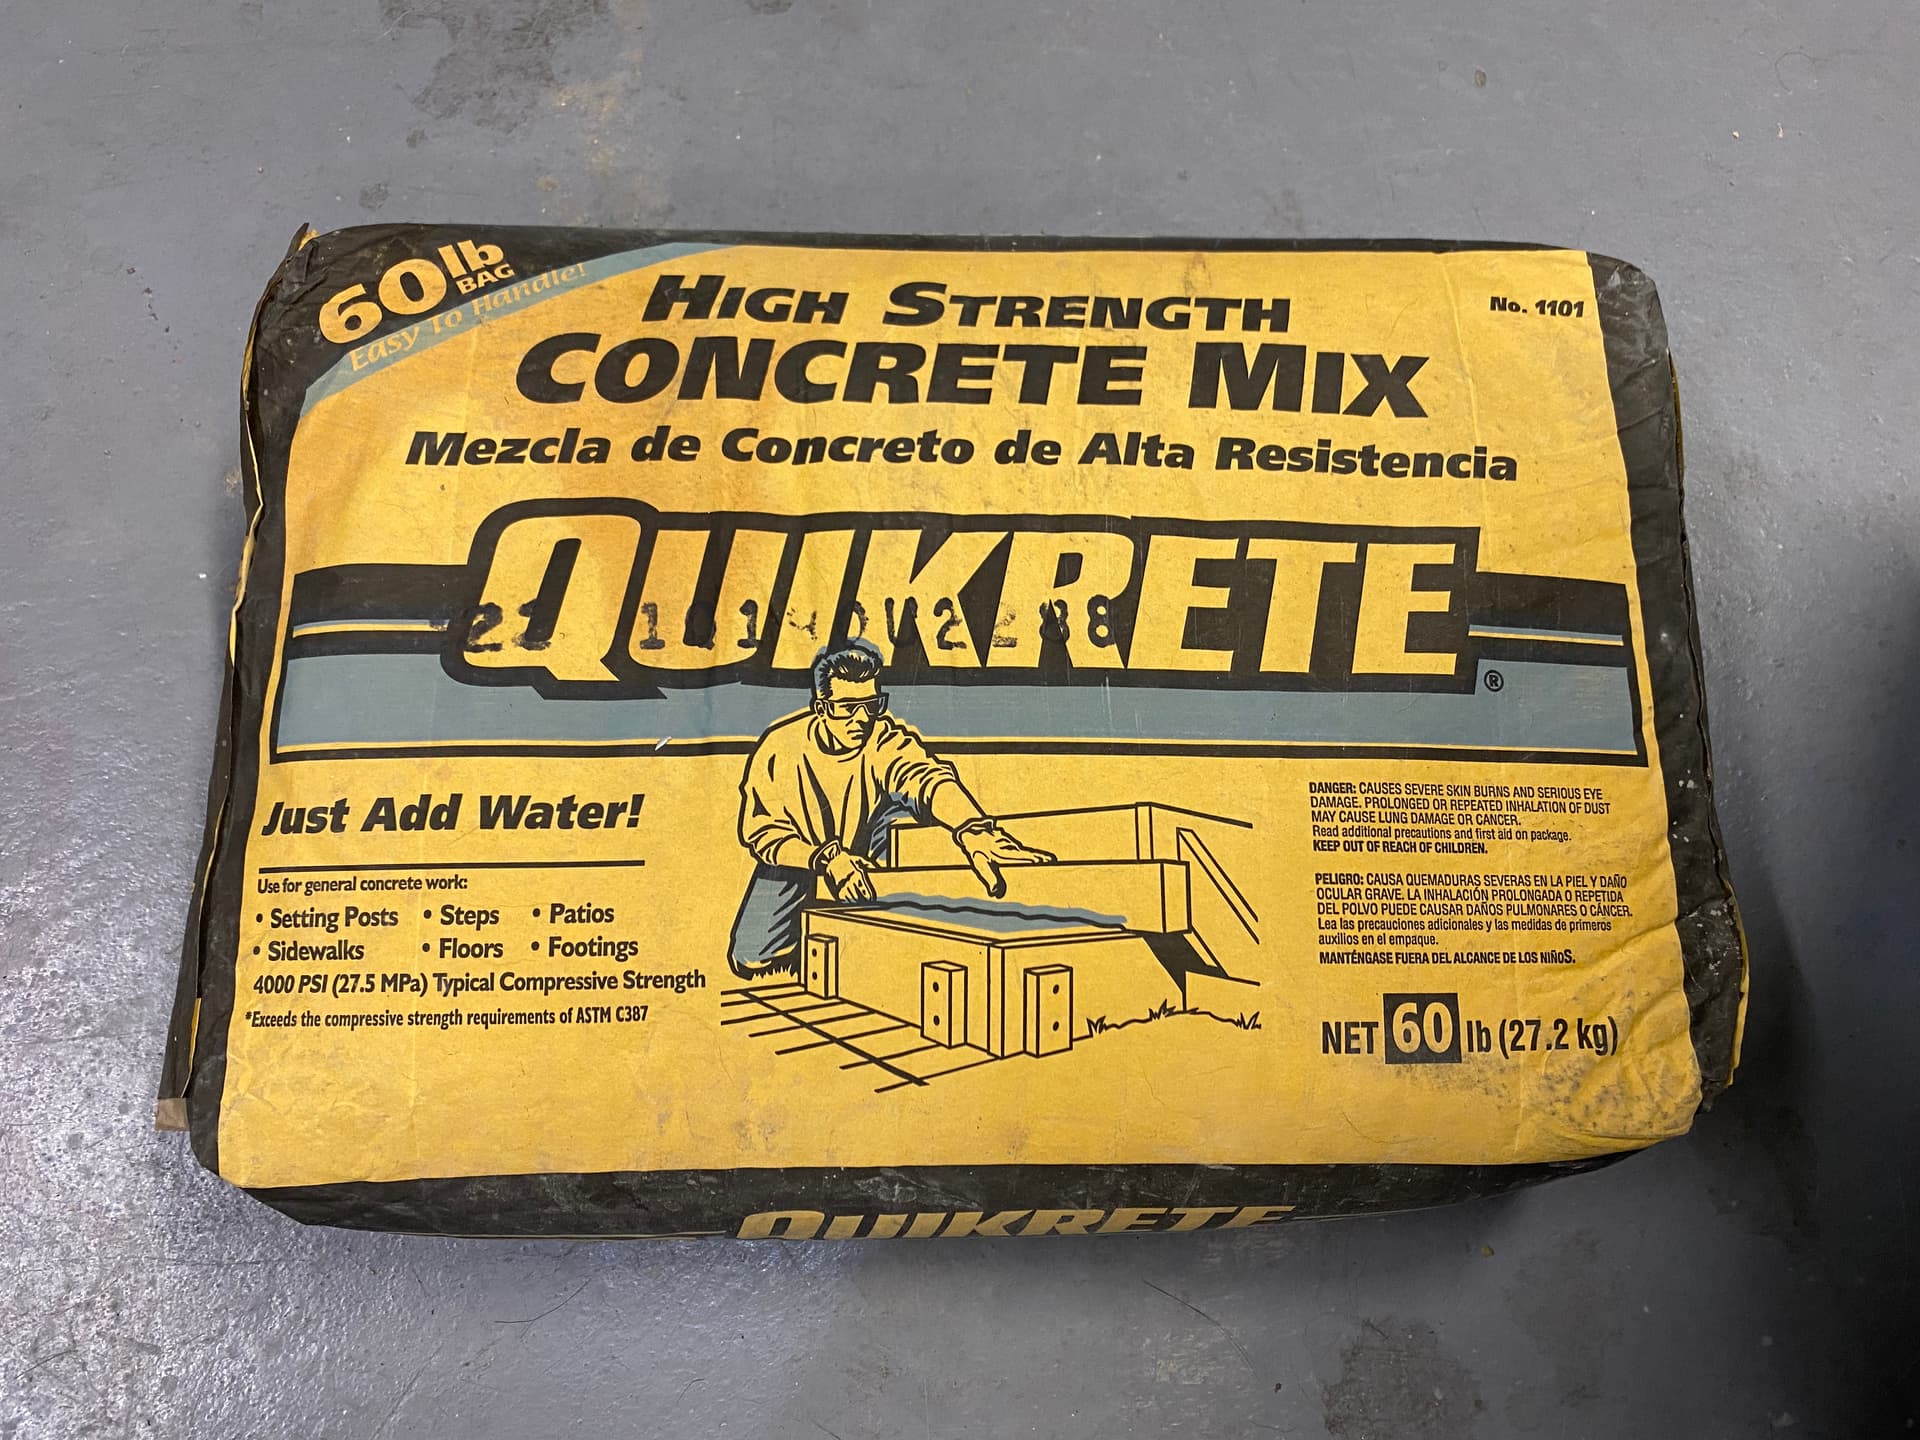
Image below is the concrete I used. no sugar. tap water, 70 degree tap water from the tap, no fiber reinforcement. Just don’t over think the process. I believe everything can be shimmed post concrete. Please note: The instructions say to use 5 pints of water per 60 pound bag, when mixing it seemed very dry, but when tapping it with a hammer and leveling it, the water rises to the top. Use judgement but under no circumstances use more than 5.5 pints. I think I sopped up a half gallon of water at least because “I knew better”. I purchased 8 bags but only used 7. (Langmuir Systems Note: The 8th bag will be necessary to get to the correct concrete level. see below for more info).
I mixed and poured while father-in-law leveled and tapped with a hammer. at this point I thought I might make a good mason.
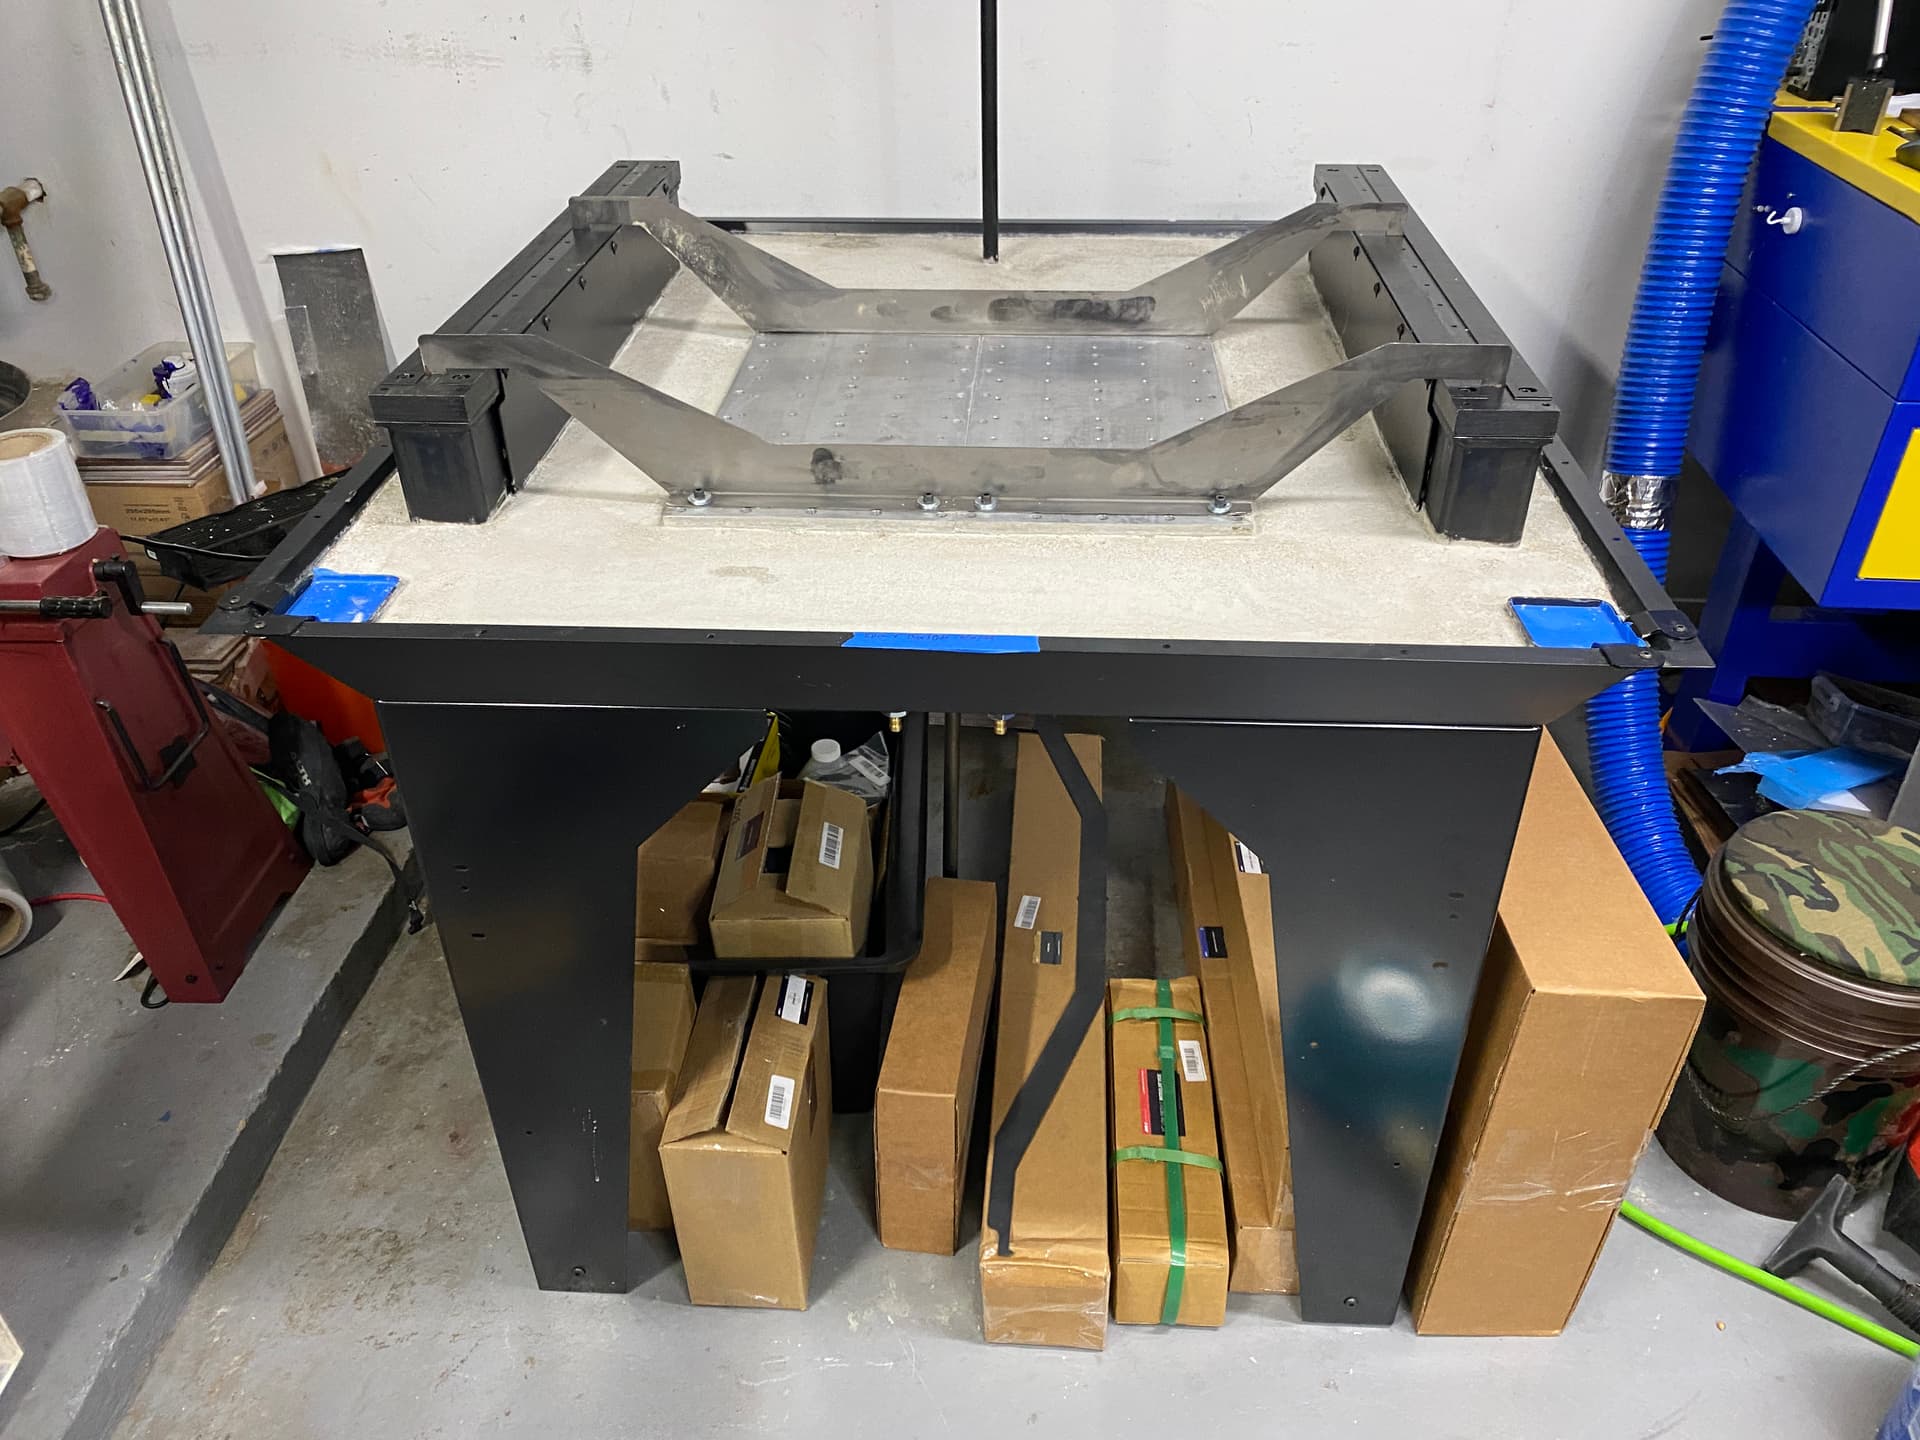
while letting the concrete dry I used this time to relocate all of the boxes under the machine.
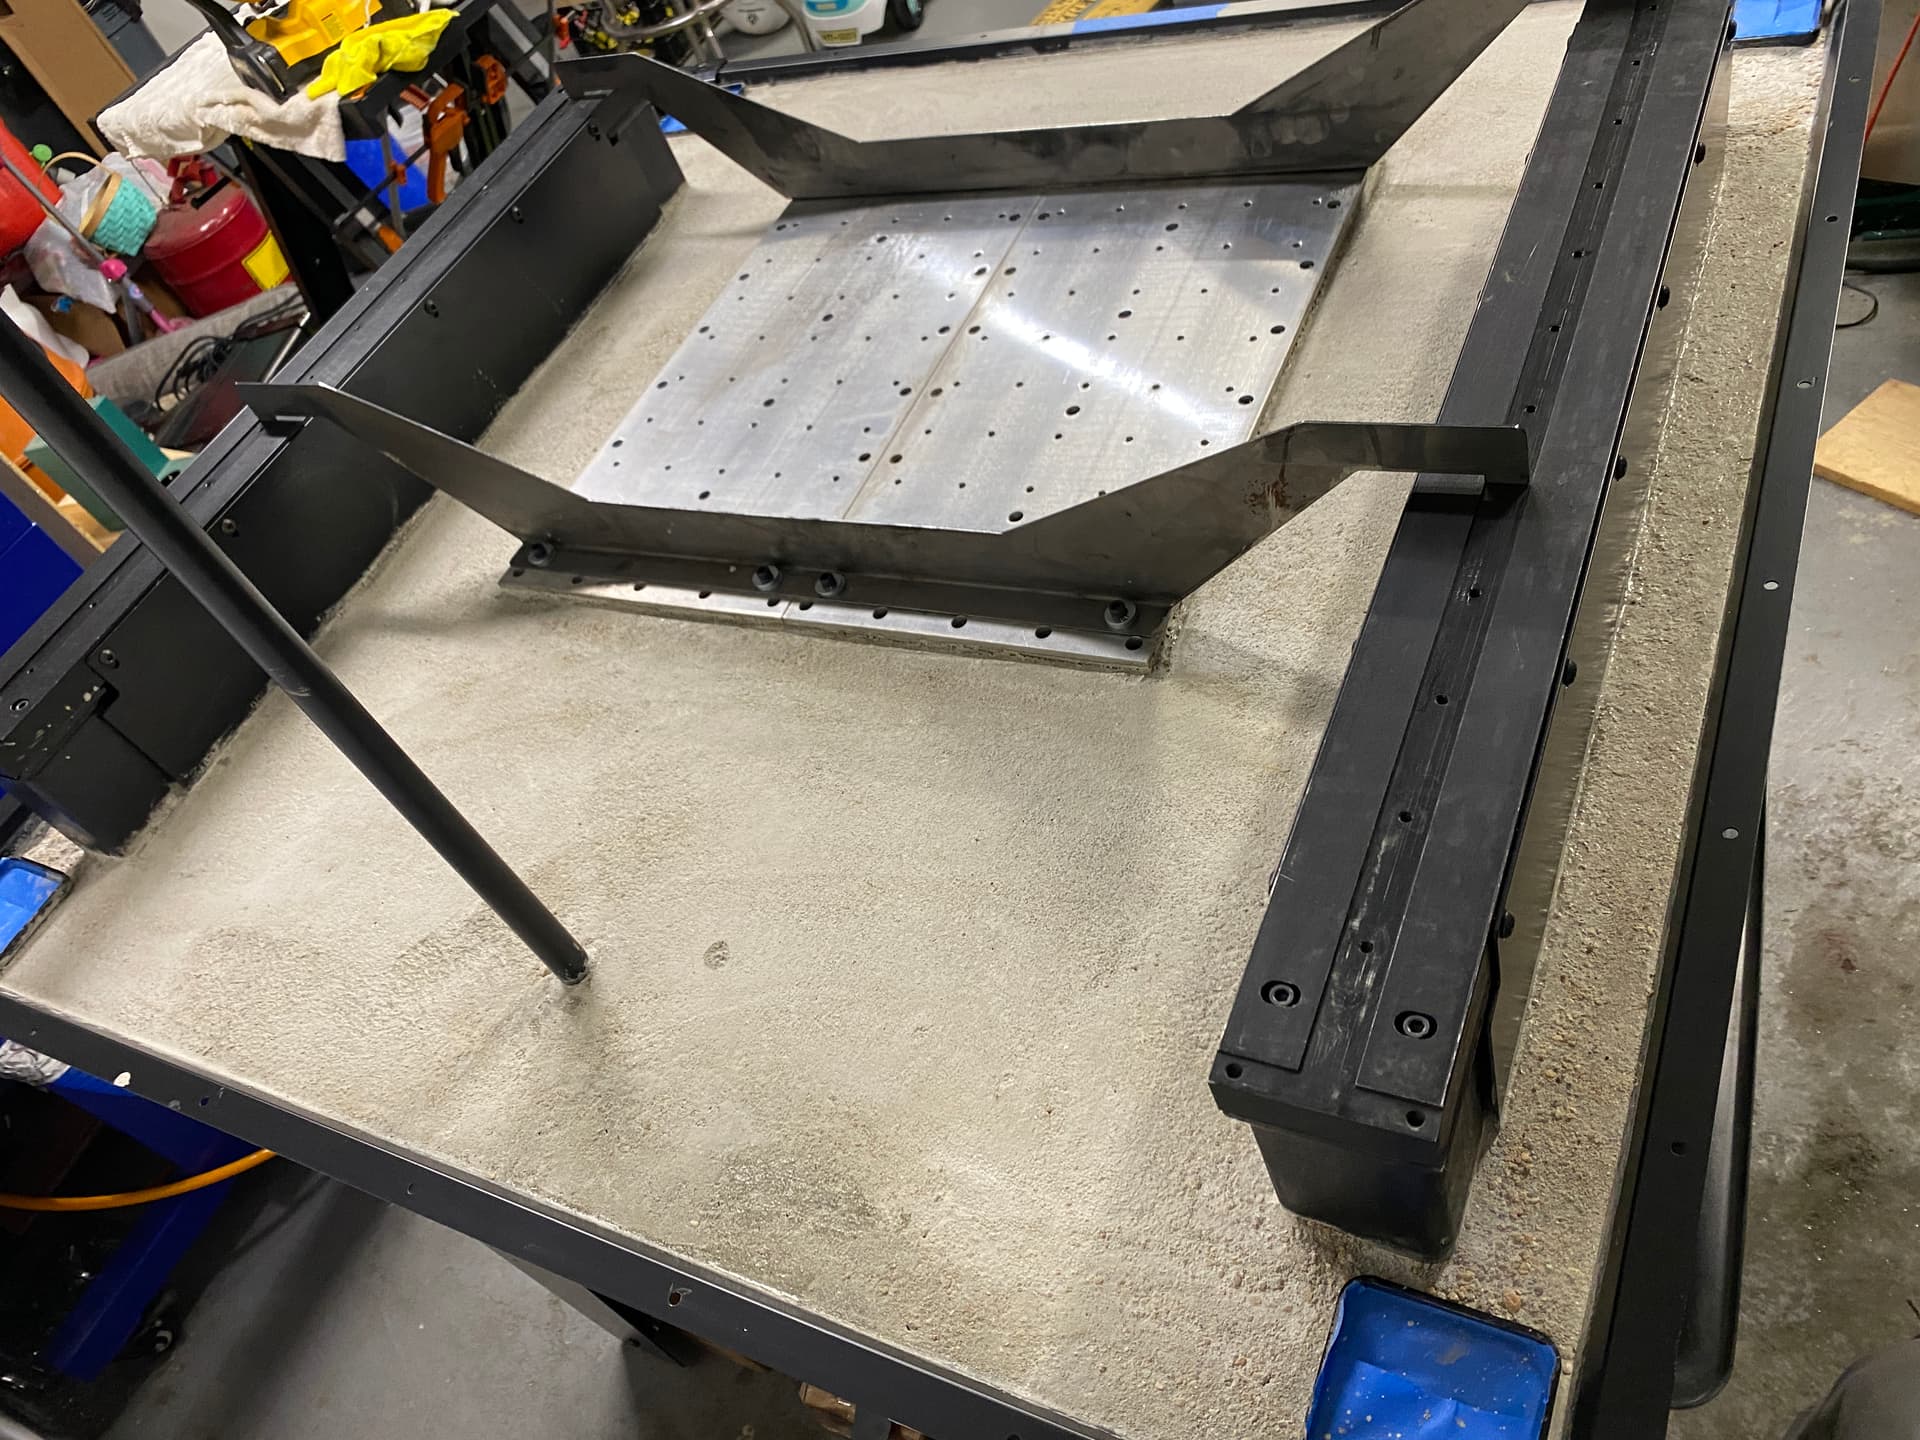
you have a few hours to make and fix all the mistakes in the world. Shaking the table and tapping with a hammer really helped sort out the high spots and remove bubbles. when you are done tapping and leveling you should wipe down all the surfaces to remove concrete splatter from all the painted parts of the mill.
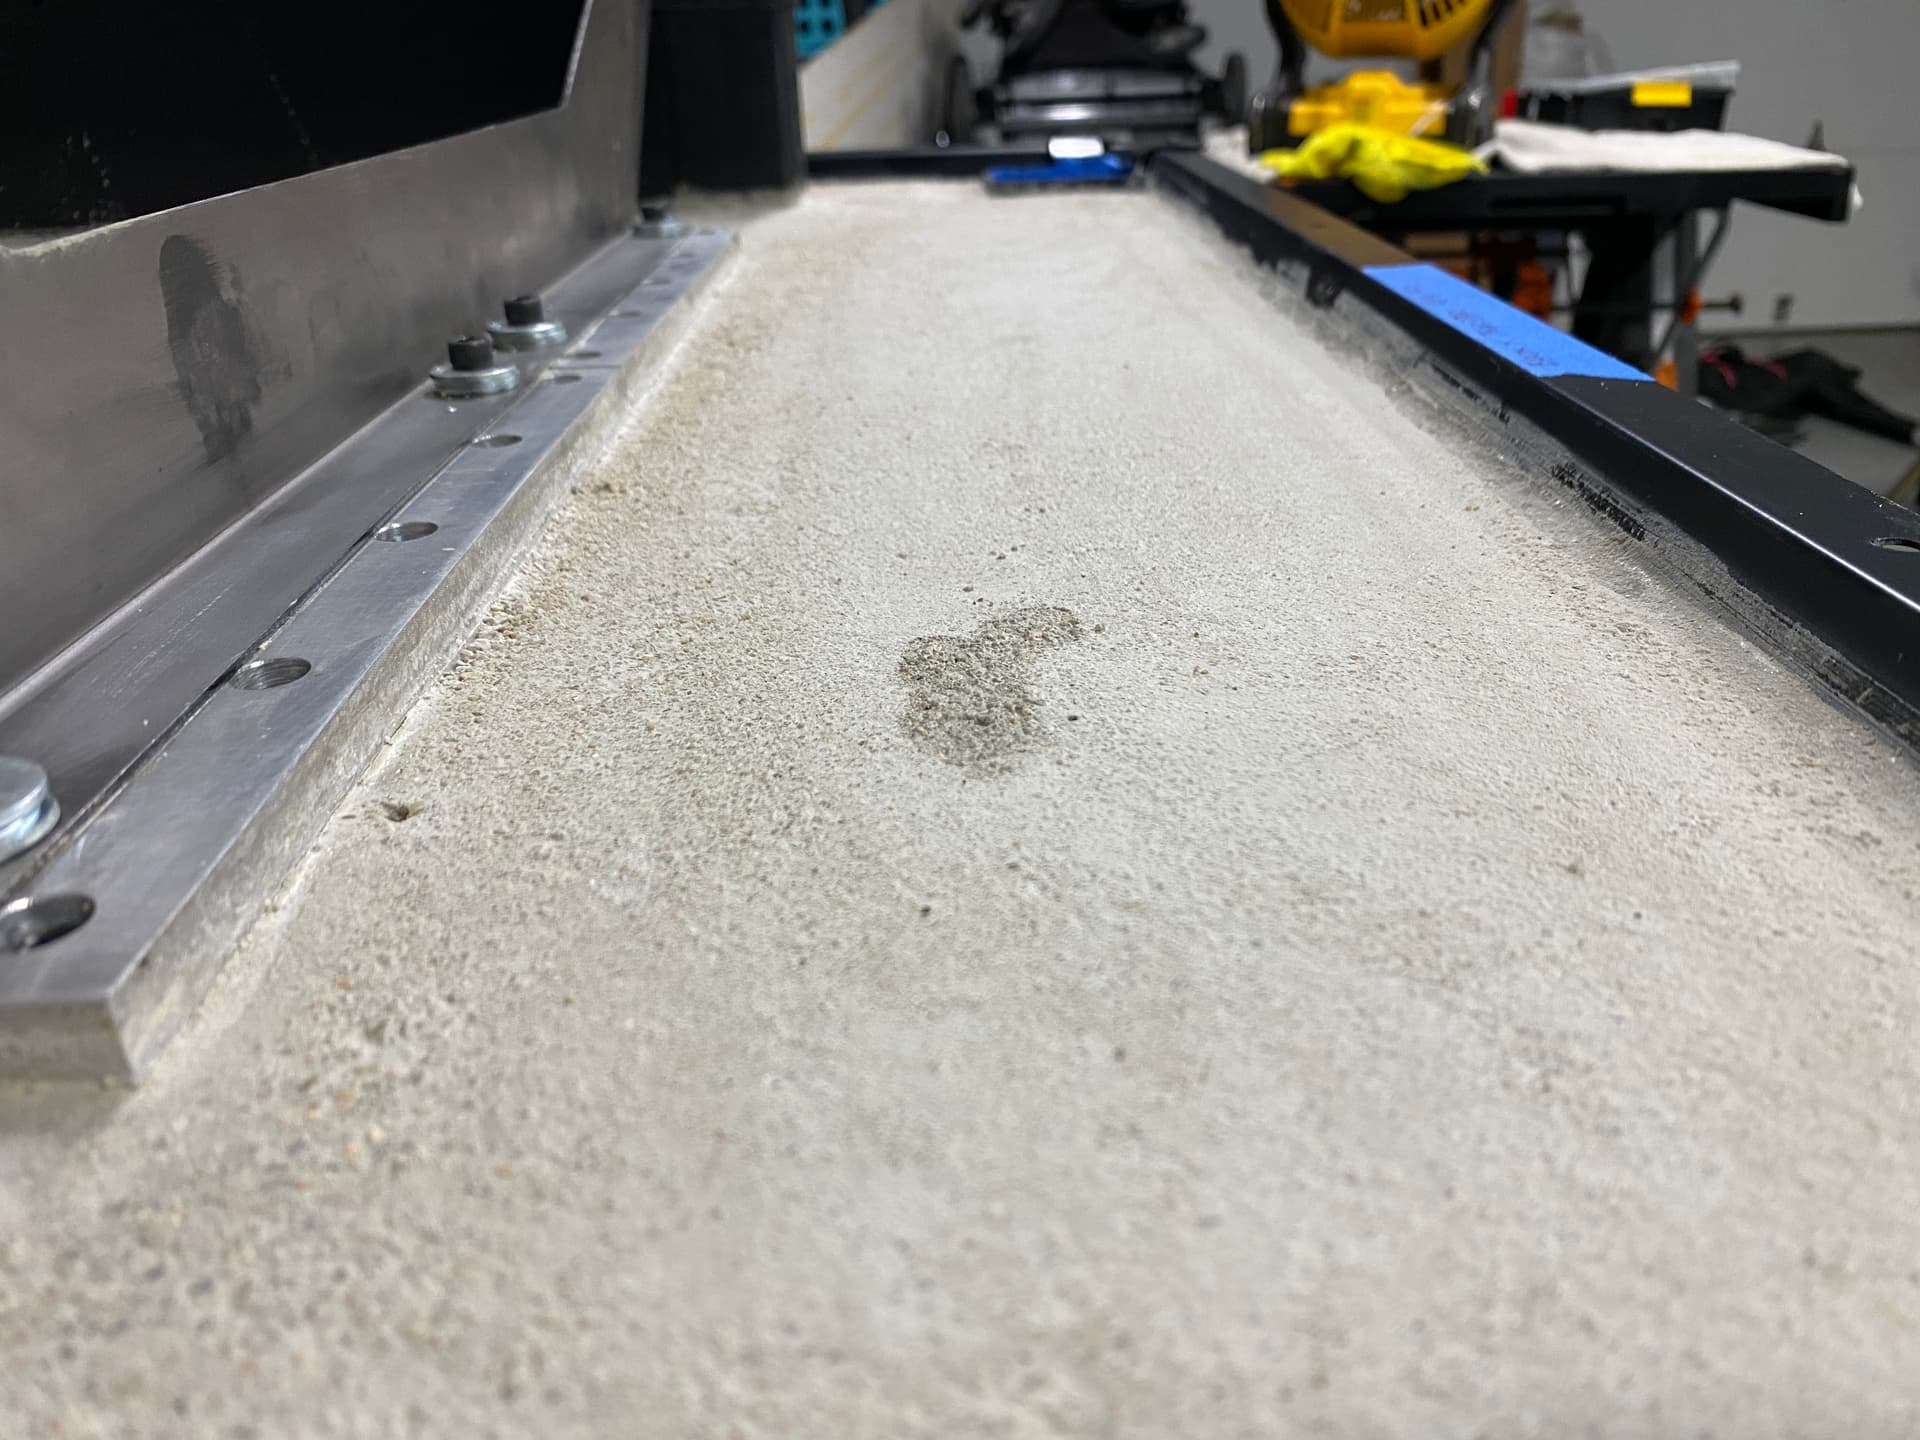
After mixing 400 lbs of concrete I let 2 beers of time pass before using a 1.5" trowel to push the larger pebbles down. After 3 hours post concrete… don’t touch the surface or you will get a smudge (image below). Fortunately Epoxy will cover a multitude of concrete sins and this should turn out 100%.
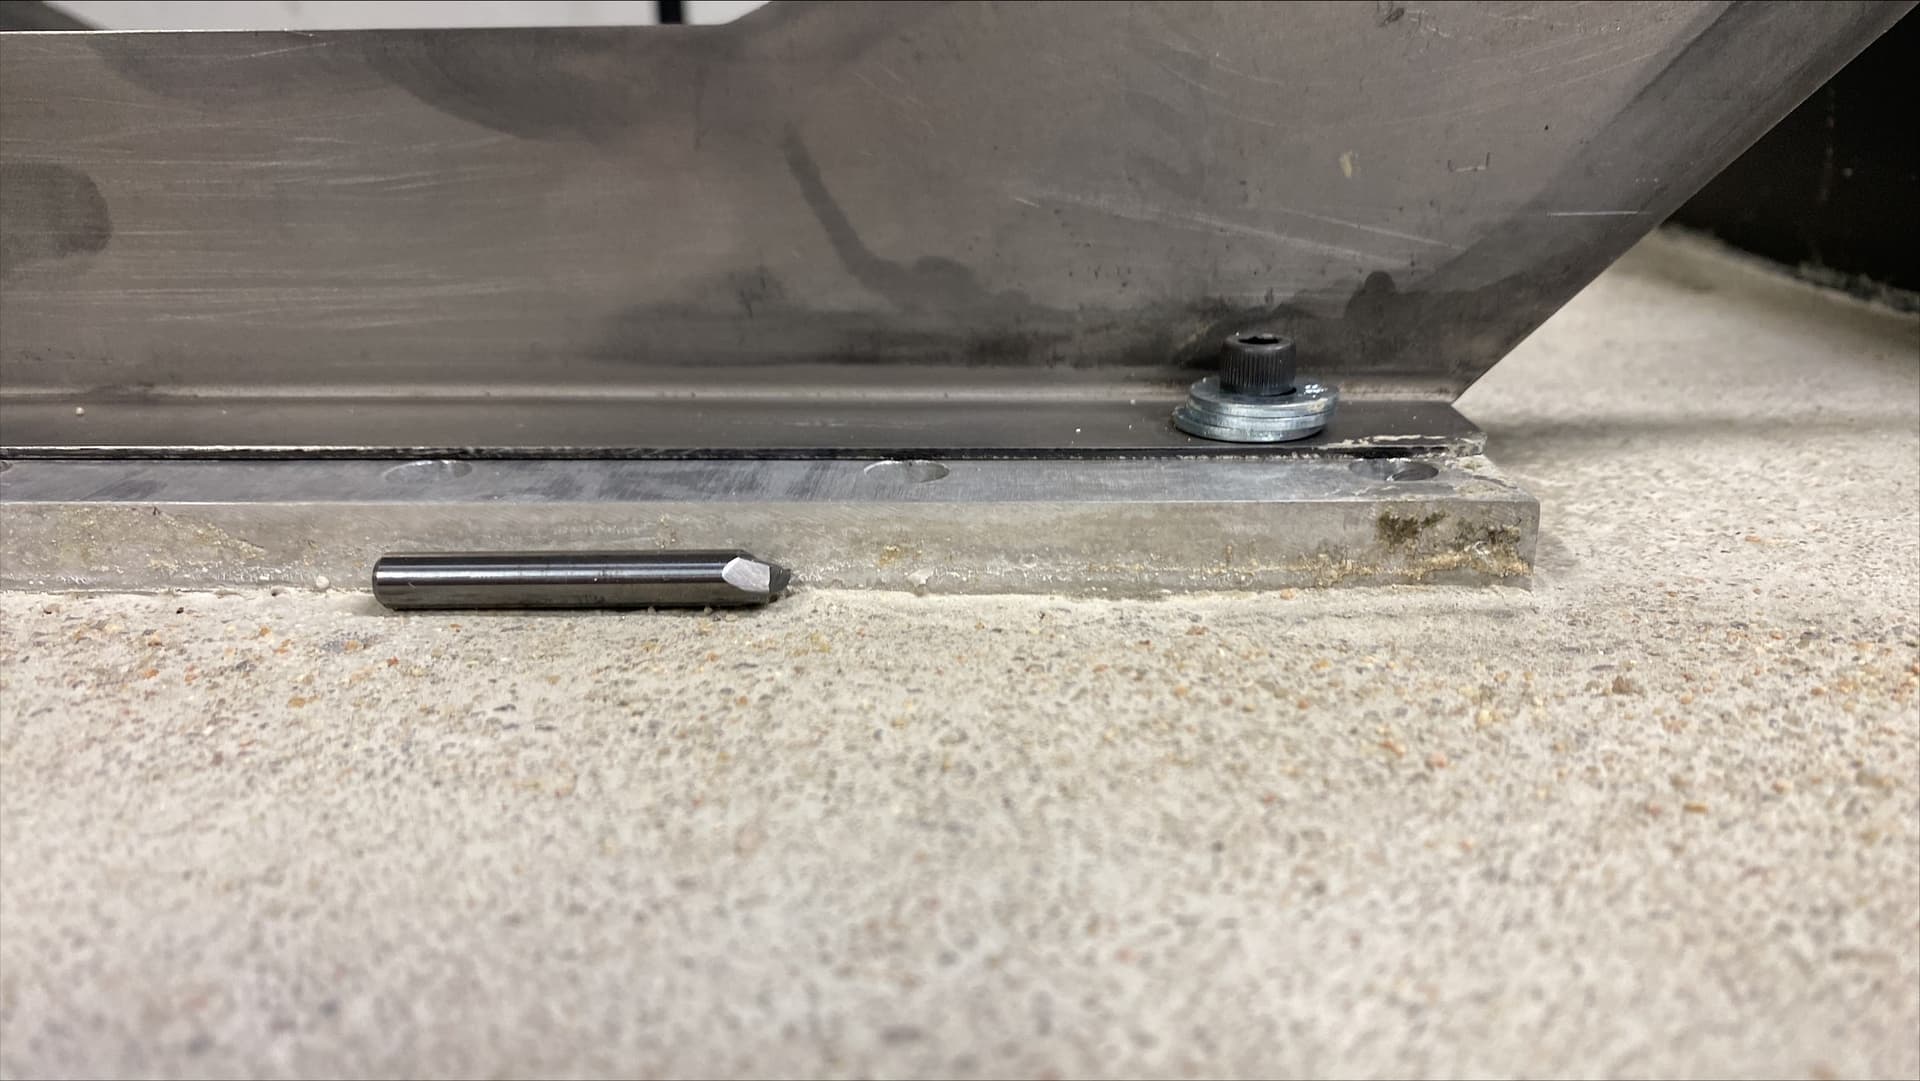
.25" endmill for reference of how far my platform is out of the concrete. also about .25" below the lip of the flood coolant cups. (Langmuir Systems Note: The concrete level shown here is slightly lower than the specified height in the assembly manual. If you plan to use the epoxy kit later, the correct concrete level is such that the concrete lies 1/8" below the corner drain top surface and the aluminum baseplate should be protruding from the surface of the concrete by about 3/8" to 1/4". If you are not going to use the epoxy, the concrete should be troweled flush to the corner drain top surface so that coolant will drain smoothly into the drains.)
5 days to let it dry. For me that is this Thursday. 1 day for epoxy cure, I may be looking at making chips this Saturday!
BTW: Please give me your feedback and ask all the questions you want. let me know if you want to discuss something specific.