I just bought this PRO system with the Razor45, so everything is new and up to date. I’m working with 3/16 mild steel. This first project was going smooth until about 1/3 of the way into it. It stopped and a window appeared explaining, Torch moving before cutting voltage sensed
Here’s what I noticed. From zero, upon restarting it, the cutter goes back to where it left off, but appears to start the torch before it even reaches piercing height. Then it lowers, and after a second, the torch stops, while the air continues until it times out. I’ve tried unplugging the computer, set razor at 75 psi, pierce delay is 0.7,cut height 06 and pierce height .15.
I was working on some advice, but it looks like it dried up for some reason. I feel like I somehow ran everyone off. I will share any details asked about additional settings to avoid an avalanche of useless information.
Have you been cutting 3/16” with a 0.7 pierce delay for long, or are you new to cutting 3/16”?
I would up the delay to maybe 0.8 or 0.9 seconds.
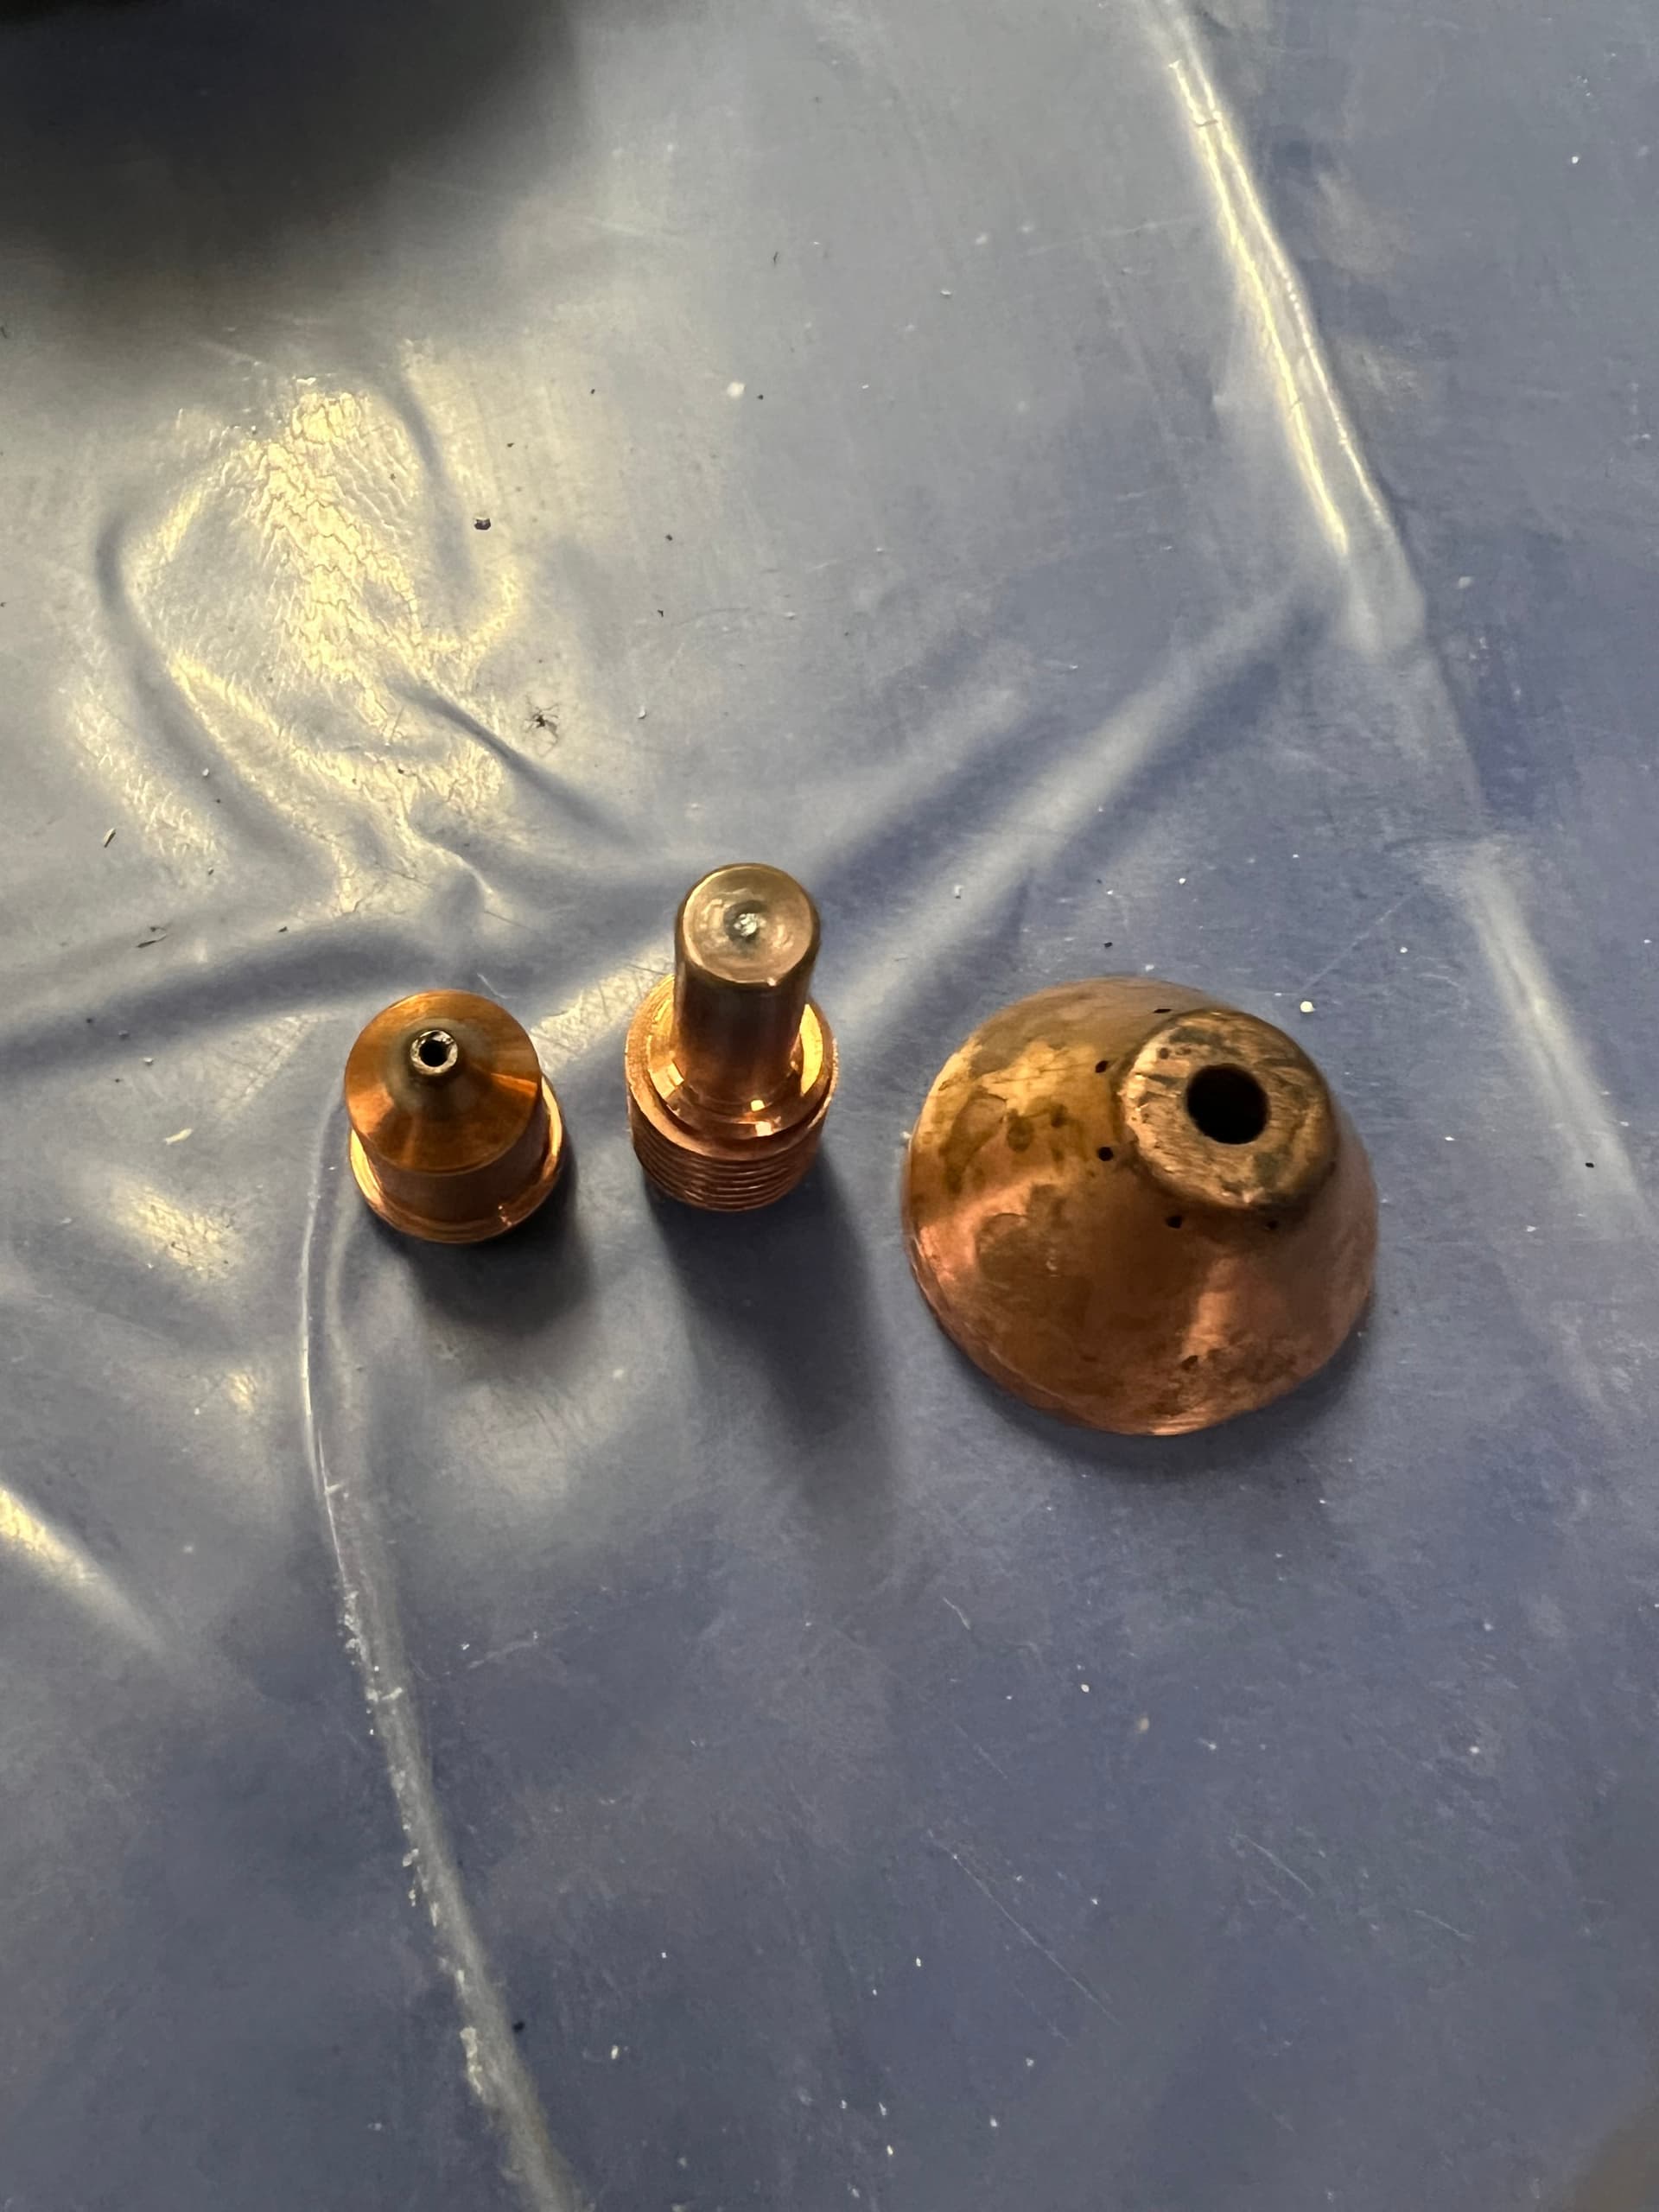
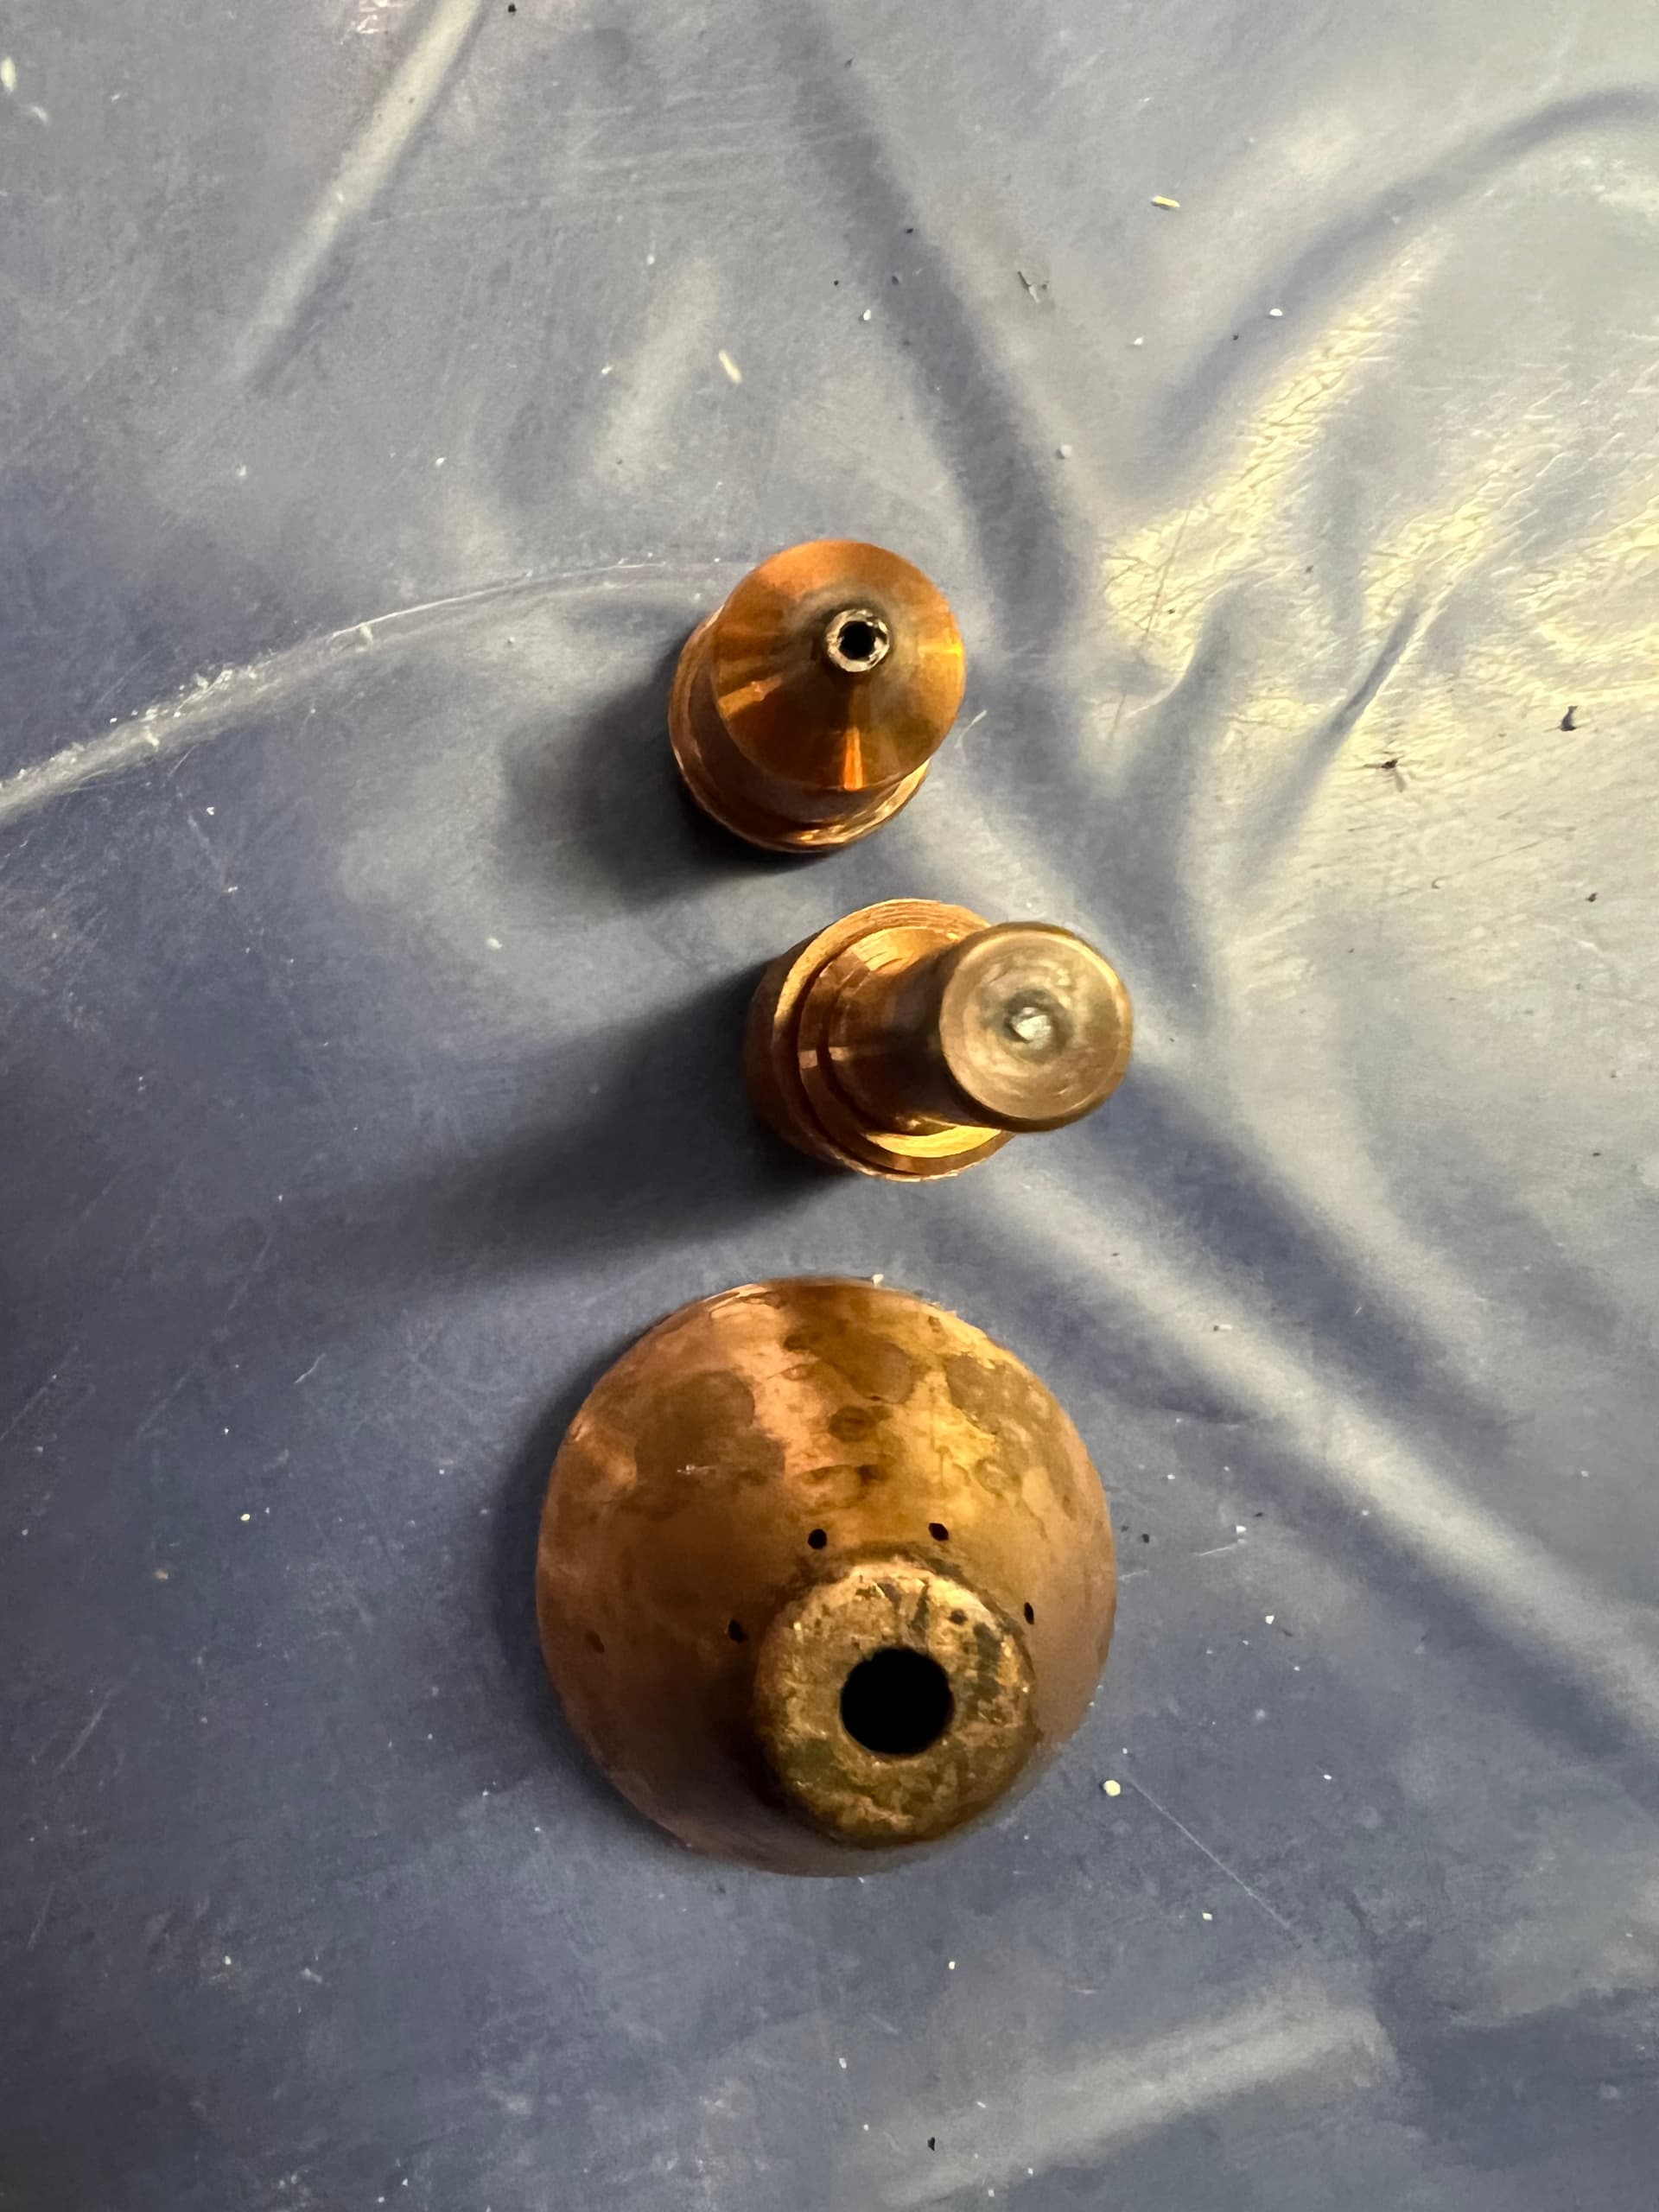
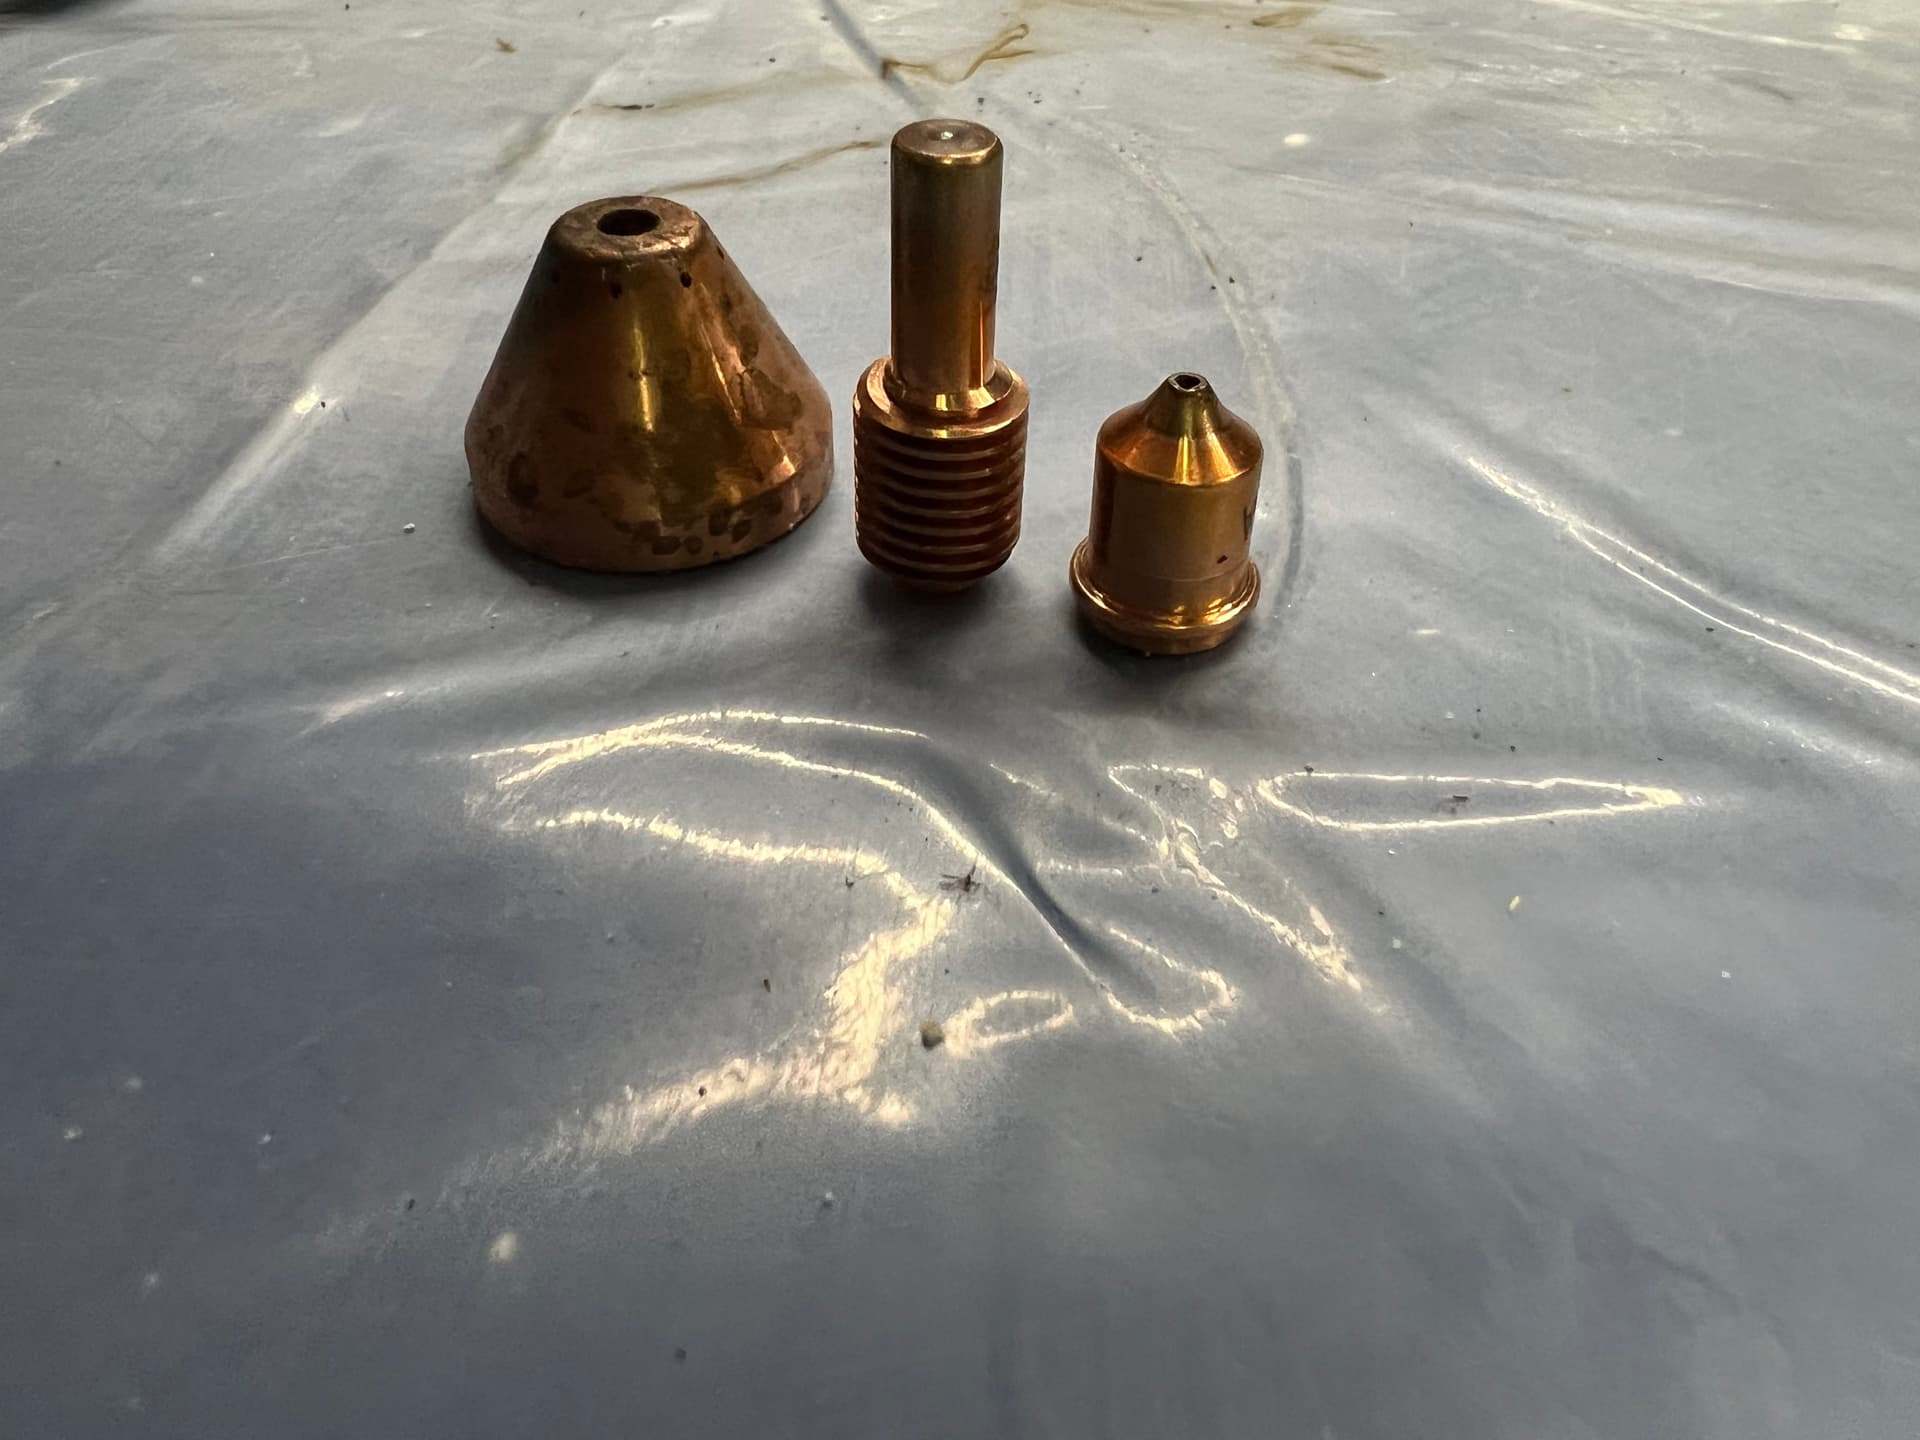
Post pictures of your consumables; not knowing how well your air setup is I would say moisture could be playing a role as it leads to inconsistent cut results.
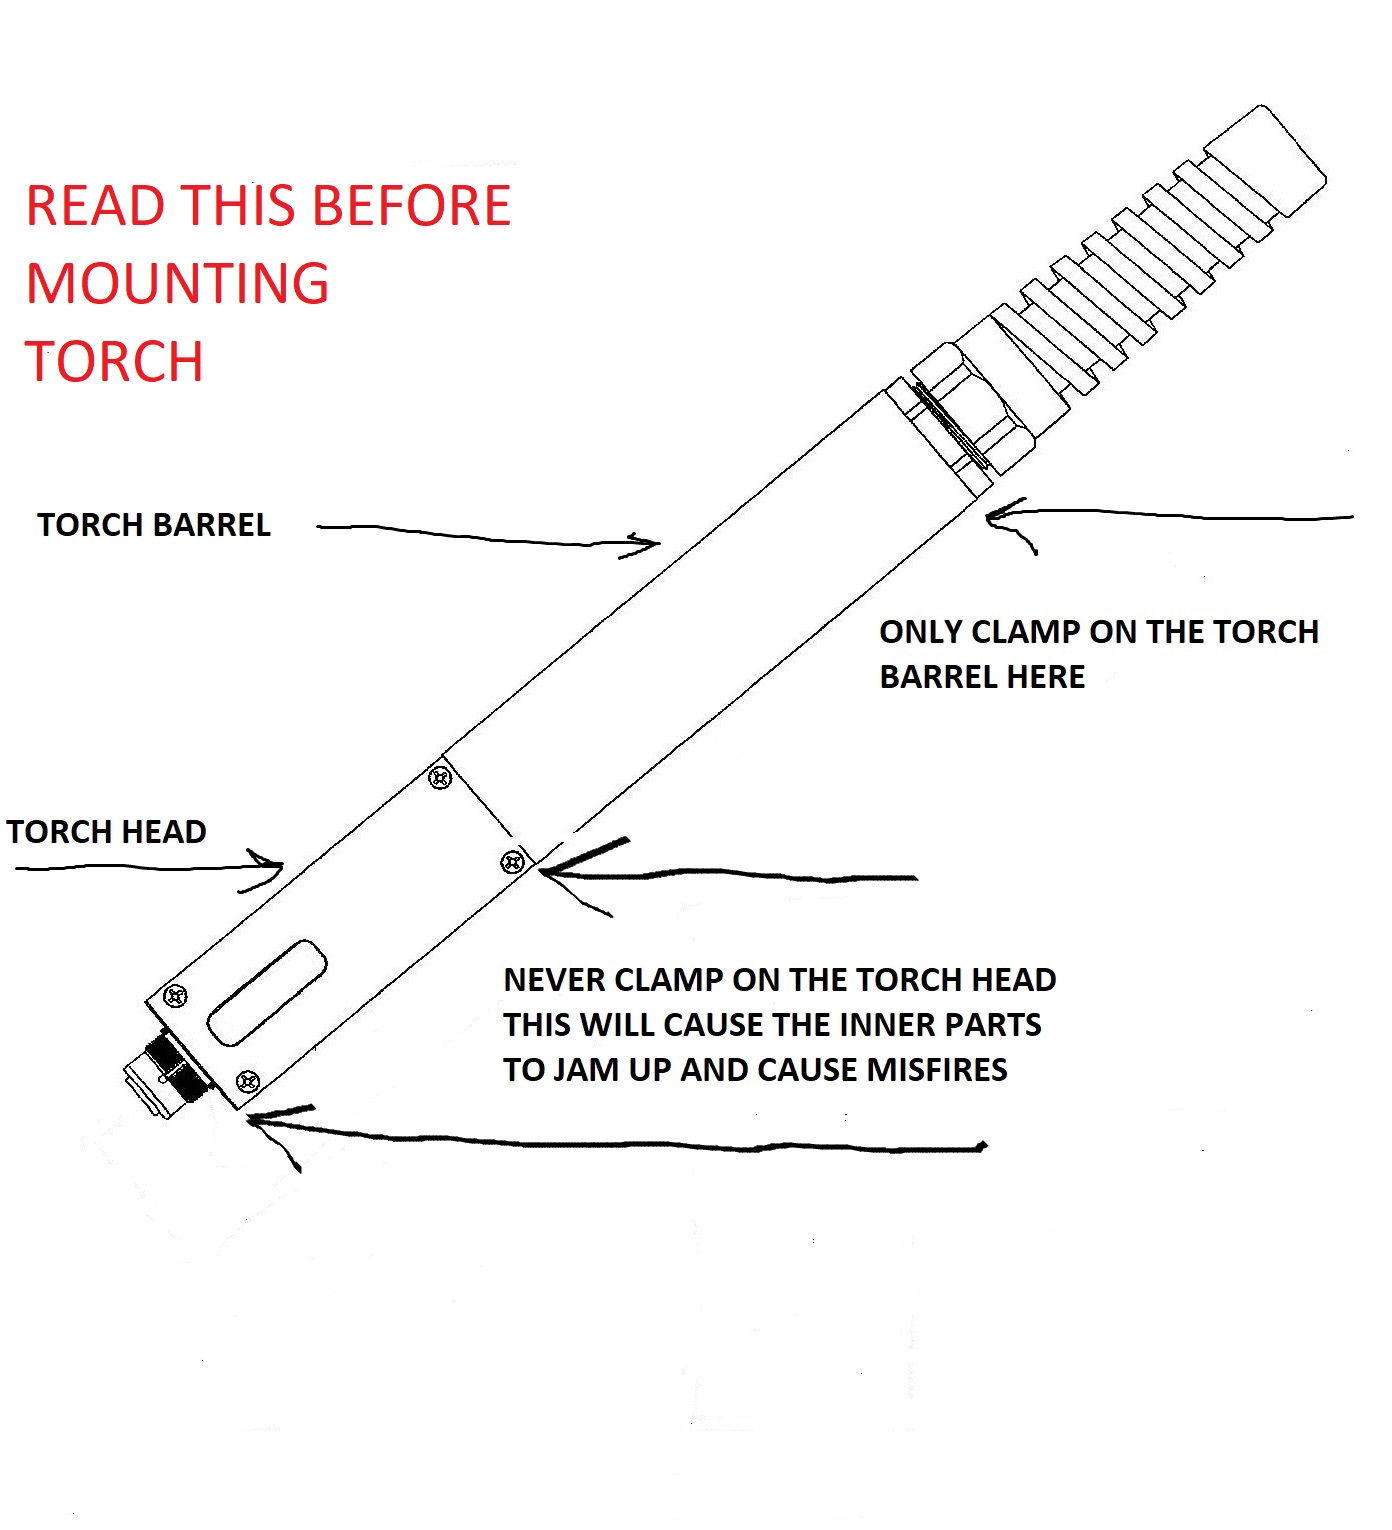
And is that a machine torch or hand torch? I ask because I see the thumb screw peeking out the right side and this caused an issue for one member in the FB group as it was digging into the torch head while clamped down in the holder.
This is by far the most posted illustration on the Langmuir Forum. Why it is not on an addendum that you must sign when buying a table is beyond me. Just kidding
Thanks for the quick response. I had the pierce set for 0.5 but was advised to move it up to 0.7. I’ll try 0.8 and then 0.9. I will get some images after coming back from dinner. But I could not detect any water releasing from the separator. I have the second separator located 5 feet from the cutter. The torch is the vertical machine type. I didn’t like the thought of a handle hanging over the work area. Going out to eat.
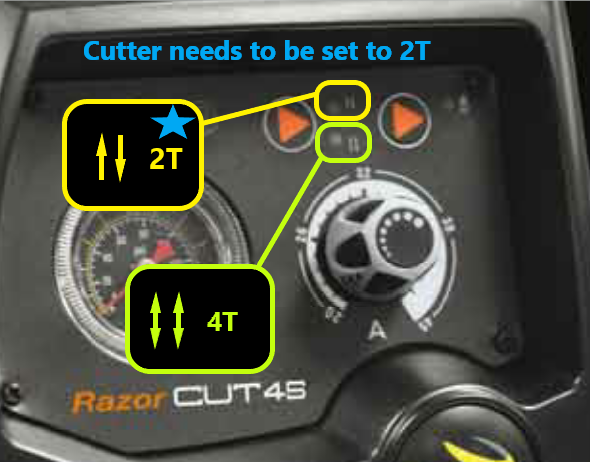
When you get back, confirm your plasma cutter is set correctly as @Bigdaddy2166 mentioned above.
And as we both stated, your torch isn’t set up correctly - you’re clamped around the torch head for one, and the second issue being that large thumbscrew.
You’re provided an allen head bolt to replace that thumbscrew as there is no reason to remove the machine torch once installed. The large thumbscrew is meant for hand torch use only.
The gauge reads 3/16. You were right about the T2. Somehow it was on T4. Thanks for the images. It is installed correctly now. The bottom was not finger breaking tight on the clamp. I replaced the thumb screw with the allen and adjusted the torch position. For the last 40 minutes I’ve been trying to load or email, message or bt the parts images from my crappy phone. I’ll probably bring the laptop out there and use that camera. This freakin pnone!
@mechanic416 George owns a plasma shop in Delaware. He only sells the good stuff and is a major contributor to this forum. He forgot more about plasma than anyone I know. Fact
I buy everything from him. You can PM him here or look up George’s plasma shop on eBay.
No buying from plasmadyne or Amazon. Chinese junk..
Thank you for the heads up and advice. George will be my goto guy from now on.
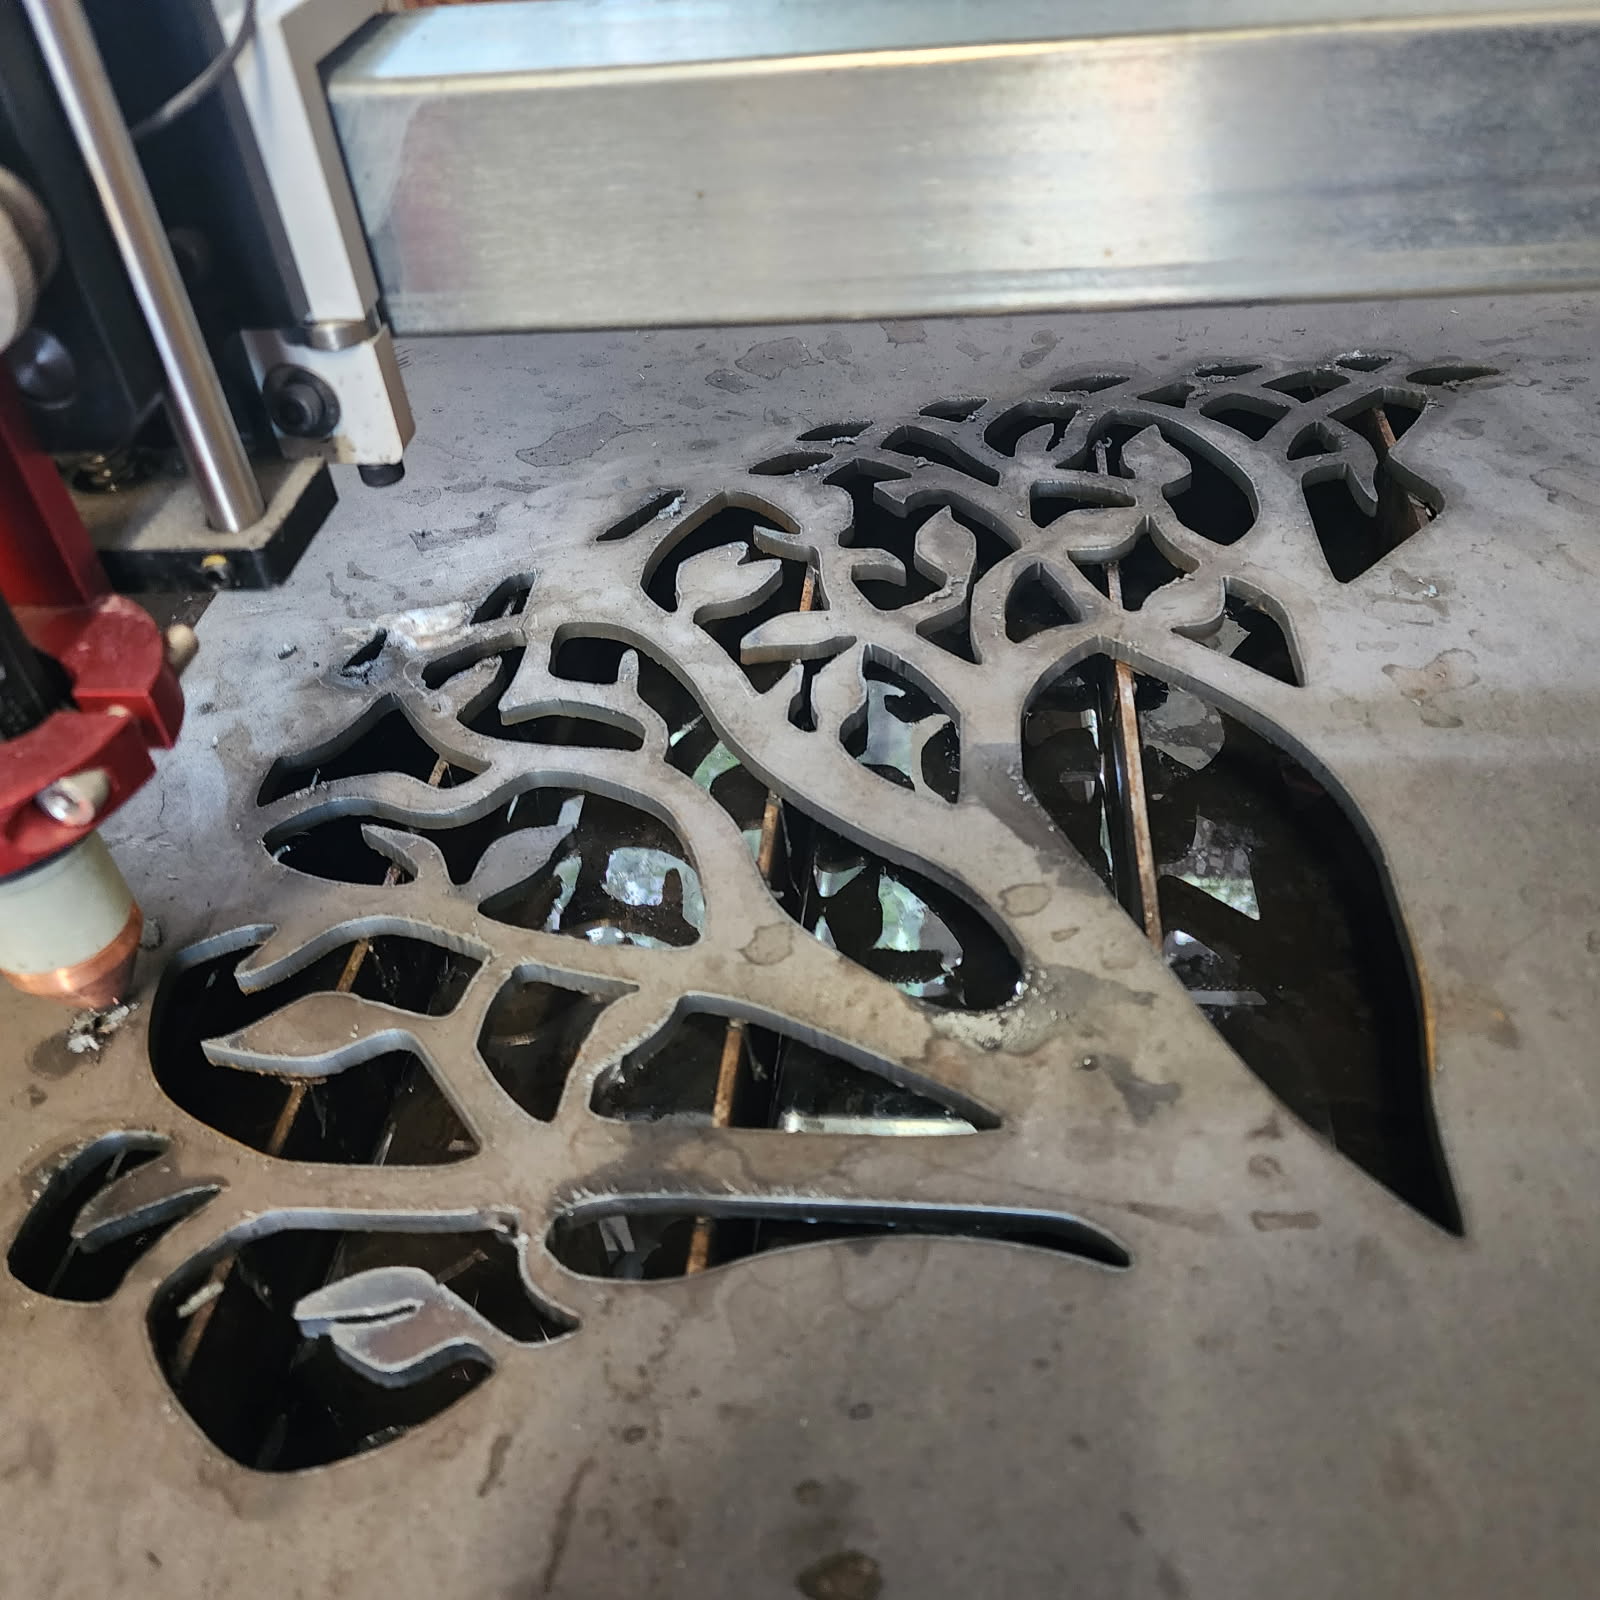
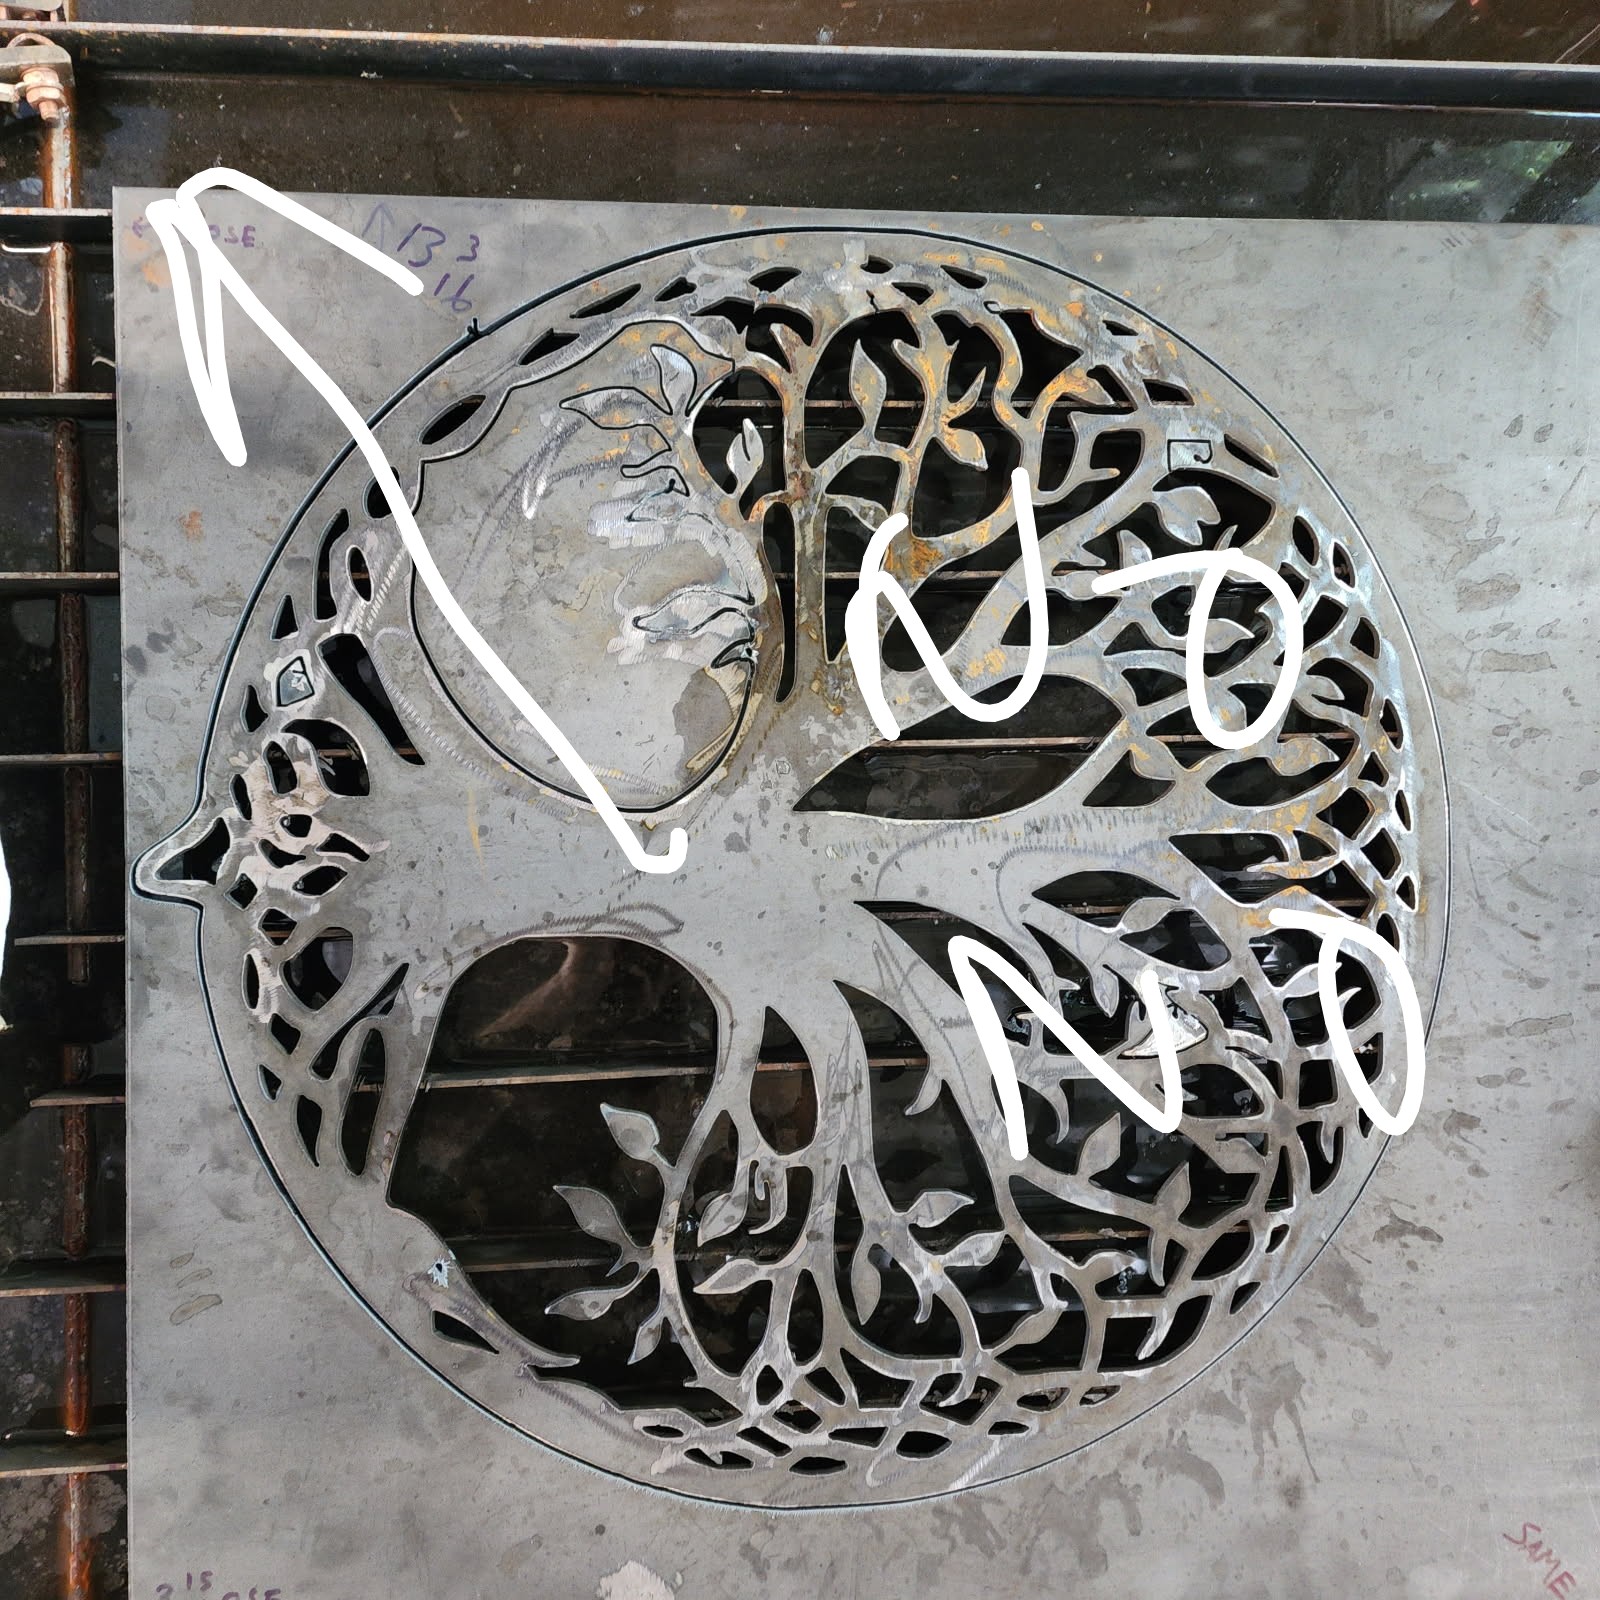
So here are the results of the first almost successful run. After finishing the program, I slide it out to inspect and clean. A couple of spots failed a full penetration. I slid it back in, hoping to hit those spots one more time. I zeroed the torch, located the line number and entered it for a dry run to be sure, then ran it. It began a pierce, BUT quickly stopped, displaying the same message as last night. It looks like everything is in order. So I’m lost again.
Also, I was kind of expecting this next one. The compressor and the cutter working together on the long final outer cut flipped the common breaker leading out from the house. The individual breakers in the shop are fine. I flipped it back on and finished the last several inches of the circle. This happened BEFORE trying to recut the failed penetration. It is possible the failed penetration is related to this condition. So, until I can change the wires from 10 to 4 or 6, I’ll have to pause the program during compressor intervals. For now though, I’ll just hand cut those pieces with a different cutter.
For the final glitch. When homing the torch, it homes okay, but a MACHINE ALARM window appears, explaining the Cycle failed to clear limit switch. I watched it close both switches. The wires have not been damaged in any way and the switches are clicking. Connections are good. I’ll do some ohm tests.
That is a lot of signs to cut with many piercings.
Are we sure your compressor is not running out of air? 75 psi the whole time. As for the homing.
Disconnect the dam limit switches and turn them off in FireControl. You don’t need them at all. With the one exception that you are indexing a part larger than the table, they are useless.
500 threads on my table won’t home, which has to be a good reason to turn them off. They were only offered because several crybabies were slamming the carriages into each other. If you crash your machine at its limits, you have bigger problems.
30 amps in your shop? The compressor will be using half of that. No wonder the cutter is starving for voltage. Duty cycle issues will show themselves quickly.
Also you have the work clamp on a slat not on the metal your cutting.
I never said it was a 30 amp in the shop. The cutter circuit is actually 60 amps, and 30 for the compressor. The one at the house is also 60 amp, but I think it’s spent.