Cut quality - Bevel issue but just in one direction

I know this has been asked many times and I have read the answers. I still feel my issue might be a little different. Yes, I am new to this. I have a Crossfire Pro with the Hypertherm powermax 45XP with machine torch.

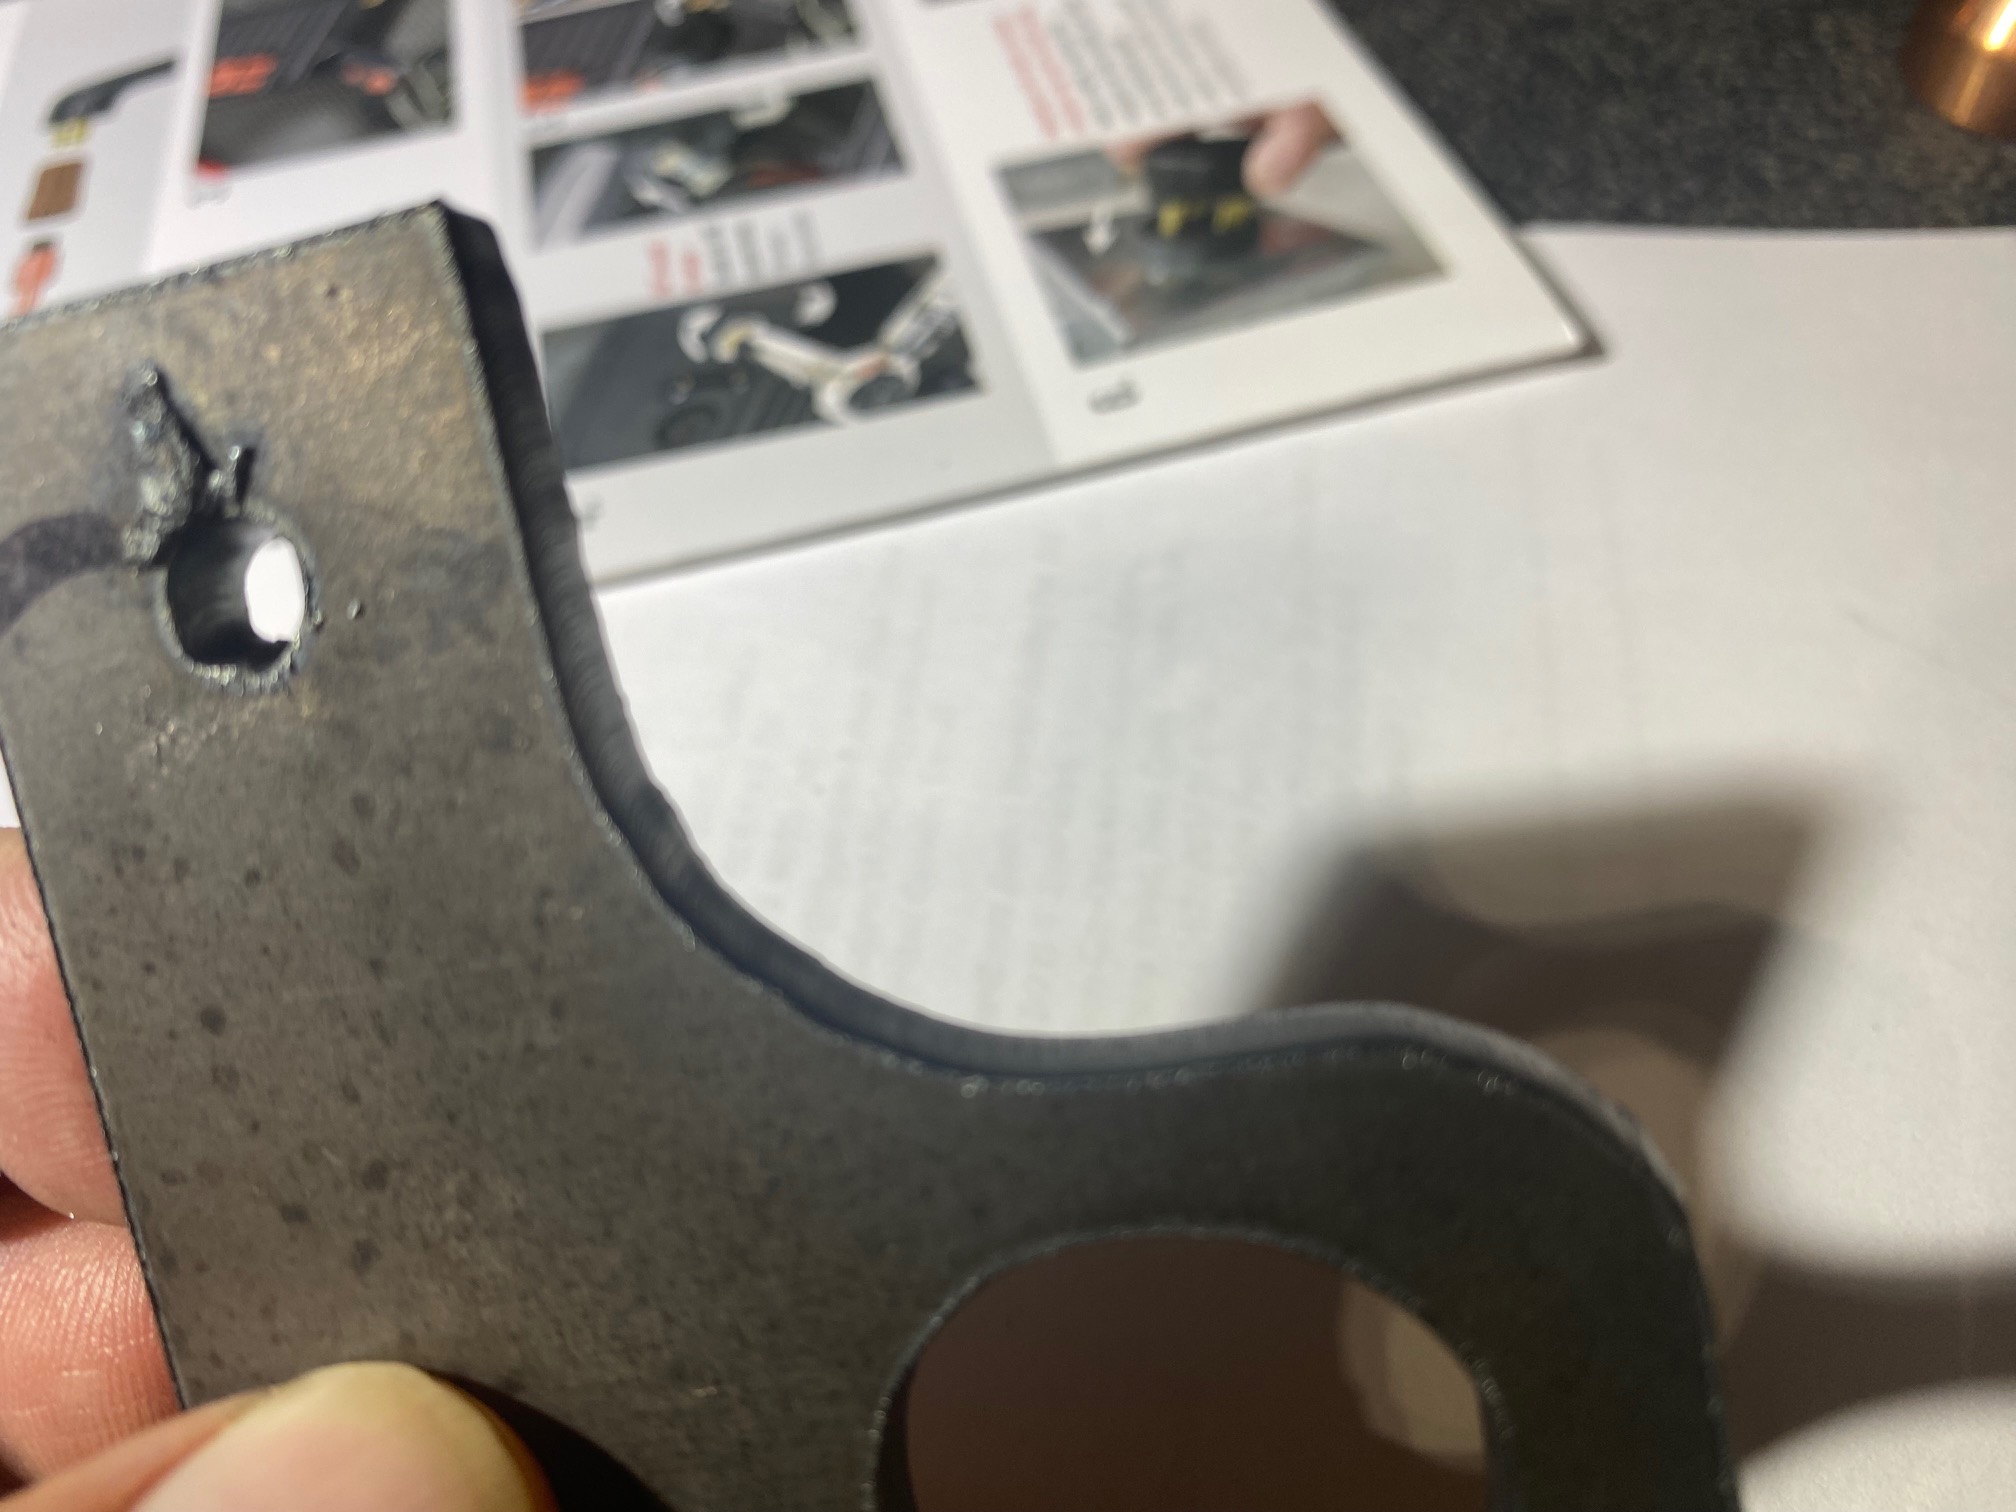
My problem is bevel but just on the Y axis. When the machine’s Y axis is moving, that cut is beveled to the right. When it moves along the X axis, the cut is strait up and down but the lines are sloped to the right. I put a plate on the table and used a precision square to check that the torch is square to the plate in both directions and it is. I can make the bevel change with settings but never go away. Always in that one direction.

I am cutting 3/16 mild steel. The cut height is 0.06. At first the cut height when paused was measured higher than that so I loosened the mounts on the torch mount and dropped the torch down to the feeler gages at 0.06 and then assumed that would fix the problem. Nope. No change.

So here is what I tried.

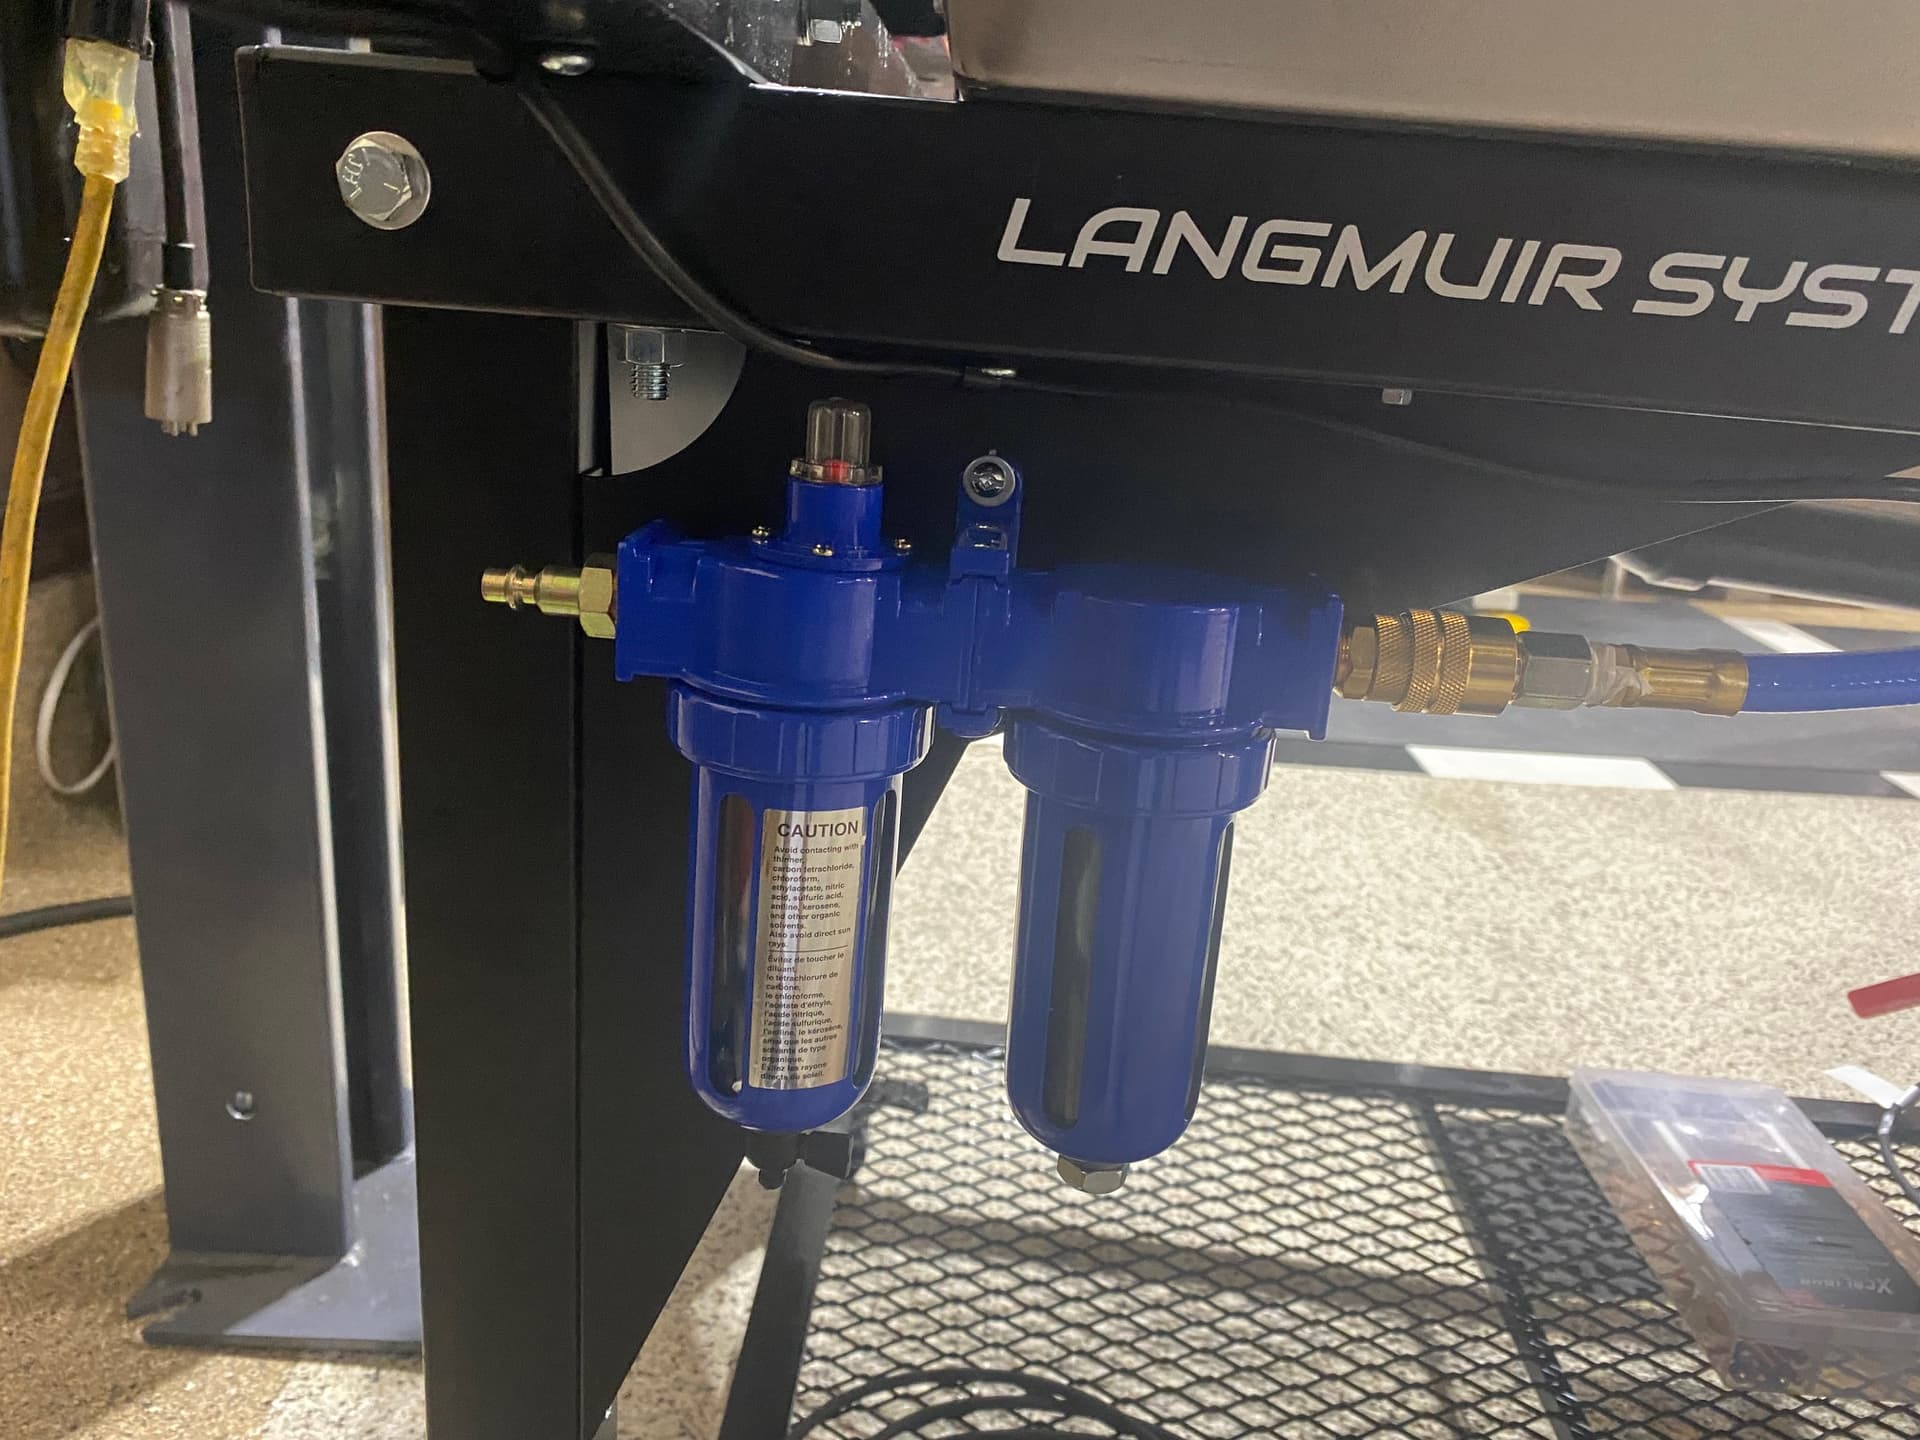
Air pressure is at 100PSI. This was not measured at the input of the plasma cutter as the air was flowing. It was just measured at the output of the air outlet used. The compressor is an 80 gal 2 stage so I assume it can keep up no problem.

I have two small air dryers in line with the unit.

Settings tried
Cut height 0.06
Feed Rate from 63 to 90 ipm (no change)

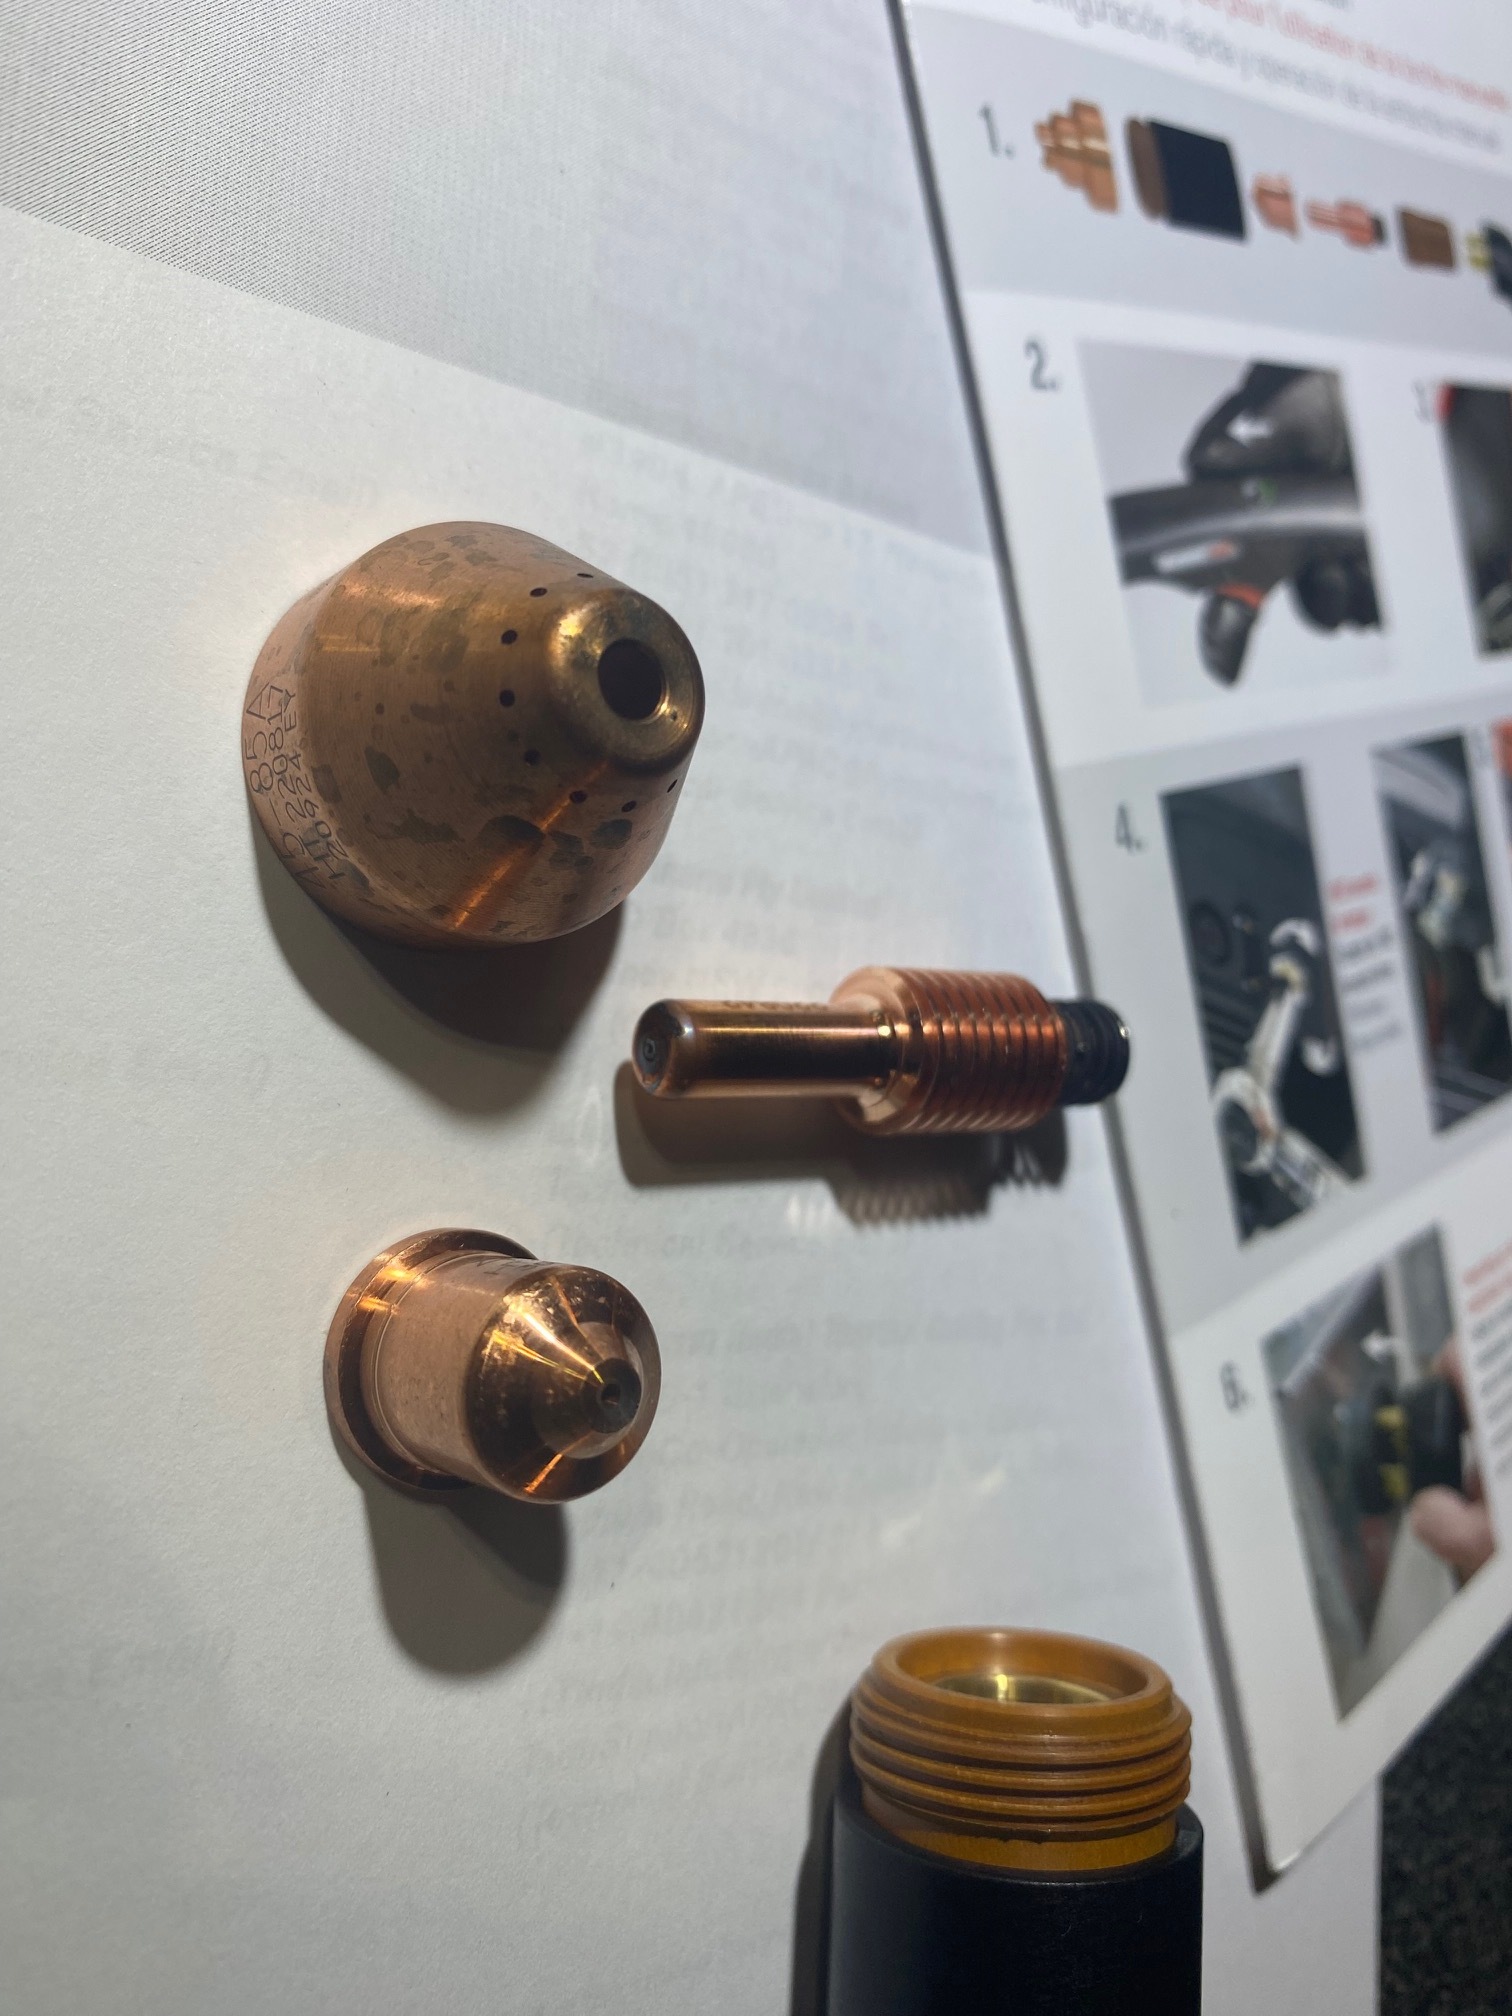
Brand new consumables as this has been the first cuts on this machine for me.

Consumables tried
220842 electrode
220948 Tip
220930 Nozzle
220947 diffuser
22085 cap

Switched to
220842 electrode
220817 Tip
220941 Nozzle
220857 diffuser
22085 cap

Result was a little better but still there and same just the one axis of cut.

I am leaning towards purposely trying to align the torch off square to square up the cuts.

I would think that is the wrong thing to do but I am at a bit of a loss here.

I have to point out that I have a transition curve in the item that goes from Y Axis cut curving onto the X axis and that curve has a rulet that I believe slows down the cut to 63ipm and the problem is worse on there so maybe cutting slow is a factor but then why just on the one direction.

I am using sheet cam and the cut direction is clockwise.

Thanks in advance for any guidance as I am wanting to learn to figure this stuff out.

Some of the Hypertherm guys should chime in. But 100 psi is too high. The pressure during operation of the torch should be 75 psi optimum. 80 being the max. To clarify, the plasma cutter has 100 psi when exiting the torch. Or is the 100 psi regulated down before the torch?

100 PSI to the cutter is fine for a 45xp, that’s within spec and that’s about what I give mine.

Are you using actual hypertherm consumables or aftermarket ones?

So you have a PRO with IHS but do you have THC?

Dropping the torch in the mount won’t change your cut height, it will just recalibrate on the next IHS cycle.

1 Like

100PSI Before the torch is activated. I mentioned I have not measured the PSI as its operating. I will be rigging up a gage for that.

1 Like

In it now, the second batch of part numbers I listed are the ones that came on the torch so factory.

How do I adjust the torch height with the software so it actually is 0.06 in the end?

It is a pro and I do have THC.

@brownfox is a Hypertherm man. He will get you dialed in.

If you tilt the torch it will just cause problems in another direction. Don’t do that.

Post pictures of your consumables and tell me about your air system. What do you have to cool and dry your air? You say two small air dryers; but what exactly and how much air line do you have and what size. You can trash consumables fast without a good setup.

Also post pictures of the bevel, and try cutting in a different area of the table.

Hypertherms are internally regulated. I have only once looked at the air pressure of my unit and it was just out of curiosity. Give it 100 psi and don’t worry about it.

Your first set of parts list the fine cut nozzle. That’s not recommended above 10 gauge so stick with the shielded set.

Is the work clamp directly on the material?

Finally, how off was the torch height and at what point in cut was it off? What were your live voltage numbers during the cut and are you setting the machine to 45 amps?

2 Likes

@GaryU - ^^^^^Lot of info Brownfox is asking for , but somewhere in your answers is the solution to your problem.

The easiest way to compensate for the torch height is to input a lower torch height in your tool. I use .040" as a cut height in Sheetcam and it gets me an actual torch height of .060".

With a Hypertherm, you can also use “nominal voltage” from the cut chart to keep the torch at the correct height. That will only work on spots where the THC is active. If the program slows down to less than 85% of the program speed, it will go back to the height set by the IHS system during the slow down.

1 Like

I learned a lot about how speeds and amps affect things by doing multiple line cut tests. Create 10 lines in Y direction side by side about 2” long. Set each line to its own speed starting at 30 then next line 40 50 60 up to 120. Set the amps to maximum and run the test. Then set amps to 90% and test. 80%, 70%. Then you could try lines in the X direction and circles with the same process. This quickly reveals an optimum speed and amp for that material. If over a large range of combinations you don’t find a good cut then you are looking at other factors than speeds and amps.

1 Like

The time my razorweld started cutting at a bad angle was when testing on 1/8” aluminum on a brand new nozzle it was blowing material back up making contact with the shield and damaged the nozzle. The cuts became 45degree cuts. If you have a cut that is fine in one direction but bad in another that would imply an angled “flame” that would create a bevel in one direction only. Can you turn on the plasma flame and look at its angle from all sides.

1 Like


The larger air dryer is mounted about 33ft from the air compressor and I used 1/2" copper tube through out the shop. The feed goes from the compressor to that larger air dryer back to the compressor area and through out the shop. The consumables shown are taken today after the have cut about 12 of those items in the picture. I am pretty sure that most of my problem is height as I did find it too high but quite a bit. I did not measure what it was as I thought I could just lower the torch in the mount and it would take care of it. The machine was set to 45 amps. I dont know about what the live voltage was. I will play with it more today and document these things. The ground I have split on a lug. I have one permanent to the table and the second is the normal clamping style that can move around. I had that on the table slat that the work piece was sitting on and not direct on the work plate. I really appreciate the help on this from everyone.

Thanks for this. I would like to see if there is a way I can do the height correction behind the scenes so to speak. Like a line in the post processor or something so my tool settings remain accurate. I just want to avoid putting in an adjusted setting to get to a number on each item if I can. Not a big deal if I cant as it is a simple solution.

I’ll sit down and take a close look later, I’m about to go jump a mountain bike for three hours. We will get you sorted out though.

The live voltage number will be the key I think, if the torch was way too high.

2 Likes

Once you determine the amount that it needs to be changed, you can edit the post processor. You should be able to do it by just changing the value that it applies for backlash, which is currently .020".

Backlash compensation is not needed for the way that the IHS system works. The weight of the Z axis carriage removes any backlash at the time that the Z zero is set by the IHS system.

3 Likes

I’ve always wondered about the backlash and “springback” discussions and recommendations people have given. But I don’t think I chimed in because honestly I’ve never checked my programmed cut height… until just now. So I feel safe to offer this opinion.

It’s been my understanding that the backlash was intended to account for slight movement in the nut on the z lead screw. Mine moves ever so slightly when engaging and disengaging the IHS switch. Perhaps, around .02. I ran one of my programs and checked the cut height, dead on at what I programmed it, .06. I put a .02 shim in addition and it moved the torch up. Now keep in mind, this was with ensuring the material was completely flat and did not move at all while IHS was sensing the height.

Which leads me to the “springback” which is only available in fusion right? This is to compensate for the material moving back after IHS? Which in my mind is unreliable and any number here will just increase your cut height (plus the post still adds the backlash).

Point being, if your programmed cut height is high by .02 then maybe you don’t have any movement in your z axis lead nut. But you have to check this at the immediate beginning of the cut. I just ran a program with the torch off and watched it drop to cut height and measured. If you stop in the middle of the cut, your height could be off for any number of reasons. But. you have to account for material movement. I hold down my material frequently to ensure proper cut height. This is more important with the thinner detailed stuff.

That being said, looking at your bevel, I’m guessing your torch is rising due to low voltage, because that’s what mine did when I experienced it. If you had an even longer cut I bet it would rise and stop cutting altogether. This usually happens on longer cuts, as the torch raises over time to reach the voltage it feels it should be at. Your interior circle is fine because the torch hasn’t had enough time to try and raise to compensate. I experienced this all because I fell for the classic plugged in laptop (grounded outlet).

Your consumables look fine, and your air setup doesn’t raise any flags. Is the bevel happening on the Y axis just because that’s a later segment in the file?

You should be starting a book specs for best quality, I think that’s 85 IPM at 45 amps. I would also not recommend changing your post processor yet.

1 Like

The picture is not that clear to the real deal. It was hard for me to get it to show up in a picture properly. the bevel issue that is.

The holes are the first to cut and the are as beveled or even more than the outside cut. Upon closer look, all the sides have a bevel too them but the one cut direction is WAY more of a bevel than the other.
Cut height and speed is something I need to play with indeed. Where it slows down for a curve, its noticeably worse.

Yeah that all makes sense still. The inside curve looks choppy too.

Update. I cut a new part (same material) just dropped the cut height 20 thou and it is very good. Maybe perfect (for me). So that compensation of 20 thou in the post is not helping me it seems. I will cut more things to confirm and if so, I willl get rid of that.

1 Like

I’m glad you got it worked out. I don’t see .02 causing that significant of a bevel though, especially at one point of the cut. I suspect there is more happening, and this fix is masking another issue.

I can’t remember who it was, but they posted about making adjustments in their programmed cut height to achieve their desired actual cut height until they fixed a THC issue and then reverted back to programming the exact height they wanted.

If you want to find the source of the issue, report your live voltage number during the cuts and that will help tell us what’s going on.

3 Likes