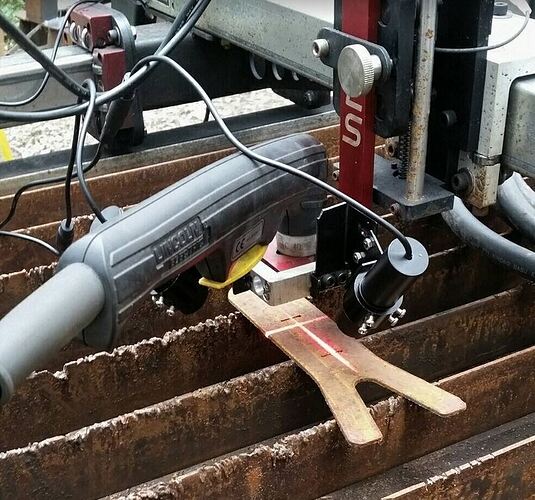
Man I need a machine torch. I need to do some more looking and thinking, but I don’t believe that there’s a good way to do this with the hand torch mounted.
you are kinda right on that one…it is the torch handle that gets in the way of the X laser…unless you put your torch handle to the side a bit…but then it will hit on the Y Gantry tubes…
I’ll let the OP comment on their build, for the XR torch one, I simplified my life and used a wall wart supply. It and the Crossfire controller are both on the same power strip, so I can turn both on and off together or separately.
There is a 3d printer file on Fireshare for a laser crosshair bracket that is set up for a hand torch.
I’ve been thinking of getting my buddy to print one up for me but haven’t yet. There’s no machine torch for my Miller 375 and I don’t really need to get another cutter (as much as I would love to  ) but I would like the crosshair option.
Any chance you could share the link the the hand torch file here? That would help others in the future that might see this thread and be in a similar situation.
Oh sure thing. I just did a search on the Fireshare site for “laser”. There’s a couple but this is the one that looked good for me. It’s actually an external link in the summary to a download of the STL file at Thingaverse
The link to the hand torch version (that combines a laser mount with a anti-swivel brace for the torch,) I made is in my post above. I included it as a DXF, here it is again: https://forum.langmuirsystems.com/uploads/short-url/rmzQbGBpyaIAF2WfUSMmz6sPFr1.dxf
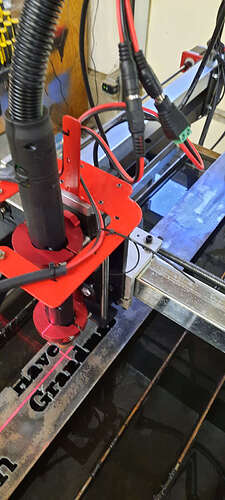
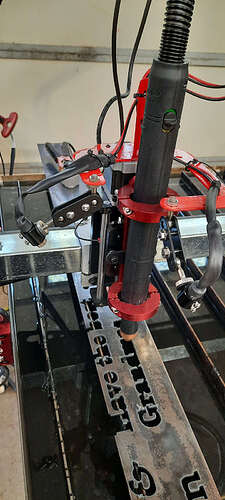
X mounted to gantry - Y to torch bracket… I’ll probably make some better mounts but for now, this is it until I dial is all in and see what I need to do. X laser will run the whole run of the table, set it up this way so I can square up sheets/line better…
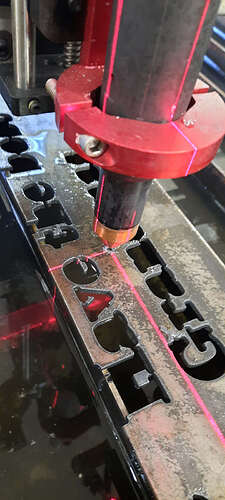
I like this and am still on the fence as to what I will do on my table. Your method screams of form following function. Your method works great for indexing and alignment of metal near the edge of the table. Kudos! But, I love the set up like @JPep and @toolboy where both laser lines are torch centric. When you can pin point the torch location it makes for better optimization of the unused pieces of metal, in addition to the indexing and alignment. I recently cut two expensive sheets into 4x4 pieces and the torch centric lasers would have made that task a breeze.
thanks for the mention…
this was my third mod for laser…and I am still working on it.
it has made a huge difference in using up material scraps…
The guy in the rowboat from china finally got here with my lasers so today I built a mount for them on my table. I wanted the lasers at 3 and 6 o’clock so I rotated my hand torch 45º which opened up room in those locations. It’s not fancy but it’s rigid and it will keep me from wasting steel by getting too close to the material edges on cutting jobs. I have pipe caps that go over the lenses to protect them during cutting. It’s still in prototype configuration and I’ll clean the wiring up once the extension cables arrive. It appears to me that it will work fine for my purposes.
Looks good, but you will never regret investing in a machine torch…and it looks like you cut a lot.
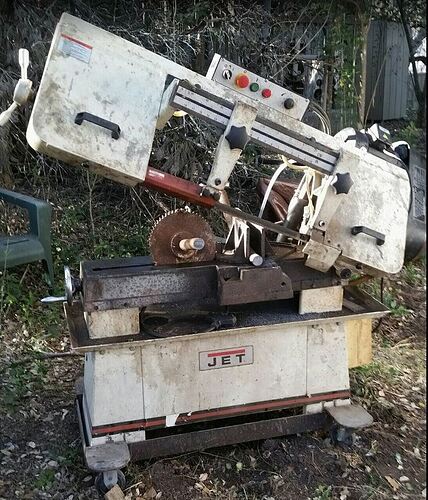
I just can’t justify $700 for a machine torch when my hand torch has done everything I’ve asked of it. I just bought a cutoff saw (below) and I only have $500 in it, so a straight torch seems like it costs way too much money to me.
I regretted it just to the point of where I forgot how much I had to pay for it and the table arrived. At that point I was glad I had the machine torch.
But @capncrusty is right that you have to see the value before it makes sense. (It should definitely be on a wish list, though)
Obviously, I borrowed (stole) the design from @JPep (or Lawrence Block?)
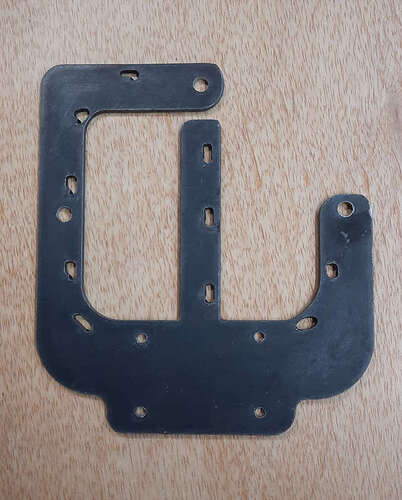
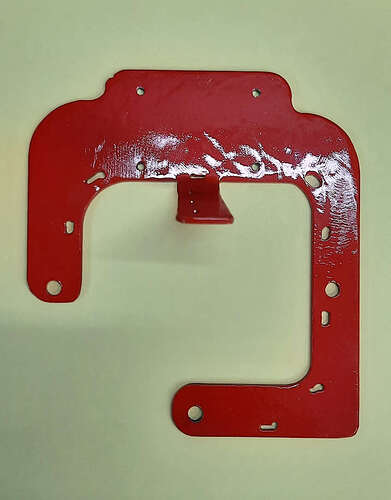
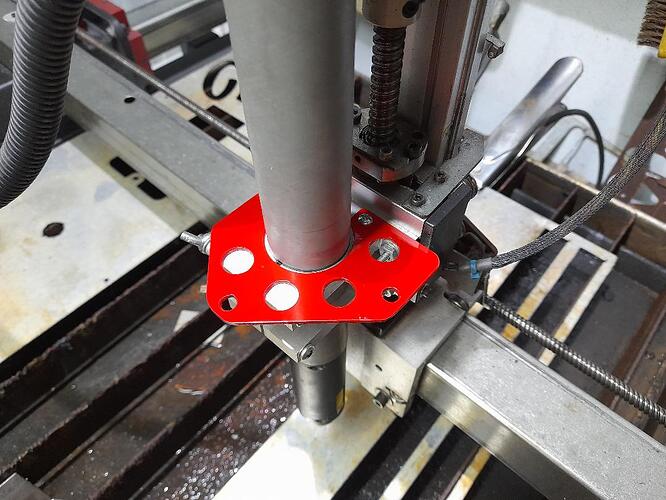
, on FireShare. I used 12 gauge mild steel and added a tang to bend up at a 90 degree angle to help with securing the wires. I added an opposing hole for a second Y- laser mount but did not use. I also added slots along the bracket to secure the wires. Based on how my slots turned out, I did not want to expose you to my poor g-code configuration so I will only supply the DXF file at this time. I used 14 mm automotive 4:1 heat shrink tubing (with adhesive lining) that was perfect for securing to the back end of the laser (thus protecting those tiny wires). I also added a barrel connector to each laser to ease replacement in the future. As someone else mentioned, the screws in the top of the Z housing are 3 mm x 6 mm so the DXF file is showing 3.5 mm holes. I drilled them out to 5/32". As you can see in several photos, I had a scrap piece of metal created from multiple mistakes (before having the lasers} and one was not really predicting accurately where the torch was going to hit. Since adding the lasers, I have really enjoyed having the “X marks the spot” when setting up a burn or cut. Not really sure of the proper term.
I think I am going to do this mod. Still on the fence on red vs green 
well…for me it really did not matter…I am red green color blind…ahahahah…so I just see a nice light on my table…
Well, It’s a work in progress now, just made and fitted the laser mounting plate. Think I will opt for the green line lasers.
EDIT: Green will take too long to get here (looks like they come directly from China and they’re pricey). Ordered a set of 4, cheap, red, line lasers and two mounts.
Will probably do a 555 timer, so the lasers will only come on for like 30-sec each time a button is triggered.
https://www.amazon.com/gp/product/B07F1T97V4/ref=ppx_yo_dt_b_asin_title_o00_s00?ie=UTF8&th=1
https://www.amazon.com/gp/product/B083SJD418/ref=ppx_yo_dt_b_asin_title_o01_s00?ie=UTF8&th=1
@Cletus, what is the name of the screw with a ball on the end that is part of the laser mount? I’m looking for them on McMaster but can’t find them. I just can’t come up with the right name.
Thanks!
Scott
I found them on the internet called “ball head screws” or “ball end bolts” but cant find them on mcmaster. I’m surprised… McMaster has everything!
