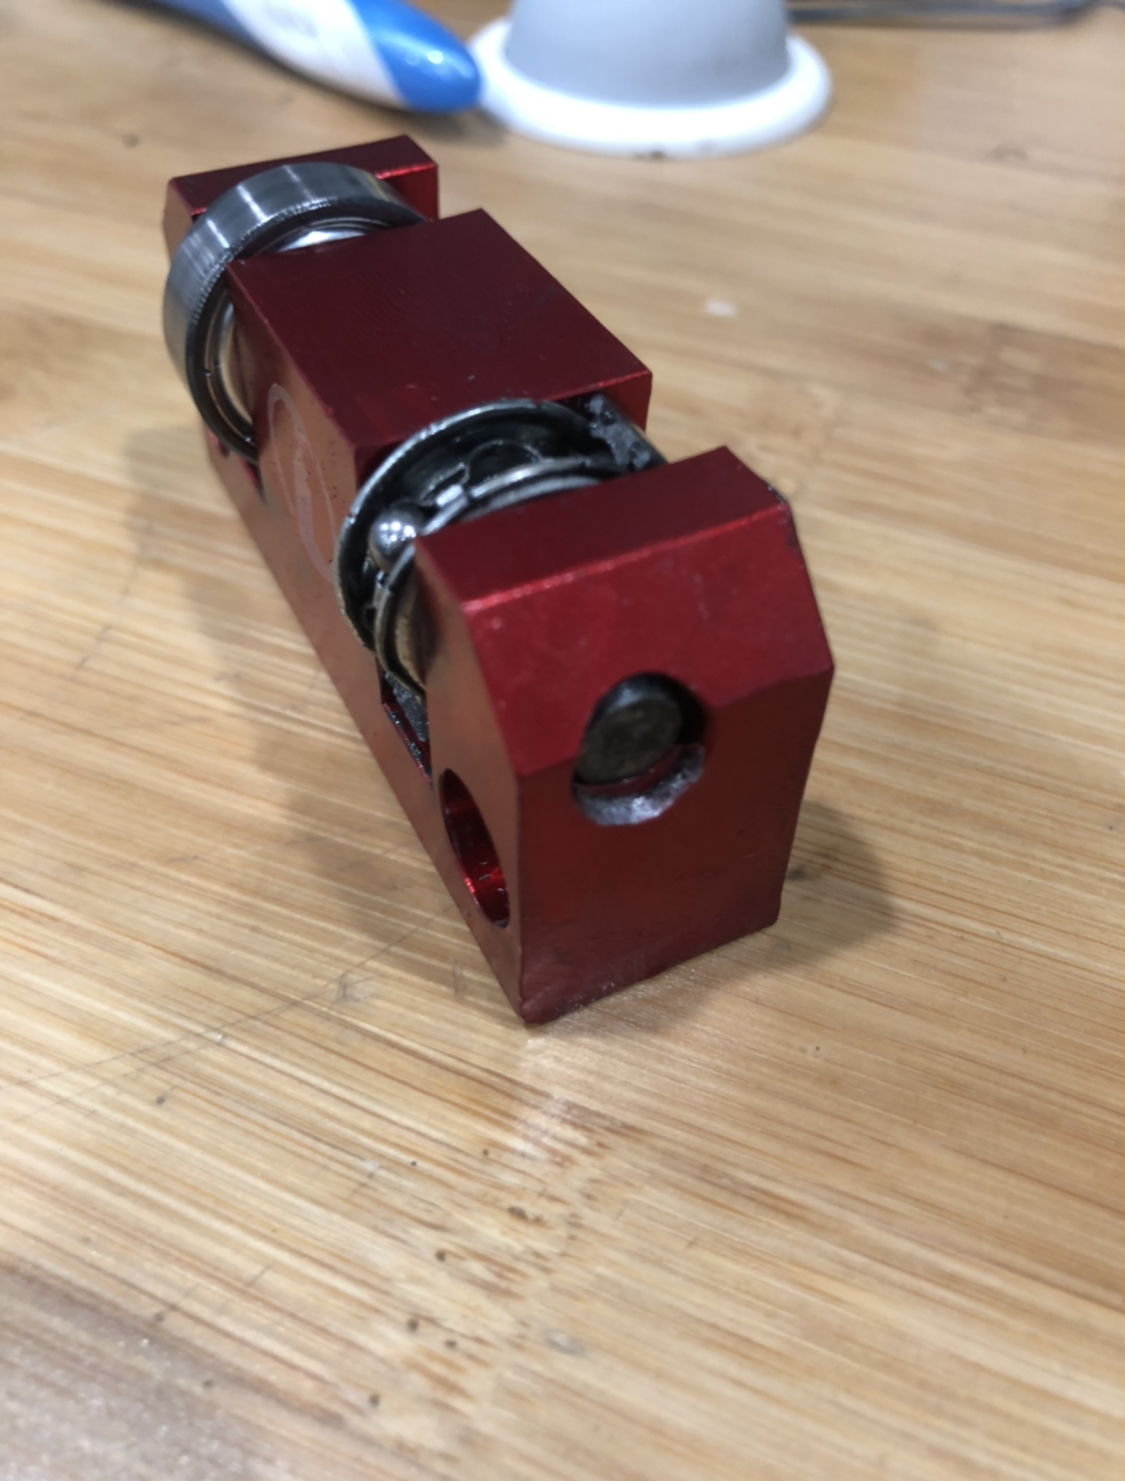
Well I don’t think I have done a ton of cutting but one of my gantry support bearings decided to explode today. I noticed it was a bit tight sliding it on and I see that bearing left a nice grove in the under side of the rail. Am I the first to break there machine? @langmuir-daniel is there a way to replace the bearing or do I need to get a new block.


Hi Brian, sorry to hear that happened. We will get a new bearing block assembly out to you ASAP!
If you want to get up and running fast, that bearing is a standard skateboard bearing if you have one of those lying around.
For what its worth, your machine was one of the first that we assembled, and we admittedly were preloading the bearings excessively. Around machine 100, we reduced the amount of preload we apply during assembly.
2 Likes
I do somewhere how do you get them out? Is it just pressed in with a pin? Also should I try and reduce the load on the bearings or just leave them. My tube has some pretty deep groves already. About how free should the gantry slide? I adjust the x axis a while ago it’s really smooth now but debating if I should pull the lead screw nut on the Y axis too see if that one is still smooth once in a while my steppers will freeze up on the Y axis mid cut. I’m pretty good about wiping all the tubes and lead screws clean the applying new lubricant since I notice using a wet lubricat attracts a lot of grime.
1 Like
I too have an early machine, #55. I’d be interested in a procedure for resetting the preload and squaring up the 2 axis. I think the improvements made to the set up jig after mine delivered has been a good thing. My friends is a much later serial and his set up seems much better than mine.
Steve.
Yes the axle pin presses out and the bearing and two shims can be removed. Make sure when installing the new bearing that the two shims are positioned on either side of the bearing.
I would recommend disconnecting the lead nut after installing the new bearing and checking to see how freely the carriage moves on the rail. You should be able to move the carriage by pushing on the far end of the gantry tube. If not, your bearings are likely too tight.
When I get a chance I will post a detailed preloading procedure.
2 Likes
ok awesome thanks… Ill have to wait till monday don’t have a press at home. I was wondering how you guys set the preload on the gantry.
I pulled off the lead screw and tried to move it from the farthest point on the x axis and it moves but binds up and stops right about 3/4 up the tube. That was without one bearing block attached too.
Hi Guys, sorry for the delay.
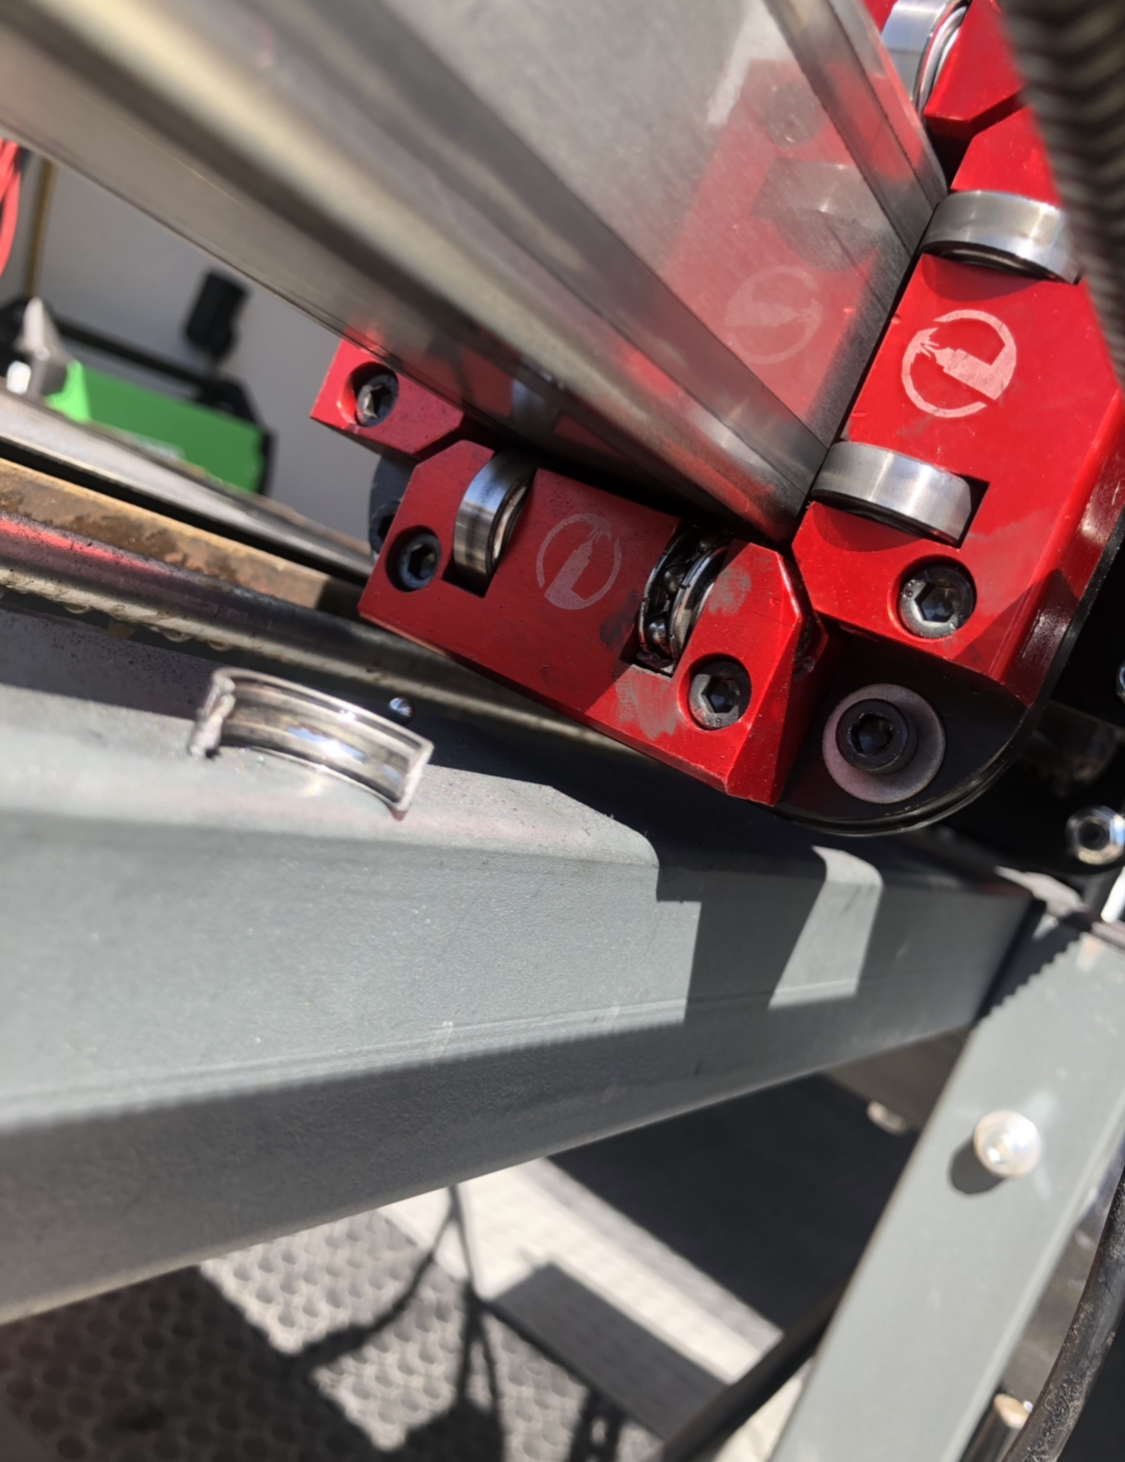
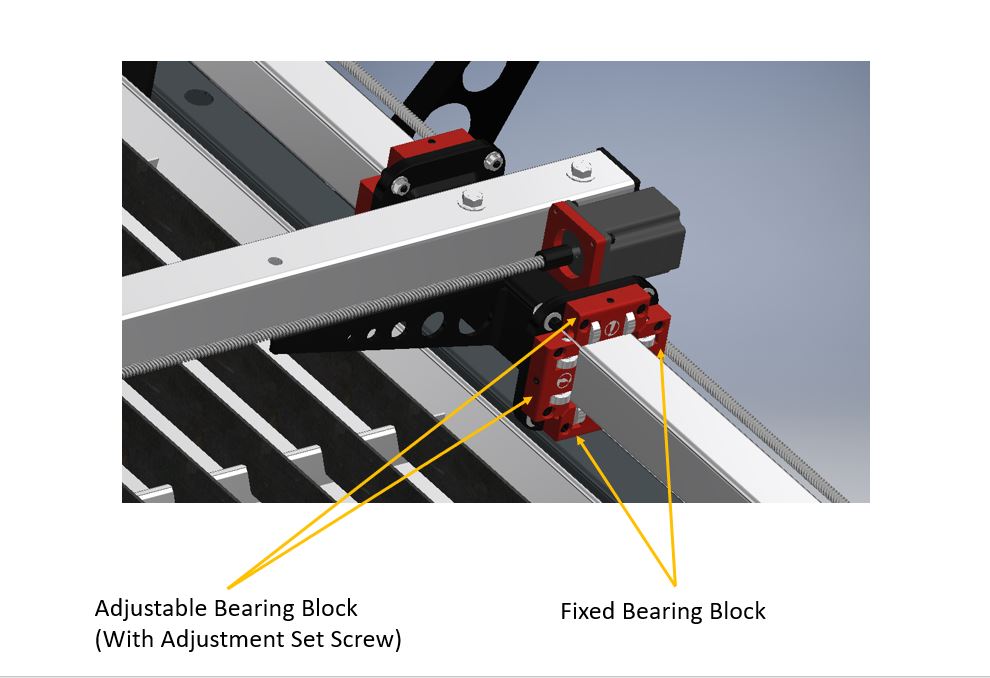
The Y axis carriage has 8 bearing block assemblies, 4 per side. Each side has two fixed bearing blocks and two adjustable bearing blocks. The holes that are used to secure the adjustable bearing blocks are slotted for preloading against the rail. Below is an image showing where the fixed and adjustable bearing blocks are installed:
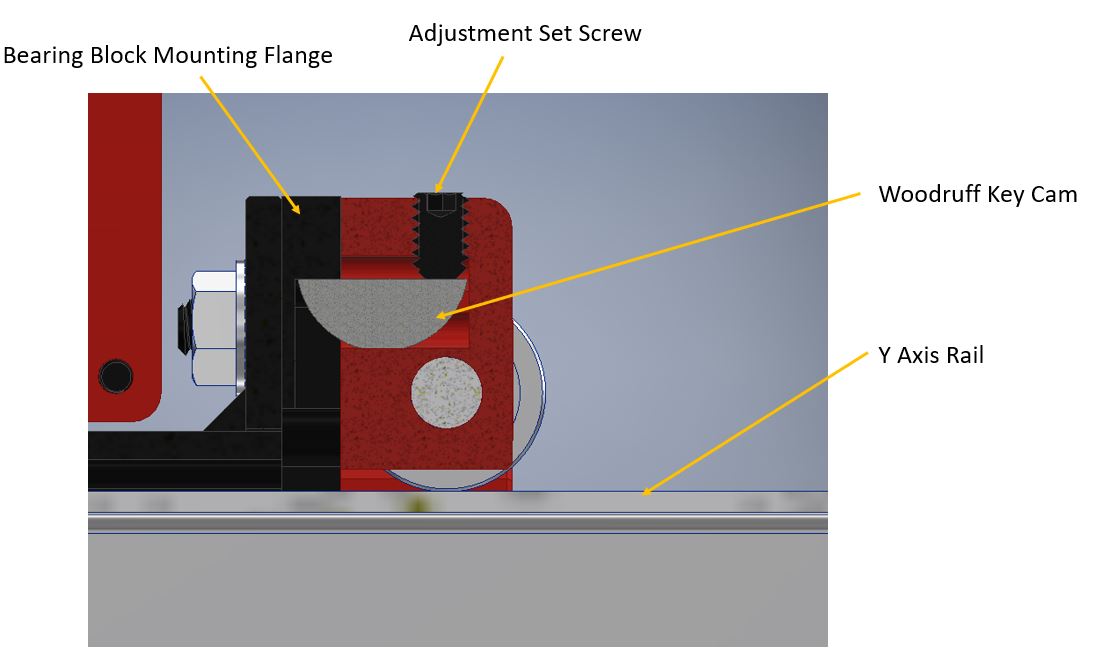
The following image is a cross section of one of the adjustable bearing blocks. Screwing in the set screw applies pressure to the woodruff key cam which reacts against the bearing block mounting flange. This in turn drives the bearing block assembly into the Y axis Rail.
The preloading procedure is as follows:
- Jog the Y axis to roughly the midpoint of travel. Jog the X axis to the positive end of travel and drop the torch mount down to the slat. Tighten the thumb screw there.
- Back out the set screws on the adjustable bearing blocks that are on the ‘torch’ side of the carriage. Just unscrew these a few turns.
- Loosen the 1/4-20 socket head cap screws that secure the adjustable bearing blocks to the the mounting flange. There are four screws that should be loosened in this step, two per bearing block.
- Reseat the four screws previously loosened in step 3. Do not tighten them, but make sure that the bearing block is resting flat against the mounting surface. They should be little more than finger tight.
- Starting with the top adjustable bearing block, slowly turn the set screw clockwise until both of the bearings are in contact with the rail. Check to see that at least one of the bearings on the opposing fixed bearing block are touching the rail. If neither are touching, continue to screw in the set screw until at least one of them is.
- Complete step 5 again, but for the other adjustable bearing block on the ‘torch side’.
- Complete steps 3 through 6, but for the bearing blocks on the ‘lead screw’ side of the Y axis carriage.
- Undo the thumb screw on the torch mount and raise the torch mount up.
- Use light pressure to check to make sure that there is no perceptible slop in the carriage joints.
- Check all of the bearings on the adjustable bearing blocks to make sure they are in contact with the rail. If there are any that are not in contact, screw in the set screws until the bearing just barely makes contact.
- Re-tighten all of the socket head cap screws that secure the adjustable bearing blocks (8 screws total)
- Jog the Y axis back and forth to check for any irregular motion characteristics.
Bonus Step: If you are feeling inclined, remove the lead nut/lead screw and traverse the carriage by hand. You should be able to grab the gantry at the end and move the carriage from one end to the other.
7 Likes
Awesome write up. I got my old bearings out but really roughed up the aluminum and the anodized red coating. To get them out you almost need a fixture to hold them they just want to kick out otherwise.
We already got your new bearing block assembly packed up this morning, going out 2 day USPS.
3 Likes
Thank you Daniel, appreciate this!
Awesome I really appreciate it. Pretty sure after adjusting the blocks I’ll be set. Mine took a lot of force to get it on the tube during assembly. Thanks again for staying on top of the issues that come up.
1 Like
Not going to lie, that setup with the woodruff key as a cam is pretty damn genius!
6 Likes
Thank you I will adjust
@langmuir-daniel Hey daniel. I just cracked a bearing today on the non adjustable assembly. Can I get a new bearing? I did crutch it today with a skateboard wheel. I’ll have to reset my gantry as it is def not running smoothly on all bearings. grooving the Y rail and X rail too.
hey everyone I got my crossfire back in April (2019) and a bearing just broke apart, I use my crossfire just about everyday for something, not sure if this could be the issue but i cut a lot of aluminum (5052) I am thinking it might be the dust from getting in the bearing just a thought, I did contact Langmuir for a replacement.
So I had the same problem a little while ago and got a price on bearing set for my Y axis I think they were $50 per side plus $50 shipping which was reasonable but I ended up Replacing two bearings I had the exact same bearings laying around from an old computer printer I set up a little Jake using the voice and pressing the pin into a socket that just fit over the other end the way lotta guys change universal joints in the driveshaft I will try to post pictures of it later
I have had quite a few bigger bearing go. My biggest issue with the floating X axis is the inconsistent weight distribution. the bearings they use are prolly cheap china bearings. If you really wanted to step up to some ceramic skateboard bearings. Powell makes famous Bones bearings that every industry relates to. They are expensive but would last much longer. Basically just look up skateboard bearings and pick a decent one. $50 for 8 would be average price.
Same issue with this…I’ve tried calling Langmuir and haven’t got anyone to call me back but I’ve had the exact same issue. Both of the bearings on the fixed bearing block decided to explode and leave deep impressions in the tubing. It’s also developed excessive grooves in the top of the tubing as well. I’m in need of replacement!