I need to cutout Some cursive text for a business sign that’ll hang on the front of the store. Any tips on what materials, finish, and how to hang the sign. I’ve seen a lot of you cut different materials with for signs, with layers, without layers, powder coated,etc. Out of the signs you’ve made, what’s the best route in your opinion for outdoor signs? Whats your “wish I would of known that?” advice?
I need to cut out some text to put onto a 8’ x 2’ board and attach it, I’ve seen a few of you design and cut your own small mount plates, do they hold up well outside?
First, you have to decide what look are you going for.
Does it need to look good for years to come? What are your options available to you? Do you need it to be a certain color or is the metal or rusted metal look an option?
If your options include powder coating, you are going to need to have a way to attach a ground wire to every letter.
If you are attaching the letters to a board. I assume you mean a piece of wood. The wood is going to deteriorate before the metal. I live in a wet climate and the board will rot but early on will get mildew attaching. If you live in a hot, dry climate, the wood will badly check, crack and dry out. The most stabile situation is when the letters and the backing are of the same material.
I have not done any powder coating so painting is my go-to covering. Paints are constantly changing but you would want a paint that is rated direct-to-metal (DTM) or use a high quality primer. Painting each individual letter will be a challenge because every edge and the back surface needs to be covered otherwise moisture will begin the oxidation/rust and it will gradually get around to affecting the front surface painting.
Aluminum or stainless would give you a more sustainable look without painting but no one wants to read a sign with letters that are highly reflective.
Attaching letters. As you mentioned there numerous ways:
double stick, exterior tape
rivets or screws with or without spacers
welded studs with a stud gun (@DonP shows some excellent examples. He also shows you clever ways to align the letters).
glue or epoxy
The worst signs to read, in my opinion, is when the letters are cut out and you can’t read because it has open background. The background is whatever you see through the letters. If the lighting is on the front surface, you can read it but otherwise: forget it.
Hanging the sign: You need to pick what will add a feature to the sign or what would be invisible. Either it is a feature that you want people to see or it becomes a distraction from the sign itself.
All good ideas @ChelanJim, thanks! Yes I am attaching to a wood board which will then be secured to the building. Which, I still need to go and check out the building to see how they want it mounted to the building. You bring up good points that I never thought of, the differences in paint and primer. DTM and quality primer, can you point my in the right direction of specific brands that you favor?
Benjamin Moore makes a great DTM paint or used to. Have not bought any for awhile.
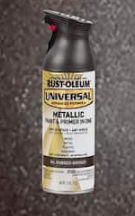
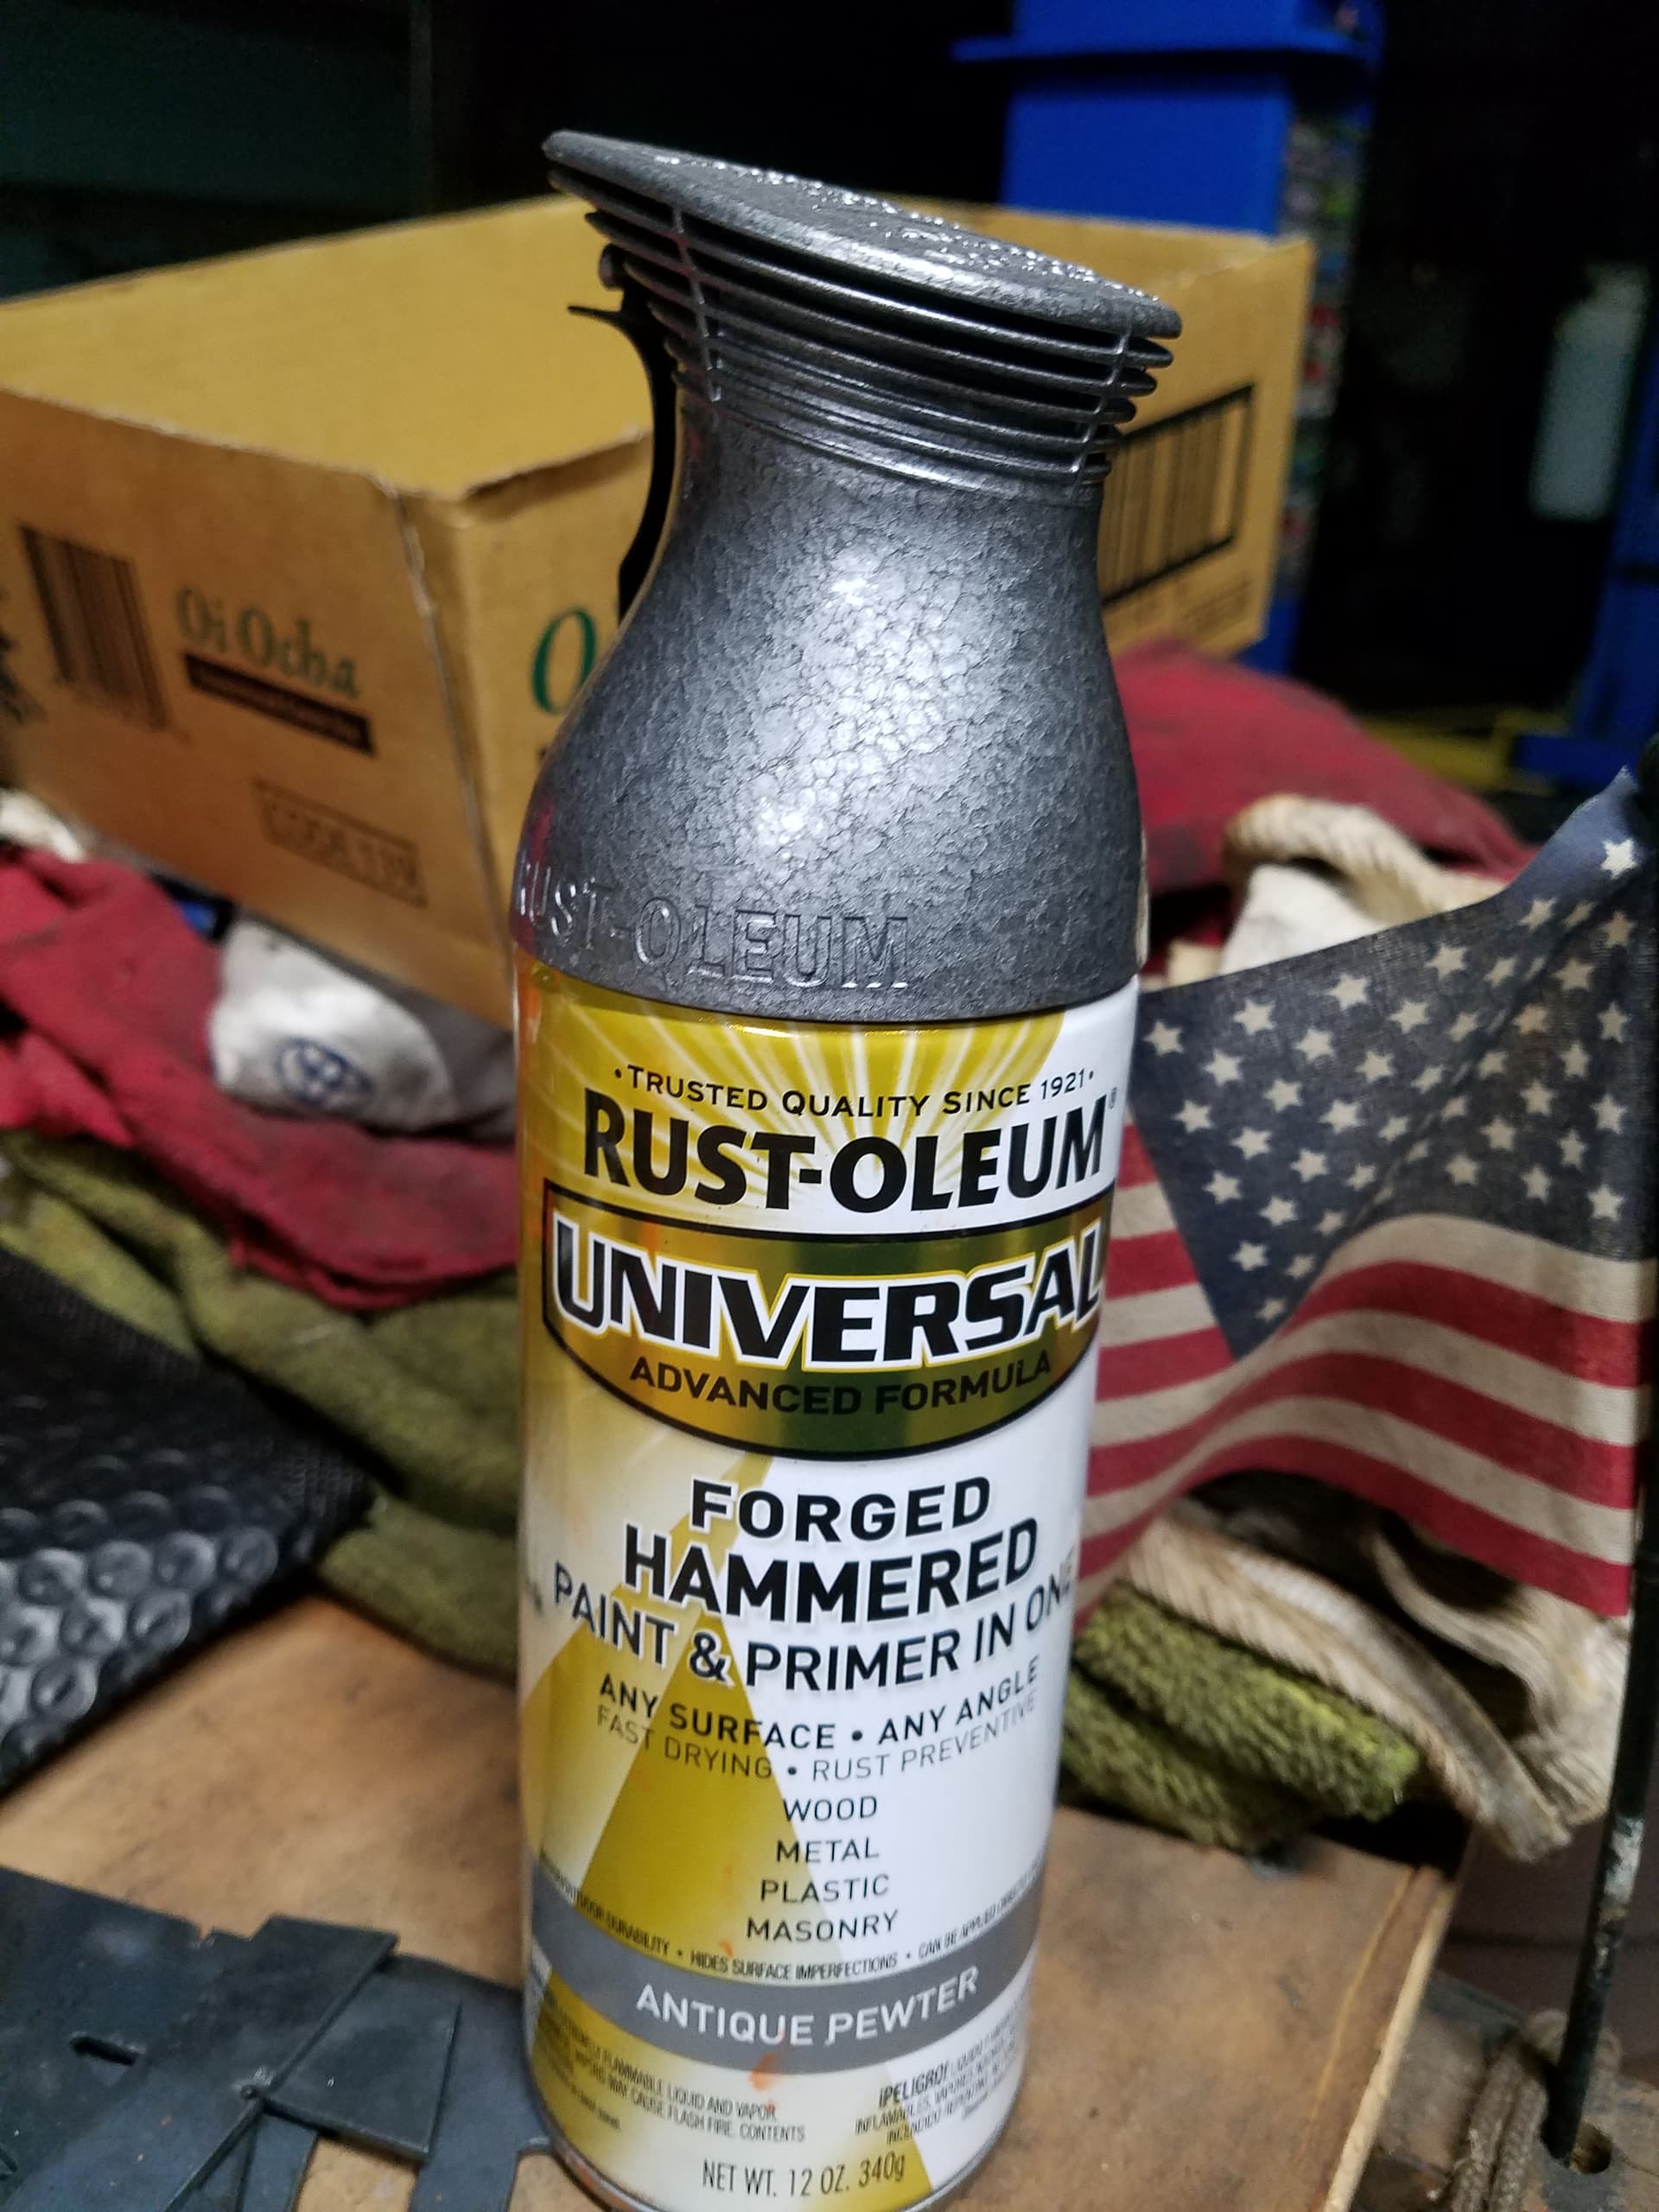
An outstanding spray paint is Rustoleum Universal, if you can find it in the color you want. Home Depot used to carry it but mostly it is online order. In the stores they are now promoting Behr spray paint but I am not impressed. Here is what the label looks like for the Rust-Oleum product:
If you have a good spray gun (HVLP), go to an Autobody paint supply place and get the two part paint. I actually don’t know what it is called. You add the activating drying agent to the paint and it sets up hard. You can’t beat this paint but it will cost you $100 per quart plus you have to buy the activator. You could have them mix any color you want.
Note: The HVLP gun is not the one that attaches to the system with the blower on it. It is an HVLP that just uses an air compressor hose. I have both types and they AutoParts store did not recommend the one with the blower. Not sure why the recommendation; but, he got more money from me when I bought the gun from him.
Final results is like anything: preparation and control of dust while painting.
All paints need a warm place to cure. The paint and the material painted need to be at least 60 degrees before painting. Too hot (above 90 degrees) may cause problems as well. You need to keep it above 60 degrees for the next three days and hopefully warmer than 75 degrees. Most all paints appear dry to touch in 24 hours but you will see the difference from 24 to 72 hours. The paint will be contracted and hard when it is good and dry.
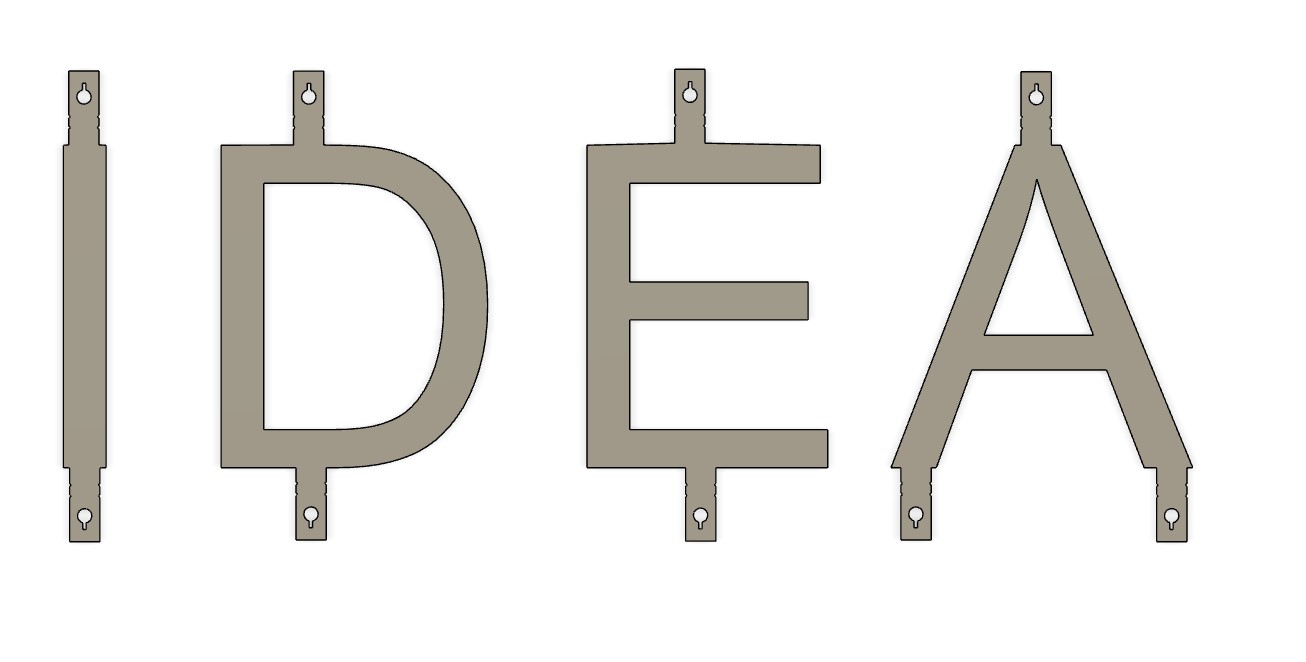
Sounds like a very cool project. @ChelanJim is correct about the stud gun. It’s comes right after sliced bread for me. The real trick is in my designs and making it really easy on me. Threaded stud welders are very expensive but can find them reasonable used sometimes. Normal Welding kills the faces of signs if using thinner steel like 16 ga but the welded studs from the gun don’t even leave a mark. I have Midwest talon and shoot 1/4"x 20 studs. So if you’re looking to do this only a few times and not business you may consider putting tabs on the letters and bending them behind them and running bolt through hole and behind wood. this would hide the mounting point for all the letters. you could wrap around the end of the wood if you didn’t care about seeing the tabs. i made this in 3 mins so things aren’t perfect but might help show you what i’m saying. no for lining up the letters cut the outline of the board with these letters cut out of them. if you can’t cut the letters create separate in boxes for each letter so you can put them down on the board and place your letters perfect without worrying about being wrong. this does waste a little metal but save you alot of time and hassle. My tabs are longer than you might need but giving you an idea that doesn’t involve welding or stud gun.
Thanks for the advice Jim, I’ll keep those tips in mind! I have a few spray guns in storage, looks like I may have to get them out and see if they’re still good.
Thanks @DonP, I just searched stud guns just to see how costly, WOW! I’m guessing you can’t take a cheap harbor freight stud gun and use it with threaded studs, lol. With those “Tabs” that you drew up quickly you’re basically using those to just wrap around the wood board itself and attach to the back side if i’m understanding that correctly? I really appreciate your knowledge.
i wish you could use the harbor freight gun but nope. You have 2 options with my tab idea. 1. wrap around outside board. 2. bend them behind the letter and put bolt through the hole and through the wood. The easiest thing would be to use carriage bolt through the face of the letter and wood. You may even consider JB weld on bolts on the back of the letters. Cut letters drill holes in back of wood to make the locations of bolt. GL
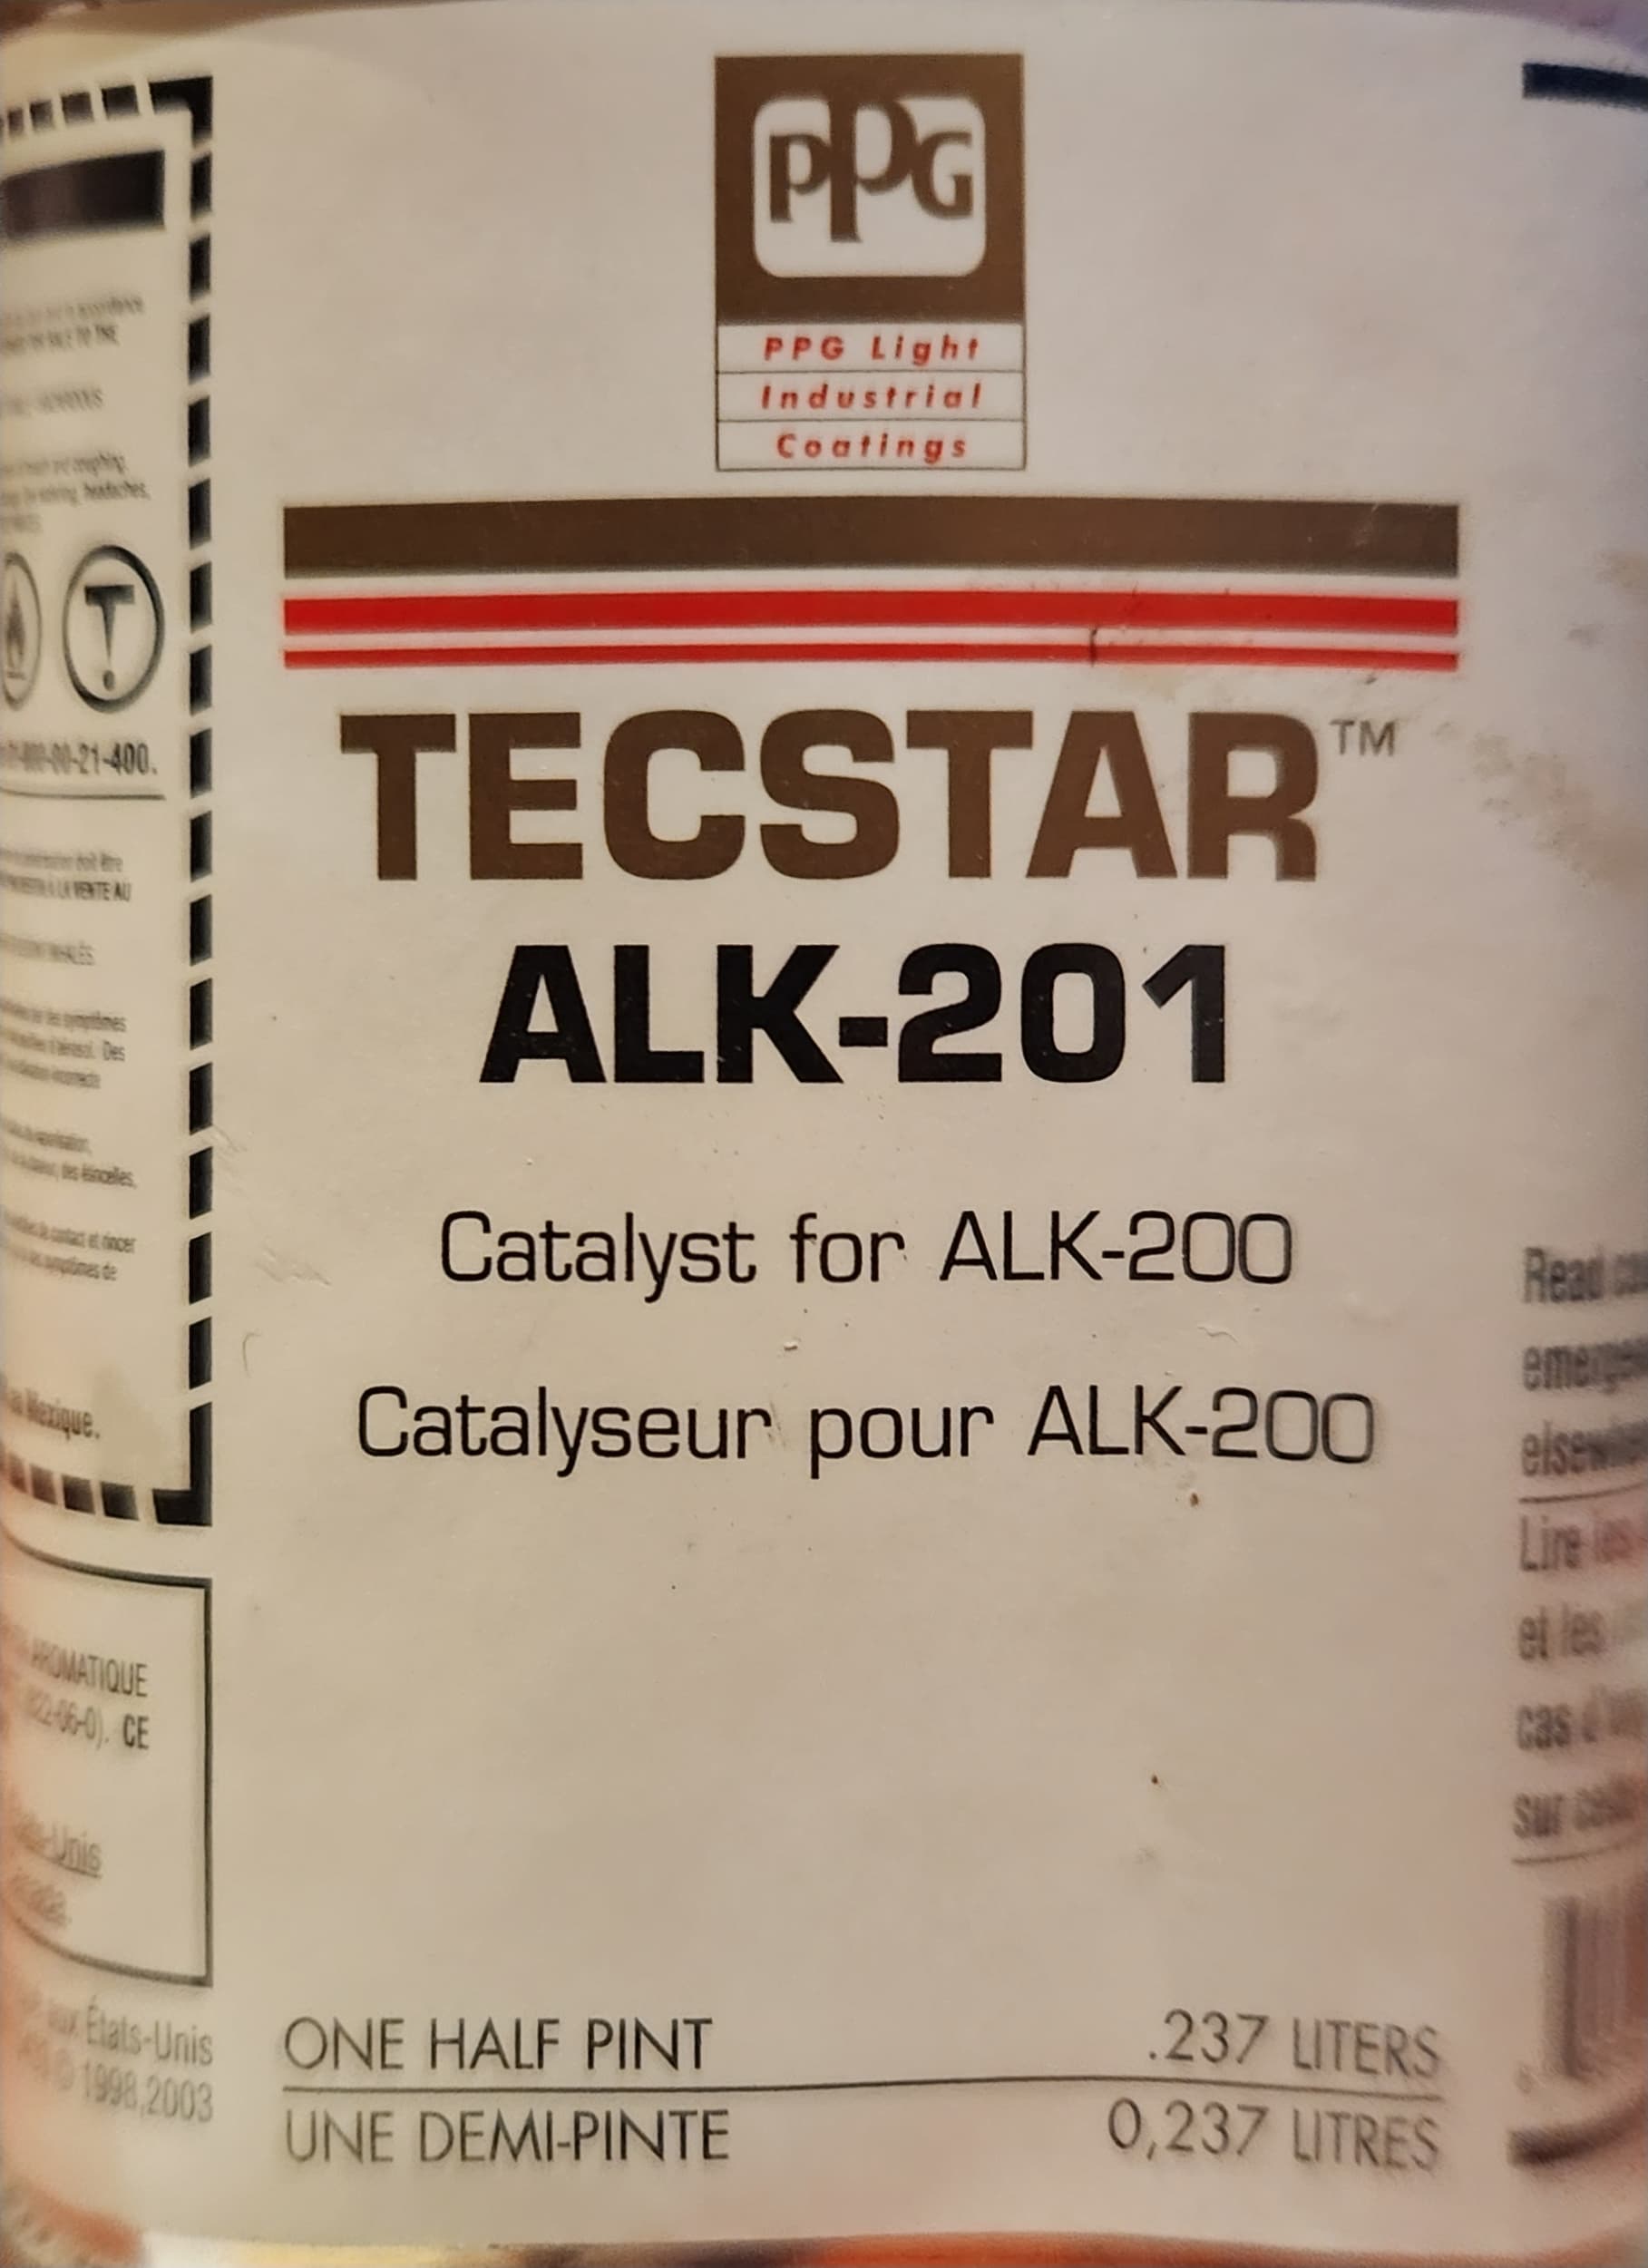
I had to go get the can. It is a Catalyst. Without it the paint will not set up right. It also helps to allow the paint have a longer shelf life perhaps. You use a very small amount from what I remember. I used it on some umbrella stands and painted some fancy stripes on a travel trailer (don’t ask for photos - that was 20 years ago and a first attempt).
Here is the picture of the can. Way different than the clearcoat process. But I realize my clumsy attempt to describe it could give you that impression.
powder coating is the way to go if you plan to do a lot of signage it is just very expensive to start up. it is used commercially because of how cheap it is to do after setup. once it cools off it is ready to go as for wet paint you may need to let it dry for a few days before handling or shipping.
the best wet paint i have used is the automotive ceramic high temp.
mounting wise if you are going to hang on a building make sure you use a fool proof way to fasten your signs you don’t want a literal headache. i do a lot of signs with studs in them. i buy 1/4 all thread i either drill or cam out a hole for the stud then tig weld them in place. which can be done without damaging the signs.
A good rule of thumb is all parts should be hung to powder coat. Most parts I do have either a hole or I have welded a stud to them. I ground the rack I hang them from so if I hang them through a hole or by a stud they have a good ground.
I have seen guys spot weld welding wire to the back side which I don’t recommend. I have even seen one guy on you tube use a copper based tape he says will ground as well . You know YouTube is like tv you can always make things look better than the are. I have seen people attach the ground to the part with a alligator clamp spray the whole part remove the clamp then spray that part un grounded as well.
lol thanks! never seen that one before, really cool lookin. How does it hold up being a primer and paint? let’s say you put that on steel, is it good enough with a few coats and your done?
I’ve looked into powder coating a while ago, the eastwood kit actually and almost bought it but room for an oven and such kinda stopped that lol. Definitely still tossing the idea around for some small parts but it seems like everything I need to cut is bigger than my table so it will be too big for a small house oven (which is what I was looking at just to get started).
This is an idea I was thinking about doing, but instead of using threadall, was just going to weld a bolt to the backside. Using threadall is a good idea, hmm.
As I noted before and @Wsidr1 is also having similar results, that Rust-Oleum Universal line is outstanding. No need for primer on bare metal. As a matter of fact, I would not trust another primer to work any better to stick to the metal than what this paint does. Now I am sounding like I have stock in the paint. I don’t but I have numerous examples of metal that I have painted and this paint really holds up.
It has different make up of the carrier solvent than most paints. You will notice that it dries to touch much faster. For that reason, if the environment is too warm you will notice more gritty overspray on the product as it is drying so quickly that you can’t keep a wet surface to merge into. This becomes a bit of an issue when you are trying paint edges and the backside of you object. I try to leave the front side for last so that it can have a good full wet surface without cause runs/drips/errors.
You know, I just got to thinking that if you used @DonP idea of the tabs, you could make the tabs a conventional drill bit size (say 1/4 inch or 3/8 inch) and on your board drill holes that size. Again, using Don’s idea with using another piece of metal, you could mark all of the holes on that metal for everything.
Place the metal with the holes that will help mark the location of holes on the wood. Mark and drill holes. Drill all the way thru. Put spaces between the sign and the wood board. Fill the holes with an epoxy. Now assemble your sign. All the holes will be where you need them and the spacers keep it at the right level. The epoxy with bond the level so the spacers will be free to fall out.
The part I didn’t figure out is how to improve the look of the exposed epoxy.
(This rambling note is Don’s fault. He said to think outside of the box.)
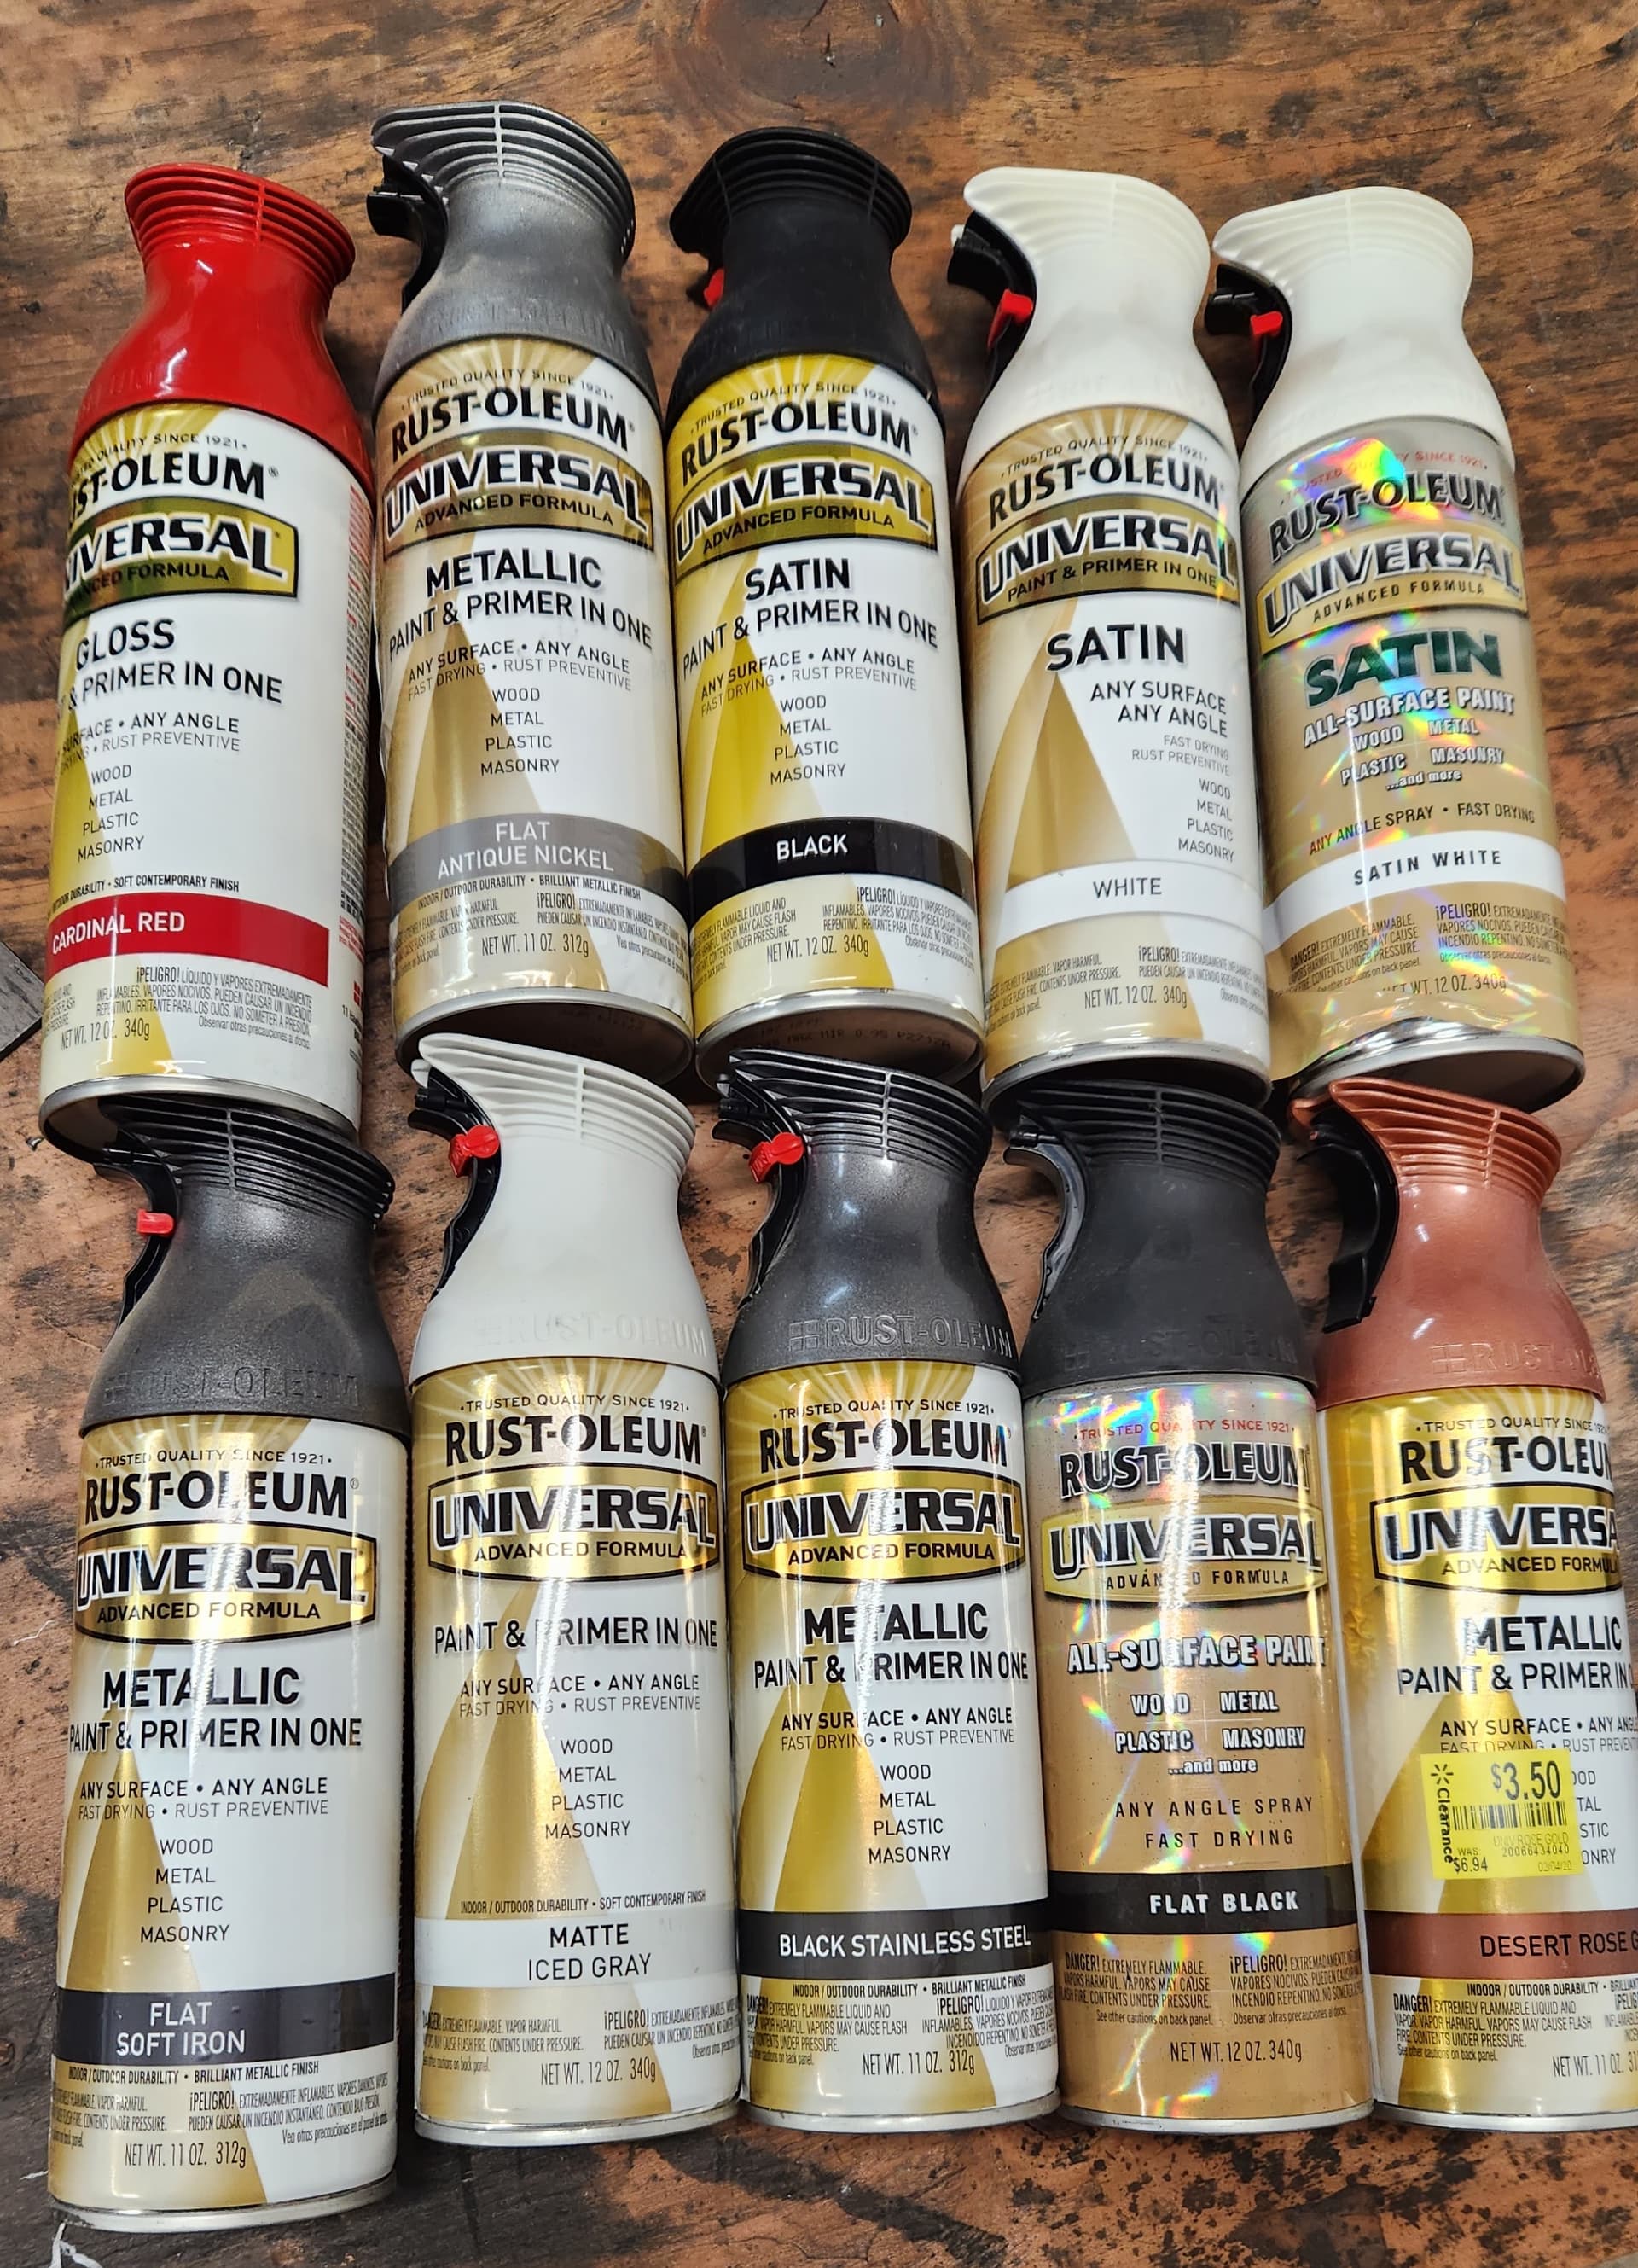
I agree with @Wsidr1 , the hammered finish rustoleum paint is excellent for a few reasons…its slightly textured so it hides imperfections, its a quality paint able to be sprayed on bare metal. It comes in about 8 colors or so. All available on amazon for about 9 or 10 bucks a can.
Totally agree with Dylan about the hammered finish. Great looking finish for most anything and covers up imperfections. I just looked in the garage for some of my selection. The one color that I really like is the “Black Stainless Steel.” Apparently, I have been stocking up for the time that I am on a fixed income as I have more than just the Black Stainless Steel. I hope my wife doesn’t see this. BUT: I really needed them!!!