I have a function it would be good for that no one has mentioned yet. If you download one of the preconfigured NC files off fireshare there is no way to resize or scale it other than using firecontrol so far that I have found, or at least not quickly and easily. Sometimes I want to do that from the comfort of my office where I have heat, a large 4k monitor, and a comfortable office chair. Once I have it where I like it in fireshare I could then make the trip to my shop, with the laptop, and get the object printed quickly so I can return back to my nice comfy office
You need to buy a control board from Langmuir. FireControl won’t function without the board being connected via USB. Several of us have them for that same purpose and help post screenshots on the forum. I will tell you this: it will be a waste of $129 to sit in a comfy chair. But, I get it.
3 Likes
Quick use of a calculator and you can figure out the factor to scale your design at within a few seconds. Probably why your method wasn’t mentioned.
I don’t need help with math. I need to be able to do it sometime without standing in front of the table. Right now my shop is under construction and no power so kind of want to shrink a few things down from fireshare and would like to have the files ready to go when I get power in the shop.
2 Likes
If it’s a pro table you could unplug the entire electronic enclosure, bring it into the office and plug it in. It only needs the USB connection to function. If it’s an XR you’ll need to at least plug in the enclosure and turn it on.
2 Likes
A separate controller could be useful in that case, even if temporary so you don’t have to disassemble any part of yours.
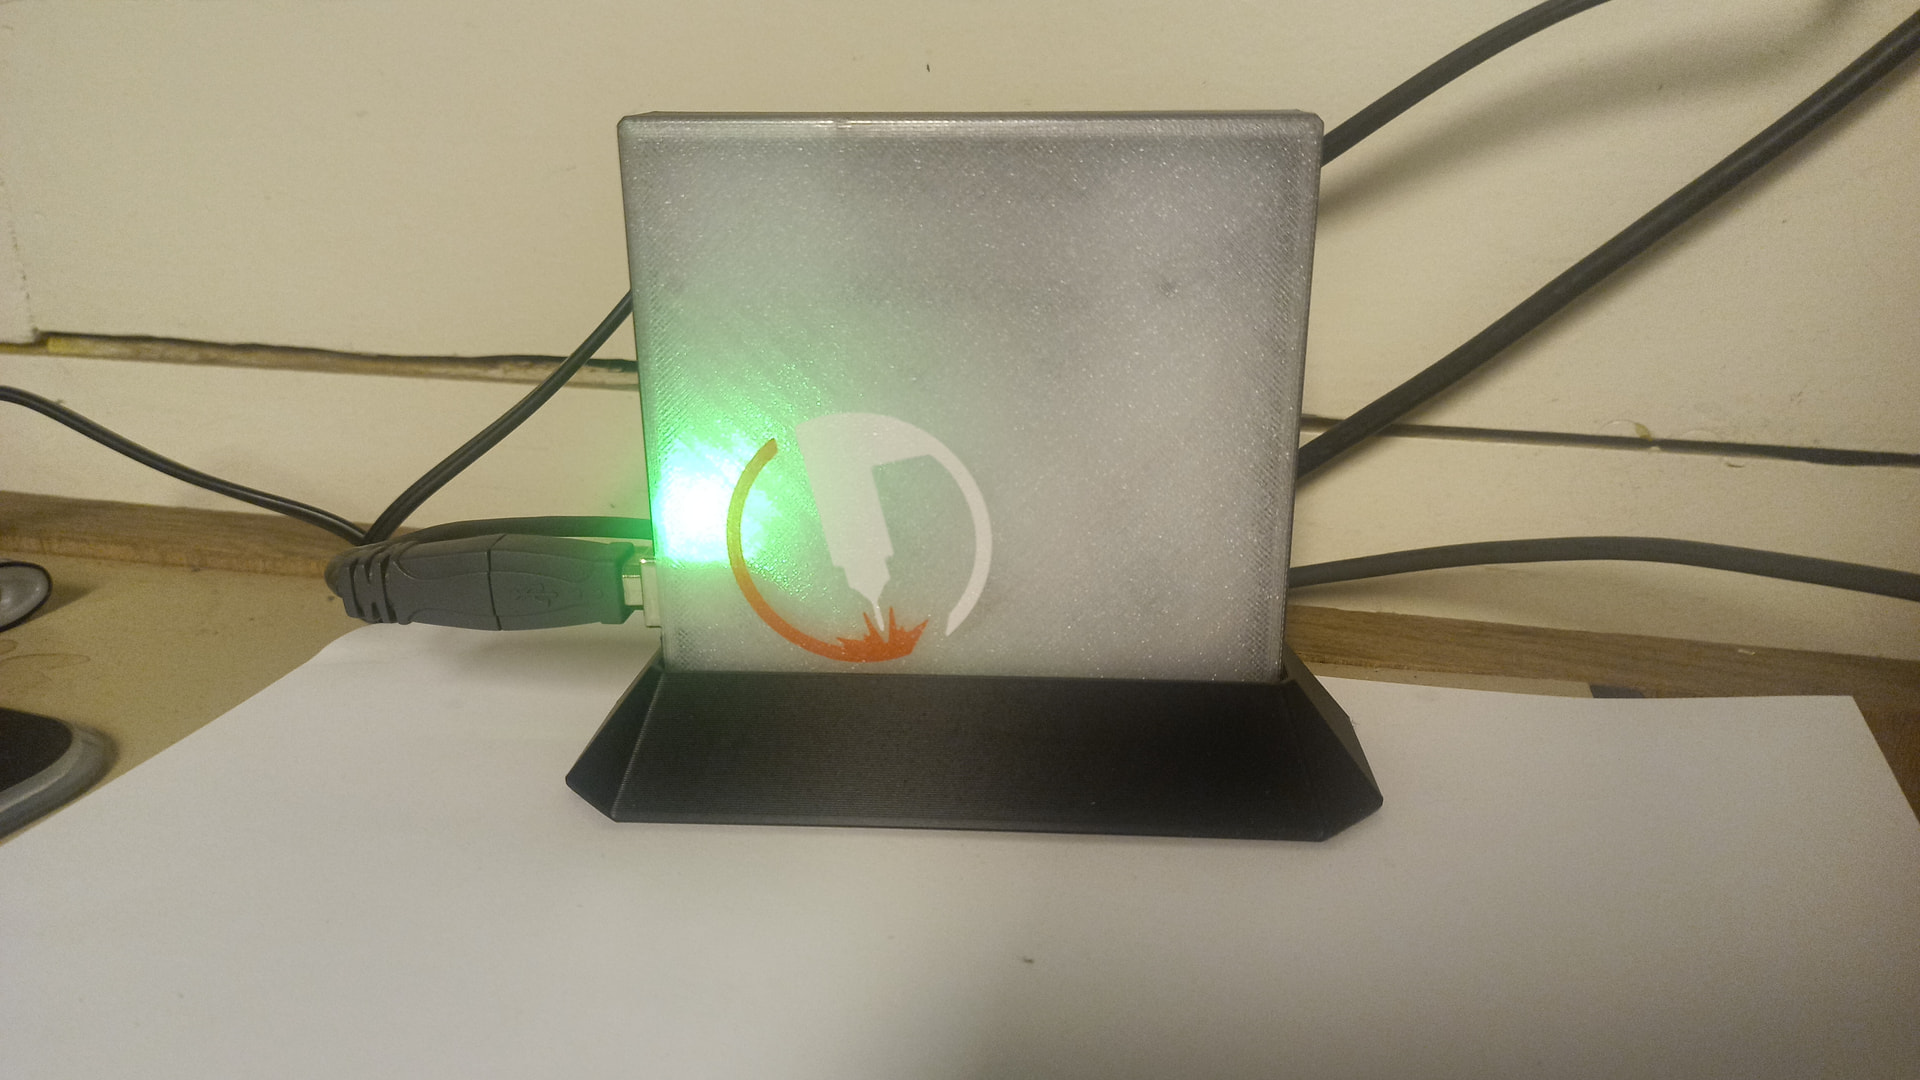
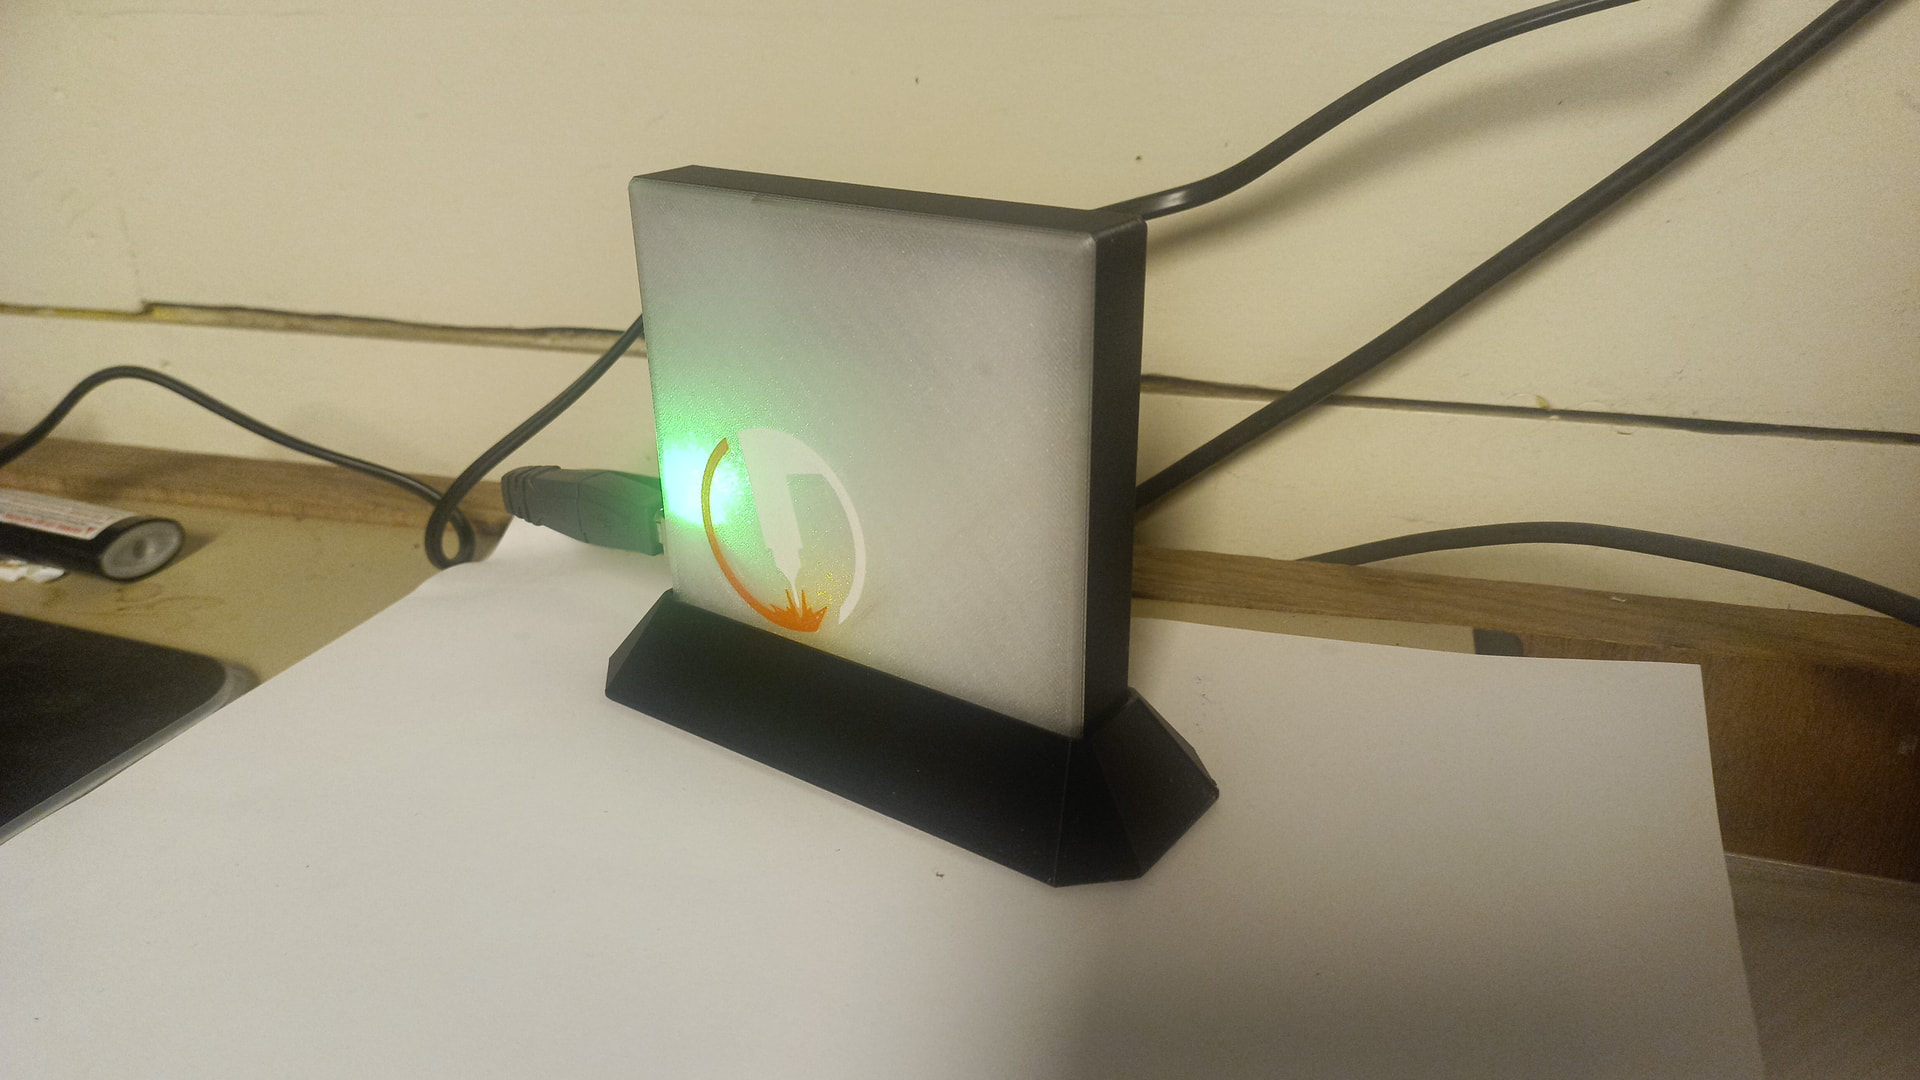
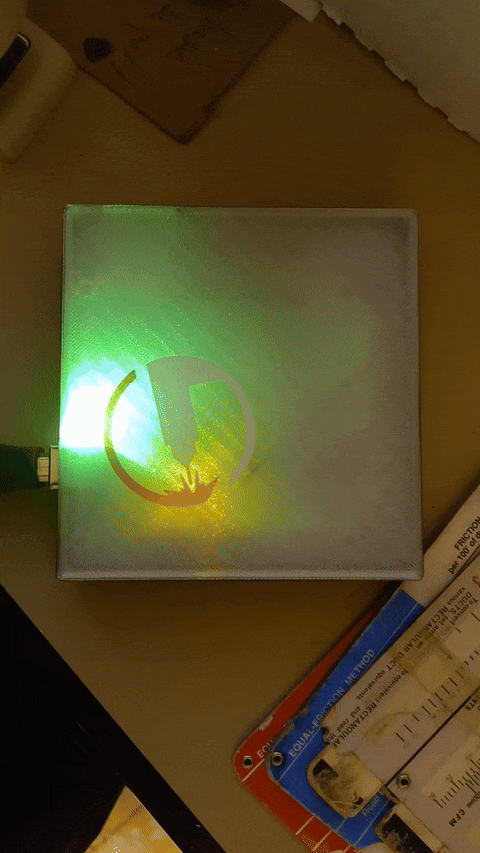
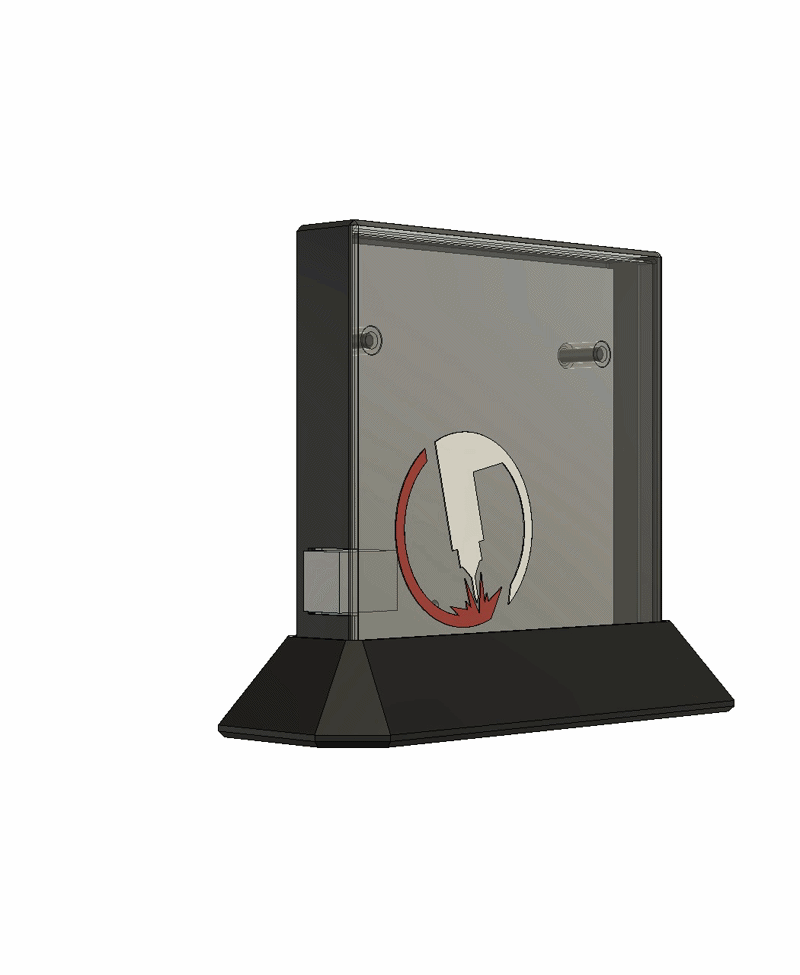
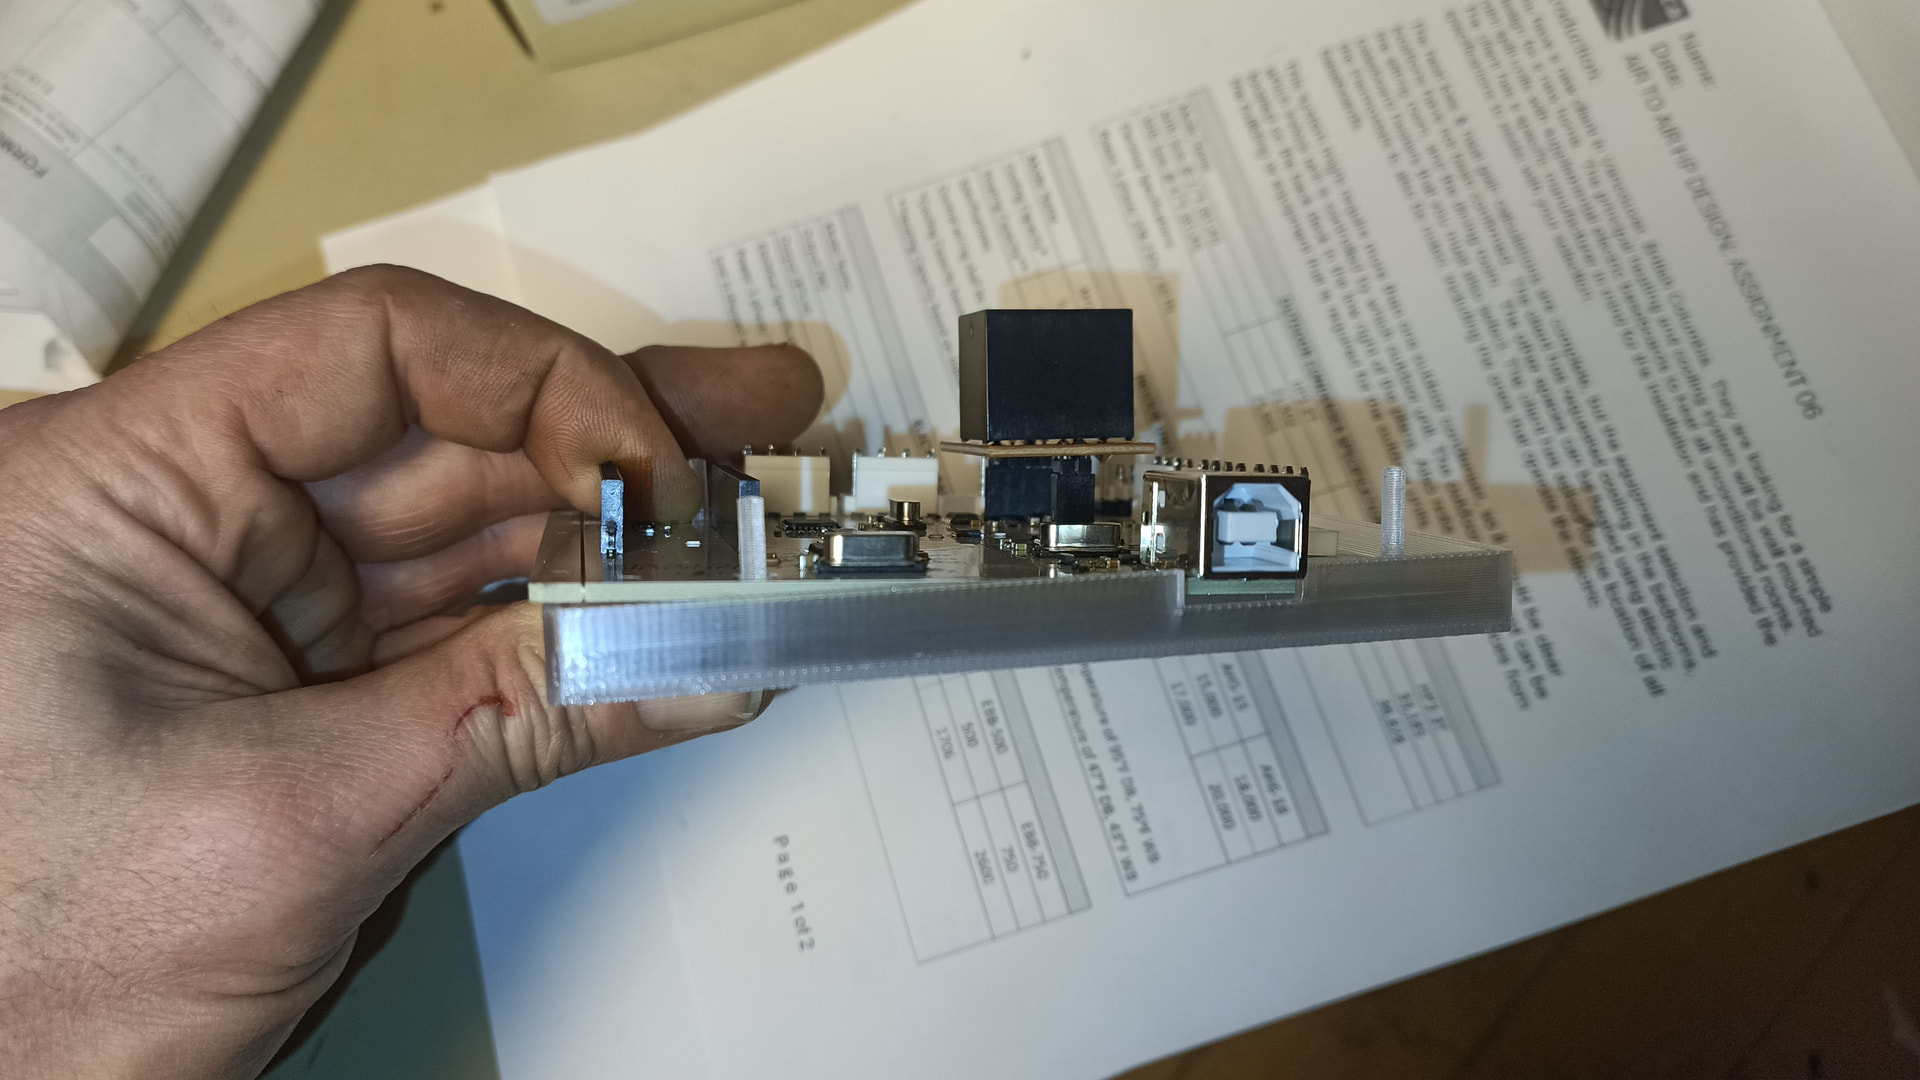
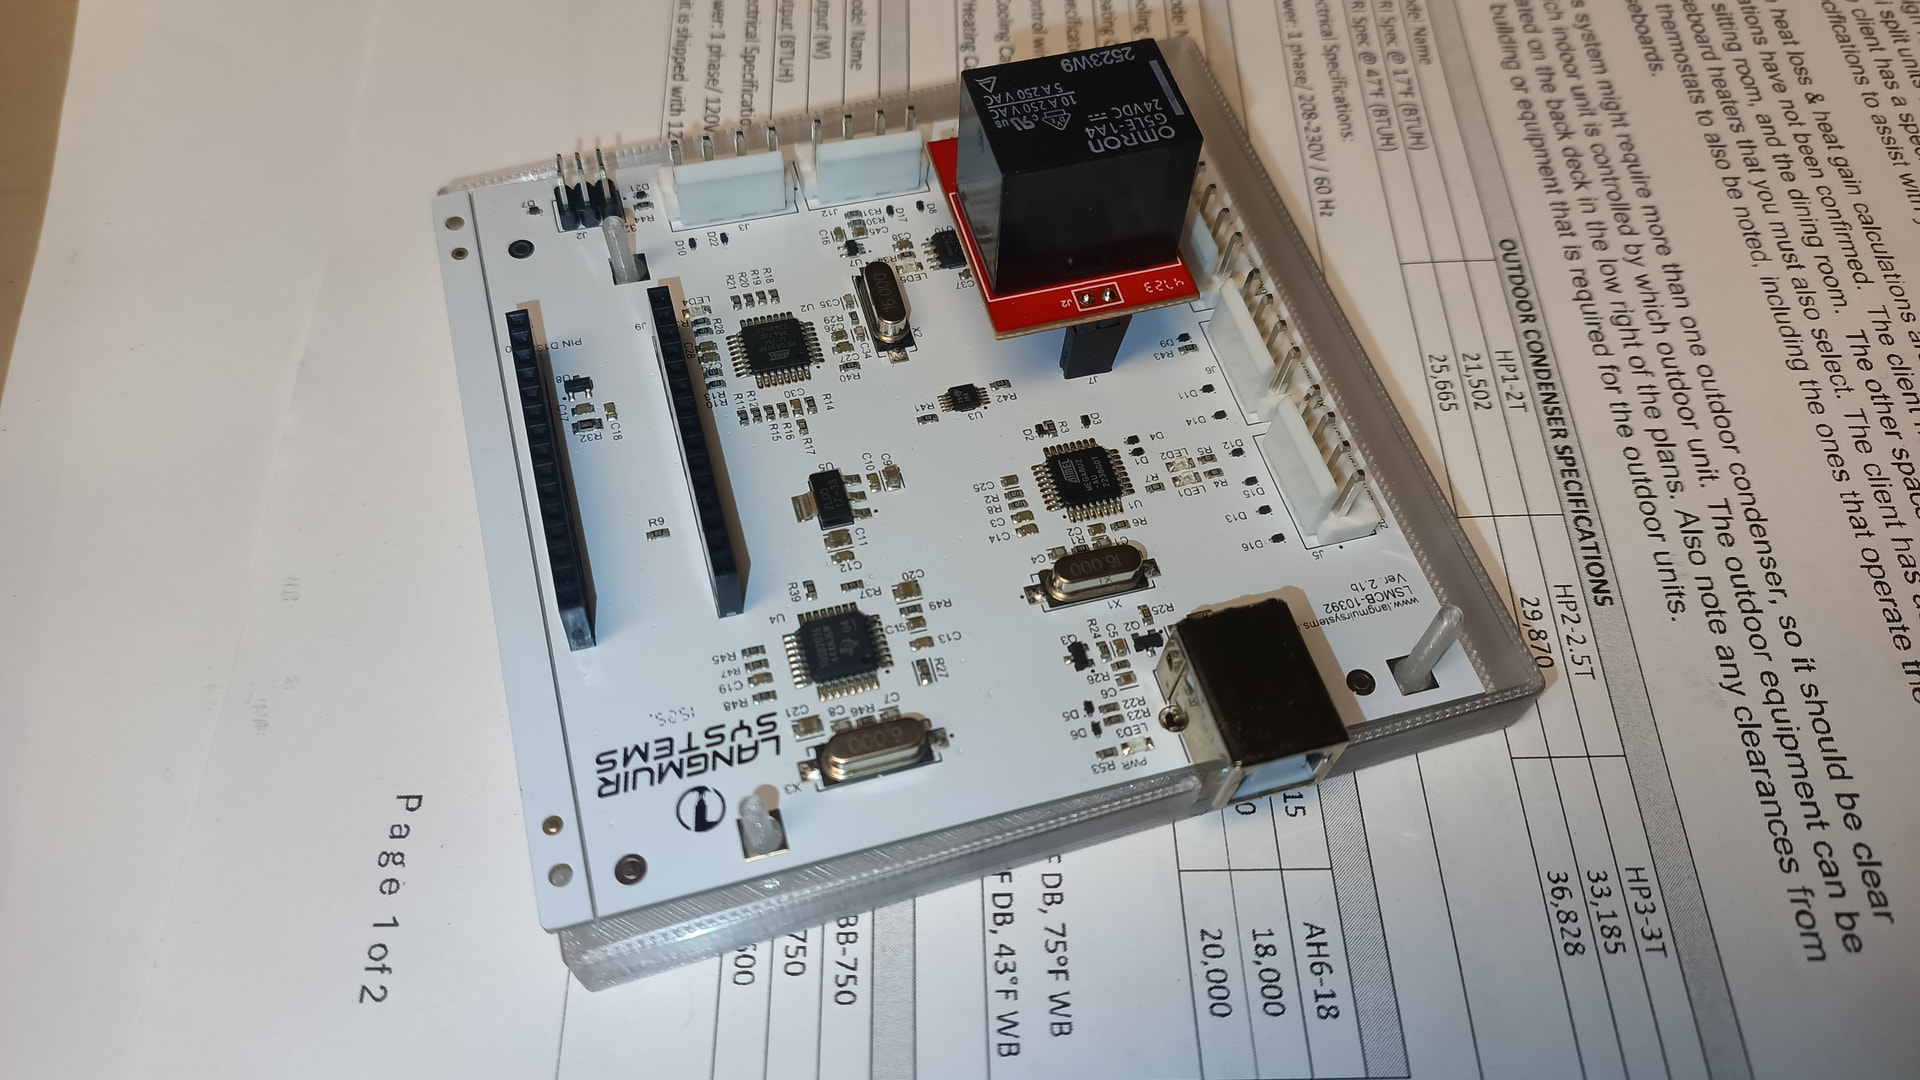
I threw up an STL on Makerworld if you want to print up an enclosure for a Crossfire or Crossfire Pro control board.
@rpcraft The file mentioned above is not compatible with the new crossfire version of the circuit board.
I found this out after wasting some filament.
I did quickly make my own design and posted it to maker world.
This version is compatible with both the new and old versions of the Control Board.
Also comes with a nice stand to free up desk space.
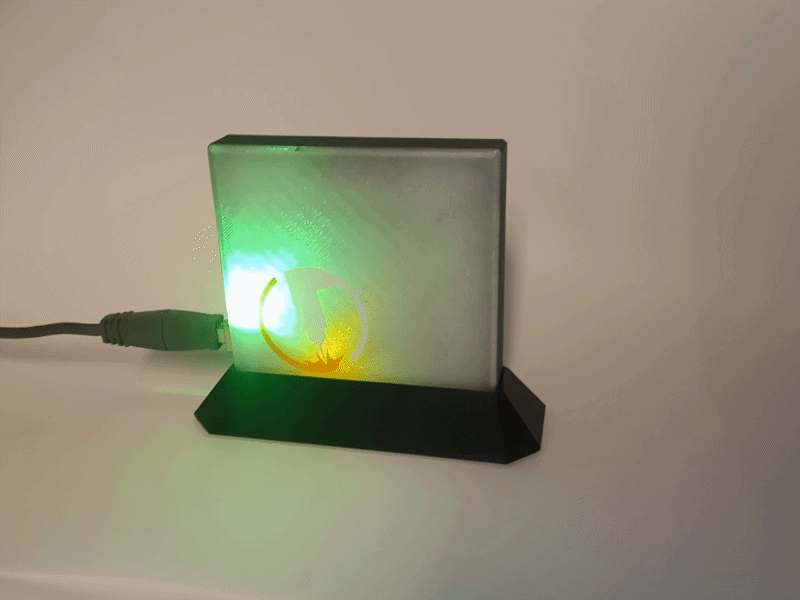
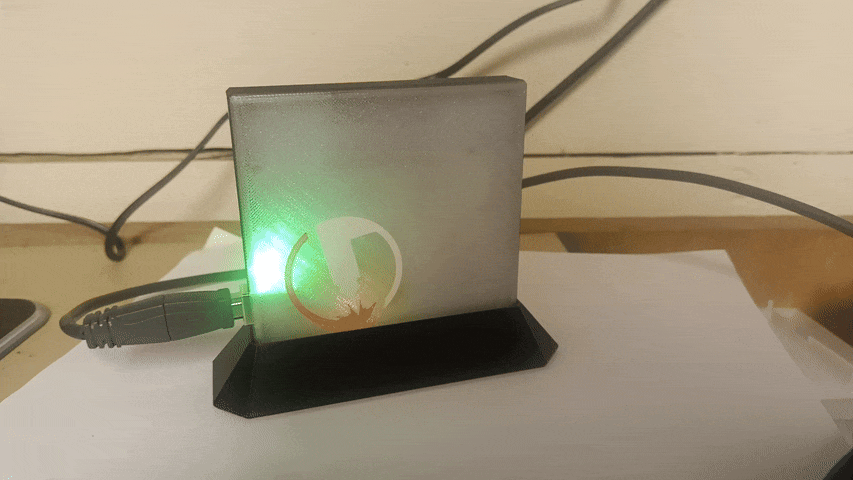
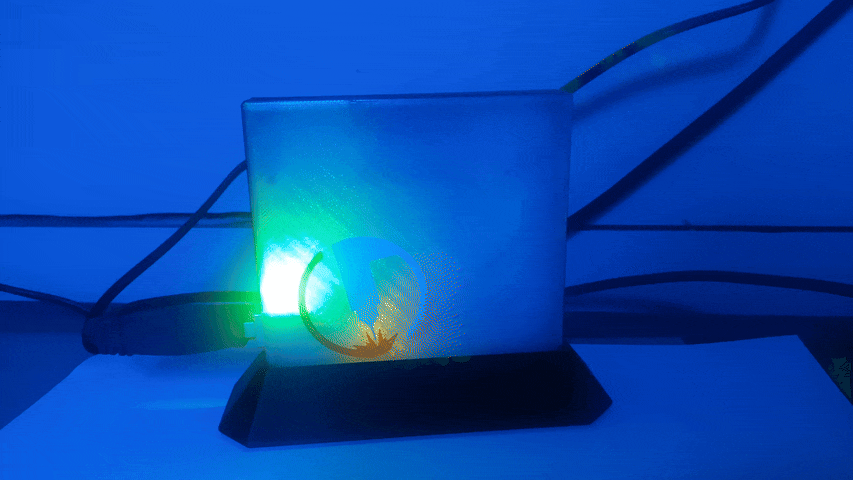
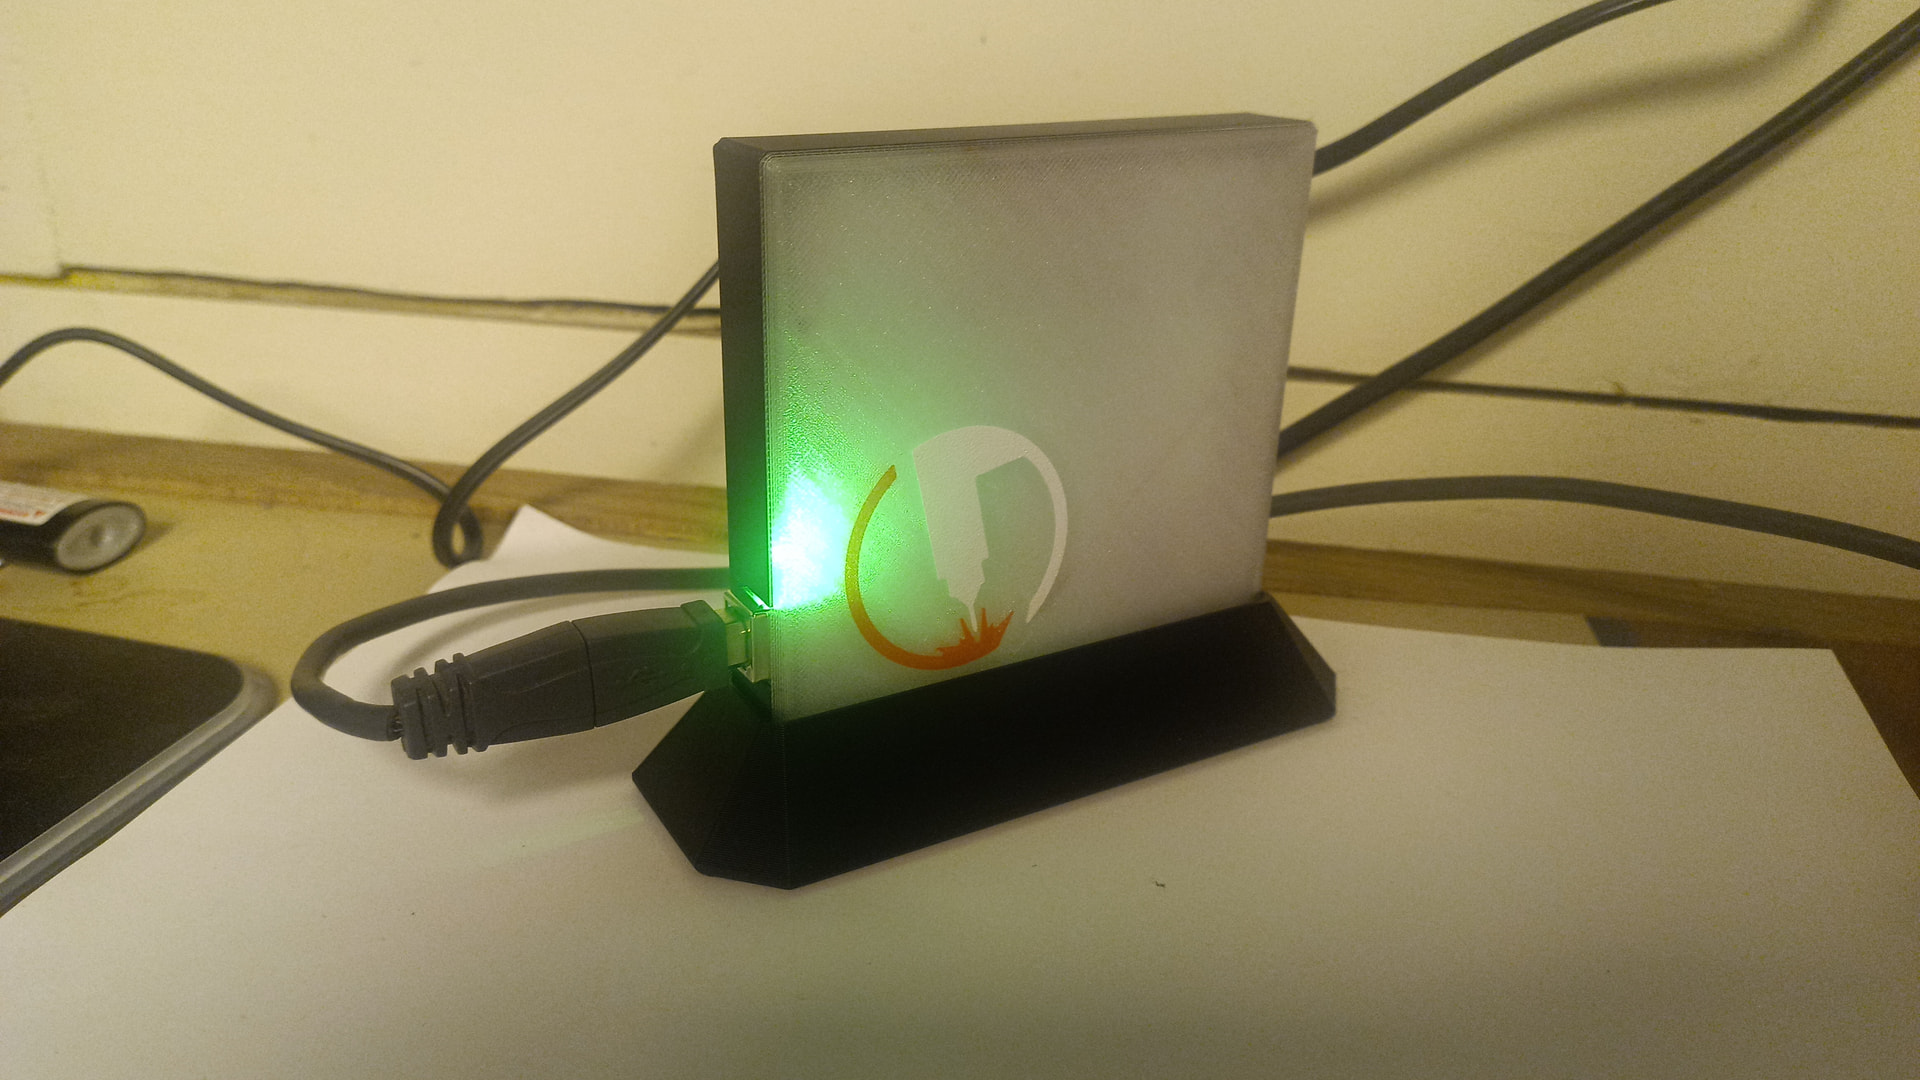

Enjoy!
3 Likes
Wow that’s awesome!!! I love LOVE how you made it so the flashing light was right at the point of the arc!!
Really smart to make it compatible with both versions of the Langmuir board!
The stand is a nice touch!
Some serious talent in this group!!
3 Likes
Pictures of the controller? Mine is about a year old, from a Crossfire Pro.
Third picture in on the maker world link
2 Likes
I’ll have to print it out when I get home and see how much it differs, interesting to see it change.
Then again Langmuir has changed stuff like the IHS tab and orientation without warning.
1 Like
It’s just wider by 3/16 of an inch on one side. There’s a step file available for download which you could use to compare against your CAD drawing without printing it
1 Like
Offhand can you tell me how much one of the control boards is from Langmuir since it is the weekend. I can call in Monday and ask but figure you may have an idea! Thanks for the great idea. It will at least enable me to do dry runs and mess around in the office on my desktop. Thanks and sorry for the long pause on my reply.
$105 +/-? Plus shipping
1 Like
Is that USD or CAD? Maybe there’s no difference now that we have the Great Equalizer in charge. ![]()
2 Likes
I believe it is around $125. I suspect that Langmuir will soon start limiting boards to repairs only. Having the board serves no purpose except maybe as a teaching avenue.
2 Likes
Tin, I just saw this. I’ve been off the site for a while, too many other irons in the fire…
I just pulled the files, I will print them up tomorrow. I wish I had some clear filament, it looks really neat. Maybe I’ll pop over to MicroCenter tomorrow and grab some..
appreciate you taking the time to do this, I wish I was better with 3D CAD software. I guess I just need to take the time to practice and get more proficient.
1 Like
RP, I have a spare you can have. The output driver transistor for the torch fire relay is toast but the rest of the board works perfectly.
TinmanI printed the3 files. The control board fits perfectly. I was going to pick up some clear filament at MicroCenter but they were out, I just ordered online..
How did you get the torch to show up on the cover? Mine printed with out it. I like the little detail it brings..
2 Likes
I’m happy to hear it worked out.
Did you download the step file or the m3f file for bambu labs?
The torch logo step should be separate components that you can apply the colors to in your slicer.
The bambu Labs file should be already set up to print the logo in full color.
1 Like