What’s going on guys, I’m super stocked to have found a used (like new) mr1 locally that I was able to purchase and get into my garage.
While I have not powered up the spindle just yet, I just wanted to see what your thoughts were on a few things.
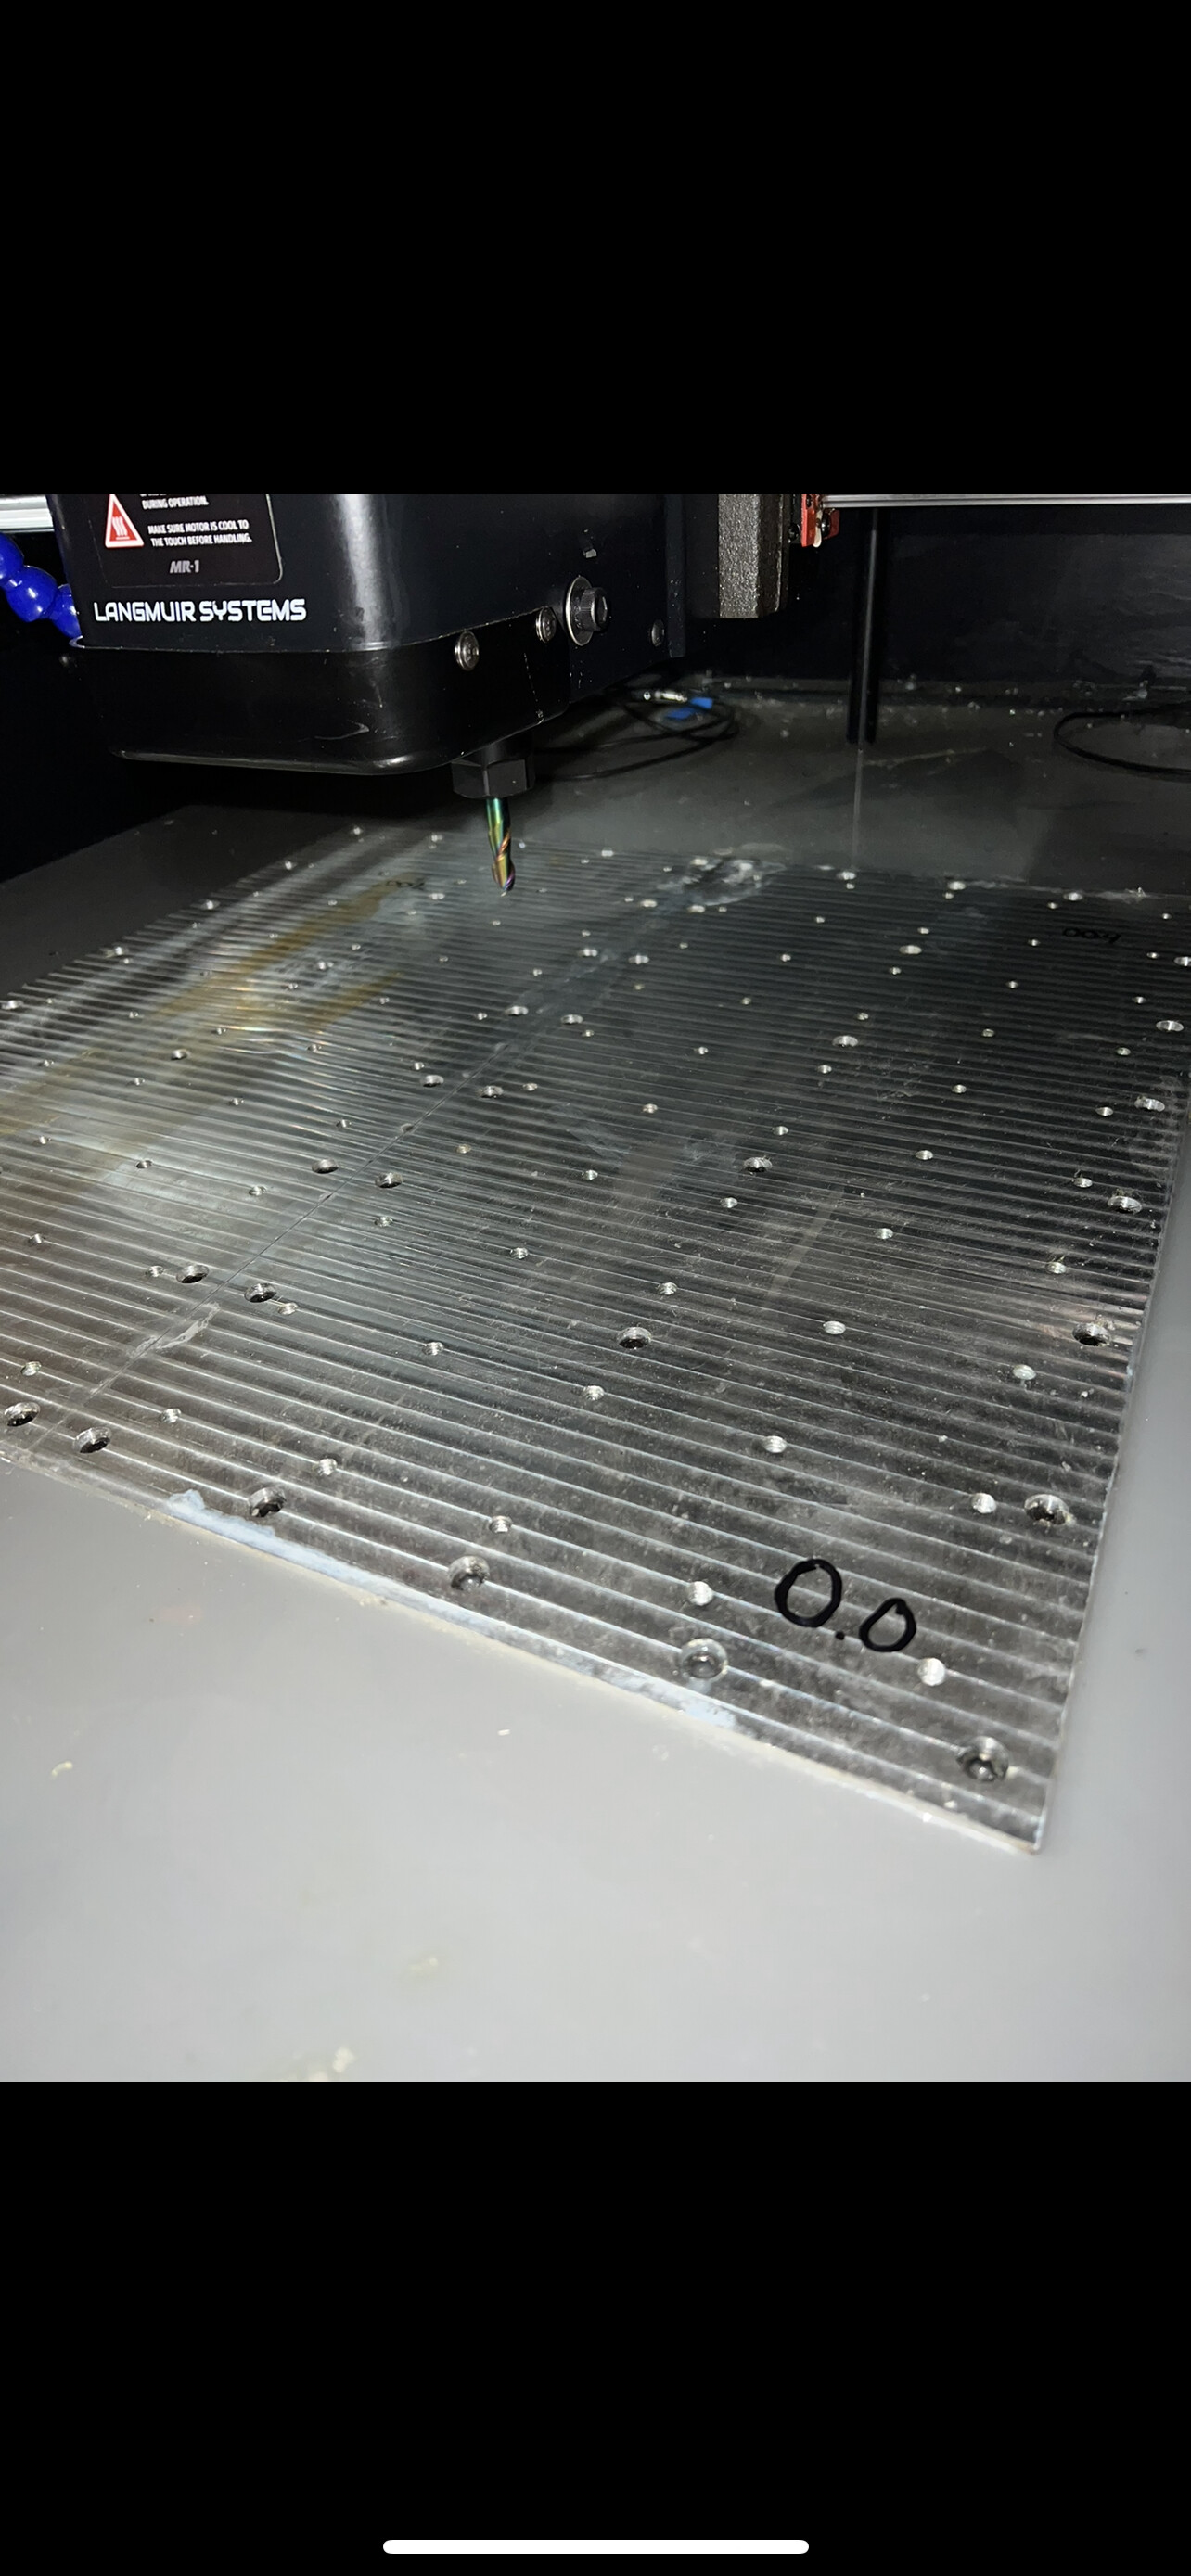
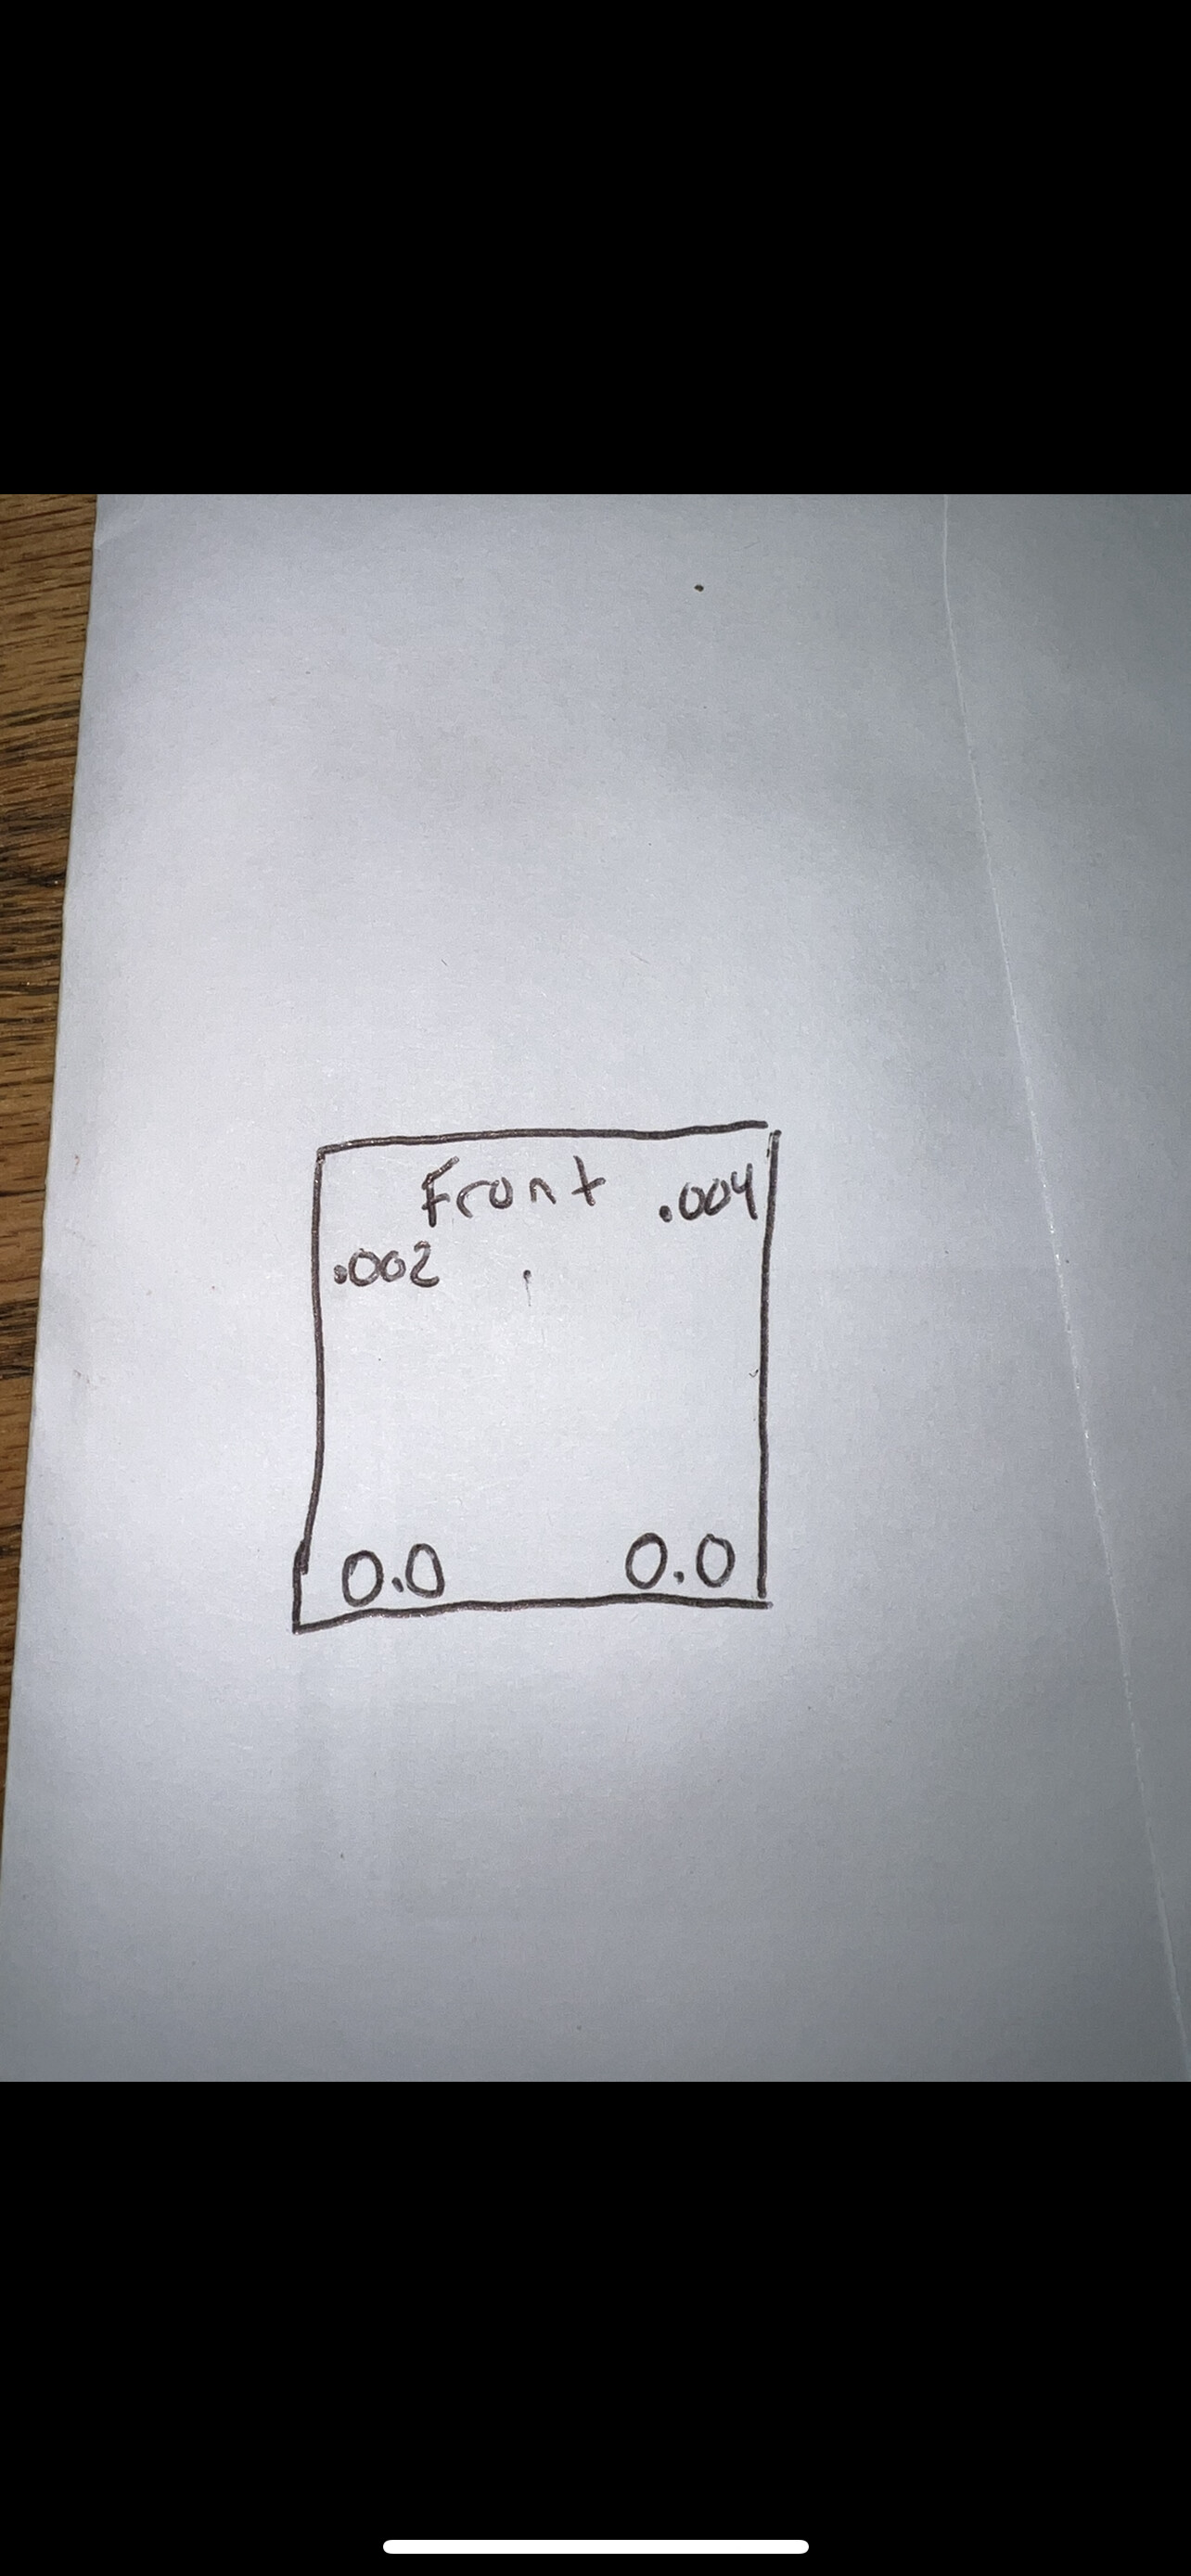
I moved it in a box truck with a lift gate, went as gently as possibly on a 1 hour ride. Should this totally mess up the tolerances the previous owner set up? He never actually used it on aluminum, aside from a few fly cuts and the fixture plate. I will attach a photo of the readings I got from the dial indicator of all the corners. I’m assuming it’s going to need some fiddling to get dialed in and probably the set screw mod.
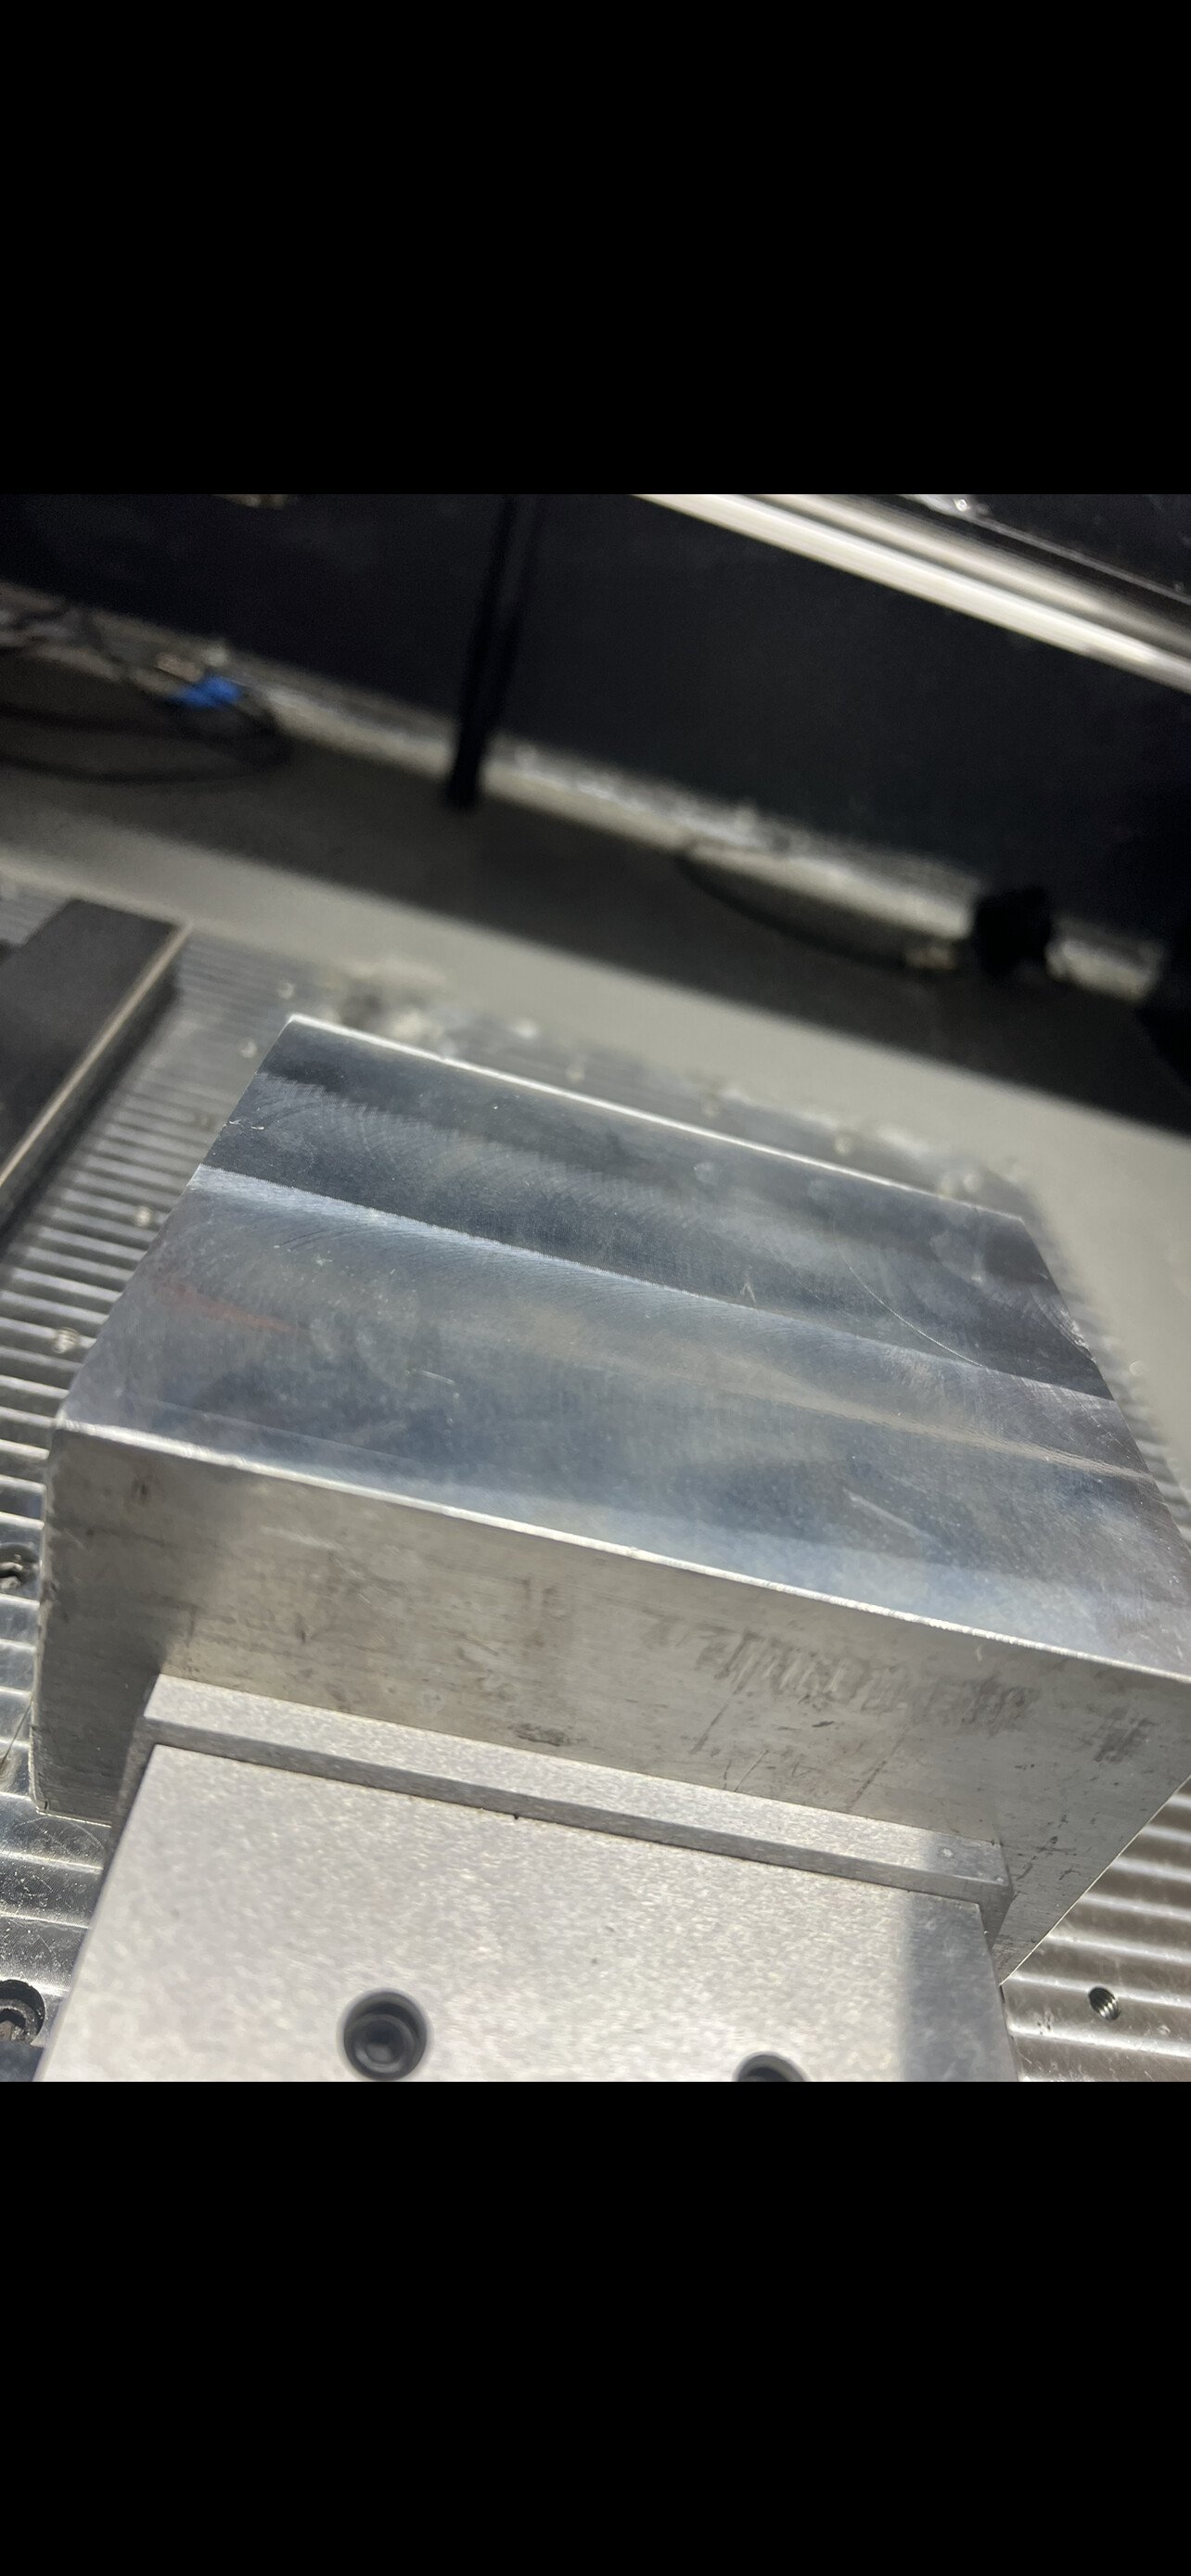
one thing I don’t like, is the back right corner is about .01” from the top of the fixture plate. I’m not sure if he cut it down too much, or if the epoxy was just high when poured. I know the plates are replaceable, but is there a procedure for it out yet? Not that I necessarily need it replaced, I was just curious more than anything.
This fly cut is smooth as a baby’s bottom. But I didn’t see them being done as they were from the previous owner.
Did you check the tram and nod yet?
Also check that the X axis is square to the Y axis.
Same with Z and Y.
Wouldn’t hurt to check the compensation on X, Y and Z are set accurately also.
Do some test cuts and see if the surfaces are flat and perpendicular.
I’m always skeptical when getting anything precision from another party. You never know if it’s taken a bump or not.
If all looks good, then let the chips fly!
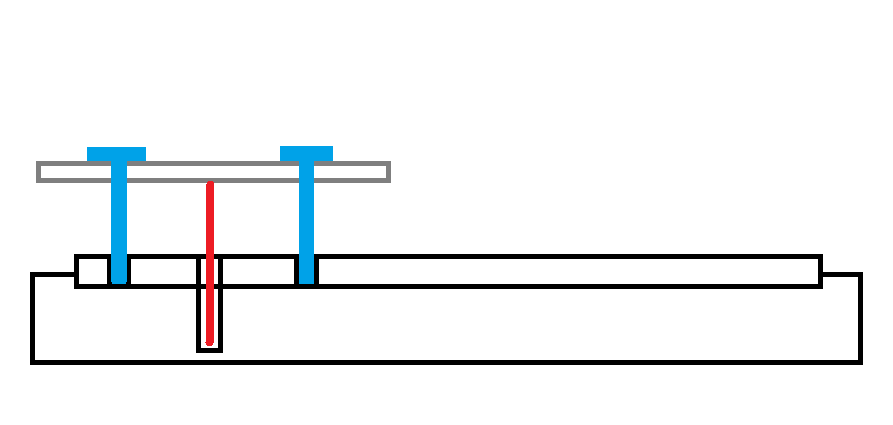
I have pulled the plates up after pouring the concrete and before the epoxy so your mileage might very. You can take out the screws and use the the steel inserts in the concrete as a jack point. I used a scrap 1/4" steel plate with slots in it that spanned the baseplate mounting holes and the threaded fixturing holes.
First, remove all the mounting screws and put in a long bolt you want to jack from so it sticks up above the baseplate. Next, put the 1/4" plate over the long bolt and align the slots to two or more of the threaded fixturing holes. Screw down them down progressively and it should draw the baseplate upward. Move around the baseplate repeating the process. Eventually you can raise it up enough to get under with a pry tool.
A word of caution: It was incredibly difficult to separate the fixture plate from the cured cement. This method worked for me with no damage but stripping the fixturing holes crossed my mind. Also, the original plates are not perfectly flat or square. The anchors will set into the concrete to match the baseplate warp. If you install new plates will likely need to be cut to fit.
Here is a poorly drawn diagram to explain what I am talking about:
Cool I definitely understand what you’re saying. I’m going to leave it be for now, since I’m as green as it gets with machining, let alone cnc I’m sure down the road I’ll come up with a good plan.
For the epoxy issue, I was considering using a router around it, maybe just an oscillating tool will work and It will save me from hitting concrete with my router
Another option would be to mill out most of the plate prior to pulling them.
But again I’ll have to cross that bridge when I get there. Thank you for your idea, I’ll definitely save that for when the time comes.
I wouldn’t remove the plates. I also removed mine after pouring the concrete because I wanted to see if it was possible. In this case you have small potential error and you should just relevel and shim and tram the machine for it’s new location, then cut the plates again.
Since the plates were nowhere near flat when new I ended up leaving one corner of my plates unmachined because I’m not using that corner of the machine at the moment and it left me with more potential passes as I tune the machine. My low corner is about 0.005 below the rest of the machined surface.