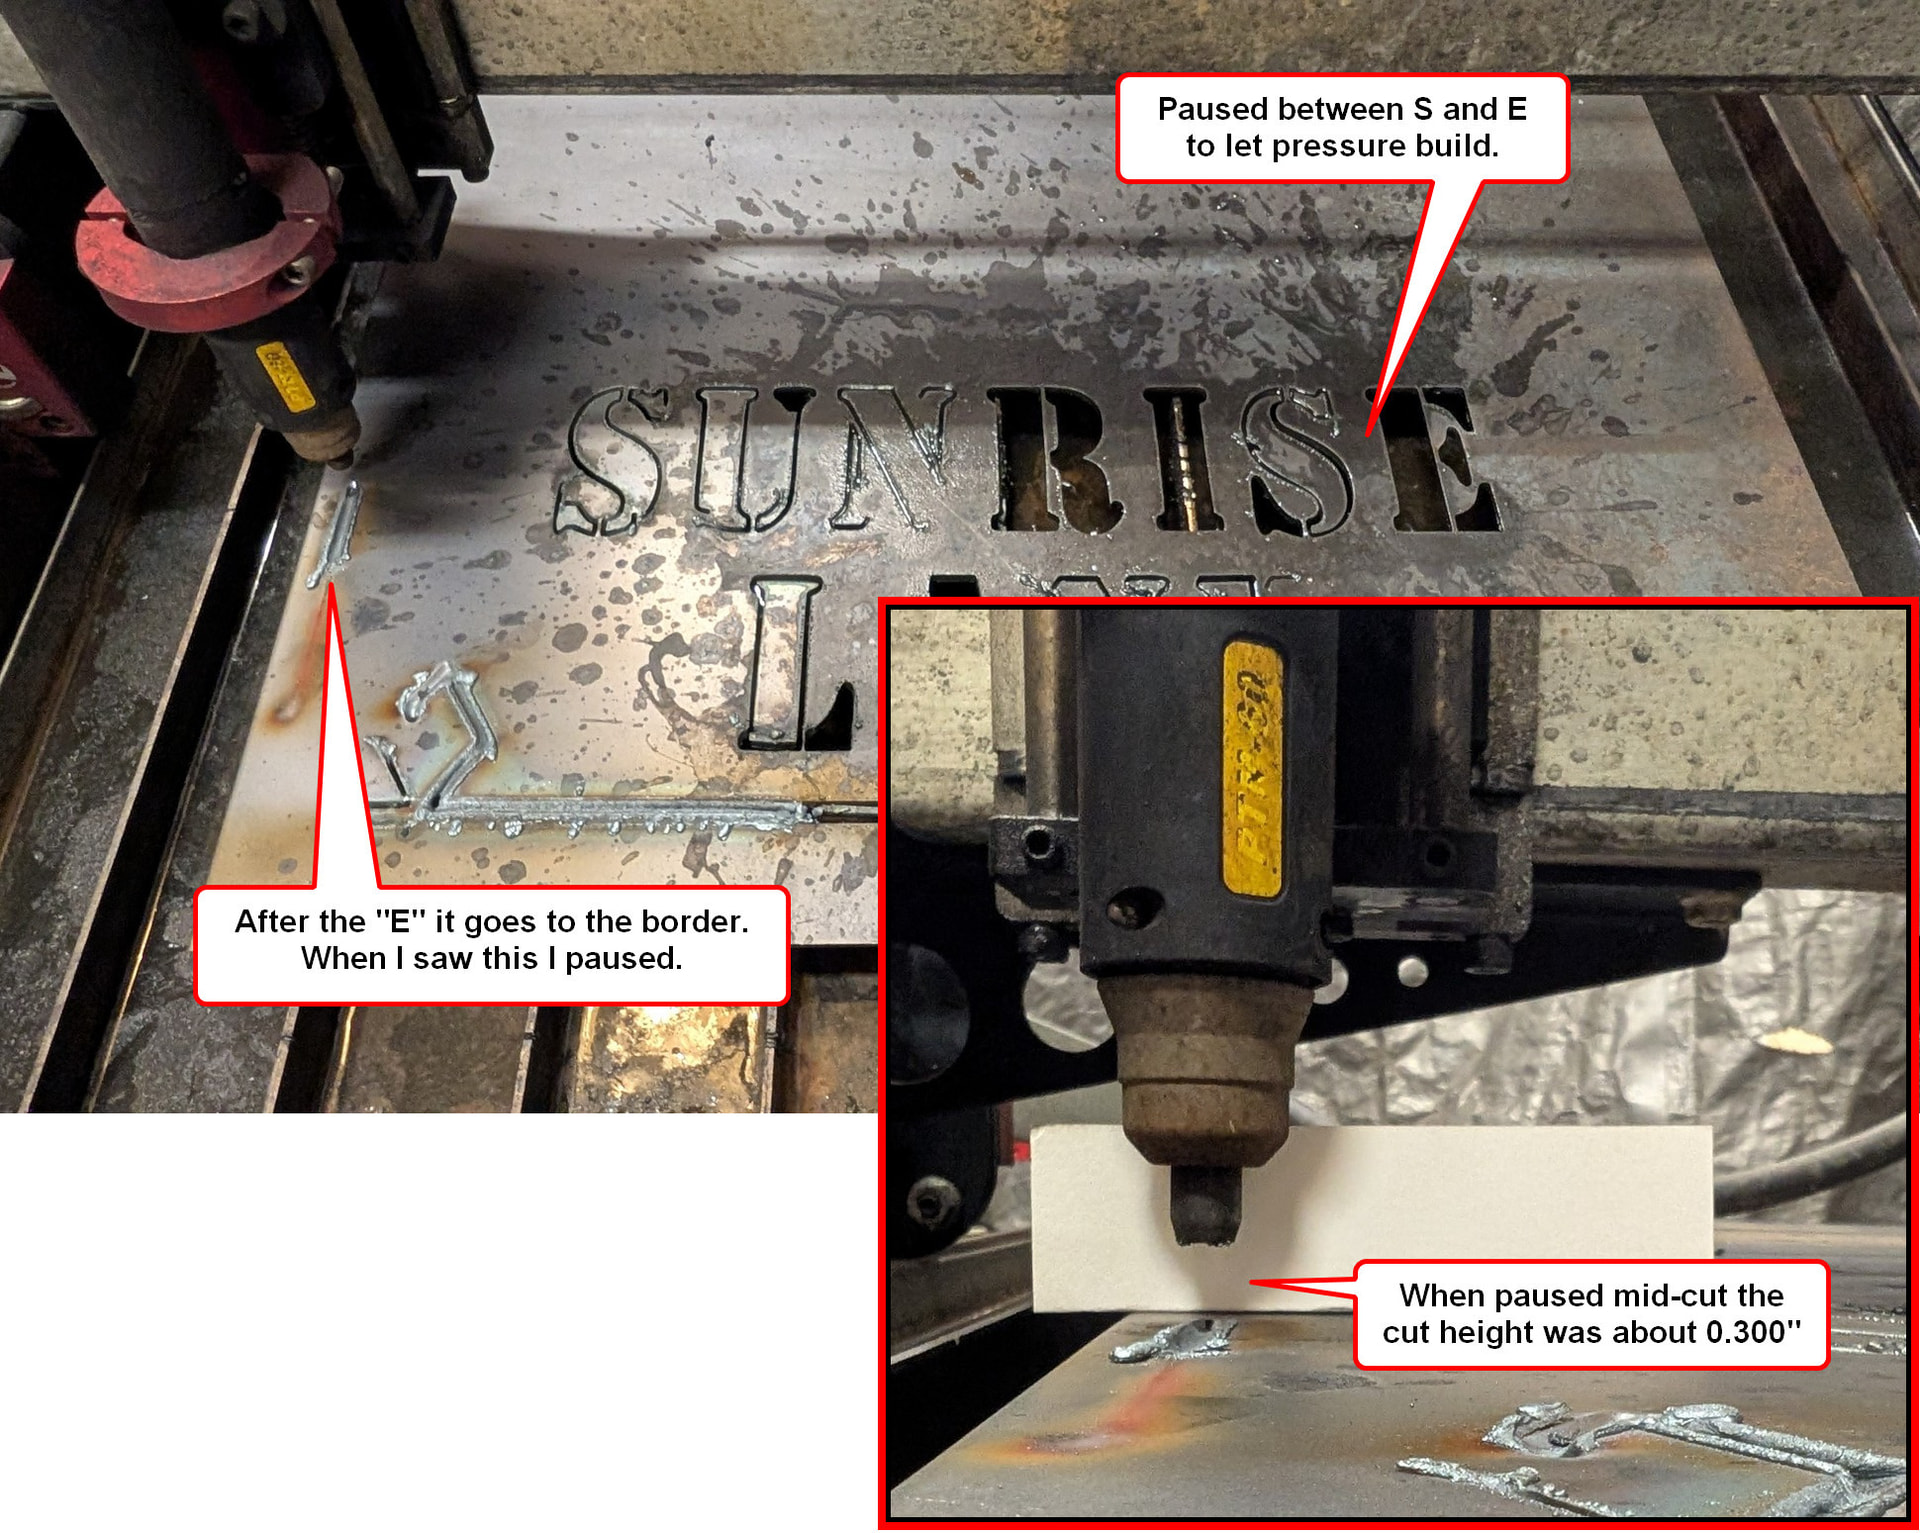
After a lot of help on this forum I was able to cut two signs (same design) that came out great. The text on this sign is only difference. I’ve compared the cutting profiles and post settings for both signs and don’t see any differences. I noticed a delay before cutting started on the “E” in “Lane” and started watching for it. You can see that it happened when it started cutting “Sunrise” but the “R” came out fine. Although I ran the entire program on the first sign without pausing I did pause between the “S” and the last “E” because I thought is still could be pressure. After the “E” it goes to the border where it did not pierce until it had moved some and which point I paused again. The cut height at this point was about 0.300”. (Yes, 0.300” not 0.030”.)
If you cut it once, and it did fine, zero reason to post a new file as you can just recut the initially created file at any other point.
With that said, I’m curious as to how the consumables look in case you have moisture. Moisture can affect cut quality in random ways including failing to cut out a shape and more.
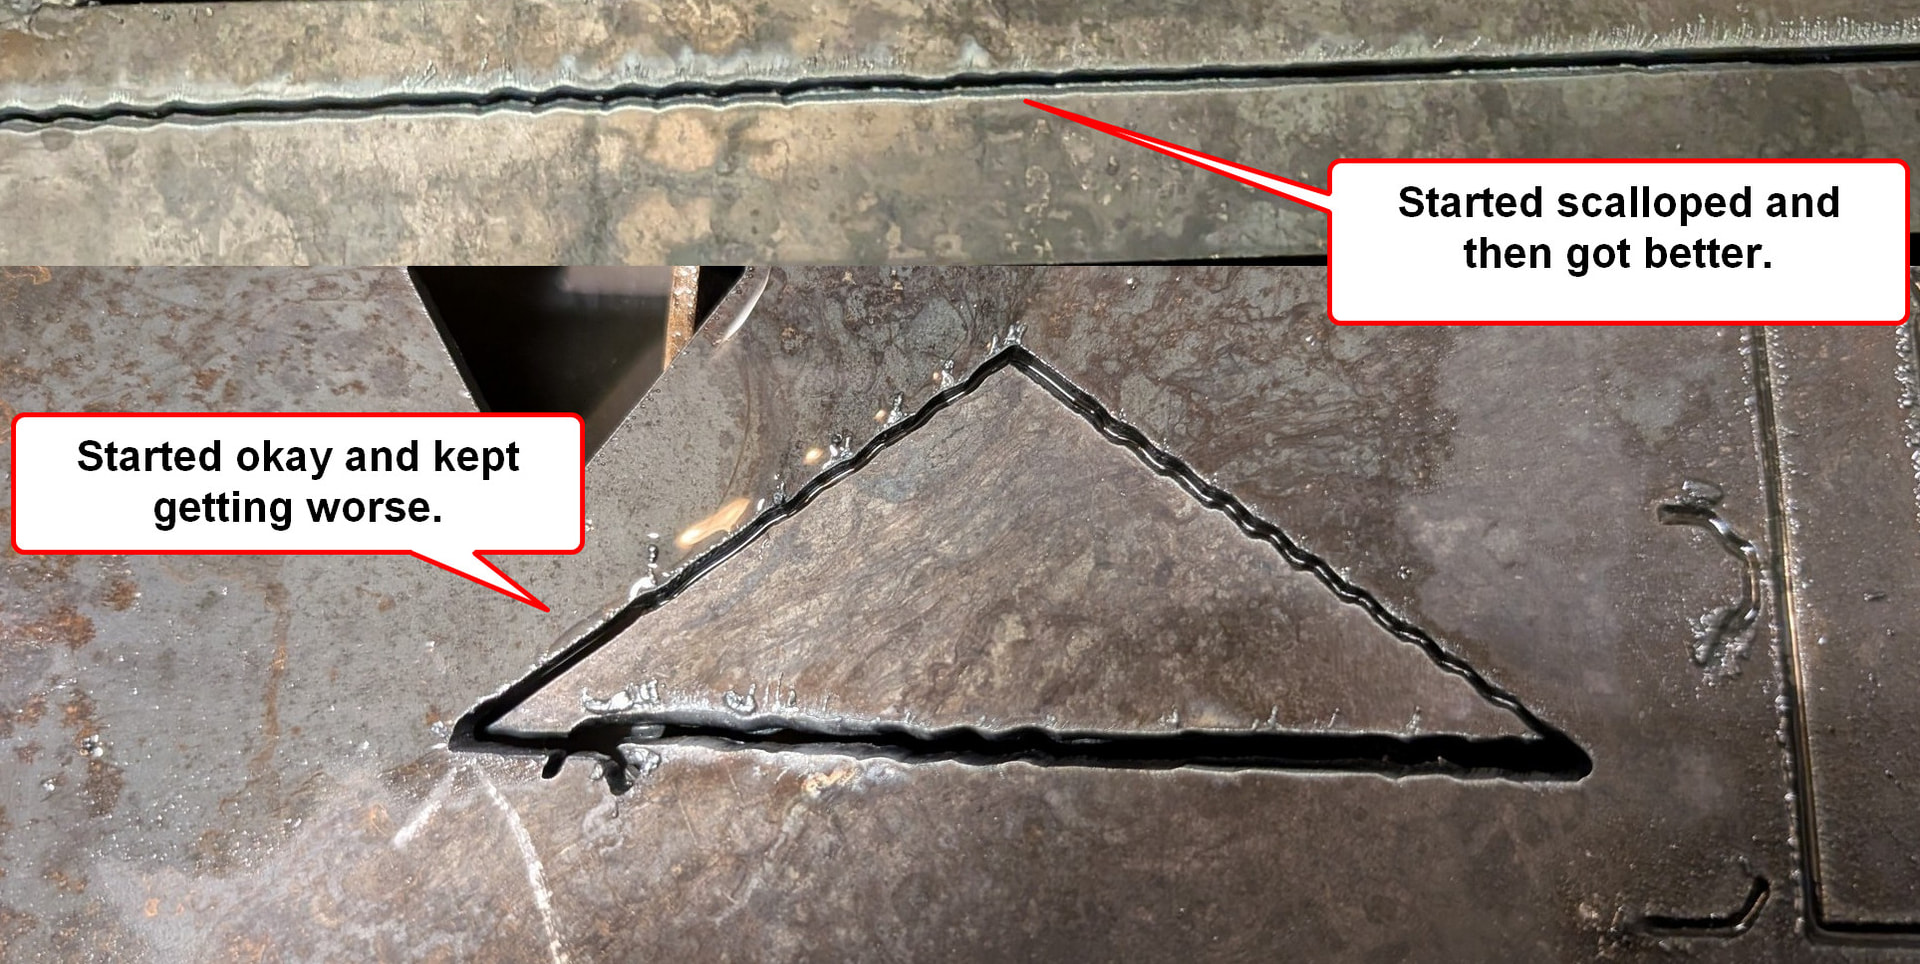
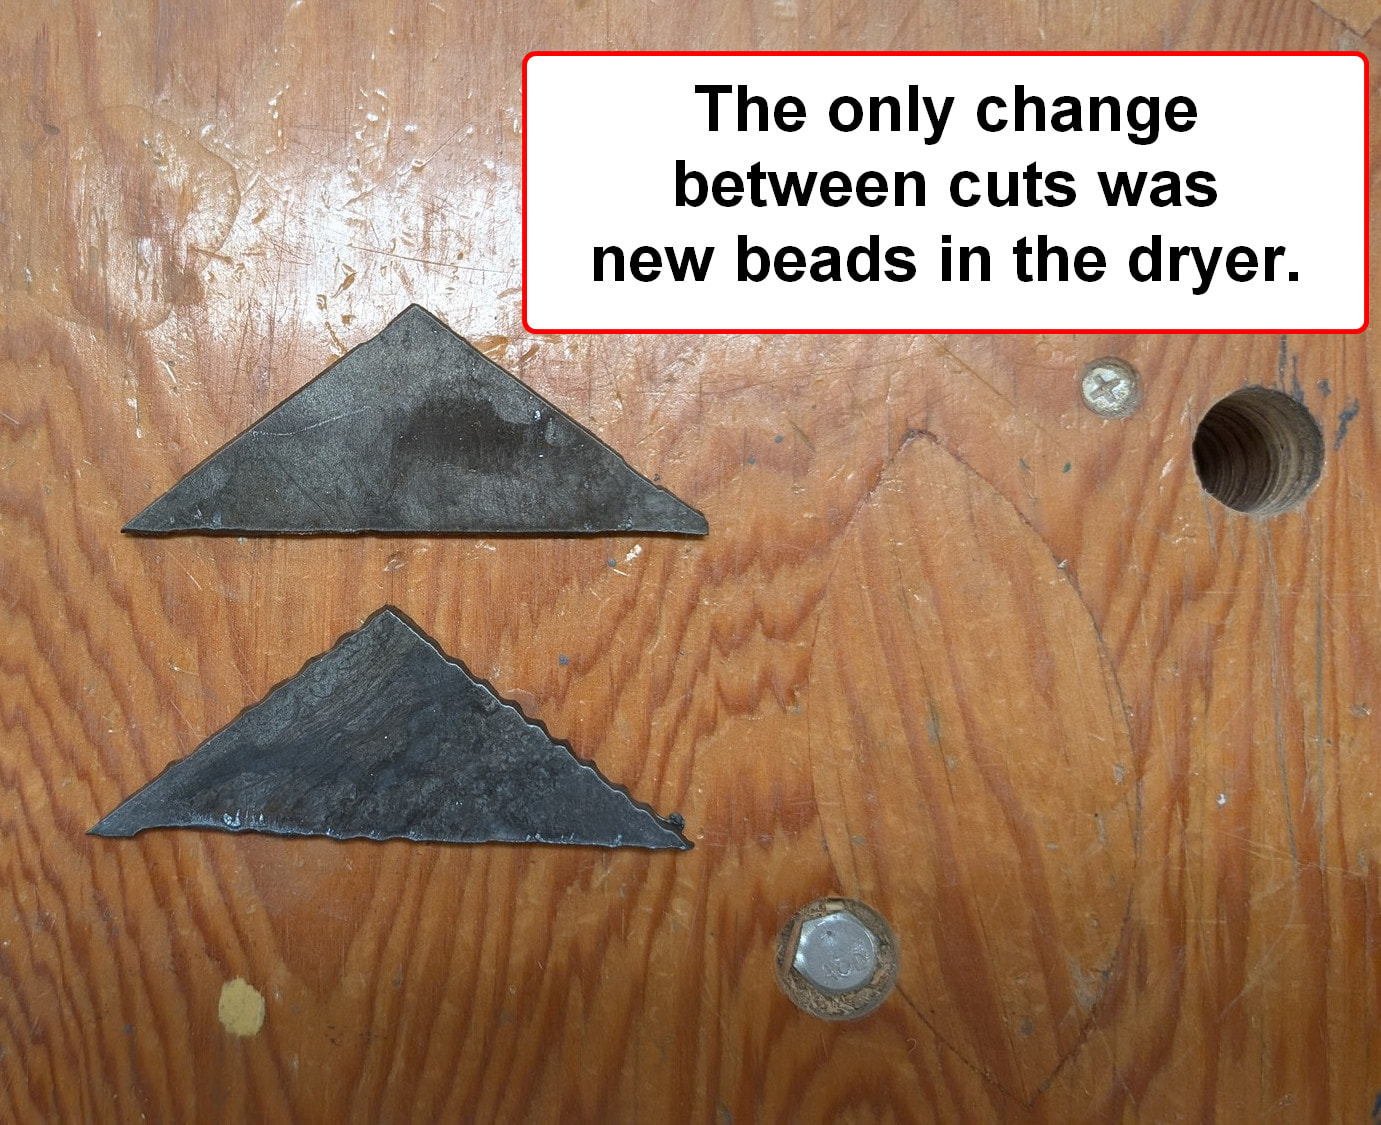
I have a self-built tube dryer. I never get any water out of it, probably because I’m in the high desert in NM. Air then goes through a dessicant dryer and I do change the beads when the color is faded. After attempting more cuts and the torch not firing I took the nozzle off a second time and stuff had accumulated. That’s a little weird because the torch wouldn’t fire on a straight cut. I then replaced the electrode and tip. I did make one clean straight cut although the torch didn’t fire for the first inch or so. On the second straight it started with the scalloping you see in the second image and then cleaned up. I then cut the small triangle which got worse as it went along.
I installed a new electrode and nozzle on Tuesday and got this result. I did not go back to cutting until today. If moisture did this from one cut to the next it is not condensing out in my dryer.
And like Bigdaddy said, those consumables were long due for replacement.
Are you tracking your pierce count? If you’re new and just started, you should periodically check your consumables (both the nozzle and electrode) every 50 or 100 pierces.
Doing so will allow you to track when your consumables wear down enough to warrant replacing, only to prompt you to reset your counter and start over again. I did this for about 3 consumable changeovers until I decided on a specific number to change them out at.
It’s just a good habit to get into as you’ll know what to expect and how close you are to killing off your consumables before starting that next, long cut program.
It also prevents wasting steel like you did earlier.
The sign that came out very nice had 37 pierces and then 5 more on the second sign before things went south. Could that be enough to end the nozzle and electrode? Nozzles and electrodes are cheap compared to steel and if replacing them on evey sign will be necessary I’ll do it. I have six signs to go on this project. Will bad consumables and/or water cause the scalloping? I’ve never had that before.
They are definitely cheaper than steel. But you have an excessive amount of moisture in your air system. You need to clean it up before you get any life out of your consumables. No Amazon or Plasmadyn consumables either. The other recommendation is to run the torch height test to see what your table thinks .062 actually is. It does appear to be cutting or piercing too high. That will trash consumables very fast.
The swirl marks on the electrode are water droplets swirling around it while it’s firing. The consumables are usually copper with a hafnium coating. If you sand the you will remove the hafnium coating and that will be the end of them. You can tell by the color of your arc if the hafnium is gone.
I’ll work on the water issue. I’ve done the cut height test a couple of times. It was at 0.090” so I set the springback to 0.0” and the cut height to 0.040” starting with the really nice sign. I don’t know any way to lower the cut height.
you may have EMI, if you’d like to solve it we would need your live voltage numbers while cutting along with what material you’re cutting. Perhaps run the THC test as well from firecontrol
pics of your air setup will help as well
I’ve joked before with others, and I’ll joke about it again. “Your air is not clean and dry until we tell you it’s clean and dry”
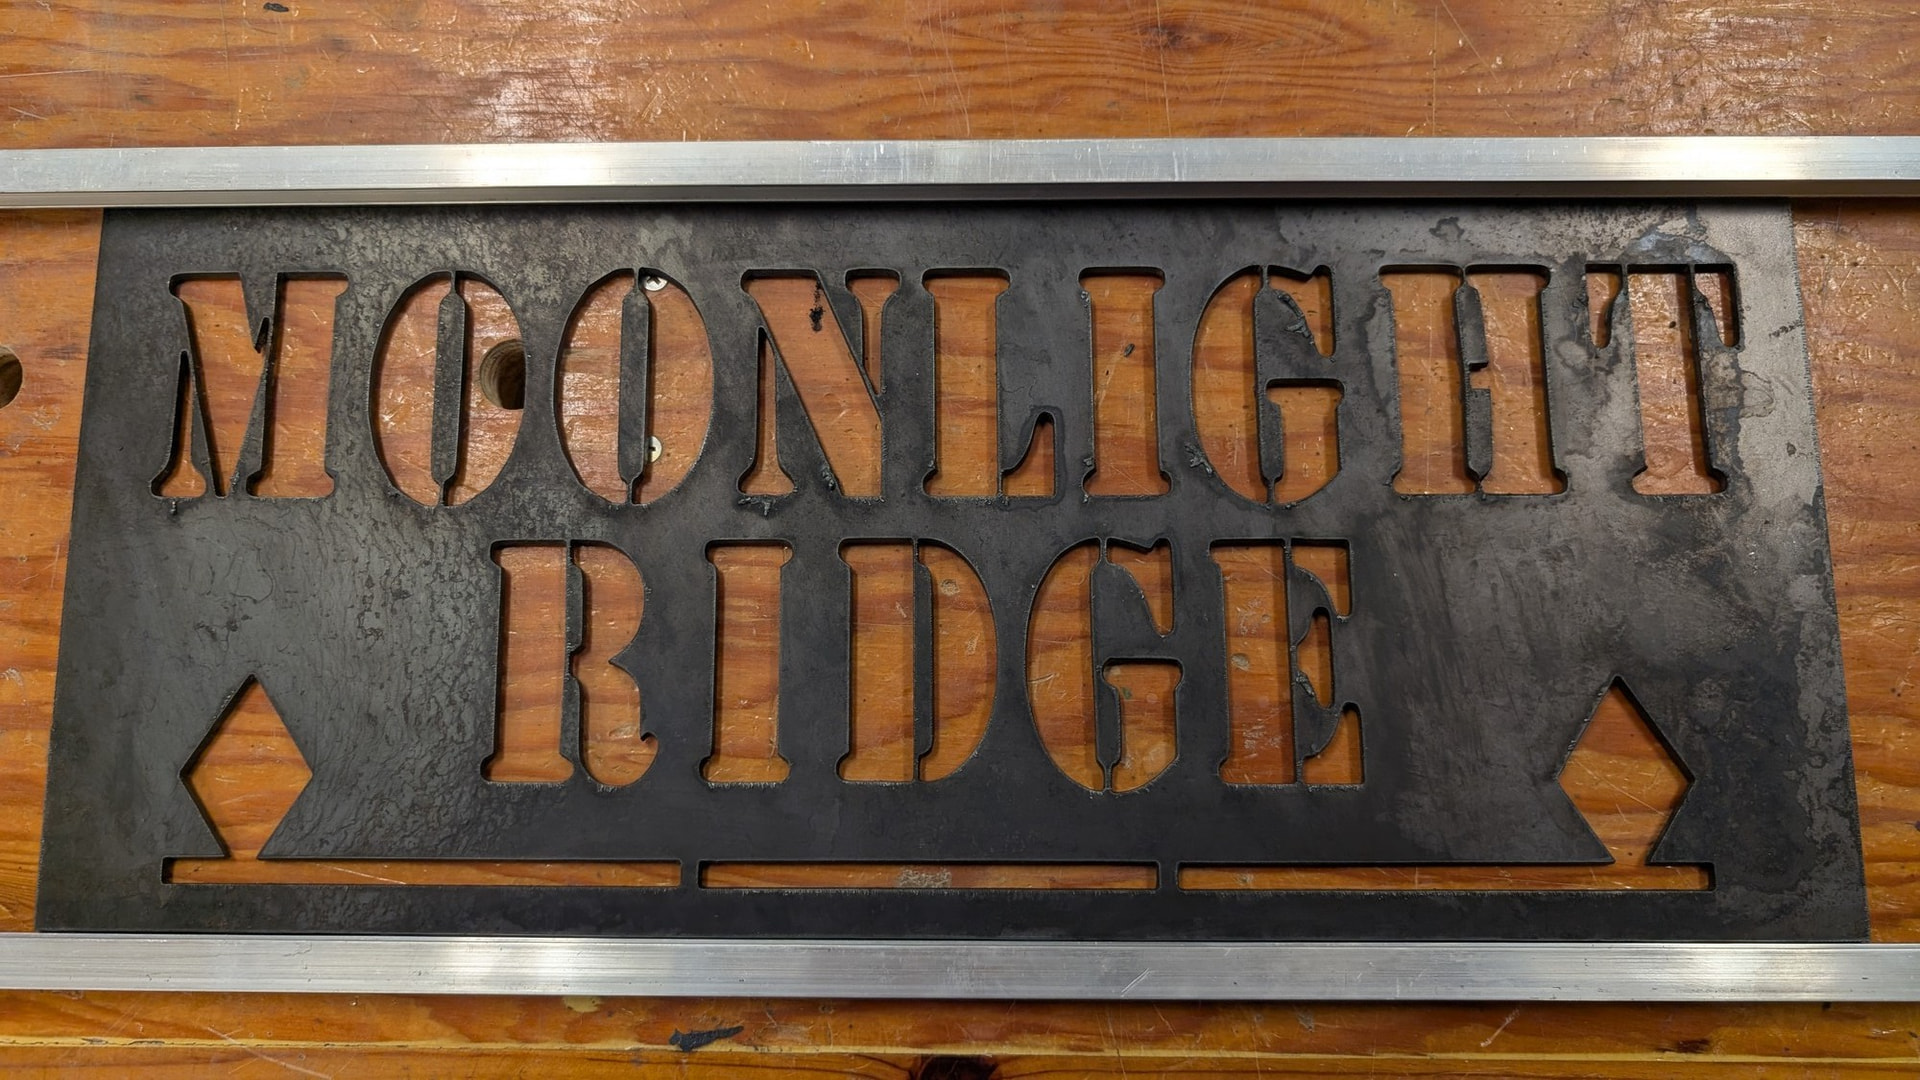
Addressing several comments at once here. I cut the Moonlight Ridge sign above and a few days later TRIED to cut the Sunrise Lane sign with identical settings. Actually I cut two of the Moonlight Ridge signs and both were near perfect. That means there were over 70 pierces, not the 37 I said above.
All of these are 11ga mild steel. I started a cut of the triangle and paused it mid cut and the cut height was at 0.060”.
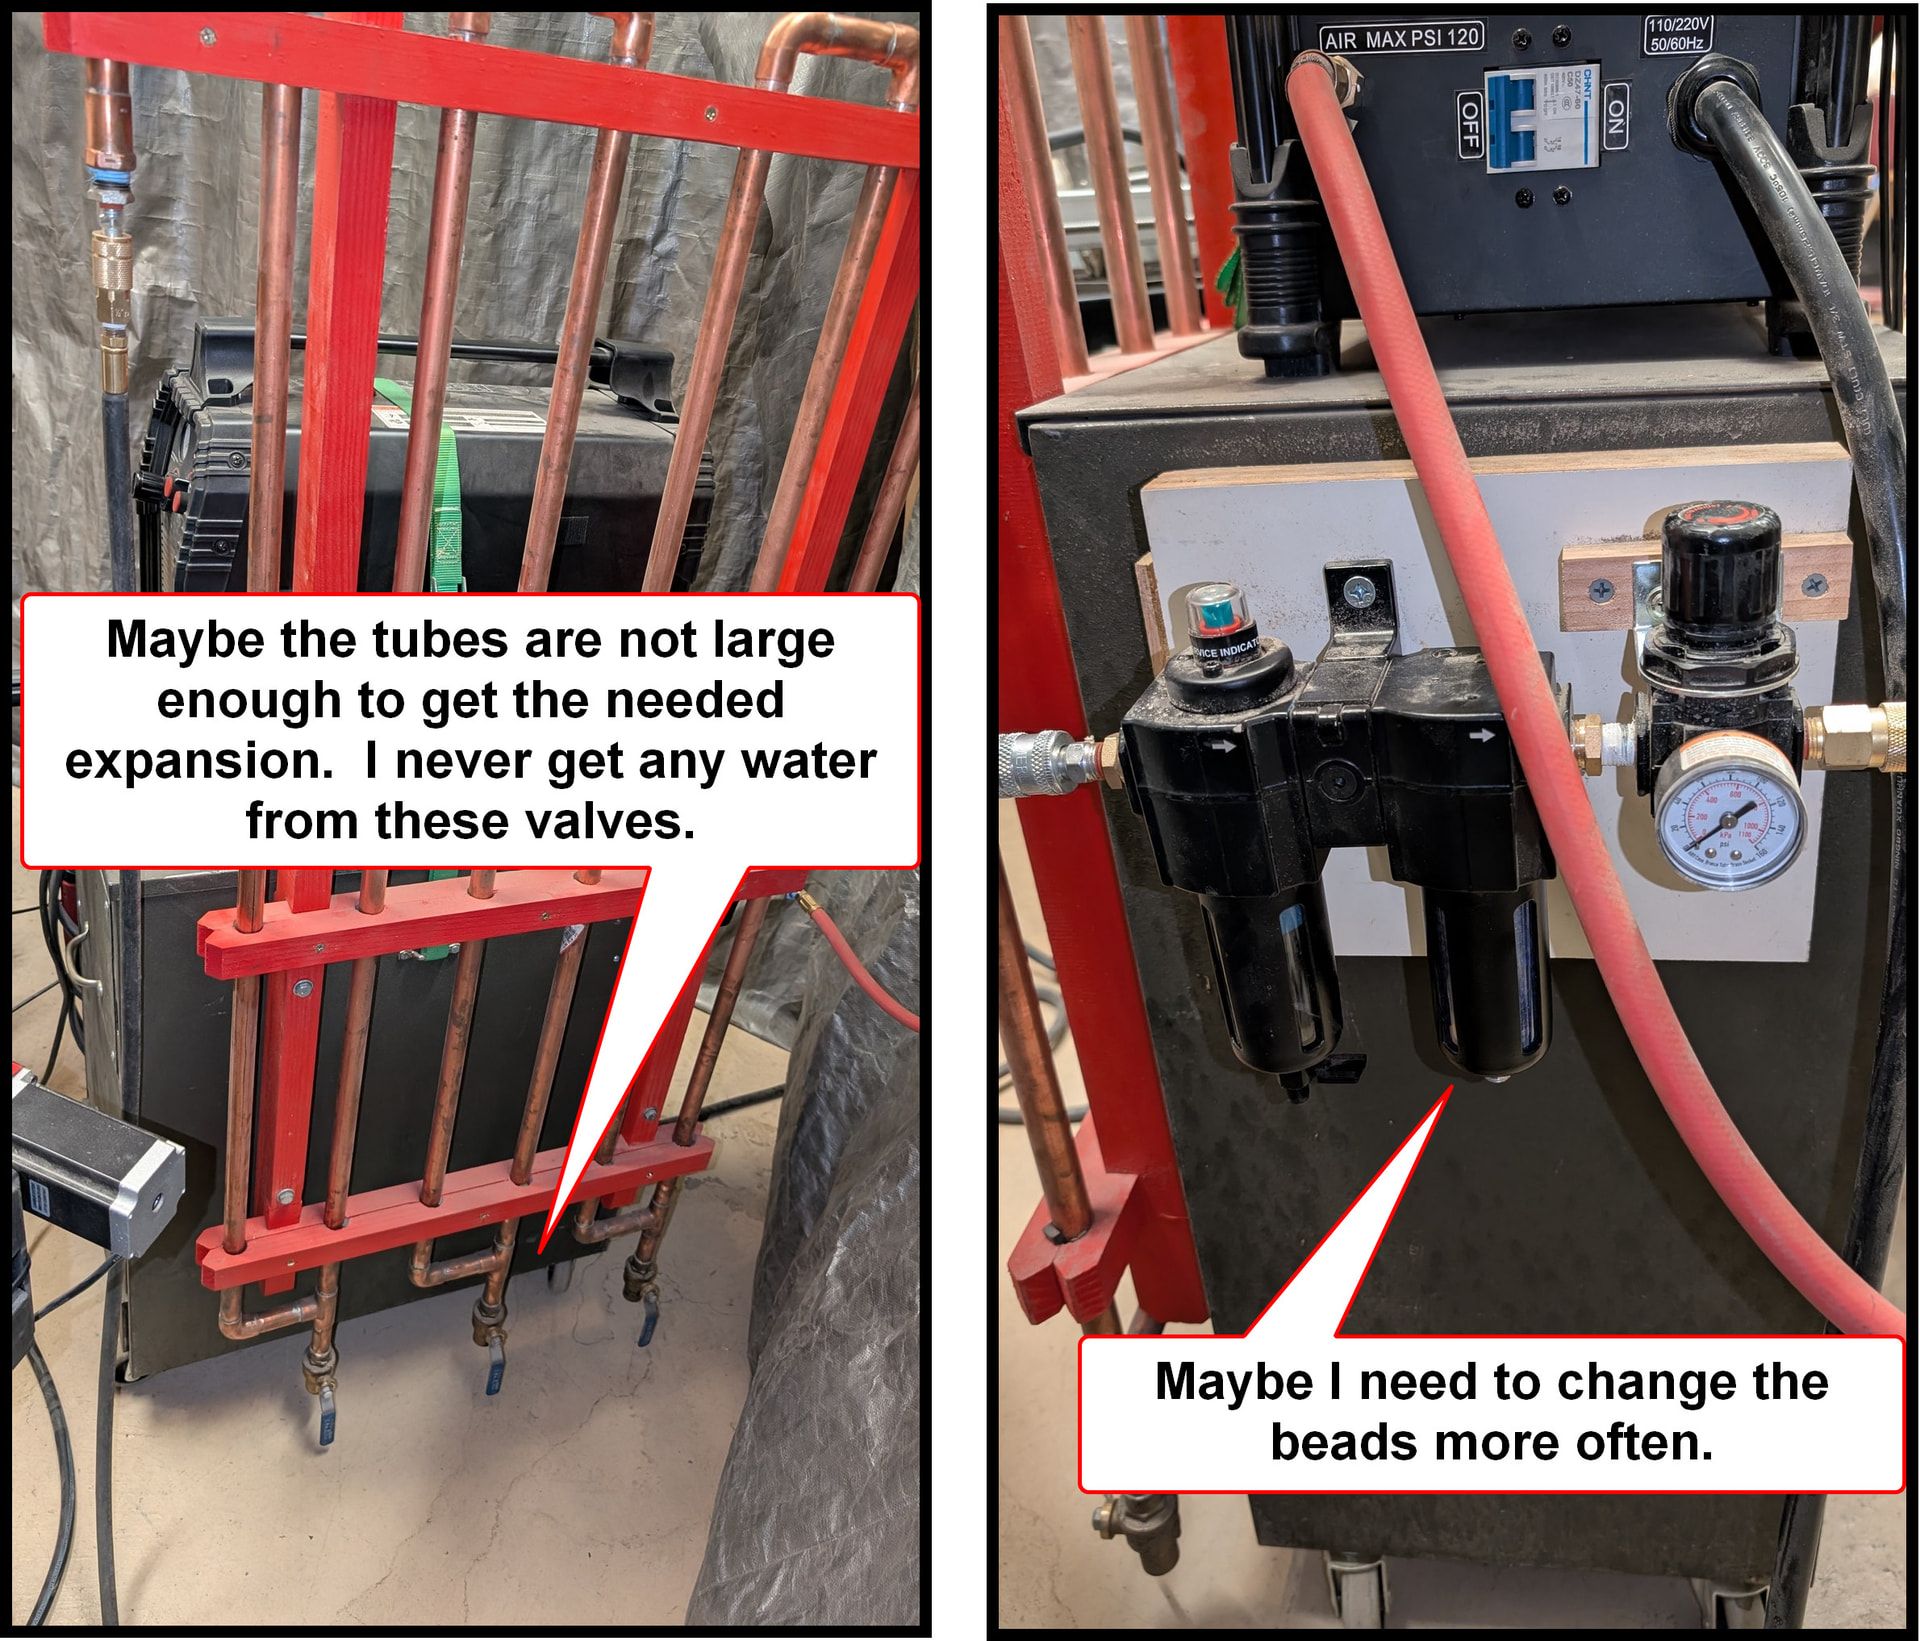
You can see the tube dryer I built. Maybe the tubing is not big enough to get the expansion necessary to dry the air. I never get any water out of the valves at the bottom. (I drained the compressor tank yesterday and got maybe a bit more than a teaspoon of water.) After the tubes the air goes through the dessicant dryer. I may need to change the beads much more often. The only thing that changed between cutting the two triangles was new beads. The better cut is still not nearly as nice as the Moonlight Ridge signs.
Keep in mind that the hot air coming from the compressor will hold onto the moisture thru the tube dryer (like you have), moisture traps and transmission coolers (often used as water condensing traps). It is recommended that your have at least 30 feet or more of compressor hose before you start trying to grab the moisture. Based on what I can see in your photos, you are trying to grab the moisture mere inches after the tank.
The fact that you got such a great cut by changing the beads, is incredible. Question: did you use the same consumables that cut poorly in this new test?
You might spend some time reading some of the other topics that talk about “drying the air.”
I am a big fan of frequently draining the compressor tank. What is your schedule with that?
And, as @brownfox mentioned, you could still have some EMI issues. But you have got to solve the moisture issue.
And while we are on the subject of getting a better picture of what is happening, it would not be a bad idea for you to share your gcode files both a few that have worked out and a few that failed to give clean cuts.
There is a 50 ft. hose on the compresser which I plug into a PEX system that goes up and over so another 40 ft. and then the hose you can see going to the tube dryer which is 20 ft. long. Yes, the two triangles were cut with the same consumables. In my small home shop I don’t have the room for anything like the setup you have. Space (along with cost) is the main reason I don’t have a refrigerated air dryer. I don’t drain the compressor tank very often. It’s been months and like I said I got about a teaspoon out yesterday.
For a very little cost, you could add an automatic drain. The fact that you are not draining your compressor regularly, you are contributing unnecessarily to your moisture problem.
That extra moisture in the tank will jeopardize the health of your compressor tank.
Here is an easy drain. You can add the additional inkbird temperature sensor or an external timer if you want to limit how often the compressor drains. If it drains regularly, there is never anything more than a little mist that is ejected with my system. I don’t even have a collection system attached.
3/8 hose I presume. This makes me wonder what kind of pressure drop you’re getting across the system. Maybe a case of the pressure dropping during the cut and starving the nozzle for air prematurely killing it.
Do you have a gauge at the tank outlet that you can compare against the gauge you have right at the end of everything before it goes into your plasma. There should be a setting on your plasma cutter to just have air run out of it and you could make the comparison between the two gauges. Your pressure drop will be in the difference between these two values.
I haven’t watched the guage right before it goes in the cutter, but I keep an eye on the front of the cutter. It is 75 psi when not cutting and 60 psi while cutting.