So I have seen several great threads about z axis and torch height control, but no step by step, or wiring diagrams. I’m currently in the process of installing a THC, but I’m stuck at how to wire it. I believe I have a diagram that possibly works, but would love some confirmation. I built a second cabinet so that I do not have to modify the one that came with my crossfire. Any help with this wiring would be greatly appreciated. This is what I have come up with conceptually, but I have zero electronics experience.
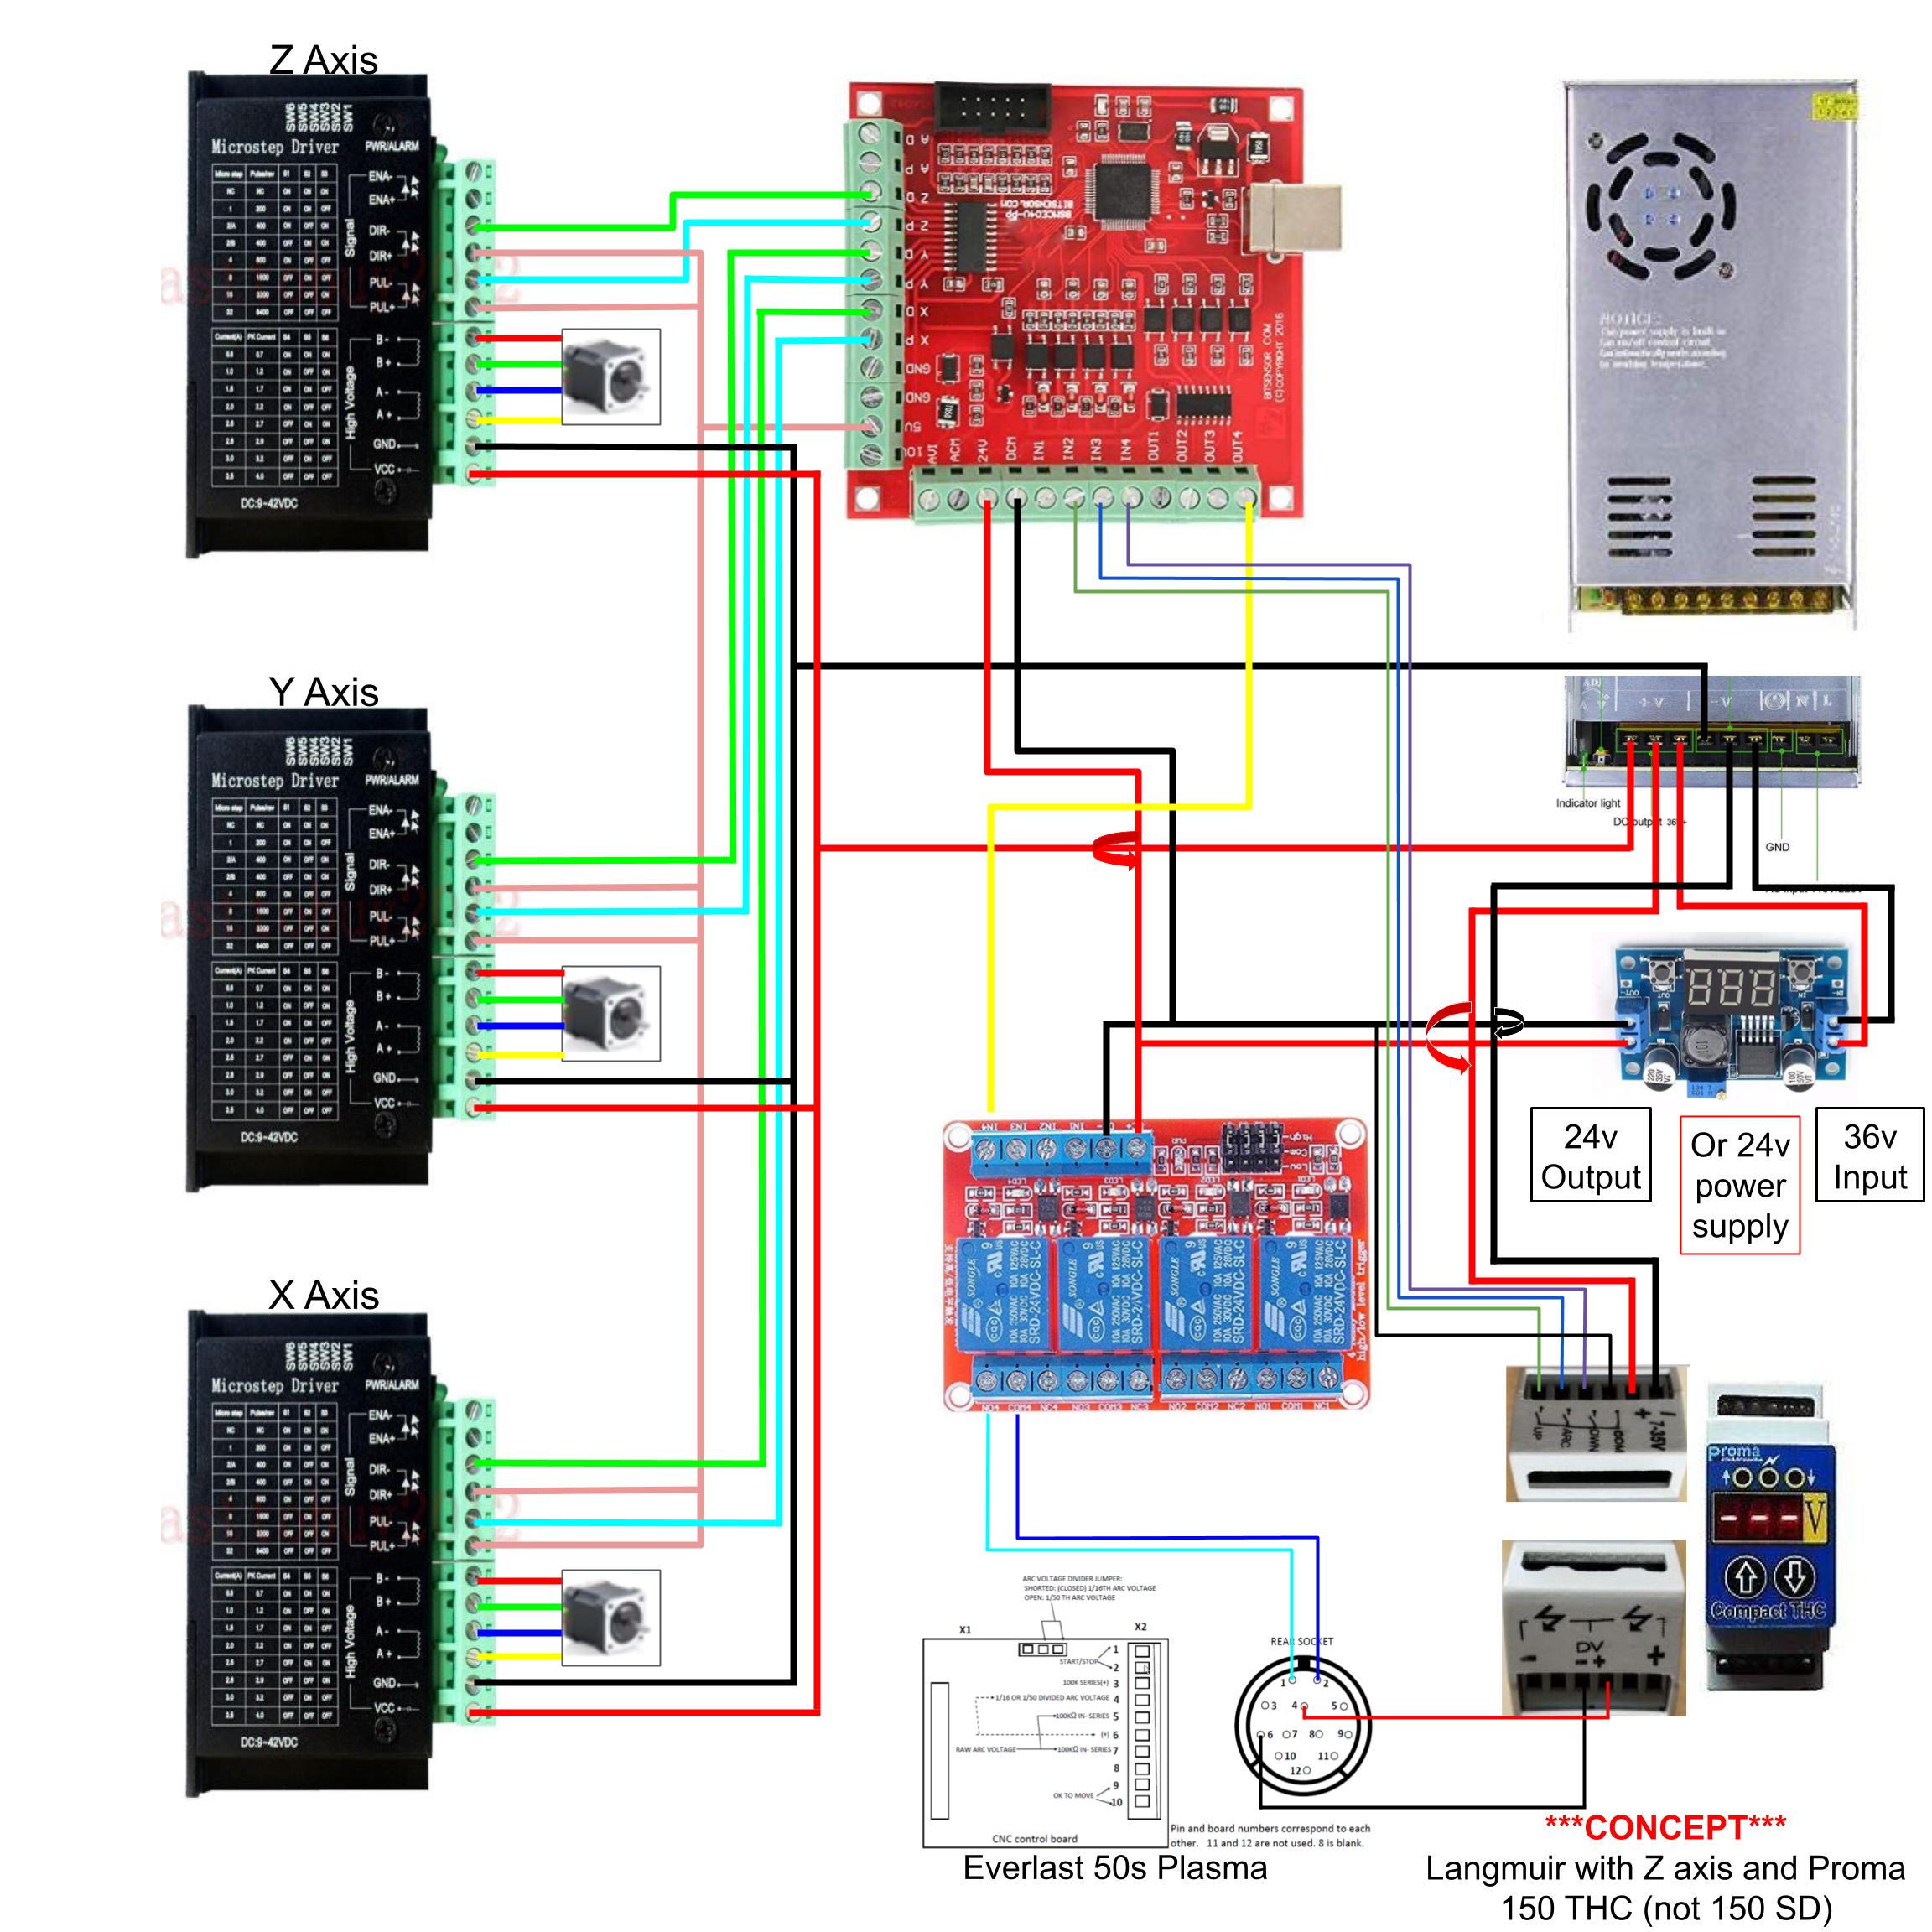
If I had no other inputs this is how I would wire mine. Just need to check the proma input voltage from your plasma and make sure it wired correctly. You will also need a probe input to set initial height unless you plan on doing it manually. If doing it manually then I would add an arc ok input from the plasma.
Another thing to check is how the drivers are wired for signal voltage and make sure the z axis is wire the same.
Edit: looks like the proma has an arc ok. You wont need one from the plasma then.
You said if you had no other inputs. What do you mean? Can the 24v 4 relay module also be used as inputs? Or do you mean inputs like limit switches, probe, e-stop, etc… If so, how would you wire it differently? Thanks in advance!
Hello! I bought everything in your diagram. I received them all except the Proma Compact 150 HTC…
I found a guy on youtube that make it, but he use the Proma SD. So I ask him why, and he sais he was not able to make it work…
So, i’m not sure i will keep the Standard Proma, maybe i will switch it for the SD.
1 Like
Once the proma is installed to the inputs, you have to define what they do inside of mach 3, did you do that? You also have to enable THC as well. Skip the video to 5:13 for the software portion, the beginning is just him wiring the proma to the plasma cutter.
1 Like
I think you did a Great job with your project! I have a Razorweld 30 and the z axis ready to hook up to the Proma sd. I looked at your electrical connections to yours. I would like to know how to hook it up to my plasma. You are hook up to the 1:50 connections and the Arc OK from your plasma machine. This is the only part I do not understand for my plasma.
Thank you for any help.
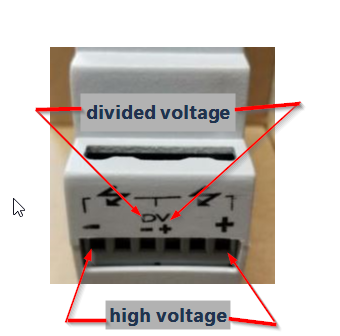
I don’t have the specs on the razor weld, but I don’t think it has a cnc port with a voltage divider… Sooooo, The proma has a spot for hooking up the high voltage from your plasma… check out this video… He hooks up the proma, similarly to the way you would have too… after that the remaining wiring would be the same as mine…

3 Likes
So I’m a little stuck here… Mailman came, THC is here, already installed, I’ll post pics in a bit, but I’m curious about this one ground jumper that was there on the original board… Does it stay now that I’ve given the break out board it’s own power and ground at the 24v input?
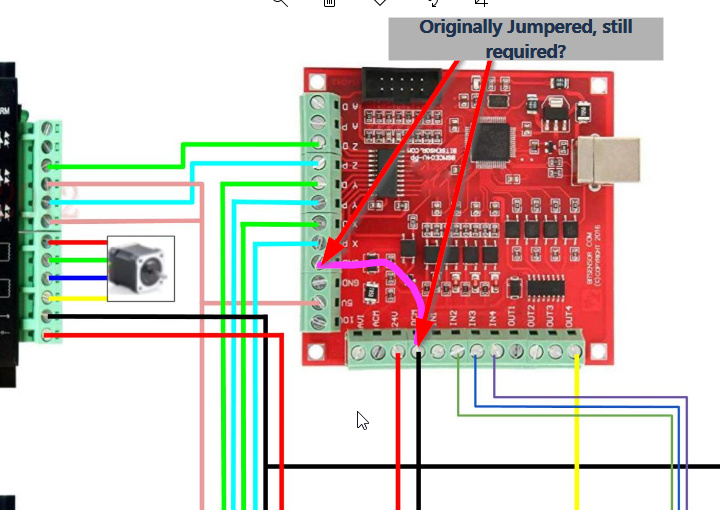
Or do I stick with the plan?
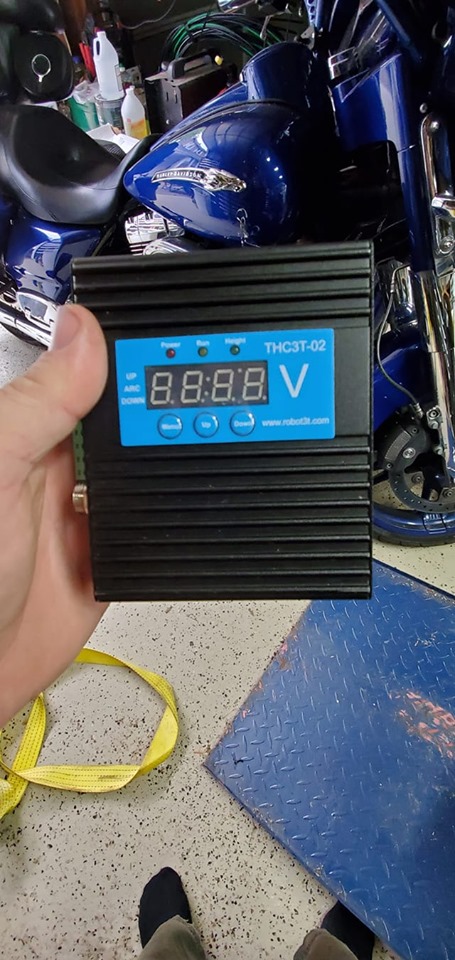
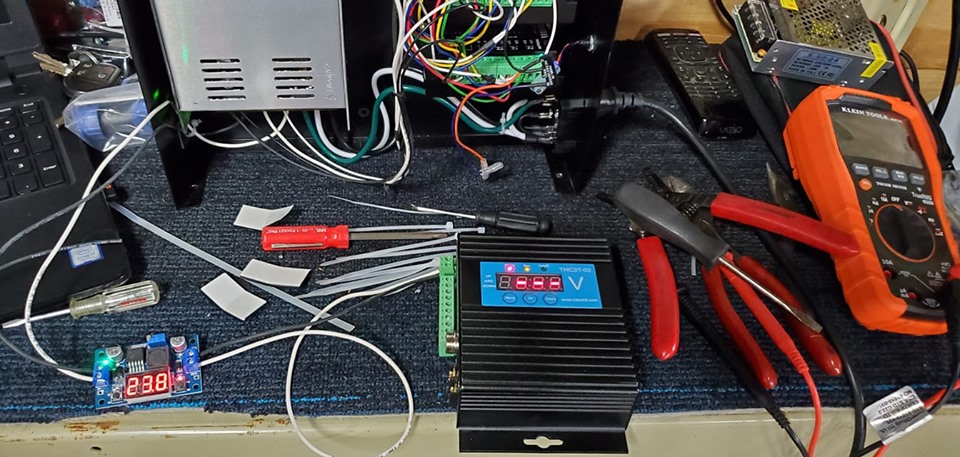
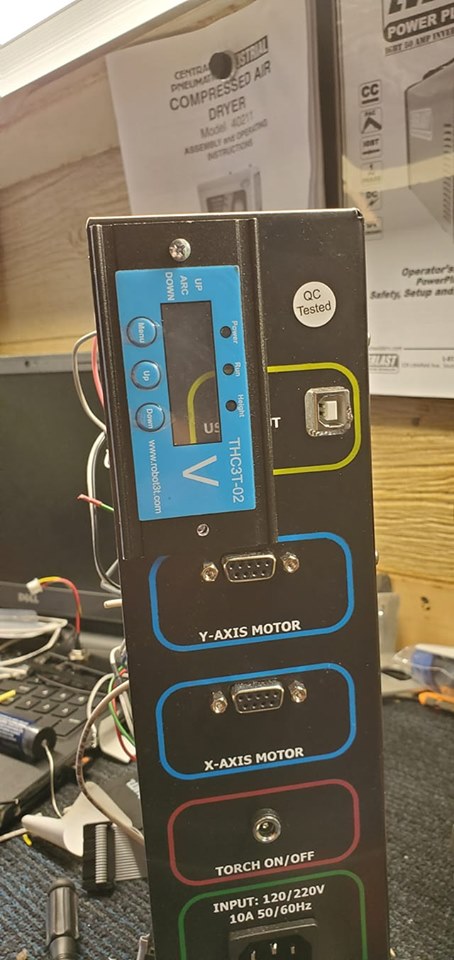
Ok here is the THC as it arrived… I was excited!
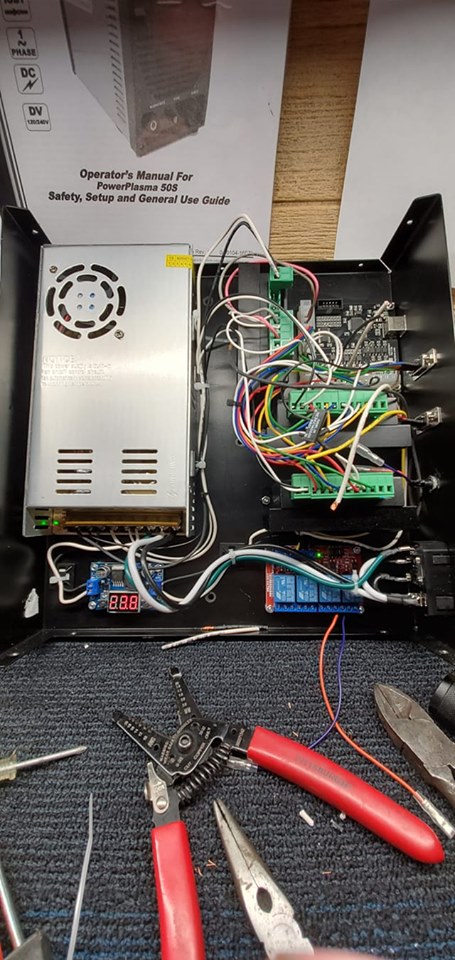
So I started wiring in, or getting ready to wire in everything, moved the power supply up and inch and a quarter to make room for the step down converter and 24v relay… That was the start of making 10lbs of crap fit in a 5lb bag… I decided I really didn’t like the enclosure that the THC was in, sooo…
Nice that it had screws on the enclosure, decided to open it up and see what was inside, curious minds you know…
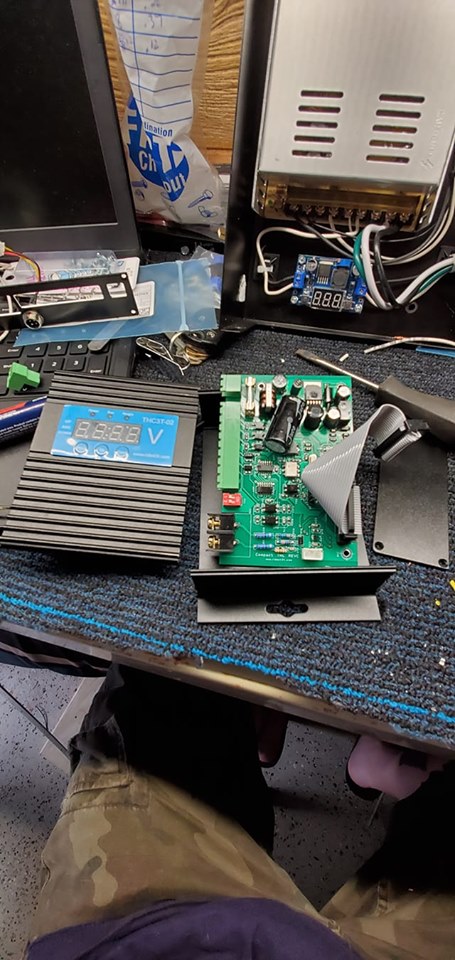
Couple of boards connected by a ribbon cable, and the potentiometer was a plug in socket, not needed…
EDIT: The potentiometer IS needed to set the nominal voltage for torch height… I can’t see that changing much, so I’m gonna make accommodations for it, but I don’t think it’ll get used that much… Everything else is controlled via the menu and the up/down buttons… not sure why they didn’t incorporate this into the menu options as well…
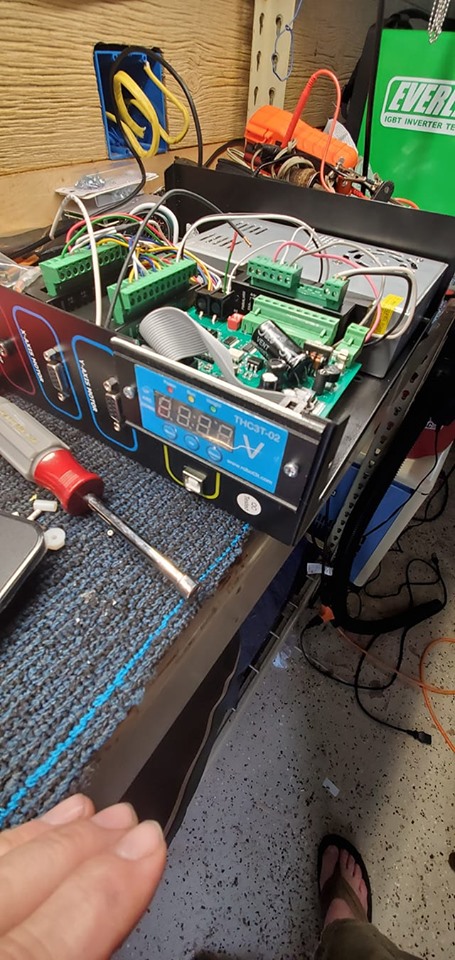
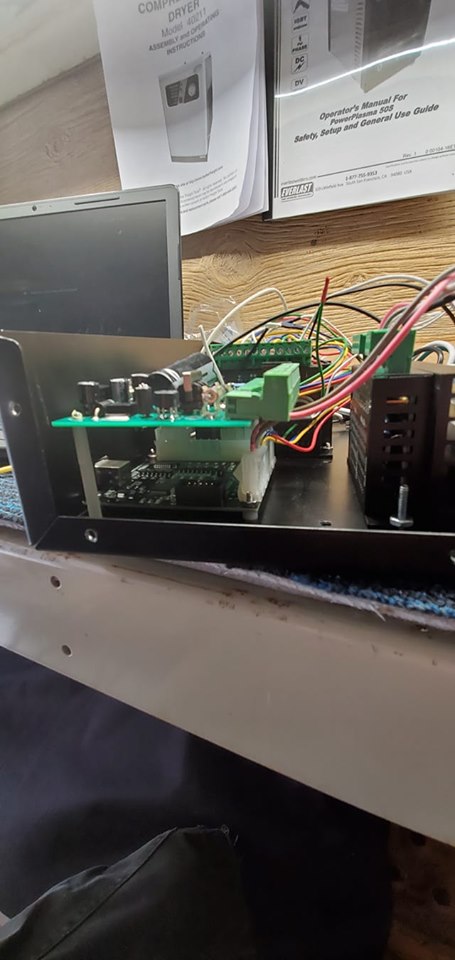
I decided to mount the components of the THC inside with the rest, but still wanted access to the THC control panel… A few relocation trial and errors and I found a place for the board, chopped up the mounting plate for the controls so the face would fit in the langmuir case, rather on the langmuir case (which took a little modifying), I would have rather it was horizontal, but hey, maybe next round… All in all, I think it looks pretty good, and will function… Now on to buttoning up the wiring… Still waiting on a reply to my question about the jumpered ground… Enjoy!!!

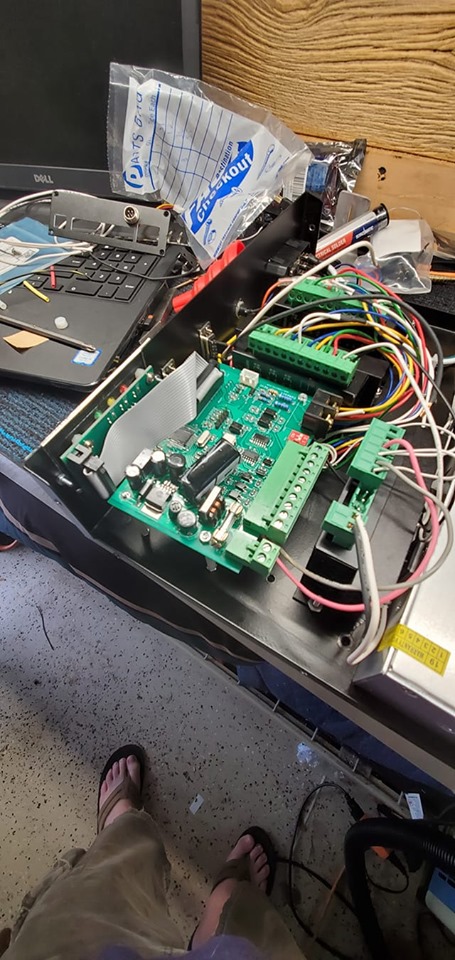
Well, I have success! The wiring diagram I came up with worked great, at least in a test mode. Now to hook it all back up to the machine!
2 Likes
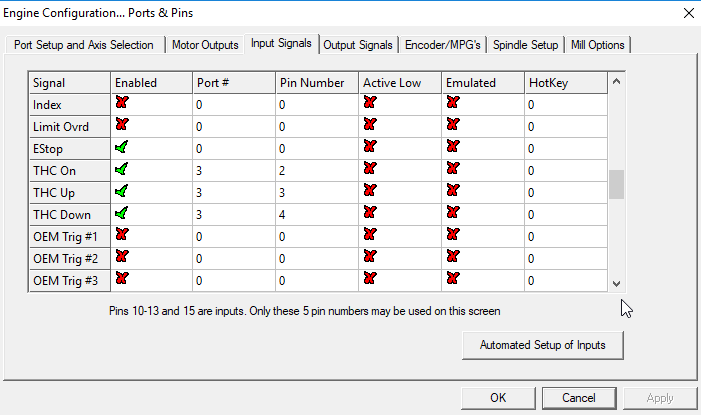
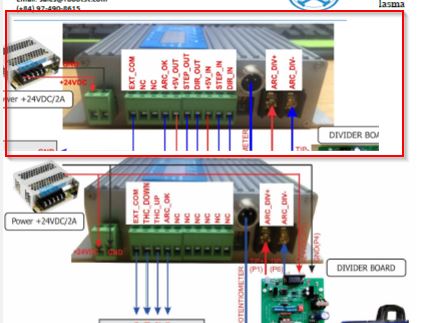
Here are the ports and pins for as used when wired following my diagram… Not sure why that e-stop is checked, it was already like that, so I left it…
2 Likes

So I had an epiphany after I ordered the step/dir controller from the same manufacturer… I was looking at the wiring instructions and noticed that the pins on the S/D model are not used on the Up/Down model and vice versa. The arc ok is common, and so are the rest… I figured that these are the same boards, the only difference is how you wire it… And it worked… So this model is capable of both modes and works great! The only downfall I find is that when in step mode, the Z axis does not move, and in continuous jog mode it does not move under 58%, although the DRO thinks it is moving and the numbers change. I had already planned on using the probing method (because I have a floating Z) to set my Z zero, so this doesn’t bother me so much… When running in THC mode, the Z axis moves, but the DRO does not change, again, not an issue… Hope it helps!! Does the proma do the same thing with the jog modes?
Im using the THC3T-02
So I have a question about that 24v relay. Can I use it to control the 24v going to the THC? Example… Power wire split an connected to the normally open circuit of the relay (3). Output 3 from the BOB to the Input 3 on the relay. So when a signal is sent from BOB output 3, the open circuit closes and powers on the THC. I noticed @ToolJunkie uses an automotive relay in his wiring diagram. Didn’t know if I need to do that or the relay board would suffice… I’m really a dummy when it comes to electronics… Thanks!
1 Like
You can use the relay board if you like, I just used the automotive relay because I ran out of relays.
I only needed a way to kill the 50:1 signal coming from the plasma cutter. My THC needs boot up time from power up, so i didn’t want to control it by the power. That way when you use the software button in Mach3 it will work with no delay. Tooljunkie…
Awesome! Thank you! I like that idea better, mine needs to boot up as well!
Well my jog step works now, had a motor tuning issue. The motor tuning function did not work, not sure how it got out of whack, but I did it manually and after that the jog step functions are working perfectly.
You’re welcome, glad I could help.
1 Like
Well, I’ve got it all up and running, a couple snafus left to deal with, and a few wiring things to button up, quick disconnects and all… I’ll do a full write up about the THC I’m using, and how it’s all wired… Gonna take a break and have a little fun up north for the weekend though! Thanks to all for the help that got me here! Heres the THC in action, and a my first attempt at cutting a real part… LOL, the feed rate was a little fast!
Nicely done. Looking forward to your write-up. Looks like I know what I’ll be doing after I do the Langmuir extension 
1 Like