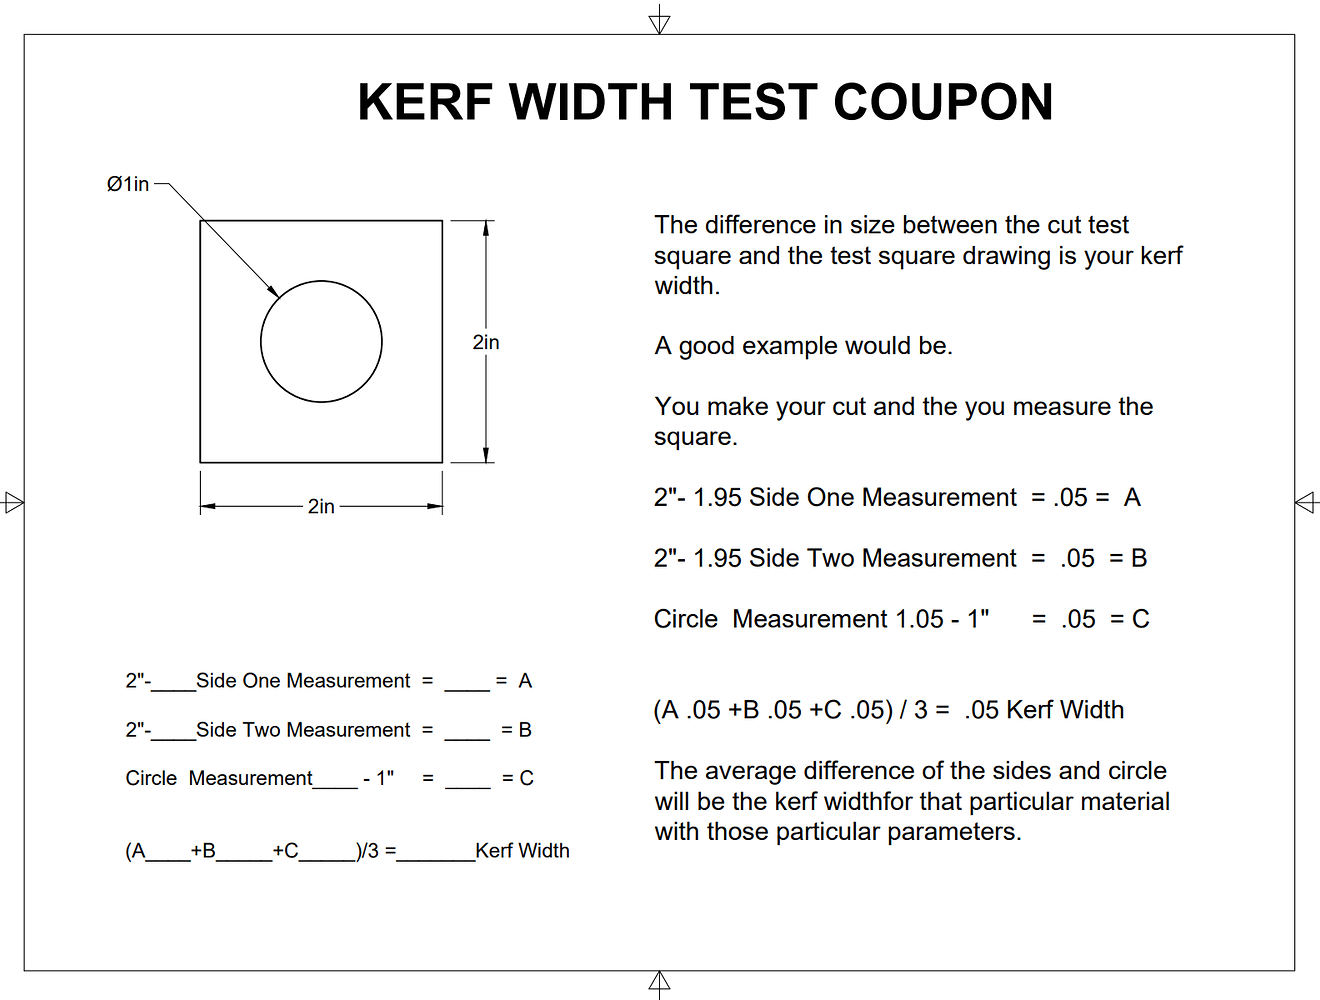
I’m going to try and dial my machine in a little closure with different thickness of metal. So far it has been hit and miss on getting a nice straight cut (No Bevel). At one time I saw some instructions on cutting a test cube, maybe 2” square with a 1” hole, maybe that was just for kerf width, I’m not sure.
Anyway looking for pointers here. Most of what I have cut so far has been signs or yard art out of 16 gauge. No big deal if I had bevel or not. When I cut out my belt grinder (1/4” steel) I had to do a lot of post processing with a grinder to make it work.
My thought is just to start cutting some 2” squares and adjusting my Z height until I get a good cut.
I’m sure there are instructions about this, I just can’t find them.
@TinWhisperer Thanks for the all the info, that is exactly what I was referring to.
@Kwikfab I get on Facebook so infrequent I don’t think I saw your post. I did just check and I am a member. I just don’t know how to look things up on there.
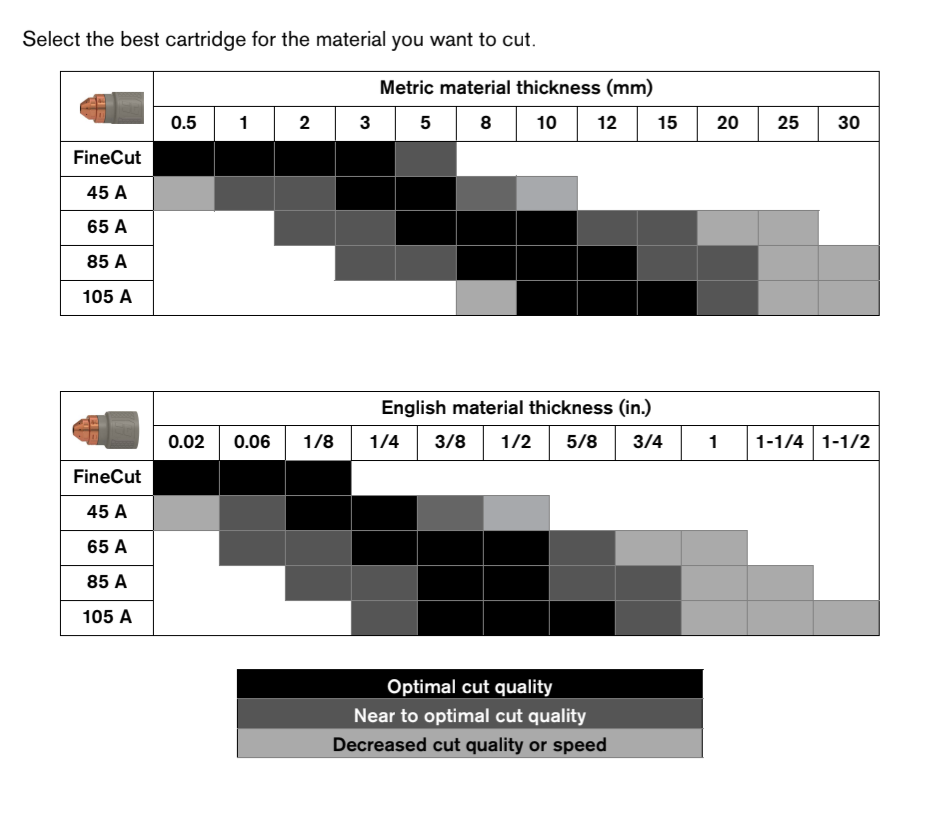
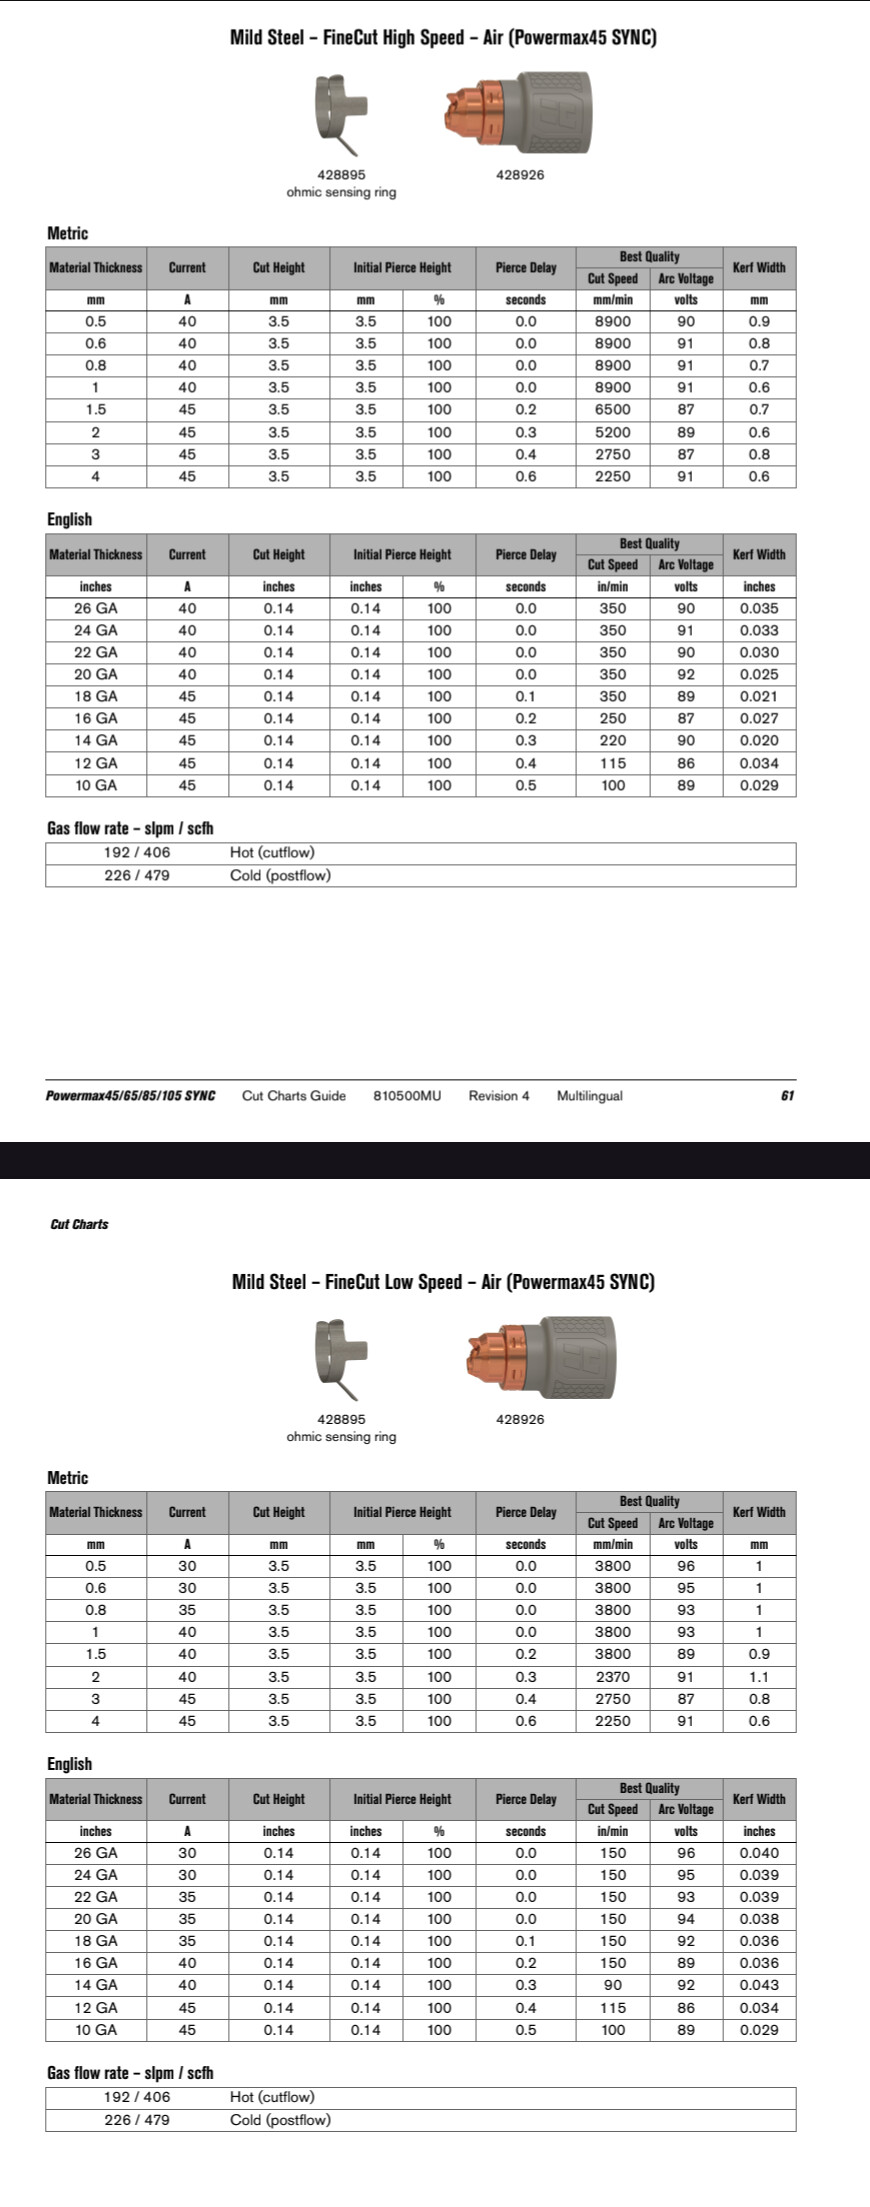
I setting here looking at the cut chart for the PowerMax 45 SYNC, using the Fine Cut Tip everything from 26 GA to 10 GA the cut height is .14 inches. For the Standard Cut tip the cut height is .12 from 26 GA all the up to 1”. So, at this point I’m thinking all those setting are just a starting point.
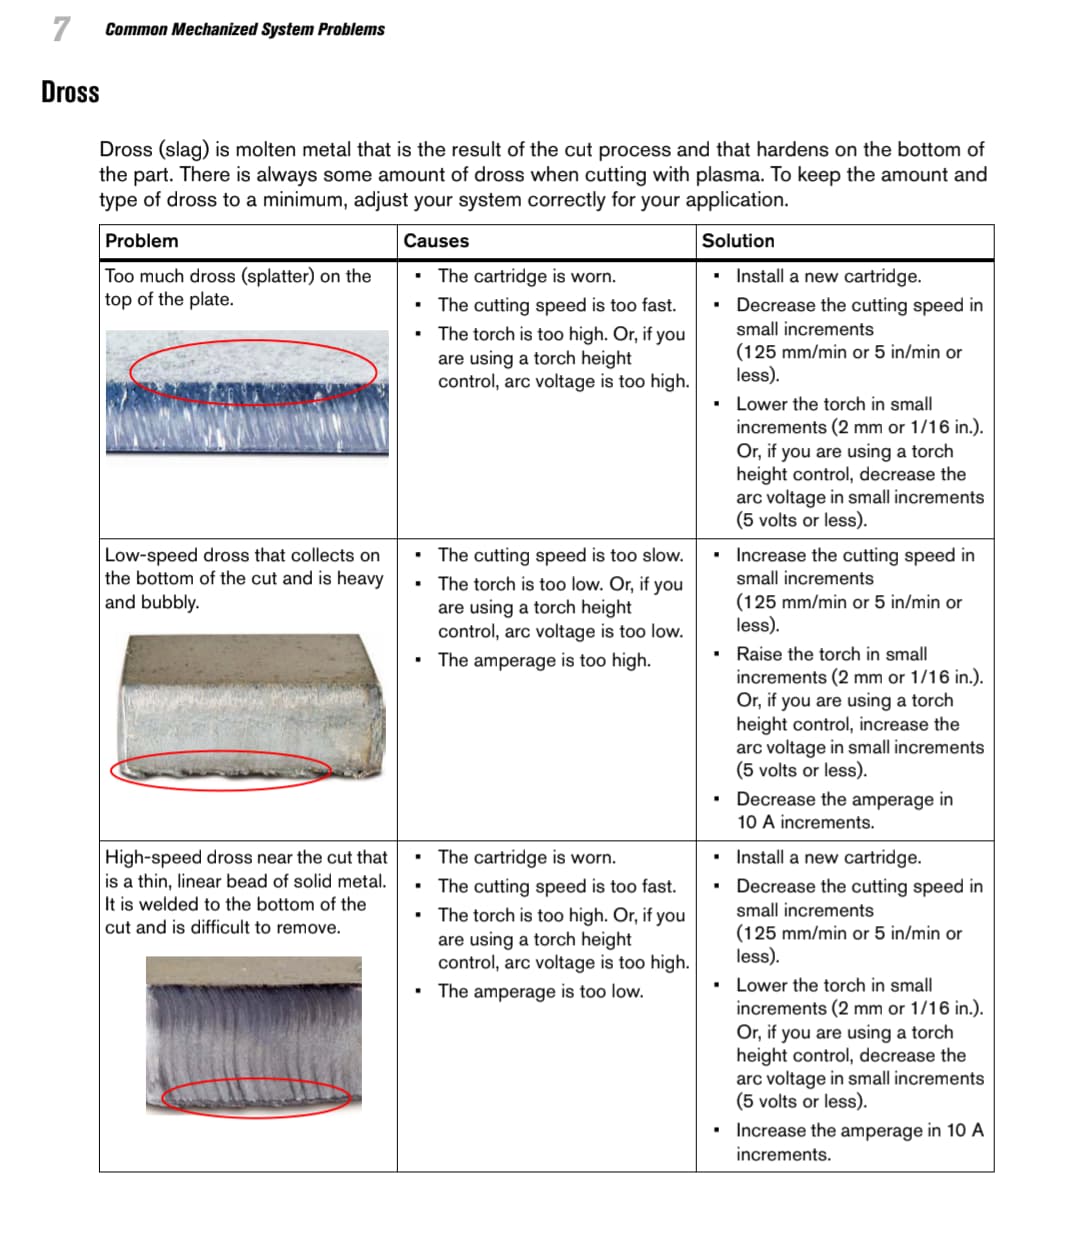
By the way my machine does have Torch Height Control. I also notice on my cuts I have a fair amount of dross, most of the time.
You can see it listed as arc voltage in the cut charts.
And when using fine cuts you have two options, high speed and low speed .you’re going to get better quality with the low speed. You’ll see the amperage reduces as the material thickness reduces on the low speed charts keep the speed down.
I would say for the most part it is the High Speed Dross. A couple days ago I cut a bracket out of 11 GA steel, I had to use a hammer and chisel to get the dross off. And it has a bevel on to it that I’m 90 percent sure indicates the torch is too high.
I have to confess, I have not did a good job keeping notes on what works and what hasn’t.