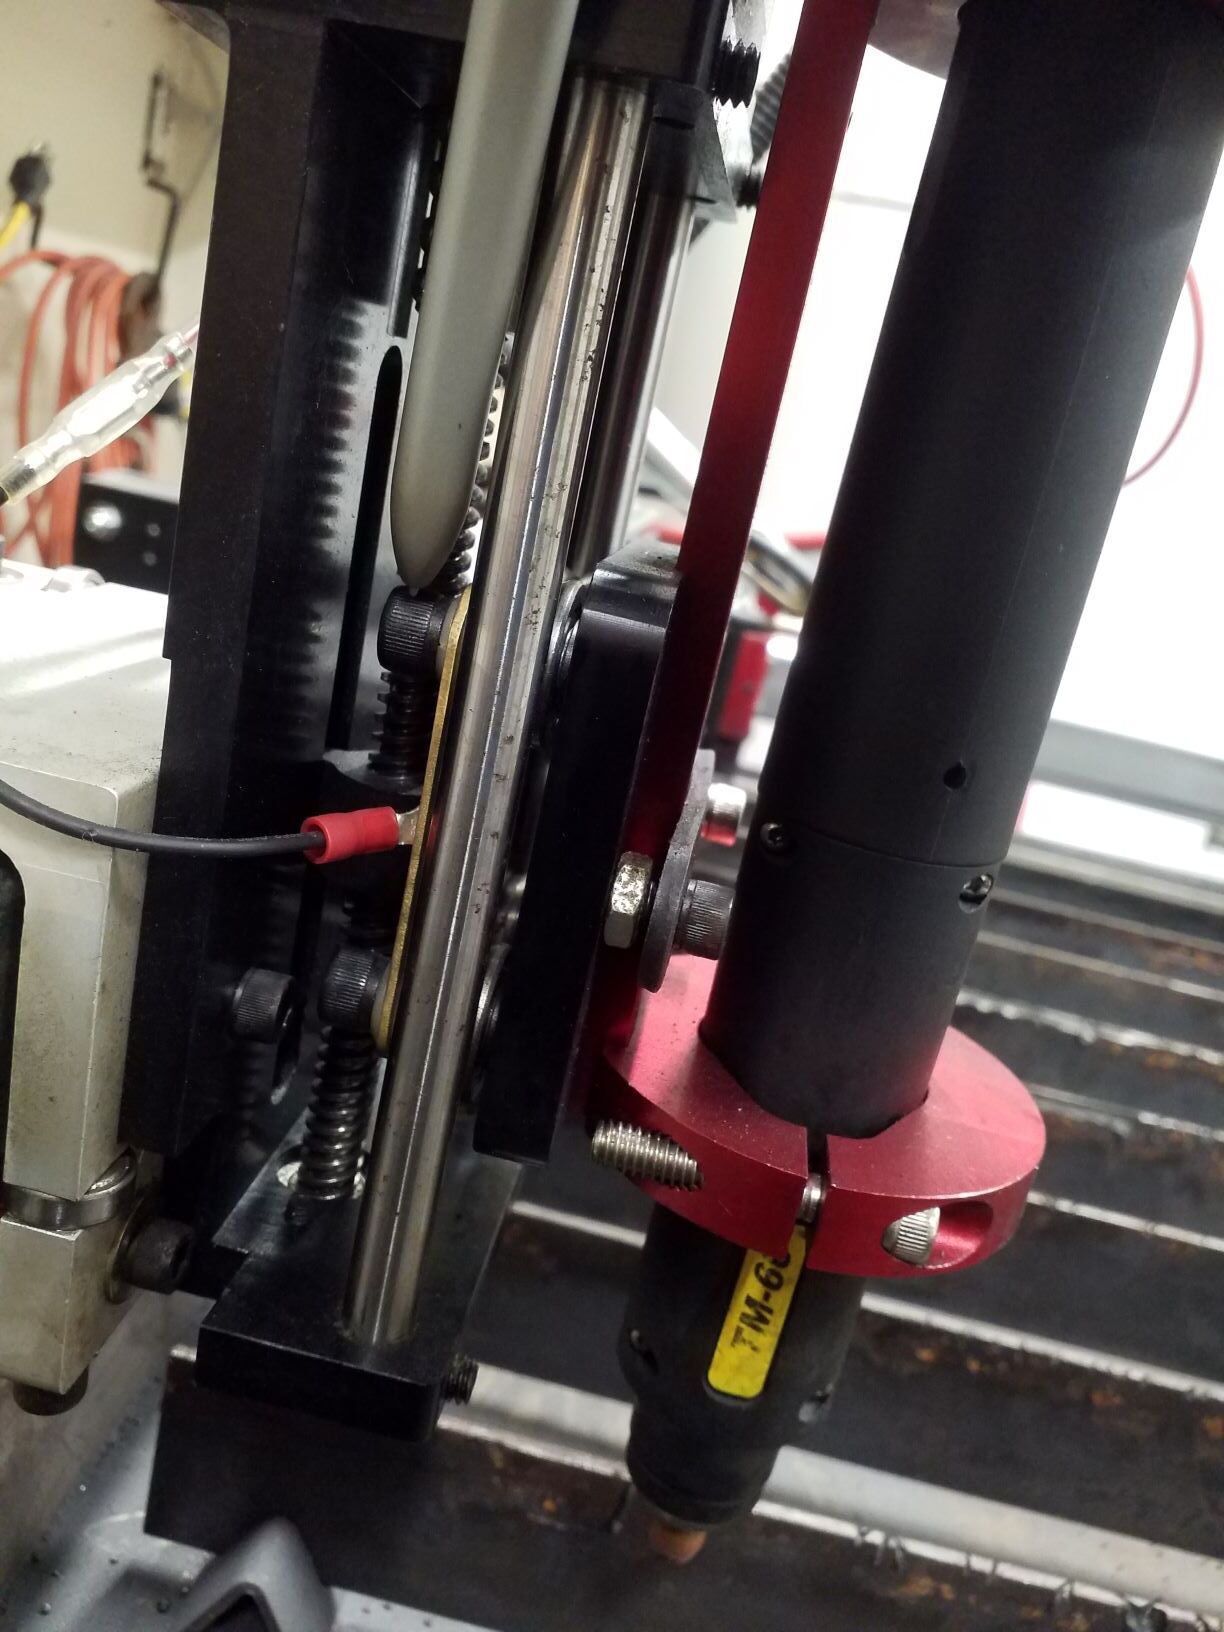
I noticed I have significant play in the z-axis bearings that support the torch mount plate riding vertically on two fixed rails( rods in this case). See video for reference: https://youtu.be/BM7CjbT15yc
This is likely causing wavy cuts when some tension is put on the machine torch cable. Thought on why this is happening or how to fix? Don’t see any obvious way to adjust this.
Thanks for checking! Just checked to see if the four bolts/screws holding the bearings were tight. Unfortunately, still a lot of play so I am guessing a possible manufacturing defect. It is definitely causing wavy lines so need to get it fixed
You don’t want a lot of lash in the slide, but typically a little bit of lash wont affect the cut straightness unless the torch is physically dragging along the plate. Can you confirm that your torch is always maintaining appropriate standoff height during the cuts?
Noticed during cutting a really warped panel the torch tip has dragged a bit on the panel. Seeing the instructions you provided, I will check the THC live voltage when the torch is not firing to make sure the contacts are not dirty. The main issue I still see is the forward and back play in the torch if you put the slightest tension on the torch lead. I can see this rocking causing wavy lines as the z carriage moves across the x axis. There is plenty of slack on the torch lead but of course it’s a thick cable so some tension will always be there as it moves. The eccentric bearings nuts are tight and make no difference in the front to back rocking of the torch.
Okay, I figured the problem out here. Using your guidance I was able to loosen the axle nuts and use a 5mm wrench on the end of the eccentric bearing axles (adjusting one axle at a time) to rotate it which allowed me to take all of the play out of the bearings to vertical rail contact. Then I tightened the axle nut while having the 5mm wrench on the end of the axle to keep the axle from rotating from its optimal position. It is super easy to adjust now that I know how it works
I will try some cuts tomorrow. Figuring this will address the slop issue.
I was having trouble with consistency in setting up my crossfire pro z axis today and came across this thread without any follow ups in it.
My torch mounting block had nearly an 1/8” of slop and more importantly the ihs sensor tab was so loose that it was continuously making contact for atleast 1/4” past contact of the torch.
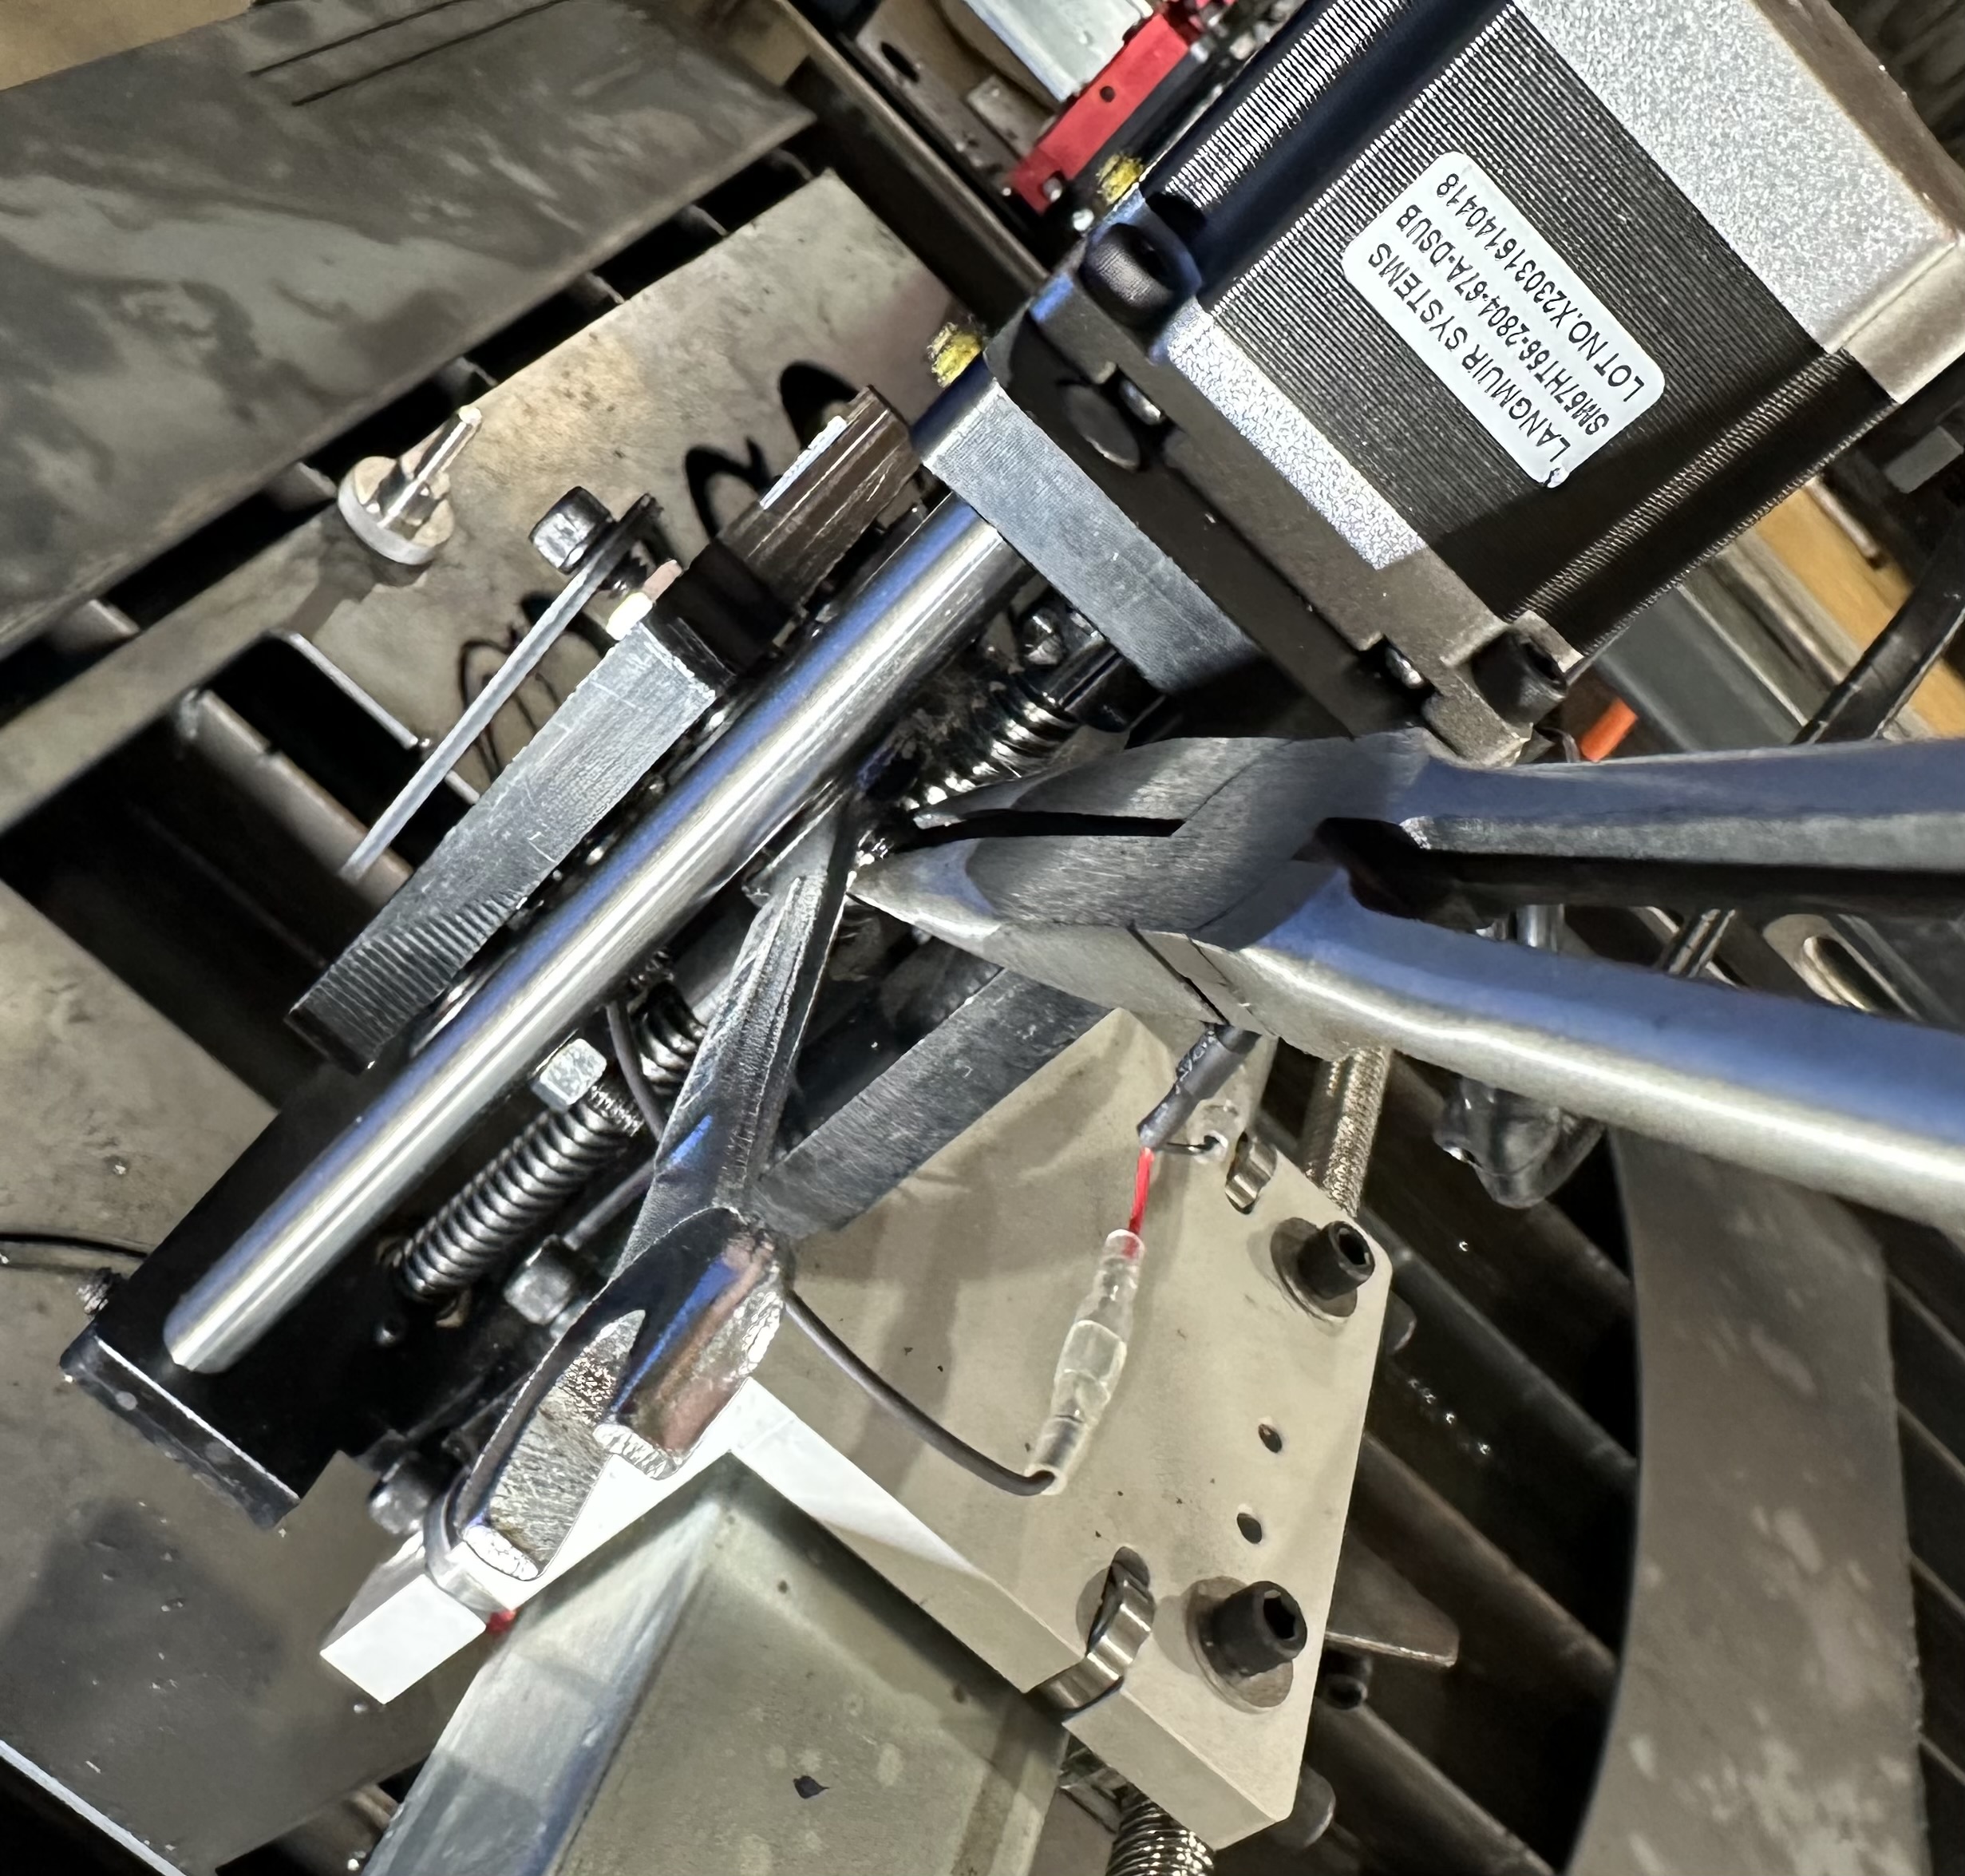
I ended up pulling the z motor off and removed the y1 side rail to correct.
Be cause the way the eccentric bolts are on the right side, I couldn’t see the flats cut in them until the block was fully removed.
Use the wrench to loosen the jam nut and then the pliers to rotate the eccentric stud. Keep rotating until the stud is hard to rotate with light pressure on the pliers. Tighten jam nut. Repeat on the other stud. Check the block for free movement up and down.