Here’s a photo of the difference between a powermax 85 consumable compared to a Everlast 60s
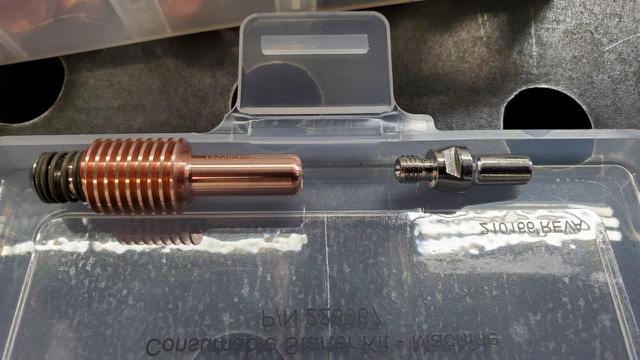
Here’s a photo of the difference between a powermax 85 consumable compared to a Everlast 60s
Just having fun… Yours was just the easiest avitar to put on a strutting “Hypertherm”
What can I say… I needed a laugh this morning.
You have certainly earned everything you have!
Hello,
I am not sure who this might help.
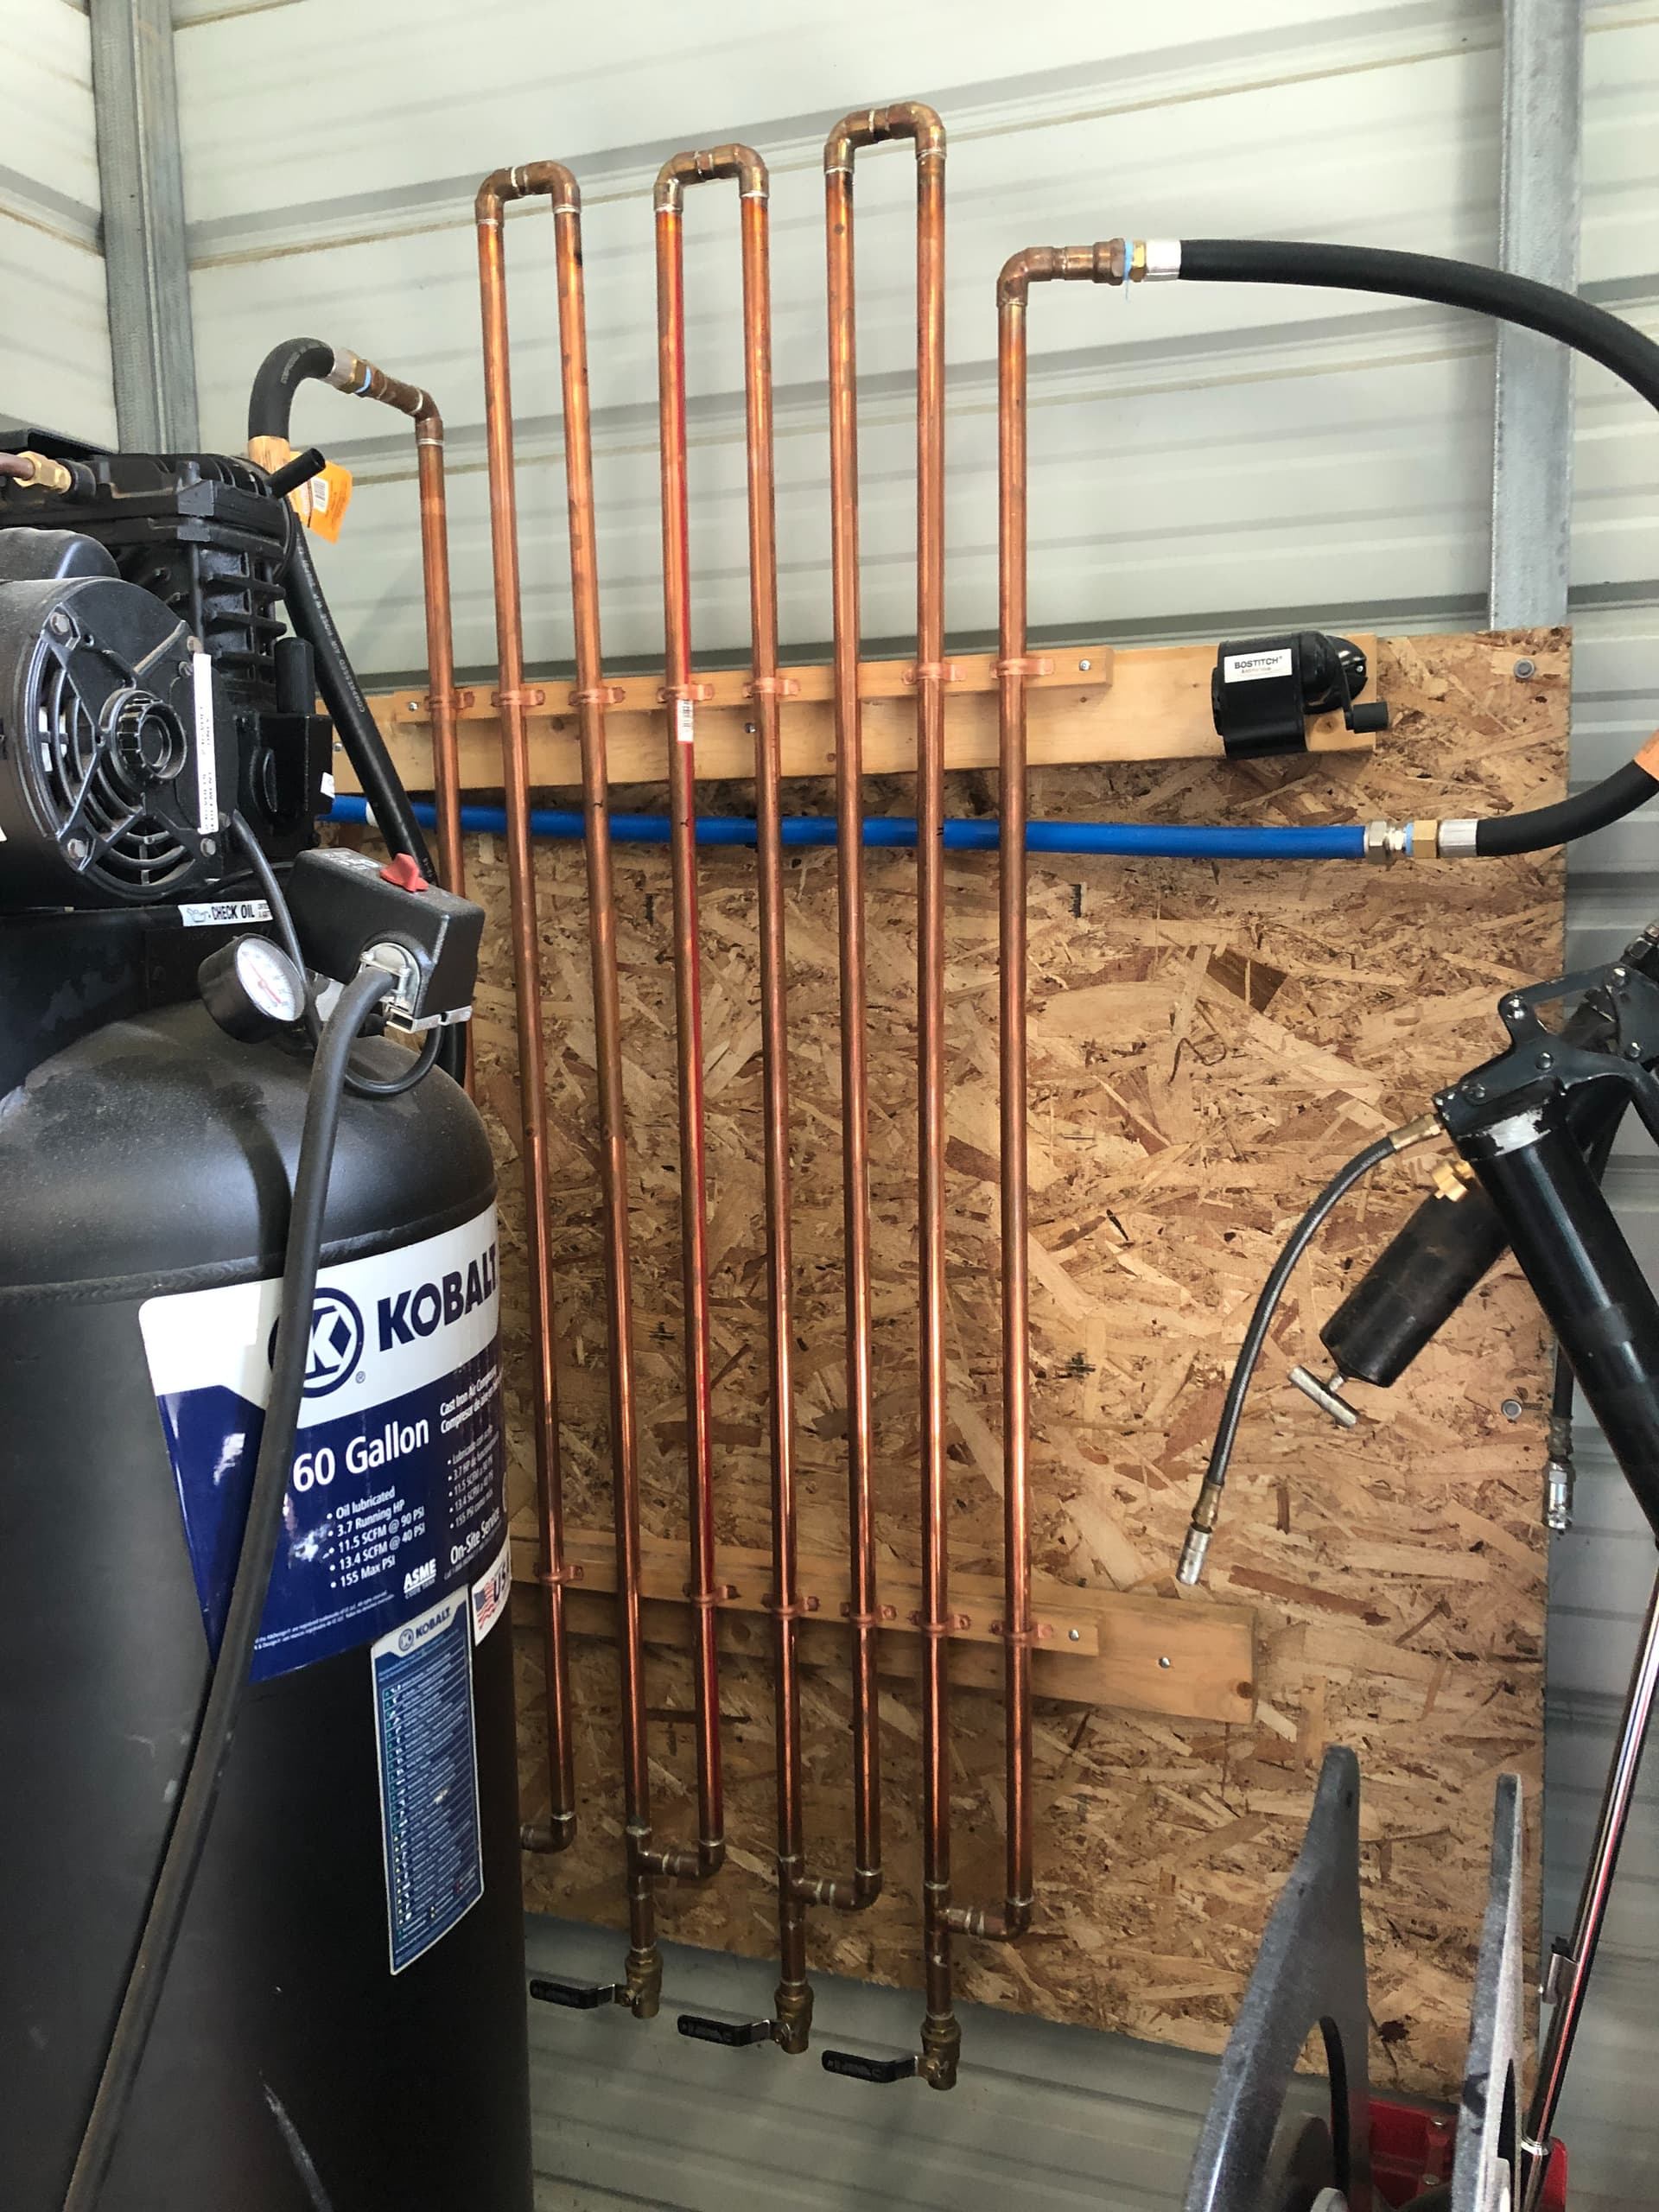
I had been researching dry air for HVLP painting, plasma cutting, sand blasting and other formats for use. I built this based on that research. I got the idea from Chrysler Motors. When I was a kid I was allowed to go to work with my dad to learn about what his duties were for the company in Detroit. On one wall I saw a HUGE set of pipes that I learned (a little boy with so many questions) was an “air dryer” for the air system that ran many of the automated machines. What you see in this pic is a scaled down version of that system. I built this based off of what I saw all those years ago. It has kept my air dry enough to do all the things I wanted it to do. Materials were about 300.00 USD.
The consumables on my plasma cutter started lasting much longer since I built this radiator/dryer. I only post this to try to help others who may be on a budget, who are DIY’ers. and do not want to shell out thousands of $$ to buy the comercial systems. It works GREAT for my application.
Side note: My XP table is the furthest away from my air supply and has a water separator as a window to see if there is any water building up before going into the system. So far I have had zero water visible. This winter will be the tell tale tape but so far ![]() My air travels about 120 feet before it reaches my table. It seems perfectly dry. Notice the valves at the bottom of the radiator. I empty them before running my table and they do contain water most times when I bleed them.
My air travels about 120 feet before it reaches my table. It seems perfectly dry. Notice the valves at the bottom of the radiator. I empty them before running my table and they do contain water most times when I bleed them.
This seems like a good thread for this question, I’m getting about 250’ out of my tips and electrodes cutting 14GA, is that within range of normal? I run an M60 to dry my air and 95% of my cuts are 14GA mild steel at 37A 100ipm 55PSI. I have no complaints about it but I also have no baseline to judge if by because I’m brand new to this. PrimeWeld Cut60 for the torch with the machine torch but I was getting similar life cycles with the handheld torch as well.
Not sure myself how the primeweld should hold up. I would say extra drying measures should increase consumable life.
Is the m60 all you have no bead dryer?
Just the M60 on a dedicated line for the plasma cutter. Also the tips are 1.1mm, I just got a shipment of finer tips in that I will test this weekend (.6,.8,.9mm).
pierces are what kills the consumables…so can you see how many pierces you are getting …that is a better way of telling.
I run an everlast 62i with machine torch…I was running desiccant beaded dryer with a motorguard filter…at the start of my plasma cutting I was getting 250-300 pierces…then I installed a copper pipe cooler like the one pictured above but only after the compressor…this alone almost nearly doubled my pierces…then I added an refrigerated dryer…this took my pierces up to 700…when my shop is finished and I have the cooler between the compressor and tank…and put an extra storage tank after my refrigerated cooler…I should be well on the way to above 750 pierces on consumable…
I would definitely consider at least a bead dryer. I would bet money what you save in consumables will pay for it.
Dry air is a rabbit hole kind of the the amount of drying equipment you need depends on where you live…
My compressor is like a pressure washer without a drying system.
I’m in the Chicago area so we are relatively humid but not every day humid. I really like that tubing dryer, I think that will go on the list of projects. I’ll check my pierce count, I have to start logging my pierce counts I think because I only see a lifetime pierce counter in FireControl.
You can reset your pierce count in fc.
We had a good discussion about air drying in another thread. We debated using copper tubing vs. trans coolers. I will look that one up for you.
I am in the southwestern part of Virginia. I am really shocked at the amount of moisture I get out of my air.
You can reset this when you change your consumables
I will do that today, I have 4 things to cut today.
I have 1524 pierces, but I have changed consumables several times so I’ll have to reset it.
Where do you reset that counter in FC? I’m changing my consumables next time I fire it up so I’m going to reset it then. I also have 3 hours and 10 minutes of torch time according to FC. I’ve only had the table for about 2 months but I’m starting to get the hang of it and keeping the table pretty busy. I’ve had a lot of help along the way from you guys when I’ve had issues or questions so thank you all very much! This is all brand new to me and I already feel like I’ve been doing it for years but in a good way…

I have a Razorweld X45 torch. Is it standard procedure to change both the nozzle and the electrode
at the same time or just the nozzle?
For the most part yes when one is used up it is best to change both.
That would all depend on what you are cutting and what the consumables look like.
If you are cutting out a 24" x 36" sign with a lot of detail, yes use a new cutting tip and electrode. Then cutting another sign I would change out the cutting tip and electrode. You don’t want to get half way through a paying project and have it ruined because you tried to save a few bucks on consumables.
That does not mean the cutting tip and electrode you took out are bad, they can be used for things like brackets and yard art and other small projects.
If the electrode looks good and the pit in the end is small, less then a 1/16"/.125" and not burnt around the edges I will just replace the cutting tip and go back to cutting.
mechanic416, you have answered my question. The cut goes bad but the electrode can still look
very good. Replace the nozzle and go back to cutting, Thank you for the reply.