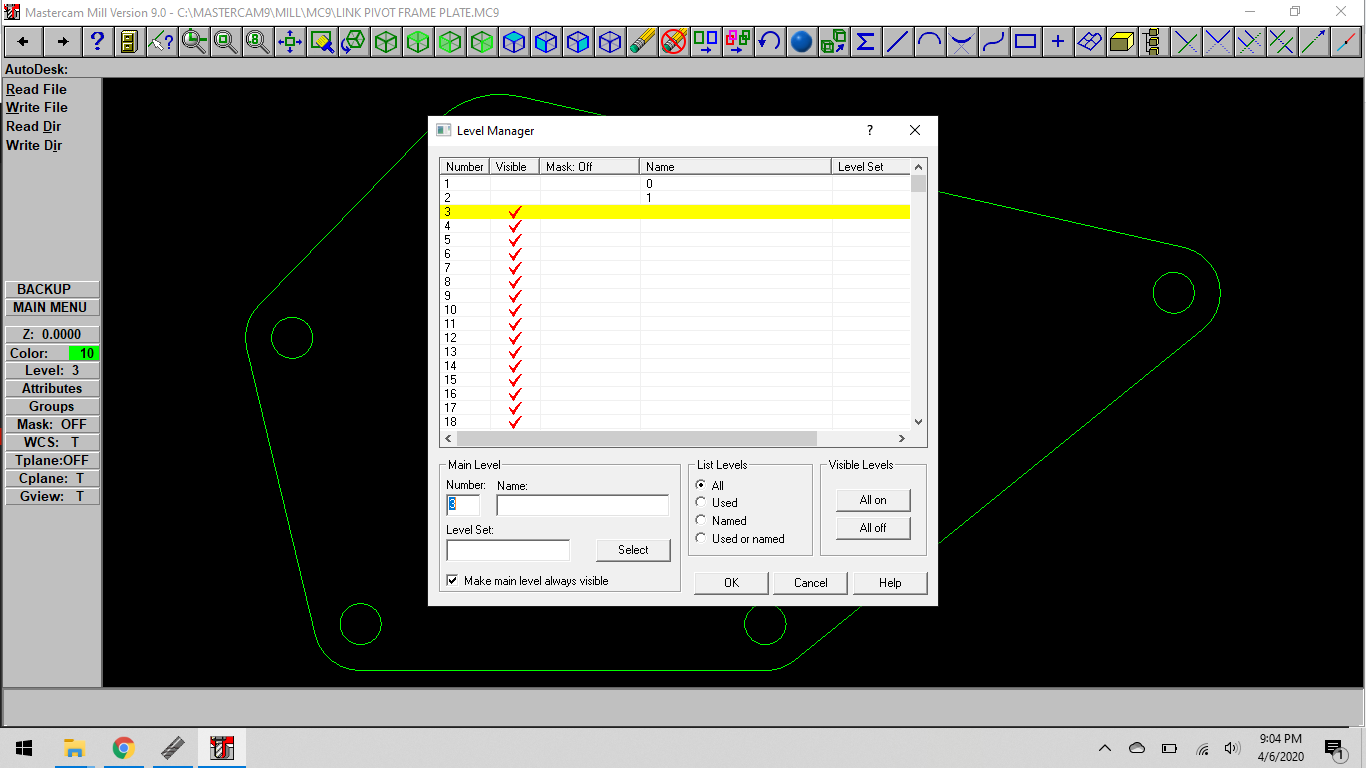
Try View -> Layer Tool and check what the layers are doing / how many you have. I suspect your drawing might have multiple layers, but not sure without looking at it in detail. If multiple layers, you may need multiple tool paths / operations for each layer. It’s also possible your paths are disconnected, but they look ok from screenshot. Or it could be something else …just a few ideas…
Sorry - I’m not familiar with Mastercam, but someone else on here might be. I don’t remember off hand, but may be able to combine multiple layers into one operation in sheetcam - but having multiple ops is not hard to setup.
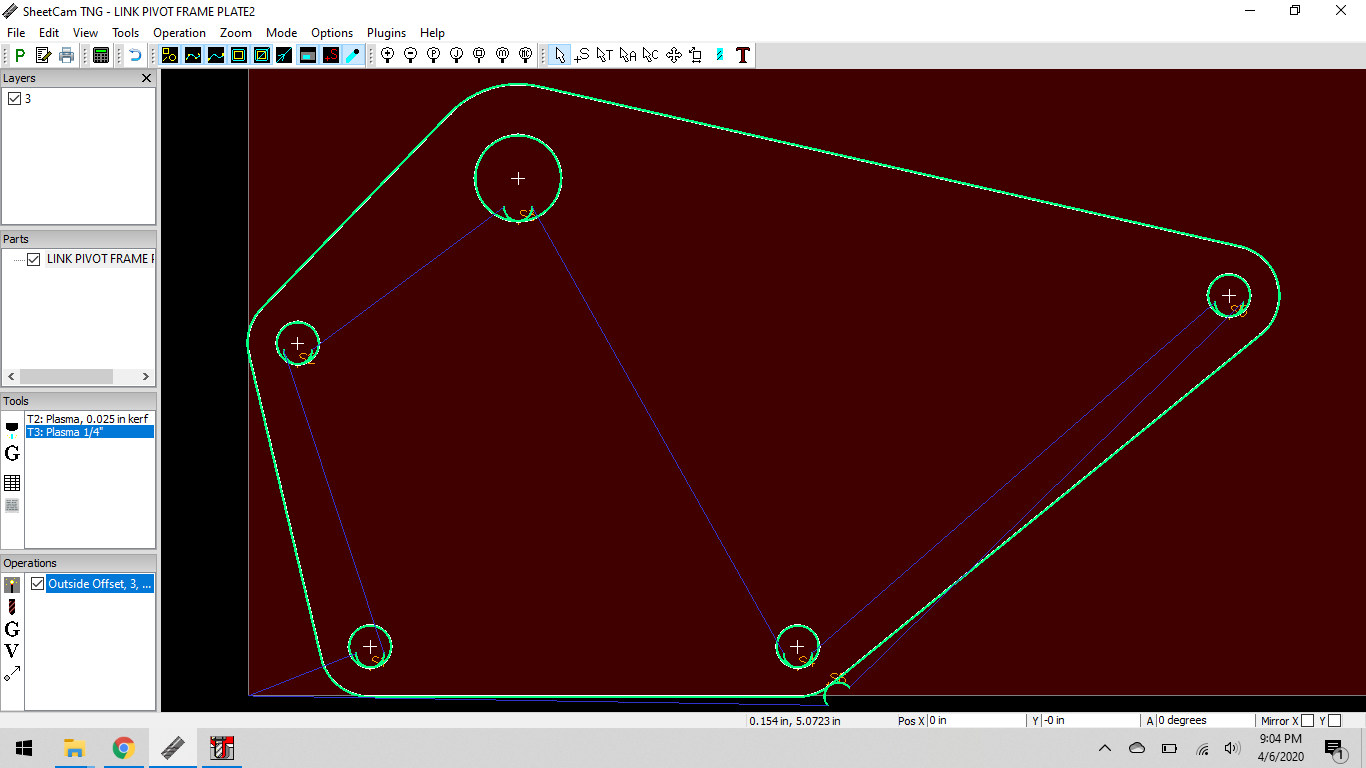
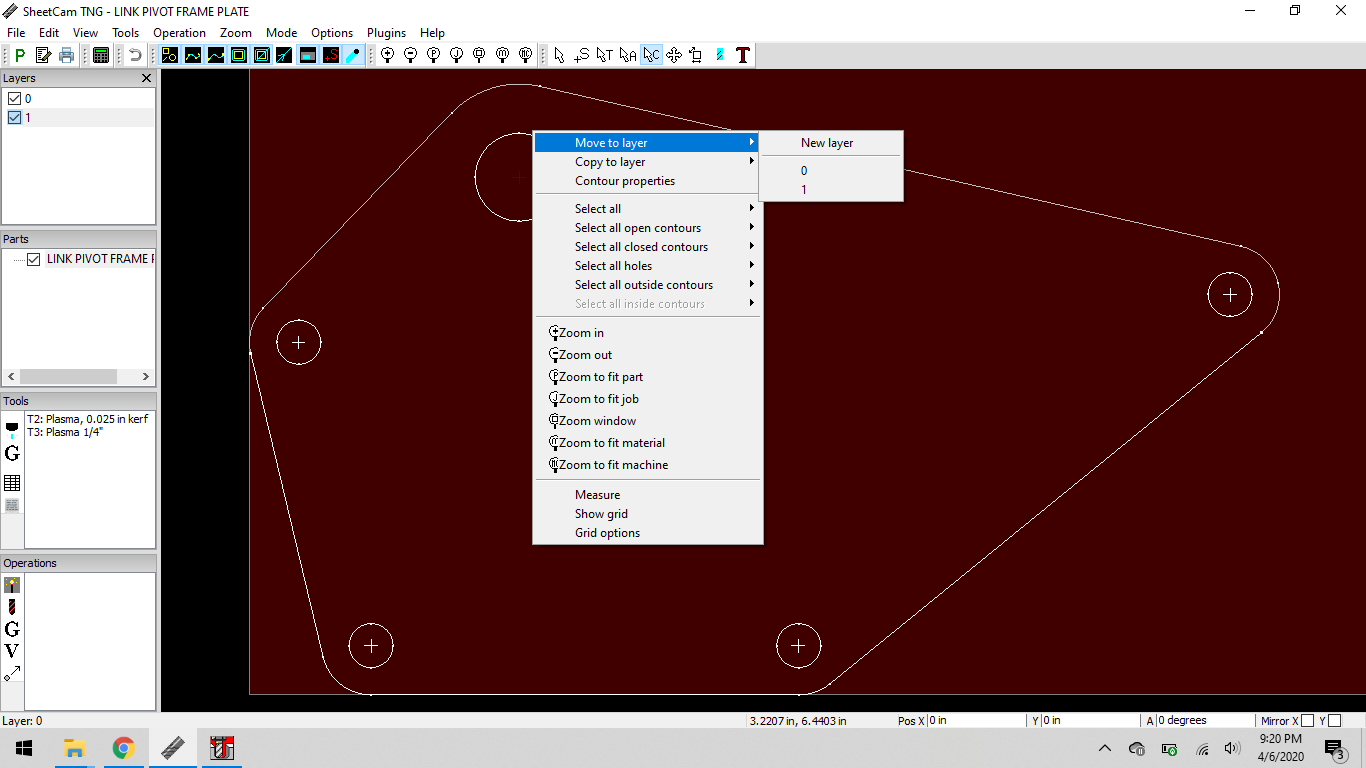
Sheetcam defaults each color line to its own layer. If you want them in the same operation just select the contour tool, right click and pick “move to layer”.
I usually add layers to my drawings in Sheetcam because I want more control over parameters like lead-in for different sized objects.
okay, figured it out.
mastercam has a feature where you can assign layers to certain pieces of your drawing.
HOW I DID IT?, i dont know. but i redraw everything under one layer and now its working.
Thanks for your help buddy, ive been in the garage redrawing this damn thing about a dozen times not knowing what the hell is going on. On the brightside, i sat in there long enough to hear my CrossFire Pro water table leaking at the seam, so i guess it was kind of a hidden blessing.
Yes - very important point - layers are very useful in sheetcam.
My pro water table just came UPS today, so I’ll pay some attention to that! Still waiting on the rest of shipment. Love to see some pics posted of cuts once you get rolling! Have a good one!
honestly, ive heard people welding the seam being the only way to prevent leaking. the silicone LS sends with the table is garbage.
I welded the drain nipples on the bottom of my table and it warped it pretty bad. looking back, i should have used those Van Sant flanges someone mentioned in the Pro Thread.
Don’t want to put words in JDH’s mouth, but I think he typo’d Contours Tool…when it’s selected you can right click on a path and move it to another layer.
Yep Fixed it. Thanks. (Pesky fingers too big for the phone & odd choices by Android on typo replacements.)
Definitely. I usually have an outside cut profile layer and one or more inside cut ones. Sometimes (especially for art pieces, I’ll also have a no offset layer).
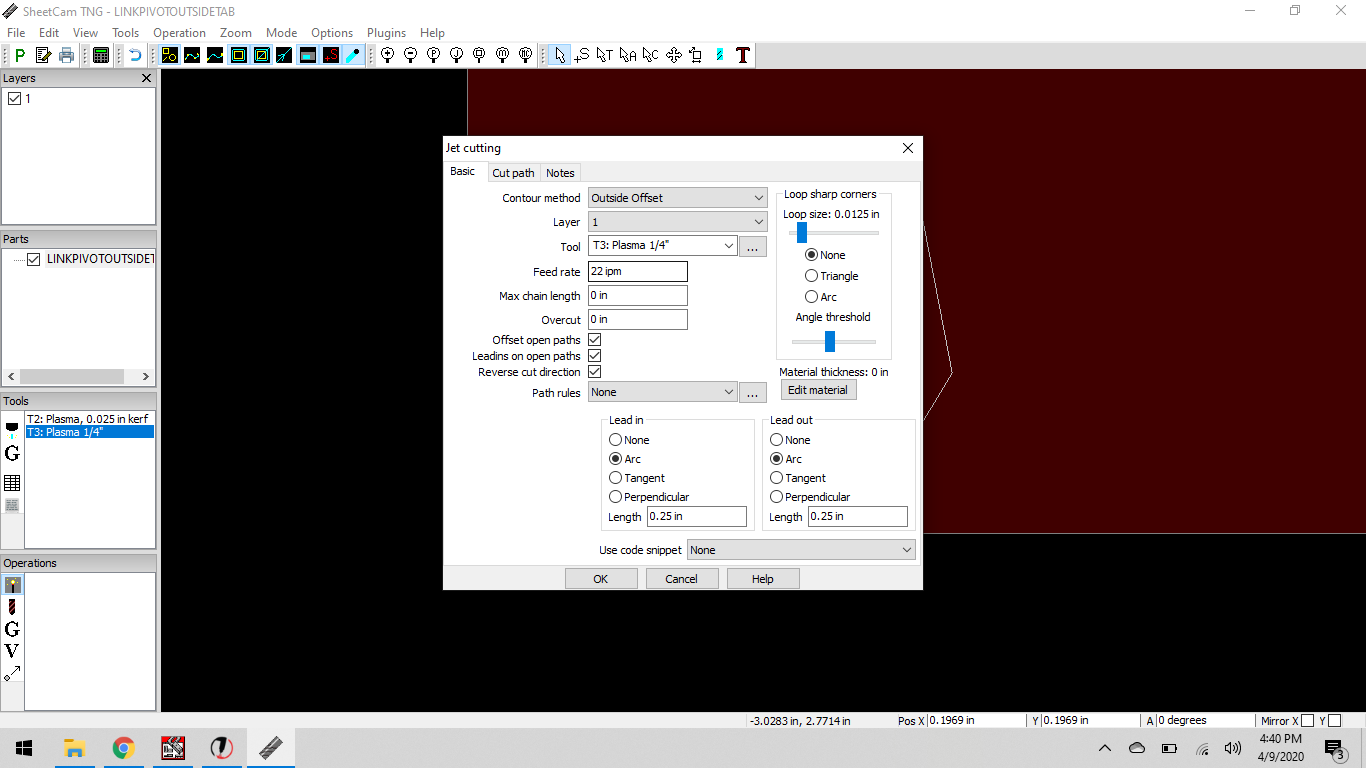
I typically use a lead-in of Arc with 0.12" distance. That lets the pierce establish and sweep gently into the cut and eliminates any burrs on the edges of holes due to piercing too close to the cut line or because the torch has too slow too much for a sharp turn onto the cut line.
But that’s not always possible depending on the size of the cut out. So for those I’ll setup a layer (& operation) where I tweak the lead-in down to the kerf width (generally 0.06"). If there are tiny cut outs that still won’t path properly, that’s when I setup a layer (& operation) without a lead-in and accept the divot or burr. Usually not a real issue for art pieces.
Then I order the operations so I start with inside smallest cut outs to the final outside cut out so I don’t have the piece shifting in the middle me cause I cut the outside profile and then try to cut middle parts out.
If things are really densely packed I will add other layers & operations to allow me to break up the order of cuts even more so I can minimize warping and give myself time to grab any tip-ups.
A lot of this is personal preference but it helps minimize problems and sometimes some post-processing for me.
Dunno about that. Yeah TIGing it is the best solution but I put the RTV on as directed and tightened the bolts slowly, alternating from side to side till all was snug, let it set for 48 hours '(cause I pulled a long shift at work), and I have seen nary a drip.
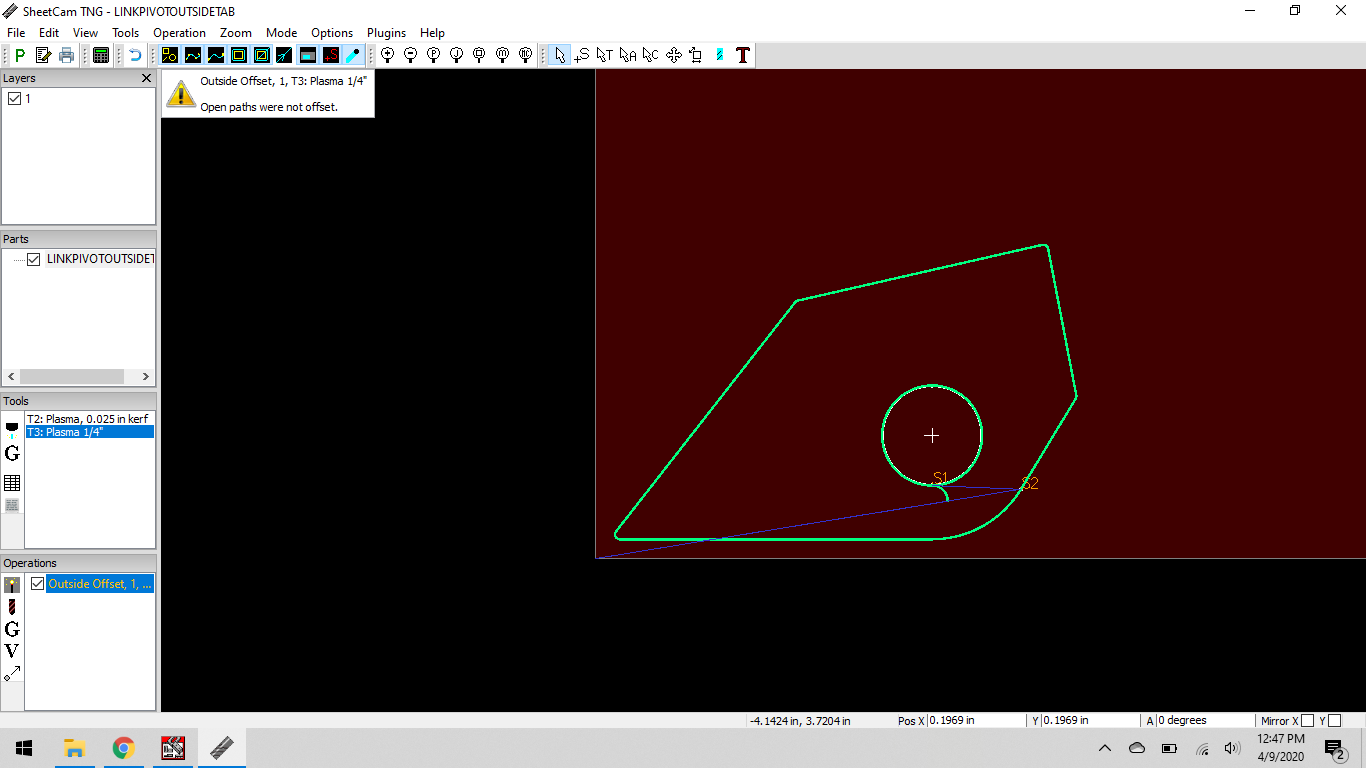
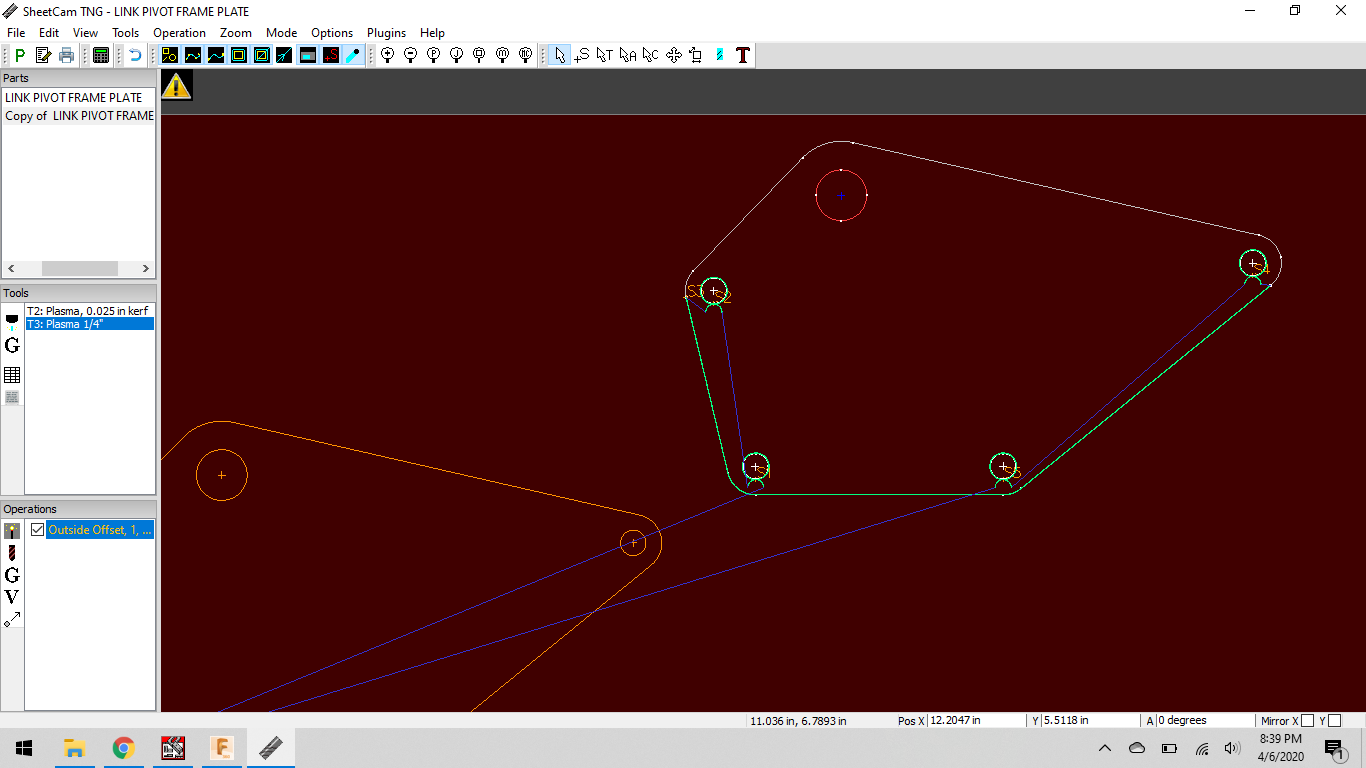
well, im having more issues with sheetcam again. it doesnt recognize the part as is, and keeps thinking the outside is inside or something, the hole keeps getting a lead in from the metal side and wont add a lead in for the outside
 …just a few ideas…