I’m loving this thread BTW, both for the content and for all that tone talking. I bought my LS CPro for the same reason, tube amp builds. Funny, I have a Baileigh box and pan too. In the coming months, I’ll be cutting and bending. Good luck, please post your builds and any guidance you’ve determined along the way.
1 Like
@Joel48 I went through my drawing to follow the steps in you illustration and when I get to part #5 in mine, all the inner corners of the sides of are touching, but they are not in yours, but eyeballing part #4 it looks like the should be touching, and in part #6, it looks like they are again.
I want to make sure I’m not missing something important. Did you move them apart for illustrative clarity? Am I missing something?
@holla2040 cool stuff! I’ll be glad to share what I learn, as I appreciate the help I’ve gotten from this forum. Outstanding.
Presuming you are working from the same flat pattern, you wouldn’t have the radius remnants you would see in an isometric drawing. I removed those radius remnants because they mean nothing in the context of the flat pattern.
Because I did that, it was necessary to extend those lines in both directions to end up with a square the same size as the K factor to put the round corner relief holes in the center of the squares.
I could have calculated where the corner holes were to be placed, but it is easier for me to make the square, add a cross line and snap the holes to the center of the line. That’s what I did, however, I didn’t illustrate drawing that line and deleting it after snapping the holes in position.
The bottom line is you didn’t miss anything important. You likely will find your own creative ways to reach the same conclusion.
Update: I had to proof read and make corrections. I couldn’t understand what I wrote a day later!
1 Like
An update. I got sent out of town for work right as I got back from vacation, so took a while to get back to this.
I spent some time leveling the slats on my Crossfire. I bought a fender shim kit using those to slide under the slat holders. I discovered the key is to start with the highest corner, it will have NO shim, then level opposing corners accordingly.
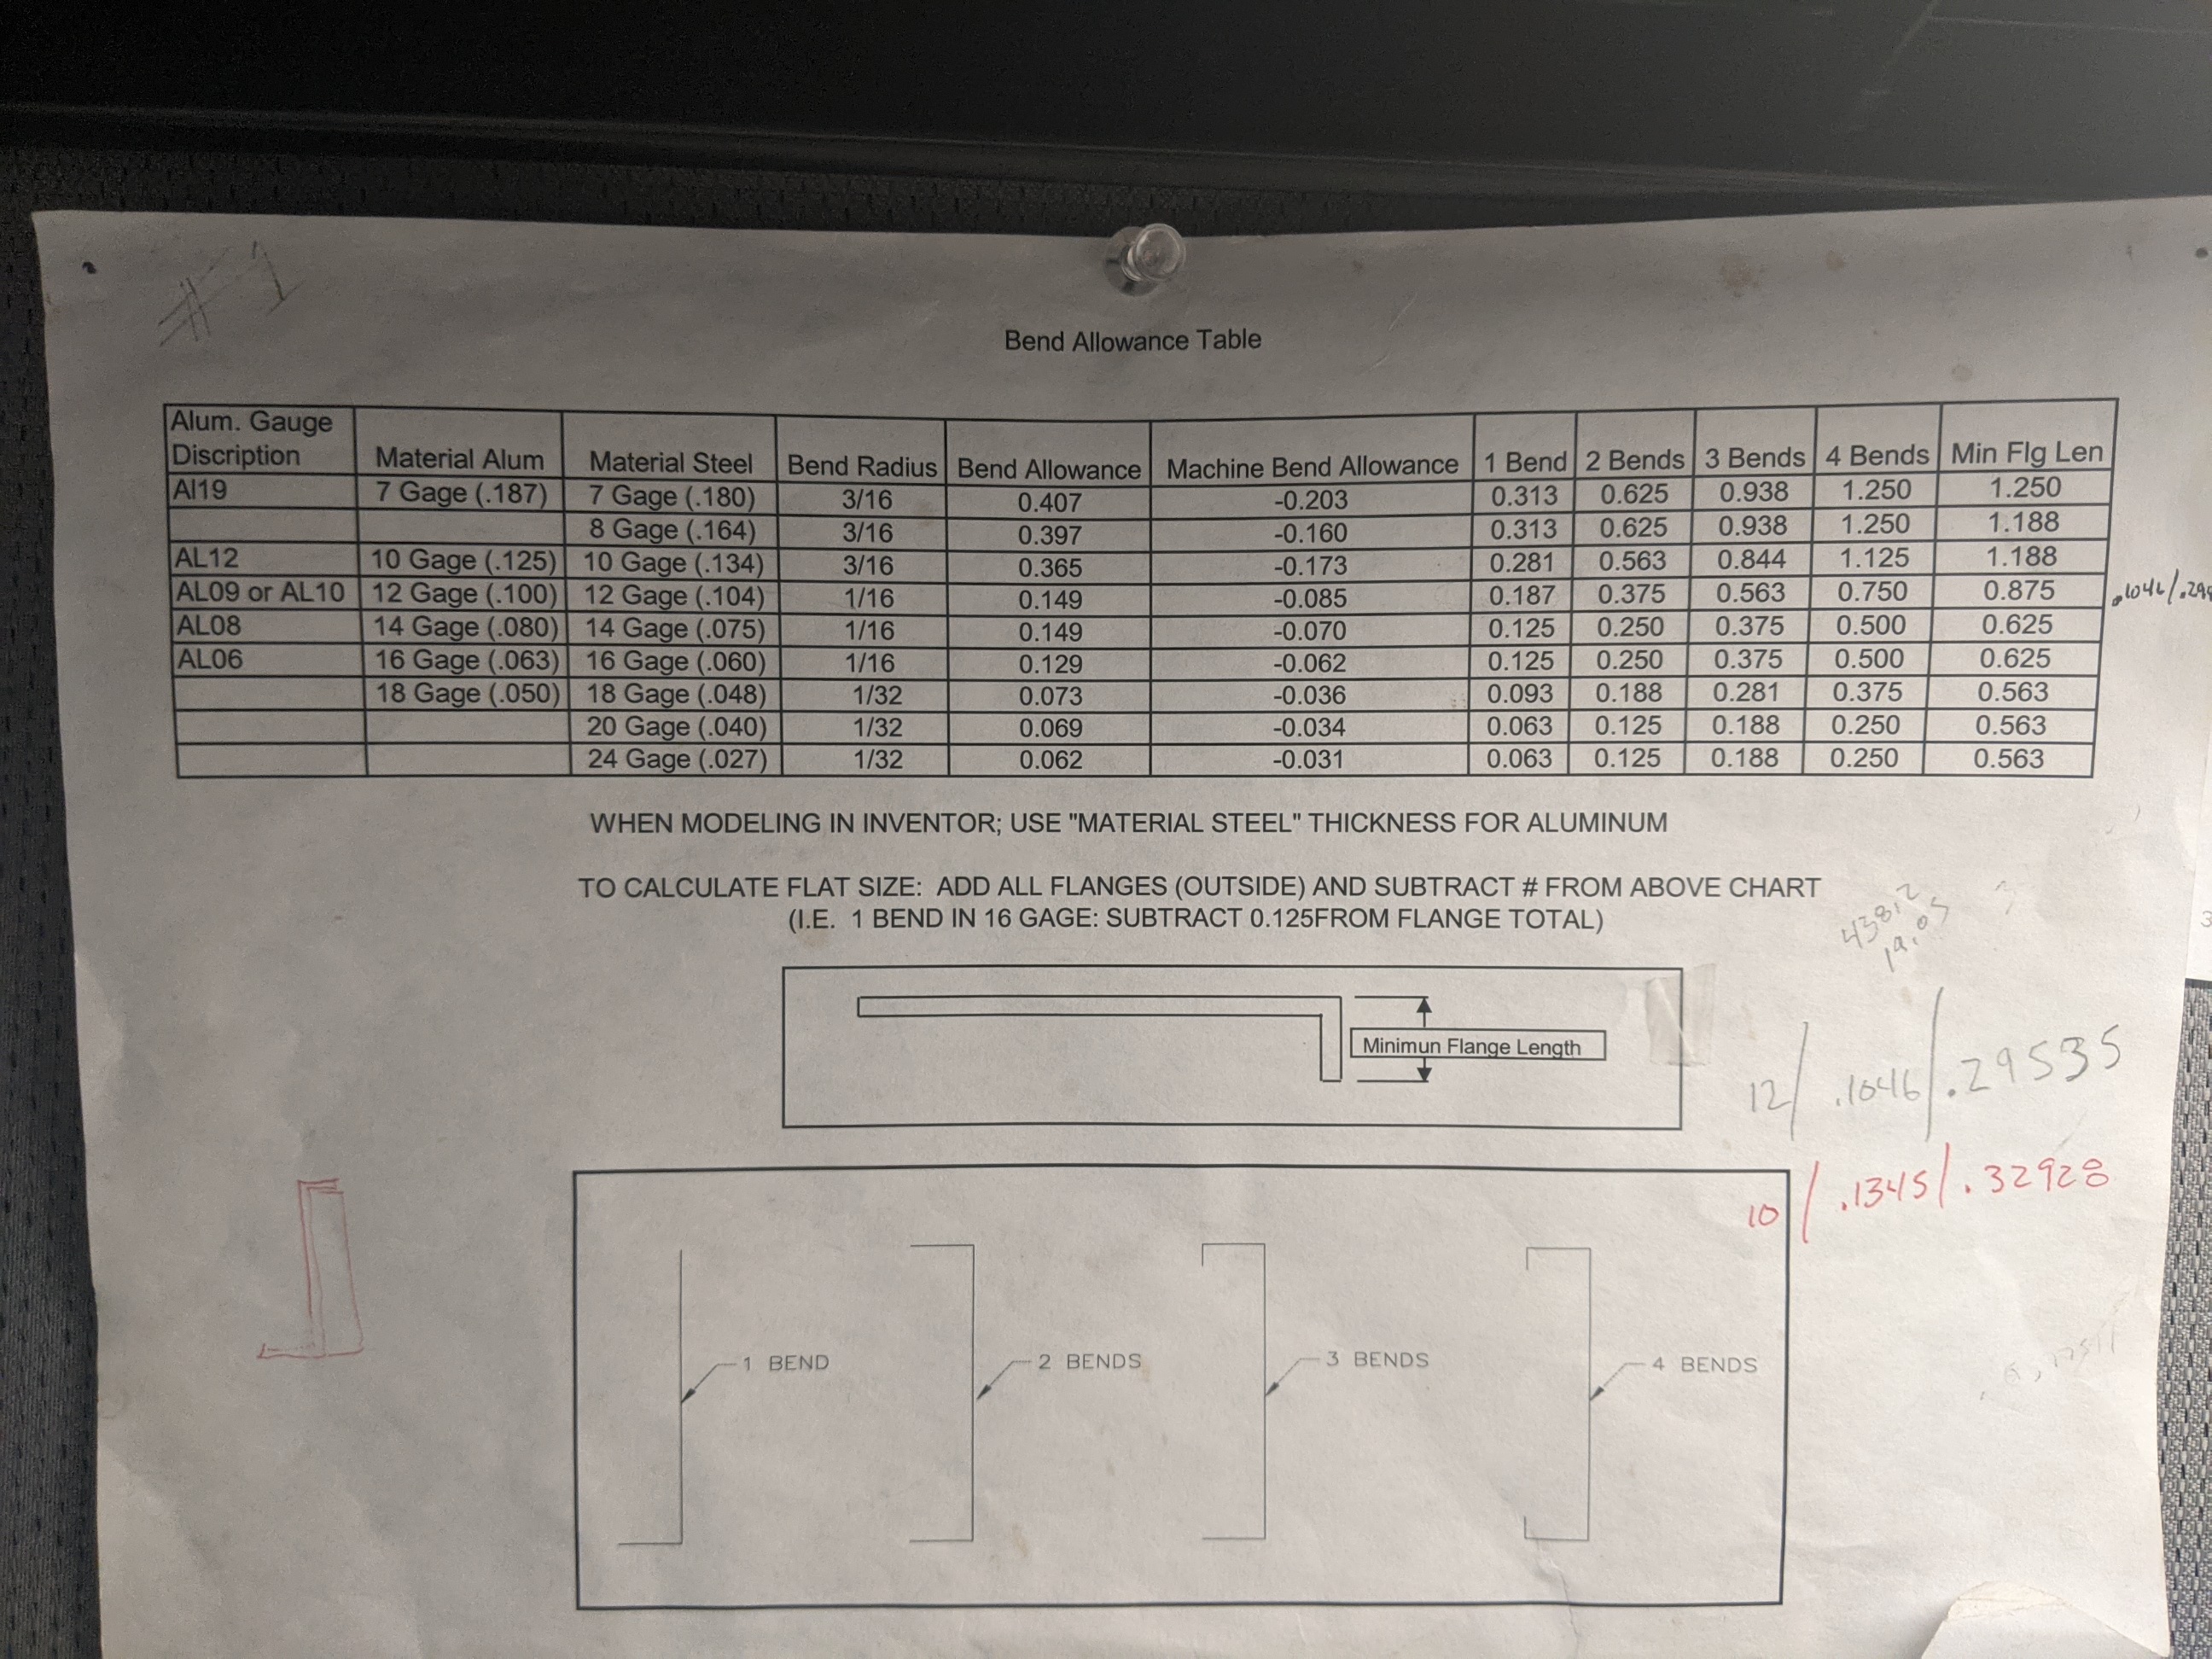
I cut out a 3x3 inch piece of my .090 aluminum and set the setback on my Baileigh finger brake3 to 1.5x the material thickness. I did a test bend and it appeared to be a tighter radius than my original chassis supplier use, so I bumped the setback to 2 x material thickness. This provided what looks like a pretty much spot-on match for radius. The material length after bending is 3.15", so I’ll factor that into my drawings.

2 Likes
Pretty close to what we figure here. .1875 Our numbers are rounded so you can put a tape measure on it.
Sorry, I lost track of this:
https://valveheaven.com/2015/03/an-inexpensive-easy-to-build-diy-valvetube-tester/
Your tube tester is damn impressive. I take it your an amp builder, we should talk.
Being a guitarist and an audiophile, I built my share of amps as a teenager. A couple years ago I built me a kit Dynaco St-120 Stereo amp kit using four KT88 tubes. I also bought myself a 1974 Fender Twin Reverb guitar amp in pristine condition, which I changed out all the caps for a restoration. At that point, I decided, I can’t be so into tubes again without a decent tube tester.
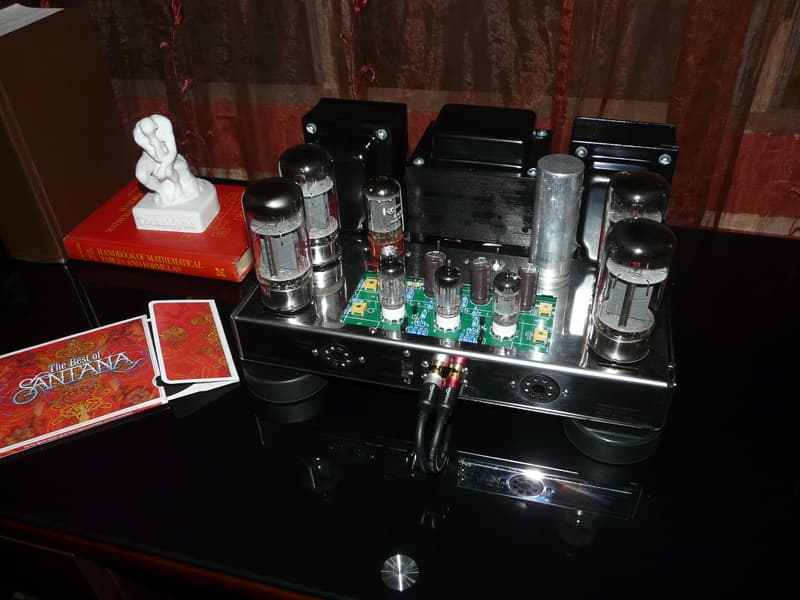

Here’s my handcrafted hybrid preamp

2 Likes
Cletus, You are one talented guy. These projects just blow me away. I still smile thinking about you pulling the milling machine through the kitchen.