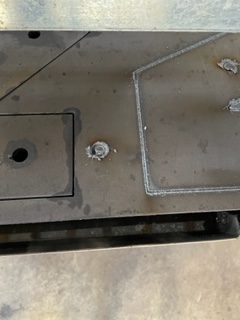
I new at all this but had early success. My “pro” worked through 4 sheets of 1/4 steel, with multiple shapes but now, a few months later, the same material and shapes are no longer working. It seems that the curves and corners are cutting deep enough but not the straight runs. Any ideas? Help? I have the matched Razor 45 and have used Fusion 360 and Fire Control for my design, G code, and Fire. I’m including a picture.
Work clamp not on material.
Bad Consumables.
Reduced air pressure.
Bad Cut Height.
Wrong Amperage
a few ideas
3 Likes
Have you changed the electrode and nozzle since you started? That looks like what happens when the electrode is burned up. Does the arc look green?
3 Likes
I will say that @TinWhisperer and sp is @ds690 is right on track as usual…yes a little polite ass kissing here…lol…
youi m,ight also want to see if you have water in your tank…
but I would bet on the consumables
2 Likes
It is a green arc.
The clamp is secure to the material. The height is controlled by THC. Hire do I determine is the consumables are bad? I see a little discoloration. The air is dry and strong. I turned up the power from 35 to 40 then 45 with poorer results. Do you think it may be my THC not working properly?
1 Like
could be. but bad consumables will also give you a bad cut height.
Pull apart the consumables and take some clear picture and post them here. ( the electrode and nozzle ) This is the likely cause.
1 Like
Green arc means the hafnium core of the electrode is gone and you are burning copper. Continuing to try to cut, after the hafnium core is gone, can lead to the destruction of your torch.
You can usually hear a difference and see the arc turn green, when the electrode goes bad. You should stop cutting immediately and change the electrode and nozzle.
3 Likes
Here is a picture of the consumables
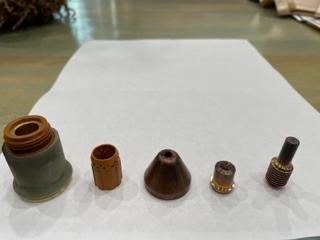
Can you get some clear, well light photos of the nozzle and electrode on the right.

Take a picture of the tip of the electrode and the orifice of the nozzle from the outside.
Their is nothing to wear on the sides of these components so the side view doesn’t give us any useable information .
4 Likes

Still need a little more info. Something has changed in your setup somewhere along the line.
Where are you sourcing your consumables?
What is your air setup from compressor to cutter?
Have you tried new consumables?
Laptop plugged into grounded outlet?
Live voltage number also needed.
Thank you for your help.
I ordered consumables for the first time yesterday from the Langmuire Store. (Nozzles, Electrodes)
I have a new Dewalt 60-gallon compressor rated for 15.2 scfm at 90 lbs. I have a new 3/4 galvanized pipe with two trip legs before my inline dryer. I used fast-flow connectors and have a short 5/8 hose to the plasma cutter. I check and there is no water in the dryer or the drip lines. However, I live in Florida with high humidity (today is 79%) so I may need to consider that as a possibility. My shop does not have any climate control.
I have the original consumables. I only cut 1/4 steel and used up 4 full sheets (the size of the pro) and cut 50-60 building straps for a timber-frame construction project. It may be the consumables.
My laptop is plugged into a grounded plug but it is on the same circuit as my controller, if that matters.
My voltage for the plasma cutter was set at 40 amps in the initial cuts but when I was having trouble yesterday at raised it to 45. I am including a second picture that shows how the corners and circles were cutting through but not the straight cuts. In FireControl it says “THC” running in the strait cuts.

how often do you drain the actual tank?..also you might want to consider a beaded desiccant dryer then a motor guard filter just before the plasma.
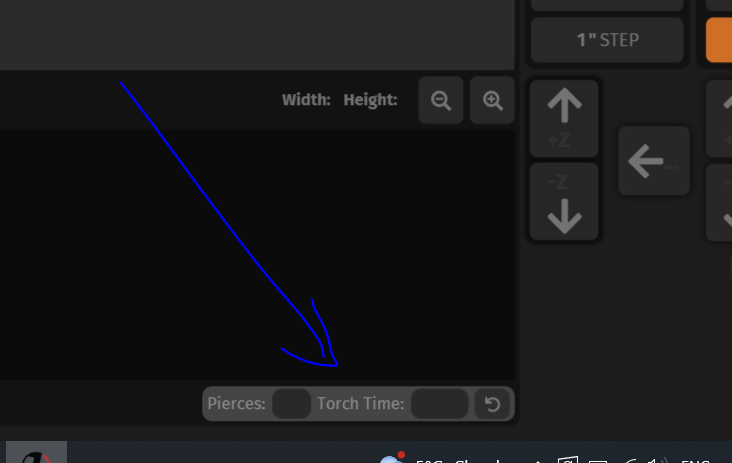
check the consumables at the start of each new pattern you cut…and track the use in firecontrol…there is a pierce counter and time counter under the window display…
here is a general look of what consumables look like…when the consumable look like it is ready to change mark down the time and number of pierces you have done…mark down the values…reset the counter and install new consumables

after a while you will l earn to see the slight color change…you will know you are getting close to the end of the consumable life by watching the counter…
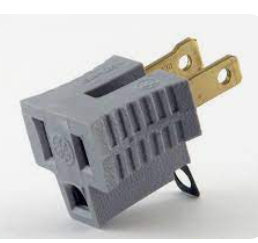
run your laptop on batteries when cutting…or buy a ground isolation plug adaptor to prevent gounding issues…
raising the amps does not help worn out consumables…
if you want good quality plasma parts @mechanic416 (george) has a ebay store…sells great stuff…
that should give you a good start
3 Likes

Thank you!!!
I will second what @toolboy said. Definitely consider the desiccant filter. @TinWhisperer posted an interesting fact a while back. Only way to get the air dry enough without a desiccant filter would be to live at the North Pole. ![]() Also make sure you have a good particulate filter. Most guys use a motorguard filter just before the plasma cutter.
Also make sure you have a good particulate filter. Most guys use a motorguard filter just before the plasma cutter.
2 Likes
The South Pole.
Lol. ![]()
I don’t think the North Pole gets clod enough to meet the air standards that hypertherm recommends for air pressure dew point