I am hoping to find some help or guidance on how I can fix or improve the cut quality I’m getting on some holes I am trying to cut. I have the Crossfire PRO with the Razorweld 45 CNC available from Langmuir. We run the cutter with shop air at around 115psi.
I do not have any previous experience with plasma cutters so most of the settings I use for my cuts come from research I have done here and online.
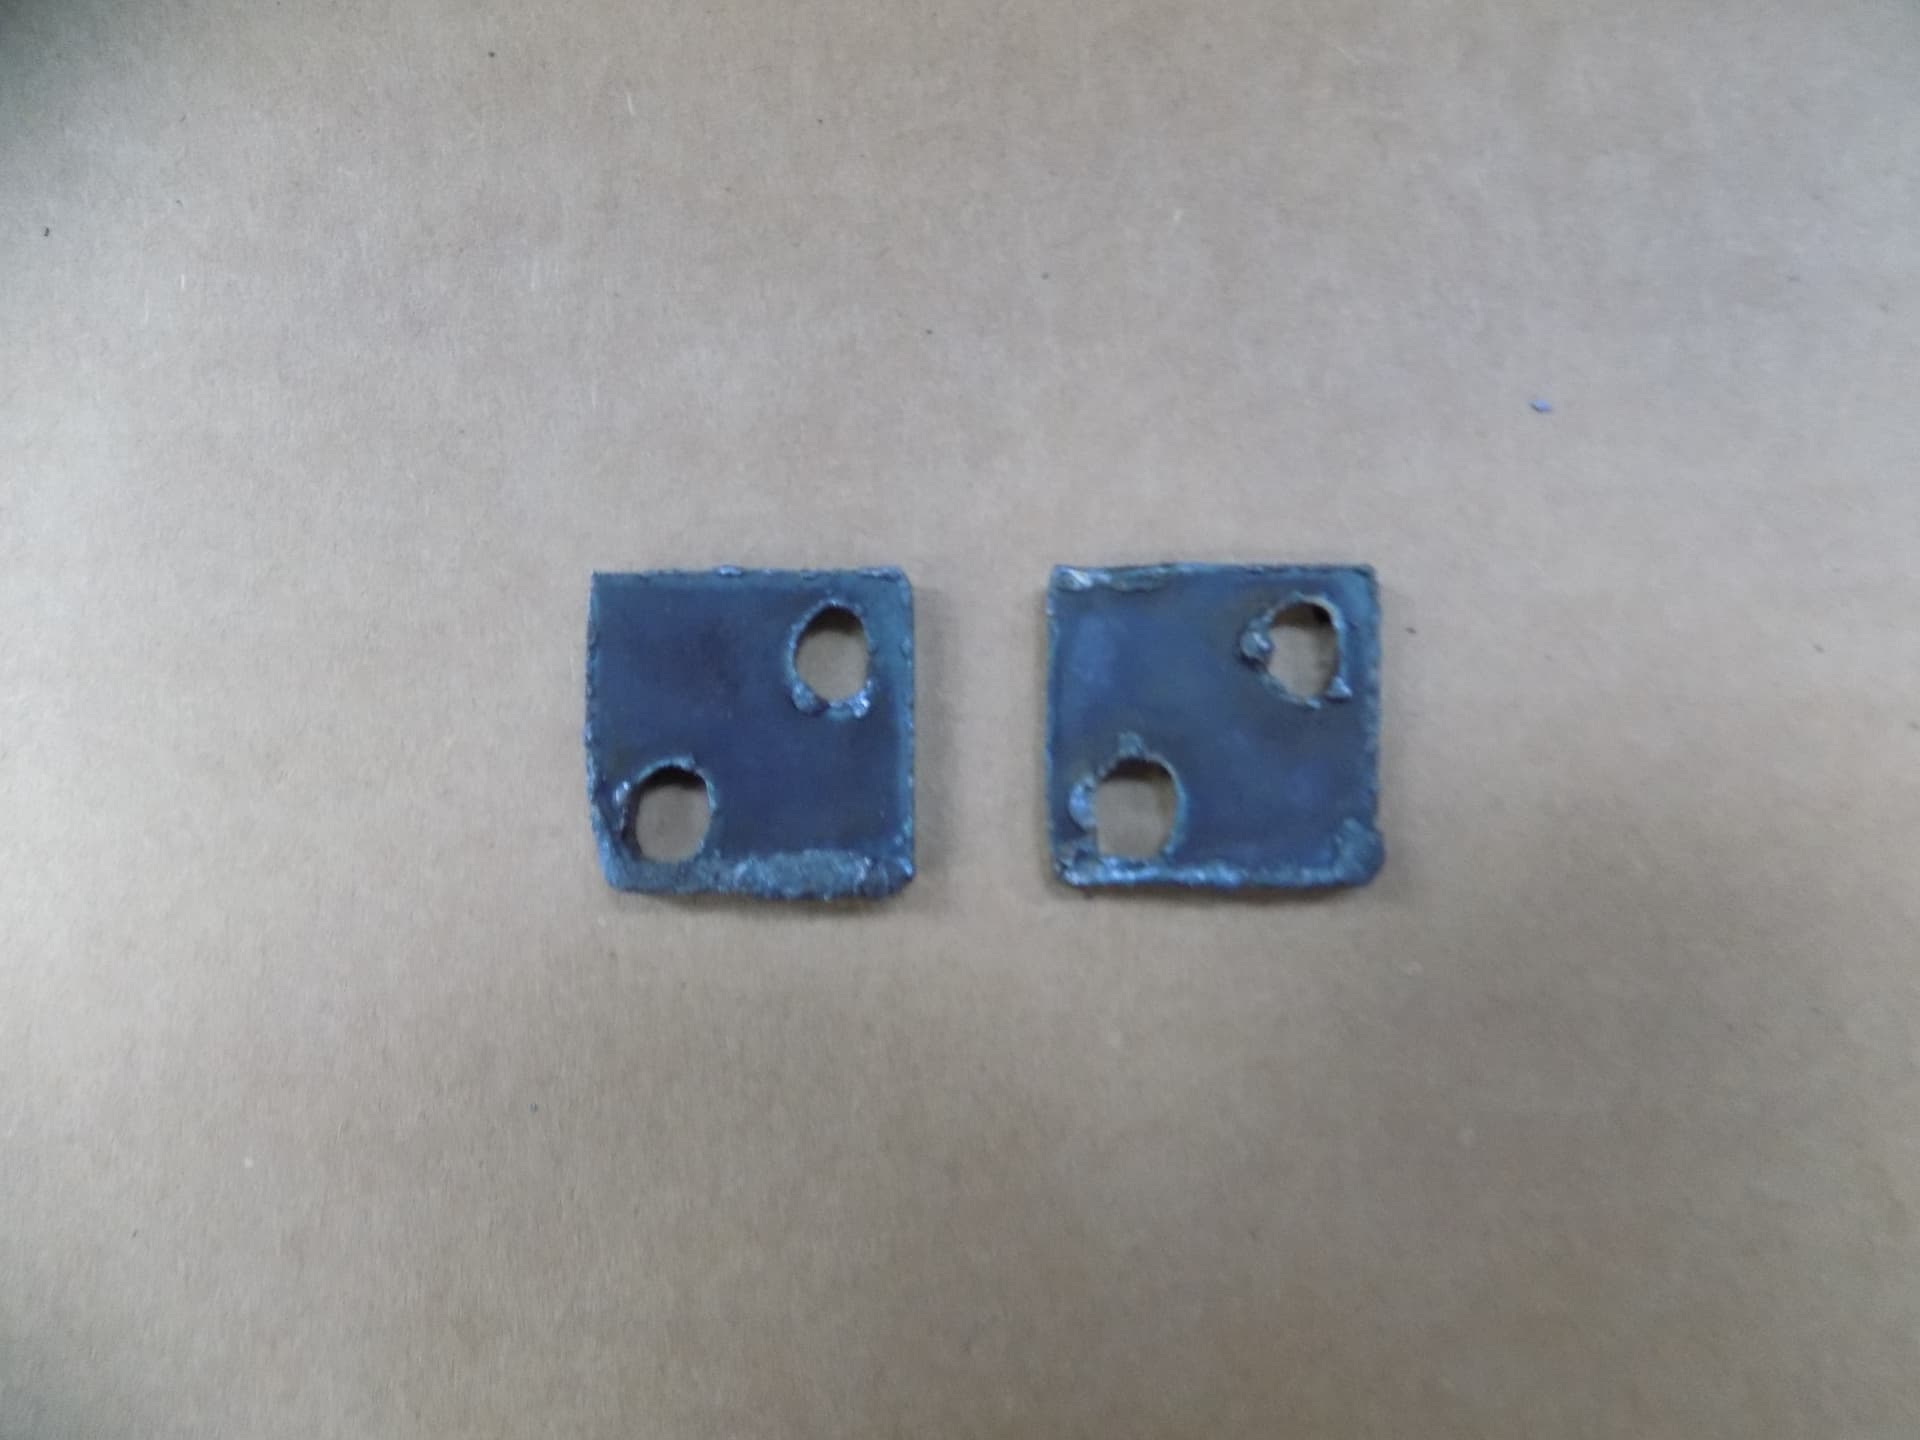
While running some tests to try and figure out what settings would be best for cutting some holes I ran into a problem where the holes kept coming out as ovals. The material I am using is 1/8" hot rolled mild steel. My cut settings are as follows:
35 amps
115psi
0.079" cut height
70ipm cut speed for contour
25ipm cut speed for holes
arc lead-in = 0.125"
no lead out
kerf width = 0.055"
We are using all the standard consumables that came with the cutter originally (will look for the list and update)
Parts are made in Solidworks 2023 and tool paths are made in SheetCAM.
Thank you so much. These settings have given me some of the best edge quality I have seen come off our table. The holes are still coming out as ovals so I will look into the couplers to see if they need tightening.
I was wondering how do you come up with or where do you find your cut settings? I have had a hard time locating a reliable resource, and while the forum is an awesome way to learn it would be great to have something I can reference immediately.
These are not the first cuts of this table. I have had some alright cuts before but nothing as clean as what I got after the above changes. Checked all three couplers which are all tight and I did not notice any slippage during movement, but the hole are still ovals.
For the Razorweld 45, at 45A, I used Hypertherm’s XP45 cut charts as a basis, reducing the speed by 33%. This provided a good starting point to adjust cut quality. Pierce time varies, as the FireControl controller requires ~.5 sec to send the command. (So for 18ga, I’m at .5s. For .25", I’m closer to 1.6s.)
For less than 45A settings, figure the percentage change from 45A and adjust cut speeds accordingly. (I’ve only just started playing with 30A consumables with the RW45.)
As for your cuts, the best I was able to achieve with the RW45 @ 45A was +.002" X / +.004 Y on a .105" hole. I believe my lead-in was around .015 - .025" arc (thru Fusion.) SheetCAM provides good resolution for this as well.
I suspect speed and cut height were your problems!
Very doable. I do that all the time. 0.280 / .281" for a 1/4" bolt is good. (+.030") Try to verify in SheetCAM that your lead in starts close to the center of your hole. If the settings seem to place it off center, adjust as needed.
For 11ga, I don’t think I’d run lower than 45A, but that’s my preference.